モデル リーダーボード
| タイル | 説明 |
|---|---|
 |
構築された全モデルのリストと各モデルの概要情報を開くとともに、モデルの取得可能なインサイトにアクセスします。 |
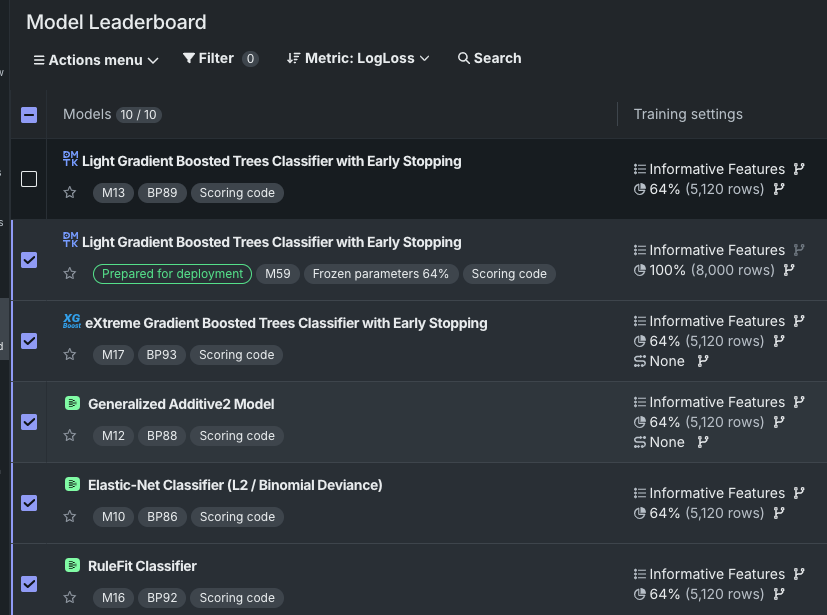
モデリングを開始すると、ワークベンチでは、モデルリーダーボードの構築が開始されます。リーダーボードでは、モデルがパフォーマンス順にランク付けされるので、モデルの迅速な評価に役立ちます。 リーダーボードには、エクスペリメントで構築された各モデルについてのスコアリング情報を含む情報のサマリーが表示されます。 リーダーボードから、モデルをクリックして視覚化にアクセスして、さらに詳しく調べることができます。 これらのツールを使用すると、次のエクスペリメントで何をする必要があるかを評価するのに役立ちます。
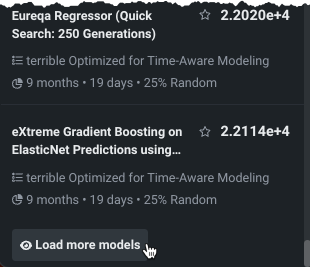
DataRobotは、リーダーボードを構築する際にモデルを入力し、最初は最大50のモデルを表示します。 追加のモデルをロードをクリックすると、クリックするたびに50のモデルが読み込まれます。
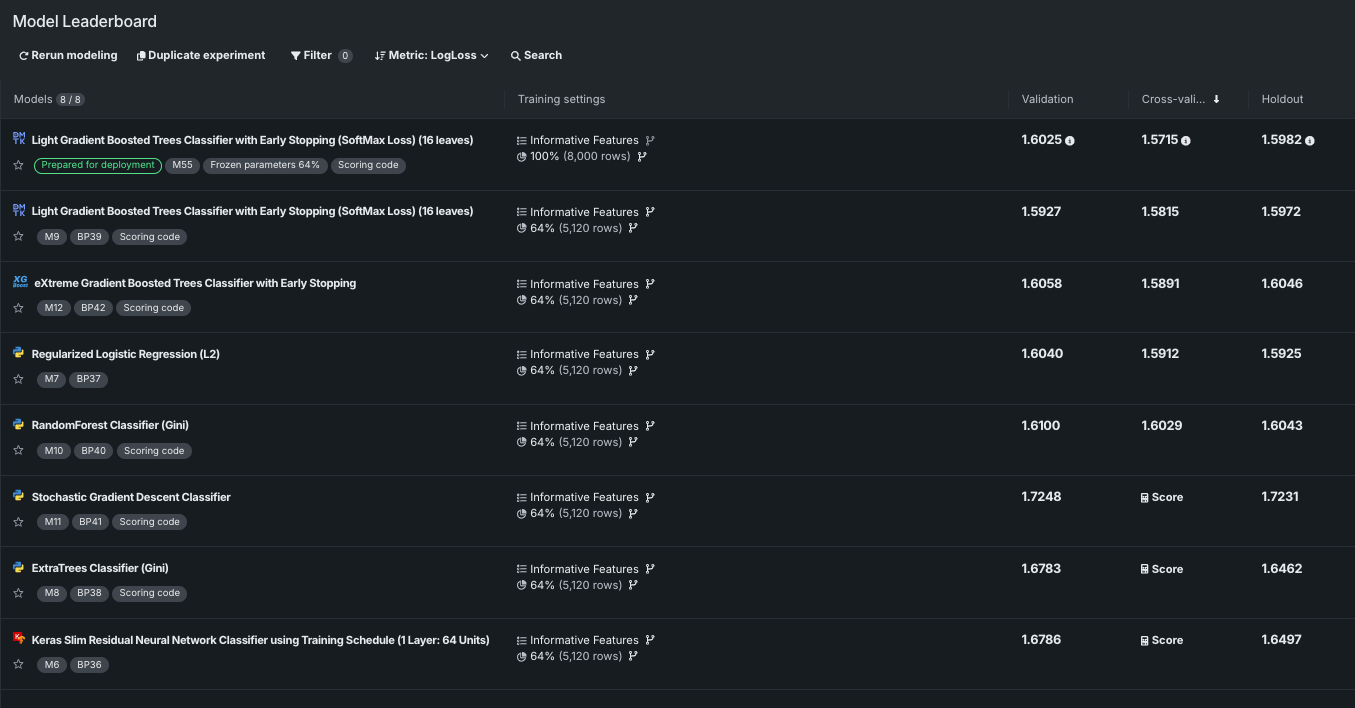
クイックモードを実行した場合、ワークベンチでサンプルサイズフェーズが64%完了すると、最も精度の高いモデルが選択され、100%のデータでトレーニングされます。 そのモデルには、デプロイの準備済みバッジが付けられます。
デプロイの準備済みモデルがリーダーボードの先頭に表示されないのはなぜですか?
ワークベンチでデプロイするモデルが準備されると、100%のデータでモデルがトレーニングされます。 最も精度の高いものが準備対象として選択されましたが、64%のサンプルサイズに基づいて選択されたものです。 デプロイ用の最も精度の高いモデルの準備の一環として、ワークベンチはホールドアウトのロックを解除し、準備されたモデルを元のデータとは異なるデータでトレーニングします。 リーダーボードをホールドアウトで並べ替えるように変更しない場合、左側のバーの検定スコアは、準備されたモデルが最も正確ではないかのように表示されます。
リーダーボードは、次の2つの要素で構成されます。
モデルリスト
デフォルトでは、リーダーボードは展開された全幅表示で開き、エクスペリメント内のすべてのモデルとそのトレーニング設定の概要、および検定、交差検証、ホールドアウトの各スコアが表示されます。 バッジによって、モデルの識別とスコアリングに関する情報をすばやく確認でき、モデル名の前のアイコンはモデルタイプを示します。
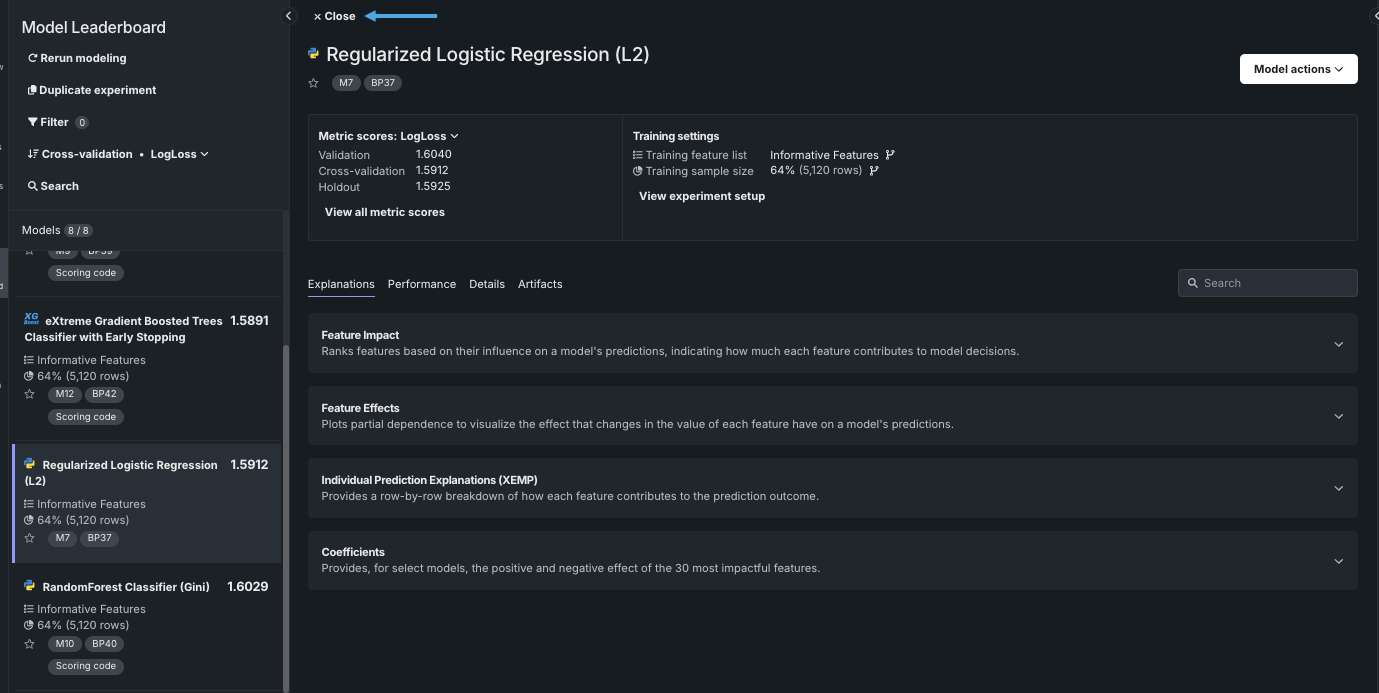
任意のモデルをクリックすると、さらにスコアリング情報が表示され、モデルのインサイトにアクセスできます。 閉じるをクリックすると、全幅表示に戻ります。
リーダーボードに表示可能な数を超えるバッジがモデルにある場合は、ドロップダウンを使用します。
モデルリストの表示
リーダーボードには、モデルリストのフィルター処理と並べ替えを行うためのさまざまな方法が用意されており、関連のあるモデルの表示と絞り込みが簡単にできます。 検索機能の利用だけでなく、モデルのフィルター、並べ替え、「お気に入り」登録も可能です。
検索
検索のフィルターには、任意のフィルターを組み合わせることができます。 まず、モデルタイプやブループリント番号などを検索し、次に「フィルター」を選択して、そのタイプのモデルの中から、追加の条件を満たすモデルのみを検索します。
モデルのフィルター
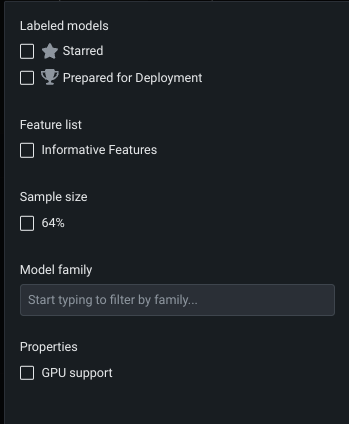
フィルターを使用すると、関連するモデルの表示とフォーカスが容易になります。 フィルターをクリックして、ワークベンチのリーダーボードに表示されるモデルの条件を設定します。 各フィルターで使用できる選択は、エクスペリメントおよびモデルタイプ(少なくとも1つのリーダーボードモデルで使用されたタイプ)に依存し、モデルがエクスペリメントに追加されると変更される可能性があります。 例:
| フィルター | 表示されるモデル |
|---|---|
| ラベルが設定されたモデル | リストされたタグが付与されたモデル( スター付きモデルまたは デプロイ推奨モデル) |
| 特徴量セット | 選択した特徴量セットで構築されたモデル |
| サンプルサイズ(ランダムまたは層化抽出パーティション) | 選択したサンプルサイズでトレーニングされたモデル |
| トレーニング期間(日付/時刻パーティション) | 選択した期間メカニズムによって定義されたバックテストでトレーニングされました。 |
| モデルファミリー | 選択したモデルファミリーに属するモデル:
|
| プロパティ | GPUを使用して構築されました。 |
使用可能なフィールドとそのフィールドの設定は、プロジェクトやモデルタイプによって異なります。 たとえば、日付/時刻以外のモデルではサンプルサイズでのフィルターが可能ですが、時間認識モデルではトレーニング期間を設定できます。
備考
フィルターは包括的です。 つまり、すべてのフィルターではなく、いずれかのフィルターに一致するモデルが結果として表示されます。 また、選択可能なオプションには、基準に一致するモデルが少なくとも1 つリーダーボードにあるものを含めます。
モデルの並べ替え
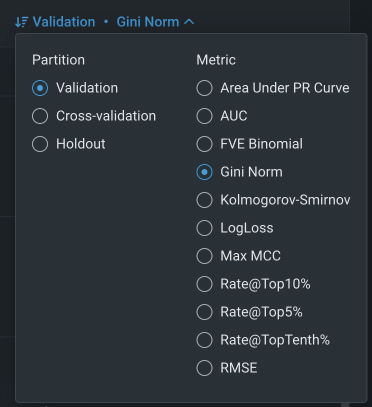
デフォルトでは、リーダーボードは、選択した 最適化指標を使用して、検定パーティションのスコアに基づいてモデルをソートします。 ただし、制御によるモデルの並べ替えを使用して、モデルを評価するときに表示パラメーターの基準を変更できます。
ワークベンチでは、データにとって最適な指標を使用してプロジェクトが構築されていますが、各モデルに適用される多くの指標が計算されることに注意してください。 構築が完了した後、別の指標に基づいてリーダーボードのリストを再表示できます。 モデル内の値は変更されませんが、この代替指標でのパフォーマンスに基づいてモデルの一覧の表示順序が変更されます。
それぞれの詳細については、 最適化指標のページを参照してください。
お気に入りでフィルター
リーダーボードに表示される1つまたは複数のモデルにタグ(星)を付けて、アプリケーションをナビゲートするときにモデルを容易に参照できます。 クリックして星を付けてから、フィルターを使用すると、星付きモデルのみが表示されます。
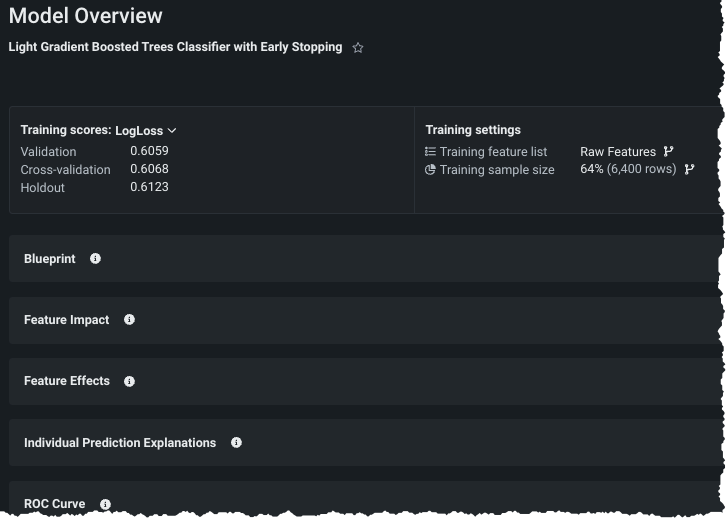
モデル概要
リーダーボードのリストからモデルを選択すると、モデル概要が表示され、以下の操作が可能です。
- 指標スコアと設定に関する特定の詳細を確認する。
- 新しい特徴量セットまたはサンプルサイズでモデルを再トレーニングする。 デプロイの準備済みモデルの特徴量セットは、 「フローズン」実行であるため変更できません。
- モデルのインサイトにアクセスする。
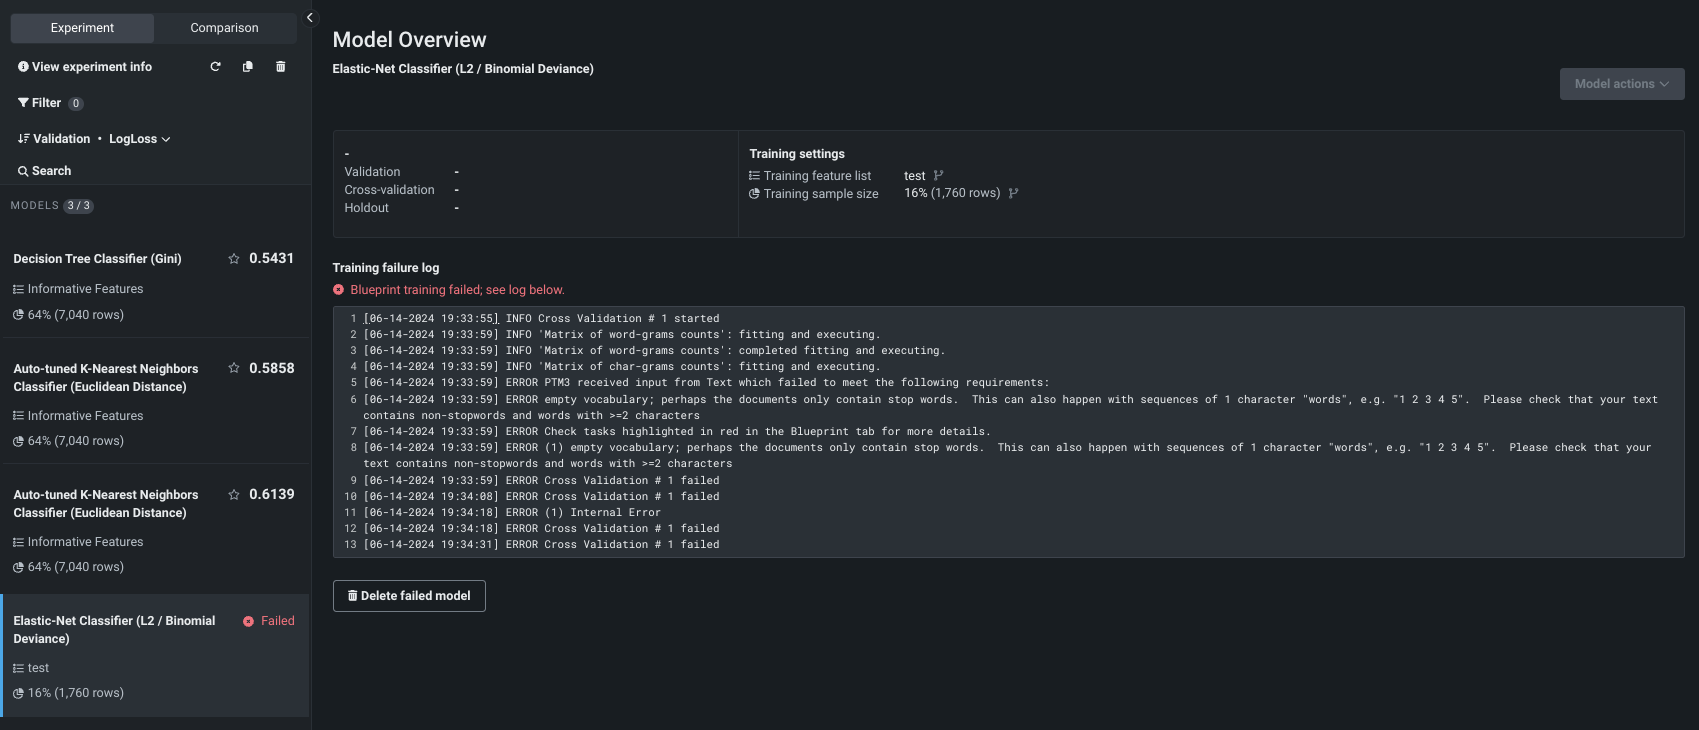
モデル構築の失敗
モデルの構築に失敗した場合、オートパイロットの実行中にジョブキューにその旨が表示されます。 完了すると、そのモデルはリーダーボードに表示されますが、失敗したことが示されます。 モデルをクリックすると、失敗の原因となった問題のログが表示されます。
リーダーボードからそのモデルを削除するには、失敗したモデルを削除ボタンを使用します。
エクスペリメントツール
リーダーボードからモデルにアクセスできるほか、以下の操作も可能です。
- ブレンダー(アンサンブル)モデルを作成し、モデルの予測を組み合わせて精度を向上させる。
- エクスペリメントを複製
- モデリングを再実行を使用して、特徴量セットまたはモデリングモードを変更するか、自動化設定を追加してオートパイロットを再実行する。
モデルをアンサンブル
ブレンダーモデルでは、2つから最大8つのモデルの予測を組み合わせることで、精度を向上させることができます。
レスポンス時間の最適化
アンサンブルモデルのレスポンス時間を改善するために、DataRobotは、オートパイロットによって使用される最大サンプルサイズ(通常64%)でトレーニングされた全モデルの予測を保存し、それらの結果からアンサンブルを作成します。 最大のサンプルサイズのみを保存することで(したがって、パフォーマンスが最も高いモデルの予測のみを保存することで)、必要なディスク容量を抑制できます。
ブレンダーモデルを作成するには:
-
リーダーボードから、ブレンドするモデルを2つ以上、最大8つ選択します。
-
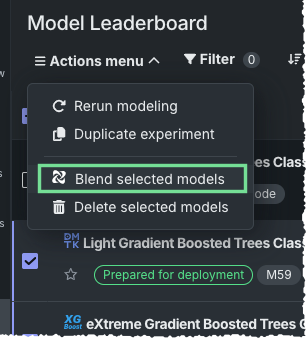
アクションメニューから、選択されたモデルをアンサンブルを選択します。 以下の場合、このオプションは使用できません。
- エクスペリメントが除外されたモデルまたはエクスペリメントタイプである。
- ブレンドするモデルを選択しすぎた。
- 選択したモデルの予測距離がそれぞれ異なる(時間認識エクスペリメント)。
- モデルのアクションが、このロールではサポートされていない。
-
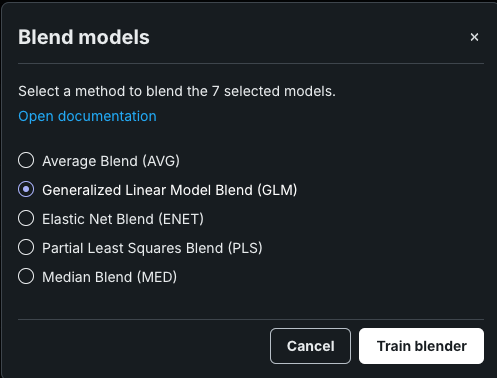
モデルをアンサンブルモーダルが開き、選択したモデルでサポートされている方法のリストが表示されます。 選択した各リーダーボードモデルから新しいブレンダーモデルを作成する方法を選択し、クリックしてトレーニングします。 利用可能な方法の詳細については、ブレンド方法のリファレンスを参照してください。
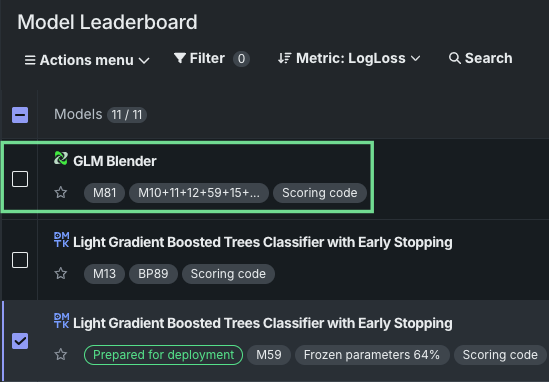
トレーニングが完了すると、新しいブレンドモデルがリーダーボード上のリストに表示されます。
ブレンド方法
以下の表に、ブレンド方法とその簡単な説明、およびその方法を利用できるエクスペリメントタイプを示します。
利用可能なブレンド方法
| 方法 | 説明 |
|---|---|
| 平均アンサンブル(AVG) | 複数のベースモデルの予測平均値を組み合わせる際に、出力値の単純な算術平均(連続値の場合)または予測された確率の平均(分類の場合)を算出します。 |
| ElasticNet Blend (ENET) | 複数のベースモデルからの予測を平均するのではなく、組み合わせるための最適な重みを学習します。 ElasticNetのL1およびL2正則化は、オーバーフィッティングを防ぎながら、最も価値のあるモデルを選択するのに役立ちます。 |
| Generalized Linear Modelアンサンブル(GLM) | 複数のベースモデルの予測値を組み合わせます。ここで、ベースモデルの予測値は入力特徴量として使われ、GLMは線形加重を学習します。 |
| Maximum Blend (MAX) | 複雑なアルゴリズム(たとえば、ニューラルネットワーク、勾配ブースティング、多層スタッキング)を用いて、ベースモデルの予測値の複雑で非線形の組み合わせを学習します。 |
| Mean Absolute Error (MAE) | ベースモデルの予測値を組み合わせる際の最適な重みを、ブレンド中に平均絶対誤差損失関数を最小化することで学習します。 これは、通常の2乗誤差ベースのブレンダーとは異なり、外れ値に対してより堅牢です。 |
| Mean Absolute Error 1 (MAE1) | ベースモデルの予測値を組み合わせる際の最適な重みを、ブレンド中に平均絶対誤差損失関数を最小化することで学習し、L1正則化を適用します。 これは、通常の2乗誤差ベースのブレンダーとは異なり、外れ値に対してより堅牢です。 |
| Minimum Blend (MIN) | 平均化(連続値の場合)や多数決(分類の場合)といった基本的な集計方法を使用して、複数のベースモデルの予測値を組み合わせます。 これは学習された重みや複雑な組み合わせルールを使用しない、基本的なアンサンブル手法です。 |
| 中央値アンサンブル(MED) | 複数のベースモデルの予測値を組み合わせる際に、出力の中央値(連続値の場合)または予測された確率の中央値(分類の場合)を取ります。 MED Blendは、中央値が極端な予測値の影響を受けにくいため、平均ベースのブレンドよりも外れ値に対して堅牢です。 |
| 部分最小二乗法アンサンブル(PLS) | PLS回帰を使用して、ターゲット特徴量との共分散を最大化する、基本モデルの予測値の線形組み合わせを見つけることにより、複数の基本モデルの予測値を結合します。 基本モデルの予測値を独立した特徴量として扱う単純な線形ブレンドとは異なり、PLSは特に、ターゲットと最大限に相関しながら、モデル間で共有される予測情報を捉える潜在要素を探します。 |
| 予測距離での平均アンサンブル | 時間認識。 予測距離ごとに、各モデルの予測の平均値をアンサンブルしたモデルを作成 |
| 予測距離でのENETアンサンブル | 時間認識。 予測距離ごとに、選択されたモデルの予測値に対してElasticNetモデルをトレーニングするモデルを作成します。 |
備考
DataRobotには、自然言語処理(NLP)および画像のファインチューナーモデル用に特別なロジックが用意されています。 たとえば、ファインチューナーは スタックされた予測をサポートしていません。 その結果、スタックモデルとスタック非対応モデルを組み合わせてブレンドする場合、利用可能なブレンド方法はAVG、MED、MIN、またはMAXです。 この場合、DataRobotは他の方法をサポートしません。ターゲットリーケージが発生する可能性があるためです。
機能に関する注意事項
以下のモデルタイプまたは状況では、モデルをブレンダーに含めることができません。
- NextGenでサポートされていないモデル機能(格付表、カスタムタスク)。
- 10を超えるクラスの拡張多クラスと多ラベルエクスペリメント。
- 教師なし予測または時間認識クラスタリングエクスペリメント。
- ブレンダーモデル(以前のブレンダーアクションの結果として生成されたモデル)。
- レジストリのワークショップで作成されたカスタムモデル。
- 失敗したモデル。
- 使用非推奨および無効なモデル。
エクスペリメントの複製
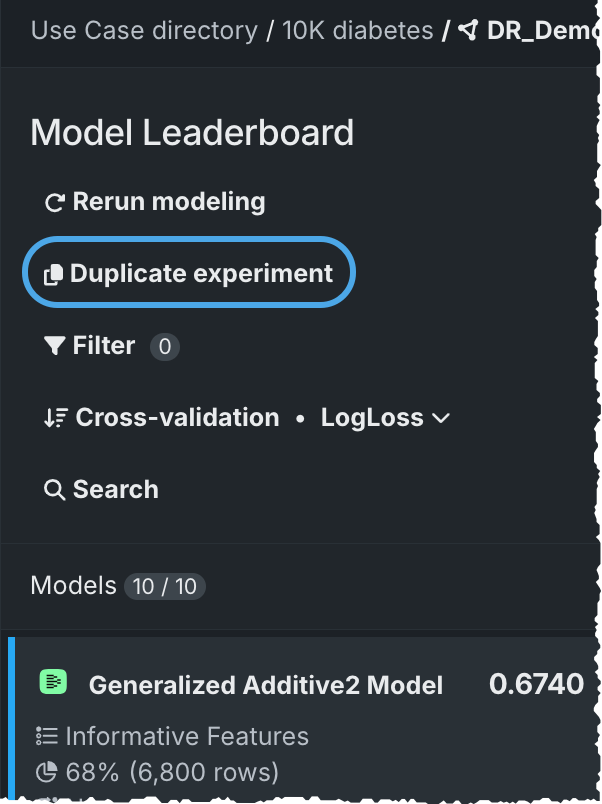
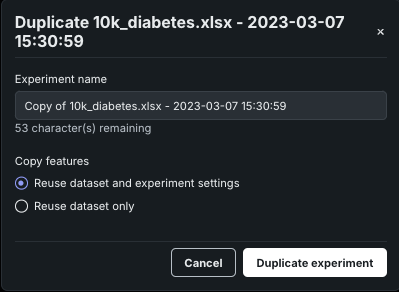
現在のエクスペリメントを複製するには、リーダーボードの上部にあるリンクを使用します。 これにより新しいエクスペリメントが作成され、データを再アップロードするよりも速くデータを操作できます。
複製をクリックすると、モーダルが開き、新しいエクスペリメント名を指定するオプションが表示されます。 次に、データセットだけをコピーするか、データセットとエクスペリメント設定をコピーするかを選択します。 設定を含めることを選択した場合、ターゲット、および元のプロジェクトに関連付けられた詳細設定とカスタム特徴量セットが複製されます。
完了すると、新しいエクスペリメント設定ページが開き、モデル構築プロセスを開始できます。
