Manage applications
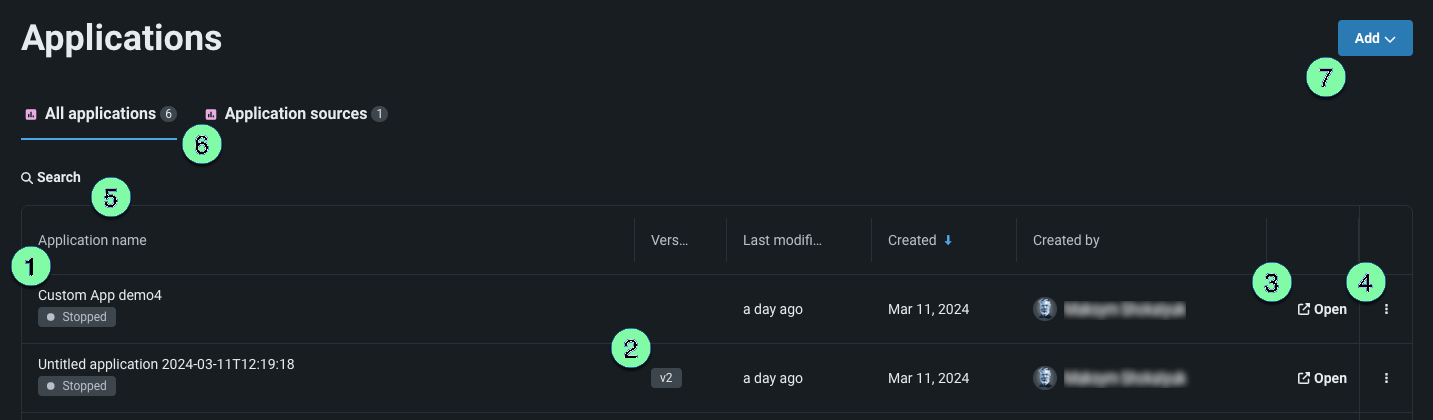
The Applications page in Registry lists all applications available to you in the All applications tab. The table below describes the elements and available actions from this page:
| Element | Description | |
|---|---|---|
| 1 | Application name | The application name. |
| 2 | Version | Lists the version number of the application or source. |
| 3 | Open | Click to open an application or source. |
| 4 | Actions menu | From the Actions menu, you can:
|
| 5 | Search | Use to find a specific application in the list. |
| 6 | Application tabs | Choose to view built applications or application sources. |
| 7 | Add dropdown | Use the Add dropdown to upload an application or create a new application source. |
Share applications
The sharing capability allows you to manage permissions and share an application with users, groups, and organizations, as well as recipients outside of DataRobot. This is useful, for example, for allowing others to use your application without requiring them to have the expertise to create one.
Warning
When multiple users have access to the same application, it's possible that each user can see, edit, and overwrite changes or predictions made by another user, as well as view their uploaded datasets. This behavior depends on the nature of the application.
To access sharing functionality in the All applications tab, click the Actions menu next to the app you want to share and select Share .
This opens the Share dialog, which lists each associated user and their role. Editors can share an application with one or more users or groups, or the entire organization. Additionally, you can share an application externally with a sharing link.
-
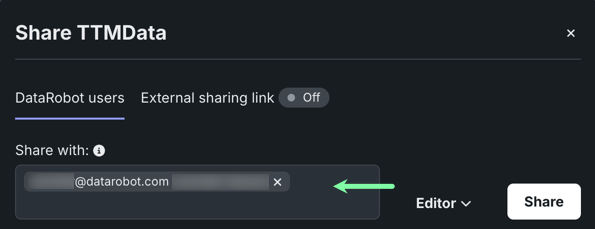
Enter a username, group, or organization in the Share with field.
-
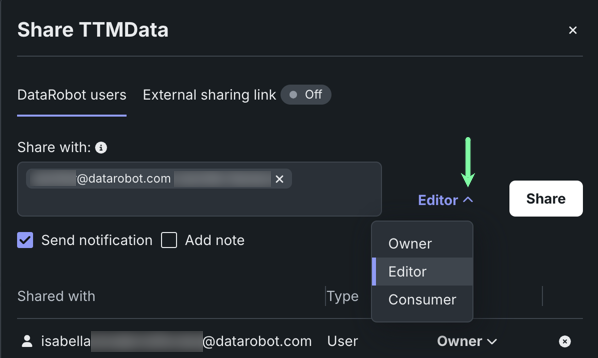
Choose a role for permissions from the dropdown.
-
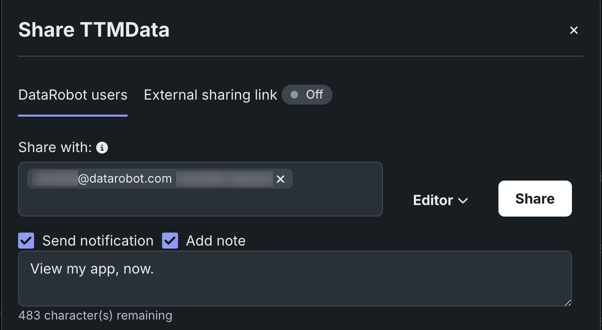
Select Send notification to send an email notification and Add note to add additional details to the notification.
-
Click Share. If you are sharing with a group or organization, the app is shared with—and the role is applied to—every member of the designated group or organization.
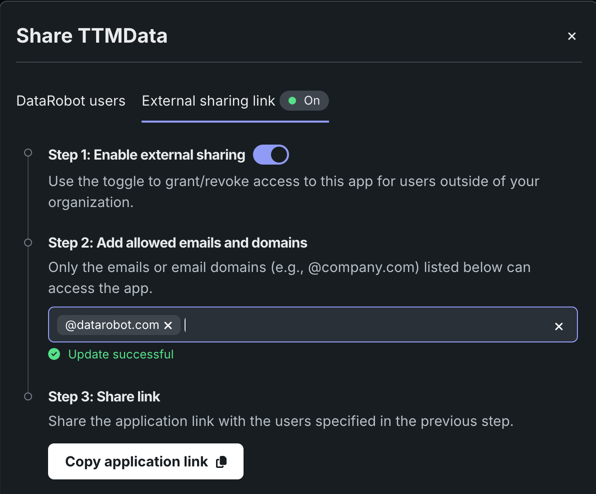
External sharing allows you to share applications with end-users who don't have access to DataRobot via a link. To share an application with non-DataRobot users:
- Click the External sharing link tab. The icon next to the tab name indicates whether or not external sharing is currently enabled.
- Toggle on Enable external sharing. Additional fields appear below.
-
Add all of the email domains and addresses you want to be able to access the application. Note that the emails and domains must be formatted correctly (e.g., @datarobot.com) and only those listed here can access the app via the sharing link.
-
Click Copy application link and send this link to all of the users specified in the previous step. They will receive an email invitation from DataRobot and require this link for verification. Email invitations expire one hour after they are sent to a user. After a user accepts authentication, the authentication token created expires after 30 days.
Revoking application access
You can revoke all access to the sharing link at any time by toggling off Enable external sharing. You can also revoke individual access by removing email domains and addresses from the allowed field.
Self-managed external sharing
For self-managed users externally sharing an application, note that you need to configure a Simple Mail Transfer Protocol (SMTP) server in order to share the application with external users.
You can also programmatically share applications using the DRApps CLI.
The following actions are also available in the Share dialog:
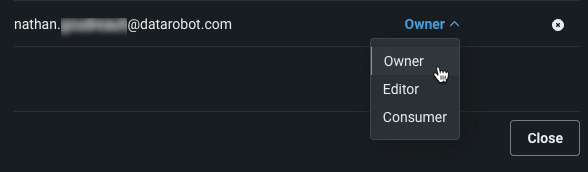
- To remove a user, click the X button to the right of their role.
-
To re-assign a user's role, click the assigned role and assign a new one from the dropdown.
Application API keys
In addition to sharing applications, you may want to grant the ability for users to access and use data from within an application. An application API key grants an application the necessary access to the DataRobot Public API. Sharing roles grant control over the application as an entity within DataRobot, while application API keys grant control over the requests the app can make when a user accesses it.
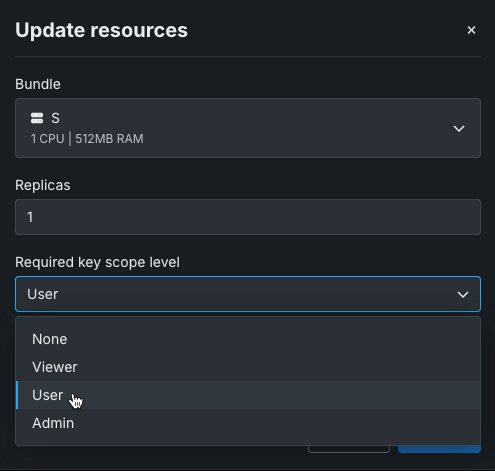
The Required key scope level setting on an application source controls how scope levels apply to the two API keys an application can use. The same dropdown value sets a different scope level for the creator and visitor API keys:
| Key level setting | Creator API key level | Visitor API key level |
|---|---|---|
| None | N/A | Admin |
| Viewer | Viewer | Viewer |
| User | User | User |
| Admin | Admin | Admin |
N/Ameans the key level setting does not assign an HTTP method scope to the creator API key. The creator key remains available throughDATAROBOT_API_TOKEN.- When the key level setting is
None, DataRobot does not inject a visitor API key into thex-datarobot-api-keyrequest header. Set the key level toViewer,User, orAdminto forward a visitor key on each request.
Creator and visitor API keys
An application can use two distinct API keys:
| Key | How the app accesses it | Availability |
|---|---|---|
| Creator API key | DATAROBOT_API_TOKEN environment variable |
Always injected at startup into an application container. The application's backend uses this key to call the REST API on behalf of the app creator. This key is never exposed to end users. |
| Visitor API key | x-datarobot-api-key request header |
The visiting user's own DataRobot API key, forwarded by the proxy in request headers. The application can use this key to call the REST API on behalf of the user who is currently interacting with the app. Injected only when the key level setting is Viewer, User, or Admin. When injected, the visitor key uses the scope level shown in the table above. Note that the visitor API key is not provided by default. It's only provided when the key level setting is specified. |
A creator API key is automatically created the first time the application starts. It persists across stop and restart cycles and is only deleted when the application itself is deleted. The key has no expiration (reflected by the empty expiration column in the UI).
The app creator can find this key on the API keys and tools page under CustomApp <application-id>. From there, the creator can copy and share the key with other users who need to make DataRobot public API calls without requiring a personal DataRobot API key. Application API keys are scoped to the allowed API endpoints, so they grant a defined subset of access rather than the full permissions of the creator's personal key.
Building a new app vs. updating an existing app's source
The creator API key is tied to the user who built or last updated the application, not to a specific source version. If you update the source of an existing application (via Replace source or by deploying a new source version) as the same user who originally built it, the existing key is preserved. If a different user updates the source, the key changes to that user's key. However, if you build a new application from a source—even the same source previously used to build an app—DataRobot creates a new application entity with a new key.
HTTP method scope
When a scope level of Viewer, User, or Admin applies to an API key, that key may call only allowed API endpoints using the HTTP methods permitted at that level:
| Scope level | Allowed methods on endpoints |
|---|---|
| Viewer | GET only |
| User | GET, POST, PATCH, and PUT |
| Admin | All HTTP methods (including DELETE) |
Allowed API endpoints
Application API keys do not grant access to the entire Public API. Each key can call only endpoints that are allowed for custom applications. See the Allowed endpoints list for the endpoints available in your environment.
Only a system administrator can change which endpoints are allowed or disallowed for custom applications through System Configuration. Who holds that role depends on your deployment:
| Deployment | Who manages allowed endpoints |
|---|---|
| Multi-tenant SaaS (MTS) | DataRobot Support |
| Single-tenant SaaS (STS) and self-managed | Your organization's system administrators |
Configure scope level
Follow the steps below to set the Required key scope level on an application source:
-
Navigate to the application source and create a new version.
-
In the Resources section, click Edit.

-
From the Update resources modal, use the Required key scope level dropdown to choose a key level setting. See the key level mapping table and HTTP method scope for the effect of each option.
-
Click Update. When you build an application from the source you configured, DataRobot applies the selected scope level to the application's API keys.
Using API keys in your application code
Your application code can use the creator API key and, when scope level is Viewer or higher, the visitor API key. The examples below show how to use each in Streamlit and FastAPI.
# Work with creator API key

endpoint = os.environ.get("DATAROBOT_ENDPOINT")
owner_api_key = os.environ.get("DATAROBOT_API_TOKEN")  # creator's Application API key (scoped)

with datarobot.Client(token=owner_api_key, endpoint=endpoint) as client:
    deployments = datarobot.Deployment.list()  # get list of app creator's datasets


# Work with visitor API key
## Streamlit

endpoint = os.environ.get("DATAROBOT_ENDPOINT")
headers = streamlit.context.headers  # request headers
visitor_api_key = headers.get('x-datarobot-api-key')  # visitor's API key from request headers

with datarobot.Client(token=visitor_api_key, endpoint=endpoint) as client:
    datasets = datarobot.Dataset.list()  # get list of visitor's datasets


## FastAPI

_router = fastapi.APIRouter(tags=["Datasets"])

@_router.get("/datasets")
async def chat_completion(request: fastapi.Request) -> Any:
    endpoint = os.environ.get("DATAROBOT_ENDPOINT")
    visitor_api_key = request.headers.get('x-datarobot-api-key')  # visitor API key from request headers

    with datarobot.Client(token=visitor_api_key, endpoint=endpoint) as client:
        datasets = datarobot.Dataset.list()  # get list of visitor datasets
Link to a Use Case
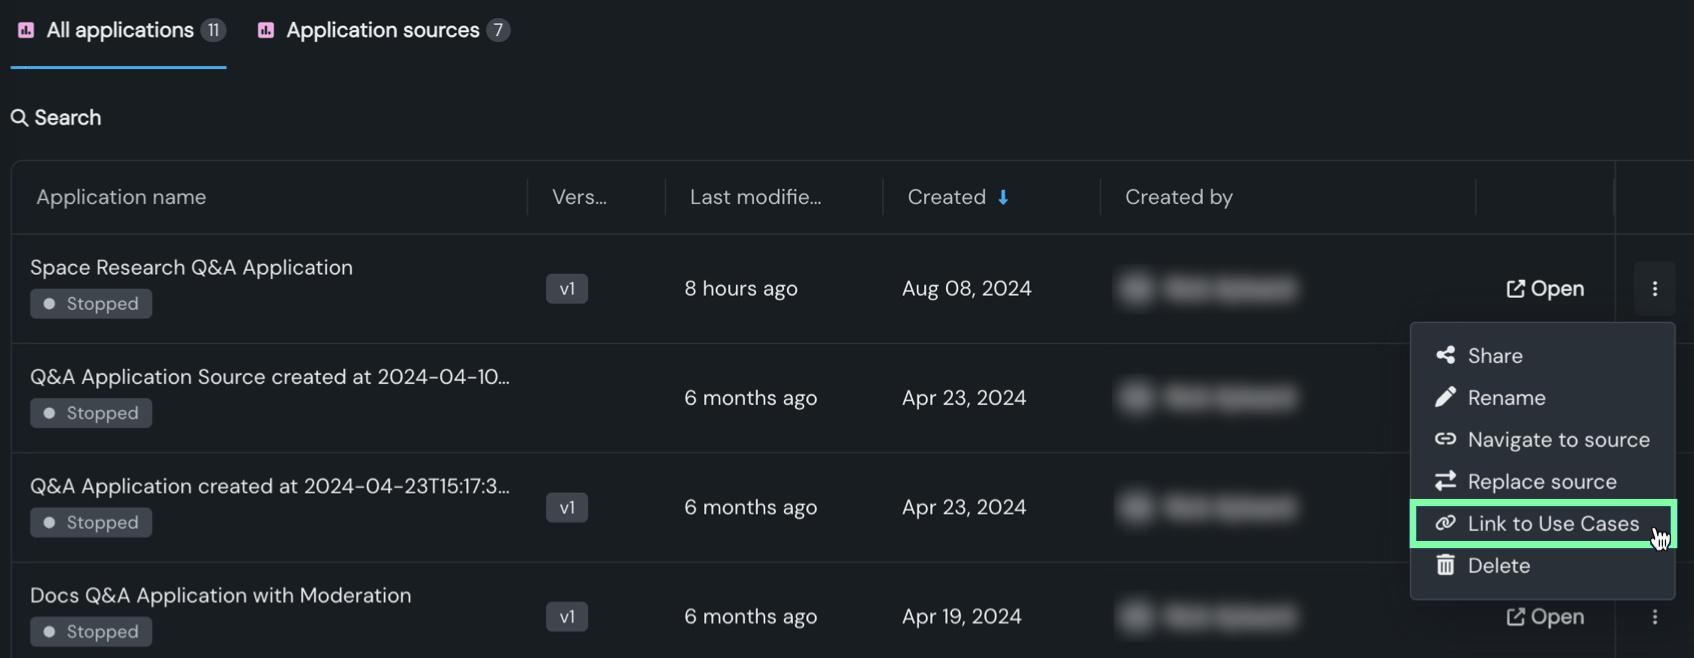
To link an application to a Workbench Use Case, in the application's actions menu , click Link to Use Cases:
In the Link to Use Case modal, select one of the following options:
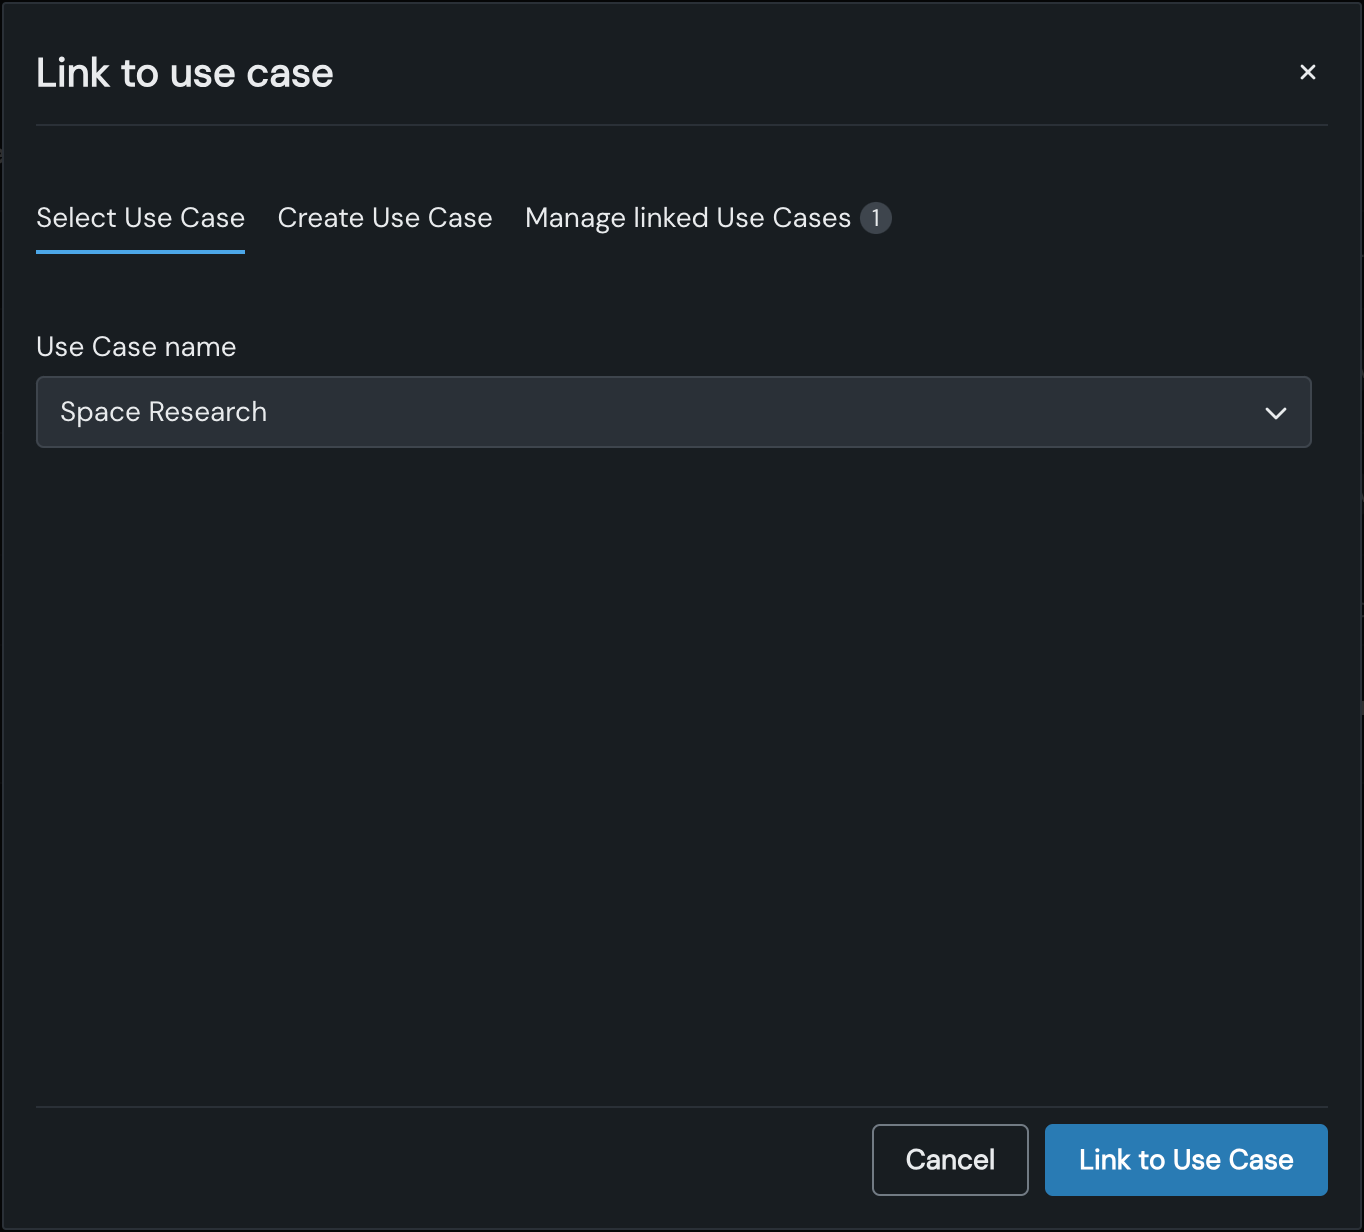
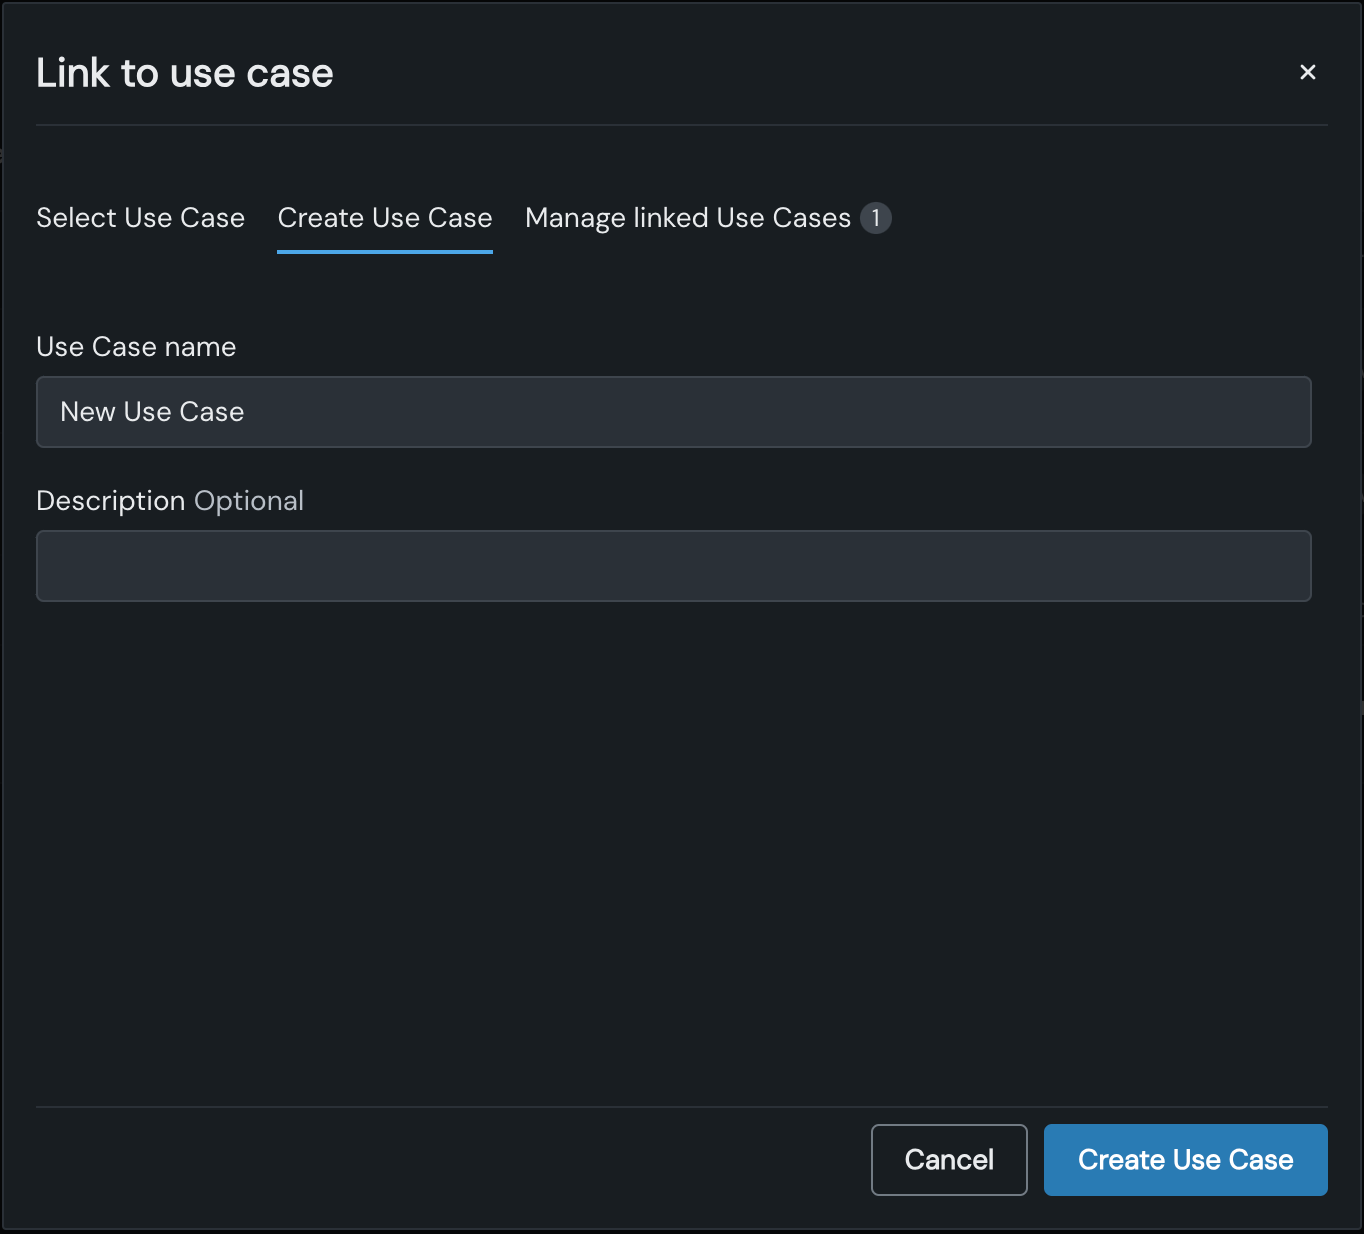
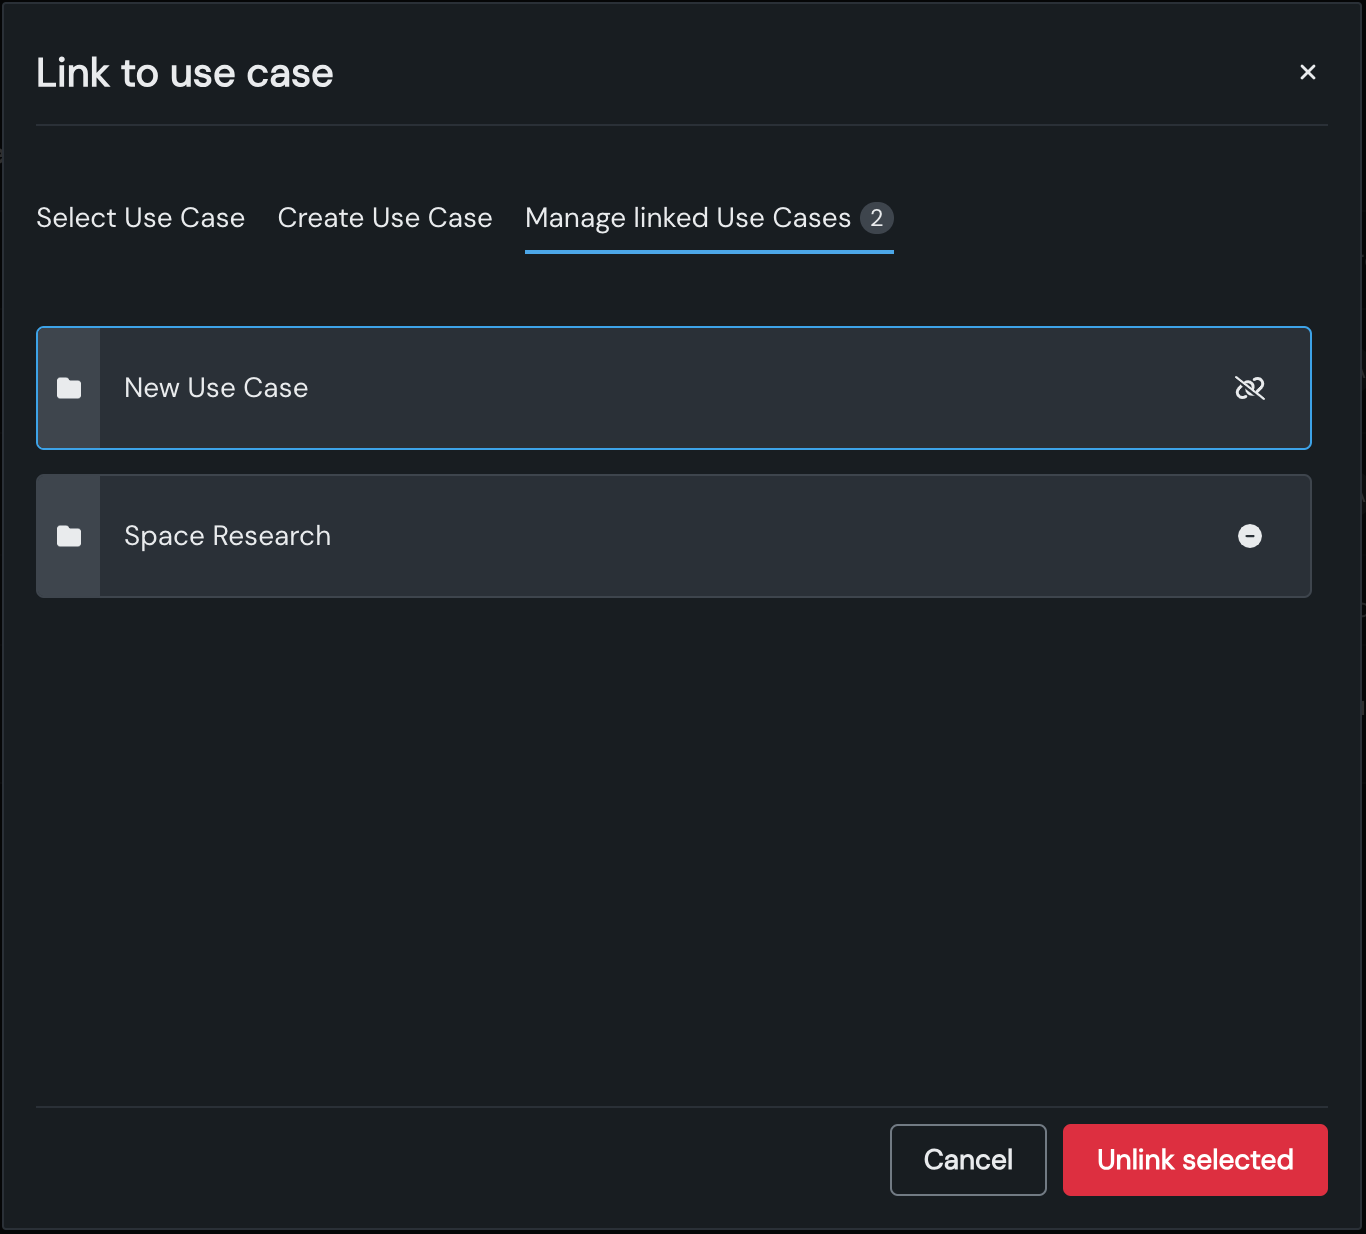
| Option | Description |
|---|---|
| Select Use Case | Click the Use Case name dropdown list to select an existing Use Case, then click Link to Use Case. |
| Create Use Case | Enter a new Use Case name and an optional Description, then click Create Use Case to create a new Use Case in Workbench. |
| Managed linked Use Cases | Click the minus icon next to a Use Case to unlink it from the asset, then click Unlink selected. |
Delete an application
If you have the appropriate permissions, you can delete an application by opening the Actions menu and clicking Delete ().