Share secure configurations
IT admins can configure OAuth-based authentication parameters for a data connection, and then securely share them with other users without exposing sensitive fields. This allows users to easily connect to their data warehouse without needing to reach out to IT for data connection parameters.
IT admins
Availability information
Required user role: Organization administrator
Prerequisites
Before proceeding, make sure you have the following parameters depending on the secure configuration type:
- Client ID
- Client Secret
- (Optional) Scopes
- Authorization endpoint URL
- Token URL
Example
If your OAuth provider is Microsoft Entra ID, see the following examples:
- Authorization endpoint URL:
https://login.microsoftonline.com/<TENANT_ID>/oauth2/v2.0/authorize - Token URL:
https://login.microsoftonline.com/<TENANT_ID>/oauth2/v2.0/token
For other OAuth providers, including Snowflake and Okta, see the following examples:
- Authorization endpoint URL:
https://<domain>/oauth/authorize - Token URL:
https://<domain>/oauth/token-request
For more information, see the documentation on connecting to Snowflake.
- Service Account Key (JSON string)
- Username (required only for Snowflake connections)
- Private Key
For more information, see the documentation for connecting to Snowflake.
- AWS access Key ID
- AWS secret access key
For more information, see the documentation for connecting to AWS S3 (available for preview).
- Client ID
- Client Secret
- Client ID
- Client Secret
- Tenant ID
- Client ID
- Client Secret
- Scopes
- Token
Create a configuration
To create a secure configuration:
-
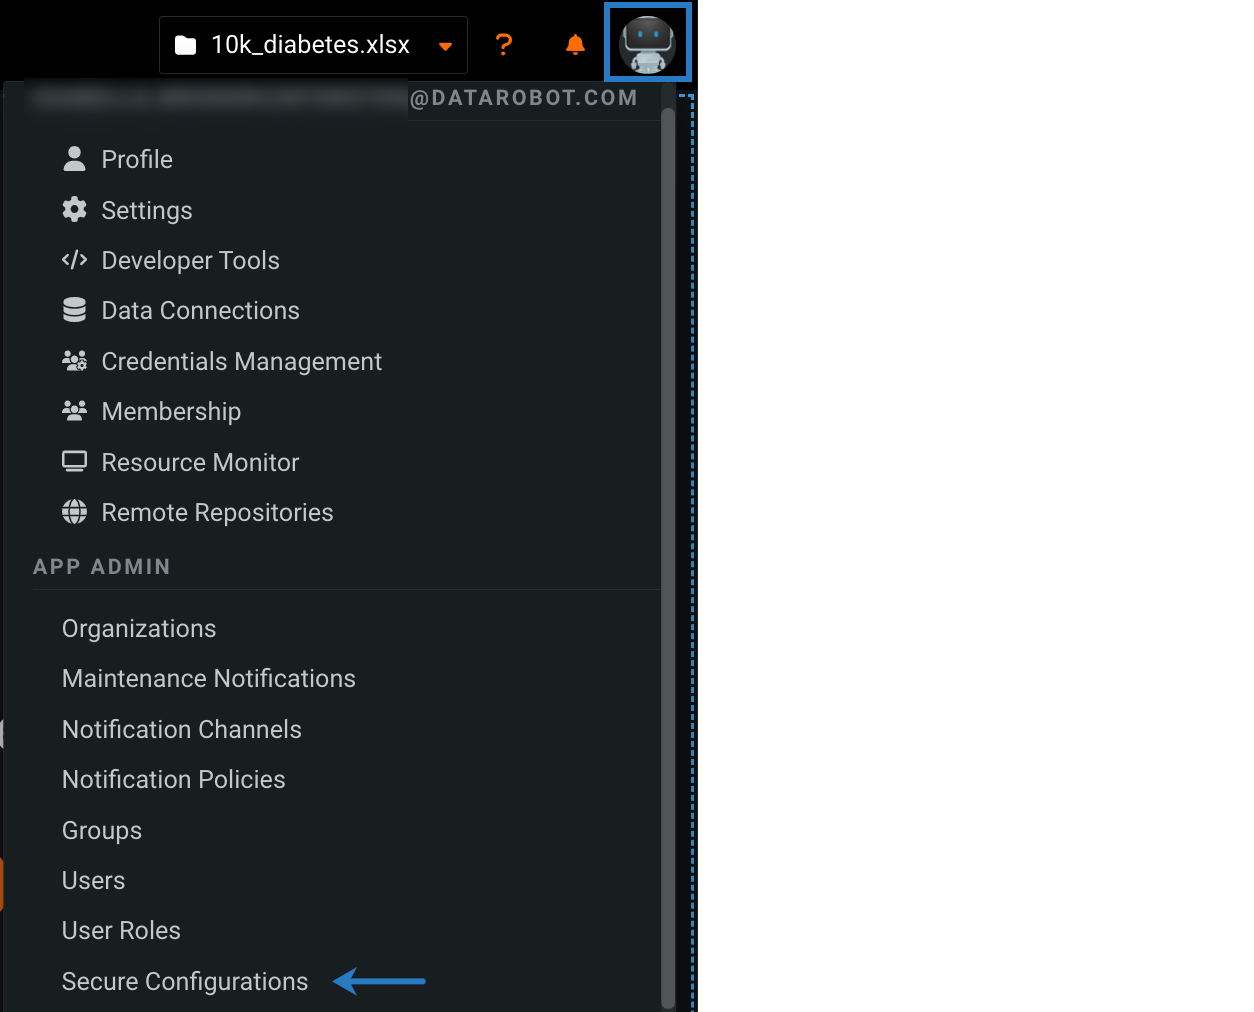
Click your user icon in the upper-right corner and select Secure Configurations.
-
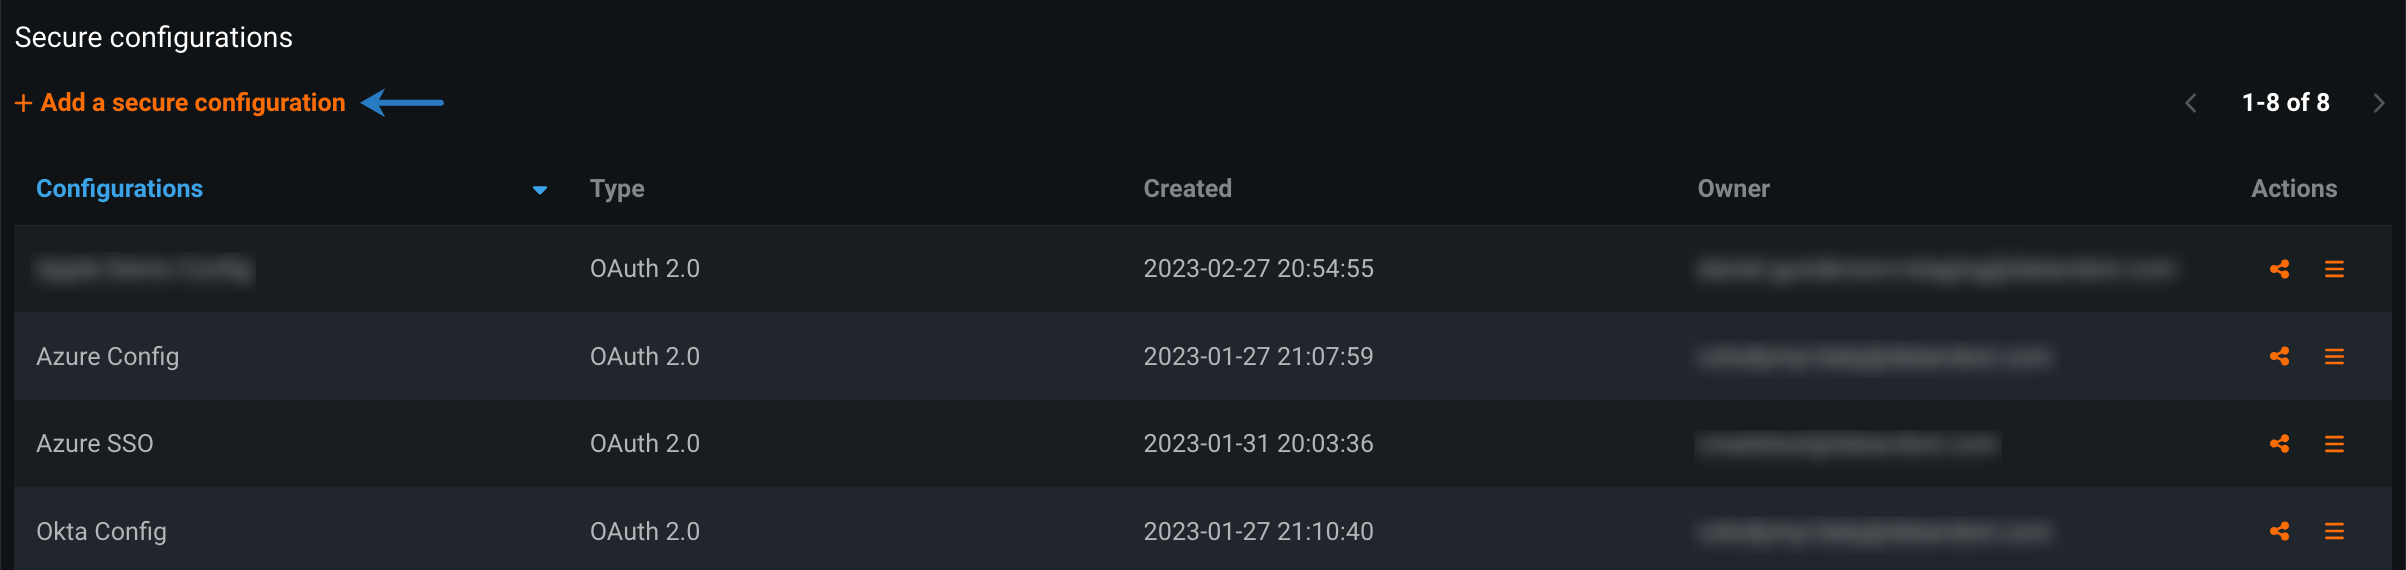
Click Add a secure configuration.
-
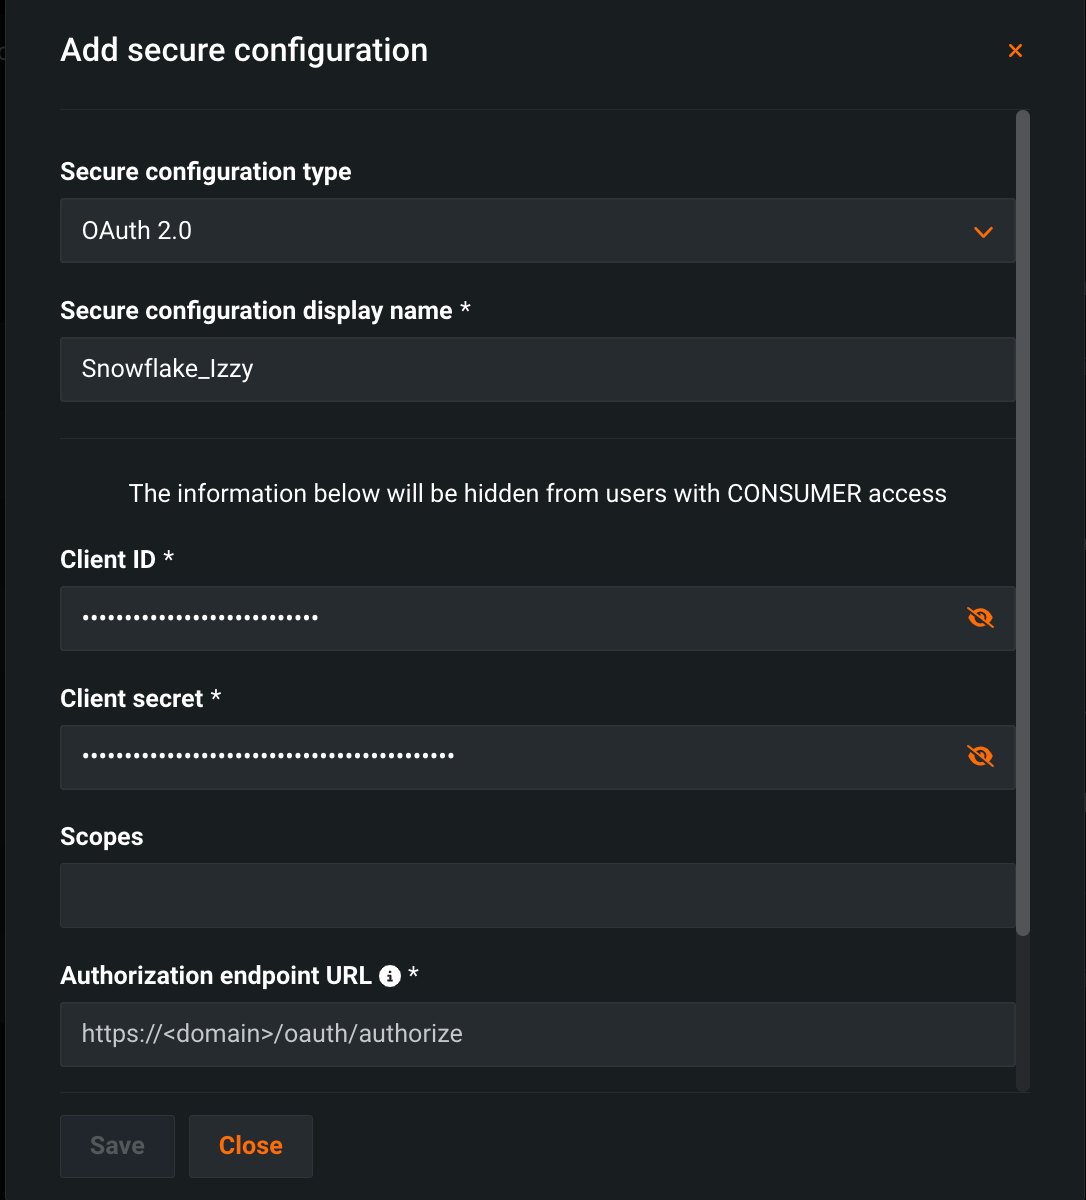
Fill out the required parameters for your data connection by selecting a schema under Secure configuration type and entering a unique name under Secure configuration display name.
-
Click Save.
Share a configuration
Other users cannot access a secure configuration when setting up a data connection until it's been shared with them.
To share a secure configuration:
- On the Secure Configurations page, click the Share icon next to a configuration.
-
In the sharing modal, enter the user(s), group(s), or organization(s) you want to grant access to (1). Then, select the appropriate user role (2) and click Share (3).
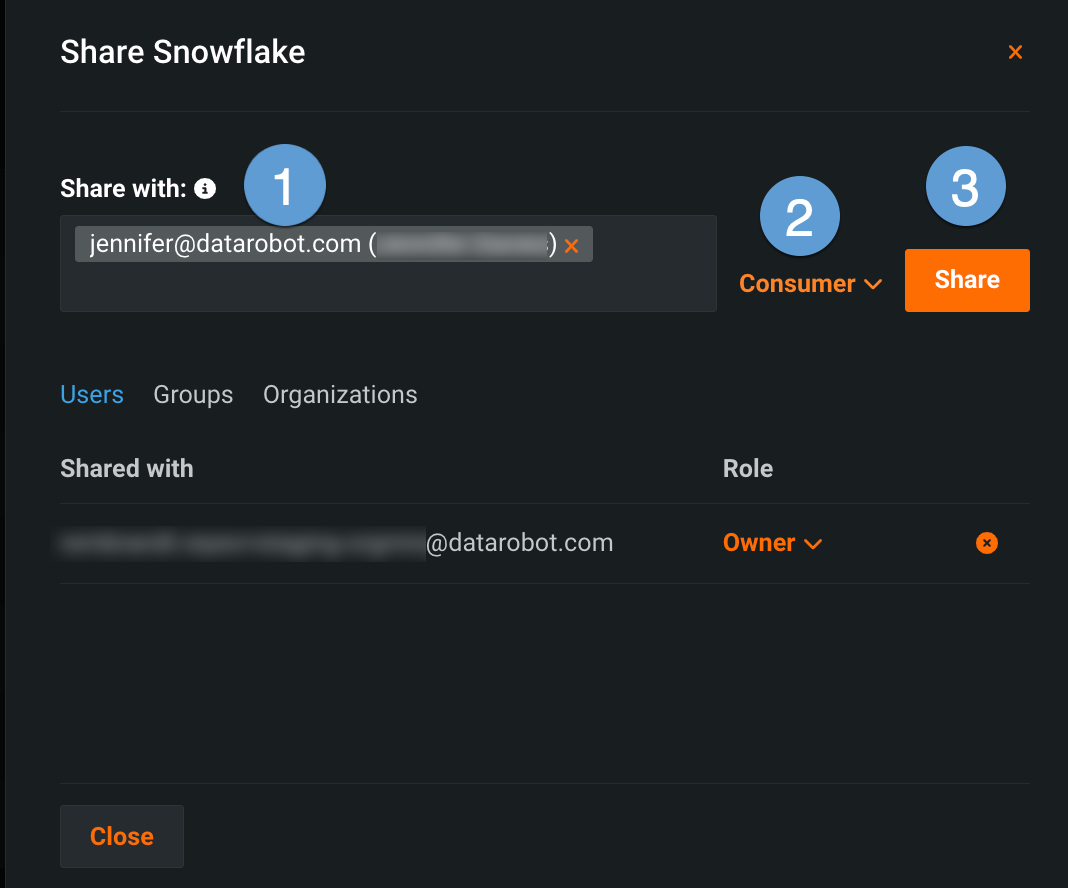
Note that the role you select determines what configuration information the recipients can view. The table below describes each option:
Role Description End users Consumer Cannot view sensitive fields (indicated in the Add secure configuration modal). Administrators Editor Can view and update sensitive fields. Owner Full permissions for secure configurations, including the ability to delete existing configurations.
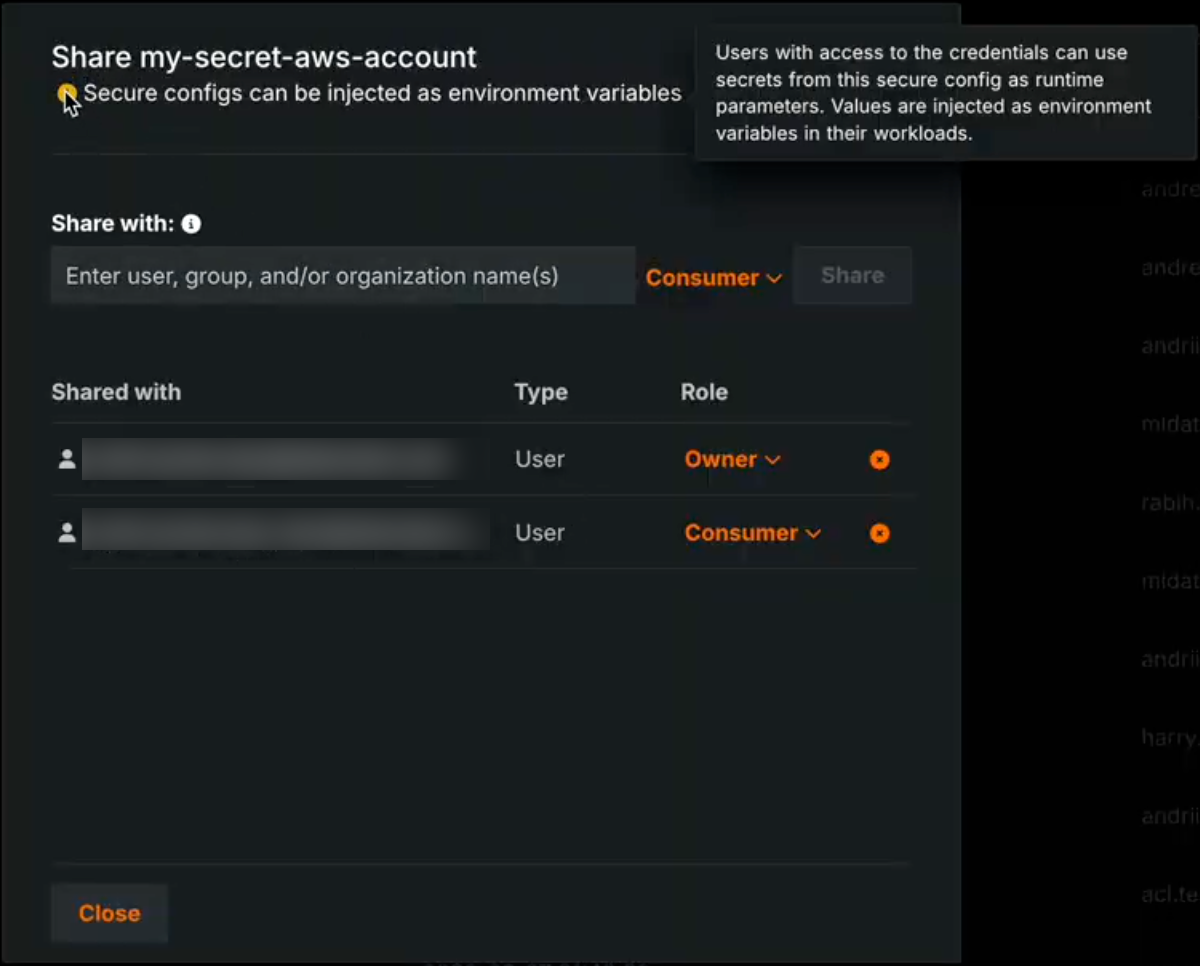
Secure config exposure message
When Enable Secure Config Exposure is active for your organization, the Share modal displays a message that secrets from the shared secure configuration can be exposed. This means users who create credentials from this shared configuration can use those credentials as runtime parameters in custom models, applications, and jobs, and the actual secret values are injected into those runtimes. For details, see Using credentials from shared secure configs in runtimes.
Secure config exposure
Premium
Secure configuration exposure is a premium feature. Contact your DataRobot representative or administrator for information on enabling the feature.
Required feature flag: Enable Secure Config Exposure
Enable Secure Config Exposure is an organization-level setting that allows the exposure of secure configuration values when they are shared with users and referenced by credentials used in runtime parameters. When this feature is enabled, secure configuration values are injected directly into the runtime parameters of a custom model, application, or job executed in the cluster. When this feature is disabled, the credential is injected using only the configuration ID, without exposing the underlying secure configuration values.
Secret exposure in runtimes
Enable Secure Config Exposure causes secret values to be exposed in the container's runtime. When this feature is enabled for your organization, any credential created from a shared secure configuration and used as a runtime parameter in a custom model, application, or job exposes actual secret values (such as access keys and tokens) by injecting them into the runtime. Those secrets are then present in the container's runtime and can be accessed by custom code. Do not enable or use this capability unless you accept the risks inherent in exposing secrets in an uncontrolled container runtime. Use only when necessary and with appropriate governance.
When Enable Secure Config Exposure is active, the Share modal shows a warning that the secret might be exposed so admins are aware that shared configs can be used in this way. Organization administrators control whether Enable Secure Config Exposure is enabled.
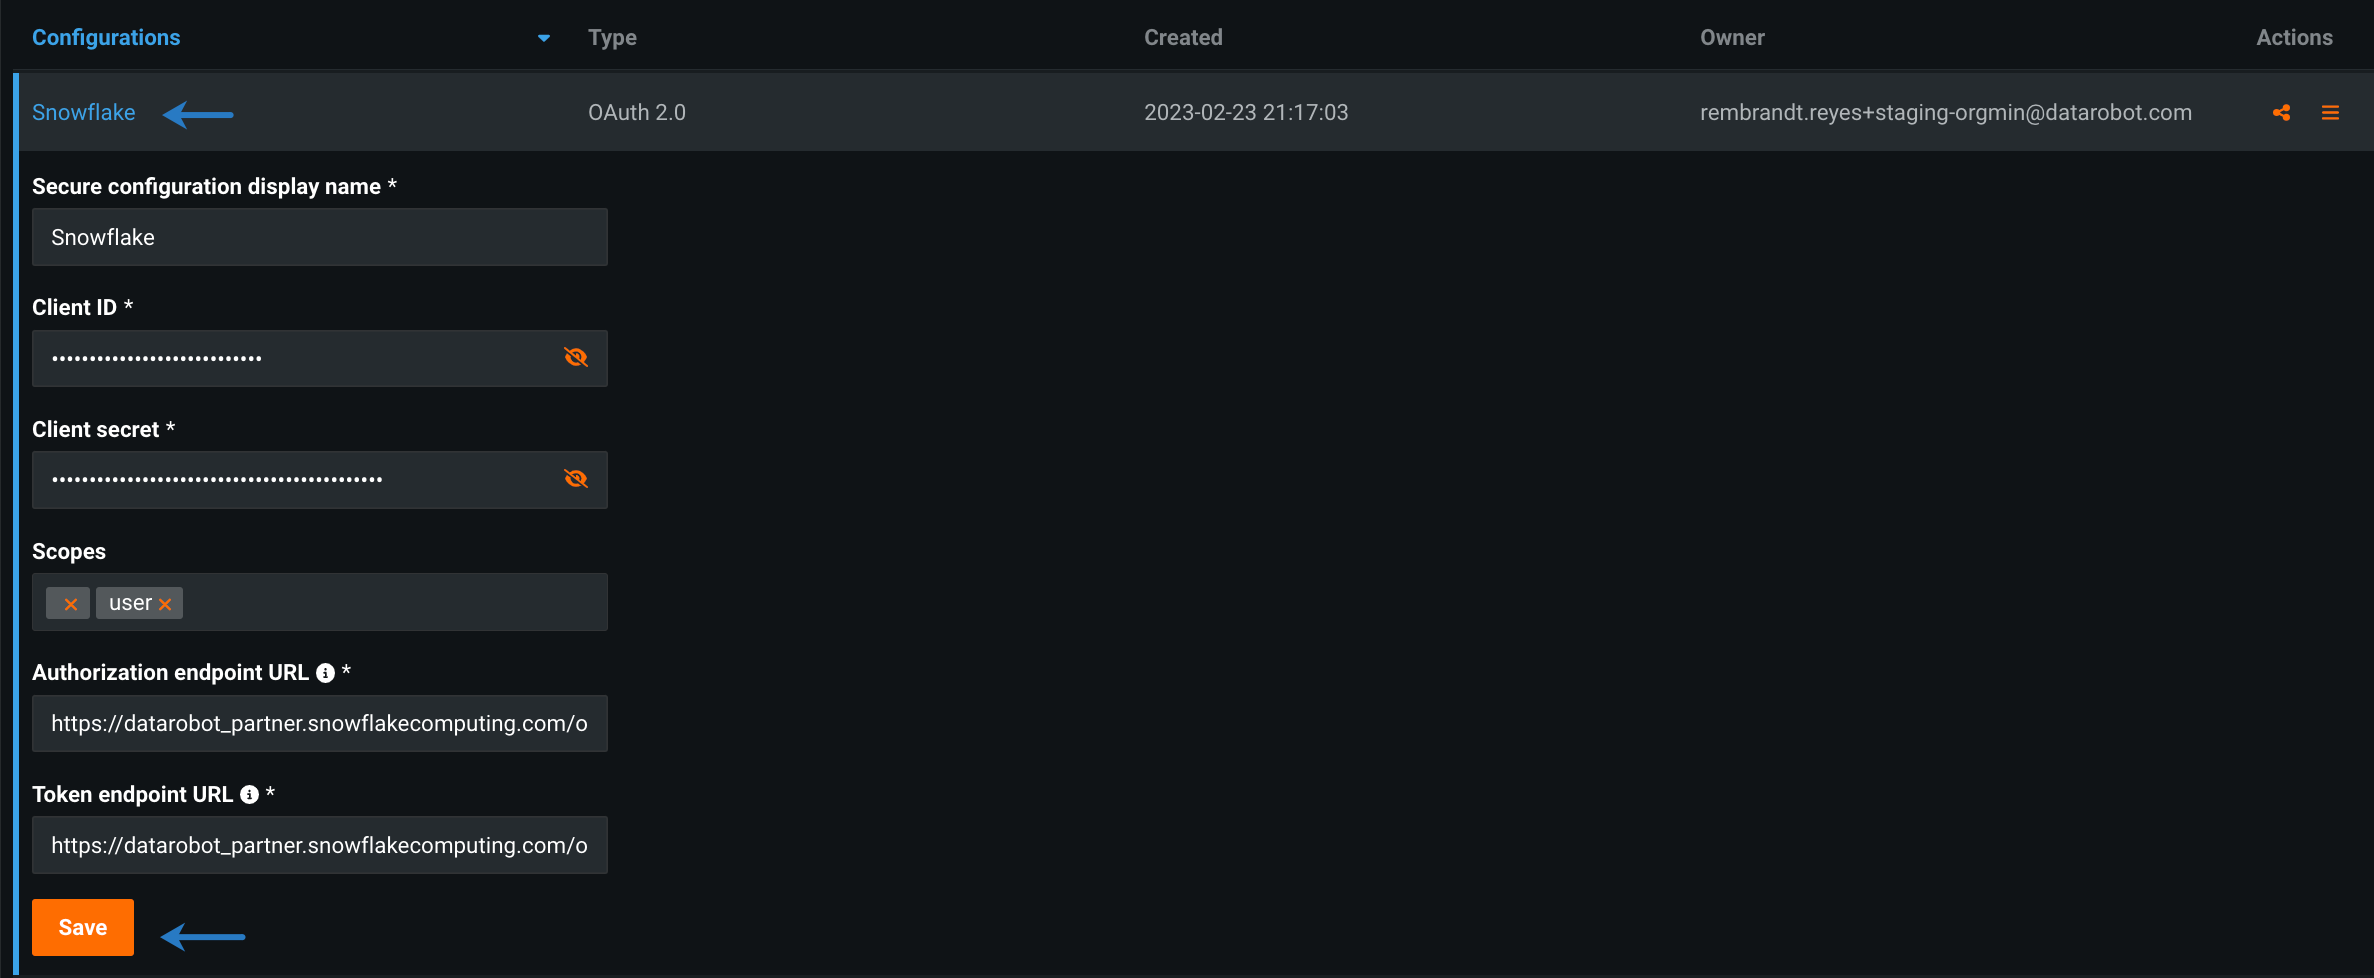
Manage secure configurations
Once you've created a secure configuration, you can:
To update an existing configuration, click the name of the configuration you want to update. Update the fields that appear below the configuration name and click Save.
To delete an existing configuration, click the Actions menu next to the configuration you want to remove, and select Delete.

To build credentials from an existing configuration, click the Actions menu next to the configuration, and select Build credentials.

You can then define your new credentials and associate a data connection with them.
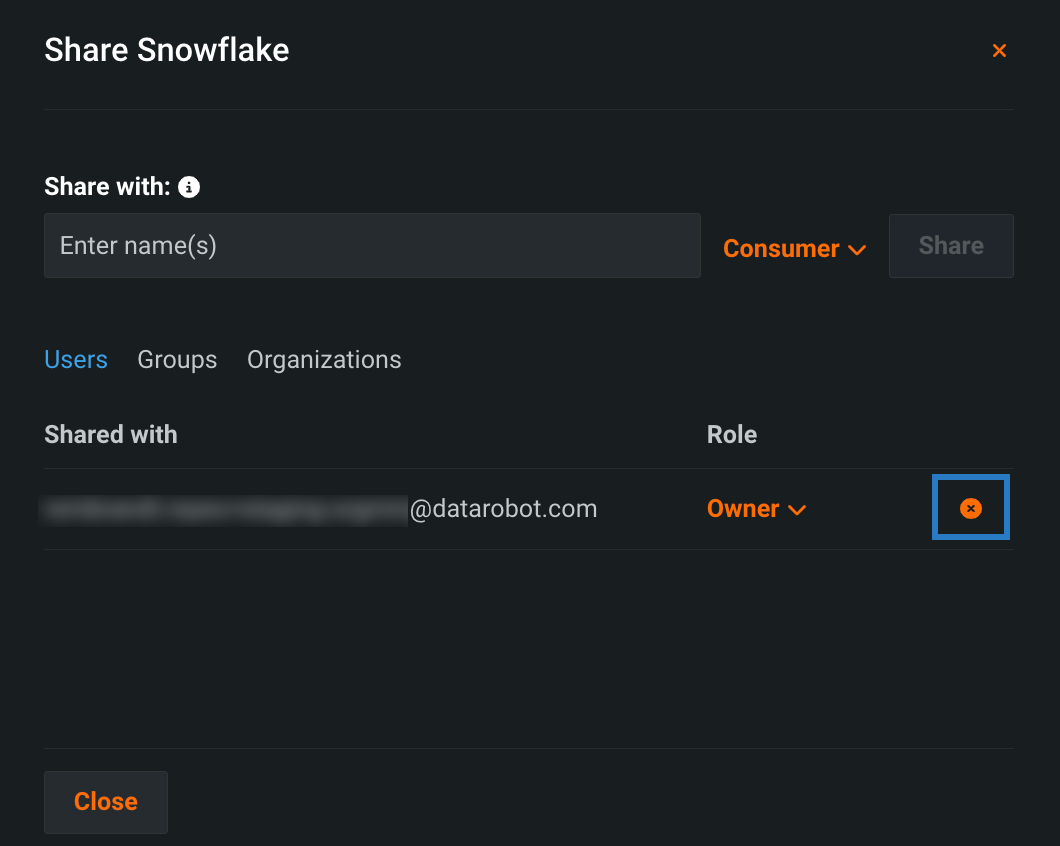
To revoke access to a shared secure configuration, click the Share icon next to the configuration and click the X next to the user, group, or organization.
Users
With a shared secure configuration, you can quickly connect to an external database or data lake without going through the trouble of filling in the required fields and potentially exposing sensitive fields.
To remove a secure configuration after it's been associated with a data connection, see the documentation on stored data credentials.
Prerequisites
Before you can add a data connection with a secure configuration, your IT admin must share it with you.
Associate a secure configuration
You can apply secure configurations anywhere you have the option to create credentials in DataRobot, this includes the:
When building a credential from a shared secure configuration, save the credential with a unique name and then select a data connection to associate with those credentials.
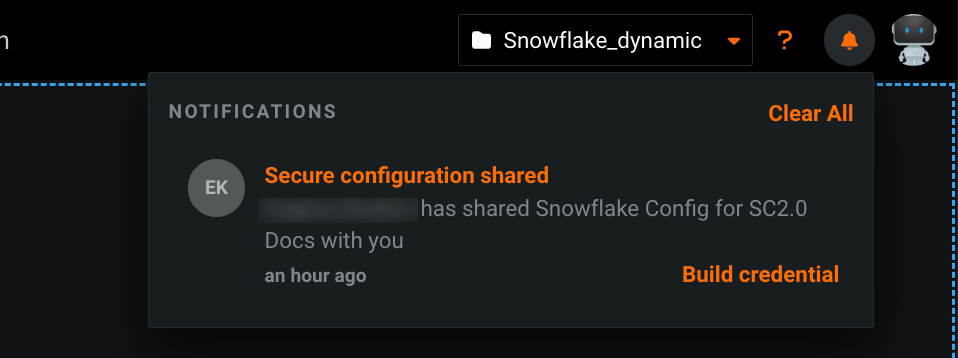
To build credentials with shared secure configurations from the in-app notification:
- Open the notification center
 at the top of the page.
 -
In the Secure configuration shared notification, click Build credentials.
-
In the Add credential modal, enter a unique name for your credentials under Display name.

-
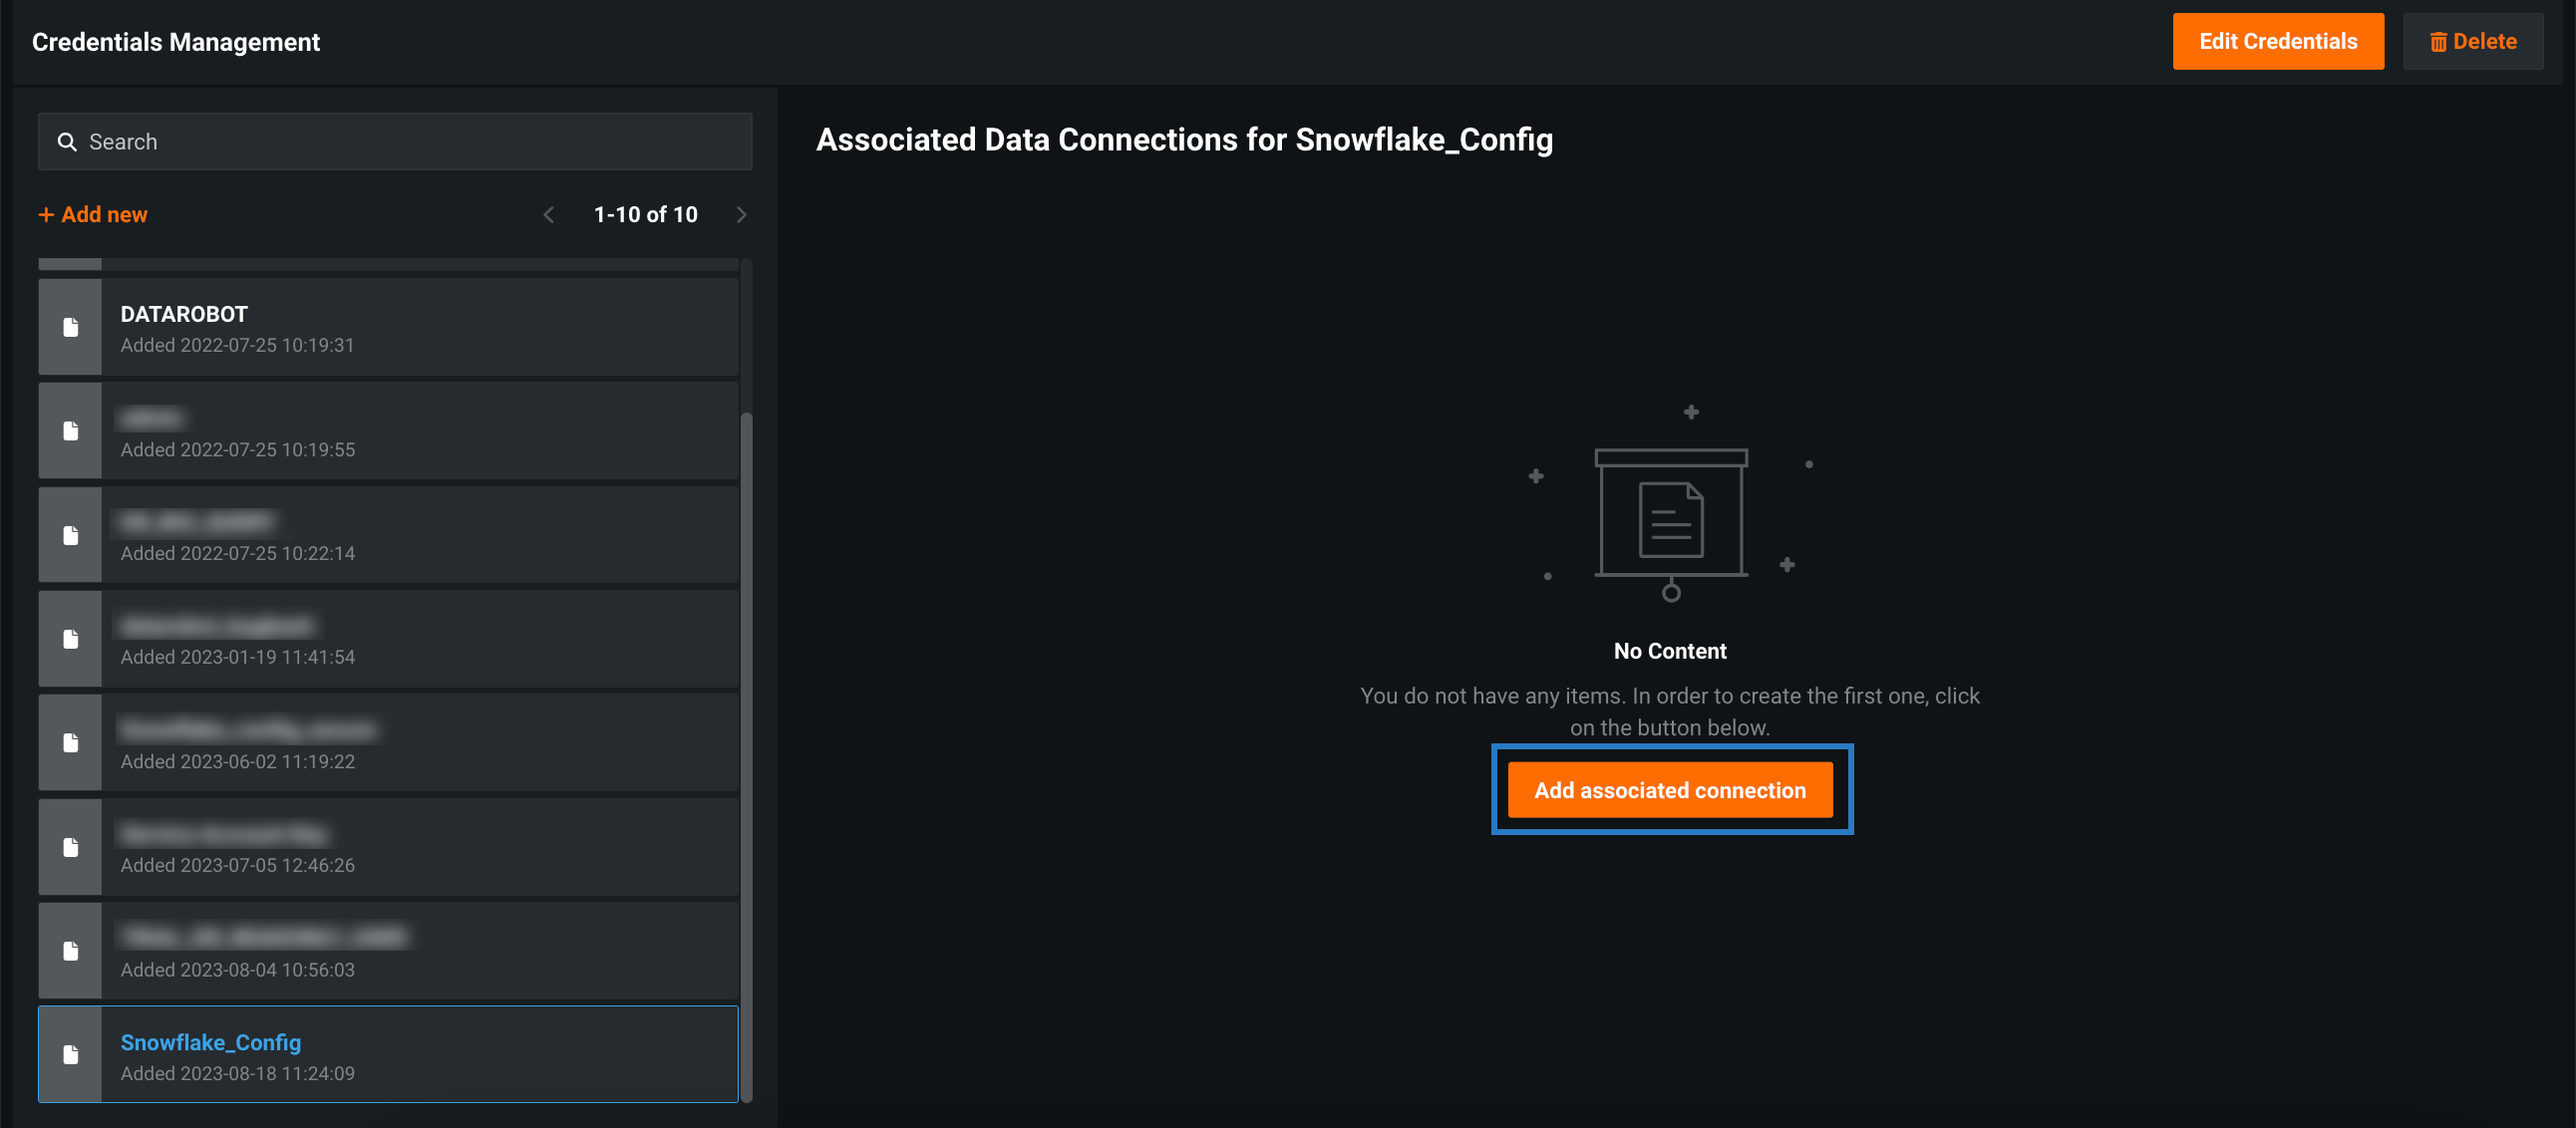
Click Save. The Credentials Management page opens with your new credentials highlighted.
-
Click Add associated connection.
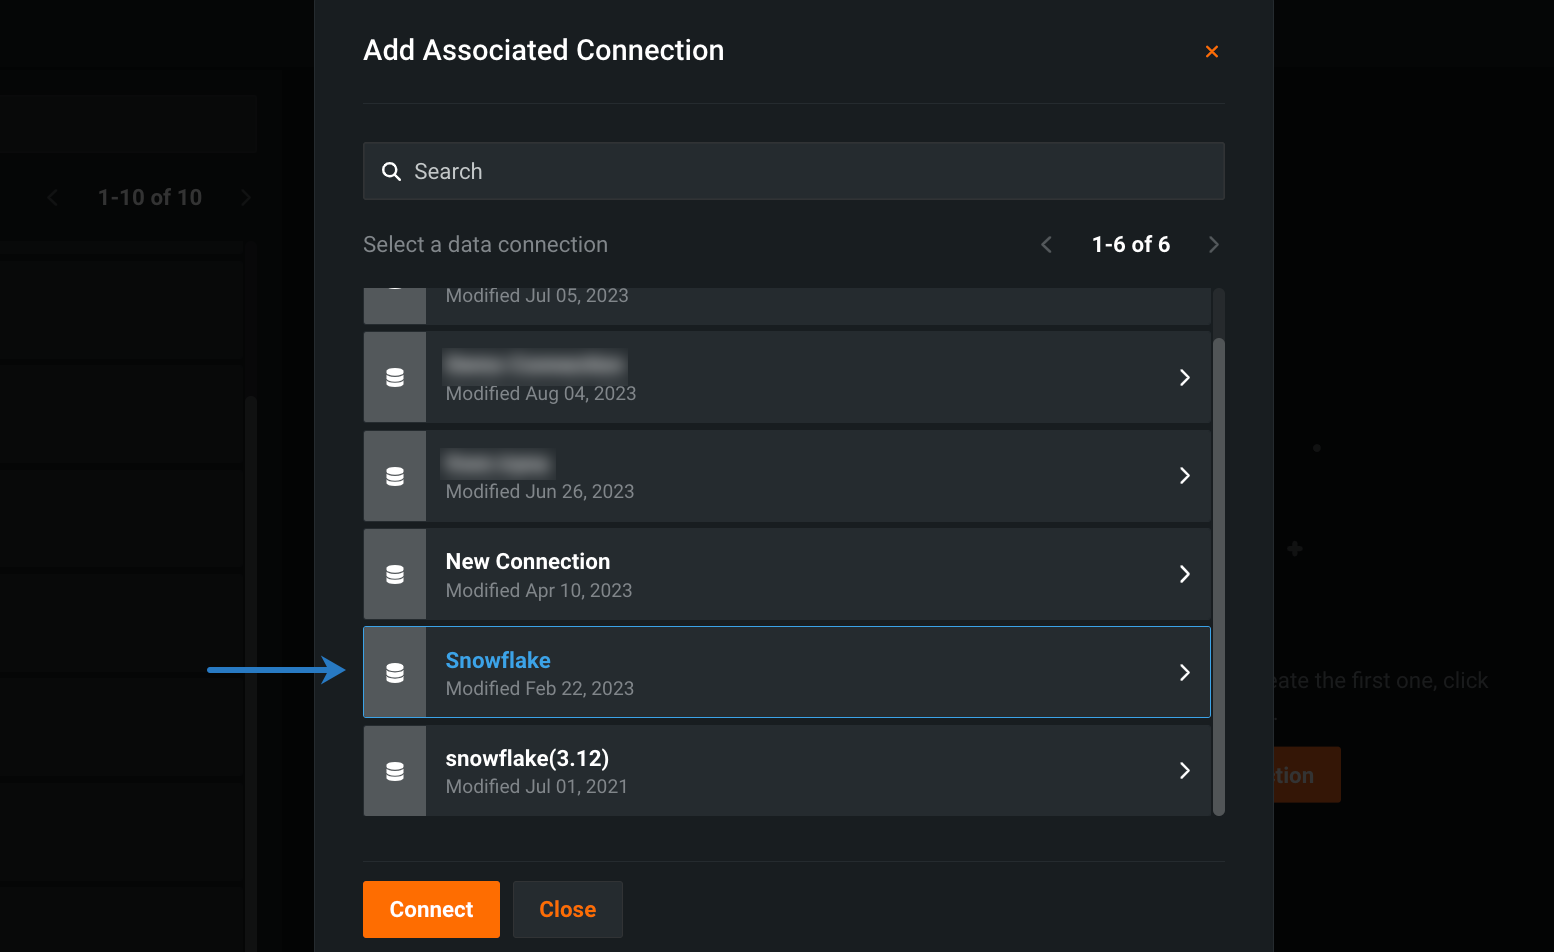
-
Select the data connection you want to associate with your secure configuration and click Connect.
-
Sign in with your database credentials.
When adding a secure configuration from the Credentials Management page, you first add your credentials and then select a data connection to associate with those credentials:
-
Click your user icon in the upper-right corner and select Credentials Management.
-
Click + Add new.
-
Fill in the available fields:
- Select the credential type associated with the secure configuration.
- Click Shared secure configurations.
- Select a secure configuration from the dropdown.
- Enter a unique display name.
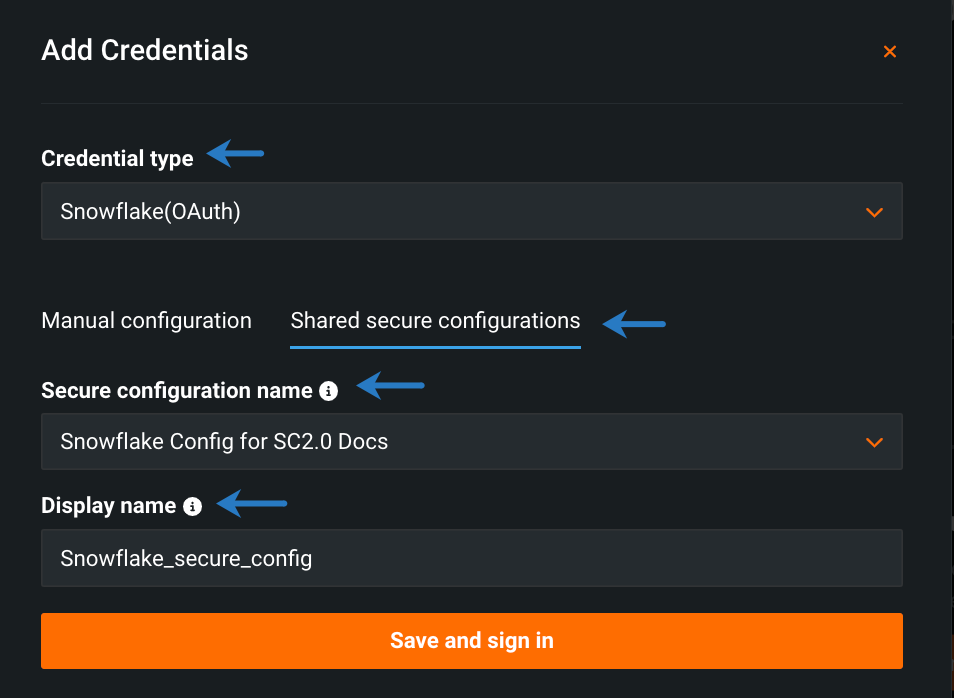
-
Click Save and sign in.
-
Click Add associated connection.
-
Select the data connection you want to associated with your secure configuration and click Connect.
-
Sign in with your database credentials.
When adding secure configuration from the Data Connection page, you first select the data connection and then add your credentials:
-
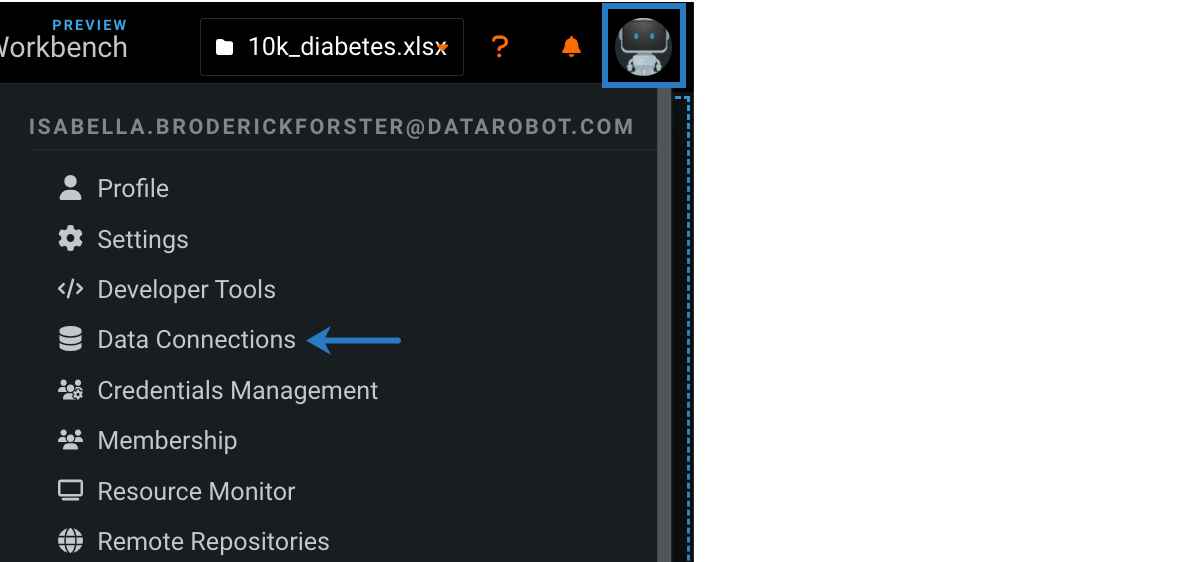
Click your user icon in the upper-right corner and select Data Connections.
-
Select a data connection.
-
Select Credentials and click + Add Credentials.
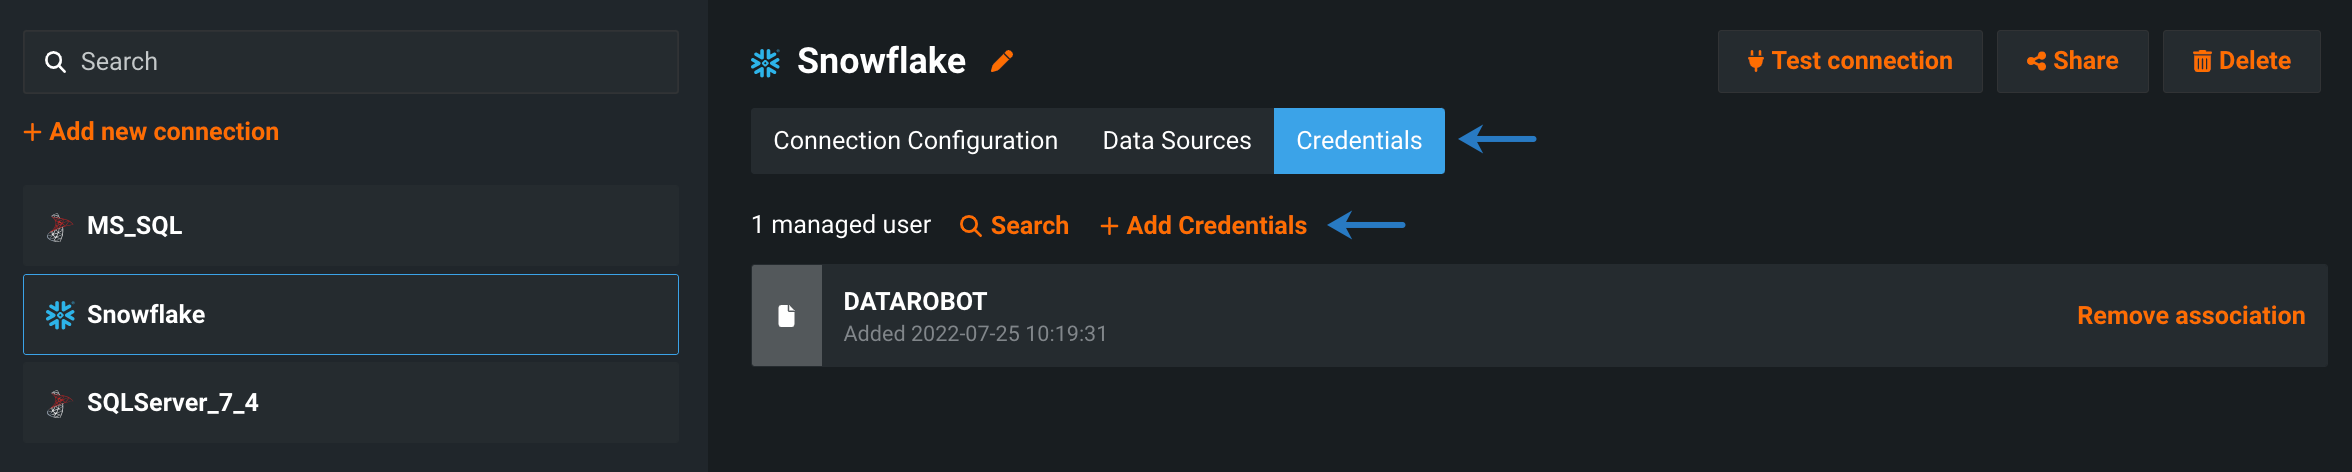
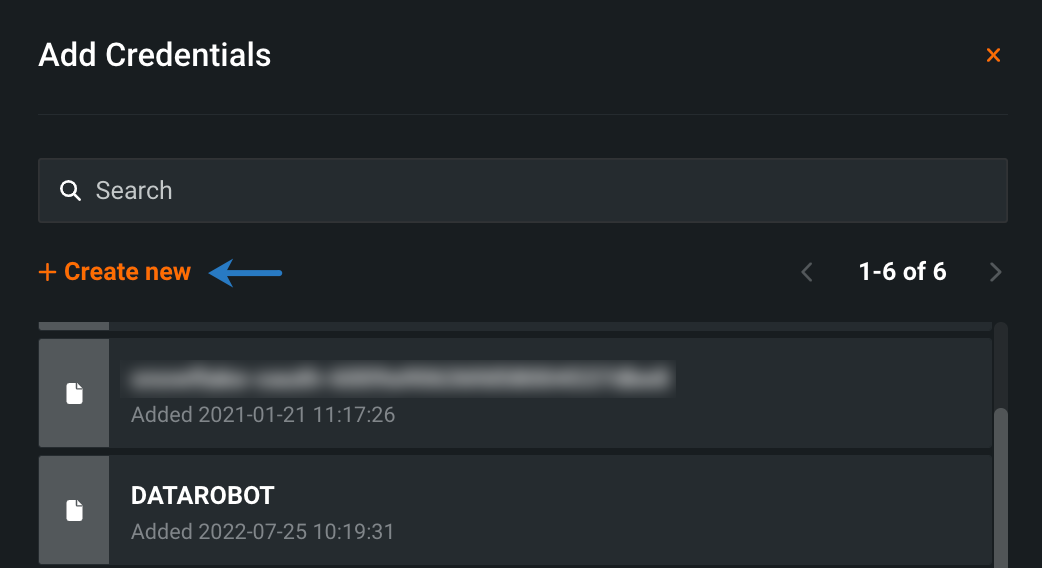
-
In the Add Credentials modal, click + Create new.
-
Fill in the available fields:
- Select the credential type associated with the secure configuration.
- Click Shared secure configurations.
- Select a secure configuration from the dropdown.
- Enter a unique display name.
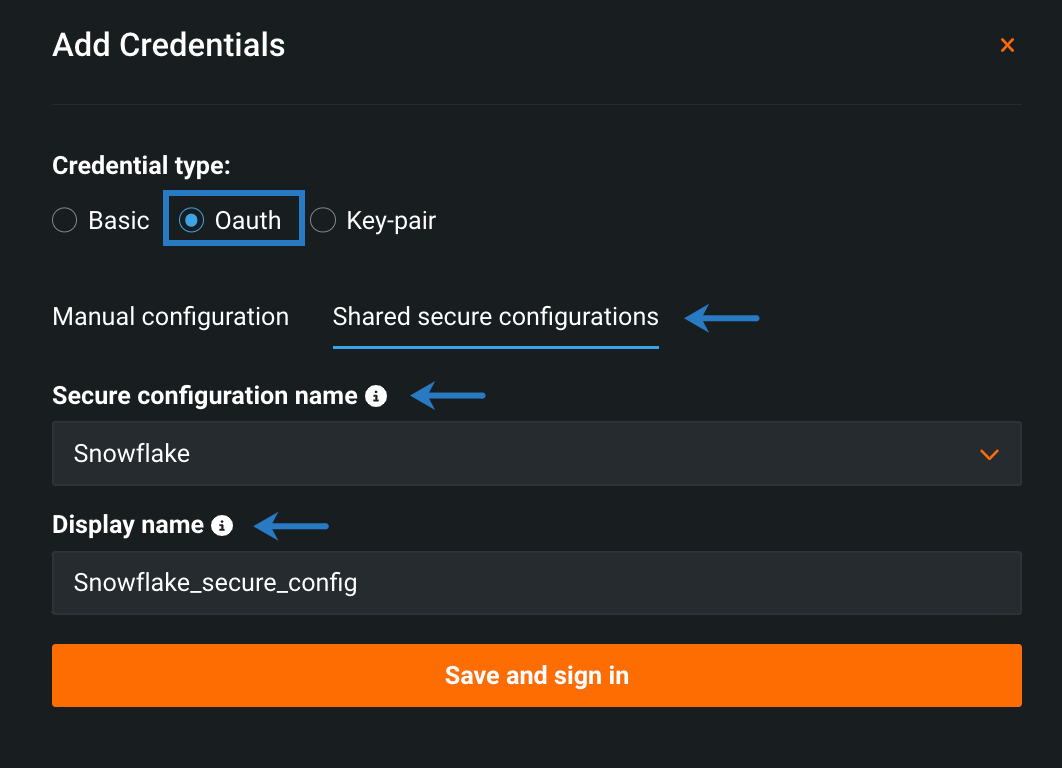
-
Click Save and sign in, and then sign in with your database credentials.