Build LLM blueprints
LLM blueprints represent the full context for what is needed to generate a response from an LLM, the resulting output is what can then be compared within the playground.
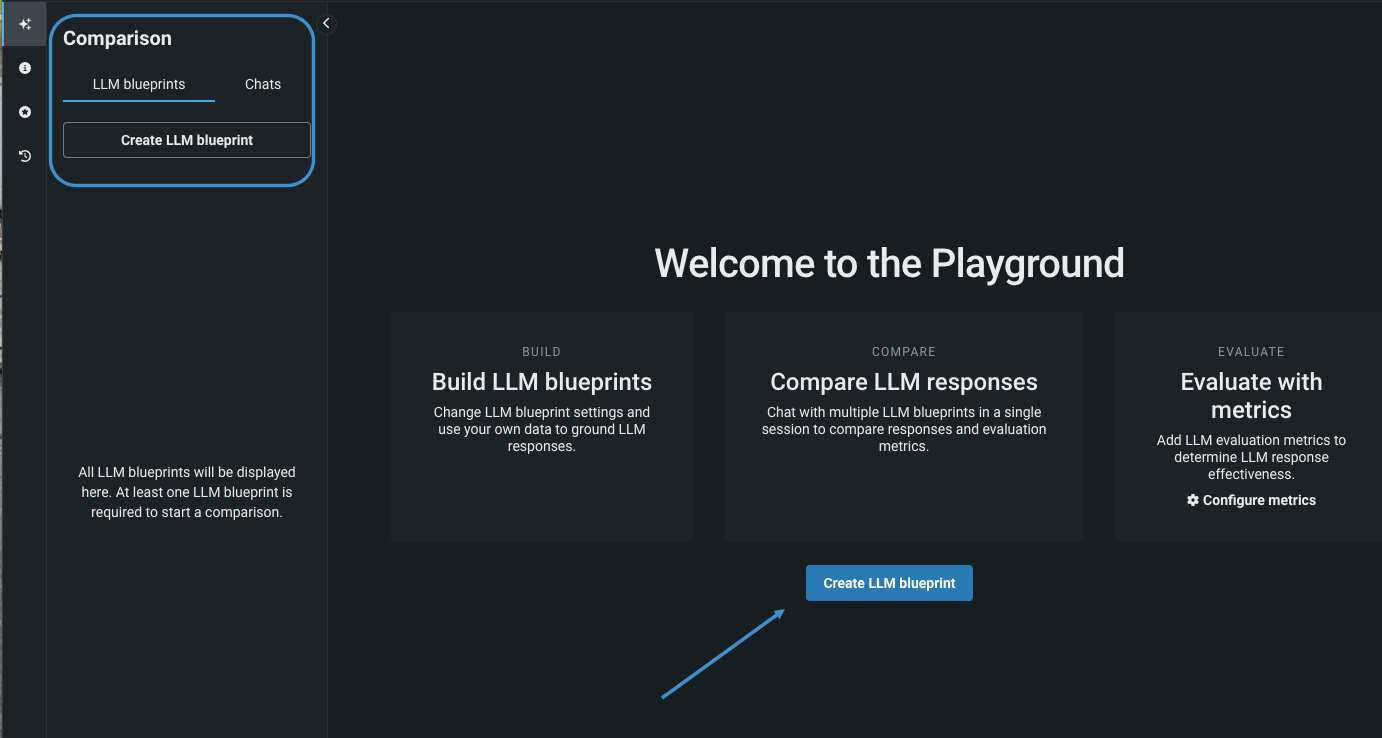
To create an LLM blueprint, select that action from either the LLM blueprints tab or, if it is your first blueprint, the playground welcome screen.
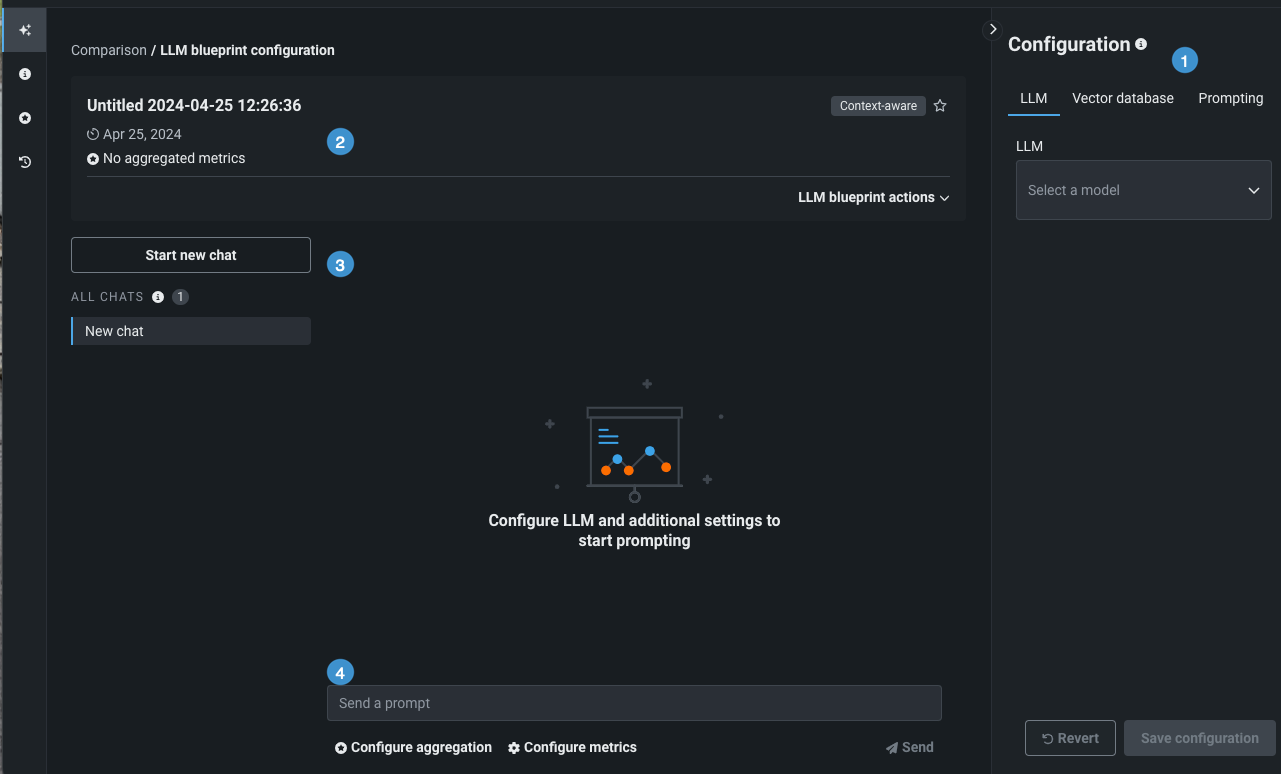
Clicking the create button brings you to the configuration and chatting tools:
| Element | Description | |
|---|---|---|
| 1 | Playground summary | Displays a summary of the playground owner and creation date. |
| 2 | Chat history | Displays a record of prompts sent to this LLM blueprint, as well as an option to start a new chat. |
| 3 | Configuration panel | Provides access to the configuration selections available for creating an LLM blueprint. |
| 4 | Prompt entry | Accepts prompts to begin chatting with the LLM blueprint; the configuration must be saved before the entry is activated. |
You can also create an LLM blueprint by copying an existing blueprint.
Select an LLM
The configuration panel is where you define the LLM blueprint. From here:
DataRobot offers a variety of preloaded LLMs, with availability dependent on your cluster and account type. Alternatively, you can add a deployed LLM to the playground, which, when validated, is added to the Use Case and available to all associated playgrounds.
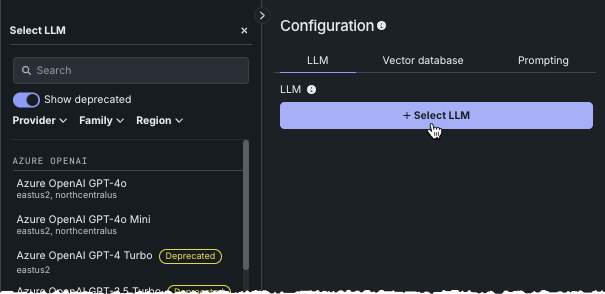
To add an LLM and begin configuring the LLM blueprint, click Select LLM. A scrollable list of available LLMs appears in a panel to the left.
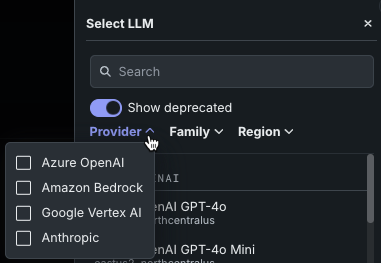
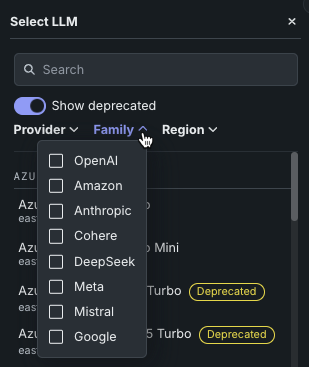
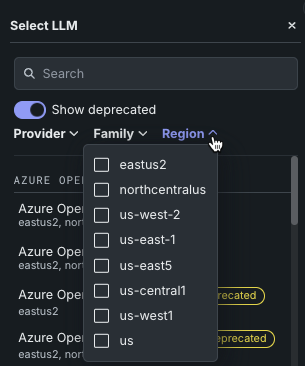
See the reference documentation for brief descriptions of each LLM's characteristics. Use the filtering tools to limit the list so that it shows only LLMs that meet your criteria:
-
Use one of the multiselect filter options:
-
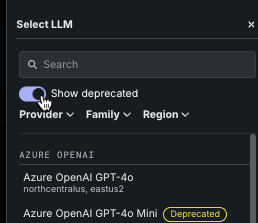
Toggle to show or hide deprecated LLMs. LLMs marked with a Deprecated badge indicate that the end of support date for the LLM falls within 90 days. Retirement dates are set by the provider and are subject to change.
While not listed in the selection panel, any LLM blueprints that were built using an LLM that has subsequently been retired are marked in the blueprints tab with a
Retiredbadge. See a list of upcoming deprecations and retired LLMs on the LLM availability page. -
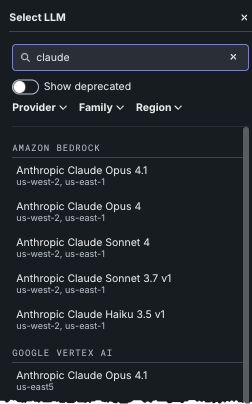
Enter a string in the search bar to match all LLMs, from all providers, for that string.
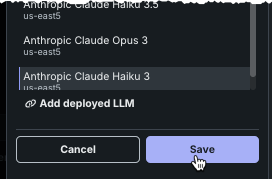
Once you select the LLM from the left panel, click Save:
Add a deployed LLM
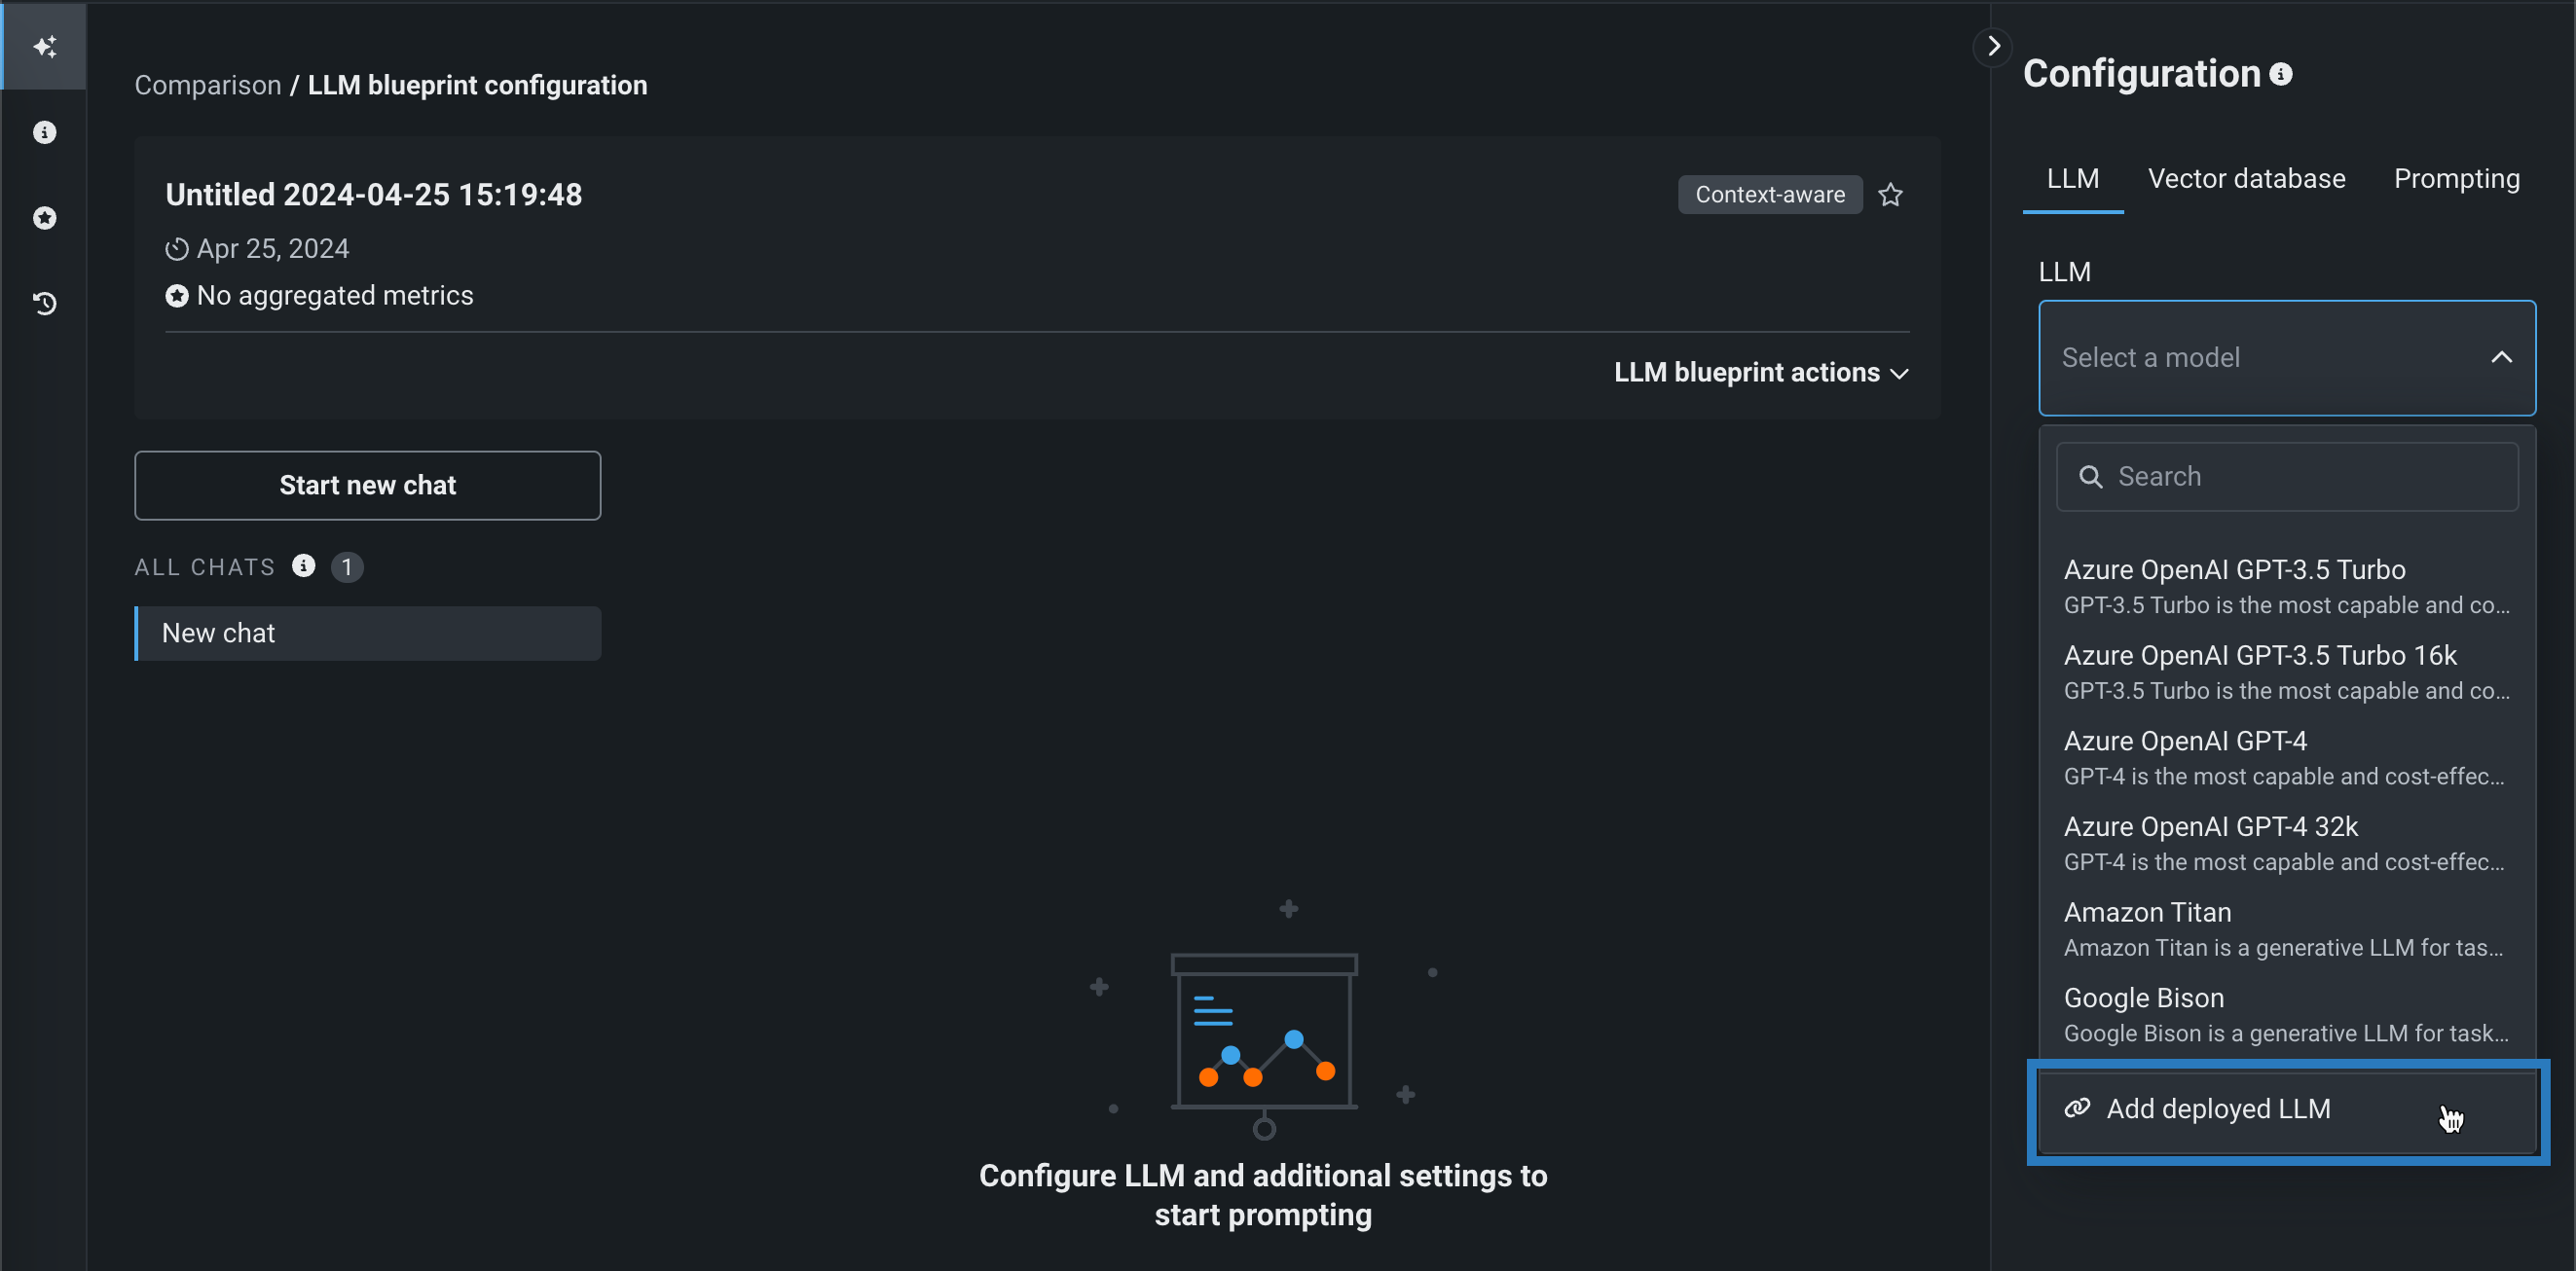
To select a custom deployed LLM in DataRobot, click Create LLM blueprint to add a new blueprint to the playground. Then, from the playground's blueprint Configuration panel, click Select LLM and Add deployed LLM:
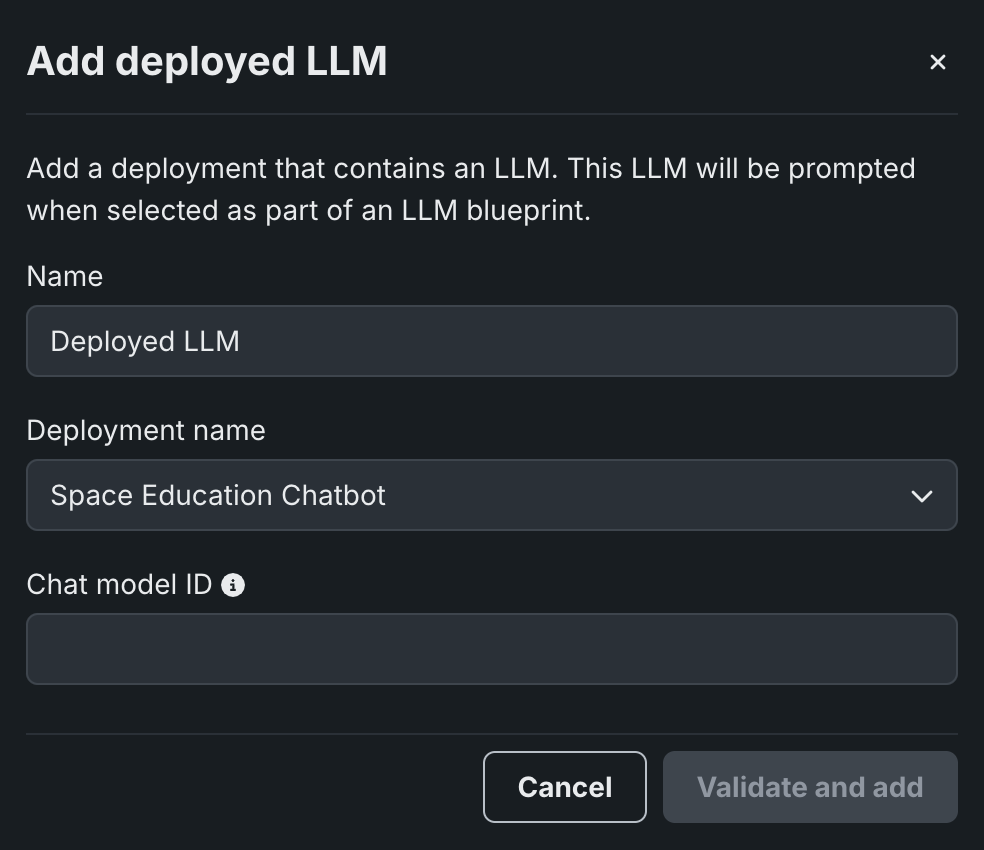
In the Add deployed LLM dialog box, enter a deployed LLM Name, then select a DataRobot deployment in the Deployment name dropdown. If the selected deployment supports the Bolt-on Governance API, configure the following:
When adding a deployed LLM that implements the chat function, the playground uses the Bolt-on Governance API as the preferred communication method. Enter the Chat model ID to set the model parameter for requests from the playground to the deployed LLM, then click Validate and add:
Chat model ID
When using the Bolt-on Governance API with a deployed LLM blueprint, see LLM availability for the recommended values of the model parameter. Alternatively, specify a reserved value, datarobot-deployed-llm, to let the LLM blueprint select the relevant model ID automatically when calling the LLM provider's services.
To disable the Bolt-on Governance API and use the Prediction API instead, delete the chat function (or hook) from the custom model and redeploy the model.
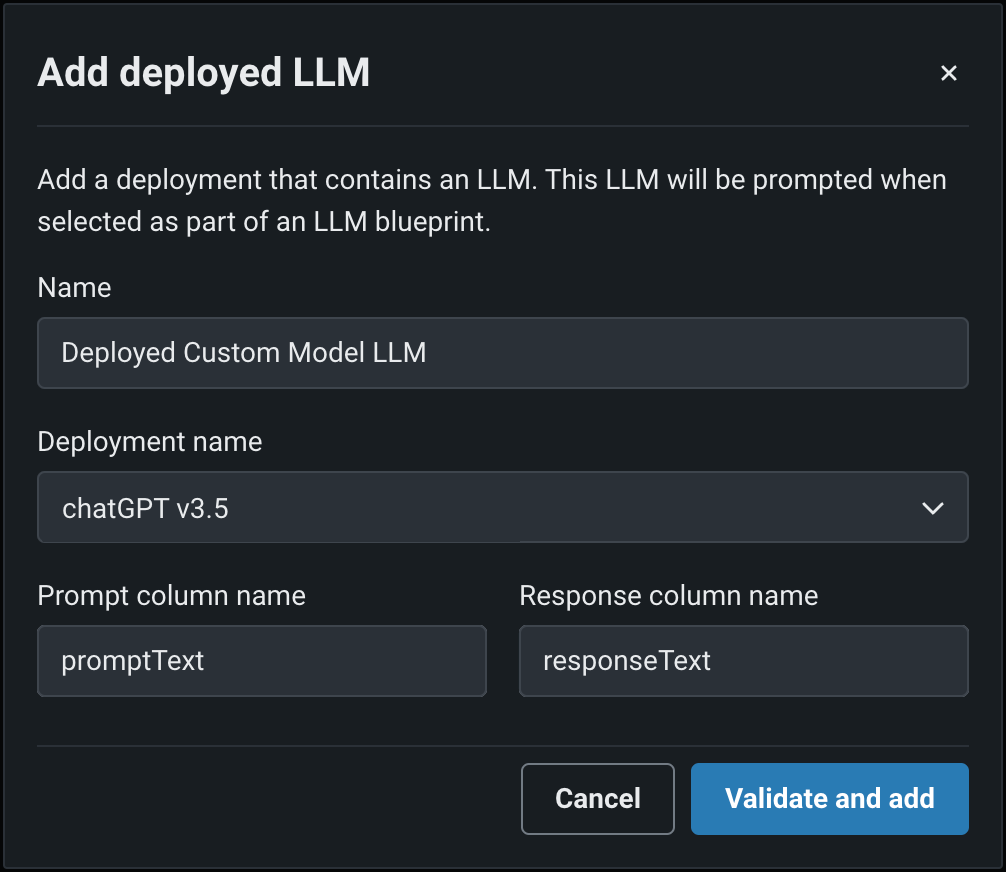
When adding a deployed LLM that doesn't support the Bolt-on Governance API, the playground uses the Prediction API as the preferred communication method. Enter the Prompt column name and Response column name defined when you created the custom LLM in the workshop (for example, promptText and resultText), then click Validate and add:
To enable the Bolt-on Governance API, modify the custom model code to use the chat function (or hook) and redeploy the model.
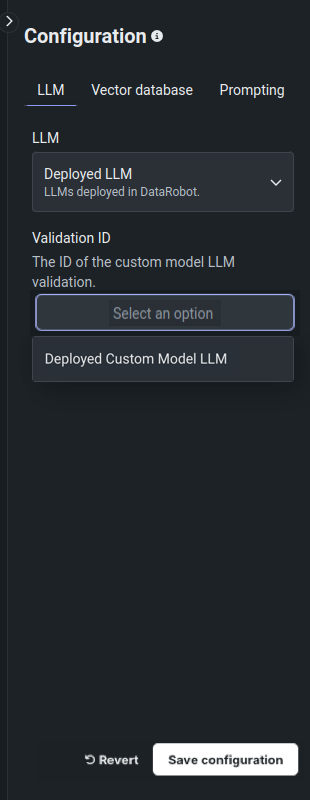
After you add a custom LLM and validation is successful, back in the blueprint's Configuration panel, in the LLM dropdown, click Deployed LLM, and then select the Validation ID of the custom model you added:
Finally, you can configure the Vector database and Prompting settings, and click Save configuration to add the blueprint to the playground.
Set the configuration
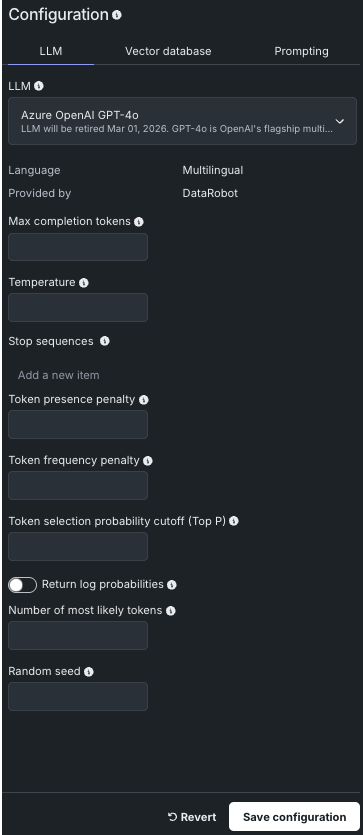
Selecting a base LLM exposes some or all of the following configuration options (listed alphabetically). Available options are dependent on the LLM selection. Note that the default value of the option can be dependent on the provider.
| Setting | Description |
|---|---|
| Max completion tokens | The maximum number of tokens allowed in the completion. The combined count of this value and prompt tokens must be below the model’s maximum context size, where prompt token count is comprised of system prompt, user prompt, recent chat history, and vector database citations. |
| Number of most likely tokens | An integer ranging from 0 to 20 that specifies the number of most likely tokens to consider when generating the response. A value of 0 means all tokens are considered. Note: The Return log probabilities setting must be enabled to use this parameter. |
| Random seed | If specified, the system will make a best effort to sample deterministically, such that repeated requests with the same seed and parameters should return the same result. Determinism is not guaranteed, and you should refer to the system_fingerprint response parameter to monitor changes in the backend. |
| Reasoning effort | For OpenAI o-series only (not GPT-4o models) constrains the reasoning effort for reasoning models—either low, medium, or high. Reducing the reasoning effort can result in faster responses and fewer tokens "spent." |
| Return log probabilities | If enabled, the log probabilities of each returned output token are returned in the response. Note that this setting is required in order to use the Number of most likely tokens parameter. |
| Stop sequences | Up to four strings that, when generated by the model, will stop the generation process. This is useful for controlling the output format or preventing unwanted text from being included in the response. The triggering sequence will not be shown in the returned text. |
| Temperature | The temperature controls the randomness of model output. Enter a value (range is LLM-dependent), where higher values return more diverse output and lower values return more deterministic results. A value of 0 may return repetitive results. Temperature is an alternative to Top P for controlling the token selection in the output (see the example below). |
| Token frequency penalty | A penalty ranging from -2.0 to 2.0 that is applied to tokens based on their frequency in the context. Positive values increase the penalty, discouraging frequent tokens, while negative values decrease the penalty, allowing for more frequent use of those tokens. |
| Token presence penalty | A penalty ranging from -2.0 to 2.0 that is applied to tokens that are already present in the context. Positive values increase the penalty, therefore discouraging repetition, while negative values decrease the penalty, allowing for more repetition. |
| Token selection probability cutoff (Top P) | Top P sets a threshold that controls the selection of words included in the response based on a cumulative probability cutoff for token selection. For example, 0.2 considers only the top 20% probability mass. Higher numbers return more diverse options for outputs. Top P is an alternative to Temperature for controlling the token selection in the output (see "Temperature or Top P?" below). |
Temperature or Top P?
Consider prompting: “To make the perfect ice cream sundae, top 2 scoops of vanilla ice cream with… “. The desired responses for a suggested next word might be hot fudge, pineapple sauce, and bacon. To increase the probability of what is returned:
- For bacon, set Temperature to the maximum value and leave top P at the default. Setting Top P with a high Temperature, increases the probability of fudge and pineapple and reduces the probability of bacon.
- For hot fudge, set Temperature to 0.
Each base LLM has default configuration settings. As a result, the only required selection before starting to chat is to choose the LLM.
Add a vector database
From the Vector database tab, you can optionally select a vector database. The selection identifies a database comprised of a collection of chunks of unstructured text and corresponding text embeddings for each chunk, indexed for easy retrieval. Vector databases are not required for prompting but are used for providing relevant data to the LLM to generate the response. Add a vector database to a playground to experiment with metrics and test responses.
The following table describes the fields of the Vector database tab:
The dropdown
| Field | Description |
|---|---|
| Vector database | Lists all vector databases available in the Use Case (and therefore accessible for use by all of that Use Case's playgrounds). If you select the Add vector database option, the new vector database you add will become available to other LLM blueprints although you must change the LLM blueprint configuration to apply them. |
| Vector database version | Select the version of the vector database that the LLM will use. The field is prepopulated with the version you were viewing when you created the playground. Click Vector database version to leave the playground and open the vector database details page. |
| Information | Reports configuration information for the selected version. |
| Retriever | Sets the method, neighbor chunk inclusion, and retrieval limits that the LLM uses to return chunks from the vector database. |
Retriever methods
The retriever you select defines how the LLM blueprint searches through, and retrieves, the most relevant chunks from the vector database. They inform which information is provided to the language model. Select one of the following methods:
| Method | Description |
|---|---|
| Single-Lookup Retriever | Performs a single vector database lookup for each query and returns the most similar documents. |
| Conversational Retriever (default) | Rewrites the query based on chat history, returning context-aware responses. In other words, this retriever functions similarly to the Single-Lookup Retriever with the addition of query rewrite as its first step. |
| Multi-Step Retriever | Performs the following steps when returning results:
|
Deep dive: Retrievers and context
It is important to understand the interaction between context state used in LLM prompting and retriever selection. The following table provides guidance and explanation for each retriever with both no context (each query is independent) and context aware (chat history is taken into account). Each retriever is described above.
| Retriever | No context | Context-aware |
|---|---|---|
| Process to return a response | ||
| None | Prompts the LLM with a query. | Prompts the LLM with a query plus the query history. |
| Single-Lookup Retriever |
|
|
| Conversational Retriever | Because there is no history to get a standalone query, use the Single-Lookup Retriever instead. |
|
| Multi-Step Retriever | Because there is no history, this retriever is not recommended; however, you can potentially use the five new search queries to retrieve better-fitting documents for the final response. |
|
Use Add Neighbor Chunks to control whether to add neighboring chunks within the vector database to the chunks that the similarity search retrieves. When enabled, the retriever returns i, i-1, and i+1 (for example, if the query retrieves chunk number 42, chunks 41 and 43 are also retrieved).
Notice also that only the primary chunk has a similarity score. This is because the neighbor chunks are added, not calculated, as part of the response.
Also known as context window expansion or context enrichment, this technique includes surrounding chunks adjacent to the retrieved chunk to provide more complete context. Some reasons to enable this include:
- A single chunk may be cut off mid-sentence or may miss important context.
- Related information might span multiple chunks.
- The response might require context from surrounding or chunks.
Enter a value to set the Retrieval limits, which control the number of returned documents.
The value you set for Top K (nearest neighbors) instructs the LLM on how many relevant chunks to retrieve from the vector database. Chunk selection is based on similarity scores. Consider:
- Larger values provide more comprehensive coverage but also require more processing overhead and may include less relevant results.
- Smaller values provide more focused results and faster processing, but may miss relevant information.
Max tokens specifies:
- The maximum size (in tokens) of each text chunk extracted from the dataset when building the vector database.
- The length of the text that is used to create embeddings.
- The size of the citations used in RAG operations.
Set prompting strategy
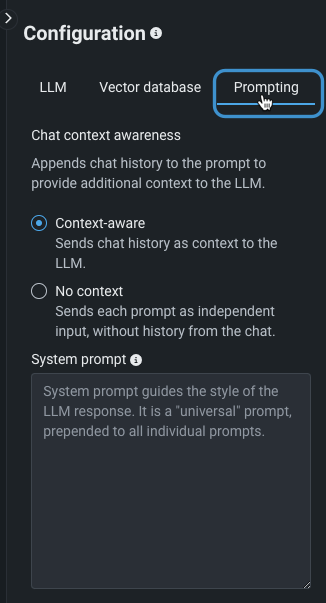
The prompting strategy is where you configure context (chat history) settings and optionally add a system prompt.
Set context state
There are two states of context. They control whether chat history is sent with the prompt to include relevant context for responses.
| State | Description |
|---|---|
| Context-aware | When sending input, previous chat history is included with the prompt. This state is the default. |
| No context | Sends each prompt as independent input, without history from the chat. |
Note
Consider the context state and how it functions in conjunction with the selected retriever method.
See context-aware chatting for more information.
Deep dive: How context is allocated
If some combination of the user prompt, vector database chunks, or conversation history are too long to fit into the context window, DataRobot must apply some form of truncation to work within the confines of the assigned context size. Context management is applied in the playground because chat history and citations often compete for the limited context window, which is particularly relevant for small context models. The calculation is as follows:
-
Model context size is determined. If this information is not available (e.g., a BYO LLM with no context metadata available and the context size was not indicated in the BYO LLM configuration), DataRobot assumes the context to be 4096 tokens.
-
The number of user-requested output tokens is determined.
-
From the initially determined context size (step 1), DataRobot subtracts output tokens (step 2), the system prompt, and the user prompt. That value results in the available context budget that can be filled with either chat history or citations.
-
If there are only citations but no chat history to consider, DataRobot adds citations in the order of most relevant to least relevant, until the context window is filled.
-
If there are no citations but only chat history, DataRobot adds chat history in the order of newest to oldest messages until the context window is filled.
-
If there are both citations and chat history, DataRobot fills the available context using a heuristically chosen ratio of 4:1, citations:history. (This is based on the assumption that citations are 4x more important than history.) That is, it fills 80% of the context using the citation rules (from step 4) and 20% of the context using the history rules in (from step 5).
Set system prompt
The system prompt, an optional field, is a "universal" prompt prepended to all individual prompts for this LLM blueprint. It instructs and formats the LLM response. The system prompt can impact the structure, tone, format, and content that is created during the generation of the response.
See an example of system prompt application in the LLM blueprint comparison documentation.
Working with LLM blueprints
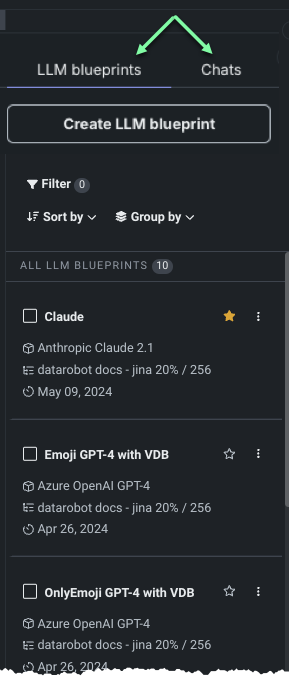
The left panel of the playground is like a file cabinet of the playground's assets—a list of configured blueprints and a record of the comparison chat history.
You can also create a new LLM blueprint, the process described above, from this area.
LLM blueprints tab
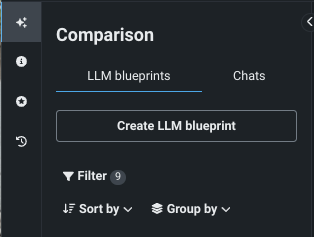
The LLM blueprints tab lists all LLM blueprints configured within the playground. It is from this panel that you select LLM blueprints—up to three if you are doing a comparison. As you select an LLM blueprint via the checkbox, it becomes available in the middle comparison panel. Click the star next to an LLM blueprint name to "favorite" it, which you can later filter on.
Display controls
Use the controls to modify the LLM blueprint listing:
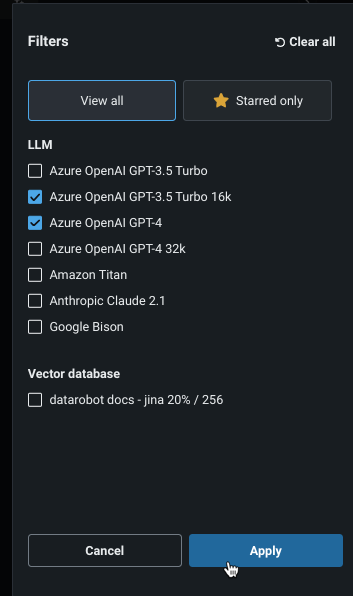
The Filter option controls which blueprints are listed in the panel, either by base LLM or status:
The small number to the right of the Filter label indicates how many blueprints are displayed as a result of any (or no) applied filtering.
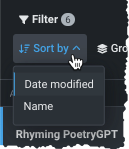
Sort by controls the ordering of the blueprints. It is additive, meaning that it is applied on top of any filtering or grouping in place. Group by, also additive, arranges the display by the selected criteria. Labels indicate the group "name" with numbers to indicate the number of member blueprints.
Actions for LLM blueprints
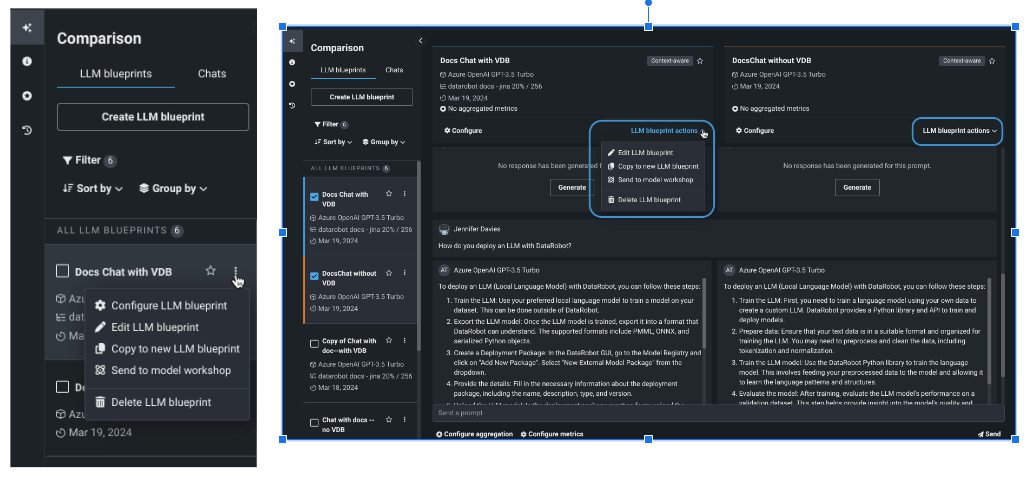
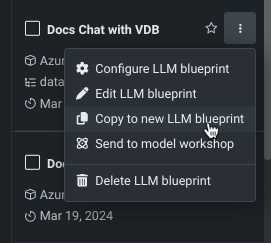
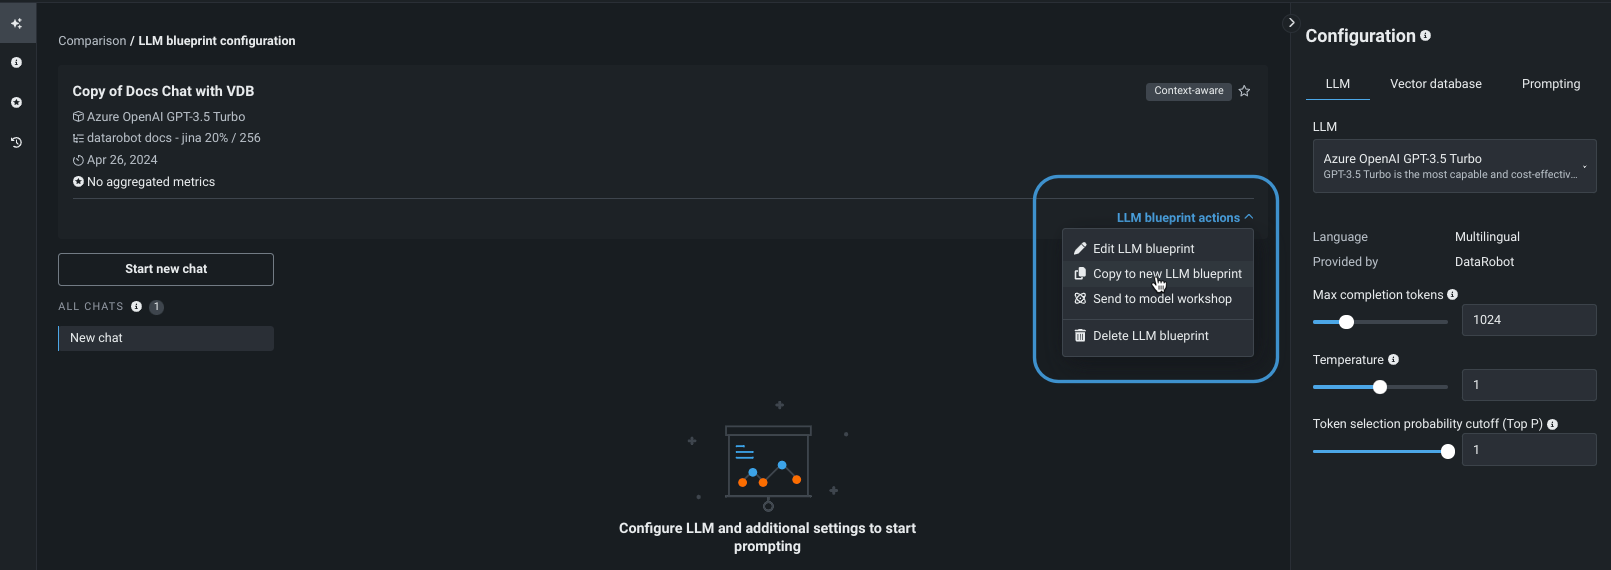
The actions available for an LLM blueprint can be accessed from the Actions menu next to the name in the left-hand LLM blueprints tab or from LLM blueprint actions in a selected LLM blueprint.
| Option | Description |
|---|---|
| Configure LLM blueprint | From the LLM blueprints tab only. Opens the configuration settings for the selected blueprint for further tuning. |
| Edit LLM blueprint | Provides a modal for changing the LLM blueprint name. Changing the name saves the new name and all saved settings. If any settings have not been saved, they will revert to the last saved version. |
| Copy to new LLM blueprint | Creates a new LLM blueprint from all saved settings of the selected blueprint. |
| Send to the workshop | Sends the LLM blueprint to Registry where it is added to the workshop. From there it can be deployed as a custom model. |
| Delete LLM blueprint | Deletes the LLM blueprint. |
Chats tab
The Chats tab provides access any previous prompts and subsequent made from the playground to the selected LLM blueprint. It also a place from which you can start a new chat. For full details, see either single blueprint or comparison chatting.
Copy LLM blueprint
You can make a copy of an existing LLM blueprint to inherit the settings. Using this approach makes sense when you want to compare slightly different blueprints, duplicate a blueprint for which you are not the owner in a shared playground, or replace a soon-to-expire LLM.
Make a copy in one of two ways:
Change LLM blueprint configuration
To change the configuration of an LLM blueprint, choose Configure LLM blueprint from the actions menu in the LLM blueprints tab. The LLM blueprint configuration and chat history display. Change any of the configuration settings and Save configuration
When you make changes to an LLM blueprint, the chat history associated with it, if the configuration is context-aware, is also saved. All the prompts within a chat persist through LLM blueprint changes:
- When you submit a prompt, the history included is everything within the most recent chat context.
- If you switch the LLM blueprint to No context, each prompt is its own chat context.
- If you switch back to Context-aware, that starts a new chat context within the chat.
Note that chats in the configuration view are separate from chats in the Comparison view—the histories don't mingle.
