OAuth providers
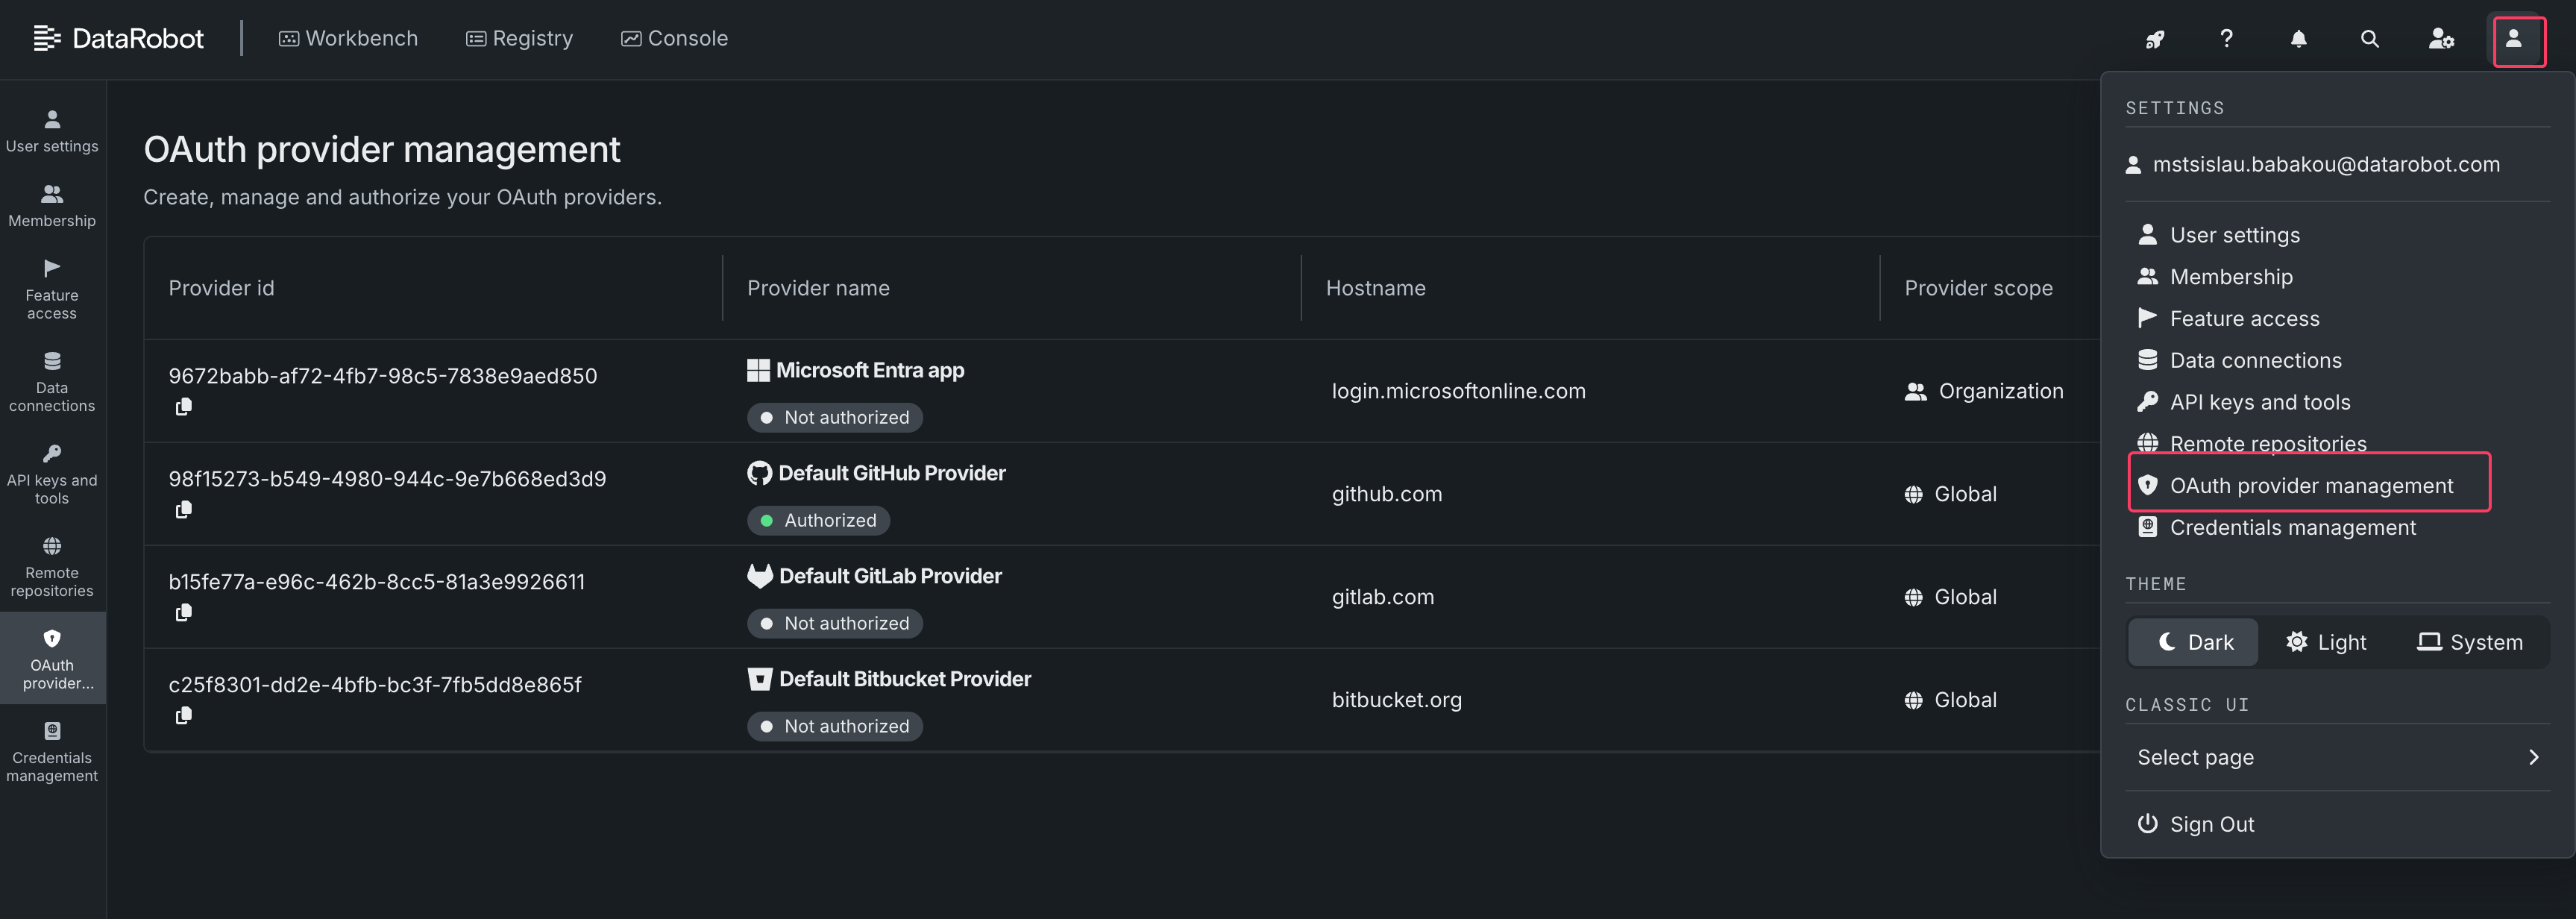
The OAuth Providers system enables the OAuth2 workflow, allowing DataRobot users to grant the system permissions to access their external resources directly within DataRobot.
The currently supported OAuth providers:
- Github Cloud
- GitLab
- Bitbucket Cloud
- Box
- Microsoft
備考
Starting with DataRobot 11.1, self-managed versions of supported OAuth providers are supported.
備考
The OAuth Providers system has been available since DataRobot 11.0. It was originally introduced to enhance the Notebooks session experience by utilizing the OAuth2 flow for accessing private Git repositories instead of relying on Personal Access Tokens. Starting with DataRobot 11.1, it's also used in custom applications to access external resources, such as Google Docs.
Configure OAuth providers
To fully leverage the OAuth Providers functionality, you need to set up corresponding OAuth apps in the provider site and integrate the app with DataRobot:
GitHub
備考
DataRobot uses GitHub Apps, not GitHub OAuth Apps.
-
Navigate to Settings → Developer Settings → GitHub Apps.
-
Fill out the register new GitHub App form:
フィールド 値 GitHub App name DataRobot x {YOUR_ORG_NAME}(could be anything, but should be unique)説明 DataRobot GitHub App to authorize DataRobot to authenticate to the user's Git provider on their behalf. Could be anything, but it's shown to the end users, so make it clear what the app does for them. Homepage URL {DATAROBOT_BASE_URL}Callback URL {DATAROBOT_BASE_URL}/account/oauth-providers/(with the trailing slash)Expire user authorization tokens チェック済み Request user authorization (OAuth) during installation チェック済み Webhook > Active 選択解除 Permissions > Repository permissions > Contents Read & Write Permissions > Repository permissions > Metadata 読み取り専用 Permissions > Repository permissions > Workflows Read & Write Permissions > Organization permissions > Members 読み取り専用 Permissions > Account permissions > Email addresses 読み取り専用 Permissions > Account permissions > Profile Read & Write Where can this GitHub App be installed? Any account -
Create a new GitHub App with this information.
-
Generate a new private key and save it securely. Then, go to the top of the form and generate a Client Secret. The secret should also be saved securely.
-
Copy the following information to configure the DataRobot installation. The Client ID and Client Secret should be set as corresponding values of the
oauth-providers-service-oauth-githubk8s secret:
data:
  OAUTH_PROVIDERS_GITHUB_CLIENT_ID: <base64 encoded Client Id>
  OAUTH_PROVIDERS_GITHUB_CLIENT_SECRET: <base64 encoded Client Secret>
Mount the secret in the `oauth-providers-service` deployment:
oauth-providers-service:
  secrets:
    - name: "OAUTH_PROVIDERS_GITHUB_CLIENT_ID"
      valueFrom:
        secretKeyRef:
          name: "oauth-providers-service-oauth-github"
          key: OAUTH_PROVIDERS_GITHUB_CLIENT_ID
    - name: "OAUTH_PROVIDERS_GITHUB_CLIENT_SECRET"
      valueFrom:
        secretKeyRef:
          name: "oauth-providers-service-oauth-github"
          key: OAUTH_PROVIDERS_GITHUB_CLIENT_SECRET
Use the **Public Link** as `OAUTH_PROVIDERS_GITHUB_APP_PUBLIC_URL` config in `values.yaml`:
core:
  config_env_vars:
    OAUTH_PROVIDERS_GITHUB_APP_PUBLIC_URL: <Public Link>
GitLab
-
Navigate to User Settings → Applications
-
Fill out the Add new application form:
フィールド 値 名前 DataRobot x {YOUR_ORG_NAME}Redirect URI {DATAROBOT_BASE_URL}/account/oauth-providers/(include the trailing slash)Confidential チェック済み Scopes: api チェック済み Scopes: read_user チェック済み Scopes: read_repository チェック済み Scopes: write_repository チェック済み -
Save configurations as a new application.
-
Copy the following information to configure the DataRobot installation. The Application ID and Secret should be set as corresponding values of the
oauth-providers-service-oauth-gitlabk8s secret:
data:
  OAUTH_PROVIDERS_GITLAB_CLIENT_ID: <base64 encoded Application ID>
  OAUTH_PROVIDERS_GITLAB_CLIENT_SECRET: <base64 encoded Secret>
Mount the secret in the oauth-providers-service deployment:
oauth-providers-service:
  secrets:
    - name: "OAUTH_PROVIDERS_GITLAB_CLIENT_ID"
      valueFrom:
        secretKeyRef:
          name: "oauth-providers-service-oauth-gitlab"
          key: OAUTH_PROVIDERS_GITLAB_CLIENT_ID
    - name: "OAUTH_PROVIDERS_GITLAB_CLIENT_SECRET"
      valueFrom:
        secretKeyRef:
          name: "oauth-providers-service-oauth-gitlab"
          key: OAUTH_PROVIDERS_GITLAB_CLIENT_SECRET
If you are adding a GitLab Enterprise OAuth Provider you will need to pass your base URL (shown in the example chart update using https://my-example.net):
oauth-providers-service:
  config_env_vars:
    OAUTH_PROVIDERS_GITLAB_BASE_URL: "https://my-example.net"
Be sure to also update notebooks charts where needed - instructions seen here.
Bitbucket
備考
Workspace admin privileges are required to access these settings.
-
Navigate to Workspace Settings → OAuth consumers
-
Fill out the Add OAuth consumer form:
フィールド 値 名前 DataRobot x {YOUR_ORG_NAME}(but could be anything)説明 DataRobot OAuth App to authorize DataRobot to authenticate to the user's Git provider on their behalf. Could be anything, but it's shown to the end users, so make it clear what the app does for them. Callback URL {DATAROBOT_BASE_URL}/account/oauth-providers/(with the trailing slash)URL https://www.datarobot.com/Privacy policy URL https://www.datarobot.com/privacy/(optional)End user license agreement URL https://www.datarobot.com/legal/(optional)This is a private consumer 選択解除 Permissions > Account Read, Email Permissions > Repositories Read, Write, Admin, Delete -
Save the configuration as a new Bitbucket OAuth app.
-
Copy the following information to configure the DataRobot installation. Set the Client ID and Client Secret as corresponding values of the
oauth-providers-service-oauth-bitbucketk8s secret:
data:
  OAUTH_PROVIDERS_BITBUCKET_CLIENT_ID: <base64 encoded Client ID>
  OAUTH_PROVIDERS_BITBUCKET_CLIENT_SECRET: <base64 encoded Client Secret>
Mount the secret in the oauth-providers-service deployment:
oauth-providers-service:
  secrets:
    - name: "OAUTH_PROVIDERS_BITBUCKET_CLIENT_ID"
      valueFrom:
        secretKeyRef:
          name: "oauth-providers-service-oauth-bitbucket"
          key: OAUTH_PROVIDERS_BITBUCKET_CLIENT_ID
    - name: "OAUTH_PROVIDERS_BITBUCKET_CLIENT_SECRET"
      valueFrom:
        secretKeyRef:
          name: "oauth-providers-service-oauth-bitbucket"
          key: OAUTH_PROVIDERS_BITBUCKET_CLIENT_SECRET
Box
Reference article: Managing platform apps
-
Navigate to the Box Developer Console.
-
On the My Platform Apps page, press the Create Platform App button.
-
Select Custom App.
-
Fill out the form with the following data:
フィールド 値 名前 DataRobot x {YOUR_ORG_NAME}(but could be anything)説明 DataRobot OAuth App to authorize DataRobot to access files on behalf of users. This can be anything, but it's displayed to end users, so ensure it clearly explains the app's purpose. 目的 インテグレーション カテゴリー Box Sign Which external system are you integrating with? DataRobot
Press the Next button.
-
Select User Authentication (OAuth 2.0) and press the Create App button.
!!! note "備考" (Optional) If you are setting up a self-managed version of the provider, go to the DataRobot Application OAuth Provider Management → + Add OAuth Provider and fill out the form with data from the OAuth 2.0 Credentials section on the app configuration page in the Box Developer Console.
-
In the app configuration, go to the OAuth 2.0 Redirect URIs section and add
{DATAROBOT_BASE_URL}/account/oauth-providers/?providerId=<PROVIDER ID>to the Redirect URI field, then press the Add button. The provider ID can be found on the DataRobot Application OAuth Provider Management page. -
In the Application Scopes section, select Read all files and folders stored in Box.
-
Save the settings by clicking the Save button.
-
(Only for system-level applications) Copy the following information to configure the DataRobot installation. Set the Client ID and Client Secret as corresponding values of the
oauth-providers-service-oauth-boxKubernetes secret:
data:
  OAUTH_PROVIDERS_BOX_CLIENT_ID: <base64 encoded Client ID>
  OAUTH_PROVIDERS_BOX_CLIENT_SECRET: <base64 encoded Client Secret>
Mount the secret into the oauth-providers-service deployment:
secrets:
  - name: "OAUTH_PROVIDERS_BOX_CLIENT_ID"
    valueFrom:
      secretKeyRef:
        name: "oauth-providers-service-oauth-box"
        key: OAUTH_PROVIDERS_BOX_CLIENT_ID
  - name: "OAUTH_PROVIDERS_BOX_CLIENT_SECRET"
    valueFrom:
      secretKeyRef:
        name: "oauth-providers-service-oauth-box"
        key: OAUTH_PROVIDERS_BOX_CLIENT_SECRET
Google
Reference article: Using OAuth 2.0 to Access Google APIs
- Navigate to the Credentials page of your Google Cloud project.
- Press the Create credentials button and select OAuth client ID.
- Fill out the creation form:
| フィールド | 値 |
| --- | --- |
| アプリケーションのタイプ | Web application |
| 名前 | DataRobot x
{YOUR_ORG_NAME}| | Authorized JavaScript Origins |{DATAROBOT_BASE_URL}| | Authorized Redirect URIs | Skip this field for now. Press the Create button. | -
Save the Client ID and Client Secret from the popup dialog. You are no longer able to view or download the client secret once you close this dialog.
!!! note "備考" (Optional) If you are setting up a self-managed version of the provider, go to the DataRobot Application OAuth Provider Management → + Add OAuth Provider and fill out the form with data from the previous step.
-
Go to the application settings page in the Google Cloud Console. Find the Authorized redirect URIs section and add
{DATAROBOT_BASE_URL}/account/oauth-providers/?providerId=<PROVIDER ID>to the list. The provider ID can be found on the DataRobot Application OAuth Provider Management page. -
(Only for system-level applications) Copy the following information to configure the DataRobot installation. Set the Client ID and Client Secret as corresponding values of the
oauth-providers-service-oauth-googleKubernetes secret:
data:
  OAUTH_PROVIDERS_GOOGLE_CLIENT_ID: <base64 encoded Client ID>
  OAUTH_PROVIDERS_GOOGLE_CLIENT_SECRET: <base64 encoded Client Secret>
Mount the secret into the oauth-providers-service deployment:
secrets:
  - name: "OAUTH_PROVIDERS_GOOGLE_CLIENT_ID"
    valueFrom:
      secretKeyRef:
        name: "oauth-providers-service-oauth-google"
        key: OAUTH_PROVIDERS_GOOGLE_CLIENT_ID
  - name: "OAUTH_PROVIDERS_GOOGLE_CLIENT_SECRET"
    valueFrom:
      secretKeyRef:
        name: "oauth-providers-service-oauth-google"
        key: OAUTH_PROVIDERS_GOOGLE_CLIENT_SECRET
Microsoft
備考
Currently, only Multi-Tenant Microsoft Entra ID applications are supported.
Reference article: Register an application in Microsoft Entra ID
-
Navigate to the Microsoft Entra ID App Registrations and click New registration.
-
Fill out the registration form: | フィールド | 値 | | --- | --- | | 名前 | DataRobot x
{YOUR_ORG_NAME}| | Supported account types | Accounts in any organizational directory (any Microsoft Entra ID tenant - Multitenant) | | Redirect URI | Leave this field empty for now. | -
Click Register to create the application.
-
On the new application control screen, copy and save the Application (client) ID value. This is needed later as CLIENT_ID.
-
On the application control screen, go to the Certificates & secrets section, create a new client secret, and copy its value. This is needed later as CLIENT_SECRET.
!!! note "備考"
(Optional) If you are setting up a self-managed version of the provider, go to the DataRobot Application *OAuth Provider Management* → *+ Add OAuth Provider* and fill out the form with the data from the previous step. -
Go to the application settings page, navigate to the Authentication (Preview) section, and click the Add Redirect URI button.
-
Select "Web" as the platform and add
{DATAROBOT_BASE_URL}/account/oauth-providers/?providerId=<PROVIDER ID>to the Redirect URI field. Leave other fields empty and click the Configure button. -
(Only for system-level applications) Copy the following information to configure the DataRobot installation. Set the Client ID and Client Secret as corresponding values (steps 4 and 5) of the
oauth-providers-service-oauth-microsoftKubernetes secret:
data:
  OAUTH_PROVIDERS_MICROSOFT_CLIENT_ID: <base64 encoded Client ID>
  OAUTH_PROVIDERS_MICROSOFT_CLIENT_SECRET: <base64 encoded Client Secret>
Mount the secret into the oauth-providers-service deployment:
secrets:
  - name: "OAUTH_PROVIDERS_MICROSOFT_CLIENT_ID"
    valueFrom:
      secretKeyRef:
        name: "oauth-providers-service-oauth-microsoft"
        key: OAUTH_PROVIDERS_MICROSOFT_CLIENT_ID
  - name: "OAUTH_PROVIDERS_MICROSOFT_CLIENT_SECRET"
    valueFrom:
      secretKeyRef:
        name: "oauth-providers-service-oauth-microsoft"
        key: OAUTH_PROVIDERS_MICROSOFT_CLIENT_SECRET