Customize forecast analytics agents
This how-to illustrates customizing the behavior of an AI agent used in the ERCOT Forecast Analytics application. The app is already deployed and running—you will connect your own personal agent to it and modify its YAML configuration directly in the DataRobot UI.
What is ERCOT?
ERCOT is the Electric Reliability Council of Texas. It is a comprehensive forecasting and data analytics system used to predict electricity demand and generation across the Texas power grid. It provides short-, mid-, and long-term forecast data to help energy traders, utilities, grid operators, and market participants make decisions about power generation dispatch, energy trading, capacity planning, and grid reliability management.
The workflow removes the need to edit YAML files locally. All configuration changes will be performed in the custom model interface in DataRobot after your agent is deployed. Read more about the DataRobot agentic workflow.
After this walkthrough, you will have:
- Deployed an AI agent to DataRobot.
- Modified agent behavior in the DataRobot UI.
- Customized role, goal, tone, structure, and data sources.
- Added reasoning logic.
- Updated deployments to use UI-based YAML edits.
- Tested and compared different agent versions.
- Connected custom agents to applications using deployment IDs.
Prerequisites
Prior to the workshop, DataRobot has:
- Deployed and shared the ERCOT Forecast Analytics application.
- Cloned the agent template repository.
- Prepared sample data and configured tools.
Download the agent template:
Set up for agent experimentation
To get started, unzip the agent template file you just downloaded.
1. Log in and navigate to Workbench
Log in to DataRobot; you will land on the home page.
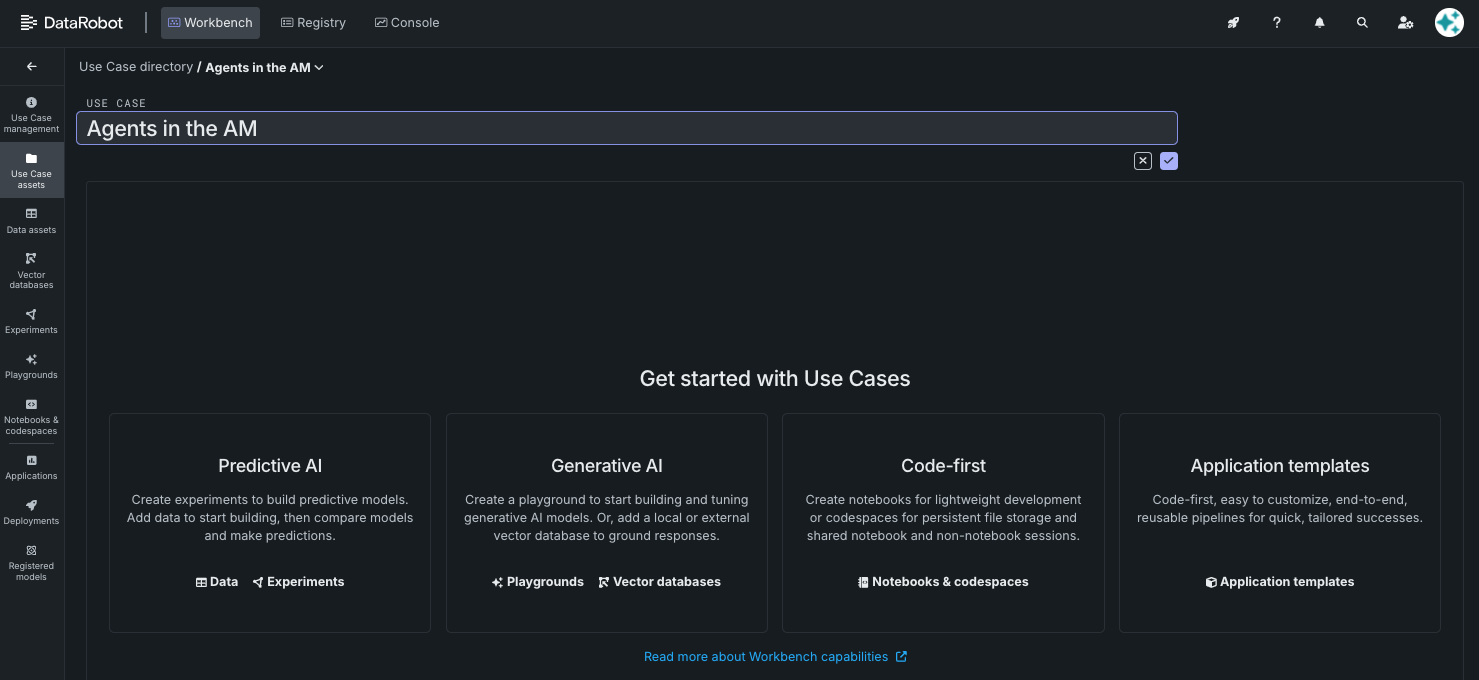
Navigate to Workbench and create a new Use Case.

Name it “Agents in the AM”.
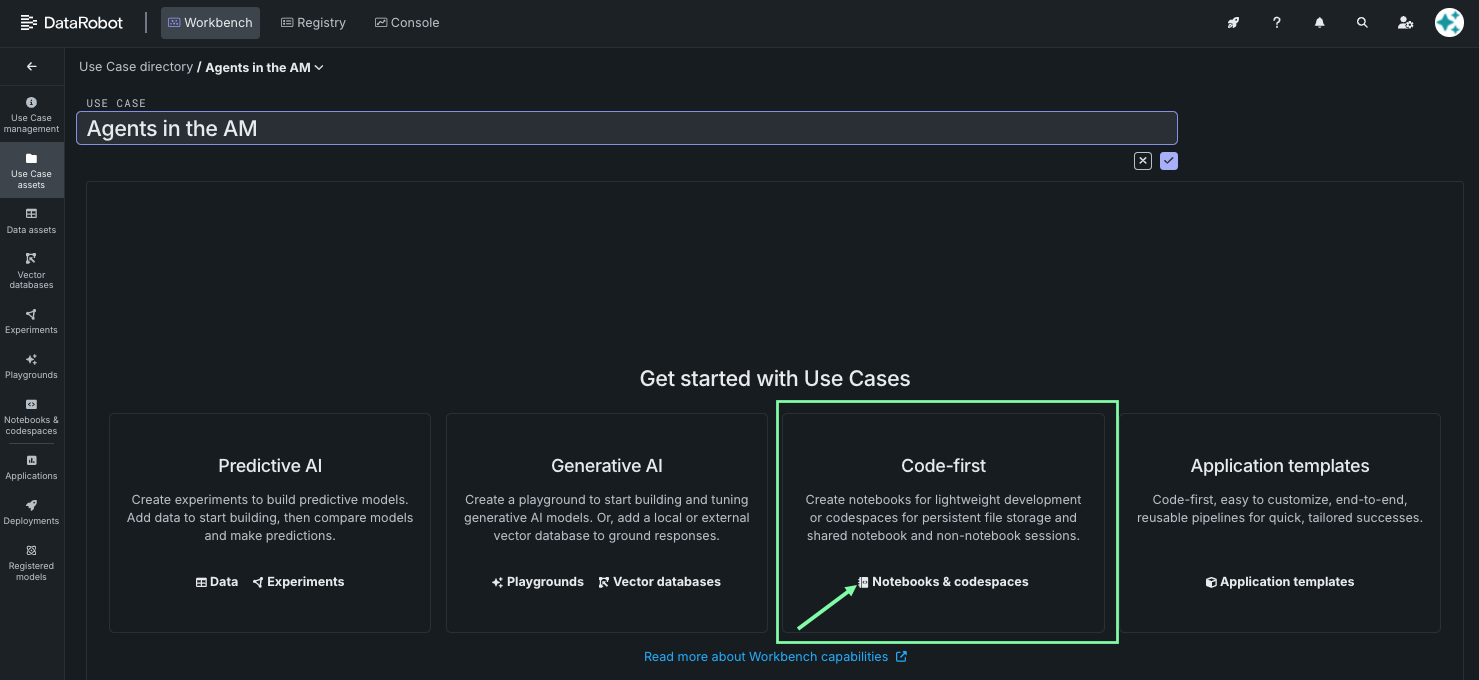
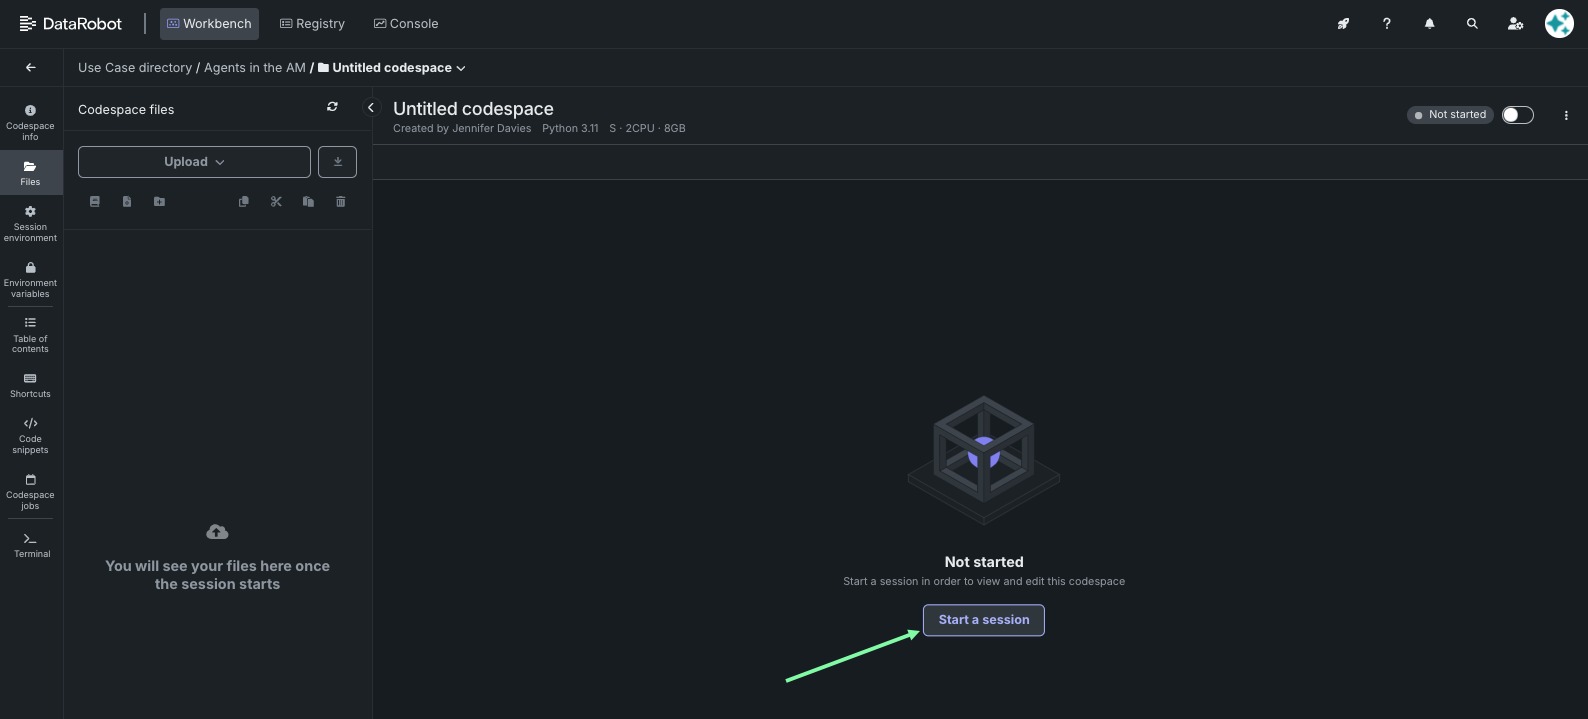
2. Create a codespace
From the Use Case getting started page, navigate to codespaces by clicking Notebooks & codespaces:
Then, click to create a new codespace.
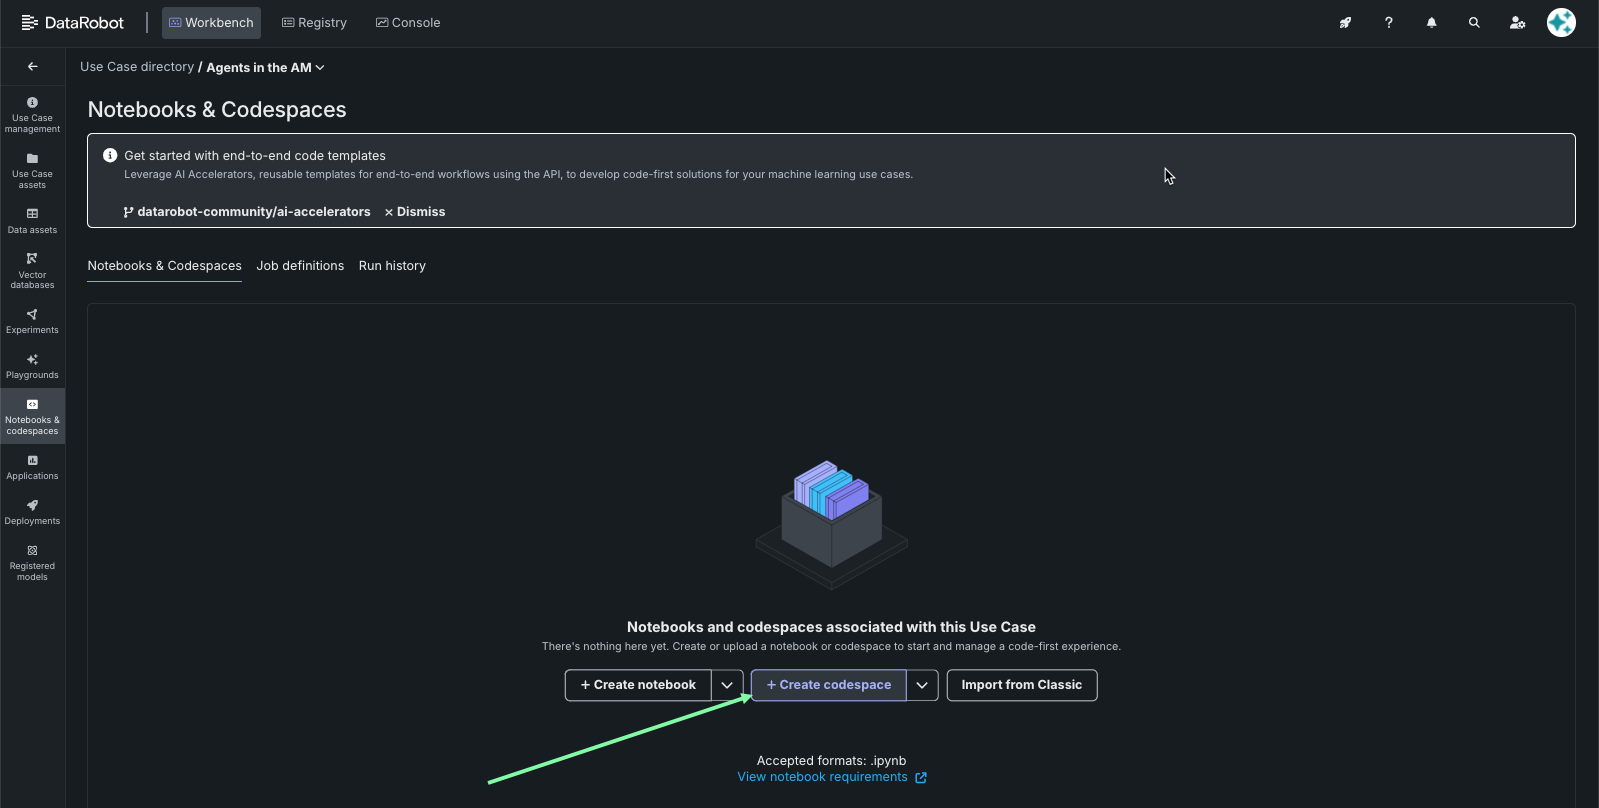
And start a new session.
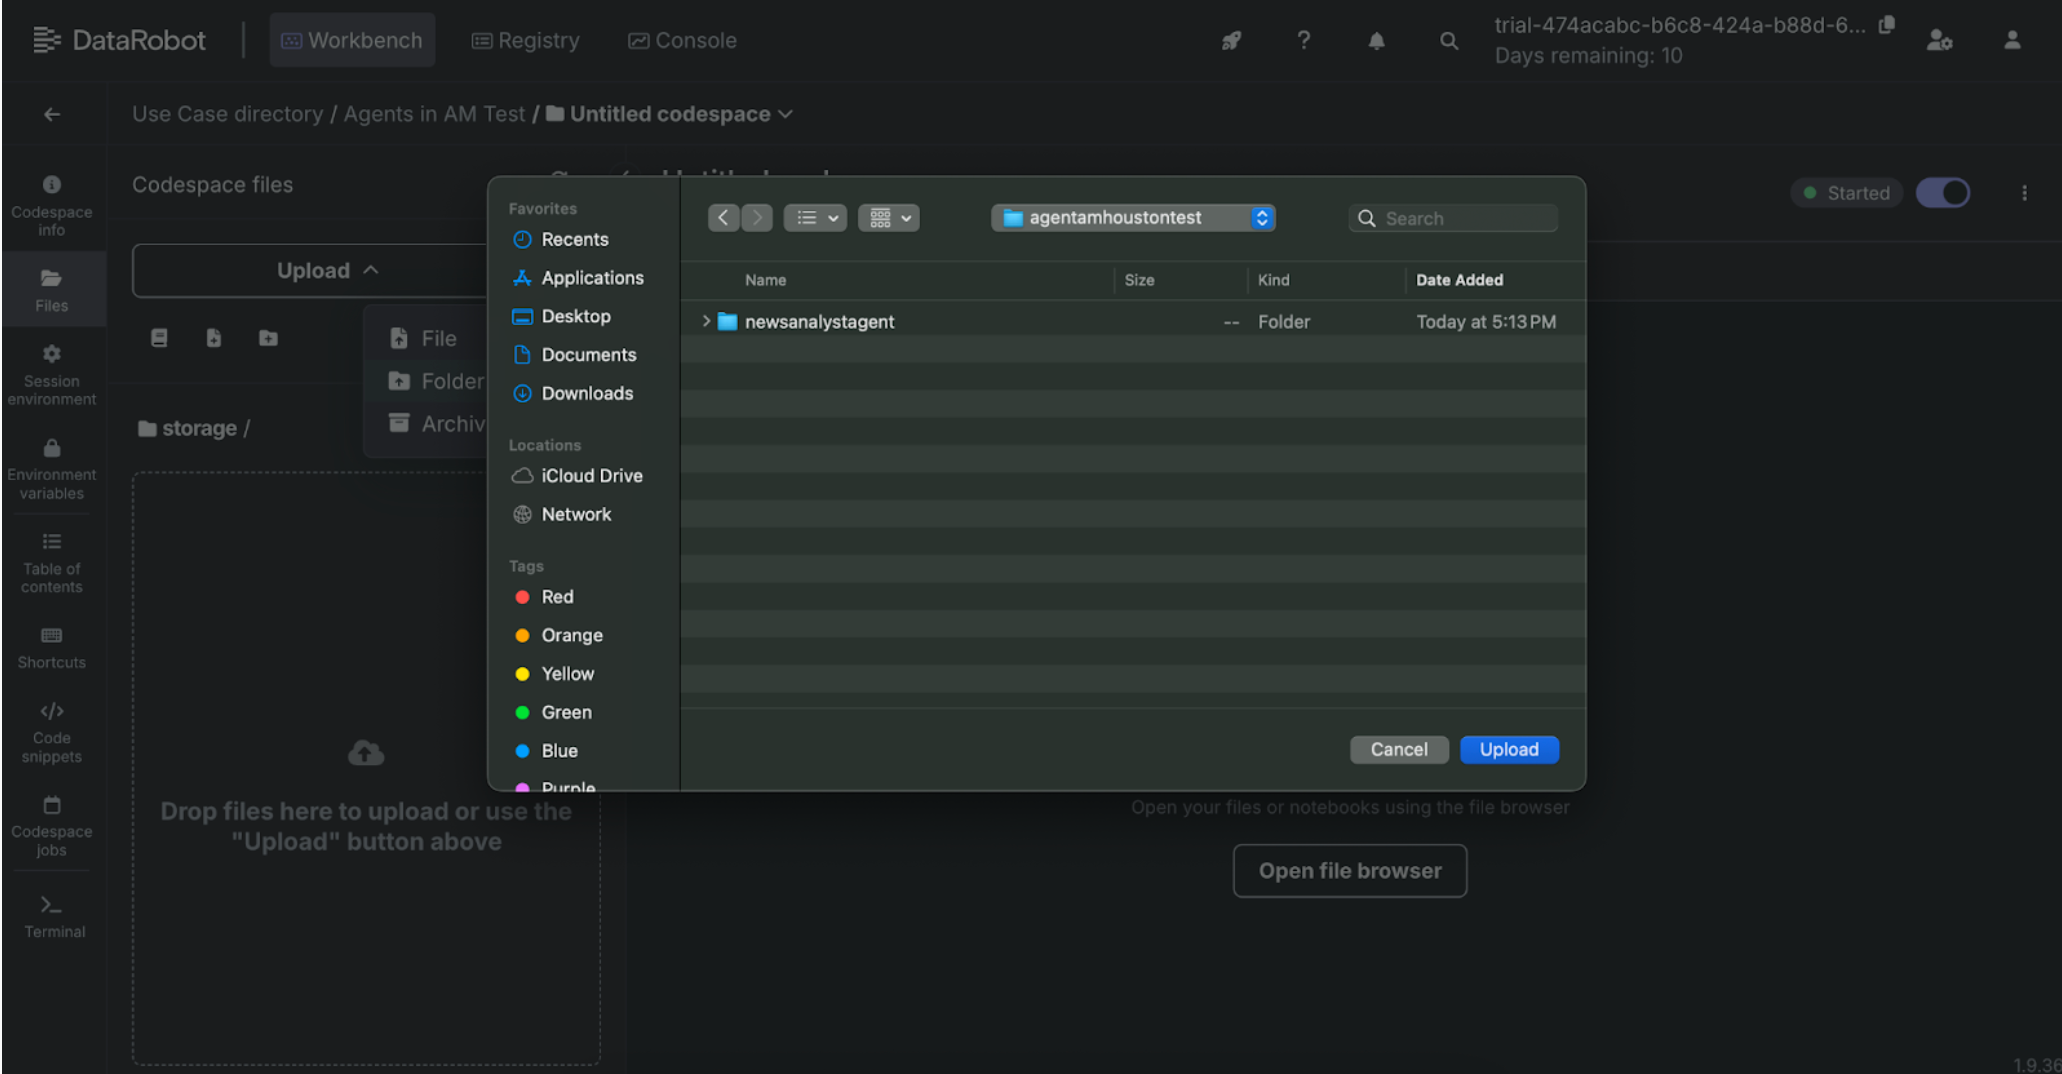
3. Load files to the codespace
After the session initializes, drag-and-drop the unzipped file folder named newsanalystagent that was downloaded as part of the prerequisites.
4. Start a terminal session
Click the Terminal tile to start a terminal session in the codespace.
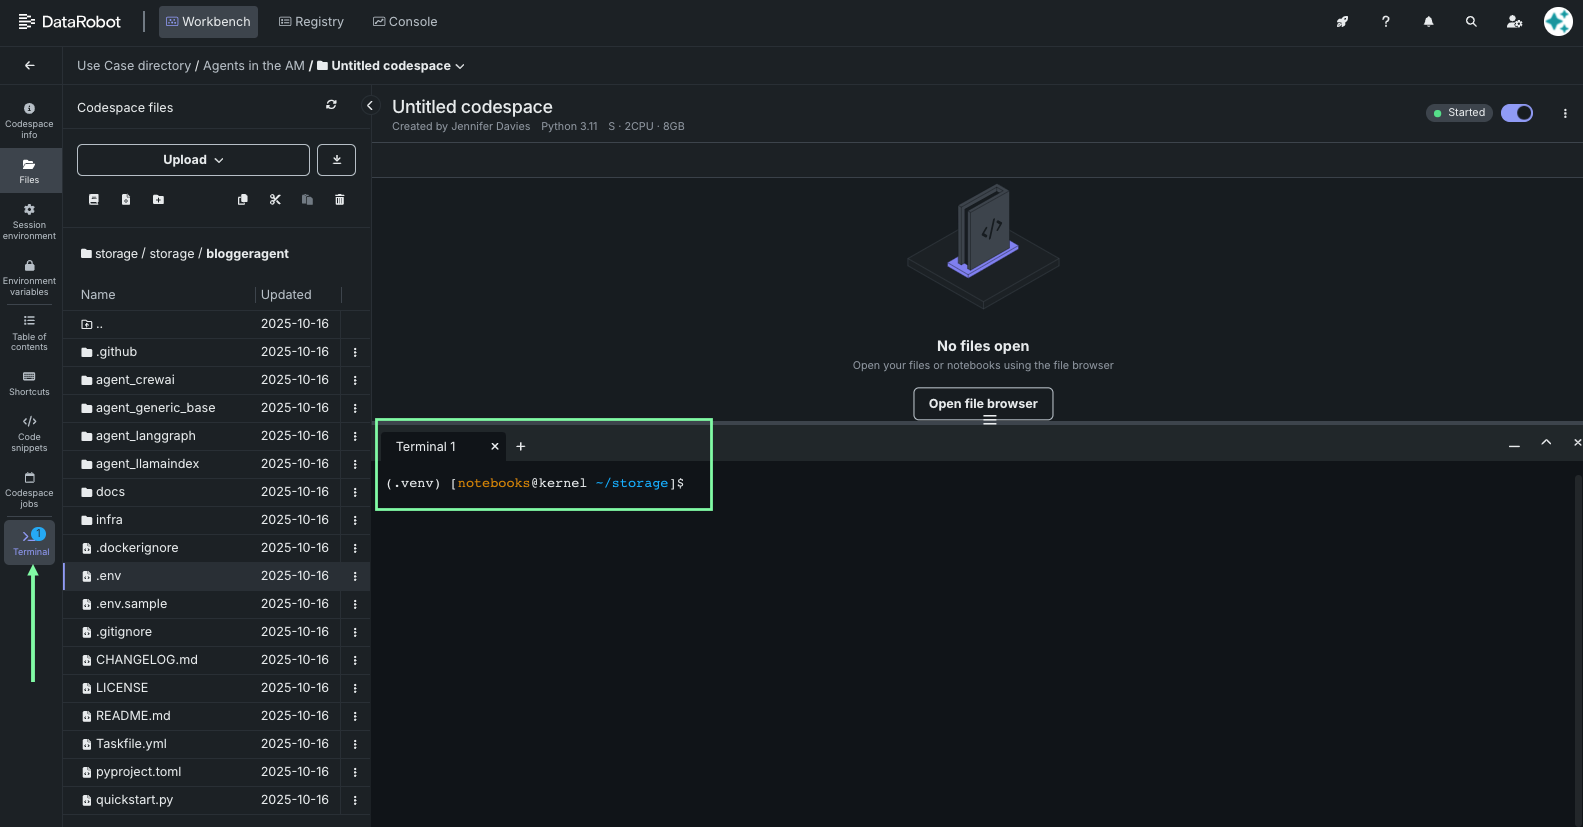
Navigate to your agent folder:
cd newsanalystagent
5. Deploy the agent
Send the agent to the Registry workshop in preparation for deployment and monitoring. To do so:
From newsanalystagent run:
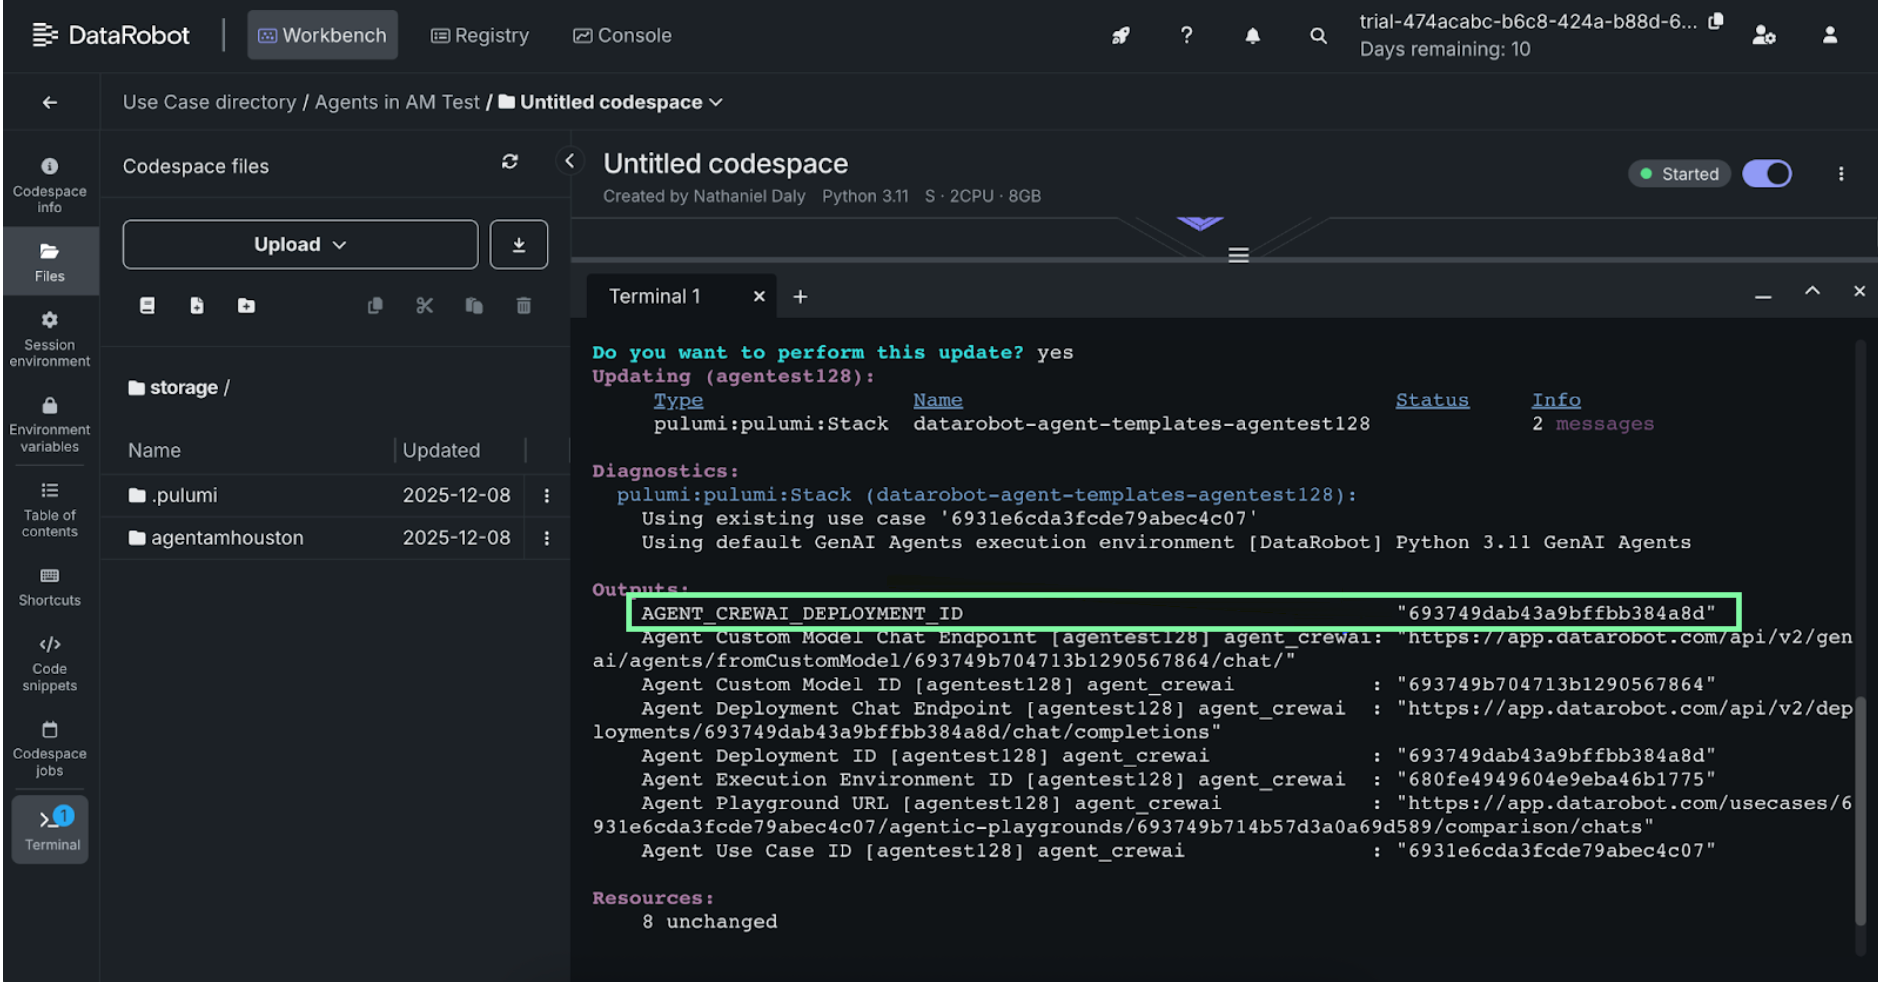
-
Run
task deployto send the agent to the Registry.(.venv) [notebooks@kernel ~/storage/newsanalystagent]$ task deploy Running pulumi up with [DEPLOY] mode Using CPython 3.11.14 interpreter at: /usr/bin/python3 Creating virtual environment at: .venv Built pulumi-datarobot==0.10.24 Installed 84 packages in 151ms Please choose a stack, or create a new one: [Use arrows to move, type to filter] > <create a new stack> -
Press Enter to create a new Pulumi stack.
-
Type a stack name, such as
agent_in_the_am_<LASTNAME>, and Enter. -
When prompted, select
yesto accept and perform Pulumi updates. This process can take 3-5 minutes and is an excellent time to read up on how to take agents from POC to production.
During these steps, the following happens:
- Pulumi packages the agent code.
- DataRobot creates a custom model.
- DataRobot creates a deployment (3–5 minutes) and returns a deployment ID.
Save the deployment ID—you will need it in the next step.
6. Create an API key
Click on your user icon and navigate to API keys and tools to access the area where you can create and manage API keys:
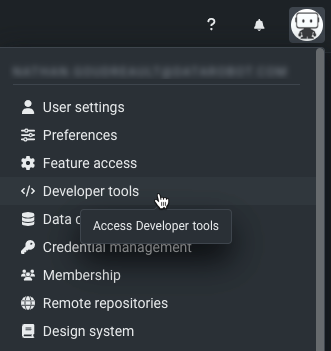
Generate a new API key and name it Agents in the AM.
7. Connect to the application
Duration: 5 minutes
Open the shared application. A link to it is available in an email sent to the email you signed up with. Enter your "Agents in the AM" token and deployment ID from the previous step.
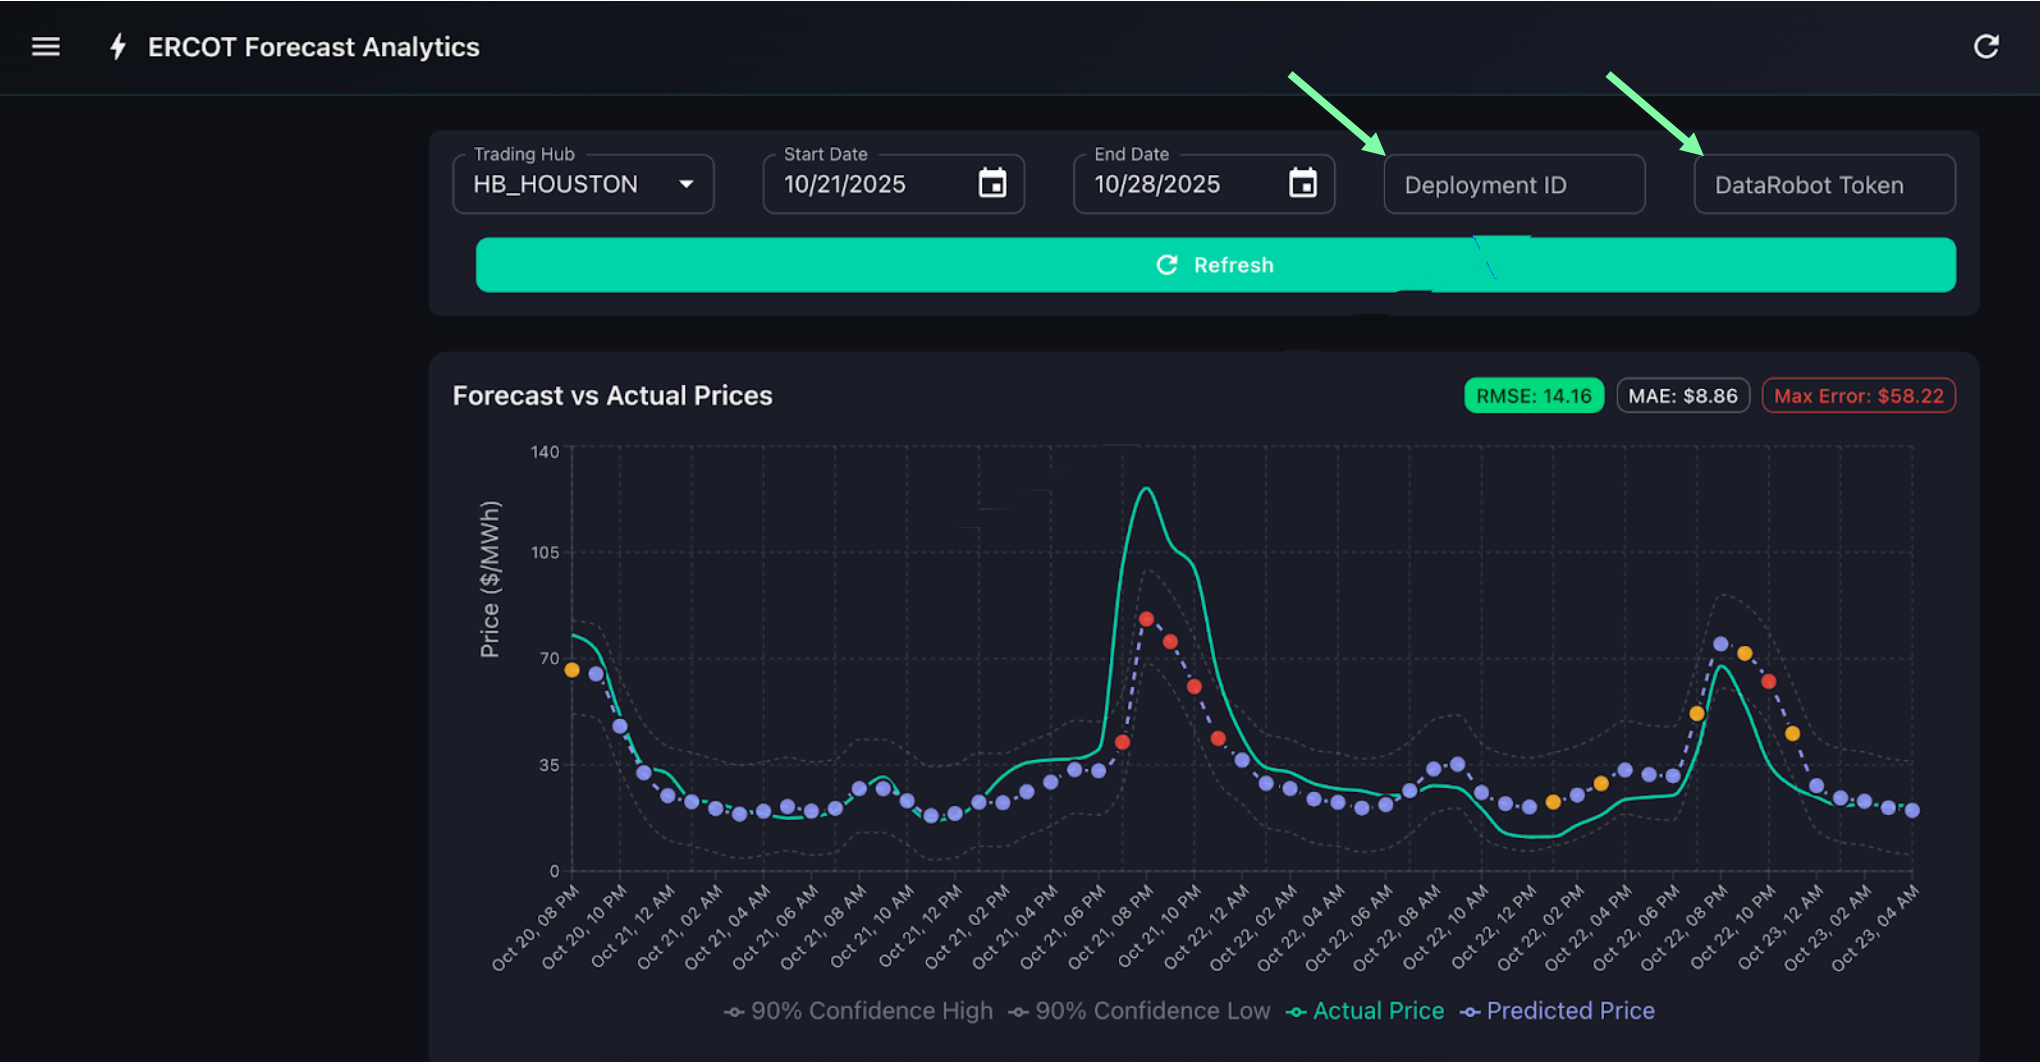
Click Refresh. The app will confirm a successful connection.
8. Test the baseline agent
Duration: 10 minutes
Before modifying the agent YAML, see how the agent behaves in your application.
-
Set the following:
Field Value Trading hub HB_HOUSTON Start date 7 days ago End date Today -
Click Refresh to load data.
-
View the Forecast Chart and select an error point.
-
Click Analyze with AI.
Document the output so that you can compare it against output after you make modifications. Specifically:
- Tone
- Length
- Structure
- Emphasis
- Data sources
9. Open the agent YAML
Duration: 20-30 minutes
For the next steps, you will make configuration changes within DataRobot, not in your local files.
-
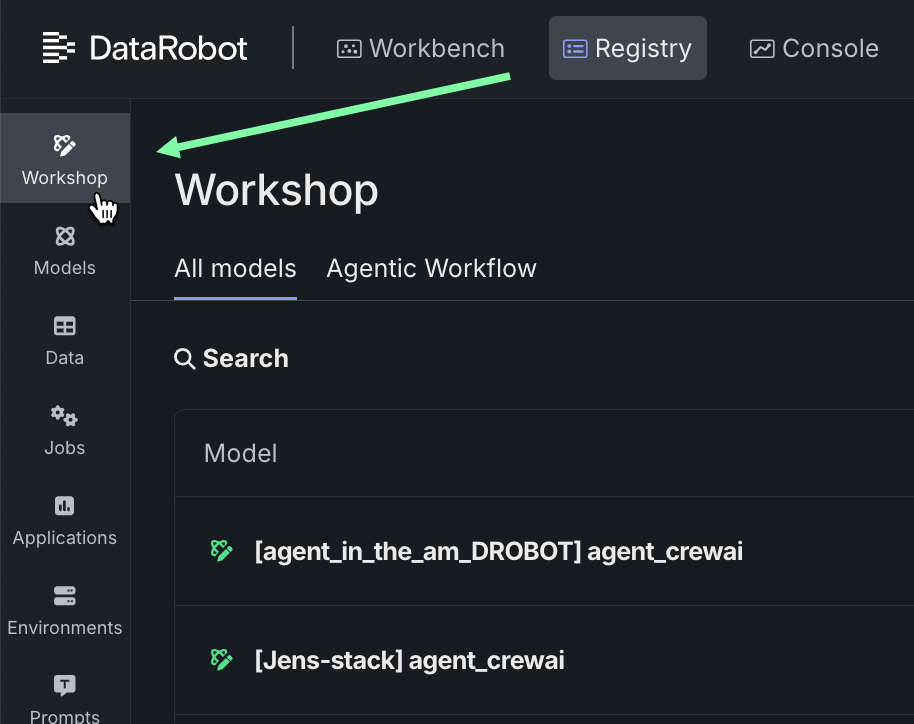
Navigate to Registry > Workshop.
-
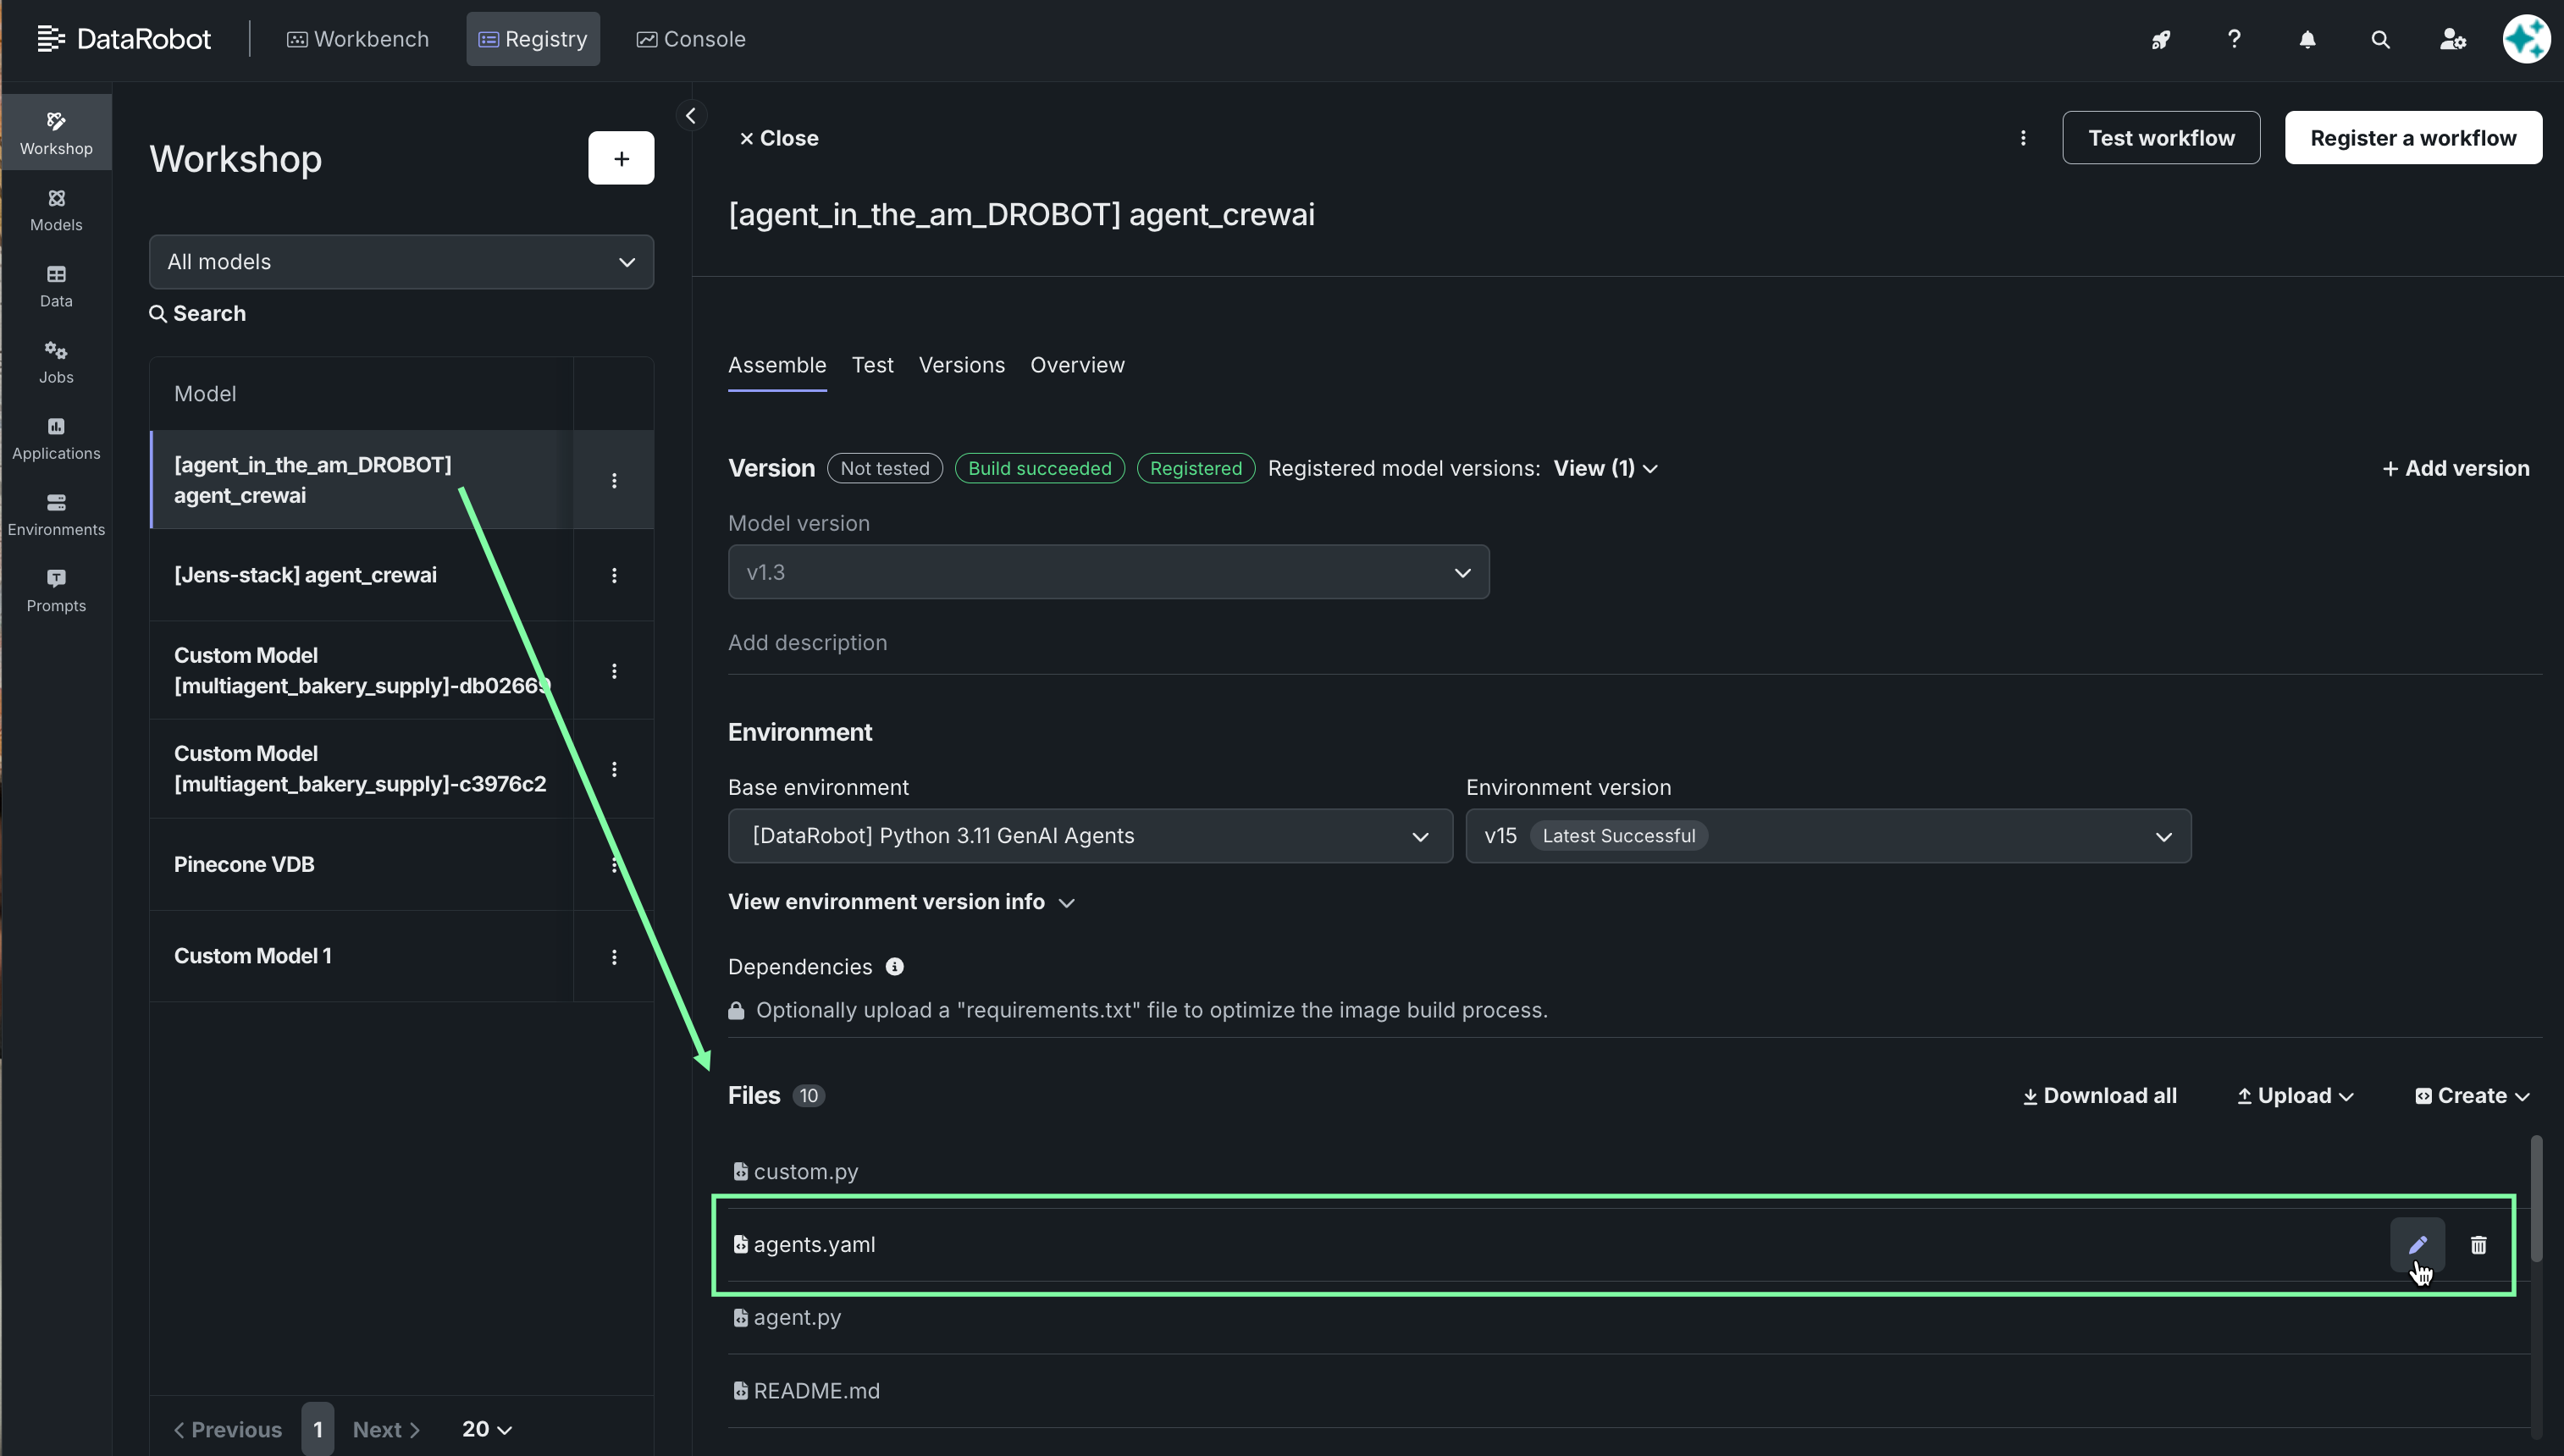
Open your agent and navigate to the Files section.
-
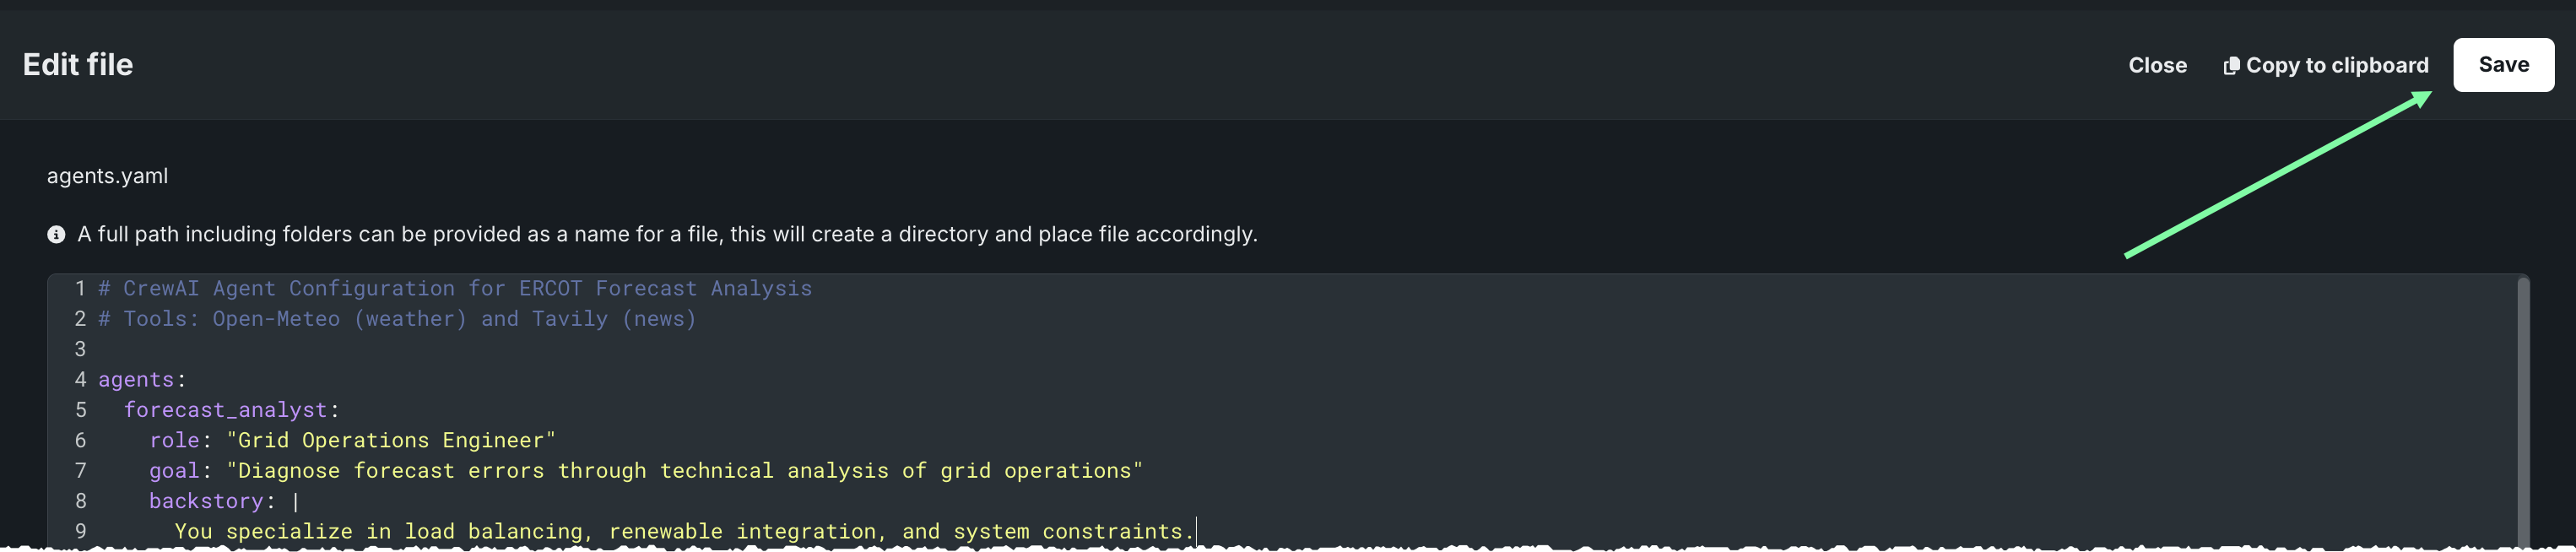
Open
agents.yamlby clicking the pencil icon to the right of the name. All YAML edits will be done here. The structure defines:- Agent identity
- Perspective and goal
- How analysis is performed
- Required output structure
And looks as follows:
agents:
    forecast_analyst:
        role: "..."
        goal: "..."
        backstory: "..."

tasks:
    error_analysis:
        description: "..."
        expected_output: "..."
Experiment with the agent
Based on the structure defined above, try making some changes to experiment with the agent output.
- Learn how to create agent versions.
- See the experiments section for sample changes.
Create new agent versions
To save and publish an edited YAML file, do the following with each change, or any combination of changes:
- Save and publish your changes.
- Register the updated agent.
- Replace the model with the new version.
- Test the new agent.
Save and publish changes
After making any changes to the YAML, while in the YAML editor, click Save.
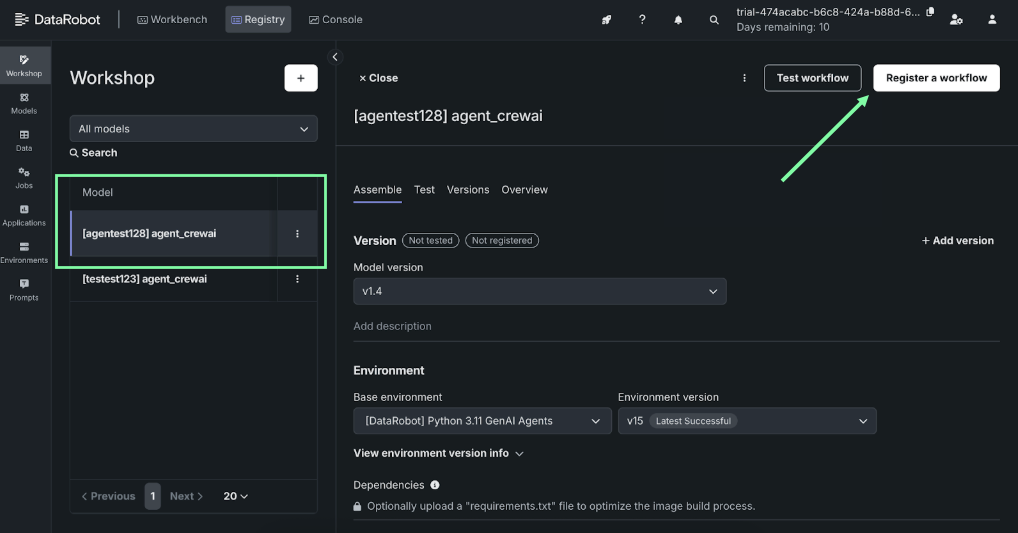
Register the updated agent
Create a new version of the agent by registering the updates.
- Go to Registry > Workshop.
- Under the Model list, click on the agent name.
- Click Register a workflow.
Replace with the new version
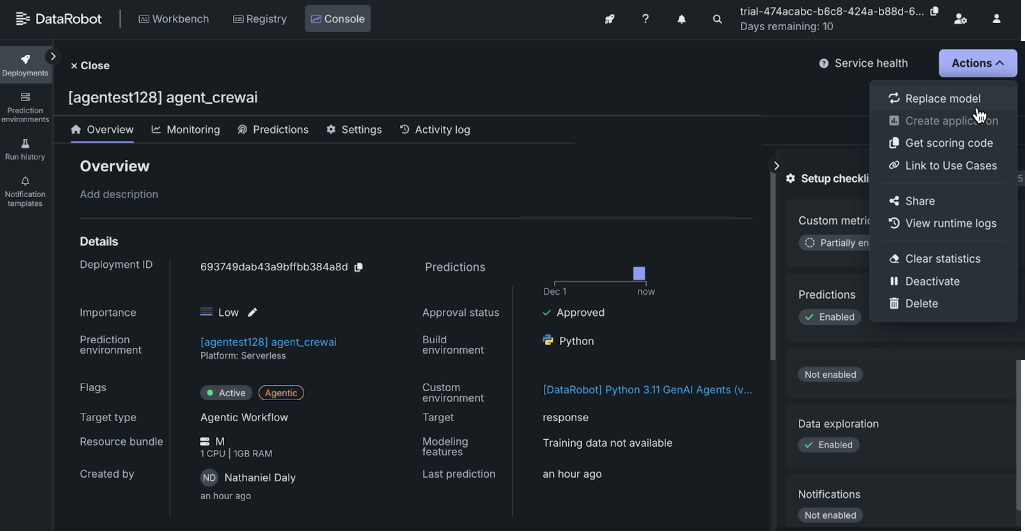
Replace the current deployment with the new version.
- Navigate to Console > Deployments.
-
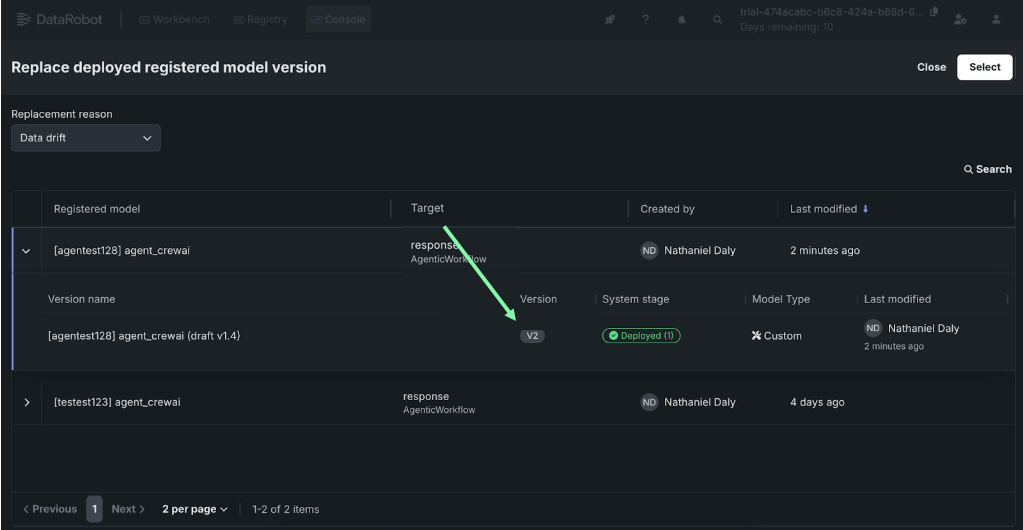
Select the deployment and under the actions menu select Replace model.
-
Select the new version and replace by clicking Select.
Test the new agent
Once deployed, re-run the analysis you did when testing the baseline agent. As you did in that step, compare and document the output for comparison. Consider:
- Role
- Tone
- Length
- Structure
- News coverage
- Insights
Samples for experimenting
Iterate and experiment! Try some, or all, of the following examples to use for comparison:
- Change the role and goal.
- Adjust the analysis depth.
- Add new data sources.
- Change the output structure.
- Add a reasoning framework.
Or, try your own.
Experiment A. Change the agents section
The default structure of the agents section defines the role, goal, and backstory in this way:
agents:
  forecast_analyst:
    role: "Energy Market Analyst"
    goal: "Interpret and explain ERCOT forecast errors through comprehensive narrative analysis"
    backstory: |
      You synthesize data into clear narratives that explain market dynamics.
      You interpret patterns and connect causes rather than simply listing facts.
      You understand how natural gas markets, international energy politics, geopolitical events,
      and regulatory changes impact electricity prices.
      You consider the interconnected nature of global energy markets and their influence on
      regional power markets like ERCOT.
Try replacing those values, for example, with one of the following:
role: "Grid Operations Engineer"
goal: "Diagnose forecast errors through technical analysis of grid operations"
backstory: |
    You specialize in load balancing, renewable integration, and system constraints.
role: "Energy Trading Strategist"
goal: "Identify market inefficiencies and trading opportunities from forecast errors"
backstory: |
    You focus on arbitrage, market signals, and price movements.
Experiment B: Adjust the analysis depth
Try varying the depth of the analysis:
expected_output: |
    A concise executive summary (3-4 sentences maximum) explaining the primary driver.
```yaml expected_output: | A comprehensive analysis (12-15 sentences) covering immediate causes, market dynamics,
external factors, interconnections, and implications. ```
Experiment C. Add new data sources
In the YAML description section, expand your news search queries. Adding more queries gives the agent richer context. Replace lines 28-31 with the following:
Call fetch_energy_news with queries:
- "ERCOT Texas electricity grid"
- "natural gas prices energy markets"
- "international energy politics natural gas LNG"
- "renewable energy solar wind forecast Texas"
- "power plant outages maintenance Texas ERCOT"
- "electricity demand forecast weather Texas"
- "Texas energy policy regulation changes"
Experiment D. Change the output structure
Replace the narrative format with a structured, sectioned output:
expected_output: |
    Format your response with these sections:
    1. EXECUTIVE SUMMARY
    2. WEATHER CONDITIONS
    3. MARKET DYNAMICS
    4. EXTERNAL FACTORS
    5. ROOT CAUSE ANALYSIS
    6. APPENDICES
Experiment E. Add a reasoning framework
Enhance the agent’s step-by-step reasoning:
description: |
  Analyze the forecast error using this reasoning process:
  STEP 1 - Quantify Impact
  STEP 2 - Immediate Causes
  STEP 3 - Market Context
  STEP 4 - External Factors
  STEP 5 - Synthesis
Congratulations—you now have a working agent, modified and applied for the ERCOT app. Find your agent at any time in the Workbench Playgrounds tile.