Customize agents
Developing an agent involves editing code in the agent/agent/ directory (primarily myagent.py). A variety of tools and commands are provided to help you test and deploy your agent during the development process.
Generic base template
You can use the generic_base template to build an agent using any framework of your choice; however, you need to implement the agent logic and structure yourself, as this template does not include any pre-defined agent code.
Modify the agent code
The first step in developing your agent is to modify the agent code to implement your desired functionality. The main agent code is located in the agent/agent directory in your application project.
agent/agent/
├── __init__.py           # Package initialization
├── myagent.py            # Main agent implementation, including prompts
├── config.py             # Configuration management
├── register.py           # DRAgent / NAT registration (framework-specific)
├── workflow.yaml         # Declarative workflow config for DRAgent (framework-specific)
└── model-metadata.yaml   # Agent metadata configuration
| File | Description |
|---|---|
__init__.py |
Identifies the directory as a Python package and enables imports. |
model-metadata.yaml |
Defines the agent's configuration, runtime parameters, and deployment settings. |
custom.py (in the parent agent/, one level up) |
Implements DataRobot integration hooks (load_model, chat) for agent execution. |
myagent.py |
Contains the main agent implementation for your framework. In LangGraph, this is typically a graph_factory function plus MyAgent = datarobot_agent_class_from_langgraph(...) rather than a hand-written MyAgent subclass (see the LangGraph tab below). |
config.py |
Manages configuration loading from environment variables, runtime parameters, and DataRobot credentials. |
register.py |
Wires the DRAgent front server to your framework: LLM selection, MCP tools (mcp_tools_context), and optional workflow tools. |
workflow.yaml |
Declares workflow type, LLM component, and optional A2A metadata for the DRAgent server. |
The primary implementation you edit is in myagent.py; the exact pattern depends on the framework.
Agentic Starter template updates (11.8.x)
In current Agentic Starter releases, agent templates (except the generic base template) build MyAgent from native framework primitives using helper factories, and MCP tooling is decoupled from the agent class. If you are upgrading an older clone, see Migrate Agentic Starter agents to 11.8.8 and the framework migration guides under docs/agent/ in the repository for more details.
The agent template provides a simple multi-step example (for example, a planner node and a writer node in LangGraph). You can modify this code to add more agents, tasks, and tools as needed.
LLM selection is not limited to an llm() method on a handwritten class. It is usually driven by a combination of the following:
- DataRobot runtime and configuration — how the platform resolves the chat model and related settings for your workflow.
- Adaptor helpers (LangGraph) — for example,
get_llmin the DRUM/DRAgent adaptor path, which supplies the model to your graph. - Declarative and environment settings — for example,
workflow.yaml(DRAgent) and environment variables that influence provider and model choice.
For details on configuring LLMs, see Configuring LLM providers. For the overall structure of agentic workflow templates, see Agent components.
datarobot_genai package
Agent templates use the datarobot_genai package to streamline development. This package provides helper functions and base classes that simplify agent implementation, including LLM configuration, response formatting, and integration with DataRobot services. The templates automatically include this package, so you don't need to install it separately.
Modify agent prompts
Each agent template uses different approaches for defining and customizing prompts. Understanding how to modify prompts in your chosen framework is crucial for tailoring agent behavior to your specific use case.
In CrewAI templates, prompts are defined through several properties in the MyAgent class within the myagent.py file:
- Agent prompts: Defined using
role,goal, andbackstoryproperties. - Task prompts: Defined using
descriptionandexpected_outputproperties.
@property
def agent_planner(self) -> Agent:
    return Agent(
        role="Content Planner",
        goal="Plan engaging and factually accurate content on {topic}",
        backstory="You're working on planning a blog article about the topic: {topic}. You collect "
        "information that helps the audience learn something and make informed decisions. Your work is "
        "the basis for the Content Writer to write an article on this topic.",
        allow_delegation=False,
        verbose=self.verbose,
        llm=self.llm,
    )
To modify CrewAI agent prompts:
- Update agent behavior: Modify the
role,goal, andbackstoryproperties in agent definitions. - Use variables: Leverage
{topic}and other variables for dynamic prompt content.
@property
def task_plan(self) -> Task:
    return Task(
        description=(
            "1. Prioritize the latest trends, key players, and noteworthy news on {topic}.\n"
            "2. Identify the target audience, considering their interests and pain points.\n"
            "3. Develop a detailed content outline including an introduction, key points, and a call to action.\n"
            "4. Include SEO keywords and relevant data or sources."
        ),
        expected_output="A comprehensive content plan document with an outline, audience analysis, SEO keywords, "
        "and resources.",
        agent=self.agent_planner,
    )
To modify CrewAI task prompts:
- Customize task instructions: Update the
descriptionproperty in task definitions. - Change expected outputs: Modify the
expected_outputproperty to match your requirements. - Use variables: Leverage
{topic}and other variables for dynamic prompt content.
For more advanced CrewAI prompt engineering techniques, see the CrewAI Agents documentation and CrewAI Tasks documentation.
In current LangGraph templates, you define a prompt template (ChatPromptTemplate), a graph_factory(llm, tools, verbose) that builds create_agent nodes and wires a StateGraph, and then MyAgent = datarobot_agent_class_from_langgraph(graph_factory, prompt_template). The Agentic Starter template follows this pattern in myagent.py; see the LangGraph guide in the repository for the full layout.
LangChain create_agent vs other LangGraph examples
DataRobot templates use langchain.agents.create_agent with system_prompt= (and optional make_system_prompt). Some community examples use langgraph.prebuilt.create_react_agent, which takes a prompt= argument instead. Those are different APIs; follow create_agent / system_prompt when editing DataRobot agent code.
from datarobot_genai.core.agents import make_system_prompt
from datarobot_genai.langgraph.agent import datarobot_agent_class_from_langgraph
from langchain.agents import create_agent
from langgraph.graph import END, START, MessagesState, StateGraph

def graph_factory(llm, tools, verbose=False):
    planner = create_agent(
        llm,
        tools=tools,
        system_prompt=make_system_prompt("You are a content planner..."),
        name="planner_agent",
        debug=verbose,
    )
    writer = create_agent(
        llm,
        tools=tools,
        system_prompt=make_system_prompt("You are a content writer..."),
        name="writer_agent",
        debug=verbose,
    )
    workflow = StateGraph(MessagesState)
    workflow.add_node("planner_node", planner)
    workflow.add_node("writer_node", writer)
    workflow.add_edge(START, "planner_node")
    workflow.add_edge("planner_node", "writer_node")
    workflow.add_edge("writer_node", END)
    return workflow

MyAgent = datarobot_agent_class_from_langgraph(graph_factory, prompt_template)
The tools argument includes MCP tools and optional workflow tools: the DRUM path builds them in custompy_adaptor with mcp_tools_context, and the DRAgent path combines workflow_tools and MCP tools in register.py before invoking MyAgent (see the template's docs/agent/frameworks/langgraph.md).
To modify LangGraph prompts:
- Update system prompts: Change the strings passed to
make_system_prompt()insidegraph_factory. - Add task-specific instructions: Include detailed instructions within those system prompt strings.
- Modify graph structure: Add or reconnect nodes and edges in
graph_factory.
For more advanced LangGraph prompt engineering techniques, see the LangGraph documentation.
In LlamaIndex templates, prompts are defined using the system_prompt parameter in FunctionAgent definitions within the MyAgent class:
@property
def research_agent(self) -> FunctionAgent:
    return FunctionAgent(
        name="ResearchAgent",
        description="Useful for finding information on a given topic and recording notes on the topic.",
        system_prompt=(
            "You are the ResearchAgent that can find information on a given topic and record notes on the topic. "
            "Once notes are recorded and you are satisfied, you should hand off control to the "
            "WriteAgent to write a report on the topic. You should have at least some notes on a topic "
            "before handing off control to the WriteAgent."
        ),
        llm=self.llm,
        tools=[self.record_notes],
        can_handoff_to=["WriteAgent"],
    )
To modify LlamaIndex prompts:
- Update system prompts: Modify the
system_promptstring inFunctionAgentdefinitions. - Customize agent descriptions: Update the
descriptionparameter to change how agents are identified. - Modify handoff behavior: Update the
can_handoff_tolist and system prompt to control agent workflow. - Add tool-specific instructions: Include instructions about when and how to use specific tools.
For more advanced LlamaIndex prompt engineering techniques, see the LlamaIndex prompt engineering documentation.
In NAT (NVIDIA NeMo Agent Toolkit) templates, prompts are defined in the workflow.yaml file using the system_prompt field within function definitions:
functions:
  planner:
    _type: chat_completion
    llm_name: datarobot_llm
    system_prompt: |
      You are a content planner. You are working with a content writer colleague.
      You're working on planning a blog article about the topic.
      You collect information that helps the audience learn something and make informed decisions.
      Your work is the basis for the Content Writer to write an article on this topic.
      1. Prioritize the latest trends, key players, and noteworthy news on the topic.
      2. Identify the target audience, considering their interests and pain points.
      3. Develop a detailed content outline including an introduction, key points, and a call to action.
      4. Include SEO keywords and relevant data or sources.
To modify NAT prompts:
- Update system prompts: Modify the
system_promptfield in function definitions withinworkflow.yaml. - Configure LLM per function: Set the
llm_namefield to reference an LLM defined in thellmssection ofworkflow.yaml. - Modify workflow structure: Update the
workflowsection to change the execution order and tool list. - Add new functions: Define additional functions in the
functionssection to extend agent capabilities.
For more advanced NAT usage instructions, see the NVIDIA NeMo Agent Toolkit documentation.
Best practices for prompt modification
When modifying prompts across any framework:
- Be specific: Provide clear, detailed instructions for what you want the agent to accomplish.
- Use consistent formatting: Maintain consistent prompt structure across all agents in your workflow.
- Test incrementally: Make small changes and test them before implementing larger modifications.
- Consider context: Ensure prompts work well together in multi-agent workflows.
- Document changes: Keep track of prompt modifications for future reference and team collaboration.
Enable streaming responses
Streaming allows agents to send responses incrementally as they are generated, rather than waiting for the complete response. This provides a better user experience by showing progress in real-time, reducing perceived latency, and enabling users to see agent actions as they happen.
Streaming support varies by agent framework. There are three levels of streaming implementation:
- Chunk streaming: Each chunk from the LLM is streamed as it's generated (such as tokens/partial text).
- Step streaming: Response from each sub-agent is streamed when ready.
- Event streaming: Each individual event (starting new step, calling a tool, reasoning) is streamed.
| Framework | Streaming | Notes |
|---|---|---|
| LangGraph | Enabled | Chunk-level streaming is automatically enabled when stream=True is passed. The generated MyAgent from datarobot_agent_class_from_langgraph handles streaming responses. |
| Generic Base | Supported | All streaming levels (chunk, step, event) require custom implementation. Example code is provided in myagent.py for chunk streaming. |
| CrewAI | Supported | All streaming levels (chunk, step, event) require custom implementation. Event listeners capture agent execution and tool usage events incrementally, which facilitates step and event streaming with custom code. Chunk streaming requires custom implementation to stream from the LLM directly. |
| LlamaIndex | Supported | All streaming levels (chunk, step, event) require custom implementation. The framework executes agents incrementally, which facilitates step streaming with custom code. Chunk and event streaming require custom implementation. |
| NAT | Supported | All streaming levels (chunk, step, event) require custom implementation. |
Infrastructure support
All agent templates include infrastructure in custom.py that can handle streaming responses. For frameworks that require custom implementation (Generic Base, CrewAI, LlamaIndex, NAT), you need to modify your agent's invoke() method to return an AsyncGenerator when streaming is requested. If your agent's invoke() method returns an AsyncGenerator, the infrastructure automatically converts it to the appropriate streaming response format. The is_streaming helper function is available to all framework templates via the datarobot_genai package by importing from datarobot_genai.core.agents import is_streaming. It checks if stream=True is present in the chat completion request body parameters.
If streaming is implemented for an agent, enable streaming when testing locally (via CLI) or when making predictions with a deployed agent (via API).
Use the --stream flag when running the agent CLI:
task agent:cli -- execute --user_prompt 'Write a document about the history of AI.' --stream
You can also use streaming with structured queries:
task agent:cli -- execute --user_prompt '{"topic":"Generative AI"}' --stream
Set stream=True in the completion parameters when making API calls:
from openai import OpenAI

client = OpenAI(
    base_url=CHAT_API_URL,
    api_key=API_KEY,
)

completion = client.chat.completions.create(
    model="datarobot-deployed-llm",
    messages=[
        {"role": "user", "content": "What would it take to colonize Mars?"},
    ],
    stream=True,  # Enable streaming
)

# Process streaming response
for chunk in completion:
    if chunk.choices[0].delta.content:
        print(chunk.choices[0].delta.content, end="", flush=True)
Testing the agent during local development
You can test your agent locally using the development server provided in the template. This allows you to run and debug your agent code without deploying it to DataRobot.
To submit a test query to your agent, the development server must be running. Start it manually or use the auto-start option:
Start the development server manually when running multiple tests. The development server runs continuously and blocks the terminal, so start it in one terminal:
task agent:dev
Keep this terminal running. Then, in a different terminal, run your test commands:
task agent:cli -- execute --user_prompt 'Write a document about the history of AI.'
You can also send a structured query as a prompt if your agentic workflow requires it:
task agent:cli -- execute --user_prompt '{"topic":"Generative AI"}'
Auto-start the development server for single tests. Use START_DEV=1 to automatically start and stop the development server:
task agent:cli START_DEV=1 -- execute --user_prompt 'Write a document about the history of AI.'
You can also send a structured query as a prompt if your agentic workflow requires it:
task agent:cli START_DEV=1 -- execute --user_prompt '{"topic":"Generative AI"}'
This command will run the agent locally and print the output to the console. You can modify the query to test different inputs and scenarios.
Fast iteration with runtime dependencies
For rapid development, you can add Python dependencies without rebuilding the Docker image using runtime dependencies. This process improves iteration speed. See the Add Python packages documentation for details on adding runtime dependencies.
Build an agent for testing in the DataRobot LLM Playground
To create a custom model that can be refined using the DataRobot LLM Playground, deploy development infrastructure (including playground-related resources) from your template project root. This is different from running the stack locally with task dev or dr run dev.
dr run deploy-dev
You can also run dr task run deploy-dev (equivalent to dr run deploy-dev). This command runs Pulumi with development targets (for example, LLM Playground and related custom model resources) and does not perform a full production deployment. This is significantly faster for iterative cloud development and testing. For command details, see dr task and dr run in the CLI documentation.
For more examples on working with agents in the DataRobot LLM Playground, see the Agentic playground documentation.
Build command considerations
The deploy-dev task can replace or update existing cloud resources for your stack. Full production resources are created with dr run deploy (or dr task run deploy). If resources are removed or recreated, new deployment IDs may apply.
Deploy an agent for production use
To create a full production-grade deployment:
dr run deploy
You can also run dr task run deploy (equivalent to dr run deploy). This matches the Agentic Starter template README (dr run deploy). The command builds the custom model and creates a production deployment with the necessary infrastructure, which takes longer but provides a complete production environment. See the CLI task and run commands for more options. The deployment is a standard DataRobot deployment that includes full monitoring, logging, and scaling capabilities. For more information about DataRobot deployments, see the Deployment documentation.
View logs and traces for a deployed agent
Once your agent is deployed, you can view OpenTelemetry (OTel) logs and traces in the DataRobot UI.
To view logs, on the Deployments tab, locate and click your deployment, click the Activity log tab, and then click Logs. The logs display in OpenTelemetry format and include log levels (INFO, DEBUG, WARN, and ERROR), time-period filtering (Last 15 min, Last hour, Last day, or Custom range), and export capabilities via the OTel logs API for integration with third-party observability tools like Datadog.
Access and retention
OTel logs are available for all deployment and target types. Only users with Owner and User roles on a deployment can view these logs. Logs data is stored for a retention period of 30 days, after which it is automatically deleted.
To view traces, which follow the end-to-end path of requests to your agent, on the Service health tab of your deployment, click Show tracing in the upper-right corner of the Total predictions chart. The tracing table displays trace information including timestamp, status, trace ID, duration, spans count, cost, prompt, and completion. Click a trace row to view detailed spans in Chart or List format, showing individual steps in the agent's execution, including LLM API calls, tool invocations, and agent actions.
For more information, see the logs documentation and tracing documentation.
Manually deploy an agent using Pulumi
If needed, you can manually run Pulumi commands to debug or refine Pulumi code.
# Load environment variables
set -o allexport && source .env

# For build mode only (custom model without deployment)
export AGENT_DEPLOY=0

# Or for full deployment mode (default)
# export AGENT_DEPLOY=1

# Navigate to the infrastructure directory
cd ./infra

# Run Pulumi deployment
pulumi up
The AGENT_DEPLOY environment variable controls whether Pulumi creates only the custom model (AGENT_DEPLOY=0) or both the custom model and a production deployment (AGENT_DEPLOY=1). If not set, Pulumi defaults to full deployment mode.
Pulumi will prompt you to confirm the resources to be created or updated.
Make predictions with a deployed agentic workflow
After the agentic workflow is deployed, access real-time prediction snippets from the deployment's Predictions > Prediction API tab. For more information on deployment predictions, see the Prediction API snippets documentation.
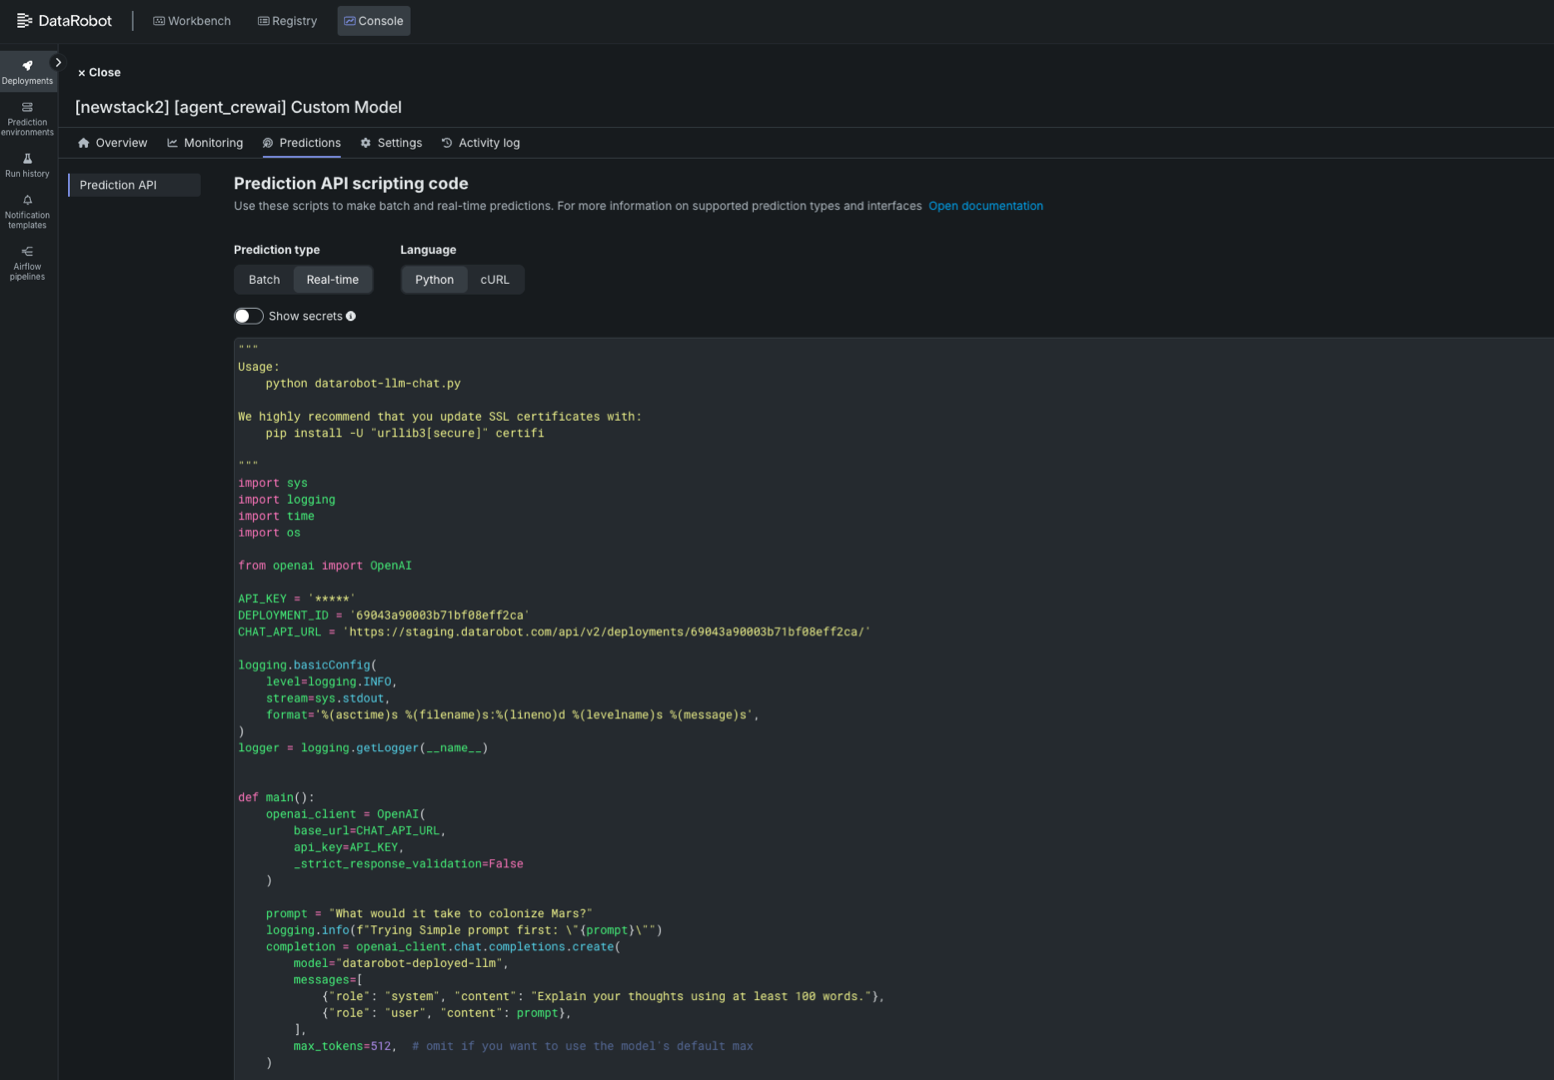
Alternatively, you can modify the script below to make predictions with the deployed agentic workflow, replacing the placeholders for the API_KEY, DEPLOYMENT_ID, and CHAT_API_URL variables.
import sys
import logging
import time
import os

from openai import OpenAI

API_KEY = '<API_KEY>' # Your API Key
DEPLOYMENT_ID = '<DEPLOYMENT_ID>' # The agentic workflow deployment ID
CHAT_API_URL = '<CHAT_API_URL>' # The chat API URL for the agentic workflow deployment
# For example, 'https://app.datarobot.com/api/v2/deployments/68824e9aa1946013exfc3415/'

logging.basicConfig(
    level=logging.INFO,
    stream=sys.stdout,
    format='%(asctime)s %(filename)s:%(lineno)d %(levelname)s %(message)s',
)
logger = logging.getLogger(__name__)


def main():
    openai_client = OpenAI(
        base_url=CHAT_API_URL,
        api_key=API_KEY,
        _strict_response_validation=False
    )

    prompt = "What would it take to colonize Mars?"
    logging.info(f"Trying Simple prompt first: \"{prompt}\"")
    completion = openai_client.chat.completions.create(
        model="datarobot-deployed-llm",
        messages=[
            {"role": "system", "content": "Explain your thoughts using at least 100 words."},
            {"role": "user", "content": prompt},
        ],
        max_tokens=512,  # omit if you want to use the model's default max
    )

    print(completion.choices[0].message.content)

    return 0

if __name__ == '__main__':
    sys.exit(main())
Next steps
After deployment, your agent will be available in your DataRobot environment. You can:
- Test your deployed agent using
task agent:cli -- execute-deployment. - Integrate your agent with other DataRobot services.
- Monitor usage and performance in the DataRobot dashboard.
For agentic platform-specific assistance beyond the scope of the examples provided in this repository, see the official documentation for each framework:
You can also find more examples and documentation in the public repositories for specific frameworks to help you build more complex agents, add tools, and define workflows and tasks.