エージェントのカスタマイズ
エージェントの開発には、agent/agent/ディレクトリ内のコード(主にmyagent.py)を編集する必要があります。 開発プロセスにおいて、エージェントのテストやデプロイに役立つさまざまなツールやコマンドが提供されています。
Generic Baseテンプレート
generic_base`テンプレートを使用して、任意のフレームワークを使用してエージェントを構築することができます。しかし、このテンプレートには定義済みのエージェントコードが含まれていないため、エージェントのロジックと構造を自分で実装する必要があります。
エージェントコードの修正
エージェント開発の最初のステップは、目的の機能を実装するようにエージェントコードを修正することです。 メインのエージェントコードは、アプリケーションプロジェクトのagent/agentディレクトリにあります。
agent/agent/
├── __init__.py           # Package initialization
├── myagent.py            # Main agent implementation, including prompts
├── config.py             # Configuration management
├── register.py           # DRAgent / NAT registration (framework-specific)
├── workflow.yaml         # Declarative workflow config for DRAgent (framework-specific)
└── model-metadata.yaml   # Agent metadata configuration
| ファイル | 説明 |
|---|---|
__init__.py |
ディレクトリをPythonパッケージとして識別し、インポートを有効にします。 |
model-metadata.yaml |
エージェントの設定、ランタイムパラメーター、デプロイ設定を定義します。 |
custom.py(親agent/内、1つ上のレベル) |
エージェントを実行するためのDataRobot統合フック(load_model、chat)を実装します。 |
myagent.py |
フレームワークにおける主要なエージェントの実装が含まれています。 LangGraphでは、これは通常、手動で作成したMyAgentサブクラスではなく、graph_factory関数とMyAgent = datarobot_agent_class_from_langgraph(...)の組み合わせです(下のLangGraphタブを参照してください)。 |
config.py |
環境変数、ランタイムパラメーター、およびDataRobotの資格情報からの設定読み込みを管理します。 |
register.py |
DRAgentのフロントサーバーをフレームワーク(LLM選択、MCPツール(mcp_tools_context)、およびオプションのワークフローツール)に接続します。 |
workflow.yaml |
DRAgentサーバーのワークフロータイプ、LLMコンポーネント、およびオプションのA2Aメタデータを宣言します。 |
主に編集する実装はmyagent.pyにあります。具体的なパターンはフレームワークによって異なります。
Agentic Starterテンプレートの更新(11.8.x)
現在のAgentic Starterのリリースでは、エージェントテンプレート(汎用的なbaseテンプレートを除く)は、ヘルパーファクトリーを使用してネイティブフレームワークのプリミティブからMyAgentを構築しており、MCPツールはエージェントクラスから切り離されています。 古いクローンをアップグレードする場合、詳細については、リポジトリのdocs/agent/にあるMigrate Agentic Starter agents to 11.8.8およびframework migration guidesを参照してください。
エージェントのテンプレートには、単純な複数ステップの例が用意されています(例:LangGraphのPlannerノードとWriterノード)。 必要に応じて、このコードを修正して、エージェント、タスク、およびツールを追加できます。
LLMの選択は、手動で作成したクラスにおけるllm()メソッドに限定されるものではありません。 通常、以下の組み合わせによって決定されます。
- DataRobotのランタイムと設定 — プラットフォームがワークフローにおいてチャットモデルおよび関連設定をどのように解決するか。
- アダプターヘルパー(LangGraph) — たとえば、DRUM/DRAgentアダプターパス内の
get_llmなど、グラフにモデルを提供するもの。 - 宣言型および環境設定 — たとえば、
workflow.yaml(DRAgent)や、プロバイダーとモデルの選択に影響を与える環境変数。
LLMの設定の詳細については、LLMプロバイダーの設定を参照してください。 エージェントワークフローテンプレートの全体的な構造については、エージェントのコンポーネントを参照してください。
datarobot_genai package
エージェントテンプレートは、datarobot_genaiパッケージを使用して開発を効率化します。 このパッケージは、LLM設定、回答形式、DataRobotサービスとの連携など、エージェントの実装を簡素化するヘルパー関数と基本クラスを提供します。 テンプレートにはこのパッケージが自動的に含まれるため、別途インストールする必要はありません。
エージェントプロンプトの修正
各エージェントテンプレートは、プロンプトの定義とカスタマイズに異なるアプローチを使用します。 選択したフレームワークでプロンプトを変更する方法を理解することは、エージェントの動作を特定のユースケースに合わせるために非常に重要です。
CrewAIテンプレートでは、プロンプトはmyagent.pyファイル内のMyAgentクラスのいくつかのプロパティを通して定義されます。
- エージェントのプロンプト:role
、goal、backstory`プロパティを使用して定義されます。 - タスクプロンプト:description
とexpected_output`プロパティを使用して定義されます。
@property
def agent_planner(self) -> Agent:
    return Agent(
        role="Content Planner",
        goal="Plan engaging and factually accurate content on {topic}",
        backstory="You're working on planning a blog article about the topic: {topic}. You collect "
        "information that helps the audience learn something and make informed decisions. Your work is "
        "the basis for the Content Writer to write an article on this topic.",
        allow_delegation=False,
        verbose=self.verbose,
        llm=self.llm,
    )
CrewAIエージェントのプロンプトを修正するには:
- **エージェントの動作を更新する:エージェント定義の
role、goal、backstoryプロパティを変更します。 - 変数を使用する:
{topic}やその他の変数をプロンプトの動的なコンテンツに利用します。
@property
def task_plan(self) -> Task:
    return Task(
        description=(
            "1. Prioritize the latest trends, key players, and noteworthy news on {topic}.\n"
            "2. Identify the target audience, considering their interests and pain points.\n"
            "3. Develop a detailed content outline including an introduction, key points, and a call to action.\n"
            "4. Include SEO keywords and relevant data or sources."
        ),
        expected_output="A comprehensive content plan document with an outline, audience analysis, SEO keywords, "
        "and resources.",
        agent=self.agent_planner,
    )
CrewAIのタスクプロンプトを修正するには:
- タスク指示のカスタマイズ:タスク定義の
descriptionプロパティを更新します。 - 期待される出力の変更:要件に合わせて
expected_outputプロパティを修正します。 - 変数を使用する:
{topic}やその他の変数をプロンプトの動的なコンテンツに利用します。
より高度なCrewAIプロンプトエンジニアリング技術については、CrewAIエージェントのドキュメントとCrewAIタスクのドキュメントを参照してください。
現在のLangGraphテンプレートでは、プロンプトテンプレート(ChatPromptTemplate)を定義し、create_agentノードを構築してStateGraphを接続するgraph_factory(llm, tools, verbose)を定義した後、MyAgent = datarobot_agent_class_from_langgraph(graph_factory, prompt_template)と記述します。 Agentic Starterのテンプレートは、myagent.pyではこのパターンに従っています。レイアウトの詳細については、リポジトリ内のLangGraphガイドを参照してください。
LangChainのcreate_agentと他のLangGraphの例との比較
DataRobotのテンプレートでは、langchain.agents.create_agentをsystem_prompt=(およびオプションのmake_system_prompt)と一緒に使用します。 コミュニティの例の中にはlanggraph.prebuilt.create_react_agentを使用するものがあります。これはprompt=引数を代わりに取ります。 これらは異なるAPIです。DataRobotのエージェントコードを編集するときは、create_agent/system_promptに従ってください。
from datarobot_genai.core.agents import make_system_prompt
from datarobot_genai.langgraph.agent import datarobot_agent_class_from_langgraph
from langchain.agents import create_agent
from langgraph.graph import END, START, MessagesState, StateGraph

def graph_factory(llm, tools, verbose=False):
    planner = create_agent(
        llm,
        tools=tools,
        system_prompt=make_system_prompt("You are a content planner..."),
        name="planner_agent",
        debug=verbose,
    )
    writer = create_agent(
        llm,
        tools=tools,
        system_prompt=make_system_prompt("You are a content writer..."),
        name="writer_agent",
        debug=verbose,
    )
    workflow = StateGraph(MessagesState)
    workflow.add_node("planner_node", planner)
    workflow.add_node("writer_node", writer)
    workflow.add_edge(START, "planner_node")
    workflow.add_edge("planner_node", "writer_node")
    workflow.add_edge("writer_node", END)
    return workflow

MyAgent = datarobot_agent_class_from_langgraph(graph_factory, prompt_template)
tools引数には、MCPツールとオプションのワークフローツールが含まれます。DRUMパスでは、mcp_tools_contextを使用して custompy_adaptor内でこれらを構築し、DRAgentパスでは、MyAgentを呼び出す前にregister.py内でworkflow_toolsとMCPツールを結合します(テンプレートのdocs/agent/frameworks/langgraph.mdを参照してください)。
LangGraphのプロンプトを修正するには:
- システムプロンプトを更新する:
graph_factory内のmake_system_prompt()に渡される文字列を変更します。 - タスク固有の手順を追加する:それらのシステムプロンプト文字列内に詳細な手順を含めます。
- グラフ構造を変更する:
graph_factoryでノードやエッジを追加または再接続します。
より高度なLangGraphプロンプトエンジニアリング技術については、LangGraphのドキュメントを参照してください。
LlamaIndexテンプレートでは、プロンプトはMyAgentクラス内のFunctionAgent定義のsystem_promptパラメーターを使って定義されます。
@property
def research_agent(self) -> FunctionAgent:
    return FunctionAgent(
        name="ResearchAgent",
        description="Useful for finding information on a given topic and recording notes on the topic.",
        system_prompt=(
            "You are the ResearchAgent that can find information on a given topic and record notes on the topic. "
            "Once notes are recorded and you are satisfied, you should hand off control to the "
            "WriteAgent to write a report on the topic. You should have at least some notes on a topic "
            "before handing off control to the WriteAgent."
        ),
        llm=self.llm,
        tools=[self.record_notes],
        can_handoff_to=["WriteAgent"],
    )
LlamaIndexのプロンプトを修正するには:
- システムプロンプトを更新する:
FunctionAgentの定義でsystem_prompt文字列を変更します。 - エージェントの説明をカスタマイズする:エージェントの識別方法を変更するために
descriptionパラメーターを更新します。 - ハンドオフ動作の変更:エージェントのワークフローを制御するために、
can_handoff_toリストとシステムプロンプトを更新しました。 - ツール固有の説明を追加する:特定の道具をいつ、どのように使うかについての指示を含めます。
より高度なLlamaIndexプロンプトエンジニアリングのテクニックについては、LlamaIndexプロンプトエンジニアリングのドキュメントを参照してください。
NAT(NVIDIA NeMo Agent Toolkit)のテンプレートでは、プロンプトはworkflow.yamlファイルで、関数定義内のsystem_promptフィールドを使用して定義されます。
functions:
  planner:
    _type: chat_completion
    llm_name: datarobot_llm
    system_prompt: |
      You are a content planner. You are working with a content writer colleague.
      You're working on planning a blog article about the topic.
      You collect information that helps the audience learn something and make informed decisions.
      Your work is the basis for the Content Writer to write an article on this topic.
      1. Prioritize the latest trends, key players, and noteworthy news on the topic.
      2. Identify the target audience, considering their interests and pain points.
      3. Develop a detailed content outline including an introduction, key points, and a call to action.
      4. Include SEO keywords and relevant data or sources.
NATのプロンプトを変更するには:
- システムプロンプトを更新する:
workflow.yaml内の関数定義のsystem_promptフィールドを変更します。 - 関数ごとにLLMを設定する:
workflow.yamlのllmsセクションで定義されたLLMを参照するように、llm_nameフィールドを設定します。 - ワークフローの構造を変更する:
workflowセクションを更新して、実行順序とツールリストを変更します。 - 新しい関数を追加する:
functionsセクションに追加の関数を定義して、エージェントの機能を拡張します。
より高度なNATの使用方法については、NVIDIA NeMo Agent Toolkitのドキュメントを参照してください。
迅速な修正のためのベストプラクティス
どのフレームワークでもプロンプトを修正する場合:
- **具体的に:エージェントに達成してほしいことを明確かつ詳細に指示します。
- Use consistent formatting:ワークフロー内のすべてのエージェントで一貫したプロンプト構造を維持します。
- インクリメンタルにテストする:より大きな変更を実装する前に、小さな変更を行い、それをテストします。
- **コンテキストを考慮する:プロンプトがマルチエージェントワークフローでうまく機能するようにします。
- ドキュメントの変更:将来の参照とチームコラボレーションのために、迅速な変更を追跡します。
ストリーミングレスポンスを有効にする
ストリーミングを使用すると、エージェントは、完全なレスポンスを待機することなく、生成されたレスポンスを段階的に送信できます。 これにより、進捗状況がリアルタイムで表示され、認識される遅延が短縮されて、エージェントのアクションが発生したときにユーザーが確認できるようになるため、ユーザーエクスペリエンスが向上します。
ストリーミングのサポートは、エージェントフレームワークによって異なります。 ストリーミングの実装には3つのレベルがあります。
- チャンクストリーミング:LLMからの各チャンクは、生成時にストリーミングされます(トークンや部分テキストなど)。
- ステップストリーミング:各サブエージェントからのレスポンスは、準備ができた時点でストリーミングされます。
- イベントストリーミング:個々のイベント(新しいステップの開始、ツールの呼び出し、推論)がストリーミングされます。
| フレームワーク | ストリーミング | 備考 |
|---|---|---|
| LangGraph | 有効 | stream=Trueが渡されると、チャンクレベルのストリーミングが自動的に有効になります。 datarobot_agent_class_from_langgraphから生成されたMyAgentは、ストリーミングレスポンスを処理します。 |
| Generic Base | サポートされています | すべてのストリーミングレベル(チャンク、ステップ、イベント)にカスタム実装が必要です。 チャンクストリーミングのサンプルコードがmyagent.pyに用意されています。 |
| CrewAI | サポートされています | すべてのストリーミングレベル(チャンク、ステップ、イベント)にカスタム実装が必要です。 イベントリスナーは、エージェント実行とツール使用のイベントを段階的にキャプチャします。これにより、カスタムコードを用いたステップおよびイベントのストリーミングが容易になります。 チャンクストリーミングには、LLMから直接ストリーミングするためのカスタム実装が必要です。 |
| LlamaIndex | サポートされています | すべてのストリーミングレベル(チャンク、ステップ、イベント)にカスタム実装が必要です。 フレームワークはエージェントを段階的に実行するため、カスタムコードを用いたステップストリーミングが容易になります。 チャンクとイベントのストリーミングには、カスタム実装が必要です。 |
| NAT | サポートされています | すべてのストリーミングレベル(チャンク、ステップ、イベント)にカスタム実装が必要です。 |
インフラストラクチャのサポート
すべてのエージェントテンプレートには、ストリーミングレスポンスを処理できるインフラストラクチャがcustom.pyに含まれています。 カスタム実装を必要とするフレームワーク(Generic Base、CrewAI、LlamaIndex、NAT)の場合、ストリーミングが要求されたときにAsyncGeneratorを返すようにエージェントのinvoke()メソッドを変更する必要があります。 エージェントのinvoke()メソッドがAsyncGeneratorを返すと、インフラストラクチャは自動的にそれを適切なストリーミングレスポンス形式に変換します。 is_streamingヘルパー関数は、from datarobot_genai.core.agents import is_streamingをインポートすることで、datarobot_genaiパッケージを通じて、すべてのフレームワークテンプレートで利用できます。 この関数は、チャット補完のリクエストボディパラメーターにstream=Trueが含まれているかどうかを確認します。
エージェントにストリーミングが実装されている場合は、ローカルでテストするとき(CLIを使用)、またはデプロイされたエージェントで予測を行うとき(APIを使用)にストリーミングを有効にします。
エージェントCLIを実行する際には、--streamフラグを使用します。
task agent:cli -- execute --user_prompt 'Write a document about the history of AI.' --stream
構造化クエリーでストリーミングを使うこともできます。
task agent:cli -- execute --user_prompt '{"topic":"Generative AI"}' --stream
APIを呼び出す際、補完パラメーターにstream=Trueを設定します。
from openai import OpenAI

client = OpenAI(
    base_url=CHAT_API_URL,
    api_key=API_KEY,
)

completion = client.chat.completions.create(
    model="datarobot-deployed-llm",
    messages=[
        {"role": "user", "content": "What would it take to colonize Mars?"},
    ],
    stream=True,  # Enable streaming
)

# Process streaming response
for chunk in completion:
    if chunk.choices[0].delta.content:
        print(chunk.choices[0].delta.content, end="", flush=True)
ローカル開発中のエージェントのテスト
テンプレートで提供される開発サーバを使用して、ローカルでエージェントをテストすることができます。 これにより、DataRobotにデプロイすることなく、エージェントコードを実行してデバッグすることができます。
エージェントにテストクエリーを送信するには、開発サーバーが稼働している必要があります。 手動で起動するか、自動起動オプションを使用します。
複数のテストを実行する場合は、開発サーバーを手動で起動します。 開発サーバーは継続的に実行され、ターミナルをブロックするため、1つのターミナルで起動します。
task agent:dev
このターミナルは起動したままにしておきます。 その後、別のターミナルでテストコマンドを実行します。
task agent:cli -- execute --user_prompt 'Write a document about the history of AI.'
エージェントのワークフローが要求した場合、構造化クエリーをプロンプトとして送信することもできます。
task agent:cli -- execute --user_prompt '{"topic":"Generative AI"}'
単一のテスト用に開発サーバーを自動起動します。 START_DEV=1を使用して、開発サーバーを自動的に起動および停止します。
task agent:cli START_DEV=1 -- execute --user_prompt 'Write a document about the history of AI.'
エージェントのワークフローが要求した場合、構造化クエリーをプロンプトとして送信することもできます。
task agent:cli START_DEV=1 -- execute --user_prompt '{"topic":"Generative AI"}'
このコマンドはエージェントをローカルで実行し、出力をコンソールに表示すします。 異なる入力やシナリオをテストするためにクエリーを変更することができます。
実行時依存関係を用いた高速イテレーション
開発を迅速に行うために、実行時依存関係を使用してDockerイメージを再構築することなく、Pythonの依存関係を追加できます。 このプロセスにより、イテレーションの速度が向上します。 実行時依存関係の追加の詳細については、Pythonパッケージの追加に関するドキュメントを参照してください。
DataRobot LLMプレイグラウンドでテスト用のエージェントを構築する
DataRobot LLMプレイグラウンドを使って改良できるカスタムモデルを作成するには、テンプレートプロジェクトのルートから、開発インフラストラクチャ(プレイグラウンド関連のリソースを含む)をデプロイします。 これは、task devまたはdr run devを使用したローカルでのスタックの実行とは異なります。
dr run deploy-dev
また、dr task run deploy-dev(dr run deploy-devと同等)を実行することもできます。 このコマンドは、開発上のターゲット(たとえば、LLMプレイグラウンドや関連するカスタムモデルリソースなど)でPulumiを実行するものであり、本番環境への完全なデプロイは行いません。 これにより、反復的なクラウド開発とテストが大幅に高速化されます。 コマンドの詳細については、CLIドキュメントのdr taskおよびdr runを参照してください。
DataRobot LLMプレイグラウンドでエージェントを扱う例については、エージェントプレイグラウンドのドキュメントを参照してください。
ビルドコマンドに関する注意事項
deploy-devタスクは、スタックの既存のクラウドリソースを置き換えたり、更新したりすることができます。 実運用リソースをすべて作成するには、dr run deploy(または dr task run deploy)を使用します。 リソースが削除または再作成されると、新しいデプロイIDが適用される場合があります。
本番用エージェントのデプロイ
完全な運用レベルのデプロイを作成するには:
dr run deploy
また、dr task run deploy(dr run deployと同等)を実行することもできます。 これは、Agentic StarterテンプレートのREADME(dr run deploy)と一致します。 このコマンドはカスタムモデルを構築し、必要なインフラストラクチャを備えた本番環境のデプロイを作成します。これには時間がかかりますが、完全な本番環境が提供されます。 その他のオプションについては、CLIのtaskおよびrunコマンドを参照してください。 デプロイは、完全な監視、ロギング、スケーリング機能を含む標準的なDataRobotデプロイです。 DataRobotのデプロイの詳細については、デプロイのドキュメントを参照してください。
デプロイされたエージェントのログとトレースを確認する
エージェントがデプロイされたら、DataRobot UIでOpenTelemetry (OTel)のログとトレースを見ることができます。
ログを表示するには、デプロイタブでデプロイを検索してクリックし、アクティビティログタブ、ログの順にクリックします。 ログはOpenTelemetry形式で表示され、ログレベル(INFO、DEBUG、WARN、ERROR)、期間指定によるフィルター(直近 15 分、直近 1 時間、直近 1 日、またはカスタム範囲)、およびサードパーティ製のオブザーバビリティツール(Datadogなど)と連携するためのOTelログAPI経由でのエクスポート機能が含まれます。
アクセスと保持
OTel logs are available for all deployment and target types. Only users with Owner and User roles on a deployment can view these logs. Logs data is stored for a retention period of 30 days, after which it is automatically deleted.
エージェントへのリクエストのエンドツーエンドのパスをたどるトレースを表示するには、デプロイのサービスの正常性タブで、予測の合計数チャートの右上隅にあるトレースを表示をクリックします。 トレーステーブルには、タイムスタンプ、ステータス、トレースID、期間、スパン数、コスト、プロンプト、補完などのトレース情報が表示されます。 トレース行をクリックすると、チャートまたはリスト形式で詳細なスパンが表示されます。これにより、LLM APIの呼び出し、ツールの起動、エージェントのアクションなど、エージェントの実行における個々のステップを確認できます。
詳細については、ログのドキュメントとトレースのドキュメントを参照してください。
Pulumiを使って手動でエージェントをデプロイする
必要に応じて、Pulumiコマンドを手動で実行して、Pulumiコードのデバッグや改良を行うことができます。
# Load environment variables
set -o allexport && source .env

# For build mode only (custom model without deployment)
export AGENT_DEPLOY=0

# Or for full deployment mode (default)
# export AGENT_DEPLOY=1

# Navigate to the infrastructure directory
cd ./infra

# Run Pulumi deployment
pulumi up
環境変数 AGENT_DEPLOYは、Pulumi がカスタムモデルのみを作成するか(AGENT_DEPLOY=0)、カスタムモデルとプロダクションデプロイの両方を作成するか(AGENT_DEPLOY=1)を制御します。 設定されていない場合、Pulumiはデフォルトでフルデプロイモードになります。
Pulumiは、作成または更新するリソースを確認するよう促します。
デプロイされたエージェントワークフローで予測を行う
エージェントワークフローがデプロイされたら、デプロイの予測 > 予測APIタブからリアルタイムの予測スニペットにアクセスします。 デプロイ予測の詳細については、予測APIスニペットに関するドキュメントを参照してください。
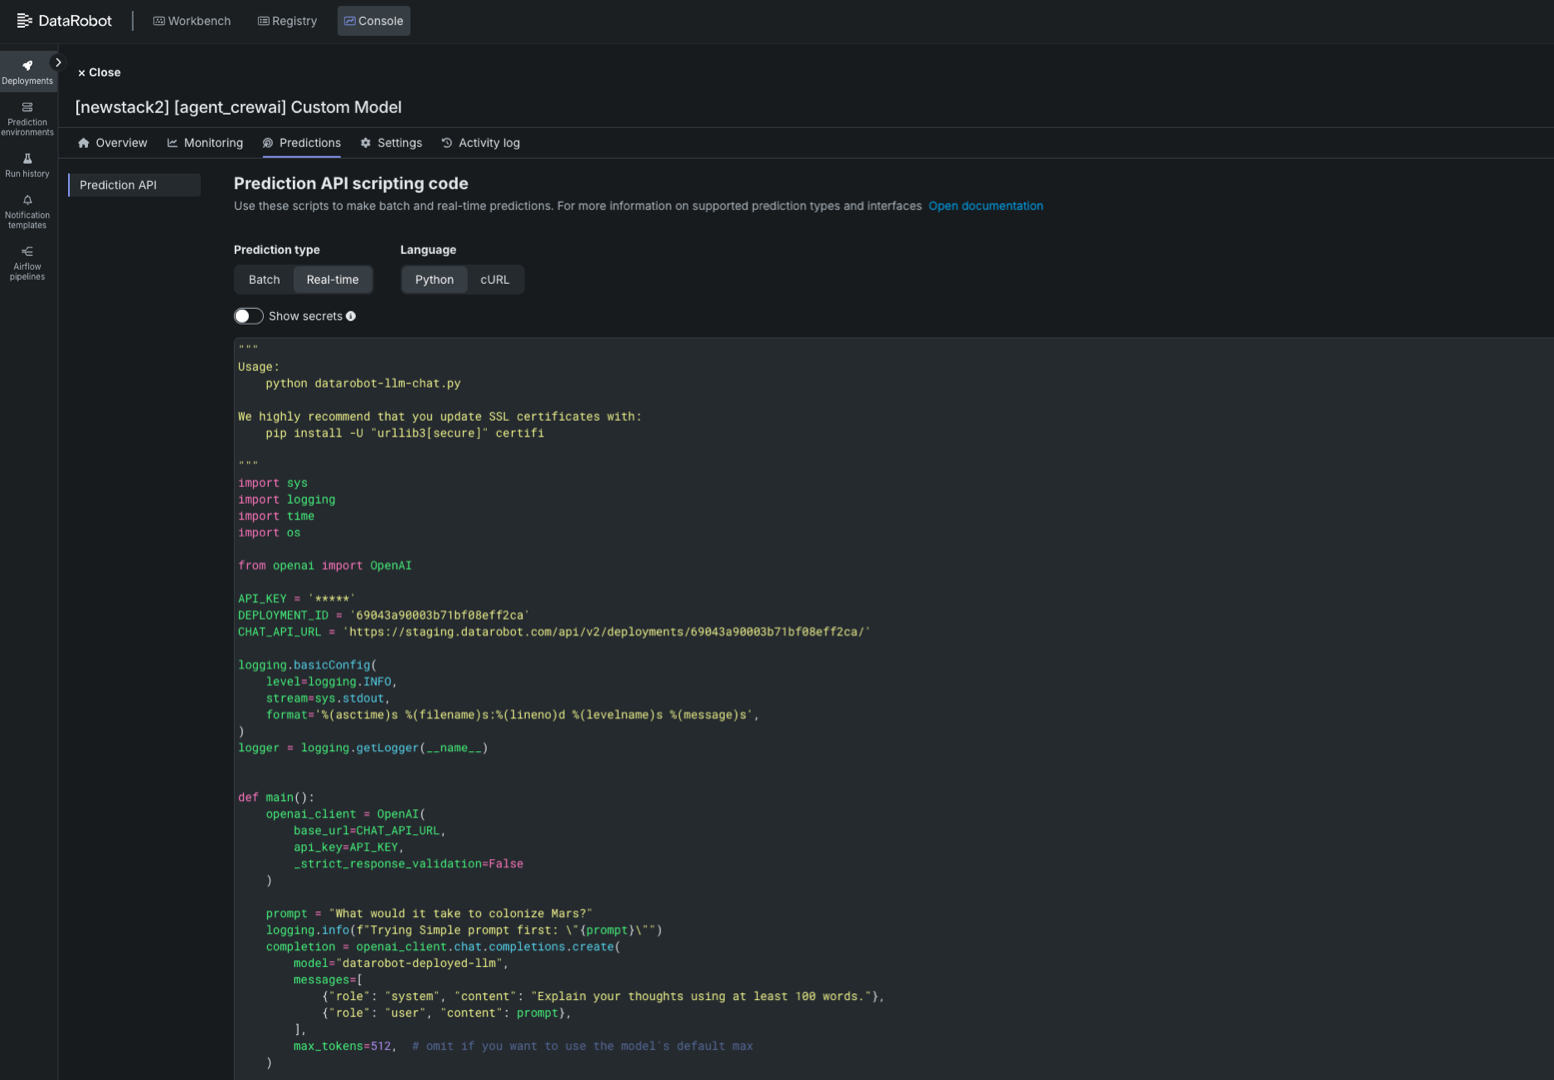
あるいは、以下のスクリプトを修正して、デプロイされたエージェントワークフローを予測し、変数API_KEY、DEPLOYMENT_ID、CHAT_API_URLのプレースホルダーを置き換えることもできます。
import sys
import logging
import time
import os

from openai import OpenAI

API_KEY = '<API_KEY>' # Your API Key
DEPLOYMENT_ID = '<DEPLOYMENT_ID>' # The agentic workflow deployment ID
CHAT_API_URL = '<CHAT_API_URL>' # The chat API URL for the agentic workflow deployment
# For example, 'https://app.datarobot.com/api/v2/deployments/68824e9aa1946013exfc3415/'

logging.basicConfig(
    level=logging.INFO,
    stream=sys.stdout,
    format='%(asctime)s %(filename)s:%(lineno)d %(levelname)s %(message)s',
)
logger = logging.getLogger(__name__)


def main():
    openai_client = OpenAI(
        base_url=CHAT_API_URL,
        api_key=API_KEY,
        _strict_response_validation=False
    )

    prompt = "What would it take to colonize Mars?"
    logging.info(f"Trying Simple prompt first: \"{prompt}\"")
    completion = openai_client.chat.completions.create(
        model="datarobot-deployed-llm",
        messages=[
            {"role": "system", "content": "Explain your thoughts using at least 100 words."},
            {"role": "user", "content": prompt},
        ],
        max_tokens=512,  # omit if you want to use the model's default max
    )

    print(completion.choices[0].message.content)

    return 0

if __name__ == '__main__':
    sys.exit(main())
次のステップ
デプロイ後、エージェントはDataRobot環境で利用できるようになります。 以下を実行することが可能です。
- task agent:cli -- execute-deployment`を使用して、デプロイしたエージェントをテストします。
- エージェントを他のDataRobotサービスと連携します。
- DataRobotのダッシュボードで使用状況とパフォーマンスを監視します。
このリポジトリで提供される例の範囲を超えたエージェントプラットフォーム固有の支援については、各フレームワークの公式ドキュメントを参照してください。
また、特定のフレームワーク向けのパブリックリポジトリには、より複雑なエージェントの構築、ツールの追加、ワークフローやタスクの定義に役立つ、多くの例やドキュメントが用意されています。