Create a vector database
GPU usage for Self-Managed users
When working with datasets over 1GB, Self-Managed users who do not have GPU usage configured on their cluster may experience serious delays. Email DataRobot Support, or visit the Support site, for installation guidance.
The basic steps for creating a vector database for use in a playground are:
-
Add an appropriate data source from the Data Registry or File Registry.
-
Set the basic configuration, including a data source and embedding model.
-
Set chunking.
Use the Vector databases tile in the Use Case directory to manage built vector databases and deployed embedding models. You will ultimately store the newly created vector database (the output of the vector database creation process) within the Use Case. They are stored either as internal vector databases (FAISS) or on connected provider instances.
Add a vector database
First, add a vector database from one of multiple points within the application. Each method opens the Create vector database modal and uses the same workflow from that point.
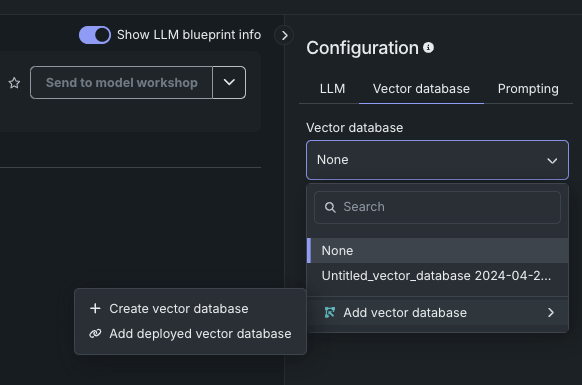
From within a Use Case, click the Add dropdown and expand Vector database:
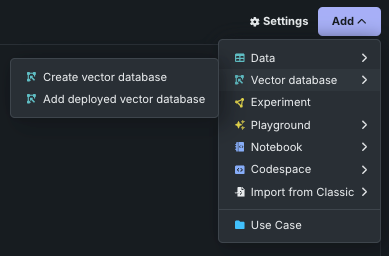
- Choose Create vector database to open the vector database creation modal.
- Choose Add deployed vector database to add a deployment containing a vector database that you previously registered and deployed.
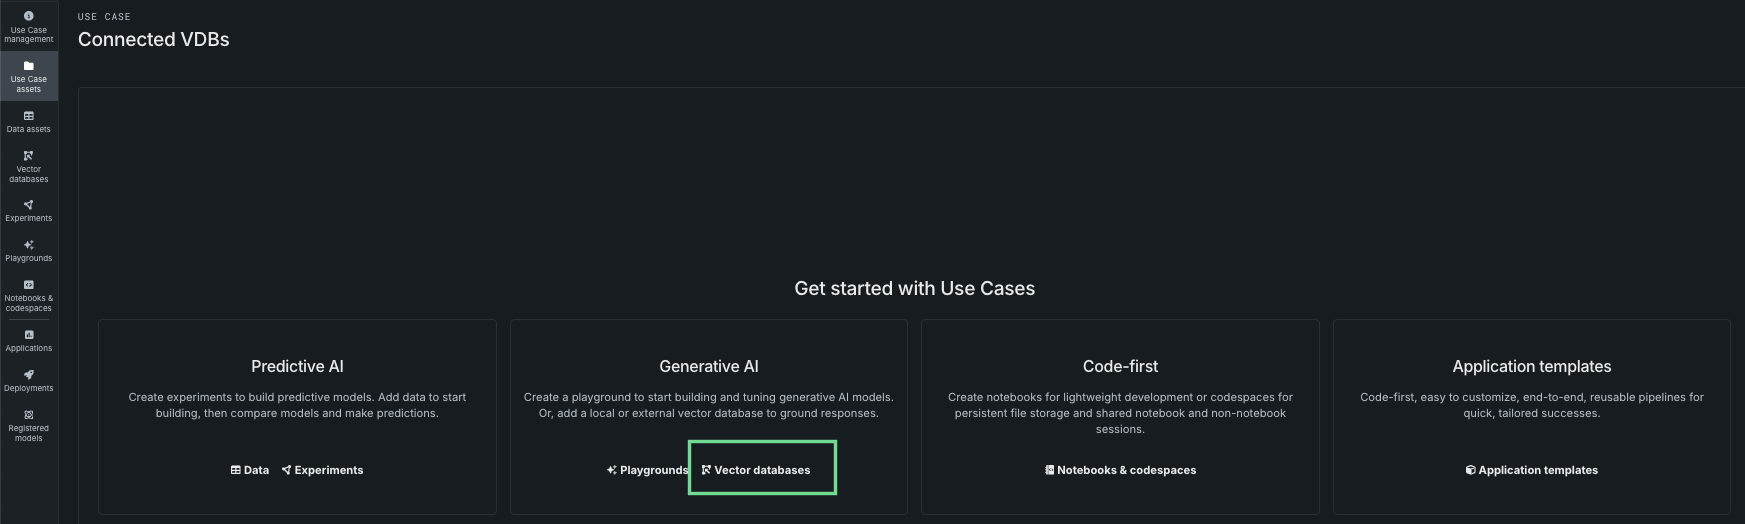
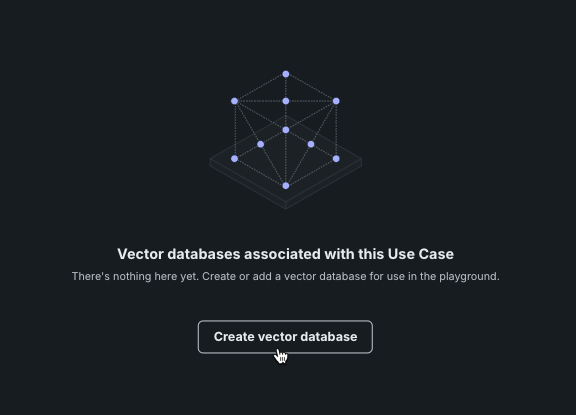
If there are not yet any assets associated with the Use Case, you can add a vector database from the tile landing page.
From the Data assets tile, open the Actions menu associated with a Use Case and select Create vector database.

The Actions menu is only available if the data is detected as eligible, which means:
- Processing of the dataset has finished.
- The data source has the mandatory
documentanddocument_file_pathcolumns. - There are no more than 50 metadata columns.
From the Vector databases tile, click the Add dropdown:
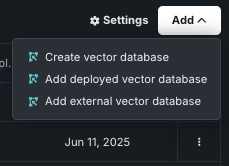
- Choose Create vector database to open the vector database creation modal.
- Choose Add deployed vector database to add a deployment that contains a vector database that you previously registered and deployed.
- Choose Add external vector database to begin assembling a custom vector database in the Registry workshop, which can then be linked to the Use Case.
If there are not yet any vector databases associated with the Use Case, the tile landing page will lead you to create one.
When in a playground, use the Vector database tab in the configuration section of the LLM blueprint:
Start vector database creation
Once you have selected to create a vector database using one of the methods above, set:
- A provider for the output of the vector database creation process, either DataRobot-resident or a connected source.
- Basic configuration.
- Text chunking.
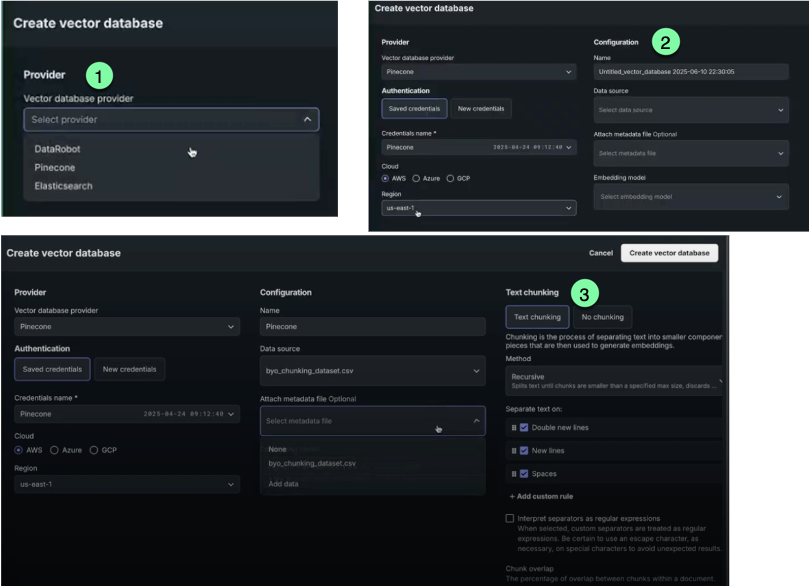
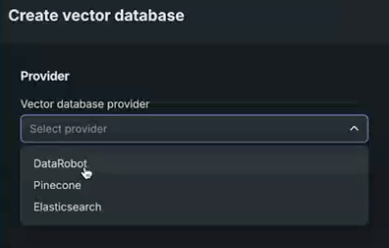
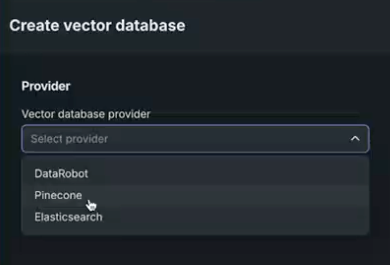
First, select a vector database provider, either internal or connected (external) with credentials. This setting determines where the output of the vector database creation process lands. The input to the creation process is always either the Data or File Registry.
| Provider/type | Description | Max size |
|---|---|---|
| DataRobot/resident | An internal FAISS-based vector database, hosted locally in the Data Registry. These vector databases can be versioned and do not require credentials. | 10GB |
| BYO | A deployment containing a vector database that you previously registered and deployed. Use a notebook to bring-your-own vector database via a custom model deployment. | 10GB |
| Connected | An external vector database that allows you to use your own Pinecone or Elasticsearch instance, with credentials. This option allows you to choose where content is stored but still experiment with RAG pipelines built in DataRobot and leverage DataRobot's out-of-the-box embedding and chunking functionality. | 100GB |
Use a resident vector database
Using a resident vector database means using data that is accessible within the application, either via the Data Registry or a custom model. Internal vector databases in DataRobot are optimized to maintain retrieval speed while ensuring an acceptable retrieval accuracy. See the following for dataset requirements and specific retrieval methods:
-
Select DataRobot for an internal vector database stored in the Data Registry.
Use an external vector database
To use an external (BYO) vector database, use the Add > Add deployed vector database option that is available from the Vector database tile. Before adding a vector database this way, develop the vector database externally with the DataRobot Python client, assemble a custom model for it, and then deploy that custom model. See an example using ChromaDB.
Use a connected vector database
DataRobot allows direct connection to either Pinecone or Elasticsearch external data sources for vector database creation. In this case, the data source is stored locally in the Data Registry, configuration settings are applied, and the created vector database is written back to the provider. Select your provider in the Create vector database modal.
For either, select the provider and enter authentication information.
Connect to Pinecone
All connection requests to Pinecone must include an API key for connection authentication. The credentials are created in your Pinecone instance and stored in DataRobot's credential management system.
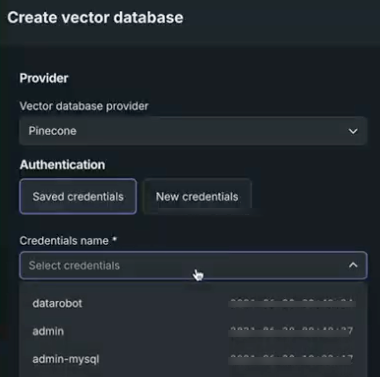
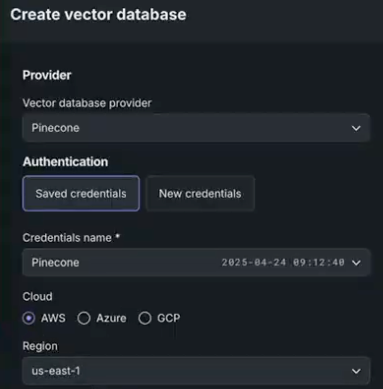
After selecting Pinecone as the provider, choose whether to use existing or new credentials.
When using saved credentials, simply select the appropriate named credentials from the dropdown. Available credentials are those that are created and stored in the credential management system:
If you do not have a Pinecone API key saved to the credential management system, click New credentials. A modal appears with fields for the API key and an option to change the display name. In the API key field, paste the key you created in the Pinecone console. Once added, DataRobot saves the Pinecone API key in the credential management system for reuse when working with Pinecone vector databases.
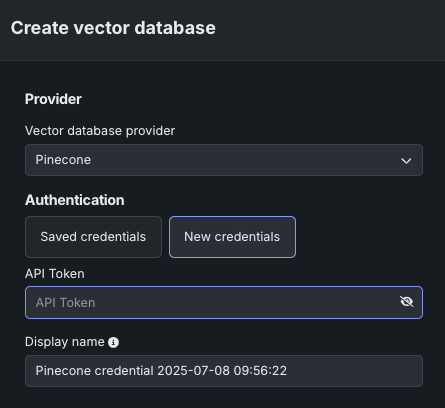
Once the token is input, select a cloud provider for your Pinecone instance—AWS, Azure, or GCP— and assigned cloud region.
After selection, the vector database configuration options become available.
Connect to Elasticsearch
All connection requests to the Elasticsearch cluster must include a username and password (basic credentials) or an API key for connection authentication. The credentials are created in your Elasticsearch instance and stored in DataRobot's credential management system for reuse when working with Elasticsearch vector databases.
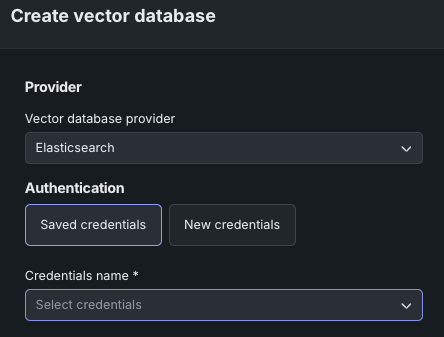
After selecting Elasticsearch as the provider, choose whether to use existing or new credentials.
When using saved credentials, simply select the appropriate named credentials from the dropdown. Available credentials are those that are created and stored in the credential management system:
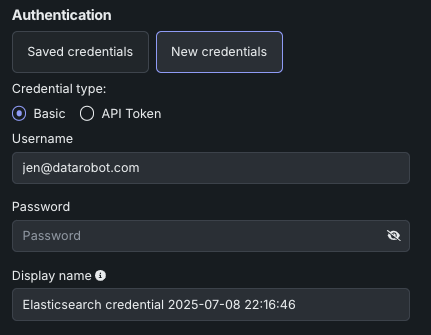
If you do not have, or wish to add, an Elasticsearch API key saved to the credential management system, click New credentials. There are two types of credentials available for selection in the modal that appears.
-
Basic: Basic credentials consist of the username and password you use to access the Elasticsearch instance. Enter them here and they will be saved to DataRobot.
-
API key: In the API key field, paste the key you created, as described in the Elasticsearch documentation.
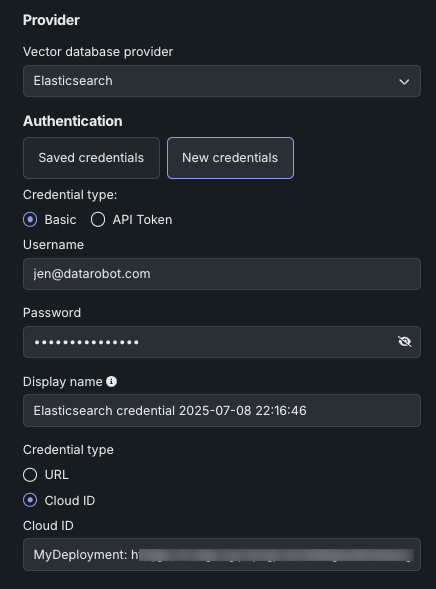
Once the credential type is selected, select a connection method, either Cloud ID (recommended by Elastic) or URL. See the Elasticsearch documentation for information on finding your cloud ID.
For self-managed users, in order for DataRobot to connect, the URL needs to be configured with a certificate signed by a trusted certificate authority (CA). Contact DataRobot Support for assistance.
After selection, the vector database configuration options become available.
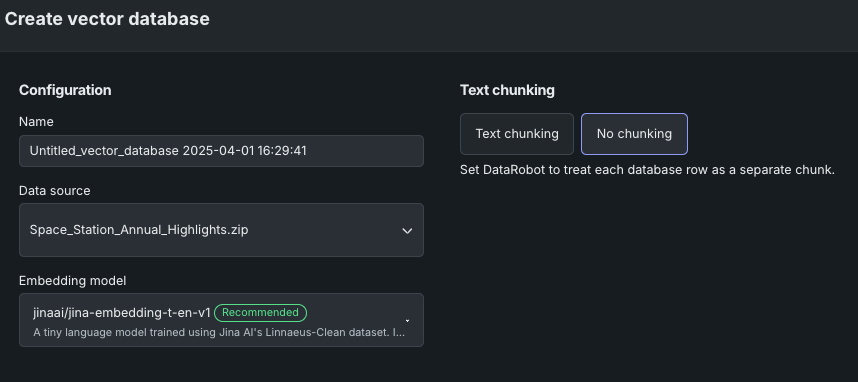
Set basic configuration
The following table describes the configuration settings used in vector database creation:
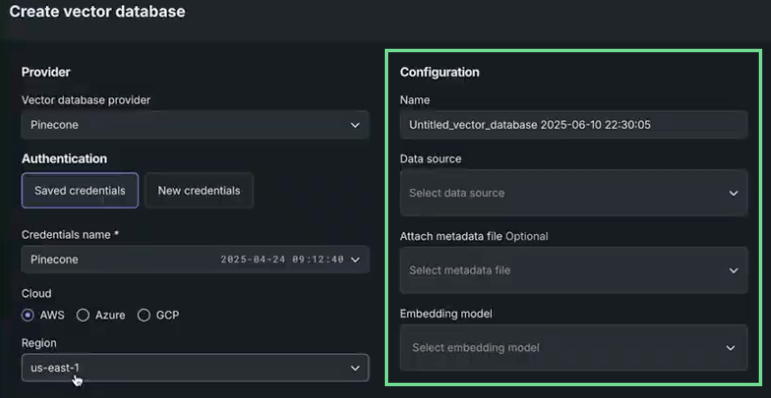
| Field | Description |
|---|---|
| Name | The name the vector database is saved with. This name displays in the Use Case Vector databases tile and is selectable when configuring playgrounds. |
| Data source | The dataset used as the knowledge source for the vector database. The list populates based on the entries in the Use Case's Vector databases tile, if any. If you started the vector database creation from the action menu on the Data assets tile, the field is prepopulated with that dataset. If there are no associated vector databases or none present are applicable, use the Add data option. |
| Attach metadata | Appends columns to the vector database to support filtering the citations returned by the prompt query. |
| Embedding model | The model that defines the type of embedding used for encoding data. |
Add a data source
If no data sources are available, or if you want to add new sources, choose Add data in the Data source dropdown. The Add data modal opens.
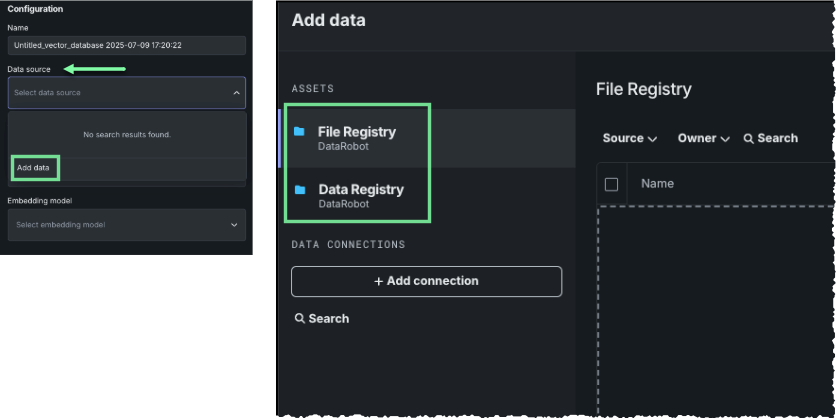
Vector database creation supports ZIP and CSV dataset formats and specific supported file types within the datasets. You can access a supported dataset from either the File Registry or the Data Registry.
| Registry type | Description |
|---|---|
| File | A "general purpose" storage system that can store any type of data. In contrast to the Data Registry, the File Registry does not do CSV conversion on files uploaded to it. In the UI, vector database creation is the only place where the File Registry is applicable, and it is only accessible via the Add data modal. While any file type can be stored there, regardless of registry type the same file types are supported for vector database creation. |
| Data | In the Data Registry, a ZIP file is converted into a CSV with the content of each member file stored as row of the CSV. The file path for each file becomes the document_file_path column and the file content (text or base64-encoding of the file) becomes the document column. |
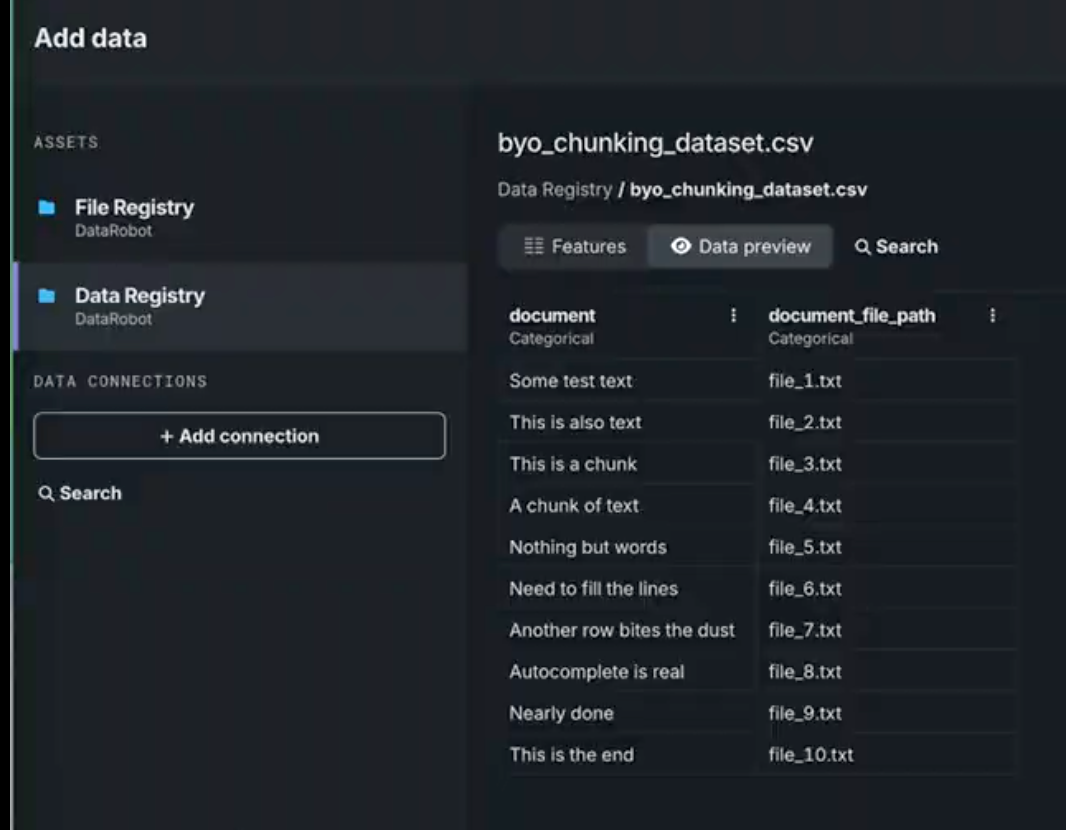
Choose a dataset. Datasets from the Data Registry show a preview of the chunk (document) and the file it was sourced from (document_file_path).
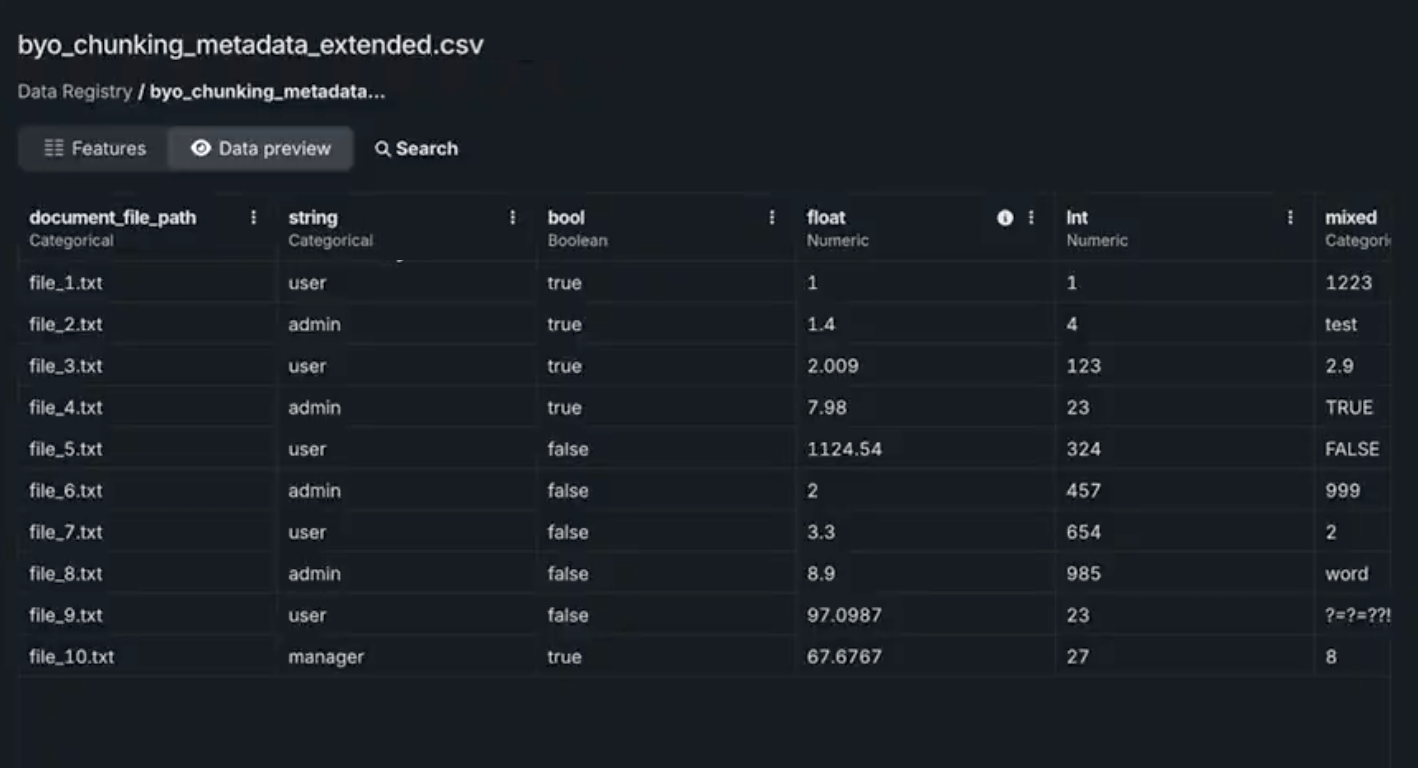
Attach metadata
Optionally, you can select an additional file to define the metadata to attach to the chunks in the vector database. That file must reside in the Data Registry and must contain the document_file_path columns. The document column is optional. You can append up to 50 additional columns, which, can be used for filtering during prompt queries.
Either select an available file, or use the Add data modal to add a metadata file to the Data Registry. In this example, the file has one column, document_file_path, which defines the file or chunk, as well as a variety of other columns that define the metadata.
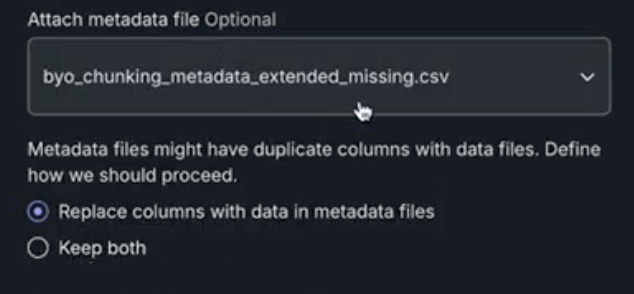
Once you select a metadata file, you are prompted to choose whether, if you also have metadata in the dataset, DataRobot should keep both sets of metadata or overwrite with the new file. Whether to replace or merge the metadata only applies to if there are duplicate columns between the dataset and metadata dataset. Non-duplicate metadata columns from both are always maintained.
Duplicate metadata example
A dataset has col1 and col2. The metadata file has col2 and col3. The metadata going into the vector database is then col1, col2, and col3. Since col2 is a duplicate, DataRobot either does the following, based on the settings:
- Replace: DataRobot uses the values from the metadata file.
- Keep both: DataRobot merges the two columns, with precedence going to the metadata file.
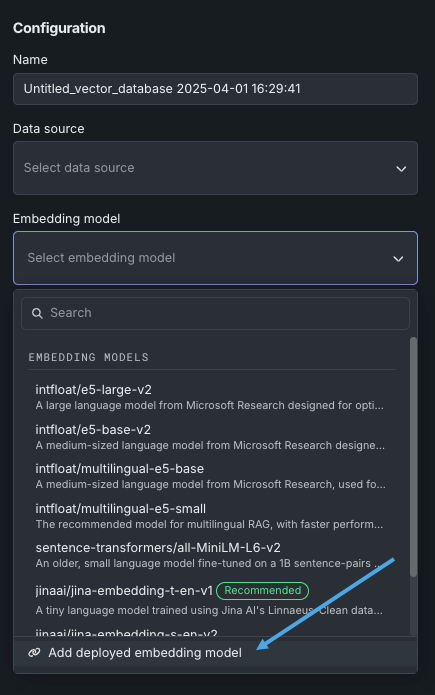
Set the embedding model
To encode your data, select the embedding model that best suits your Use Case. Use one of the DataRobot-provided embeddings or a BYO embedding. DataRobot supports the following types of embeddings; see the full embedding descriptions in the here.
| Embedding type | Description |
|---|---|
| cl-nagoya/sup-simcse-ja-base | A medium-sized language model for Japanese RAG. |
| huggingface.co/intfloat/multilingual-e5-base | A medium-sized language model used for multilingual RAG performance across multiple languages. |
| huggingface.co/intfloat/multilingual-e5-small | A smaller-sized language model used for multilingual RAG performance with faster performance than the multilingual-e5-base. |
| intfloat/e5-base-v2 | A medium-sized language model used for medium-to-high RAG performance. With fewer parameters and a smaller architecture, it is faster than e5_large_v2. |
| intfloat/e5-large-v2 | A large language model designed for optimal RAG performance. It is classified as slow due to its architecture and size. |
| jinaai/jina-embedding-t-en-v1 | A tiny language model pre-trained on the English corpus and is the fastest, and default, embedding model offered by DataRobot. |
| jinaai/jina-embedding-s-en-v2 | Part of the Jina Embeddings v2 family, this embedding model is the optimal choice for long-document embeddings (large chunk sizes, up to 8192). |
| sentence-transformers/all-MiniLM-L6-v2 | A small language model fine-tuned on a 1B sentence-pairs dataset that is relatively fast and pre-trained on the English corpus. It is not recommended for RAG, however, as it was trained on old data. |
| Add deployed embedding model | Select a deployed embedding model to use during vector database creation. Column names can be found on the deployment's overview page in the Console. |
The embedding models that DataRobot provides are based on the SentenceBERT framework, providing an easy way to compute dense vector representations for sentences and paragraphs. The models are based on transformer networks (BERT, RoBERTA, T5) trained on a mixture of supervised and unsupervised data, and achieve state-of-the-art performance in various tasks. Text is embedded in a vector space such that similar text is grouped more closely and can efficiently be found using cosine similarity.
Add a deployed embedding model
While adding a vector database, you can select an embedding model deployed as an unstructured custom model. On the Create vector database panel, click the Embedding model dropdown, then click Add deployed embedding model.
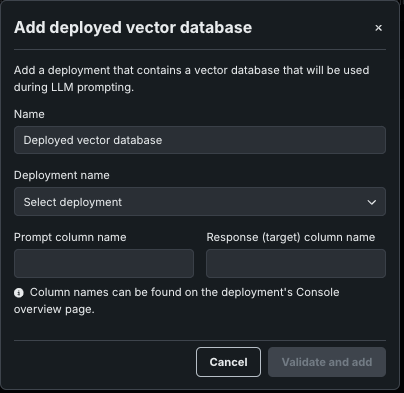
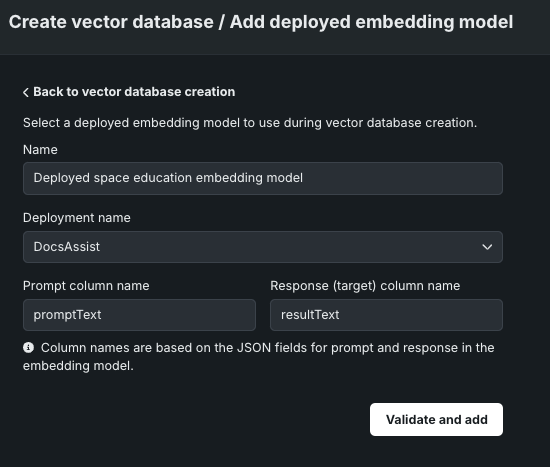
On the Add deployed embedding model panel, configure the following settings:
| Setting | Description |
|---|---|
| Name | Enter a descriptive name for the embedding model. |
| Deployment name | Select the unstructured custom model deployment. |
| Prompt column name | Enter the name of the column containing the user prompt, defined when you created the custom embedding model in the workshop (for example, promptText). |
| Response (target) column name | Enter the name of the column containing the LLM response, defined when you created the custom embedding model in the workshop (for example, responseText or resultText). |
After you configure the deployed embedding model settings, click Validate and add. The deployed embedding model is added to the Embedding model dropdown list:
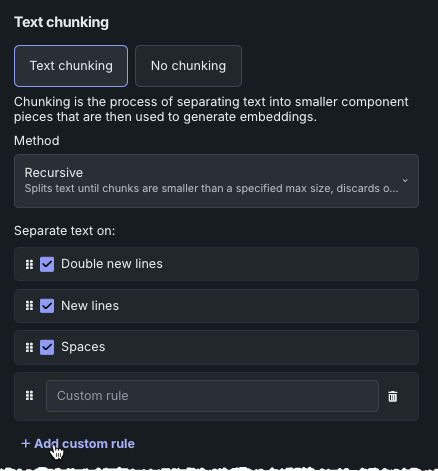
Chunking settings
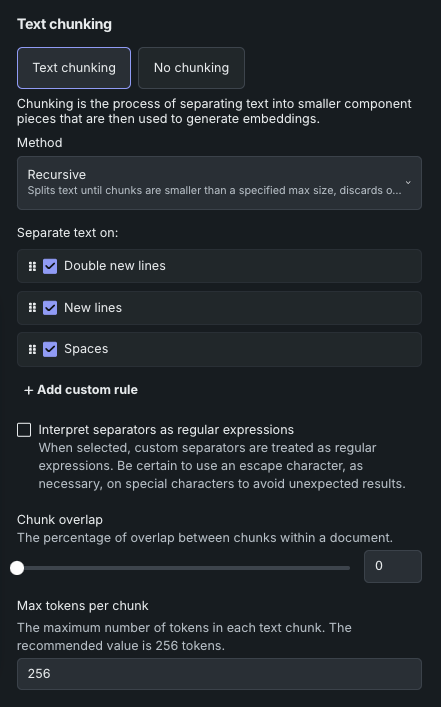
Text chunking is the process of splitting a text document into smaller text chunks that are then used to generate embeddings. You can either:
- Choose Text chunking and further configure how chunks are derived—method, separators, and other parameters.
- Select No chunking. DataRobot will then treat each row as a chunk and directly generate an embedding on each row.
Chunking method
The chunking method sets how text from the data source is divided into smaller, more manageable pieces. It is used to improve the efficiency of nearest-neighbor searches so that when queried, the database first identifies the relevant chunks that are likely to contain the nearest neighbors, and then searches within those chunks rather than searching the entire dataset.
| Method | Description |
|---|---|
| Recursive | Splits text until chunks are smaller than a specified max size, discards oversized chunks, and if necessary, splits text by individual characters to maintain the chunk size limit. |
| Semantic | Splits larger text into smaller, meaningful units based on the semantic content instead of length (chunk size). It is a fully automatic method, meaning that when it is selected, no further chunking configuration is available—it creates chunks where sentences are semantically "closed.". See the deep dive below for more information. |
Deep dive: Chunking methods
Recursive text chunking works by recursively splitting text documents according to an ordered list of text separators until a text chunk has a length that is less than the specified maximum chunk size. If generated chunks have a length/size that is already less than the max chunk size, the subsequent separators are ignored. Otherwise, DataRobot applies, sequentially, the list of separators until chunks have a length/size that is less than the max chunk size. In the end, if a generated chunk is larger than the specified length, it is discarded. In that case, DataRobot will use a "separate each character" strategy to split on each character and then merge consecutive split character chunks up to the point of the max chunk size limit. If no "split on character" is listed as a separator, long chunks are cut off. That is, some parts of the text will be missing for the generation of embeddings but the entire chunk will still be available for document retrieval.
Semantic chunking is the process of breaking down a larger piece of text into smaller, meaningful units (or "chunks") based on the semantic content or meaning of the text, rather than just arbitrary character or word limits. Instead of splitting the text based solely on length, semantic chunking attempts to keep coherent ideas or topics intact within each chunk. This method is useful for tasks like natural language processing (NLP), where understanding the meaning and context of the text is important for tasks like information retrieval, summarization, or generating embeddings for machine learning models. For example, in a semantic chunking process, paragraphs might be kept together if they discuss the same topic, even if they exceed a specific size limit, ensuring that the chunks represent complete thoughts or concepts.
That said, the DataRobot implementation of semantic chunking for out-of-the-box embedding models automatically detects the maximum supported chunk size of the selected embedding model and uses it as a safety cutoff. This forces a chunk to be cut if it would exceed the embedding model's maximum input length to ensure that all text is actually embedded. BYO embeddings, which use the default version of the algorithm, do not support the safety cutoff. Chunks can be of any length, even exceeding the embedding model's maximum input length, which can result text being cut off (and therefore not embedded). The non-embedded text is still included in the citation returned from the vector database.
Work with separators
Separators are "rules" or search patterns (not regular expressions although they can be supported) for breaking up text by applying each separator, in order, to divide text into smaller components—they define the tokens by which the documents are split into chunks. Chunks will be large enough to group by topic, with size constraints determined by the model’s configuration. Recursive text chunking is the method applied to the chunking rules.
Each vector database starts with four default rules, which define what to split text on:
- Double new lines
- New lines
- Spaces
While these rules use a word to identify them for easy understanding, on the backend they are interpreted as individual strings (i.e., \n\n, \n, " ", "").
There may be cases where none of the separators are present in the document, or there is not enough content to split into the desired chunk size. If this happens, DataRobot applies a "next-best character" fallback rule, moving characters into the next chunk until the chunk fits the defined chunk size. Otherwise, the embedding model would just truncate the chunk if it exceeds the inherent context size.
Add custom rule
You can add up to five custom separators to apply as part of your chunking strategy. This provides a total of nine separators (when considered together with the four defaults). The following applies to custom separators:
- Each separator can have a maximum of 20 characters.
-
There is no "translation logic" that allows use of words as a separator. For example, if you want to chunk on punctuation, you would need to add a separator for each type.
-
The order of separators matters. To reorder separators, simply click the cell and drag it to the desired location.
-
To delete separators, whether in fine-tuning your chunking strategy or to free space for additional separators, click the trashcan icon. You cannot delete the default separators.
Use regular expressions
Select Interpret separators as regular expressions to allow regular expressions in separators. It is important to understand that with this feature activated, all separators are treated as regex. This means, for example, that adding "." matches and splits on every character. If you instead want to split on "dots," you must escape the expression (i.e., "\."). This rule applies to all separators, both custom and predefined (which are configured to act this way).
Chunking parameters
Chunking parameters further define the output of the vector database. The default values for chunking parameters are dependent on the embedding model.
Chunk overlap
Overlapping refers to the practice of allowing adjacent chunks to share some amount of data. The Chunk overlap parameter specifies the percentage of overlapping tokens between consecutive chunks. Overlap is useful for maintaining context continuity between chunks when processing the text with language models, at the cost of producing more chunks and increasing the size of the vector database.
Retrieval limits
The value you set for Top K (nearest neighbors) instructs the LLM on how many relevant chunks to retrieve from the vector database. Chunk selection is based on similarity scores. Consider:
- Larger values provide more comprehensive coverage but also require more processing overhead and may include less relevant results.
- Smaller values provide more focused results and faster processing, but may miss relevant information.
Max tokens specifies:
- The maximum size (in tokens) of each text chunk extracted from the dataset when building the vector database.
- The length of the text that is used to create embeddings.
- The size of the citations used in RAG operations.
Save the vector database
Once the configuration is complete, click Create vector database to make the database available in the playground.
Manage vector databases
The Vector databases tile lists all the vector databases and deployed embedding models associated with a Use Case. Vector database entries include information on the versions derived from the parent; see the section on versioning for detailed information on vector database versioning.
You can view all vector databases (and associated versions) for a Use Case from the Vector database tab within the Use Case. For external vector databases, you can see only the source type. Because these vector databases aren't managed by DataRobot, other data is not available for reporting.
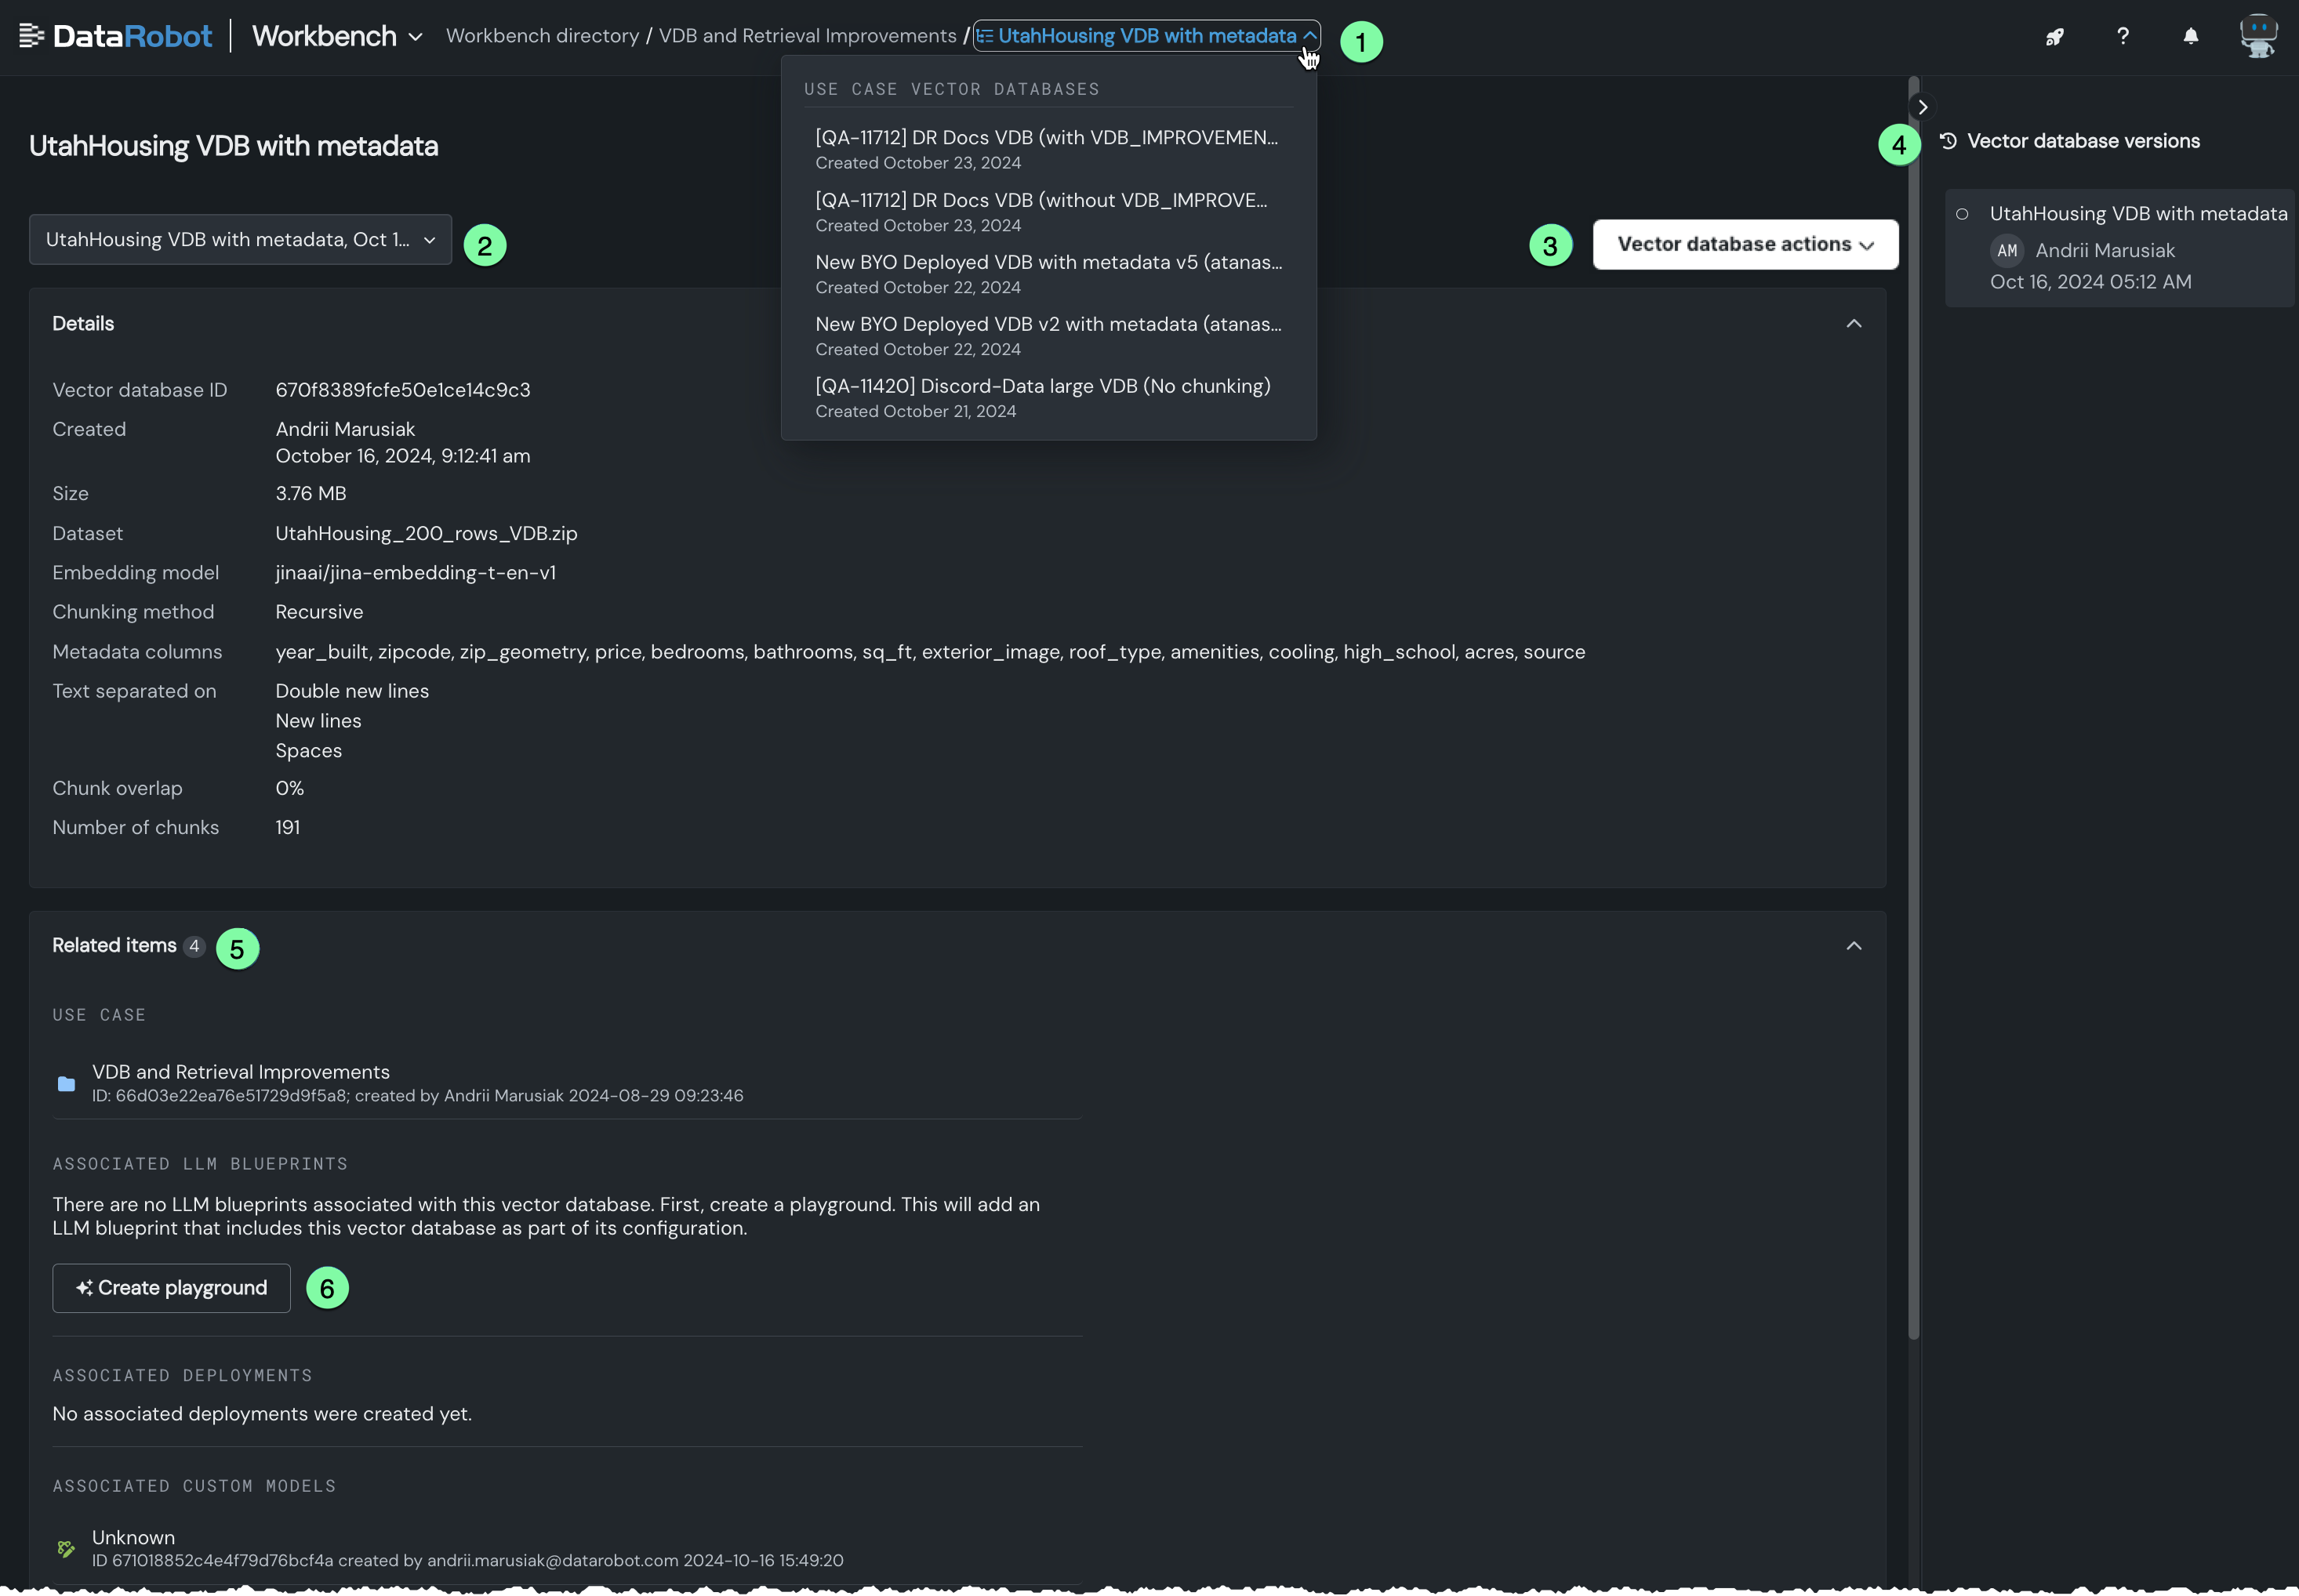
Click on any entry in the Vector databases tile listing to open a new modal where you can view an expanded view of that database's configuration and related items.
You can:
| Description | |
|---|---|
| 1 | Select a different vector database to explore from the dropdown in the breadcrumbs. |
| 2 | Select a different version of the vector database to explore from the dropdown. When you click a version, the details and reported assets (Related items) update to those associated with the specific version. Learn more about versioning. |
| 3 | Execute a variety of vector database actions. |
| 4 | View the versioning history. When you click a version, the details and reported assets (Related items) update to those associated with the specific version. Learn more about versioning. |
| 5 | View items associated with the vector database, such as the related Use Case and LLM blueprints and deployed customer and registered models that use the vector database. Click on an entity to open it in the corresponding Console tab. |
| 6 | Create a playground that uses the selected database. |
Vector database actions
The actions dropdown allows you to apply an action to the version of the vector database you are viewing. See the versioning documentation for additional information.

| Action | Description |
|---|---|
| Create playground using this version | Opens a new playground with the vector database loaded into the LLM configuration. |
| Create new version from this version | Creates a new version of the vector database that is based on the version that is currently selected. |
| Export this version to the Data Registry | Exports the latest vector database version to Data Registry. It can then be used in different Use Case playgrounds. |
| Send to the workshop | Send the vector database to the workshop for modification and deployment. For more information, see register and deploy vector databases. |
| Deploy this version | Deploy the latest version of the vector database to the selected prediction environment. For more information, see register and deploy vector databases. |
| Delete vector database | Deletes the parent vector database and all versions. Because the vector databases used by deployments are snapshots, deleting a vector database in a Use Case does not affect the deployments using that vector database. The deployment uses an independent snapshot of the vector database. |
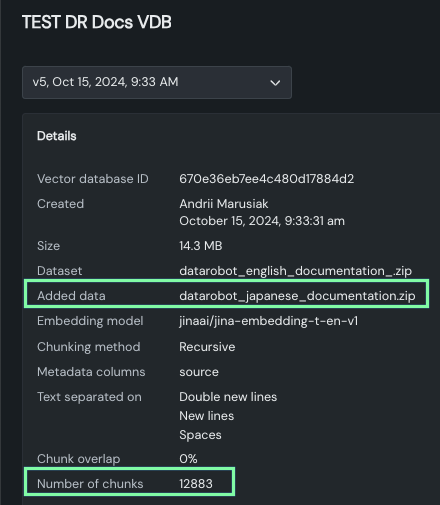
Vector database details
The details section of the vector database expanded view reports information for the selected version, whether you selected the version from the dropdown or the right-hand panel.
- Basic vector database metadata: ID, creator and creation date, data source name and size.
- Chunking configuration settings: Embedding column and chunking method and settings.
- Metadata columns: Names of columns from the data source, which can later be used for metadata filtering..
Use this area to quickly compare versions to see how configuration changes impact chunking results. For example, notice how the size and number of chunks changes between the parent version that uses the DataRobot English language documentation:
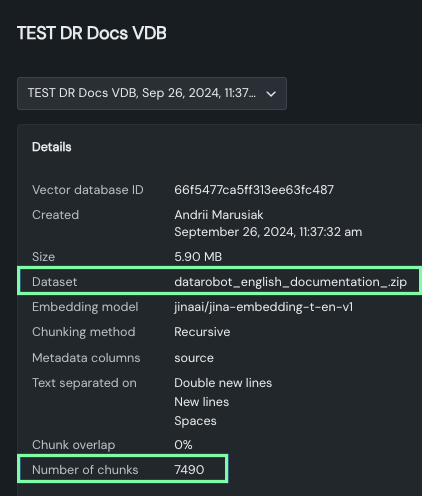
And with the addition of the Japanese language documentation: