Manage data connections
The DataRobot connectivity platform allows users to integrate with their data stores using either the DataRobot provided connectors or uploading the JDBC driver provided by the data store.
The "self-service" database connectivity solution is a standardized, platform-independent solution that does not require complicated installation and configuration. Once configured, you can read data from production databases for model building and predictions. Connectivity to your data source allows you to quickly train and retrain models on that data, and avoids the unnecessary step of exporting data from your database to a CSV file for ingest into DataRobot. It allows access to more diverse data, which results in more accurate models.
Users with the technical abilities and permissions can configure and establish data connections. Other users in the organization can then leverage those connections to solve business problems.
See also a list of supported connections in DataRobot.
Availability information
The ability to add, update, and remove JDBC drivers and connectors is only available on Self-Managed AI Platform installations. Before users can import data into DataRobot, the administrator must upload JDBC drivers and configure database connections for those drivers.
Required permission: Can manage JDBC database drivers
Data store vs. data connection
In DataRobot, data store and data connection are used interchangeably, and both refer to where your data is stored and managed as well as the dynamic link to that data. You will see both terms in the UI.
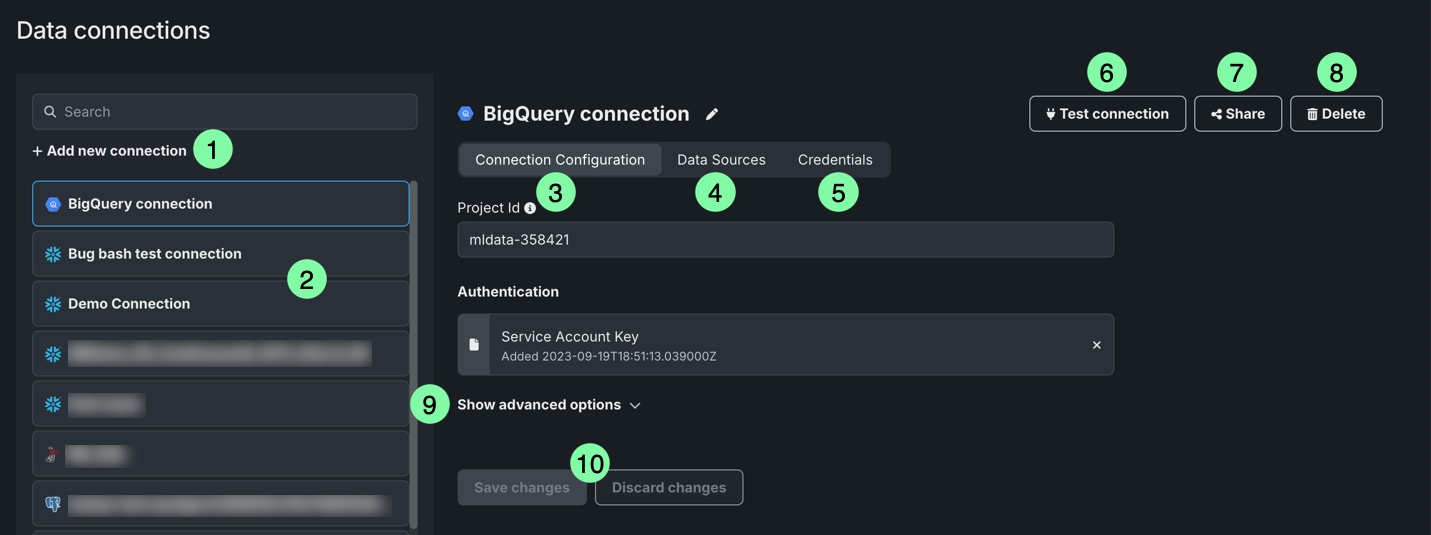
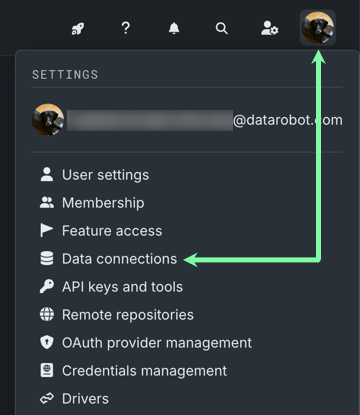
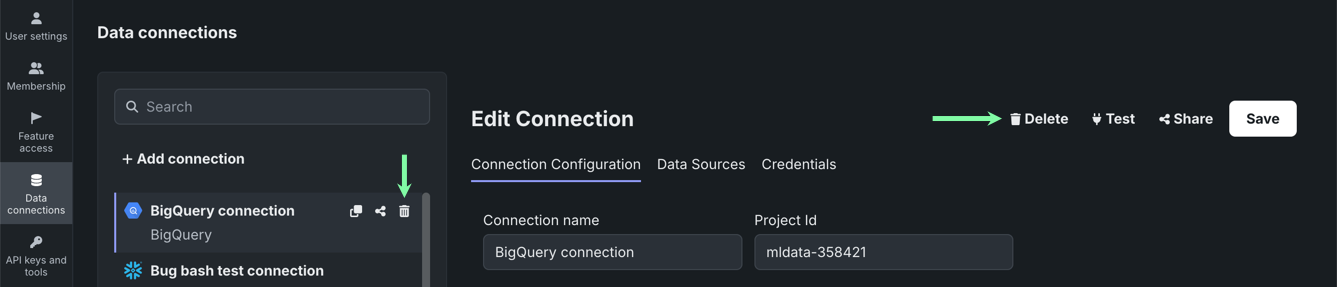
This page describes how to work with data connections from the Account Settings > Data connections tile:
| Element | Description | |
|---|---|---|
| 1 | + Add connection | Allows you to add and configure a new data connection. |
| 2 | List of connections | Lists all data connections associated with your DataRobot account. |
| 3 | Connection Configuration | Displays the parameters used to establish a connection between DataRobot and the external data source. |
| 4 | Data Sources | Displays a list of the datasets imported from the data connection. |
| 5 | Credentials | Displays a list of authentication credentials associated with the data connection. |
| 6 | Delete | Deletes the data connection. |
| 7 | Test | Tests the data connection configuration, including authentication credentials. |
| 8 | Share | Allows you to share the data connection with other users, groups, or organizations, as well as assign permissions. |
| 9 | Save | Saves any changes made to the connection configuration. |
| 10 | Show additional parameters | Allows you to add parameters to the connection configuration. |
Database connectivity options
By default, users can create, modify (depending on their role), and share data connections. You can also create data sources.
Below describes the various ways you can establish database connectivity in DataRobot NextGen:
- From Account Settings > Data Connections, create data connection configuration(s).
- From Registry > Data, click Add > Data connection.
- From the Browse data modal within a Use Case.
(Optional) Depending on role, you can also share data connections with others.
Allowed source IP addresses
Any connection initiated from DataRobot originates from an allowed IP addresses. See a full list at Allowed source IP addresses.
Create a new connection
To create a new data connection, open your Account settings > Data connections.
Then, click + Add connection.
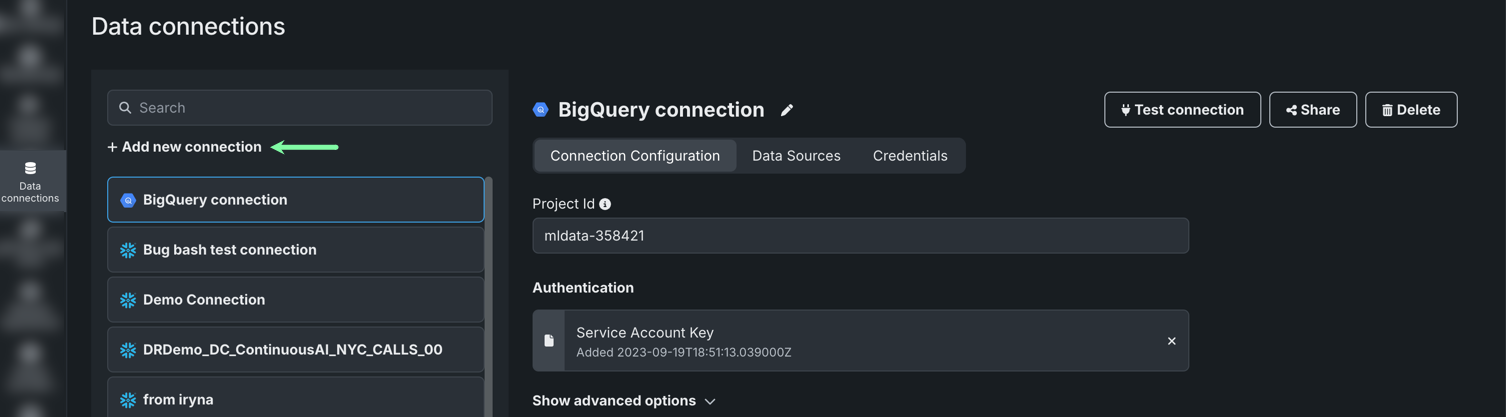
All existing connections are displayed on the left. If you select a configured connection, its configuration options are displayed in the center. While there are multiple methods to connect to a data source, the configuration process described here is used in all cases.
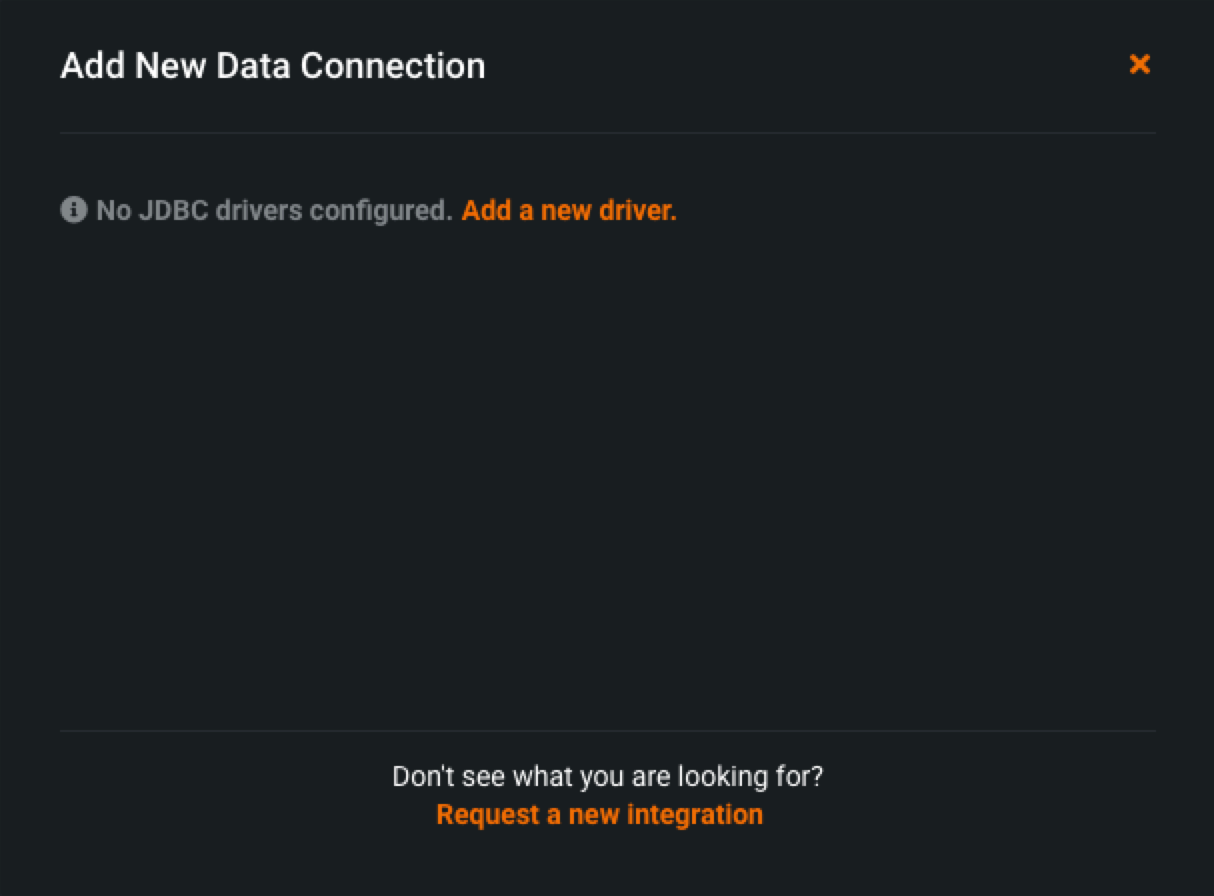
Self-Managed AI Platform installations
For Self-Managed AI Platform installations, you might not see any data stores listed. In that case, click Add a new driver and add a driver from the list of supported connections.
Saved credentials
If you previously added credentials for your datastore via the [**Credentials Management**](stored-creds.md#credentials-management){ target=_blank } tile, you can click **Select saved credentials** and choose them from the list instead of adding them manually.
Additional parameters
The parameters provided for modification in the data connection configuration screen are dependent on the selected driver. Available parameters are dependent on the configuration done by the administrator who added the driver.
Many other fields can be found in a searchable expanded field. If a desired field is not listed, open Show additional parameters and click Add parameter to include it.
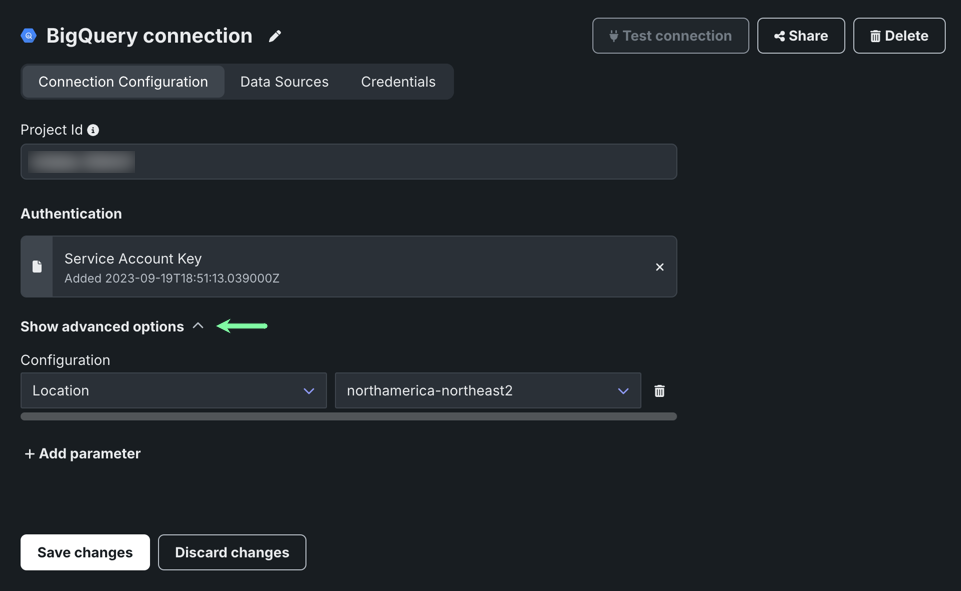
Click the delete icon to remove a listed parameter from the connection configuration.
Note
Additional parameters may be required to establish a connection to your database. These parameters are not always pre-defined in DataRobot, in which case, they must be manually added.
For more information on the required parameters, see the documentation for your database.
Test the connection
Once your data connection is created, test the connection by clicking Test.

In the resulting dialog box, enter or use stored credentials for the database identified in the JDBC URL field or the parameter-based configuration of the data connection creation screen. Click Sign in and when the test passes successfully, click Close to return to the Data Connections tile and create your data sources.
Snowflake and Google BigQuery users can set up a data connection using OAuth single sign-on. Once configured, you can read data from production databases to use for model building and predictions.
For information on setting up a data connection with OAuth, the required parameters, and troubleshooting steps, see the documentation for your database: Snowflake or BigQuery.
Edit a connection
You can modify existing data connections, including configuration parameters, as well as associated credentials and data sources.
To edit a connection, click on the data connection in the left panel. See below for a description of each tab—what information is displayed on each and the available edit options:
On the Connection Configuration tab, you can modify connection parameters, including adding new parameters and selecting or creating new credentials.

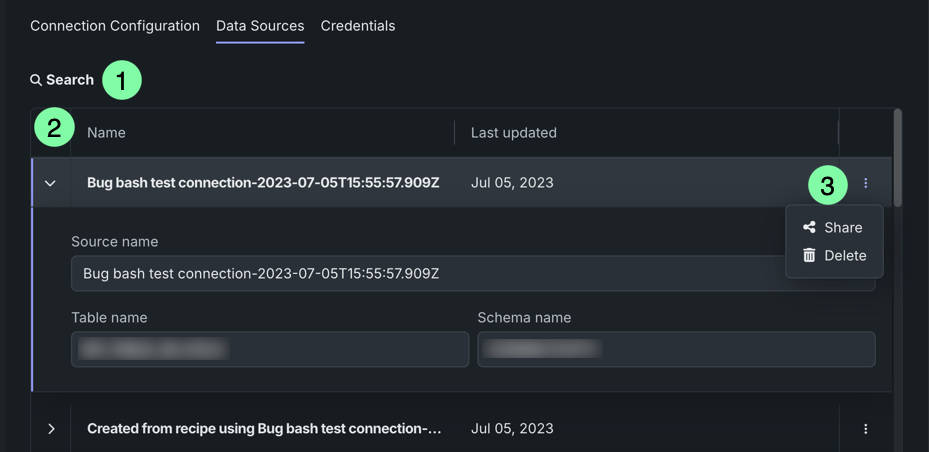
The Data Sources tab displays all data assets that have previously been accessed through this connection. Using this list, you can explore the most frequently used tables and SQL queries for a database, as well as file locations for blob (Binary Large Object) and document stores. When a dataset or file is added from this connection to the Data Registry or Use Case, a pointer to the data is automatically added to this tab. Additionally, you can add data sources directly in the connection settings. Note that this view can also support data governance workflows.
From here, you can:
| Element | Description | |
|---|---|---|
| 1 | Search | Allows you to search for specific data sources. |
| 2 | Columns | Displays the name and date when the data pointer was last updated. |
| 3 | Actions menu | Provides access to the following actions:
|
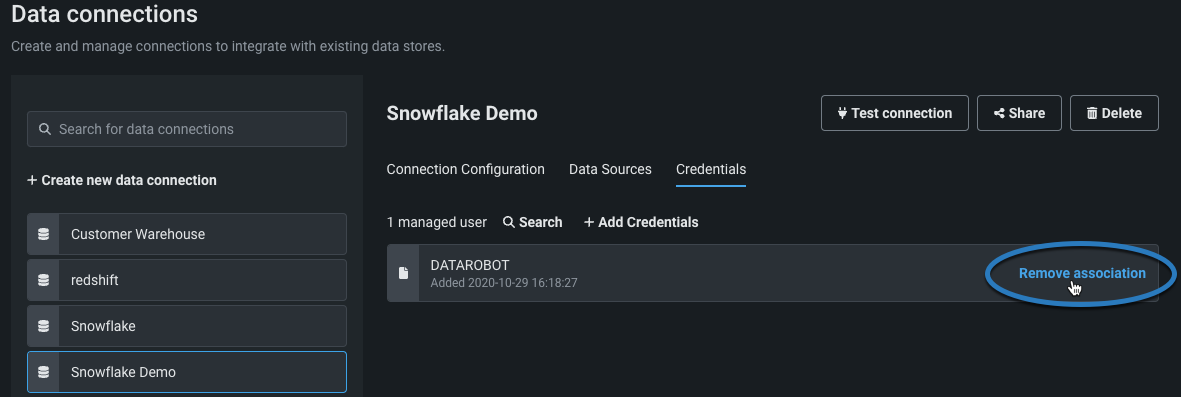
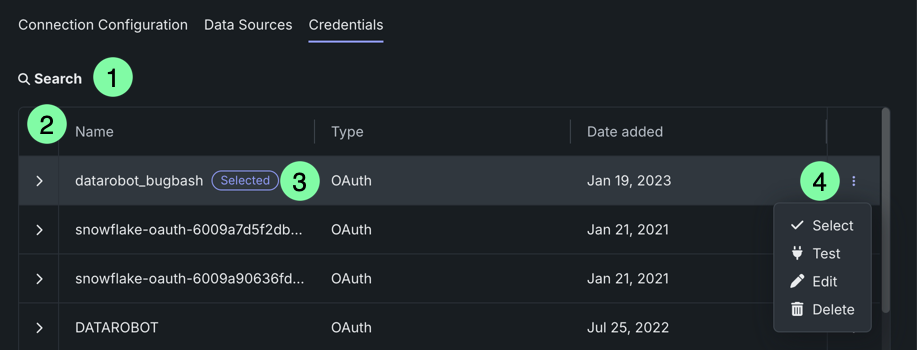
The Credentials tab displays all credentials compatible with this connection type that were added by you or shared through a shared secure configuration. From here, you can:
| Element | Description | |
|---|---|---|
| 1 | Search | Allows you to search for specific credentials. |
| 2 | Columns | Displays the name, credential type, and date the credentials were first added. |
| 3 | Selected badge | Indicates the credentials currently in use by the data connection. |
| 4 | Actions menu | Provides access to the following actions:
|
When you're done editing the connection, click Save.
Delete a connection
You can delete any data connection that is not being used by an existing data source. If it is being used, you must first delete the dependencies. To delete a data connection:
-
From the Data Connections tab, select the data connection in the left-panel connections list.
-
Click the Delete button in the upper right, or hover over the connection name in the left-panel and click the delete icon .
-
DataRobot prompts for confirmation. Click Delete to remove the data connection. If there are data sources dependent on the data connection, DataRobot returns a notification.
-
Once all dependent data sources are removed— either via the UI or API—try deleting the data connection again.
Add data sources
Your data sources specify, via SQL query or selected table and schema data, which data to extract from the data connection. It is the extracted data that you will use for modeling and predictions. You can point to entire database tables or use a SQL query to select specific data from the database.
Note
Once data sources are created, they cannot be modified and can only be deleted via the API.
To add a data source, do one of the following:
- From a the Data assets tile in a Use Case, click Add data > Browse data and select the connection that holds the data you want to add.
- From Registry > Data, click Add data > Data connection and select the connection that holds the data you want to add.
-
From the Start screen, click Data Source and select the connection that holds the data you want to add.
See how to import from an existing data source.
-
From the AI Catalog, select Add to catalog > Existing Data Connection.
See how to add data from external connections.
Share data connections
Because the user creating a data connection and the end-user may not be the same, or there may be multiple end-users for the data connection, DataRobot provides the ability to set user-level permissions for each entity. You can accomplish scenarios like the following:
- A user wants to set permissions on a selected data entity to control who has consumer-level, editor-level, or owner-level access. Or, the user wants to remove a particular user's access.
- A user that has had a data connection shared with them wants the shared entity to appear under their list of available entities.
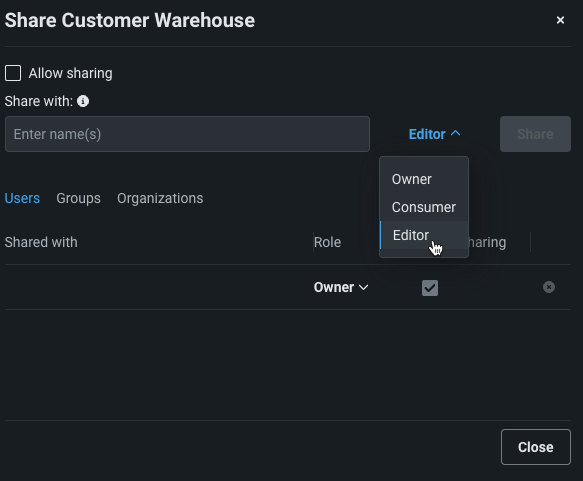
When you invite a user, user group, or organization to share a data connection, DataRobot assigns the default role of Editor to each selected target (not all entities allow sharing beyond a specific user). You can change the role from the dropdown menu.
To share data connections:
-
From the account menu on the top right, select Data Connections, select a data connection, and click Share in the upper-right corner.
Alternatively, you can hover over the connection name in the left-panel and click the share icon .
-
Enter the email address, group name, or organization you are adding and select a role. Check the box to grant sharing permission.
-
Click Share to add the user, user group, or organization.
-
Add any number of collaborators and when finished, click Close to dismiss the sharing dialog box.
Depending on your own permissions, you can remove any user or change access as described in the table of roles and permissions.
Note
There must be at least one Owner for each entity; you cannot remove yourself or remove your sharing ability if you are the only collaborating Owner.
Stored credentials
As an alternative to managing credentials from the Credentials management tile, you can interact with credentials when working with a data connection— on the Credentials tab, you can select and remove credentials associated with the connection, and on the Connection Configuration tab, you can create new credentials.
Note
You cannot edit stored credentials in the Data connections tile. To edit stored credentials, go to Credentials Management.
Create credentials
To create new saved credentials:
-
Select a data connection from the left panel and on the Connection Configuration tab, click New credential.
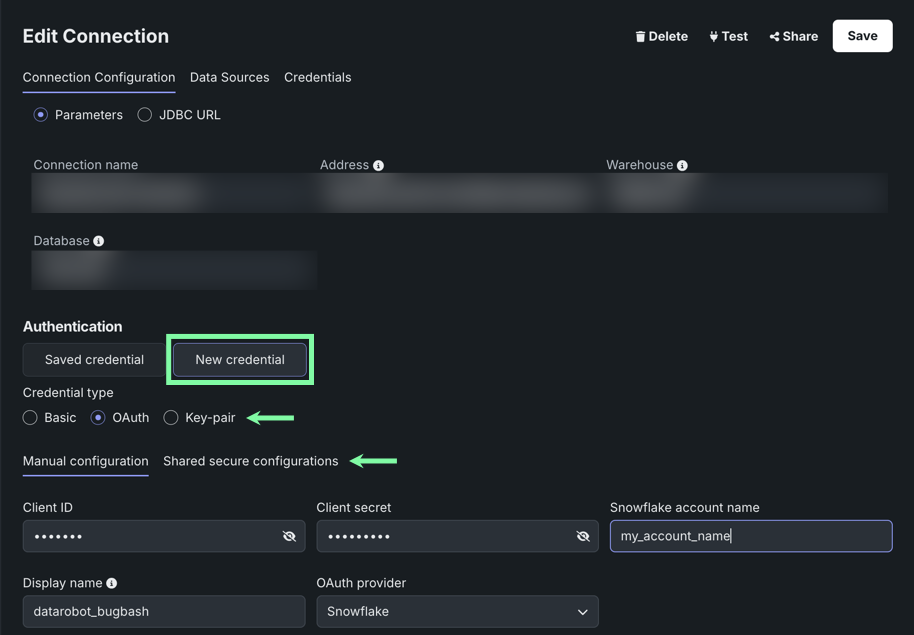
-
Select the Credential type and whether you're manually configuring the credentials or using a shared secure configuration.
- Enter the new credentials and click Save. Optionally, you can test your new credentials.
Remove credentials
From the Data connections tile, select the connection and then click the Credentials tab. Click the Actions menu next to the credentials you want to use for this connection and click Select. The credentials currently associated with the connection displays a "Selected" badge.