Import data to the AI Catalog
Import methods are the same for both legacy and catalog entry—that is, via local file, HDFS, URL, or JDBC data source. From the catalog, however, you can also add by blending datasets with Spark. When uploading through the catalog, DataRobot completes EDA1 (for materialized assets), and saves the results for later re-use. For unmaterialized assets, DataRobot uploads and samples the data but does not save the results for later re-use. Additionally, you can upload calendars for use in time series projects and enable personal data detection.
Dataset formatting
To avoid introducing unexpected line breaks or incorrectly separated fields during data import, if a dataset includes non-numeric data containing special characters—such as newlines, carriage returns, double quotes, commas, or other field separators—ensure that those instances of non-numeric data are wrapped in quotes ("). Properly quoting non-numeric data is particularly important when the preview feature "Enable Minimal CSV Quoting" is enabled.
To add data to the AI Catalog:
-
Click AI Catalog at the top of DataRobot window.
-
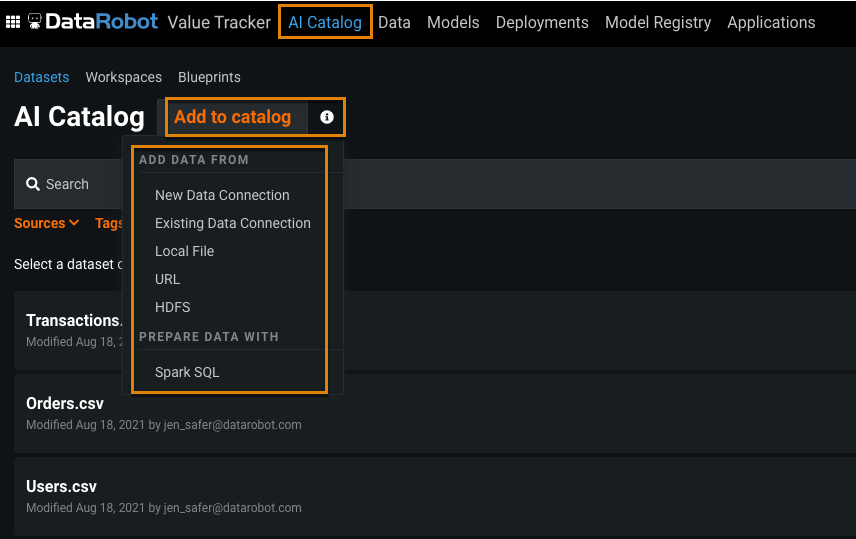
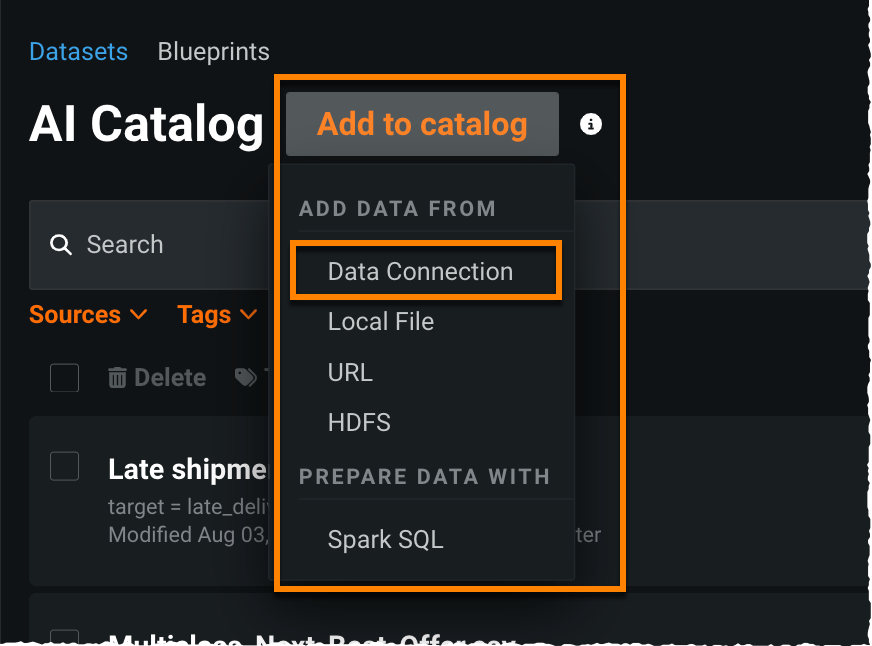
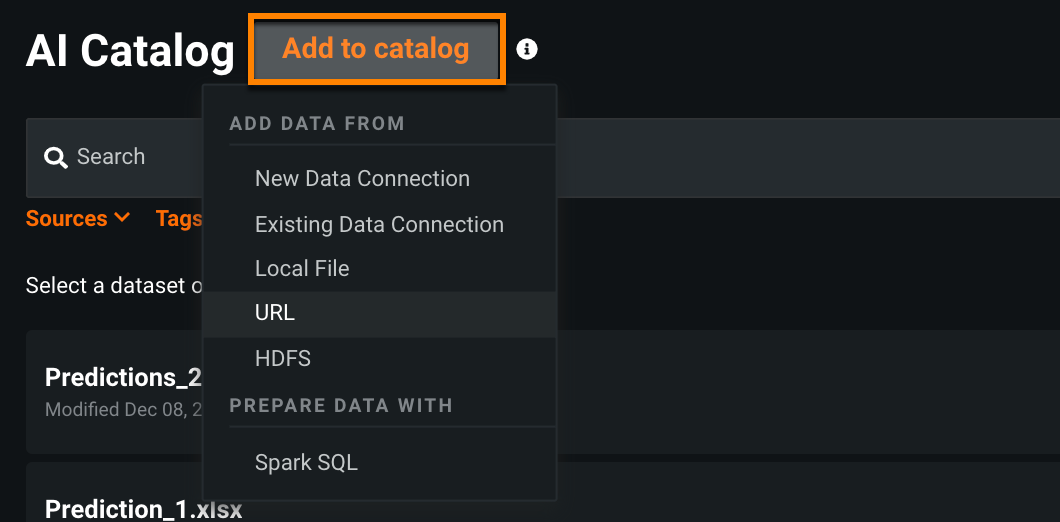
Click Add to catalog and select an import method.
The following table describes the methods:
Method Description New Data Connection Configure a JBDC connection to import from an external database of data lake. Existing Data Connection Select a configured data source to import data. Select the account and the data you want to add. Local File Browse to upload a local dataset or drag and drop a dataset for import. URL Specify a URL. Spark SQL Use Spark SQL queries to select and prepare the data you want to store.
DataRobot registers the data after performing initial exploratory data analysis (EDA1). Once registered, you can do the following:
- View information about a dataset, including its history.
- Blend the dataset with another dataset.
- Create an AutoML project.
- Use the additional tools to view, modify, and manage assets.
From external connections
Using JDBC, you can read data from external databases and add the data as assets to the AI Catalog for model building and predictions. See Data connections for more information.
-
If you haven't already, create the connections and add data sources.
-
Select the AI Catalog tab, click Add to catalog, and select Existing Data Connection.
-
Click the connection that holds the data you would like to add.
-
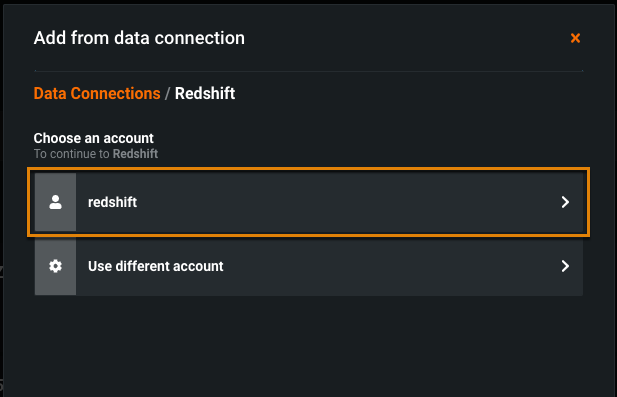
Select an account. Enter or use stored credentials for the connection to authenticate.
-
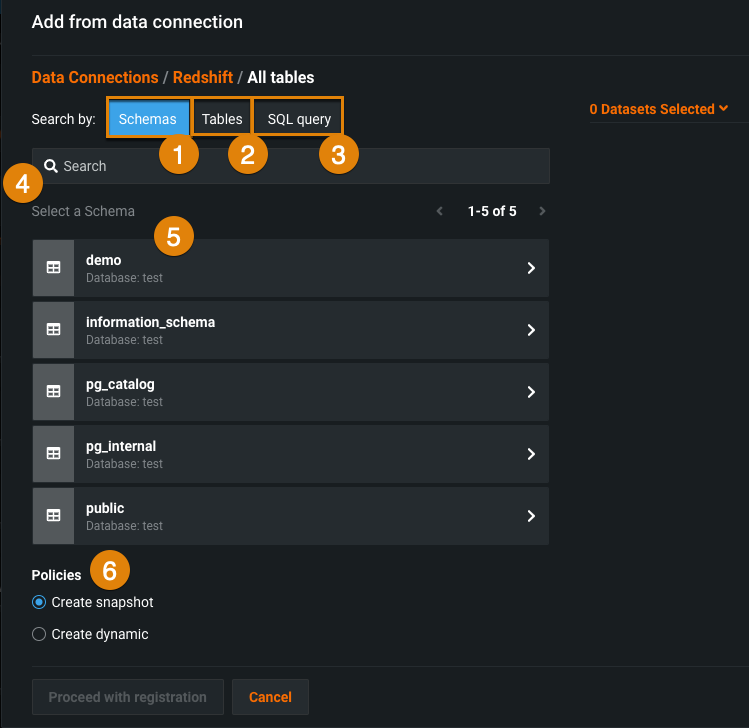
Once validated, select a source for data.
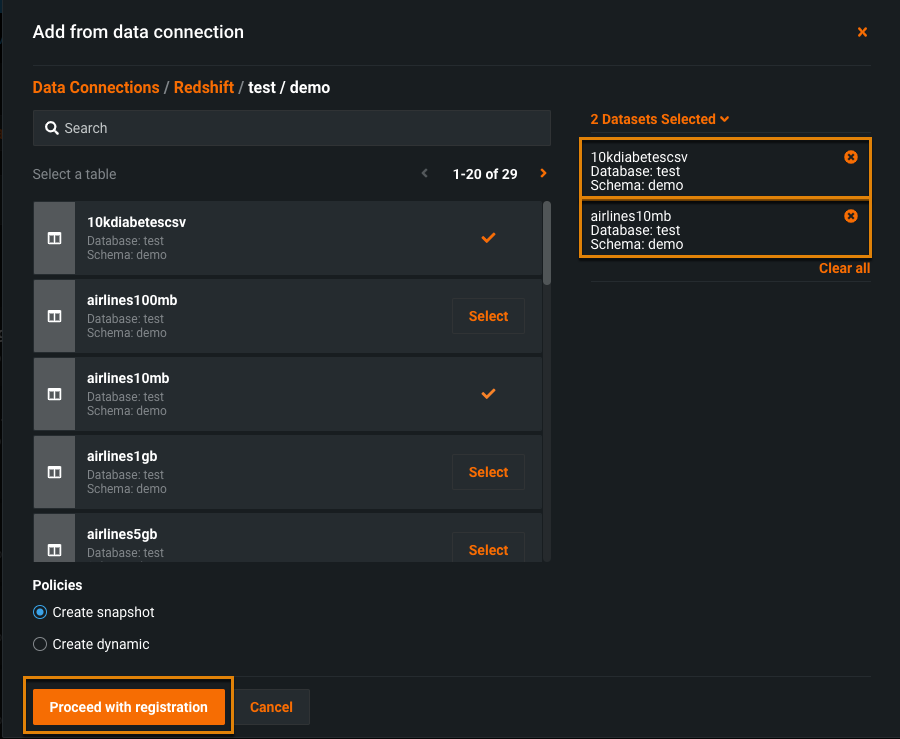
Element Description 1 Schemas Select Schemas to list all schemas associated with the database connection. Select a schema from the displayed list. DataRobot then displays all tables that are part of that schema. Click Select for each table you want to add as a data source. 2 Tables Select Tables to list all tables across all schemas. Click Select for each table you want to add as a data source. 3 SQL Query Select data for your project with a SQL query. 4 Search After you select how to filter the data sources (by schema, table, or SQL query), enter a text string to search. 5 Data source list Click Select for data sources you want to add. Selected tables (datasets) display on the right. Click the xto remove a single dataset or Clear all to remove all entries.6 Policies Select a policy: - Create snapshot: DataRobot takes a snapshot of the data.
- Create dynamic: DataRobot refreshes the data for future modeling and prediction activities.
-
Once the content is selected, click Proceed with registration.
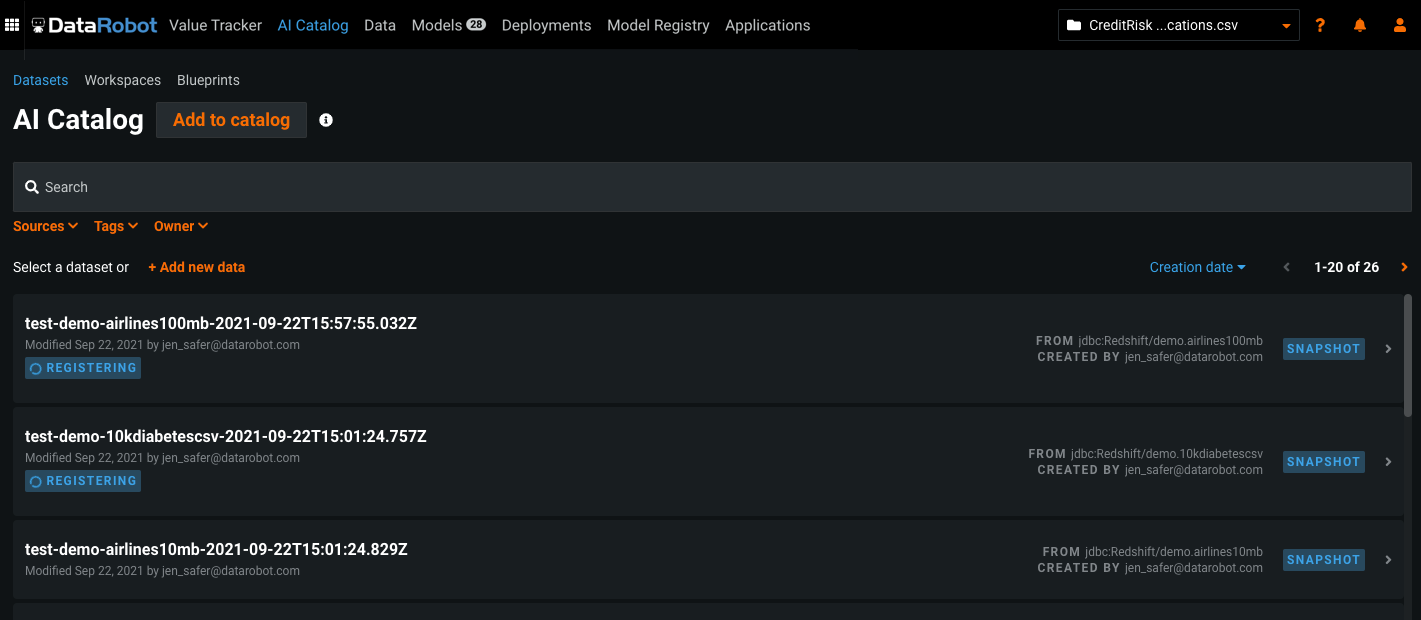
DataRobot registers the new tables (datasets) and you can then create projects from them or perform other operations, like sharing and querying with SQL.
From a SQL Query
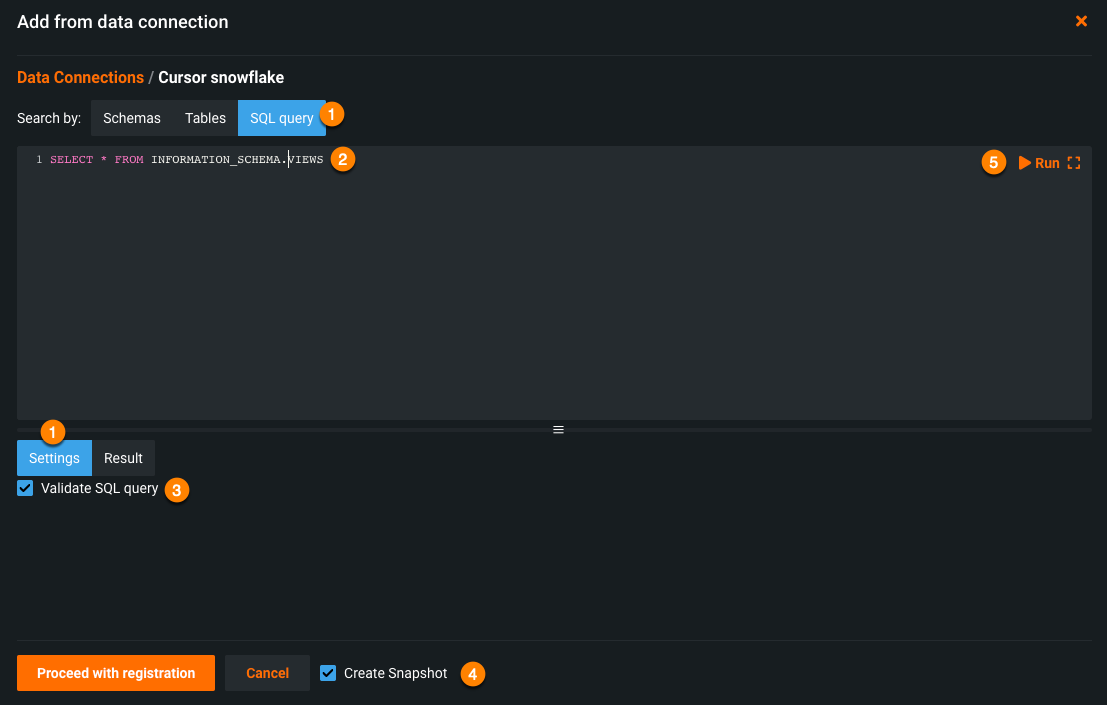
You can use a SQL query to select specific elements of the named database and use them as your data source. DataRobot provides a web-based code editor with SQL syntax highlighting to help in query construction. Note that DataRobot’s SQL query option only supports SELECT-based queries. Also, SQL validation is only run on initial project creation. If you edit the query from the summary pane, DataRobot does not re-run the validation.
To use the query editor:
-
Once you have added data from an external connection, click the SQL query tab. By default, the Settings tab is selected.
-
Enter your query in the SQL query box.
-
To validate that your entry is well-formed, make sure that the Validate SQL Query box below the entry box is checked.
Note
In some scenarios, it can be useful to disable syntax validation as the validation can take a long time to complete for some complex queries. If you disable validation, no results display. You can skip running the query and proceed to registration.
-
Select whether to create a snapshot.
-
Click Run to create a results preview.
-
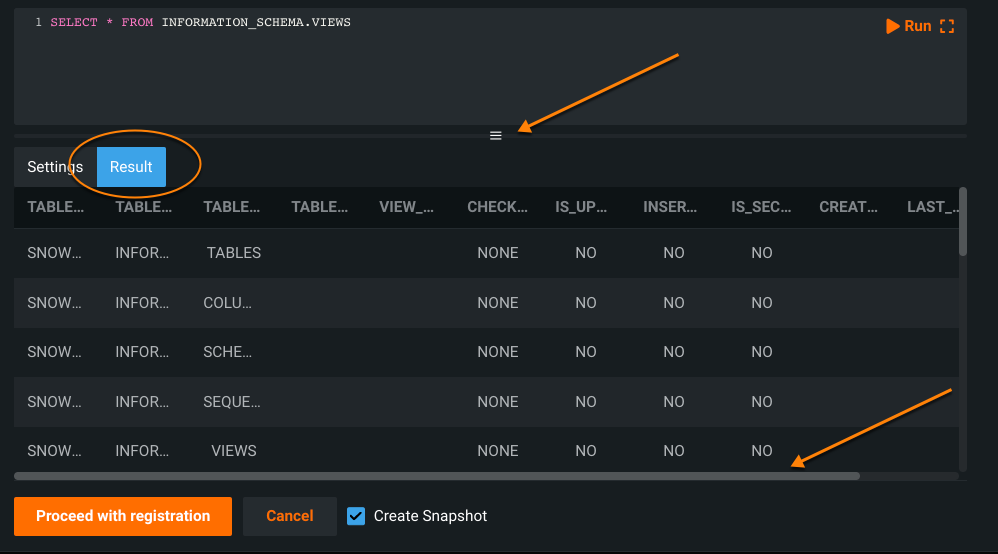
Select the Results tab after computing completes.
-
Use the window-shade scroll to display more rows in the preview; if necessary, use the horizontal scroll bar to scroll through all columns of a row:
When you are satisfied with your results, click Proceed with registration. DataRobot validates the query and begins data ingestion. When complete, the dataset is published to the catalog. From here you can interact with the dataset as with any other asset type.
For more examples of working with the SQL editor, see Prepare data in AI Catalog with Spark SQL.
Configure fast registration
Fast registration allows you to quickly register large datasets in the AI Catalog by specifying the first N rows to be used for registration instead of the full dataset. This gives you faster access to data to use for testing and Feature Discovery.
To configure fast registration:
-
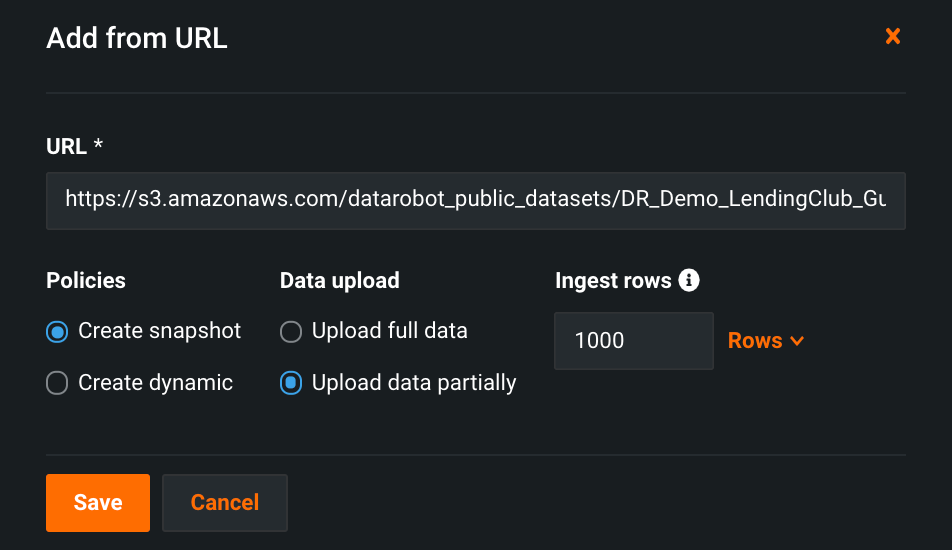
In the AI Catalog, click Add to catalog and select your data source. Fast registration is only available when adding a dataset from a new data connection, an existing data connection, or a URL.
-
In the resulting window, enter the data source information (in this example, URL).
-
Select the appropriate policy for your use case—either Create snapshot or Create dynamic.
For both snapshot and dynamic policies, the AI Catalog dataset calculates EDA1 using only the specified number of rows, taken from the start of the dataset. For example, it calculates using the first 1,000 rows in the dataset above.
Where the two policies differ is that if you consume the snapshot dataset (for example, using it to create a project), the consumer of the dataset will only see the specified number of rows when consuming it, but the consumer of the dynamic dataset will see the full set of rows rather than the partial set of rows.
-
Select the fast registration data upload option. For snapshot, select Upload data partially, and for dynamic, select Use partial data for EDA.
-
Specify the number of rows to use for data ingest during registration and click Save.
Upload calendars
Calendars for time series projects can be uploaded either:
- Directly to the catalog with the Add to catalog button, using any of the upload methods. Calendars uploaded as a local file are automatically added to the AI Catalog, where they can then be shared and downloaded.
- From within the project using the Advanced options > Time Series tab.
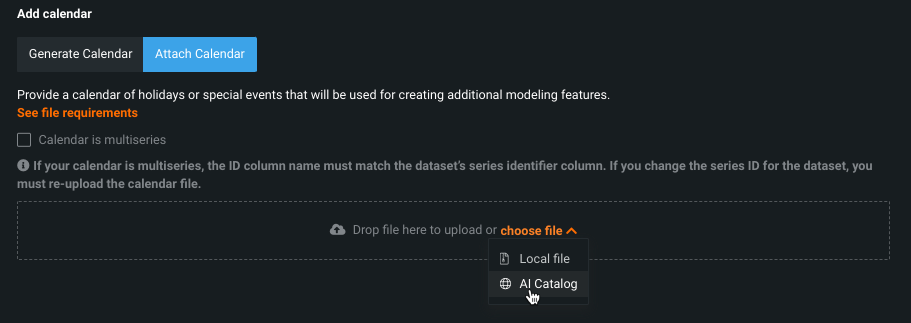
To upload calendar files from Advanced options on the Time Series tab:
-
When adding from Advanced options, use the choose file dropdown and choose AI Catalog.
-
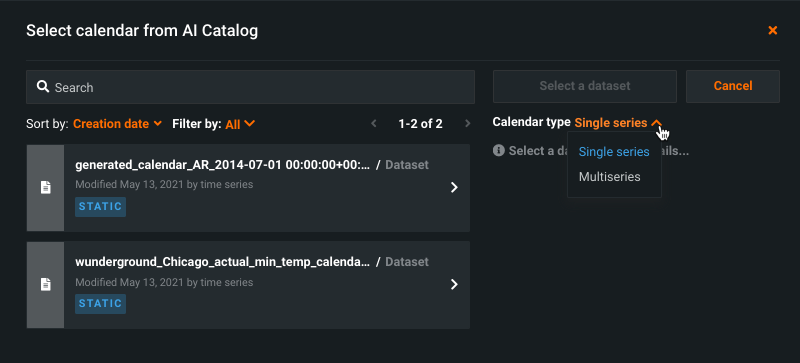
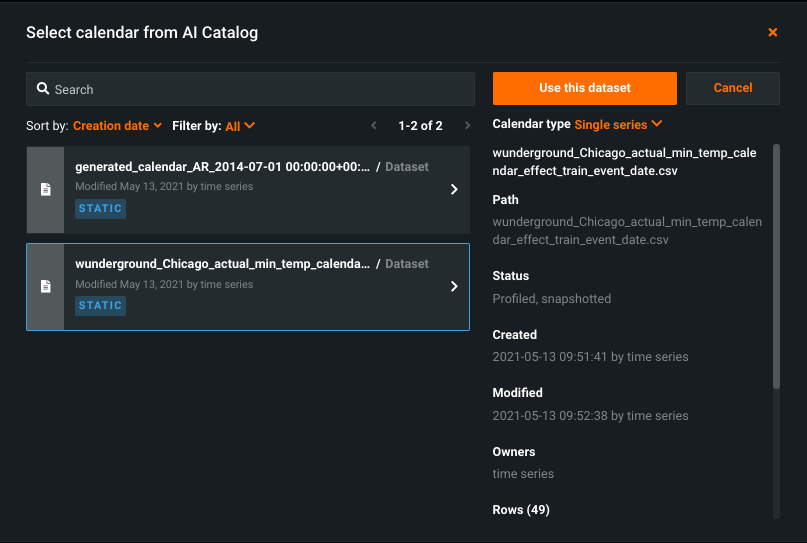
A modal appears listing available calendars, which was determined based on the content of the dataset. Use the dropdown to sort the listing by type.
DataRobot determines whether the calendar is single or multiseries based on the number of columns. If two columns, only one of which is a date, it is single series; three columns with just one being a date makes it multiseries.
-
Click on any calendar file to see the associated details and select the calendar for use with the project.
The calendar file becomes part of the standard AI Catalog inventory and can be reused like any dataset. Calendars generated from Advanced options are saved to the catalog where you can then download them, apply further customization, and re-upload them.
Personal data detection
In some regulated and specific use cases, the use of personal data as a feature in a model is forbidden. DataRobot automates the detection of specific types of personal data to provide a layer of protection against the inadvertent inclusion of this information in a dataset and prevent its usage at modeling and prediction time.
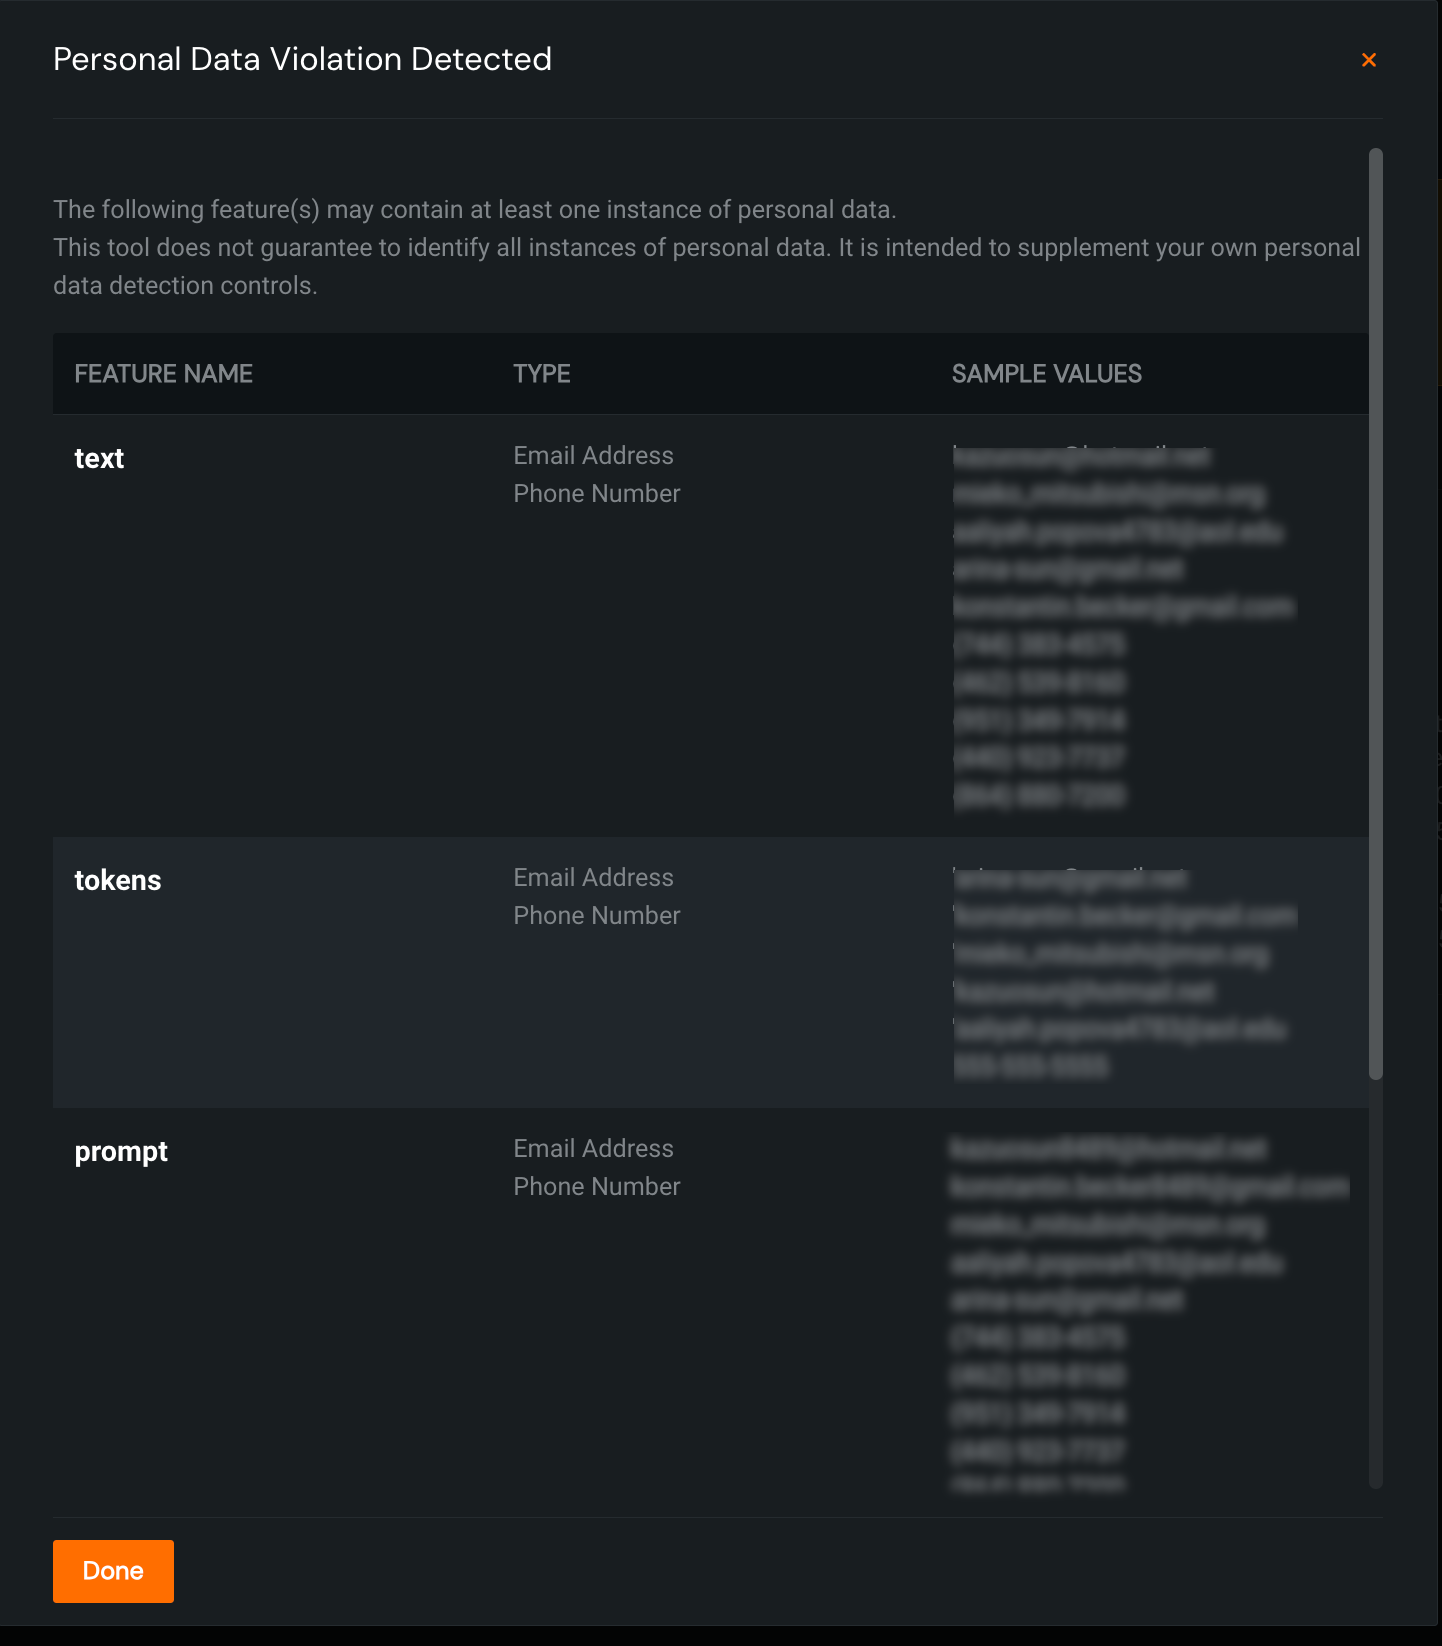
After a dataset is ingested through the AI Catalog, you have the option to check each feature for the presence of personal data. The result is a process that checks every cell in a dataset against patterns that DataRobot has developed for identifying this type of information. If found, a warning message is displayed in the AI Catalog's Info and Profile pages, informing you of the type of personal data detected for each feature and providing sample values to help you make an informed decision on how to move forward. Additionally, DataRobot creates a new feature list—the equivalent of Informative Features but with all features containing any personal data removed. The new list is named Informative Features - Personal Data Removed.
Warning
There is no guarantee that this tool has identified all instances of personal data. It is intended to supplement your own personal data detection controls.
DataRobot currently supports detection of the following fields:
- Email address
- IPv4 address
- US telephone number
- Social security number
To run personal data detection on a dataset in the AI Catalog, go to the Info page click Run Personal Data Detection on the banner that indicates successful dataset publishing:.
If DataRobot detects personal data in the dataset, a warning message displays. Click Details to view more information about the personal data detected; click Dismiss to remove the warning and prevent it from being shown again.
Warnings are also highlighted by column on the Profile tab:
