Basic model workflow
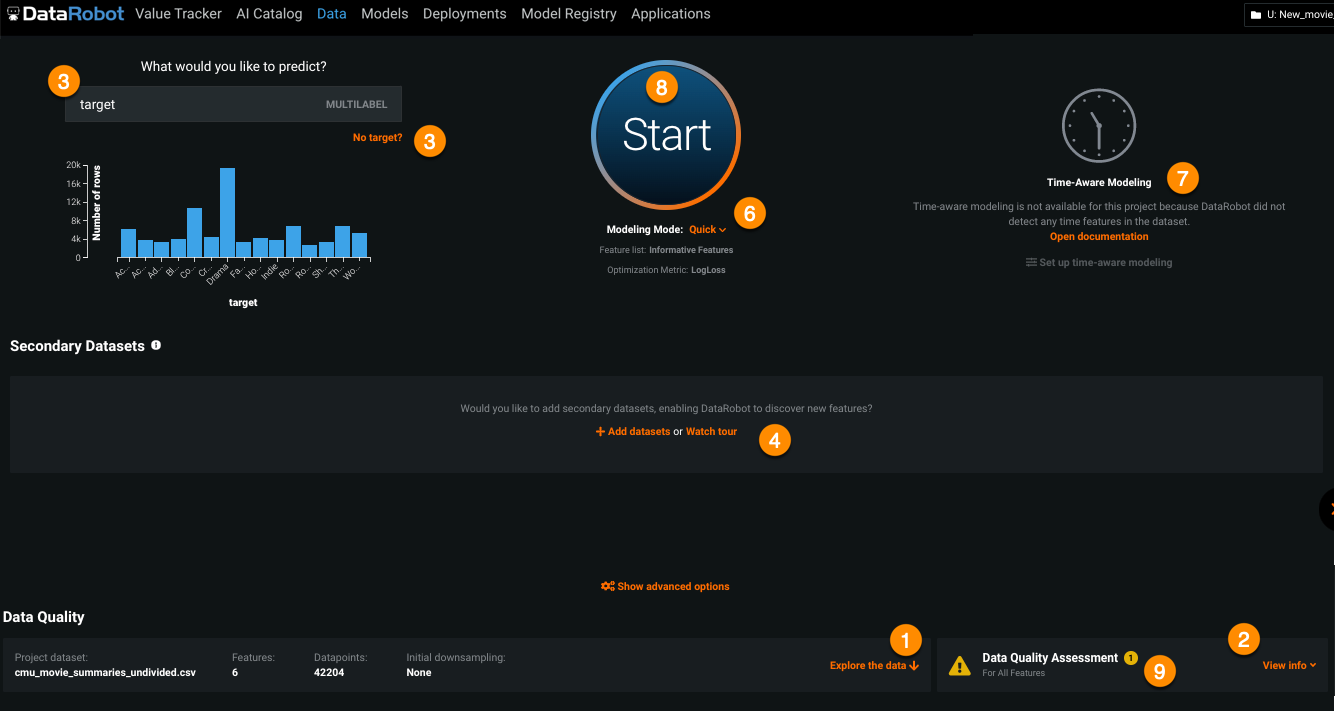
Once the import has finished, DataRobot displays the Data page. From here you can set a target and change your project settings, then build your models. DataRobot initiates EDA2 when you start the modeling process.
Generally speaking, once you select a target and click Start, DataRobot searches through millions of possible combinations of algorithms, preprocessing steps, features, transformations, and tuning parameters. It then uses supervised learning algorithms to analyze the data and identify (apparent) predictive relationships. These relationships represent the value of the target in unseen data, as determined by its relationship to the other dataset variables.
Model building workflow
DataRobot supports both supervised and unsupervised learning. The following outlines the steps for building models after EDA1 completes, with links to more detailed discussions of each step:
- (Optional) Explore your data.
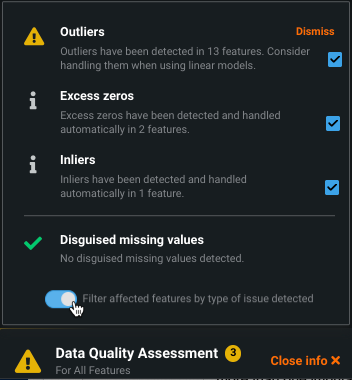
- (Optional) Investigate the Data Quality Assessment.
- Set the target feature or set up an unsupervised learning run by clicking No target and selecting Anomalies or Clusters.
- (Optional) Add secondary datasets for Feature Discovery.
- (Optional) Customize your model build, including:
- Creating multiclass models.
- Changing the optimization metric.
- Setting advanced model building options.
- Creating feature lists to define feature subsets.
- Creating new (transformed) features.
- Set the modeling mode.
- (Optional) Set up time-aware modeling, if applicable.
- Start the model build process. (DataRobot provides special handling when the project fails after the build process starts.)
- (Optional) Investigate results of automated target leakage detection.
-
(Optional) Rerun modeling with newly configured settings.
Note
DataRobot provides special handling of larger datasets to make viewing and model building work more efficiently. Specifically, early target selection allows you to set build parameters and set the project to start automatically when ingestion completes. For more information, see the sections on viewing the project summary and interpreting summary information.
See the deep dive for more details on the model building process.
Explore your data
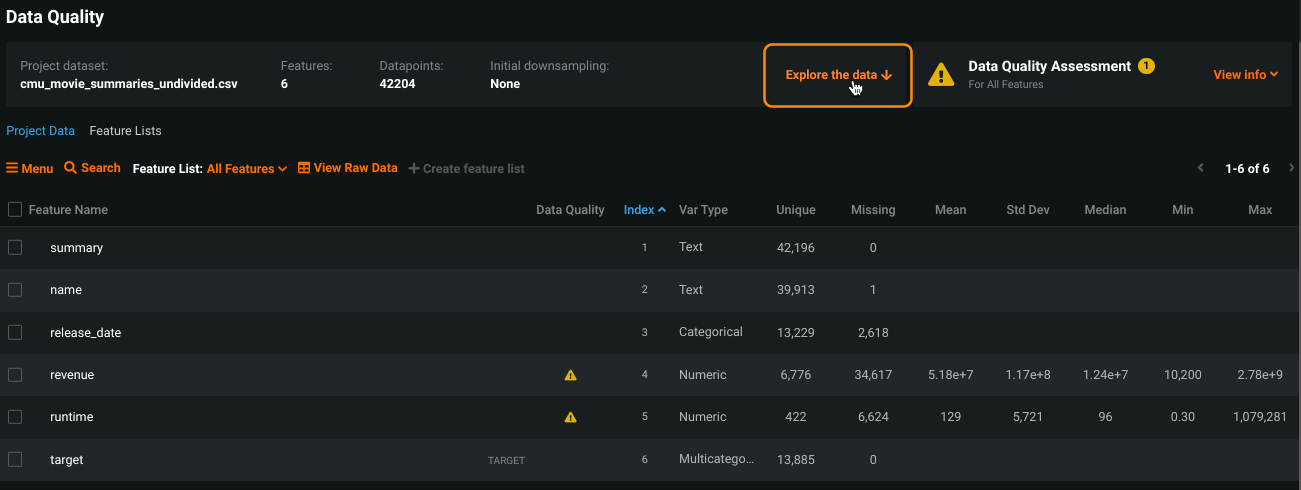
Even before you begin the model building process, DataRobot can provide information about your data. After EDA1 completes, you can scroll down or click the Explore link to view DataRobot's first analysis of the data. EDA1 provides the following resources for exploring the data:
-
For each feature, DataRobot detects the data (variable) type of each feature; supported data types are listed here. Additional information on the data page includes unique and missing values, mean, median, standard deviation, and minimum and maximum values.
-
A histogram or table of Frequent Values for a selected feature as well as a dialog to modify the variable type (described in more detail here).
Set the target feature
The model building phase of the project starts with selecting a target feature. The target feature is the name of the column in the dataset that you would like to predict. Until you select a target, the other Start screen configuration options aren't available.
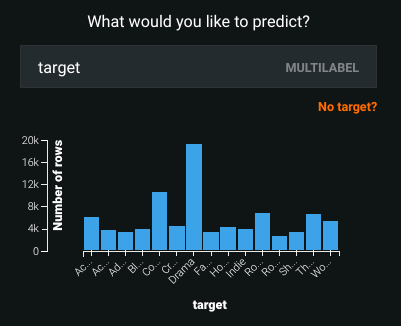
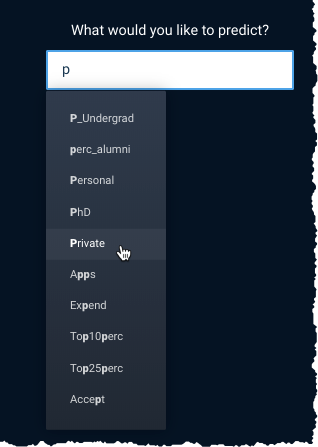
Enter the name of the target feature you would like to predict. DataRobot lists matching features as you type:
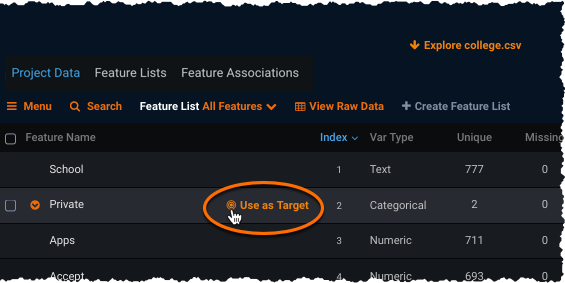
Alternatively, while exploring your data, notice that when you hover over a feature name a Use as Target link appears. Click the link to select that feature as the target.
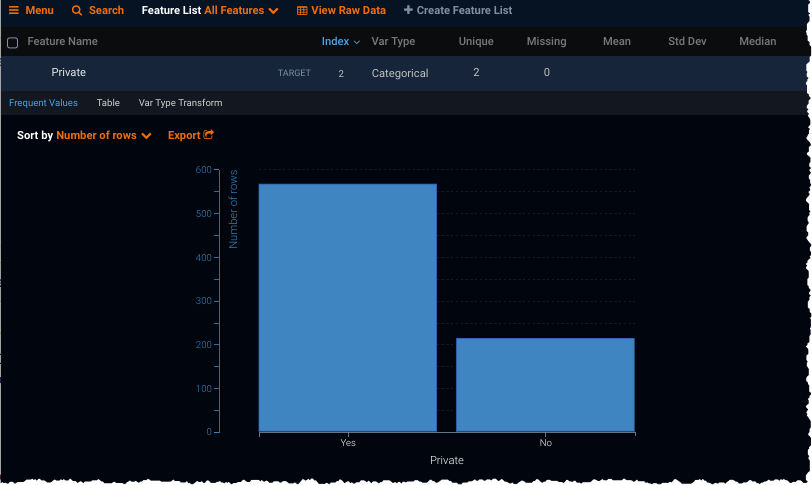
When you enter a target, DataRobot displays a histogram providing information about the target feature's distribution.
Customize the model build
If you want to customize the build prior to building, you can modify a variety of advanced parameters (the optimization metric and many others), create feature lists, and transform features. These options are described below.
Optimization metric
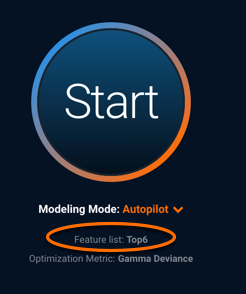
The optimization metric defines how to score your models. Once you enter a target, DataRobot selects a default metric based on your data. The metric choice, which becomes visible after you select a target variable, is listed under the Start button. You can change the optimization metric through the Advanced options link.
Note that although you choose and build a project optimized for a specific metric, DataRobot computes many applicable metrics on each of the models. After the build completes, you can redisplay the Leaderboard listing based on a different metric. It will not change any values within the models, it will simply reorder the model listing based on their performance on this alternate metric.
Improve accuracy
If accuracy is a prime concern, consider selecting the "accuracy-optimized metablueprint" checkbox in Advanced options prior to model building. Using this feature causes model building to run much more slowly, but potentially produces more accurate blueprints. (For example, with this option you may get XGBoost models with many more trees but a lower learning rate or with a deeper grid search.)
Other advanced options
The Show advanced options link allows you to set far more than the optimization metric. From there you can:
- Set partitioning options
- Enable Smart Downsampling
- Set a variety of additional parameters, including weights, offset/exposure, running time limits, and more
Create new features
DataRobot supports two different types of transformations— automatic and manual. The software automatically creates derived features from any column that it identifies as var type Date. DataRobot also supports user-created transformations, which you can then include in your feature lists. See the more detailed description of transformations for more information.
Set up time-aware modeling
For projects where time is an important dimension, DataRobot provides an option to create time-aware models—models that use time for validation (OTV) or forecasting (time series). You can use out-of-time validation (OTV) and Automated Time Series modeling to predict individual events and to use time to validate performance for future data. Options for time-aware modeling become available after you select a target feature and if DataRobot detects a date/time feature in your dataset. If there are no time features, the option is grayed out and you can continue the modeling workflow.
Set the modeling mode
Note
See the multistage Autopilot description for time-aware modeling.
By default, DataRobot runs Quick (Autopilot)—a shortened and optimized version of the full Autopilot mode. In Autopilot, DataRobot selects a predefined set of models to run based on the specified target feature and then trains the models on the training dataset. Sample percentage sizes are based on the selected mode (see the table below) and time-aware setting.
For example, in full Autopilot, DataRobot first builds models using 16% of the total data on the selected models. When the models are scored, DataRobot selects the top 16 models and reruns them on 32% of the data. Taking the top 8 models from that run, DataRobot runs on 64% of the data (or 500MB of data, whichever is smaller). Results of all model runs, at all sample sizes, are displayed on the Leaderboard. This method supports running more models in the early stages and advancing only the top models to the next stage, allowing for greater model diversity and faster Autopilot runtimes. See the notes on calculating Autopilot stages for more detail.
When running Autopilot, DataRobot initially caps the sample size at 500MB. Once it selects a model for deployment, that model is rerun at 80% (exceeding the previous 500MB cap). Note that you can train any model to any sample size (exceeding 500MB) from the Repository or retrain models to any size from the Leaderboard.
For more control over which models are run, use the additional options beneath the Start button. For large datasets, see the section on early target selection.
Note
See the table of differences applied when working with smaller datasets.
Modeling modes explained
The following table describes each of the modeling modes:
| Modeling mode | Description |
|---|---|
| Quick (default) | Using a sample size of 64%, Quick Autopilot runs a subset of models, based on the specified target feature and performance metric, to provide a base set of models that build and provide insights quickly. |
| Autopilot | In full automatic Autopilot mode, DataRobot selects the best predictive models for the specified feature. By default, Autopilot runs on the Informative Features feature list. |
| Manual | Manual mode gives you full control over which blueprints to execute. When you select Manual mode, DataRobot provides a message and link to the Repository after EDA2 completes. |
| Comprehensive | Comprehensive Autopilot mode runs all Repository blueprints on the maximum Autopilot sample size to ensure more accuracy for models. This mode results in extended build times. Note that you cannot use Comprehensive Autopilot mode for time series or anomaly detection projects. |
Start the build
To start the build, select a feature list:
Then, select a modeling mode and click Start to initiate EDA2. When the modeling process begins, DataRobot indicates the activity with a spinning icon by the Models tab. As models complete, a badge count also appears:
The modeling process finds the best predictive models for the target feature. You can manage the build using the DataRobot Worker Queue. If projects fail to build, DataRobot provides information, including a traceback that can be sent to Support.
As models build, you can explore the EDA2 data DataRobot is using from the Project Data tab. Once complete, you can also work with feature lists or visualize associations within your data from the Data page.
Note
If you close your browser or log out, DataRobot continues building models in any projects that have started the model building phase.
Build failure
After you load data, set a target, and select options, it is possible that your project fails to build (due to data format errors, for example). When this happens, DataRobot provides the information necessary to help troubleshoot the problem, whether on your own or with the help of Support. Errored projects, while not built, are saved to the Manage Projects inventory, with their traceback information. This helps to debug or repair issues without losing any feature engineering or other customization preprocessing you may have performed.
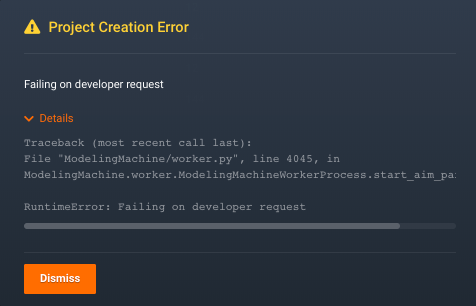
On first fail, DataRobot presents a dialog with:
- a brief error message
- the option to view traceback details by expanding the Details link
- the ability to dismiss the dialog
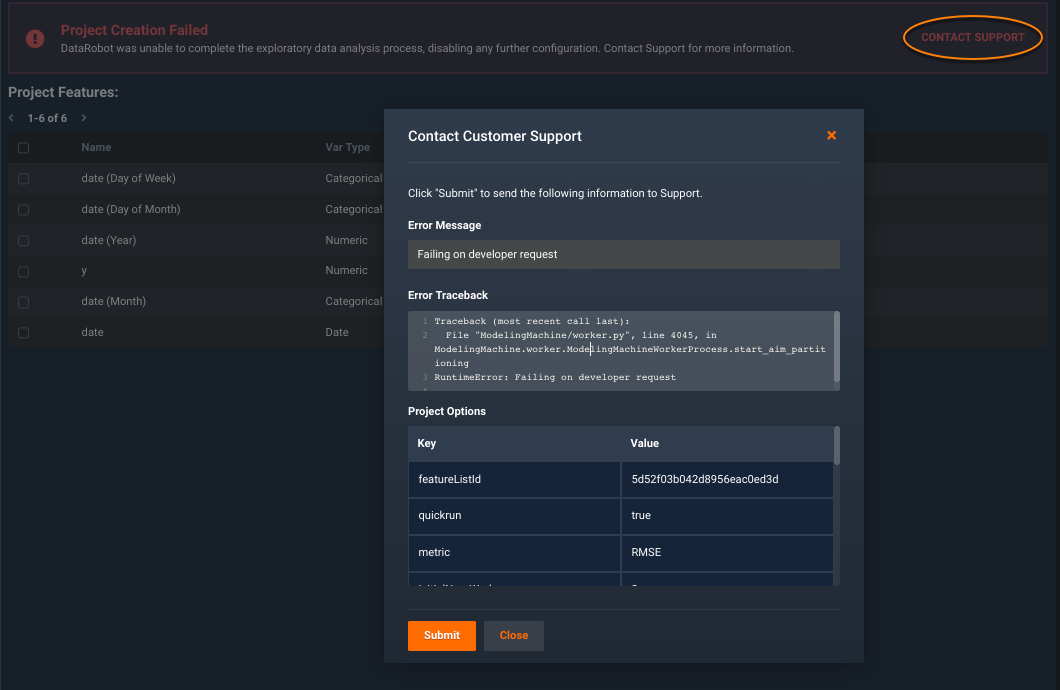
Once dismissed, DataRobot provides a preliminary summary of project data with a message indicating that project creation failed. Click the CONTACT SUPPORT link to see the information available, then click Submit to send the information to the Support team. (For organizations that are not configured for direct contact to Support through the application, clicking the link opens your mail client.)
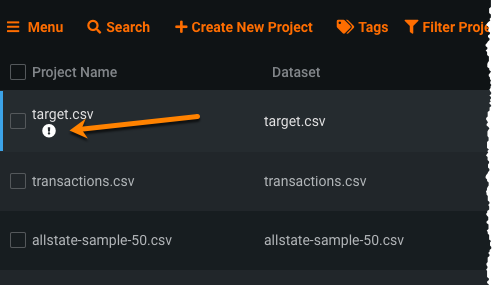
At this point, you can continue working on other projects while Support investigates your issue. To revisit the failed project, open Manage Projects. The failed project is marked with an icon indicating an issue:
Select the project to return to the preliminary project data summary page. From here you can open the Support contact link or view your traceback.
Configure modeling settings
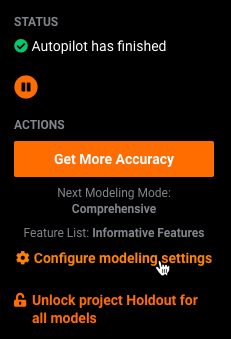
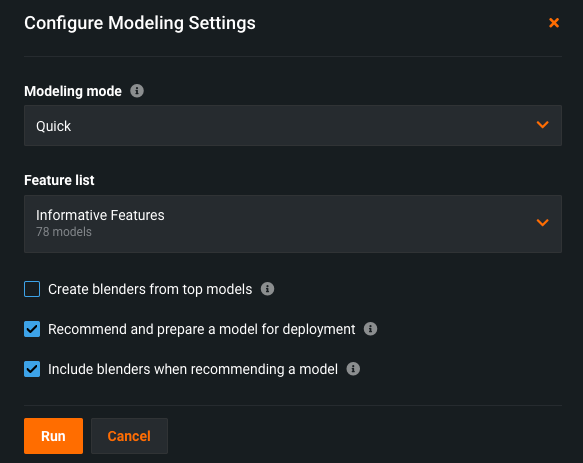
When modeling completes, you can rerun the process—in either Autopilot, Quick, or Comprehensive mode—with new settings. Select Configure modeling settings in the right-side panel.
-
Select the modeling mode: Autopilot, Quick, Manual, or Comprehensive.
-
Choose the feature list used for modeling.
-
Determine the automation settings: choose to only include blueprints with Scoring Code support, create blenders from top models, and recommend models for deployment.
Once configured, click Rerun to restart the modeling process.
