Composable ML Quickstart
Composable ML gives you full flexibility to build a custom ML algorithm and then use it together with other built-in capabilities (like the model Leaderboard or MLOps) to streamline your end-to-end flow and improve productivity. This quickstart provides an example that walks you through testing and learning Composable ML so that you can then apply it to your own use case.
In the following sections, you will build a blueprint with a custom algorithm. Specifically, you will:
- Create a project and open the blueprint editor.
- Replace the missing values imputation task with a built-in alternative.
- Create a custom missing values imputation task.
- Add the custom task into a blueprint and train.
- Evaluate the results and deploy.
Create a project and open the blueprint editor
This example replaces a built-in Missing Values Imputed task with a custom imputation task. To begin, create a project and open the blueprint editor.
-
Start a project with the 10K Lending Club Loans dataset. You can download it and import as a local file or provide the URL. Use the following parameters to configure a project:
- Target: is_bad
- Autopilot mode: full or Quick
-
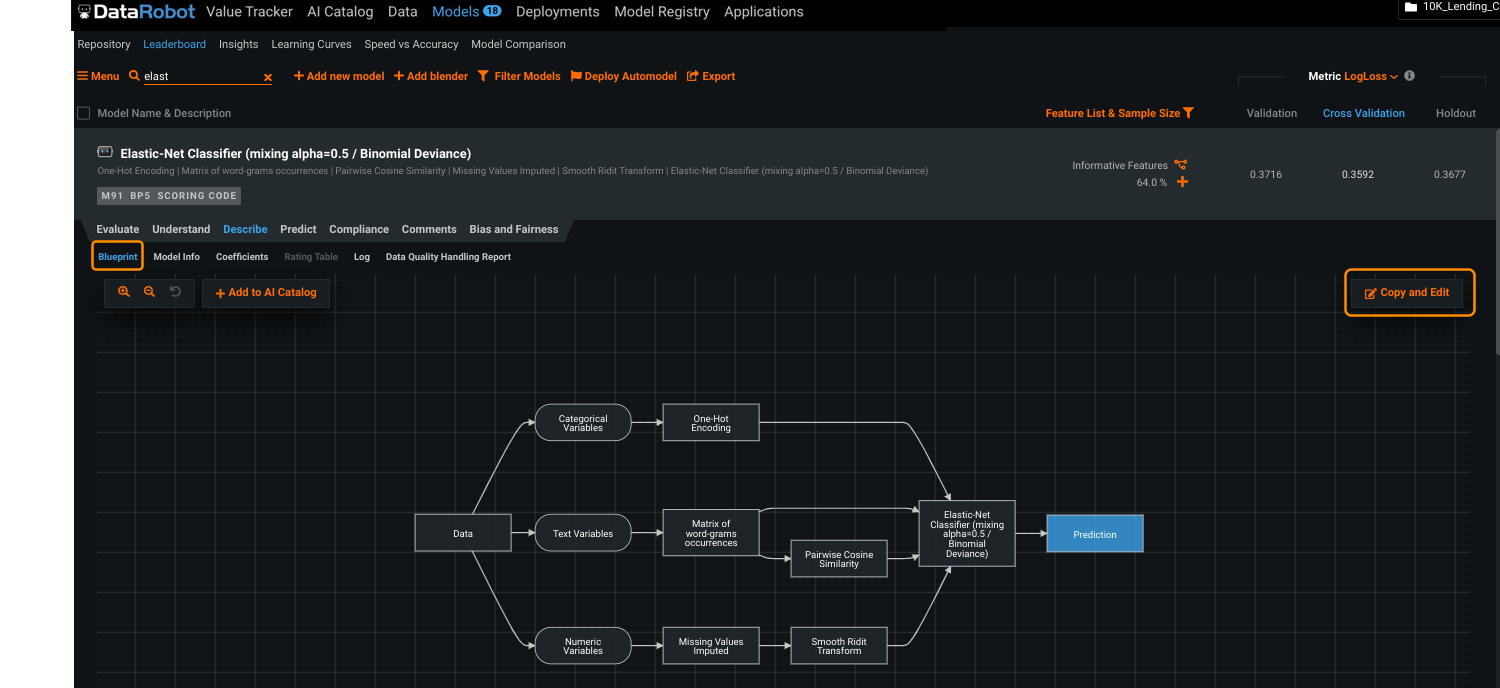
When available, expand a model on the Leaderboard to open the Describe > Blueprint tab. Click Copy and edit to open the blueprint editor, where you can add, replace, or remove tasks from the blueprint (as well as save the blueprint to the AI Catalog).
Replace a task
Replace the Missing Values Imputed task within the blueprint with an alternate and save the new blueprint to the AI Catalog.
-
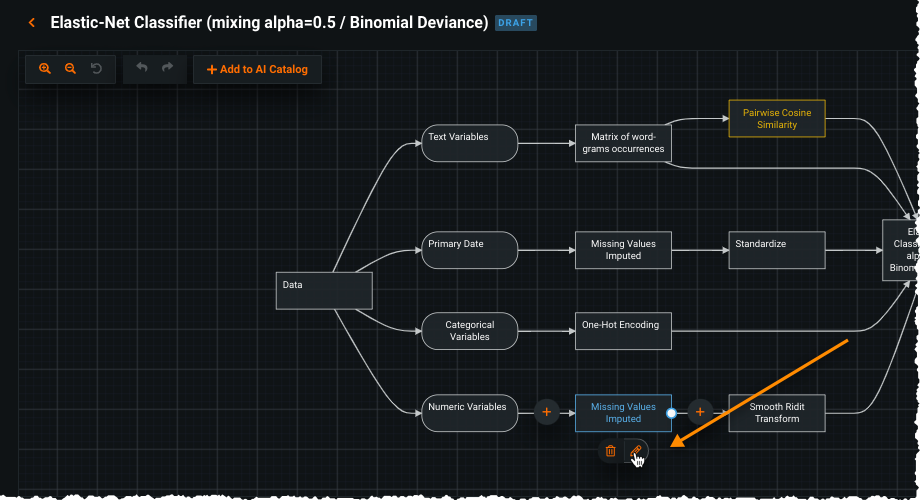
Select Missing Values Imputed and then click the pencil icon (
 ) to edit the task.
 -
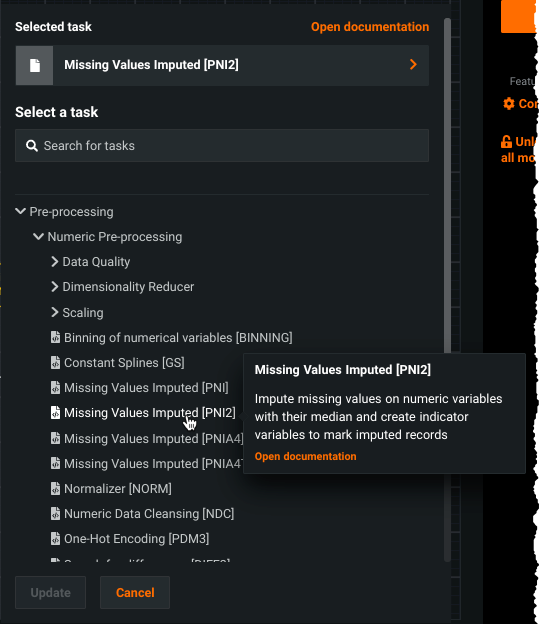
In the resulting dialog, select an alternate missing values imputation task.
- Click on the task name.
- Expand Preprocessing > Numeric Preprocessing.
- Select Missing Values Imputed [PNI2].
Once selected, click Update to modify the task.
-
Click Add to AI Catalog to save it to the AI Catalog for further editing, use in other projects, and sharing.
-
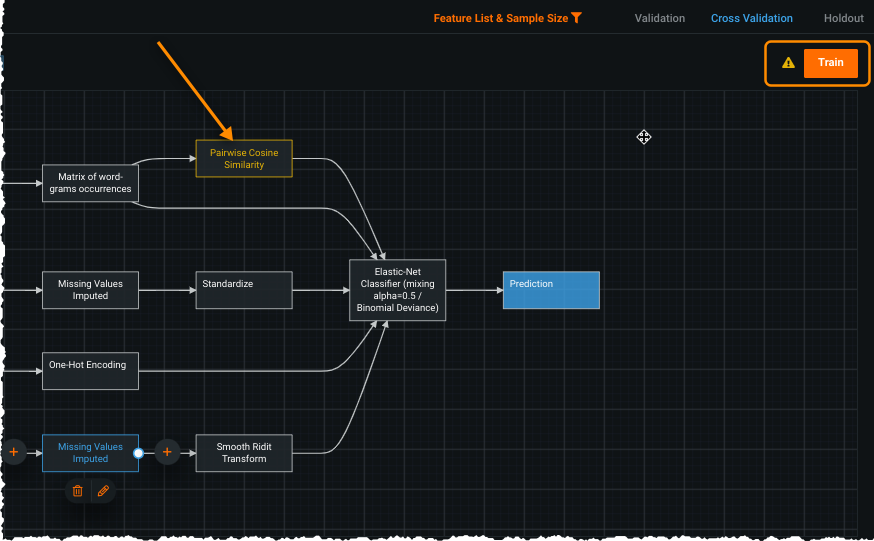
Evaluate potential issues by hovering on any highlighted task. When you have confirmed that all tasks are okay, train the model.
Once trained, the new model appears in the project’s Leaderboard where you can, for example, compare accuracy to other blueprints, explore insights, or deploy the model.
Create a custom task
To use an algorithm that is not available among the built-in tasks, you can define a custom task using code. Once created, you then upload that code as a task and use it to define one or multiple blueprints. This part of the quickstart uses one of the task templates provided by DataRobot; however, you can also create your own custom task.
When you have finished writing task code (locally), making the custom task available within the DataRobot platform involves three steps:
- Add a new custom task in the Model Registry.
- Select the environment where the task runs.
- Upload the task code into DataRobot.
Add a new task
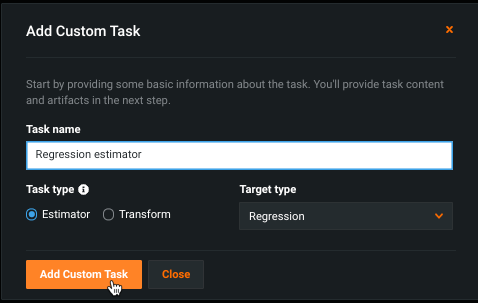
To create a new task, navigate to Model Registry > Custom Model Workshop > Tasks and select + Add new task.
- Provide a name for the task, MVI in this example.
-
Select the task type, either Estimator or Transform. This example creates a transform (since missing values imputation is a transformation).
-
Click Add Custom Task.
Select the environment
Once the task type is created, select the container environment where the task will run. This example uses one of the environments provided by DataRobot but you can also create your own custom environment.
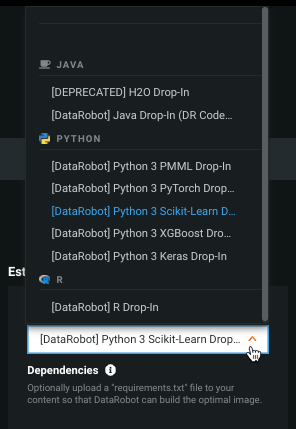
Under Transform Environment, click Base Environment and select [DataRobot] Python 3 Scikit-Learn Drop-In.
Upload task content
Once you select an environment, the option to load task content (code) becomes available. You can import it directly from your local machine or, as in this example, upload it from a remote repository. If you haven't added a remote repository, add and authorize the DataRobot Model Runner repository in GitHub, providing https://github.com/datarobot/datarobot-user-models as the repository location.
To pull files from the DRUM repository:
-
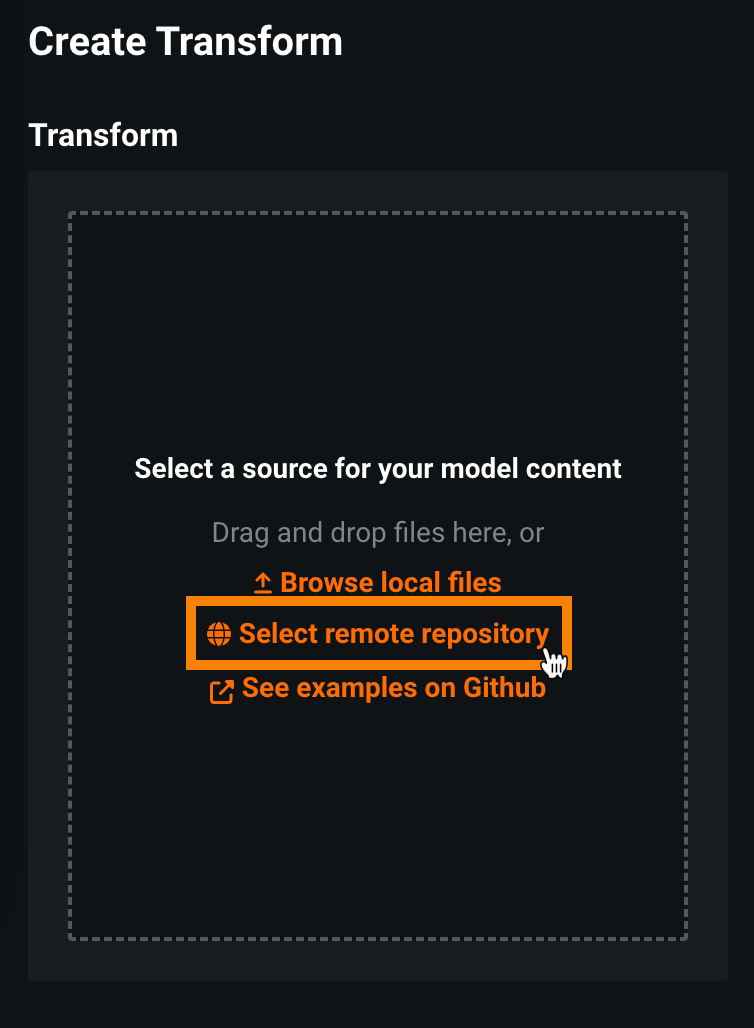
Under Create Transform, in the Transform group box, click Select remote repository.
If the Transform group box is empty, make sure you selected a Base Environment for the task.
-
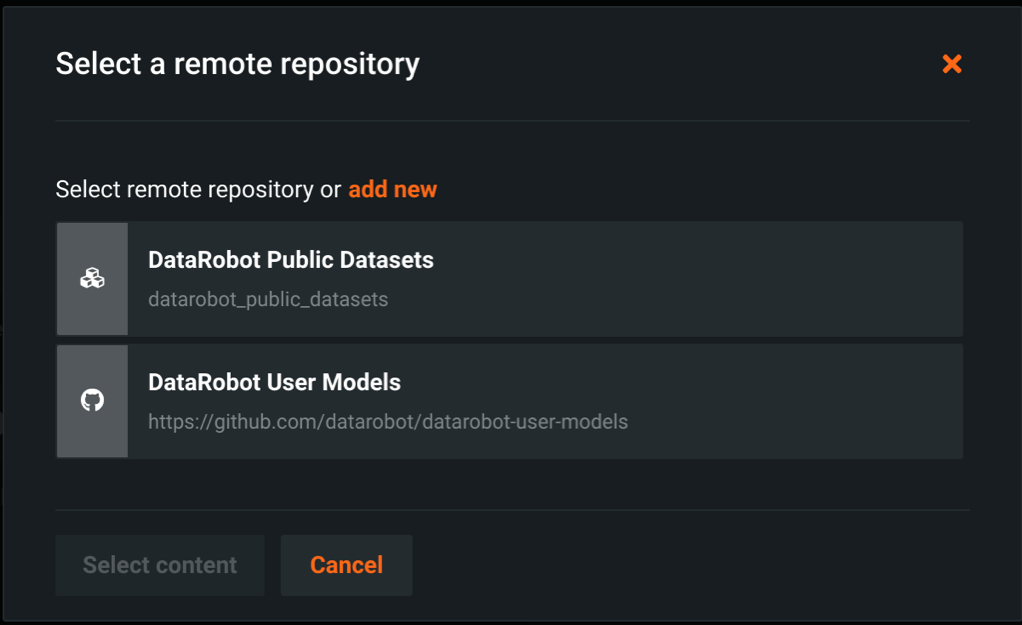
In the Select a remote repository dialog box, select the DRUM repository from the list and click Select content.
Note
If you haven't added a remote repository, click Add repository > GitHub, and authorize the GitHub app, providing
https://github.com/datarobot/datarobot-user-modelsas the Repository location. -
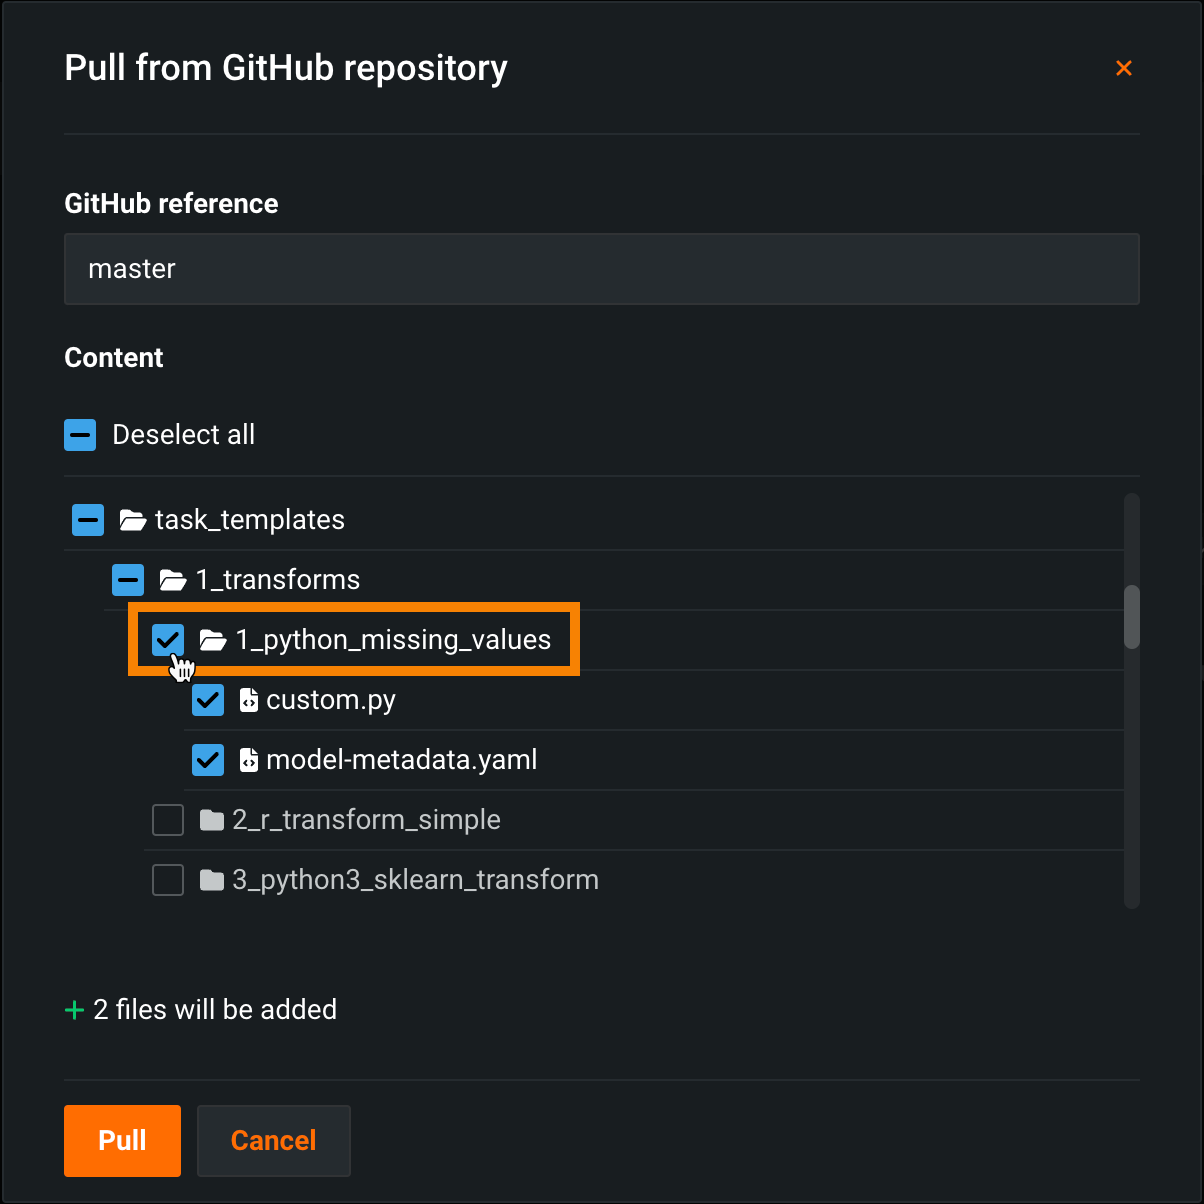
In the Pull from GitHub repository dialog box, navigate to
task_templates/1_transforms/1_python_missing_valuesand select the checkbox for the entire directory you want to pull the task files into your custom task.Note
This quickstart guide uses GitHub as an example; however, the process is the same for each repository type.
Tip
You can see how many files you have selected at the bottom of the dialog box (e.g., + 2 files will be added).
-
Once you select the
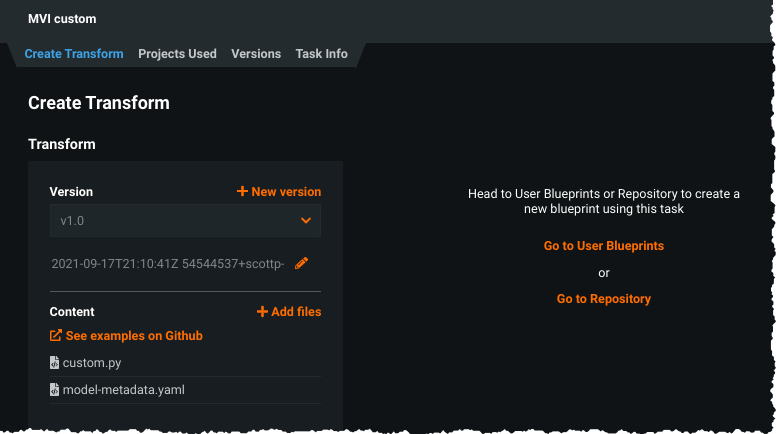
task_templates/1_transforms/1_python_missing_valuesfiles to pull into the custom task, click Pull.Once DataRobot processes the GitHub content, the new task version and the option to apply the task become available. The task version is also saved to Model Registry > Custom Model Workshop > Tasks under the Transform header as part of the custom task:
Apply new task and train
To apply a new task:
-
Return to the Leaderboard and select any model. Click Copy and Edit to modify the blueprint.
-
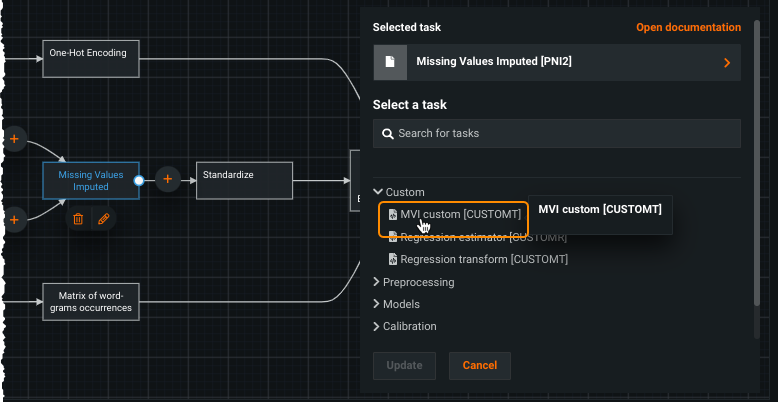
Select the Missing Values Imputed or Numeric Data Cleansing task and click the pencil (
 ) icon to modify it.
 -
In the task window, click on the task name to replace it. Under Custom, select the task you created. Click Update.
-
Click Train (upper right) to open a window where you set training characteristics and create a new model from the Leaderboard.
Tip
Consider relabeling your customized blueprint so that it is easy to locate on the Leaderboard.
Evaluate and deploy
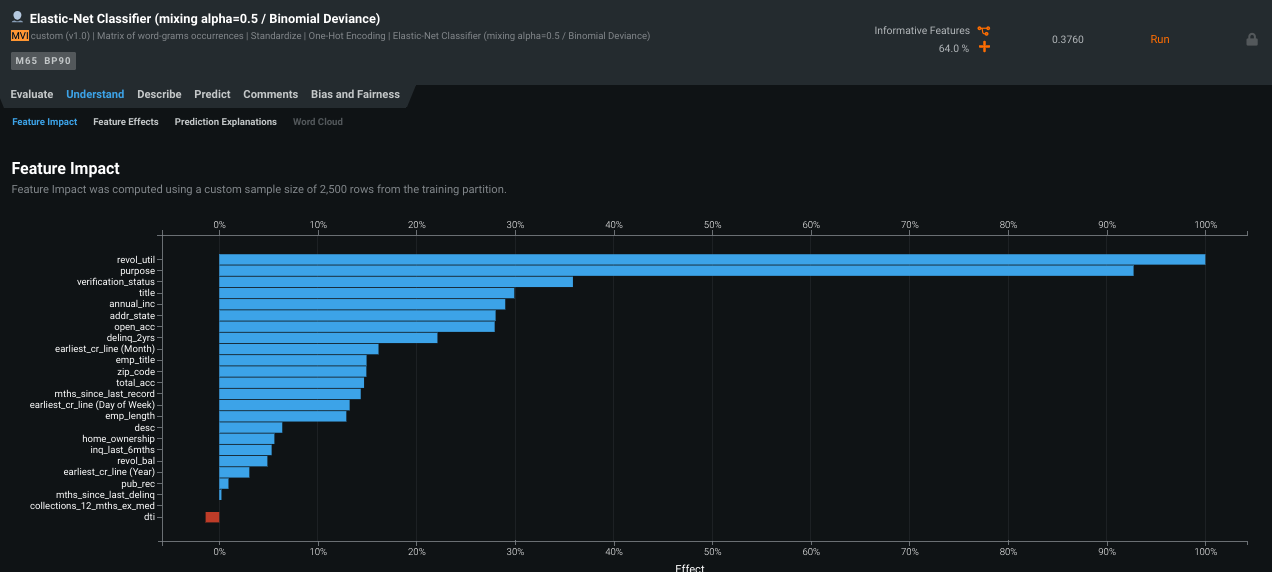
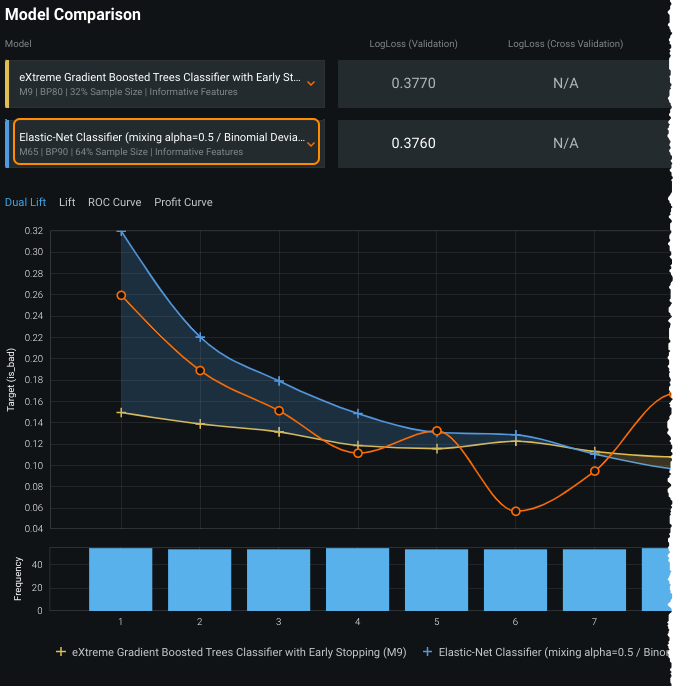
Once trained, the model appears in the project Leaderboard where you can compare its accuracy with other custom and DataRobot models. The icon changes to indicate a user model. At this point, the model is treated like any other model, providing metrics and model-agnostic insights and it can be deployed and managed through MLOps.
Compare metrics:
View Feature Impact:
Note
For models trained from customized blueprints, Feature Impact is always computed using the permutation-based approach, regardless of the project settings.
Use Model Comparison:
Deploy the best model in a few clicks.
For more information on using Composable ML, see the other available learning resources.
