Automated deployment and replacement of Scoring Code in Snowflake
Preview
Automated deployment and replacement of Scoring Code in Snowflake is off by default. Contact your DataRobot representative or administrator for information on enabling this feature.
Feature flag: Enable the Automated Deployment and Replacement of Scoring Code in Snowflake
Now available for preview, you can create a DataRobot-managed Snowflake prediction environment to deploy DataRobot Scoring Code in Snowflake. With DataRobot management enabled, the external Snowflake deployment has access to MLOps management, including automatic Scoring Code replacement.
Service health information for external models and monitoring jobs
Service health information is unavailable for external agent-monitored deployments and deployments with predictions uploaded through a prediction monitoring job.
Create a Snowflake prediction environment
To deploy a model in Snowflake, you first create a custom Snowflake prediction environment:
-
Click Deployments > Prediction Environments and then click Add prediction environment.
-
In the Add prediction environment dialog box, configure the prediction environment settings:
-
Enter a descriptive Name and an optional Description of the prediction environment.
-
Select Snowflake from the Platform dropdown list. The Supported Model Formats settings are automatically set to DataRobot Scoring Code and can't be changed, as this is the only model format supported by Snowflake.
-
Enable the Managed by DataRobot setting to allow this prediction environment to automatically package and deploy DataRobot Scoring Code models through the Management Agent.
Note
DataRobot management of Scoring Code in Snowflake requires an existing Data Connection to Snowflake with stored Credentials. If you don't have an existing Snowflake data connection, the No Data Connections found alert appears, directing you to Go to Data Connections to create a Snowflake connection.
-
Select a Data Connection and the related Credentials, and then select the Snowflake Schemas. Snowflake schemas are collections of Snowflake tables.
-
-
After you configure the environment settings, click Add environment.
The Snowflake environment is now available from the Prediction Environments page.
Deploy a model to the Snowflake prediction environment
Once you've created a Snowflake prediction environment, you can deploy a model to it:
-
Click Model Registry > Registered Models and select the Scoring Code enabled model you want to deploy to the Snowflake prediction environment.
Tip
You can also deploy a model to your Snowflake prediction environment from the Deployments > Prediction Environments tab by clicking + Add new deployment in the prediction environment.
-
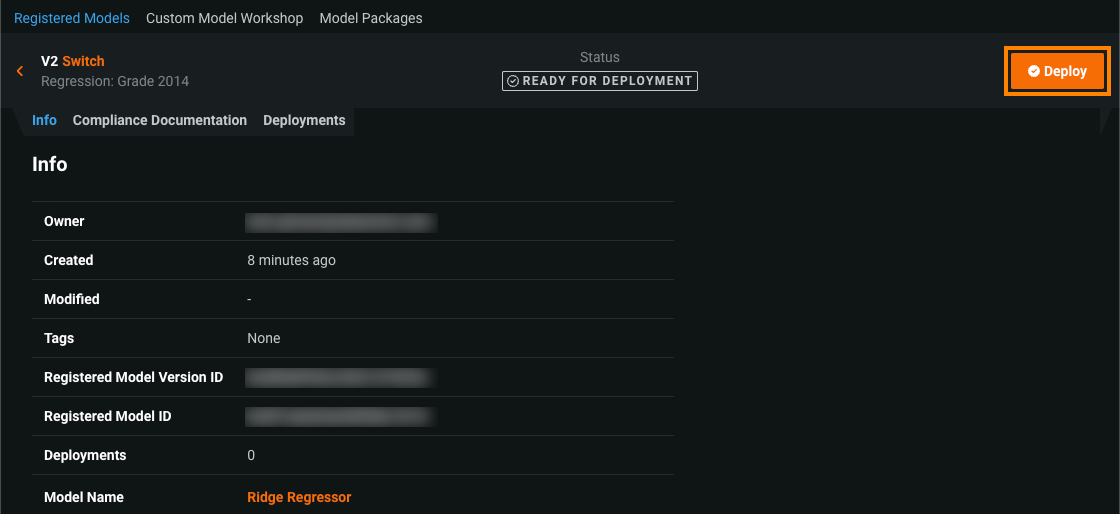
On any tab in the registered model version, click Deploy.
-
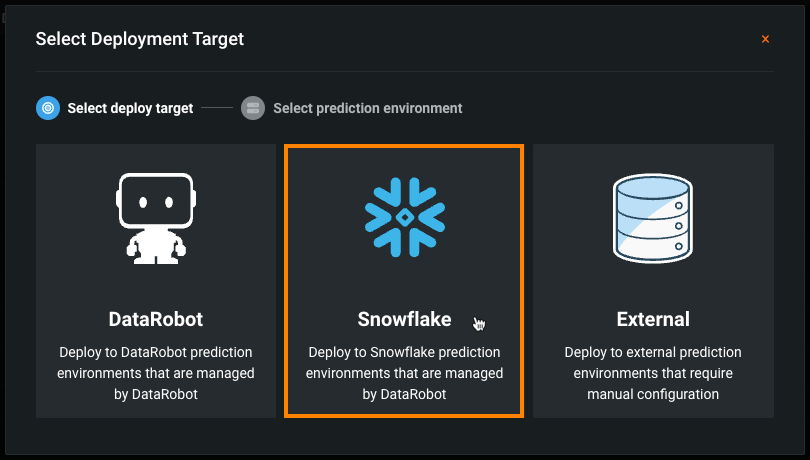
In the Select Deployment Target dialog box, under Select deploy target, click Snowflake.
Note
If you can't click the Snowflake deployment target, the selected model doesn't have Scoring Code available.
-
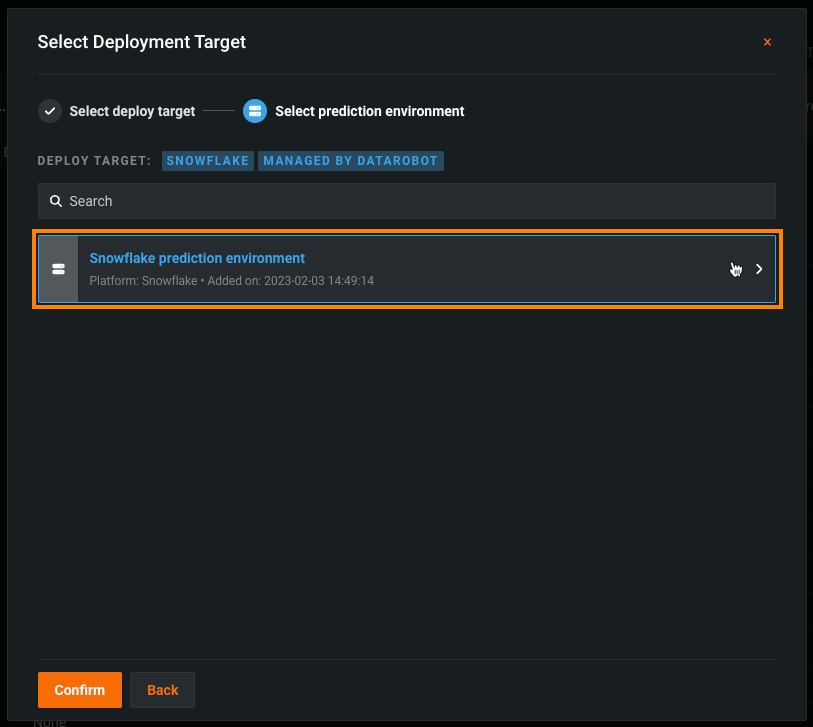
Under Select prediction environment, select the Snowflake prediction environment you added, and then click Confirm.
-
Configure the deployment, and then click Deploy model.
-
Once the model is deployed to Snowflake, you can use the Score your data code snippet from the Predictions > Portable Predictions tab to score data in Snowflake.
Restart a Snowflake prediction environment
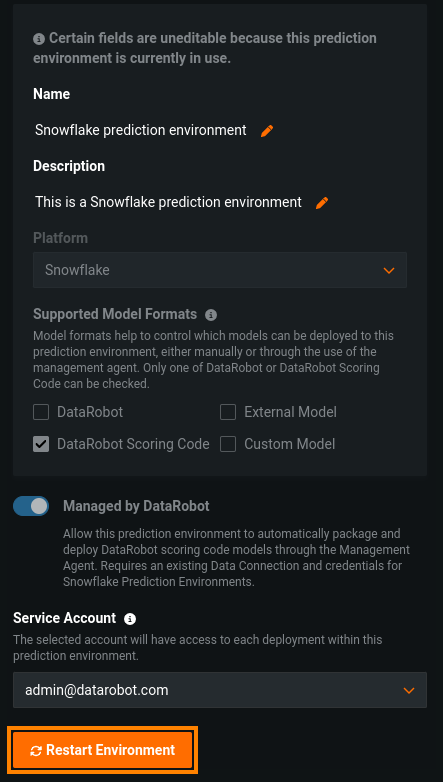
When you update database settings or credentials for the Snowflake data connection used by the prediction environment, you can restart the environment to apply those changes to the environment:


