Create custom inference models
Custom inference models are user-created, pre-trained models that you can upload to DataRobot (as a collection of files) via the Custom Model Workshop. You can then upload a model artifact to create, test, and deploy custom inference models to DataRobot's centralized deployment hub.
You can assemble custom inference models in either of the following ways:
-
Create a custom model without providing the model requirements and
start_server.shfile on the Assemble tab. This type of custom model must use a drop-in environment. Drop-in environments contain the requirements andstart_server.shfile used by the model. They are provided by DataRobot in the Custom Model Workshop. You can also create your own drop-in custom environment. -
Create a custom model with the model requirements and
start_server.shfile on the Assemble tab. This type of custom model can be paired with a custom or drop-in environment.
Be sure to review the guidelines for assembling a custom model before proceeding. If any files overlap between the custom model and the environment folders, the model's files will take priority.
Note
Once a custom model's file contents are assembled, you can test the contents locally for development purposes before uploading it to DataRobot. After you create a custom model in the Workshop, you can run a testing suite from the Assemble tab.
Create a new custom model
-
To create a custom model, navigate to Model Registry > Custom Model Workshop and select the Models tab. This tab lists the models you have created. Click Add new model.
-
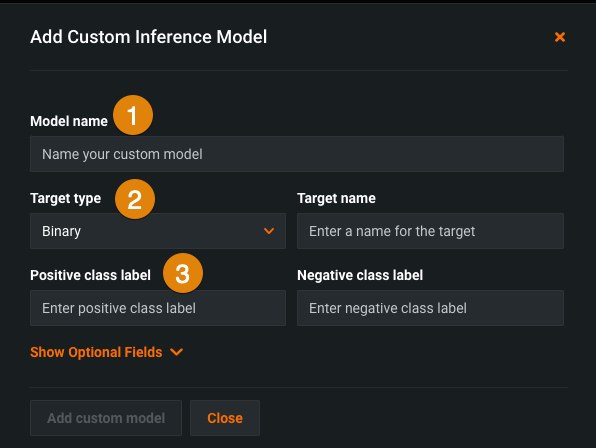
In the Add Custom Inference Model window, enter the fields described in the table below:
Element Description 1 Model type Select Custom model or Proxy (external). 2 Model name Name the custom model. 3 Target type / Target name Select the target type (binary classification, regression, multiclass, text generation (premium feature), anomaly detection, or unstructured) and enter the name of the target feature. 4 Positive class label / Negative class label For binary classification models, specify the value to be used as the positive class label and the value to be used as the negative class label.
For a multiclass classification model, these fields are replaced by a field to enter or upload the target classes in.csvor.txtformat.Target type support for proxy models
If you select the Proxy model type, you can't select the Unstructured target type.
-
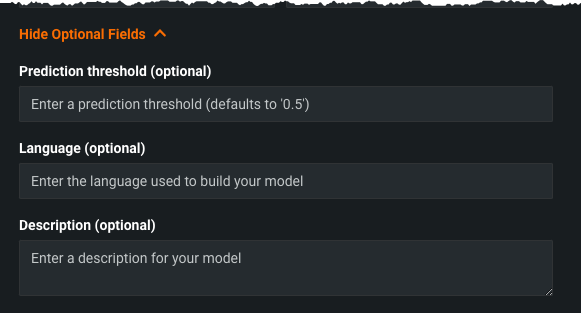
Click Show Optional Fields and, if necessary, enter a Prediction threshold, the Language used to build the model, and a Description.
-
After completing the fields, click Add Custom Model.
-
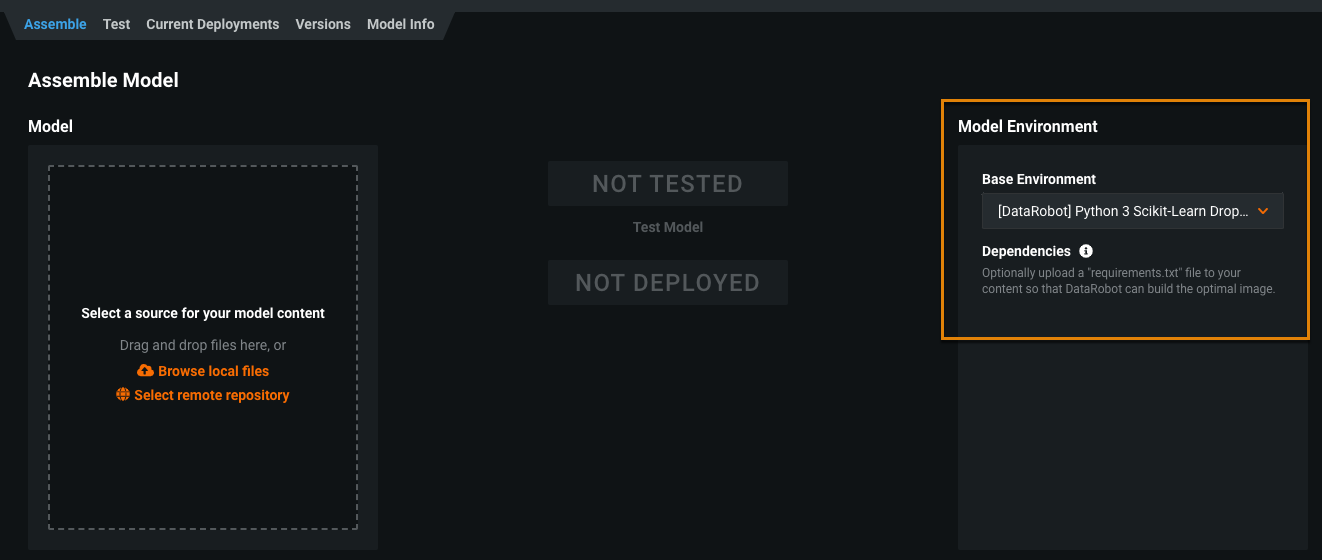
In the Assemble tab, under Model Environment on the right, select a model environment by clicking the Base Environment dropdown menu on the right and selecting an environment. The model environment is used for testing and deploying the custom model.
Note
The Base Environment pulldown menu includes drop-in model environments, if any exist, as well as custom environments that you can create.
-
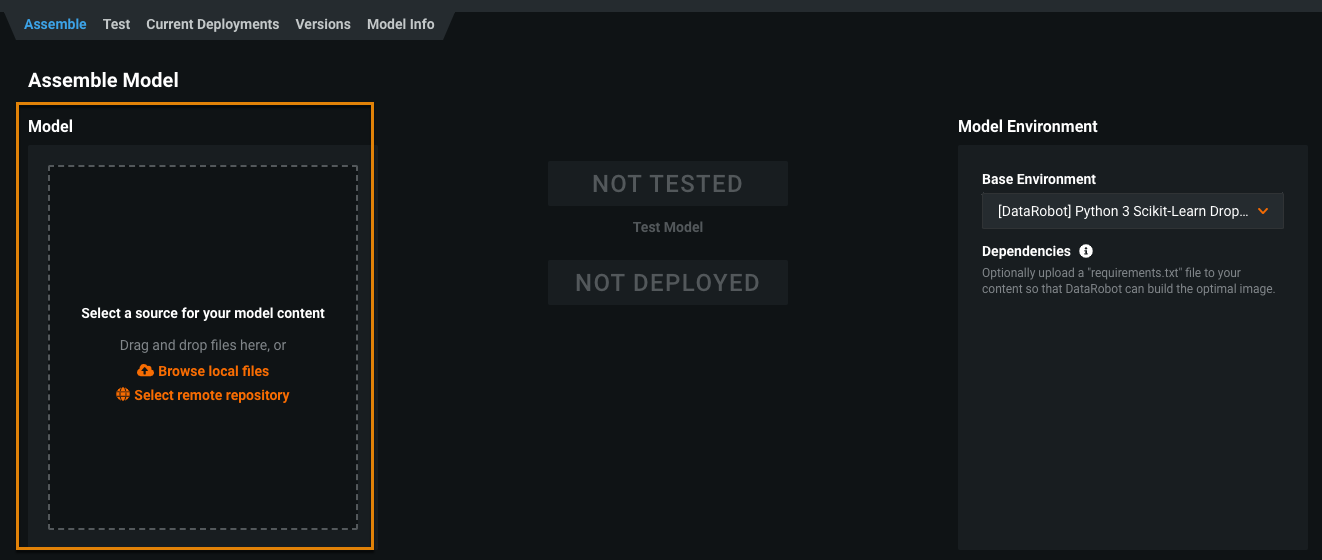
Under Model on the left, add content by dragging and dropping files or browsing. Alternatively, select a remote integrated repository.
If you click Browse local file, you have the option of adding a Local Folder. The local folder is for dependent files and additional assets required by your model, not the model itself. Even if the model file is included in the folder, it will not be accessible to DataRobot unless the file exists at the root level. The root file can then point to the dependencies in the folder.
Note
You must also upload the model requirements and a
start_server.shfile to your model's folder unless you are pairing the model with a drop-in environment.
View and edit runtime parameters
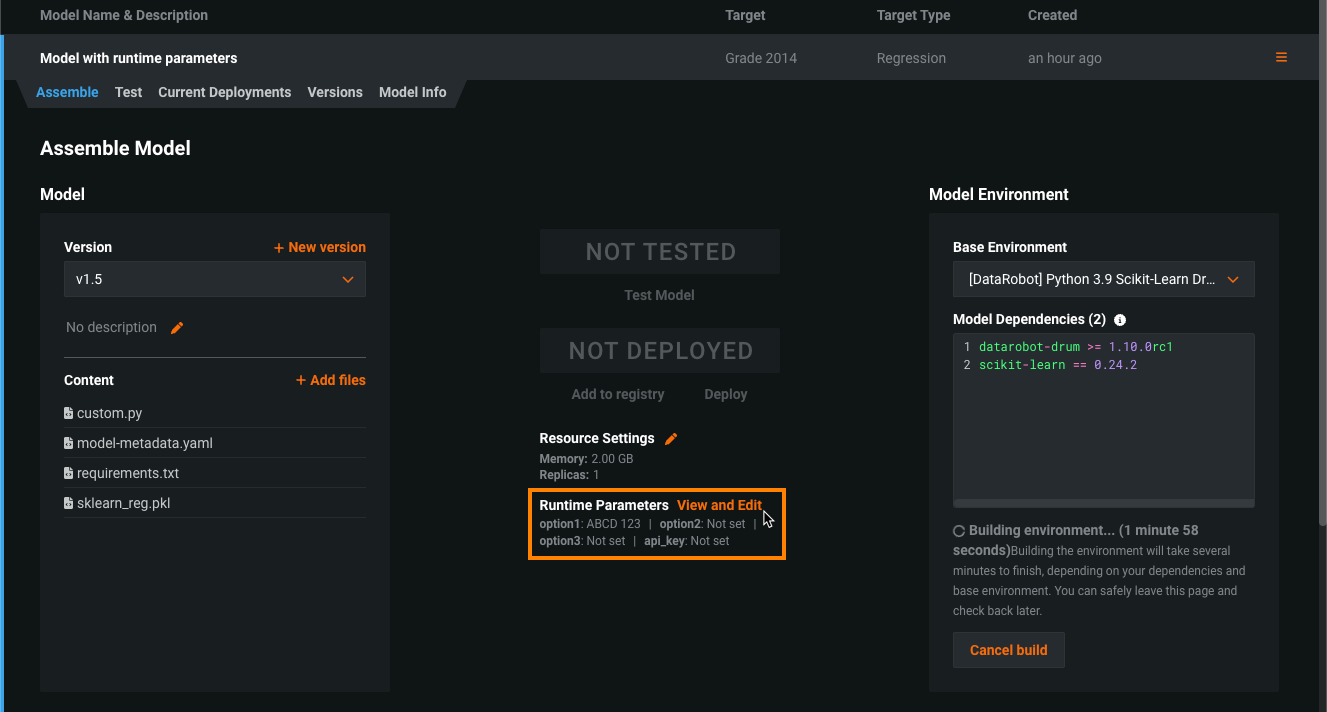
When you add a model-metadata.yaml file with runtimeParameterDefinitions to DataRobot while creating a custom model, the Runtime Parameters section appears on the Assemble tab for that custom model. After you build the environment and create a new version, you can click View and Edit to configure the parameters:
Note
Each change to a runtime parameter creates a new minor version of the custom model.
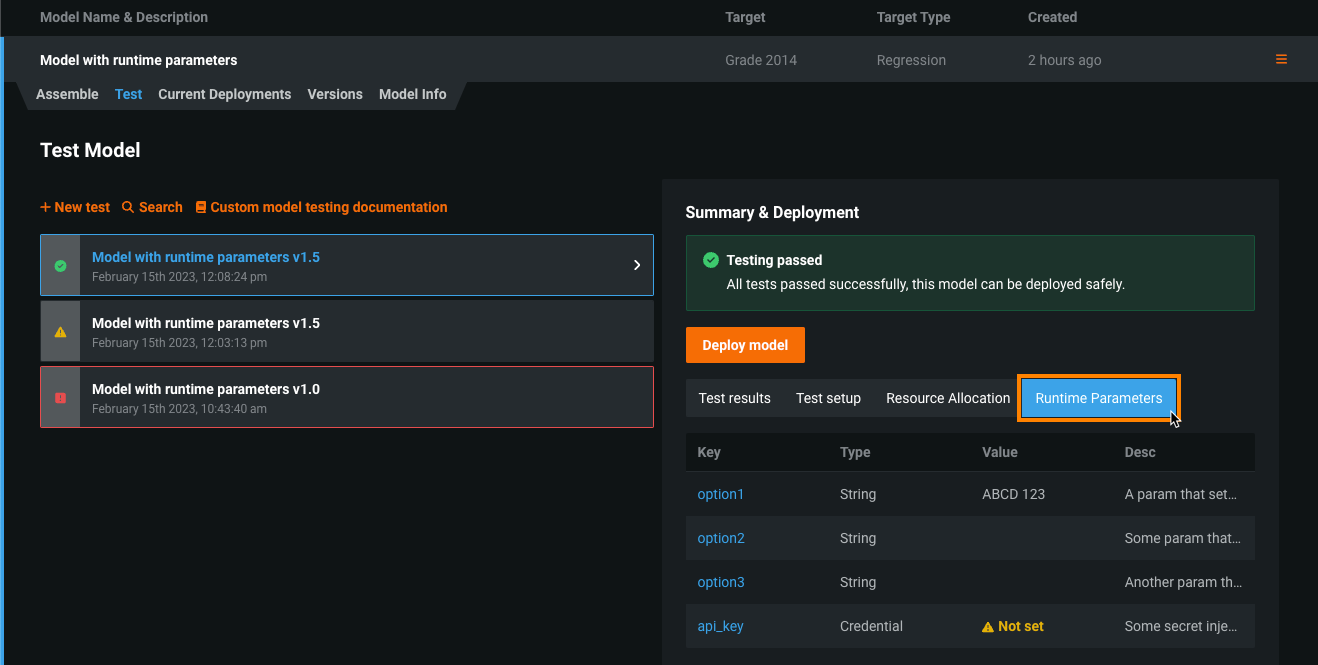
After you test a model with runtime parameters in the Custom Model Workshop, you can navigate to the Test > Runtime Parameters to view the model's parameters:
If any runtime parameters have allowEmpty: false in the definition without a defaultValue, you must set a value before registering the custom model.
For more information on how to define runtime parameters and use them in your custom model code, see the Define custom mode runtime parameters documentation.
Anomaly detection
You can create custom inference models that support anomaly detection problems. If you choose to build one, reference the DRUM template. (Log in to GitHub before clicking this link.) When deploying custom inference anomaly detection models, note that the following functionality is not supported:
- Data drift
- Accuracy and association IDs
- Challenger models
- Humility rules
- Prediction intervals

