Import to DataRobot directly
This section describes detailed steps for importing data to DataRobot. Before you import data, review DataRobot's data guidelines to understand dataset requirements, including file formats and sizes.
Guidelines for imports
Review the following data guidelines for AutoML, time series, and Visual AI projects prior to importing.
Dataset formatting
To avoid introducing unexpected line breaks or incorrectly separated fields during data import, if a dataset includes non-numeric data containing special characters—such as newlines, carriage returns, double quotes, commas, or other field separators—ensure that those instances of non-numeric data are wrapped in quotes ("). Properly quoting non-numeric data is particularly important when the preview feature "Enable Minimal CSV Quoting" is enabled.
For AutoML projects
- The data must be in a flat-file, tabular format.
- You must have a column that includes the target you are trying to predict.
For time series projects
- The data must be in a flat-file, tabular format.
- You must include a date/time feature for each row.
- When using time series modeling, DataRobot detects the time step—the delta between rows measured as a number and a time-delta unit in the data, for example (15, “minutes”). Your dataset must have a row for each time-delta unit. For example, if you are predicting seven days in the future (time step equals 7, days), then your dataset must have row for each day for the entire date range; similarly, if you are forecasting out seven years, then your data must have one row for each year for the entire date range.
- You must have a column that includes the target that you are trying to predict.
For Visual AI projects
- Set up folders that contain images for each class and name the folder for that class. Create a ZIP archive of that folder of folders and upload it to DataRobot.
- You can also add tabular data if you include the links to the images within the top folder. You can find more information on that here.
Create a project
Before you can begin building models, you must create a new DataRobot project in either of the following ways:
- Click the DataRobot logo in the upper left corner.
- Open the Projects folder in the upper right corner and click the Create New Project link.
Once the new project page is open, select a method to import an acceptable file type to the page. (Accepted types are listed at the bottom of the screen.) If a particular upload method is disabled on your cluster, the corresponding ingest button will be grayed out.
Import methods
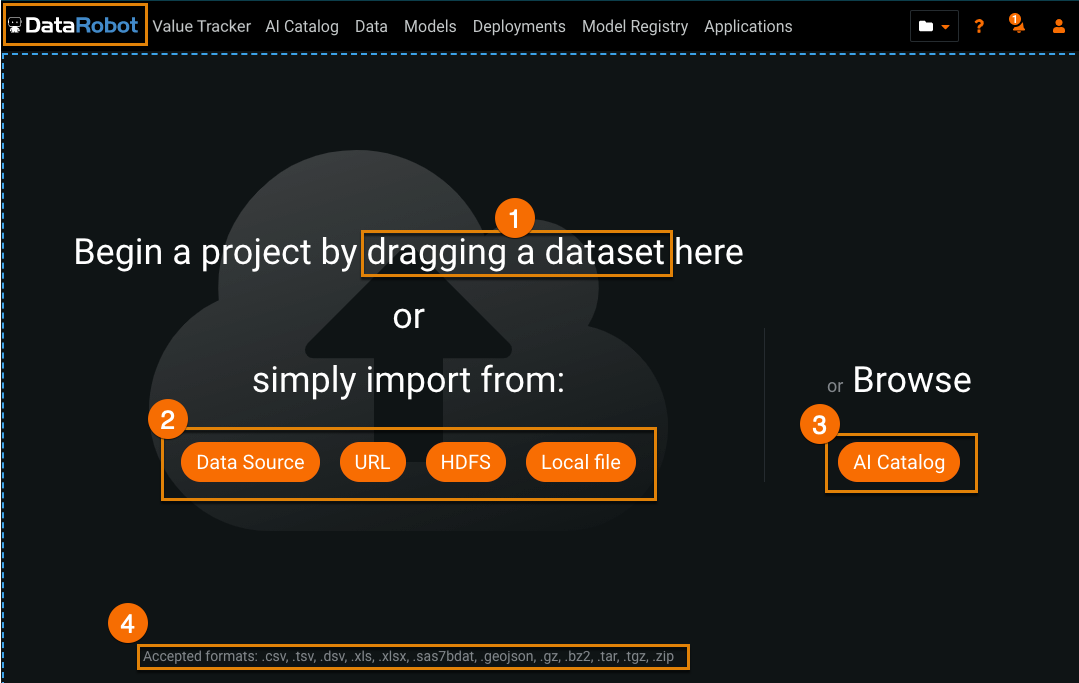
To import to DataRobot, navigate to the Begin project page by clicking the DataRobot logo on the top left. There are other methods of accessing this page depending on your account type.
| Import method | Description | |
|---|---|---|
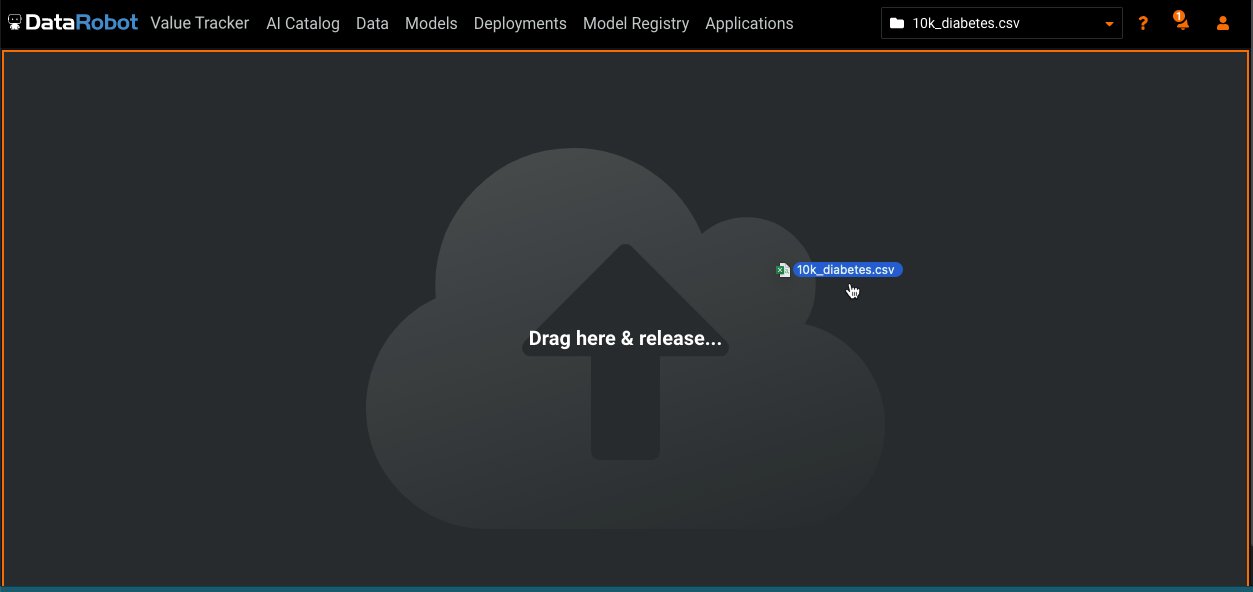
| 1 | Drag and drop | Drag and drop a file from your computer onto the Begin a project page. |
| 2 | Import from | Choose your import method. |
| 3 | Browse | Browse the AI Catalog. You can import, store, blend, and share your data through the AI catalog. |
| 4 | File types | View the accepted formats for imports. See Dataset requirements for more details. |
The following table lists each import method:
| Method | Description |
|---|---|
| Use an existing data source | Import from a configured data source. |
| Import a dataset from a URL | Specify a URL from which to import data. |
| Import local files | Browse to a local file and import. |
| Import files from S3 | Upload from an AWS S3 bucket. |
| Import files from Google Cloud Storage | Import directly from Google Cloud. |
| Import files from Azure Blob Storage | Import directly from Azure Blob. |
Note
A particular upload method may be disabled on your cluster, in which case a button for that method does not appear. Contact your system administrator for information about the configured import methods.
Some import methods may need to be configured by an admin before use, as noted in the following sections.
For larger datasets, DataRobot provides special handling that lets you see your data earlier and select project options earlier.
Upload a local file
Availability information
The ability to load locally mounted files directly into DataRobot is not available for managed AI Platform users.
Click Local file and browse for a file or drag a file directly onto the Begin a project page. You can also specify the URL link as file:///local/file/location.
DataRobot ingests the file from the network storage drive connected to the cluster and creates a project. This import method needs to be configured for your organization's installation.
Note
When dropping large files (greater than 100MB) the upload process may hang. If that happens:
- Try again.
- Compress the file into a supported format and then try again.
- Save the file to a remote data store (e.g., S3) and use URL ingest, which is more reliable for large files.
- If security is a concern, use a temporarily signed S3 URL.
Import from a URL
Use a URL to import your data. It can be local, HTTP, HTTPS, Google Cloud Storage, Azure Blob Storage, or S3 (URL must use HTTP).
-
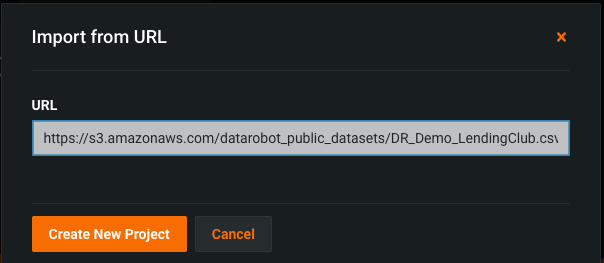
Click URL.
-
Enter the URL to your data and click Create New Project. The URL can be local, HTTP, HTTPS, Google Cloud Storage, Azure Blob Storage, or S3.
DataRobot imports the data and creates a project.
Note
The ability to import from Google Cloud, Azure Blob Storage, or S3 using a URL needs to be configured for your organization's installation. Contact your system administrator for information about configured import methods.
Import from a data source
Before importing from a data source, configure a JBDC connection to the external database.
Note
When DataRobot ingests from the data source option, it makes a copy of the selected database rows for your use in the project.
To import from an existing data source:
-
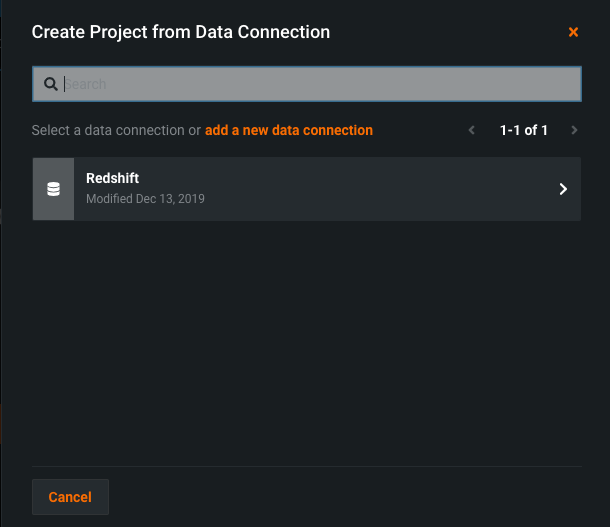
Click Data Source.
-
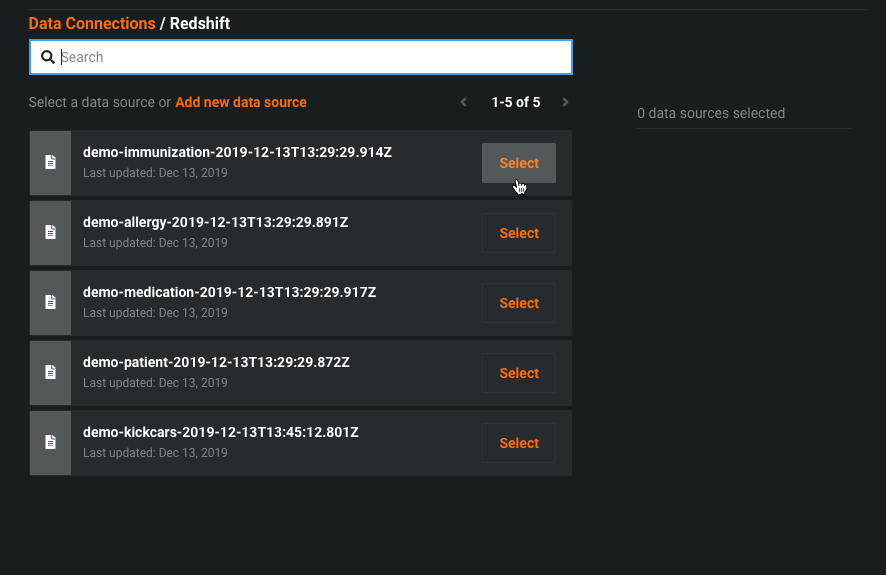
Search and select a data source.
You can also choose to add a new data connection.
-
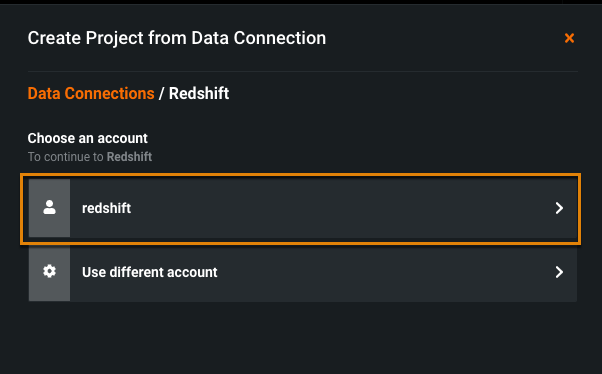
Choose an account.
-
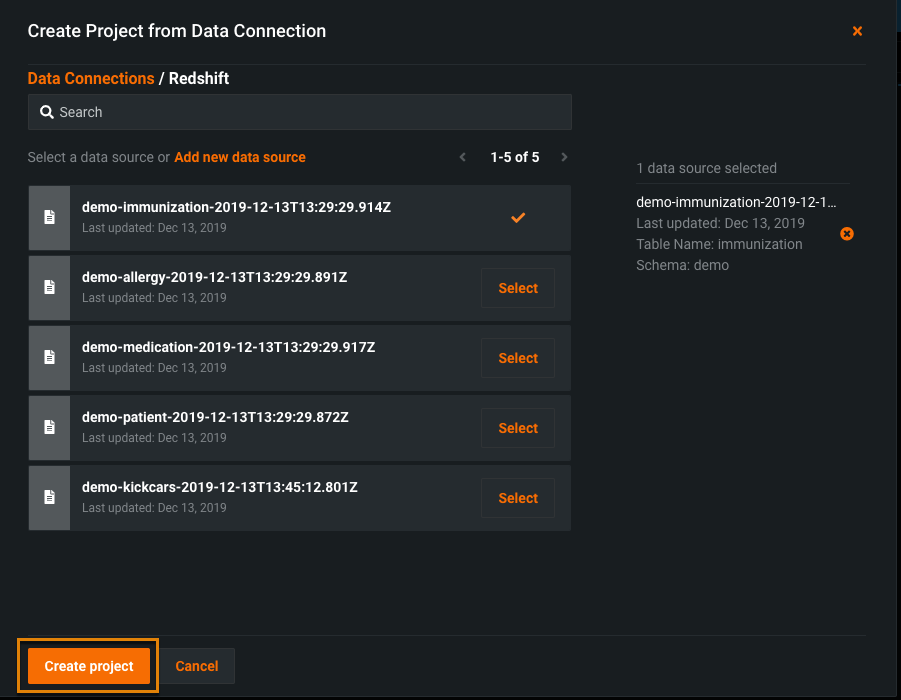
Select the data you want to connect to.
-
Click to create a project.
DataRobot connects to the data and creates a project.
Import files from S3
Self-Managed AI Platform installations with this import method configured can ingest S3 files via a URL by specifying the link to S3 as s3://<bucket-name>/<file-name.csv> (instead of, for example, https://s3.amazonaws.com/bucket/file?AWSAccessKeyId...). This allows you to ingest files from S3 without setting your object and buckets to public.
Note
This method is disabled for managed AI Platform users. Instead, import S3 files using one of the following methods:
- Using an Amazon S3 data connection.
- Generate a pre-signed URL allowing public access to S3 buckets with authentication, then you can use a direct URL to ingest the dataset.
Import files from Google Cloud Storage
You can configure DataRobot to directly import files stored in Google Cloud Storage using the link gs://<bucket-name>/<file-name.csv>. This import method needs to be configured for your organization's installation.
Note
The ability to import files using the gs://<bucket-name>/<file-name.csv> link is not available for managed AI Platform users.
Import files from Azure Blob Storage
It is possible to directly import files stored in Azure Blob Storage using the link azure_blob://<container-name>/<file-name.csv>. This import method needs to be configured for your organization's installation.
Note
The ability to import files using the azure_blob://<container-name>/<file-name.csv> link is not available for managed AI Platform users.
Project creation and analysis
After you select a data source and import your data, DataRobot creates a new project. This first exploratory data analysis step is known as EDA1. (See the section on "Fast EDA" to understand how DataRobot handles larger datasets.)
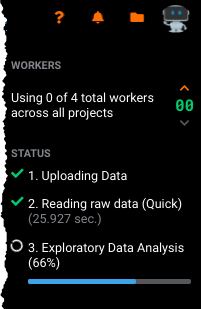
Progress messages indicate that the file is being processed.
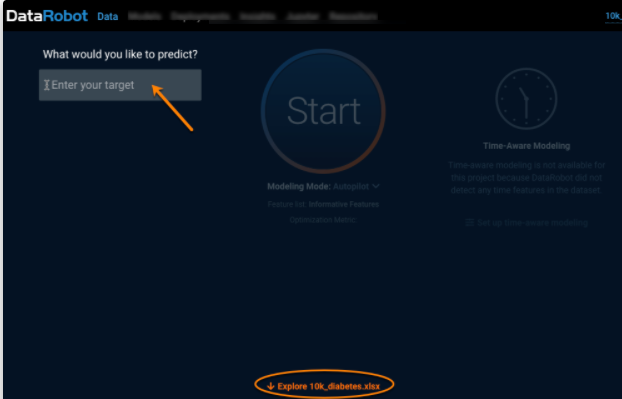
When EDA1 completes, DataRobot displays the Start screen. From here you can scroll down or click the Explore link to view a data summary. You can also specify the target feature to use for predictions.
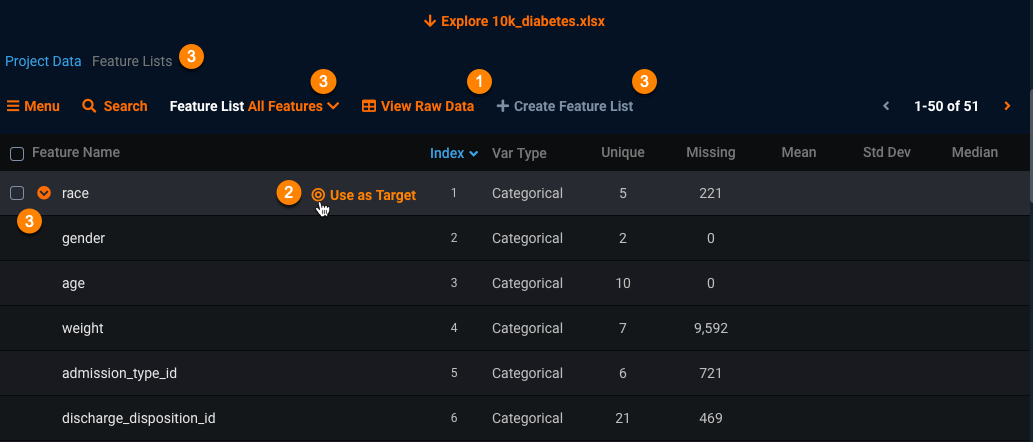
Once you're in the data section, you can:
-
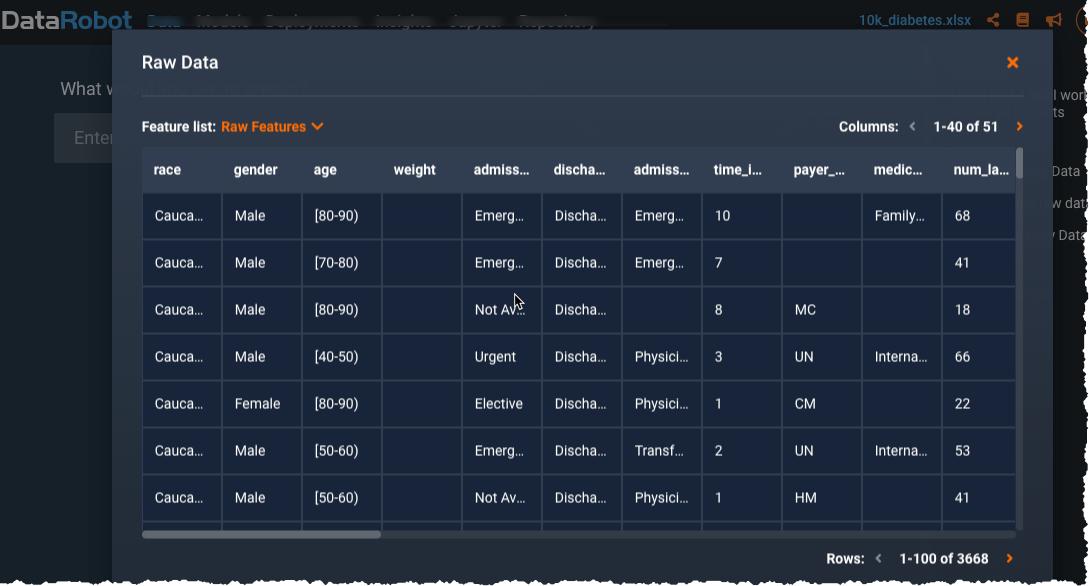
Click View Raw Data (1) to display a modal presenting up to a 1MB random sample of the raw data table DataRobot will be building models with:
-
Set your target (2) by mousing over a feature name in the data display.
-
Work with feature lists (3).
You can also view a histogram for each feature. The histogram provides several options for modifying the display to help explain the feature and its relationship to the dataset.
More information becomes available once you set a target feature and begin your model build, which is the next step.
