Anomaly visualizations
For time series anomaly detection, DataRobot provides the following additional visualizations to help view and understand anomaly scores.
Anomaly Over Time
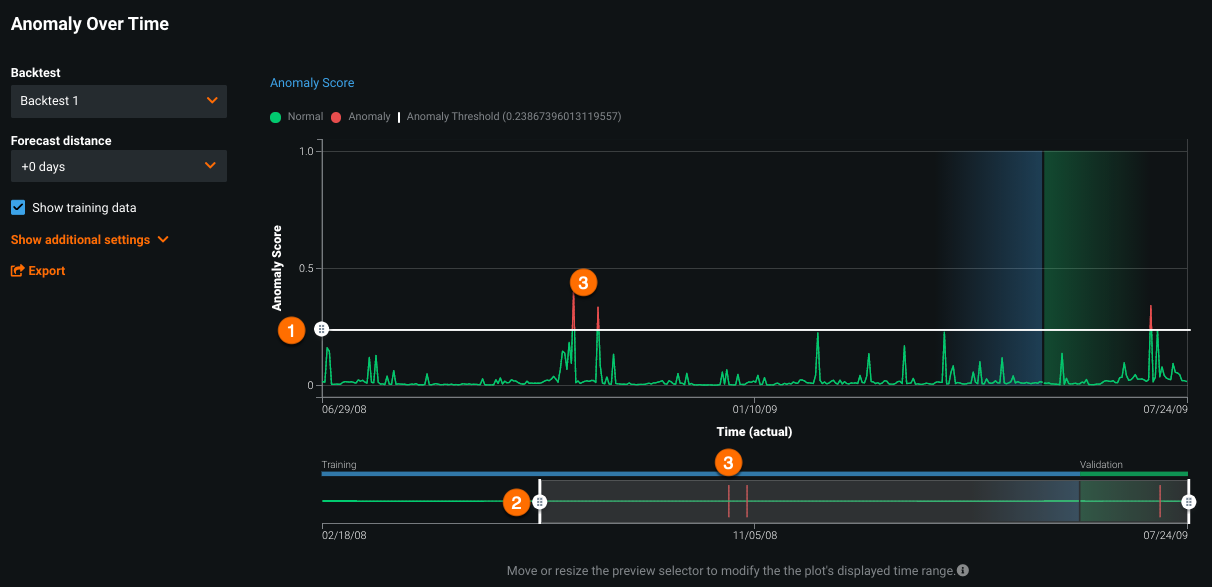
The Anomaly Over Time visualization helps to understand when anomalies occur across the timeline of your data. It functions similarly to the non-anomaly Accuracy Over Time chart. See that chart description for details of the configurable elements (backtest, forecast distance, etc.) and controlling the display.
Note
Because multiseries projects can have up to 1 million series and up to 1000 forecast distances, calculating accuracy charts for all series data can be extremely compute-intensive and often unnecessary. To avoid this, DataRobot provides alternative calculation options.
This chart, in addition to handles that control the preview (1), provides an additional handle to control the anomaly threshold (2). Drag the handle up and down to set the threshold that defines whether plot values should be considered as anomalies. Points above the threshold are indicated in red, both in the upper chart and in the preview (3).
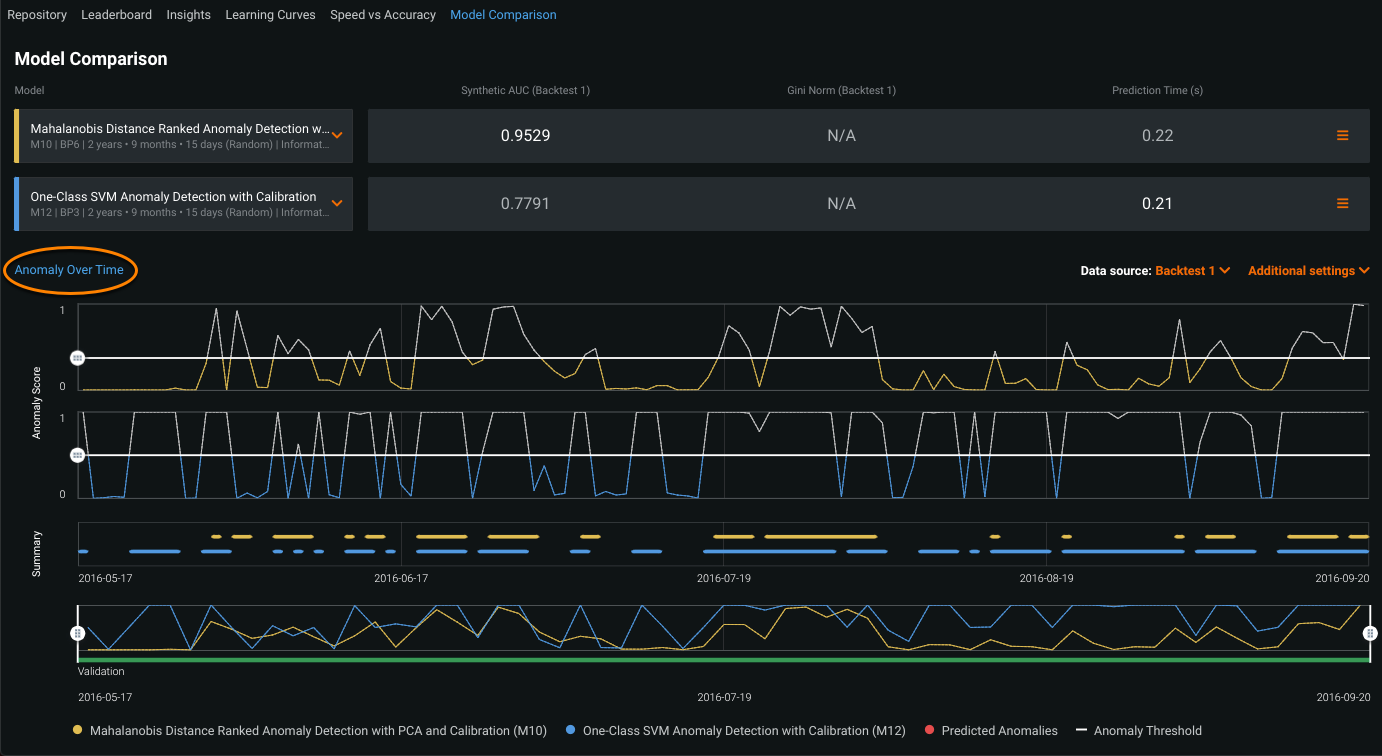
If you are using Model Comparison to visualize anomaly detection over time for two selected models, the page displays predicted anomalies in an Anomaly Over Time chart for each model and a Summary chart that visualizes where the anomaly models agree or disagree.
To control the anomaly threshold, drag the handle up and down independently for each model. Note that thresholds vary between models in the same project, meaning they do not need to be the same across the two charts to make an accurate comparison.
As the handle moves, the Summary chart updates to only display bins above the anomaly thresholds.
Select a date range of interest using the time selector at the bottom of the page. Both the Anomaly Over Time charts and Summary chart update to reflect the selected time window.
Comparing Anomaly Over Time is a good method for identifying two complimentary models to blend, increasing the likelihood of capturing more potential issues. However, you must have a good understanding of where the actual anomalies are in your data; neither chart indicates if anomalies are correctly predicted. For example, while comparing the Anomaly Over Time of two models, you might find that one model is able to detect more issues, but another model is able to detect issues earlier. Training a blender out of these two models results in more efficient anomaly detection.
Anomaly Assessment
The Anomaly Assessment tab plots data for the selected backtest and provides, below the visualization, SHAP explanations for up to 500 anomalous points. Red points on the chart indicate that explanations are calculated and available. Clicking on an explanation expands and computes the Feature Over Time chart for the selected feature. The chart and explanations together provide some explanation for the source of an anomaly.
Anomaly Assessment chart
When you open the tab and click to compute the assessment, the most anomalous point in the validation data is selected by default (a white vertical bar) with corresponding explanations below. Hover on any point to see the prediction for that point; click elsewhere in the chart to move the bar. As the bar moves, the explanations below the chart update.
Note
SHAP explanations are available for up to 500 anomalous points per backtest. When a selected backtest has more than 500 sample points, the display uses red to indicate those points for which SHAP explanations are available and blue to show points without SHAP explanations. In other words, color coding, in this case, represents the availability of SHAP explanations not the value of the anomaly score.
Control the chart display
The chart provides several controls that modify the display, allowing you to focus on areas of particular interest.
Backtest / series selector
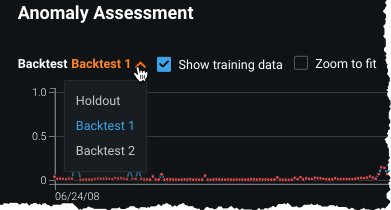
Use the dropdown to select a specific backtest or the holdout partition. The chart updates to include only data from within that date range. For multiseries projects there is an additional dropdown that allows you to select the series of interest.
Compute for training / Show training data
Initially the Anomaly Assessment chart displays anomalies found in the validation data. Click Compute for training to calculate anomalous points in the training data. Note, however, that training data is not a reliable measure of a model's ability to predict on future data.
Once computed, use the Show training data option to show training and validation (box checked) or only validation data (box unchecked).
Zoom to fit
When Zoom to fit is checked, DataRobot modifies the chart's Y-axis values to match the minimum and maximum of the target values. When unchecked, the chart scales to show the full possible range of target values:
When checked, it scales from the minimum to maximum values, which can change the relative difference in the anomaly score:
See the example in the Accuracy Over Time description for more detail.
Preview handles
Use the handles on preview pane to narrow the display in the chart above. Gradient coloring, in both the preview and the chart, indicates division in partitions, if applicable. Changes to the preview pane also impact the display of the Feature Over Time chart.
Display anomaly information
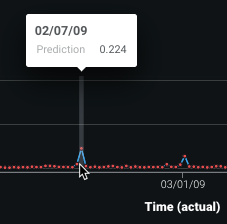
Hover on any point in the chart to see a report of the date and prediction score for that point:
Click a point to move the vertical bar to that point, which in turn updates the displayed SHAP scores. The SHAP score helps to understand how a feature is involved in the prediction.
List SHAP explanations
The white vertical bar in the main chart serves as a selector that controls the SHAP explanation display. As you click through the chart, you can notice that the list of explanations (scores) changes. For example, on 11/23/08 the anomaly score was fairly low with a derivation of the feature "Sales" having the most impact:
On 02/07/09, by contrast, a higher score is attributed to the actual precipitation on that day:
If a point is not anomalous, no SHAP scores are listed.
Display the Feature Over Time chart
From the list of SHAP scores, click a feature to see its Over Time chart. (Read more about the Over Time chart in the time series documentation.) The plot is computed for each backtest and series.
The white bar is based on the location set in the full chart. Note that if the selected anomaly point is in the training data, and Show training data is unchecked, the bar does not display.
Drag the handles in the preview pane to focus the display.
The chart is not available for text or categorical features.


