Transformations and lists
To simplify comparing multiple augmentation strategies across many models, DataRobot provides the capability to create augmentation lists. This section describes those lists and the settings and transformations that comprise them.
Augmentation lists
Augmentation lists store all the parameter settings for a given augmentation strategy. They function similarly to feature lists, with DataRobot providing the ability to create, rename, and delete lists.
DataRobot automatically creates an initial augmentation list if you set the transformation parameters from the Advanced options link prior to modeling. Alternatively, you can add lists after modeling. In either case, you can view lists once modeling completes.
To see your saved augmentation list(s), open a model on the Leaderboard and navigate to Evaluate > Advanced Tuning:
From here you can create a new list or manage existing lists. Click Show preview to replace the graph image with a preview of the image transformations or Hide preview to return to the Advanced Tuning graph.
Create a new list
To create a new list, click Create new list. A list of transformation parameters (each described below) and a preview appears. You can either begin to set parameters from the default settings or select an existing list from the dropdown as a starting point. Note that you if you manually enter a value instead of using the slider, you must click outside of the box before the change registers and can be saved. The preview displays the original image and a sample of transformed images.
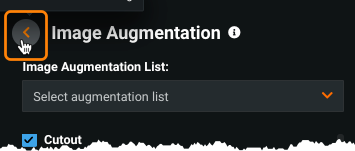
Set the transformation parameters (scroll to access all options), preview augmentation if desired, and click Save as new list. To discard changes, click the arrow to return to Advanced Tuning.
Manage existing lists
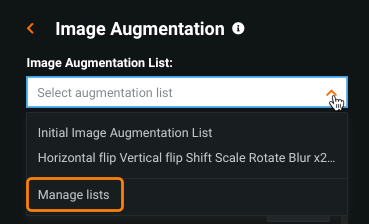
You can rename and delete augmentation lists by selecting Manage lists from the list dropdown:
Use the edit (![]() ) or delete (
) or delete (![]() ) icons to rename or remove lists. Note the following:
) icons to rename or remove lists. Note the following:
- You cannot delete any list that has been used for modeling, including the "Initial List" (created from the advanced options settings).
- You cannot rename the "Initial List."
Augmentation list components
The following describes each component of an augmentation list. After setting values, you can use Preview augmentation to fine-tune values. The preview does not display all dataset images with all possible transformations. Instead, it contains rows that consist of an original image from the dataset with examples of transformations as they would appear in the data used for training.
New images per original
The New images per original specifies how many versions of the original image DataRobot will create. Basically, it sets how much larger your dataset will be after augmentation. For example, if your original dataset has 1000 rows, a "new images" value of 3 will result in 4000 rows for your model to train on (1000 original rows and 3000 new rows with transformed images).
The maximum allowed value for New images per original is dynamic. That is, DataRobot determines a value—based on the number of original rows—that it can safely use to build models without exceeding memory limits. Put simply, for a project (regardless of current feature list), the maximum is equal to 300,000 / (number_of_rows * feature_columns) or 1, whichever is greater.
When you create new images, DataRobot adds rows to the dataset. All feature column, with the exception of the column containing the new image, are duplicate values of the original row.
For fine-tuned models, the New images per original parameter has no effect. Instead, control the size of training data using the epoch and earlystop_patience parameters in the Advanced Tuning tab.
Choose transformations probability
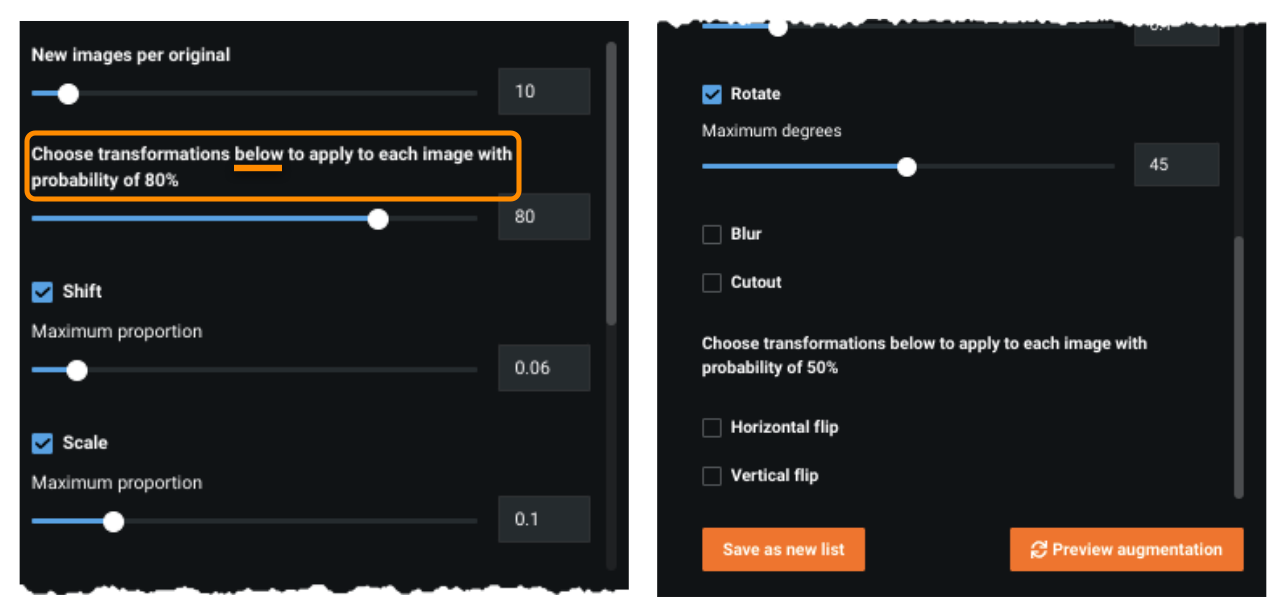
For each new image that is created, each transformation enabled in your augmentation list will have a probability of being applied equal to this parameter. So, if you enable Rotate and Shift and set the individual transformation probability to 0.8, this means that ~80% of your new images will at least have Rotate and ~80% will at least have Shift. Because the probability for each transformation is independent, and each new image could have neither, one, or both transformations, your new images would be distributed as follows:
| No Shift | Shift | |
|---|---|---|
| No Rotate | 4% | 16% |
| Rotate | 16% | 64% |
Transformations
The following sections explain the transformation options available for images.
The best way to familiarize yourself with the available transformations is to explore them in DataRobot and see the resulting transformed images using Preview Augmentation. However, the following descriptions are provided for more context and implementation details.
There are two main purposes that a transformation can serve:
-
To create a new image that looks like it could have reasonably been in the original data. Since applying transformations is typically less expensive than collecting and labelling more data, this is a great way to increase your training set size with images that are almost as authentic as originals.
-
To intentionally remove some information from the image, guiding the model to focus on different aspects of the image and thereby learning a more robust representation of it. This is described with examples under the sections for Blur and Cutout.
Shift
The Shift transformation is useful when the object(s) to detect are not centered. Once selected, you also set a Maximum Proportion:
The Maximum Proportion parameter sets the maximum amount the image will be shifted up, down, left, or right. A value of 0.5 means that the image could be shifted up to half the width of the image left or right, or half the height of the image up or down. The actual amount shifted for each image is random, and Shift is only applied to each image with probability equal to the individual transformation probability. The image will be padded with reflection padding. This transformation typically serves the purpose mentioned above—simulating whether the photographer had taken a step forward or back, or raised or lowered the camera.
Scale
Scale is likely to be helpful when:
- The object(s) to detect are not a consistent distance from the camera.
- The object(s) to detect vary in size.
Once selected, set a Maximum Proportion parameter to set the maximum amount the image will be scaled in or out. The actual amount scaled for each image is random—Scale is only applied to each image with probability equal to the individual transformation probability. If scaled out, the image will be padded with reflection padding. This transformation typically serves the first purpose mentioned above, simulating whether the photographer had taken a step forward or backward.
Rotate
Rotate is likely to be helpful when:
- The object(s) to detect can be in a variety of orientations.
- The object(s) to detect have some radial symmetry.
If set, use the Maximum Degrees parameter to set the maximum degree to which the image will be rotated clockwise or counterclockwise. The actual amount rotated for each image is random, and Rotate will only be applied to each image with probability equal to the individual transformation probability. Rotate best simulates if the object captured had turned or if the photographer had tilted the camera.
Blur
Blur and the accompanying Maximum Filter Size are helpful when:
- The images have a variety of blurriness.
- The model must learn to recognize large-scale features in order to make accurate predictions.
The Maximum Filter Size parameter sets the maximum size of the gaussian filter passed over the image to smooth it. For example, a filter size of 3 means that the value of each pixel in the new image will be an aggregate of the 3x3 square surrounding the original pixel. Higher filter size leads to a more blurry image. The actual filter size for each image is random, and Blur will only be applied to each image with probability equal to the individual transformation probability.
This transformation can serve both purposes described above. With regard to the first purpose, if the images have a variety of blurriness, adding Blur can simulate new images with varying levels of focus. With the second purpose, by adding Blur you guide the model to focus on larger-scale shapes or colors in the image rather than specific small groups of pixels. For example, if you are worried that the model is learning to identify cats only by a single patch of fur rather than also considering the whole shape, then adding Blur can help the model to focus on both small-scale and large-scale features. But if you're training a model to recognize tiny manufacturing defects, it's possible that applying Blur might only remove valuable information that would be useful for training.
Cutout
Cutout is likely to be helpful when:
- The object(s) to detect are frequently partially occluded by other objects.
- The model should learn to make predictions based off multiple features in the image.
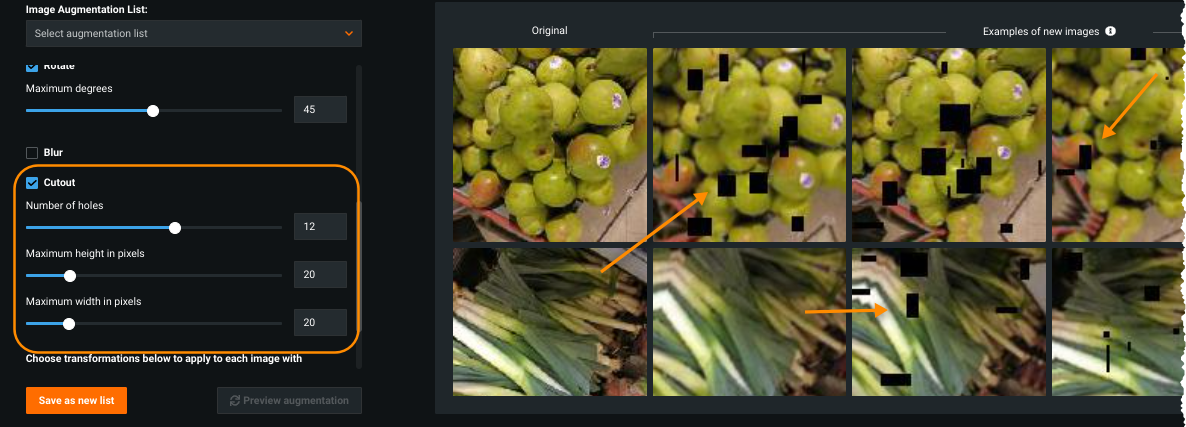
Once selected, there are a number of additional parameters you can set:
- The Number of Holes sets the number of black rectangles that will be pasted over the image randomly.
- The Maximum Height in Pixels and Maximum Width in Pixels indicate the maximum height and width of each rectangle, though the value for each rectangle will be random.
Cutout is only applied to each image with probability equal to the individual transformation probability.
This transformation can serve both purposes described above. For the first, if the object(s) to detect are frequently partially occluded by other objects, adding Cutout can simulate new images with objects that continue to be partially obscured in new ways. Regarding the second purpose, adding Cutout guides the model to not always look at the same part of an object to make a prediction. For example, imagine training a model to distinguish among various car types. The model might learn that the shape of the hood is enough to reach 80% accuracy, and so the signal from the hood might outweigh any other information in training. By applying Cutout, the model won't always be able to see the hood, and will be forced to learn to make a prediction using other parts of the car. This could lead to a more accurate model overall, because it has now learned how to use various features in the image to make a prediction.
Horizontal Flip
The following are scenarios in which the Horizontal Flip transformation is likely to be helpful:
- The object you're trying to detect has symmetry about a vertical line.
- The camera was pointed parallel to the ground.
- The object you're trying to detect could have come from either the left or the right.
This transformation has no parameters—new images will be flipped with probability of 50% (ignoring the value of the individual transformation probability). It typically serves the purpose mentioned above, simulating if the object was coming from the left instead of the right or vice-versa.
Vertical Flip
The following are scenarios in which the Horizontal Flip transformation is likely to be helpful:
- The object(s) to detect have symmetry about a horizontal line.
- The camera was pointed perpendicular the ground—for example, down at the ground, table, or conveyor belt, or up at the sky.
- The images are of microscopic objects that are hardly affected by gravity.
This transformation has no parameters—new images will be flipped with probability of 50% (ignoring the value of the individual transformation probability. It typically serves the purpose of simulating if the object was flipped vertically or if the overhead image was captured from the opposite orientation.


