Create custom tasks
While DataRobot provides hundreds of built-in tasks, there are situations where you need preprocessing or modeling methods that are not currently supported out-of-the-box. To fill this gap, you can bring a custom task that implements a missing method, plug that task into a blueprint inside DataRobot, and then train, evaluate, and deploy that blueprint in the same way as you would for any DataRobot-generated blueprint. (You can review how the process works here.)
The following sections describe creating and applying custom tasks and working with the resulting custom blueprints.
Understand custom tasks
The following helps to understand, generally, what a task is and how to use it. It then provides an overview of task content.
Components of a custom task
To bring and use a task, you need to define two components—the task’s content and a container environment where the task’s content will run:
-
The task content (described on this page) is code written in Python or R. To be correctly parsed by DataRobot, the code must follow certain criteria. (Optional) You can add files that will be uploaded and used together with the task’s code (for example, you might want to add a separate file with a dictionary if your custom task contains text preprocessing).
-
The container environment is defined using a Docker file, and additional files, that will allow DataRobot to build an image where the task will run. There are a variety of built-in environments; users only need to build their own environment when they need to install Linux packages.
At a high level, the steps to define a custom task include:
- Define and test task content locally (i.e., on your computer).
- (Optional) Create a container environment where the task will run.
- Upload the task content and environment (if applicable) into DataRobot.
Task types
When creating a task, you must choose the one most appropriate for your project. DataRobot leverages two types of tasks—estimators and transforms—similar to sklearn. See the blueprint modification page to learn how these tasks work.
Use a custom task
Once a task is uploaded, you can:
-
Create and train a blueprint that contains that custom task. The blueprint will then appear on the project’s Leaderboard and can be used just like any other blueprint—in just a few clicks, you can compare it with other models, access model-agnostic insights, and deploy, monitor, and govern the resulting model.
-
Share a task explicitly within your organization in the same way you share an environment. This can be particularly useful when you want to re-use the task in a future project. Additionally, because recipients don’t need to read and understand the task's code in order to use it, it can be applied by less technical colleagues. Custom tasks are also implicitly shared when a project or blueprint is shared.
Understand task content
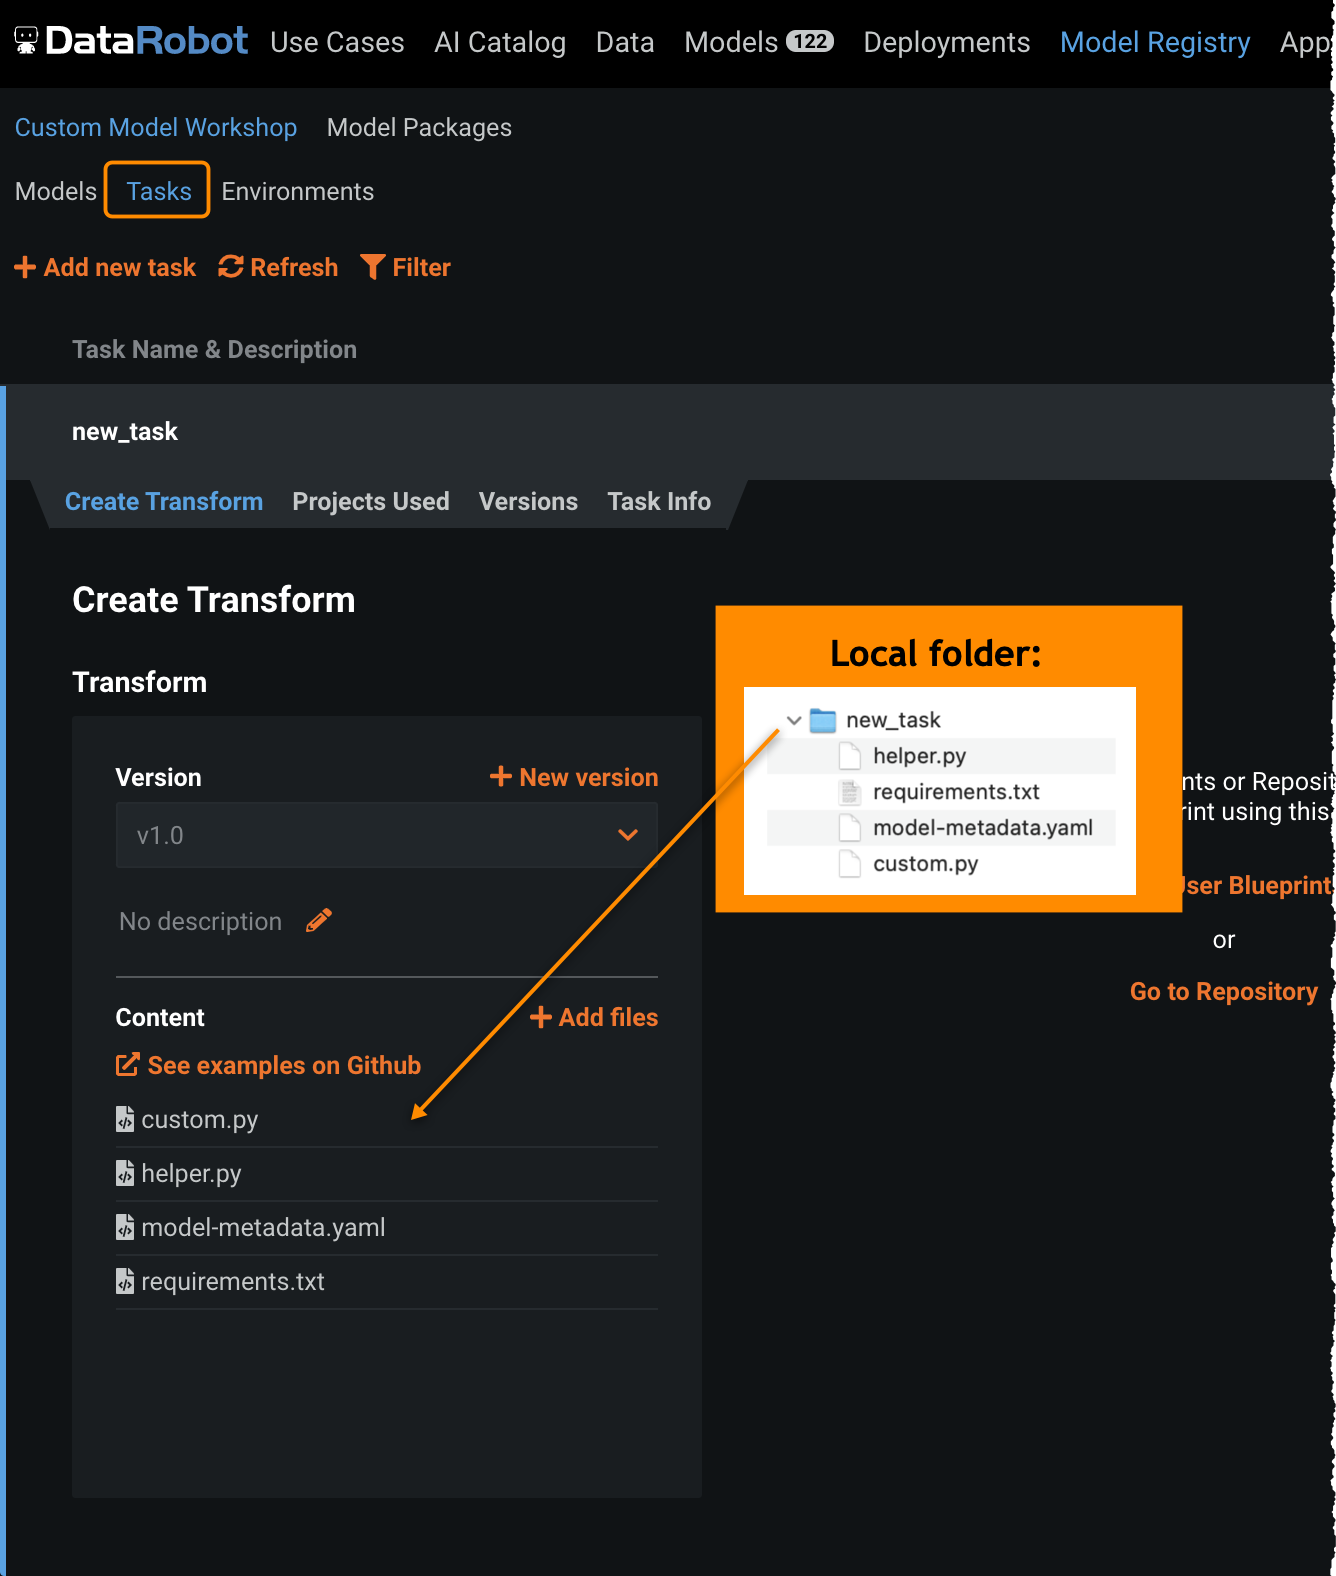
To define a custom task, create a local folder containing the files listed in the table below (detailed descriptions follow the table).
Tip
You can find examples of these files in the DataRobot task template repository on GitHub.
| File | Description | Required |
|---|---|---|
custom.py or custom.R |
The task code that DataRobot will run in training and predictions. | Yes |
model-metadata.yaml |
A file describing task's metadata, including input/output data requirements. | Required for custom transform tasks when a custom task outputs non-numeric data. If not provided, a default schema is used. |
requirements.txt |
A list of Python or R packages to add to the base environment. | No |
| Additional files | Other files used by the task (for example, a file that defines helper functions used inside custom.py). |
No |
custom.py/custom.R
The custom.py/custom.R file defines a custom task. It must contain the methods (functions) that enable DataRobot to correctly run the code and integrate it with other capabilities.
model-metadata.yaml
For a custom task, you can supply a schema that can then be used to validate the task when building and training a blueprint. A schema lets you specify whether a custom task supports or outputs:
- Certain data types
- Missing values
- Sparse data
- A certain number of columns
requirements.txt
Use the requirements.txt file to pre-install Python or R packages that the custom task is using but are not a part of the base environment.
For Python, provide a list of packages with their versions (1 package per row). For example:
numpy>=1.16.0, <1.19.0
pandas==1.1.0
scikit-learn==0.23.1
lightgbm==3.0.0
gensim==3.8.3
sagemaker-scikit-learn-extension==1.1.0
For R, provide a list of packages without versions (1 package per row). For example:
dplyr
stats
Define task code
To define a custom task using DataRobot’s framework, your code must meet certain criteria:
-
It must have a
custom.pyorcustom.Rfile. -
The
custom.py/custom.Rfile must have methods, such asfit(),score(), ortransform(), that define how a task is trained and how it scores new data. These are provided as interface classes or hooks. DataRobot automatically calls each one and passes the parameters based on the project and blueprint configuration. However, you have full flexibility to define the logic that runs inside each method.
View an example on GitHub of a task implementing missing values imputation using a median.
Note
Log in to GitHub before accessing these GitHub resources.
The following table lists the available methods. Note that most tasks only require the fit() method. Classification tasks (binary or multiclass) must have predict_proba(), regression tasks require predict(), and transforms must have transform(). Other functions can be omitted.
| Method | Purpose |
|---|---|
init() |
Load R libraries and files (R only, can be omitted for Python). |
fit() |
Train an estimator/transform task and store it in an artifact file. |
load_model() |
Load the trained estimator/transform from the artifact file. |
predict or predict_proba (For hook, use score()) |
Define the logic used by a custom estimator to generate predictions. |
transform() |
Define the logic used by a custom transform to generate transformed data. |
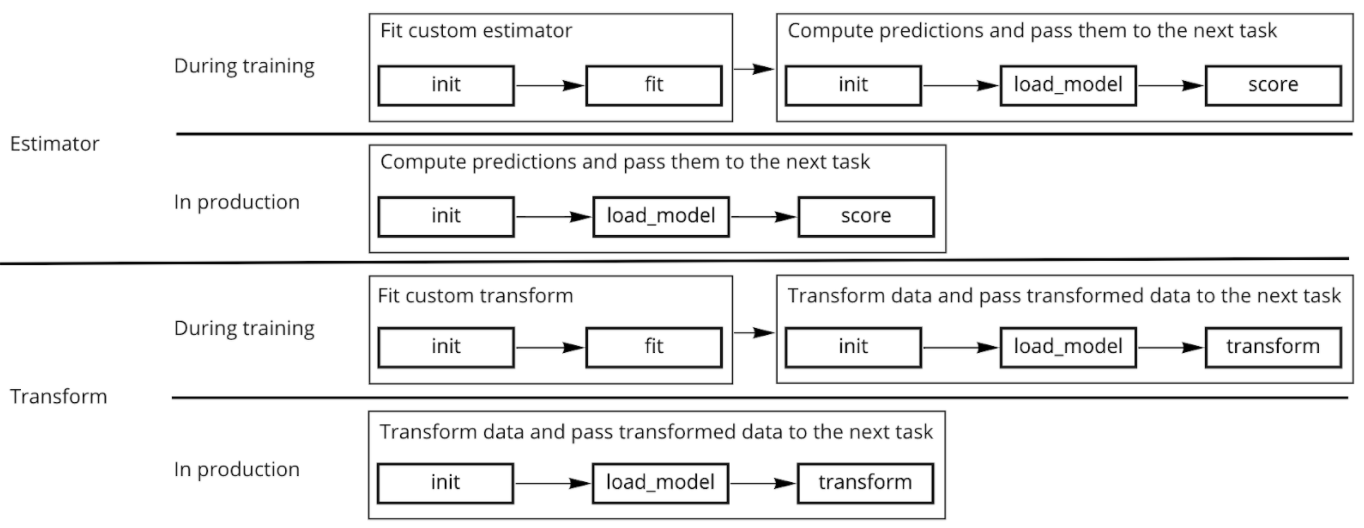
The schema below illustrates how methods work together in a custom task. In some cases, some methods can be omitted, although fit() is always required during training.
The following sections describe each function, with examples.
init()
The init method allows the task to load libraries and additional files for use in other methods. It is required when using R but can typically be skipped with Python.
init() example
The following provides a brief code snippet using init(); see a more complete example here.
init <- function(code_dir) {
   library(tidyverse)
   library(caret)
   library(recipes)
   library(gbm)
   source(file.path(code_dir, 'create_pipeline.R'))
}
init() input
| Input parameter | Description |
|---|---|
code_dir |
A link to the folder where the code is stored. |
init() output
The init() method does not return anything.
fit()
fit() must be implemented for any custom task.
fit() examples
The following provides a brief code snippet using fit(); see a more complete example here.
The following is a Python example of fit() implementing Logistic Regression:
def fit(X, y, output_dir, class_order, row_weights):
 estimator = LogisticRegression()
 estimator.fit(X, y)

 output_dir_path = Path(output_dir)
 if output_dir_path.exists() and output_dir_path.is_dir():
     with open("{}/artifact.pkl".format(output_dir), "wb") as fp:
         pickle.dump(estimator, fp)
The following is an example of R creating a regression model:
fit <- function(X, y, output_dir, class_order=NULL, row_weights=NULL){
   model <- create_pipeline(X, y, 'regression')

  model_path <- file.path(output_dir, 'artifact.rds')
  saveRDS(model, file = model_path)
}
How fit() works
DataRobot runs fit() when a custom estimator/transform is being trained. It creates an artifact file (e.g., a .pkl file) where the trained object, such as a trained sklearn model, is stored. The trained object is loaded from the artifact and then passed as a parameter to score() and transform() when scoring data.
How to use fit()
To use, train and put a trained object into an artifact file (e.g., .pkl) inside the fit() function. The trained object must contain the information or logic used to score new data. Some examples of trained objects:
- A fitted sklearn estimator.
- A median of training data, for a missing value imputation using a median. When scoring new data, it is used to replace missing values.
DataRobot automatically uses training/validation/holdout partitions based on project settings.
fit() input parameters
The fit() task takes the following parameters:
| Input parameters | Description |
|---|---|
X |
A pandas DataFrame (Python) or R data.frame (R) containing data the task receives during training. |
y |
A pandas Series (Python) or R vector/factor (R) containing project's target data. |
output_dir |
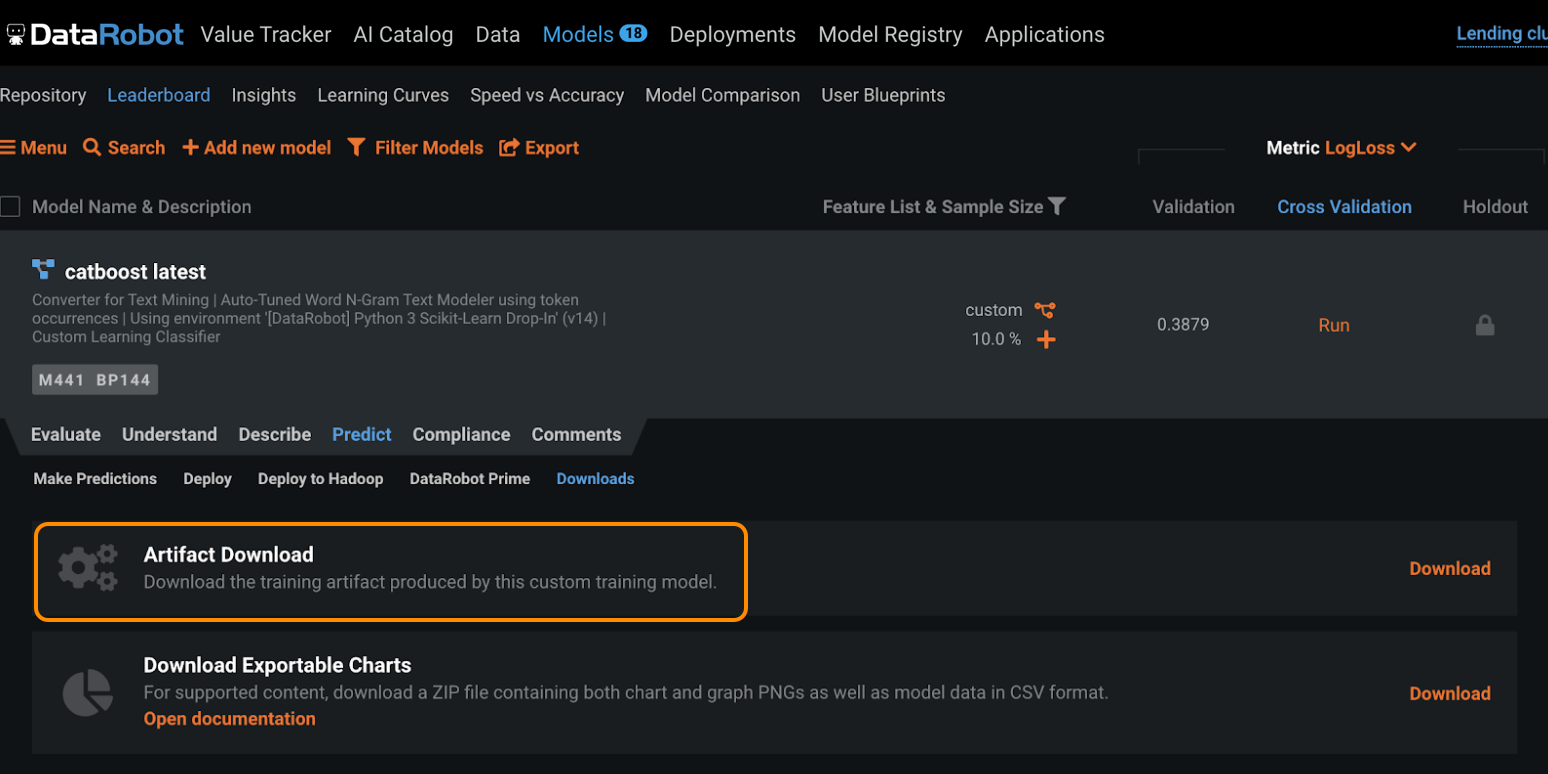
A path to the output folder. The artifact containing the trained object must be saved to this folder. You can also save other files there and once the blueprint is trained, all files added into that folder during fit are downloadable via the UI using the Artifact Download. |
class_order |
Only passed for a binary classification estimator. A list containing the names of classes. The first entry is the class that is considered negative inside DataRobot's project; the second class is the class that is considered positive. |
row_weights |
Only passed in estimator tasks. A list of weights passed when the project uses weights or smart downsampling. |
**kwargs |
Not currently used but maintained for future compatibility. |
fit() output
Notes on fit() output:
-
fit()does not return anything, but it creates an artifact containing the trained object. -
When no trained object is required (for example, a transform task implementing log transformation), create an “artificial” artifact by storing a number or a string in an artifact file. Otherwise (if
fit()doesn't output an artifact), you must useload_model, which makes the task more complex. -
The artifact must be saved into the
output_dirfolder. -
The artifact can use any format.
-
Some formats are natively supported. When
output_dircontains exactly one artifact file in a natively supported format, DataRobot automatically picks that artifact when scoring/transforming data. This way, you do not need to write a customload_modelmethod. -
Natively supported formats include:
- Python:
.pkl,.pth,.h5,.joblib - Java:
.mojo - R:
.rds
- Python:
load_model()
The load_model() method loads one or more trained objects from the artifact(s). It is only required when a trained object is stored in an artifact that uses an unsupported format or when multiple artifacts are used. load_model() is not required when there is a single artifact in one of the supported formats:
- Python:
.pkl,.pth,.h5,.joblib - Java:
.mojo - R:
.rds
load_model() example
The following provides a brief code snippet using load_model(); see a more complete example here.
In the following example, replace deserialize_artifact with an actual function you use to parse the artifact:
def load_model(code_dir: str):
    return deserialize_artifact(code_dir)
load_model <- function(code_dir) {
   return(deserialize_artifact(code_dir))
}
load_model() input
| Input parameter | Description |
|---|---|
code_dir |
A link to the folder where the artifact is stored. |
load_model() output
The load_model() method returns a trained object (of any type).
predict()
The predict() method defines how DataRobot uses the trained object from fit() to score new data. DataRobot runs this method when the task is used for scoring inside a blueprint. This method is only usable for regression and anomaly tasks. Note that for R, instead use the score() hook outlined in the examples below.
predict() examples
The following provides a brief code snippet using predict(); see a more complete example here.
Python example for a regression or anomaly estimator:
def predict(self, data: pd.DataFrame, **kwargs):
    return pd.DataFrame(data=self.estimator.predict(data), columns=["Predictions"])
R example for a regression or anomaly estimator:
score <- function(data, model, ...) {
  return(data.frame(Predictions = predict(model, newdata=data, type = response")))
}
R example for a binary estimator:
score <- function(data, model, ...) {
  scores <- predict(model, data, type = "response")
  scores_df <- data.frame('c1' = scores, 'c2' = 1- scores)
  names(scores_df) <- c("class1", "class2")
  return(scores_df)
}
predict() input
| Input parameter | Description |
|---|---|
data |
A pandas DataFrame (Python) or R data.frame (R) containing the data the custom task will score. |
**kwargs |
Not currently used but maintained for future compatibility. (For R, use score(data, model, …)) |
predict() output
Notes on predict() output:
-
Returns a pandas DataFrame (or R data.frame/tibble).
-
For regression or anomaly detection projects, the output must contain a single numeric column named Predictions.
predict_proba()
The predict_proba() method defines how DataRobot uses the trained object from fit() to score new data. This method is only usable for binary and multiclass tasks. DataRobot runs this method when the task is used for scoring inside a blueprint. Note that for R, you instead use the score() hook used in the examples below.
predict_proba() examples
The following provides a brief code snippet using predict_proba(); see a more complete example here.
Python example for a binary or multiclass estimator:
def predict_proba(self, data: pd.DataFrame, **kwargs) -> pd.DataFrame:
    return pd.DataFrame(
        data=self.estimator.predict_proba(data), columns=self.estimator.classes_
    )
R example for a regression or anomaly estimator:
score <- function(data, model, ...) {
  return(data.frame(Predictions = predict(model, newdata=data, type = response")))
}
R example for a binary estimator:
score <- function(data, model, ...) {
  scores <- predict(model, data, type = "response")
  scores_df <- data.frame('c1' = scores, 'c2' = 1- scores)
  names(scores_df) <- c("class1", "class2")
  return(scores_df)
}
predict_proba() input
| Input parameter | Description |
|---|---|
data |
A pandas DataFrame (Python) or R data.frame (R) containing the data the custom task will score. |
**kwargs |
Not currently used but maintained for future compatibility. (For R, use score(data, model, …)) |
predict_proba() output
Notes on predict_proba() output:
-
Returns a pandas DataFrame (or R data.frame/tibble).
-
For binary or multiclass projects, output must have one column per class, with class names used as column names. Each cell must contain the probability of the respective class, and each row must sum up to 1.0.
transform()
The transform() method defines the output of a custom transform and returns transformed data. Do not use this method for estimator tasks.
transform() example
The following provides a brief code snippet using transform(); see a more complete example here.
A Python example that creates a transform and outputs to a dataframe:
def transform(X: pd.DataFrame, transformer) -> pd.DataFrame:
  return transformer.transform(X)
transform <- function(X, transformer, ...){
   X_median <- transformer

   for (i in 1:ncol(X)) {
   X[is.na(X[,i]), i] <- X_median[i]
   }
     X
}
transform() input
| Input parameter | Description |
|---|---|
X |
A pandas DataFrame (Python) or R data.frame (R) containing data the custom task should transform. |
transformer |
A trained object loaded from the artifact (typically, a trained transformer). |
**kwargs |
Not currently used but maintained for future compatibility. |
transform() output
The transform() method returns a pandas DataFrame or R data.frame with transformed data.
Define task metadata
To define metadata, create a model-metadata.yaml file and put it in the top level of the task/model directory. The file specifies additional information about a custom task and is described in detail here.
Define the task environment
There are multiple options for defining the environment where a custom task runs. You can:
-
Choose from a variety of built-in environments.
-
If a built-in environment is missing Python or R packages, add missing packages by specifying them in the task's
requirements.txtfile. If provided,requirements.txtmust be uploaded together withcustom.pyorcustom.Rin the task content. If task content contains subfolders, it must be placed in the top folder. -
You can build your own environment if you need to install Linux packages.
Test the task locally
While it is not a requirement that you test the task locally before uploading it to DataRobot, it is strongly recommended. Validating functionality in advance can save much time and debugging in the future.
A custom task must meet the following basic requirements to be successful:
- The task is compatible with DataRobot requirements and can be used to build a blueprint.
- The task works as intended (for example, a transform produces the output you need).
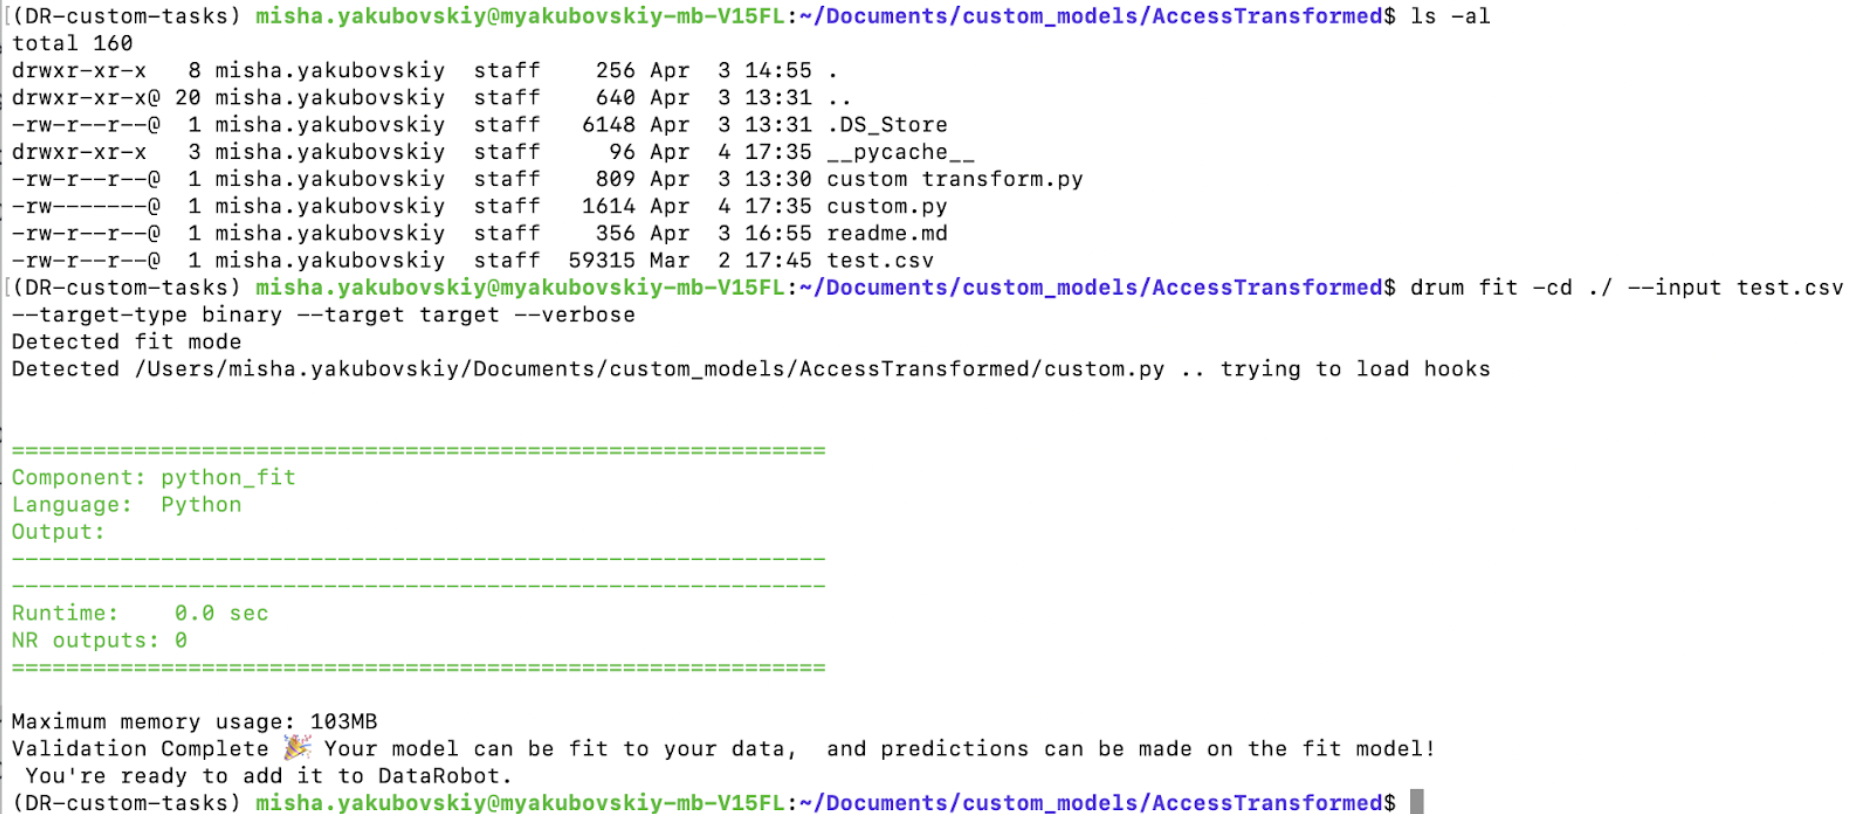
Use drum fit in the command line to quickly run and test your task. It will automatically validate that the task meets DataRobot requirements. To test that the task works as intended, combine drum fit with other popular debugging methods, such as printing output to a terminal or file.
Prerequisites
To test your task:
-
Put the task's content into a single folder.
-
Install DRUM. Ensure that the Python environment where DRUM is installed is activated. Preferably, also install Docker Desktop.
-
Create a CSV file with test data you can use when testing a task.
-
Because you will use the command line to run tests, open a terminal window.
Test compatibility with DataRobot
The following provides an example of using drum fit to test whether a task is compatible with DataRobot blueprints. To learn more about using drum fit, type drum fit --help in the command line.
For a custom task (estimator or transform), use the following basic command in your terminal. Replace placeholder names in < > brackets with actual paths and names. Note that the following options are available for TARGET_TYPE:
- For estimators: binary, multiclass, regression, anomaly
- For transforms: transform
drum fit --code-dir <folder_with_task_content> --input <test_data.csv> --target-type <TARGET_TYPE> --target <target_column_name> --docker <folder_with_dockerfile> --verbose
Note that the target parameter should be omitted when it is not used during training (for example, in case of anomaly detection estimators or some transform tasks). In that case, a command could look like this:
drum fit --code-dir <folder_with_task_content> --input <test_data.csv> --target-type anomaly --docker <folder_with_dockerfile> --verbose
Test task logic
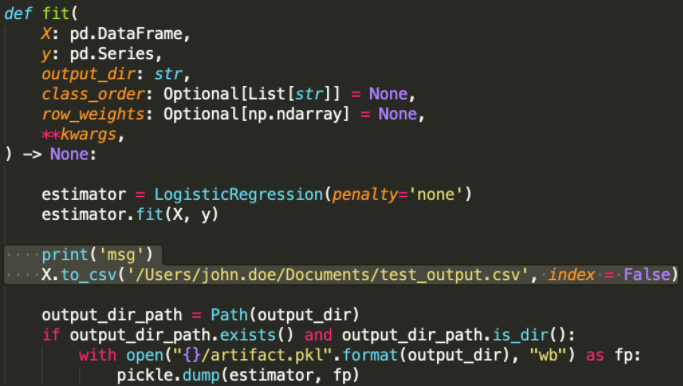
To confirm a task works as intended, combine drum fit with other debugging methods, such as adding "print" statements into the task's code:
- Add
print(msg)into one of the methods; when running a task usingdrum fit, DataRobot will print the message in the terminal. - Write intermediate or final results into a local file for later inspections, which could help to confirm that a custom task works as expected.
Upload the task
Once a task's content is defined, upload it into DataRobot to use it to build and train a blueprint. Uploading a custom task into DataRobot involves three steps:
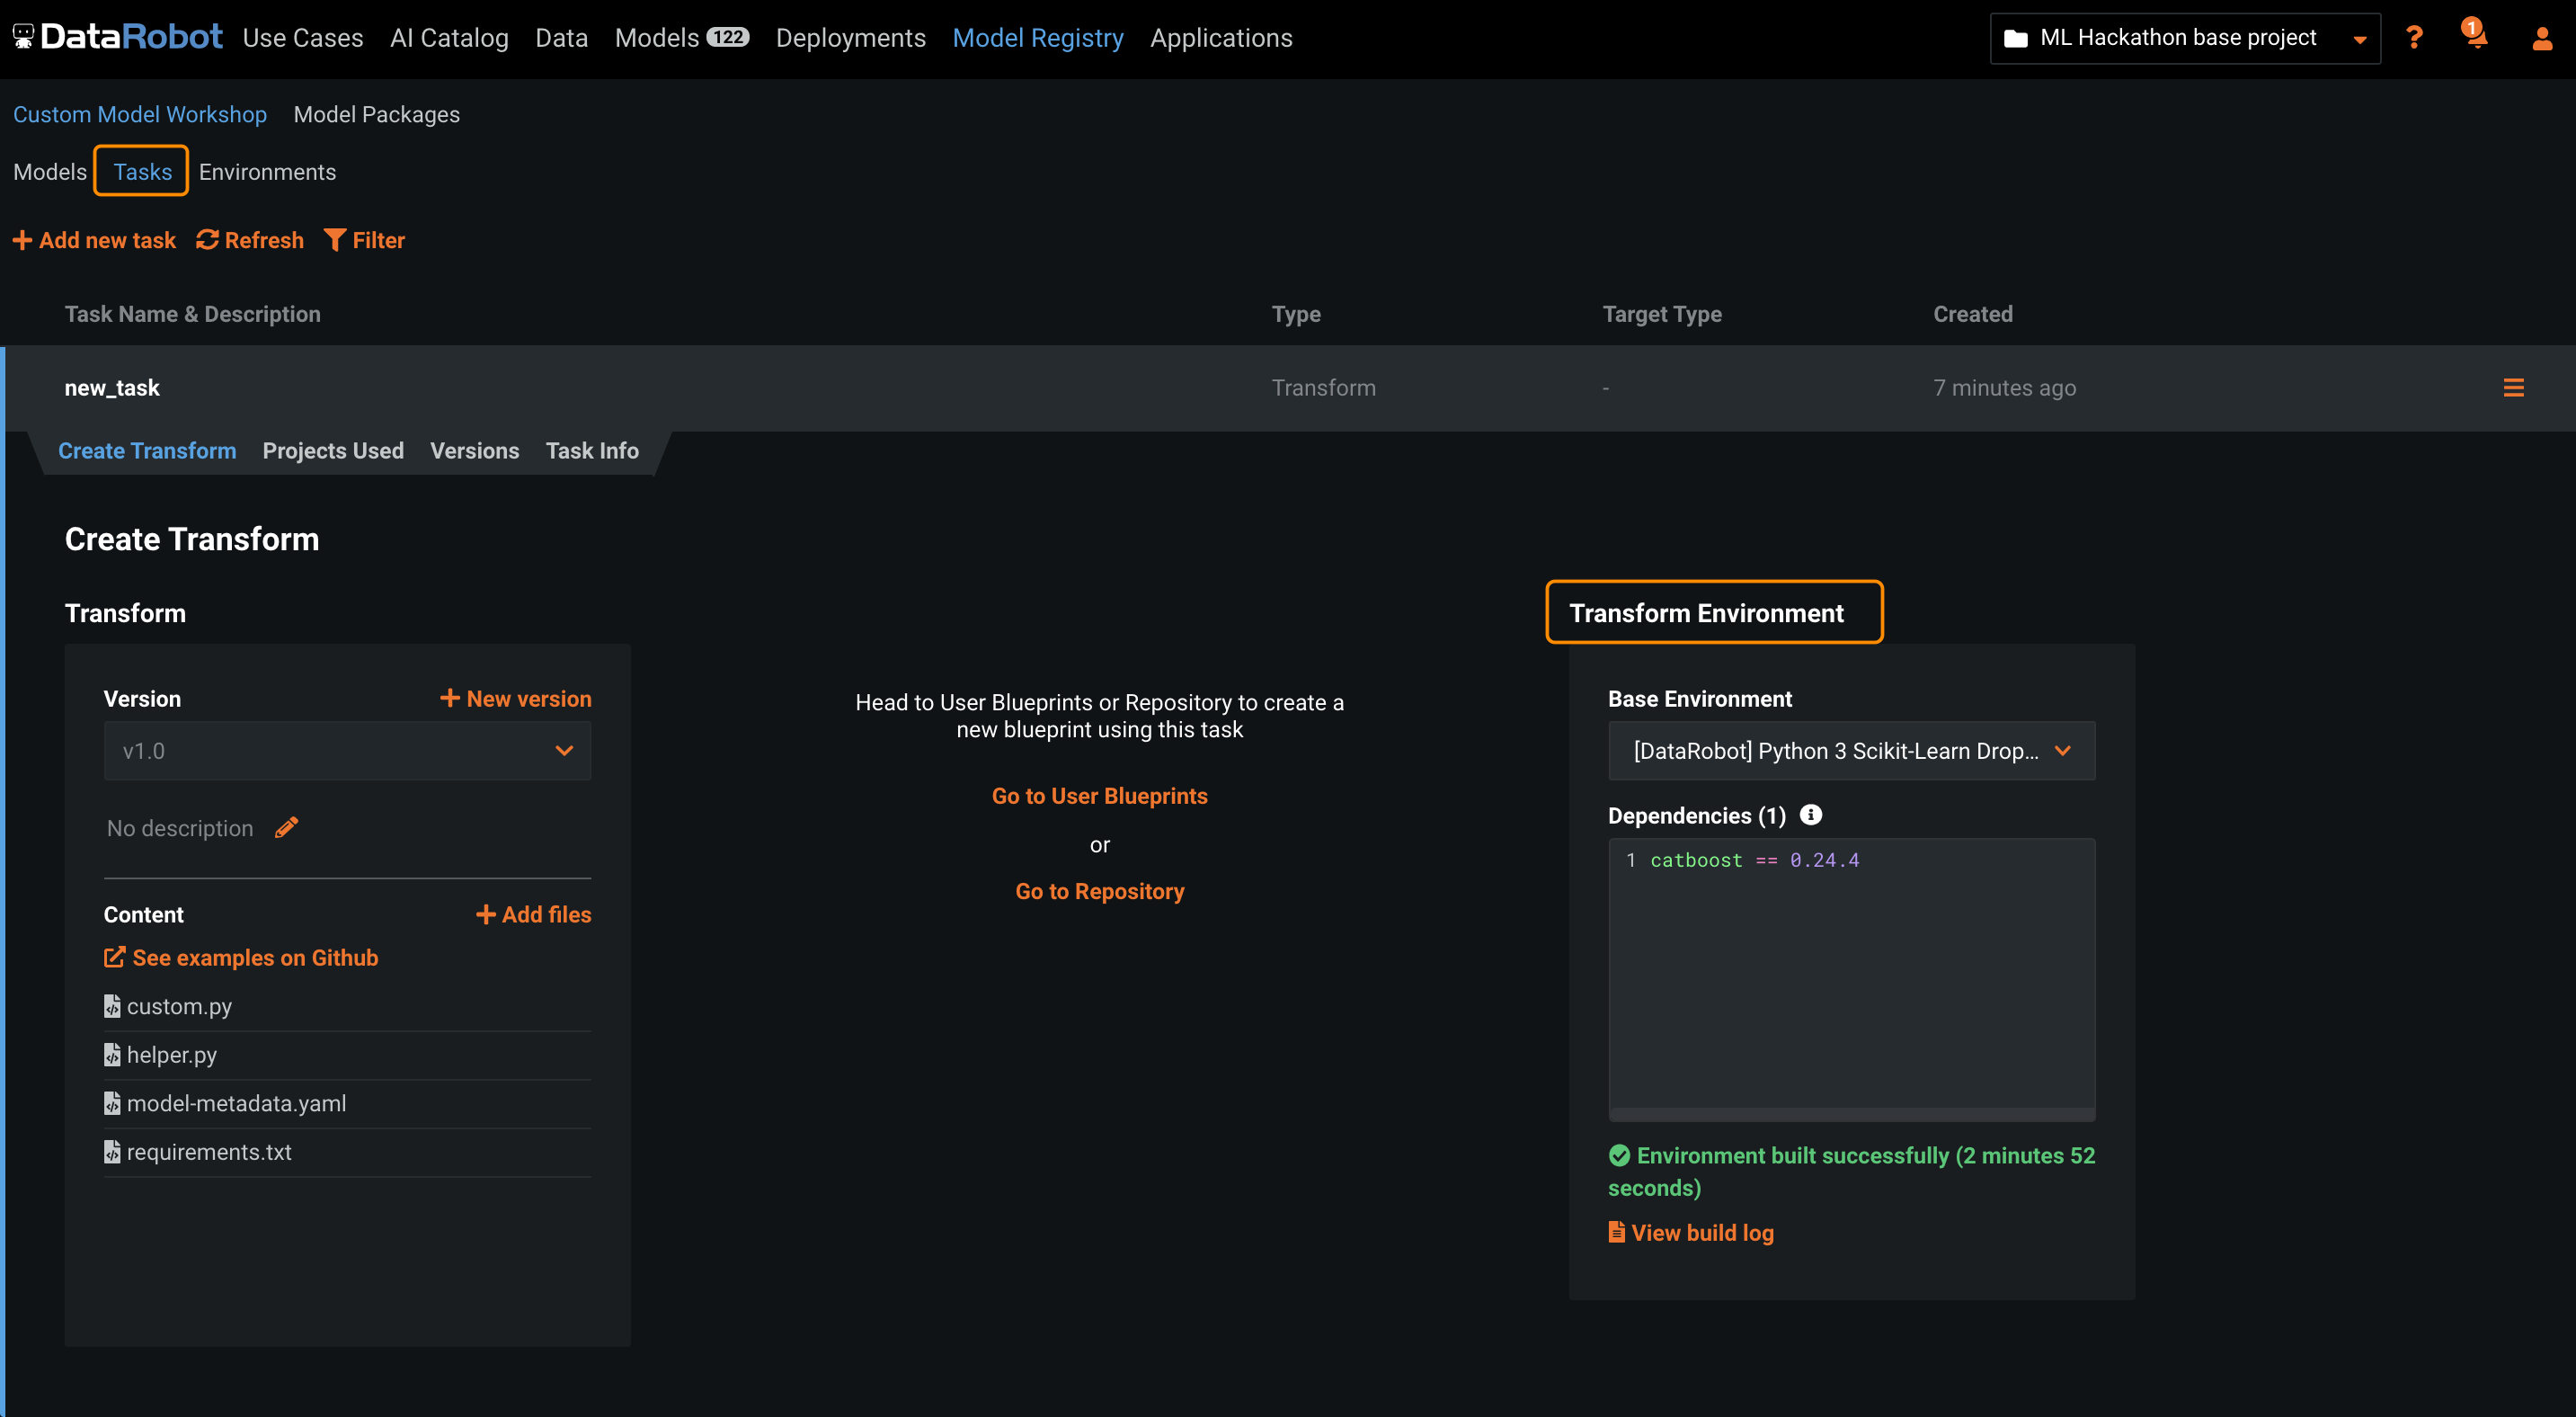
- Create a new task in the Model Registry.
- Select a container environment where the task will run.
- Upload the task content.
Once uploaded, the custom task appears in the list of tasks available to the blueprint editor.
Updating code
You can always upload updated code. To avoid conflicts, DataRobot creates a new version each time code is uploaded. When creating a blueprint, you can select the specific task version to use in your blueprint.
Compose and train a blueprint
Once a custom task is created, there are two options for composing a blueprint that uses the task:
- Compose a single-task blueprint, using only the task (estimator only) that you created.
- Create a multitask blueprint using the blueprint editor.
Single-task blueprint
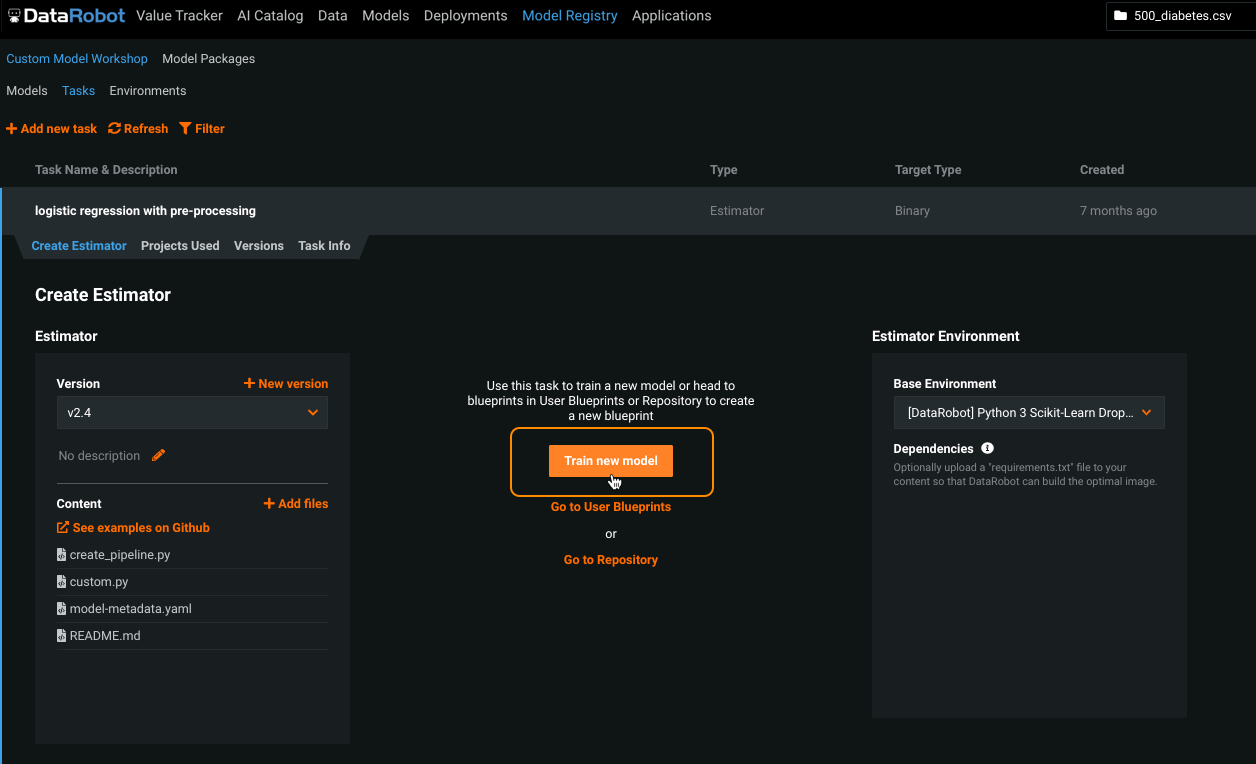
If your custom estimator task contains all the necessary training code, you can build and train a single-task blueprint. To do so, navigate to Model Registry > Custom Model Workshop > Tasks. Select the task and click Train new model:
When complete, a blueprint containing the selected task appears in the project's Leaderboard.
Multitask blueprint
To compose a blueprint containing more than one task, use the blueprint editor. Below is a summary of the steps; see the documentation for complete details.
-
From the project Leaderboard, Repository, or Blueprints tab in the AI Catalog, select a blueprint to use as a template for your new blueprint.
-
Navigate to the Blueprint view and start editing the selected blueprint.
-
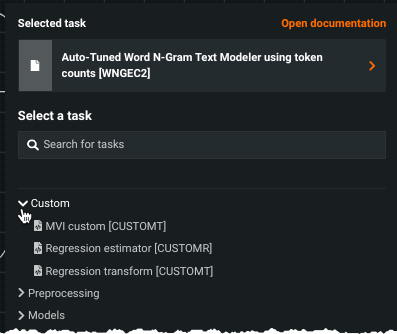
Select an existing task or add a new one, then select a custom task from the dropdown of built-in and custom tasks.
-
Save and then train the new blueprint by clicking Train. A model containing the selected task appears in the project's Leaderboard.
Get insights
You can use DataRobot insights to help evaluate the models that result from your custom blueprints.
Built-in insights
Once a blueprint is trained, it appears in the project Leaderboard where you can easily compare accuracy with other models. Metrics and model-agnostic insights are available just as for DataRobot models.
Custom insights
You can generate custom insights by creating artifacts during training. Additionally, you can generate insights using the Predictions API, just as for any other Leaderboard model.
Tip
Custom insights are additional views that help to understand how a model works. They may come in the form of a visualization or a CSV file. For example, if you wanted to leverage LIME's model-agnostic insights, you could import that package, run it on the trained model in the custom.py or other helper files, and then write out the resulting model insights.
Deploy
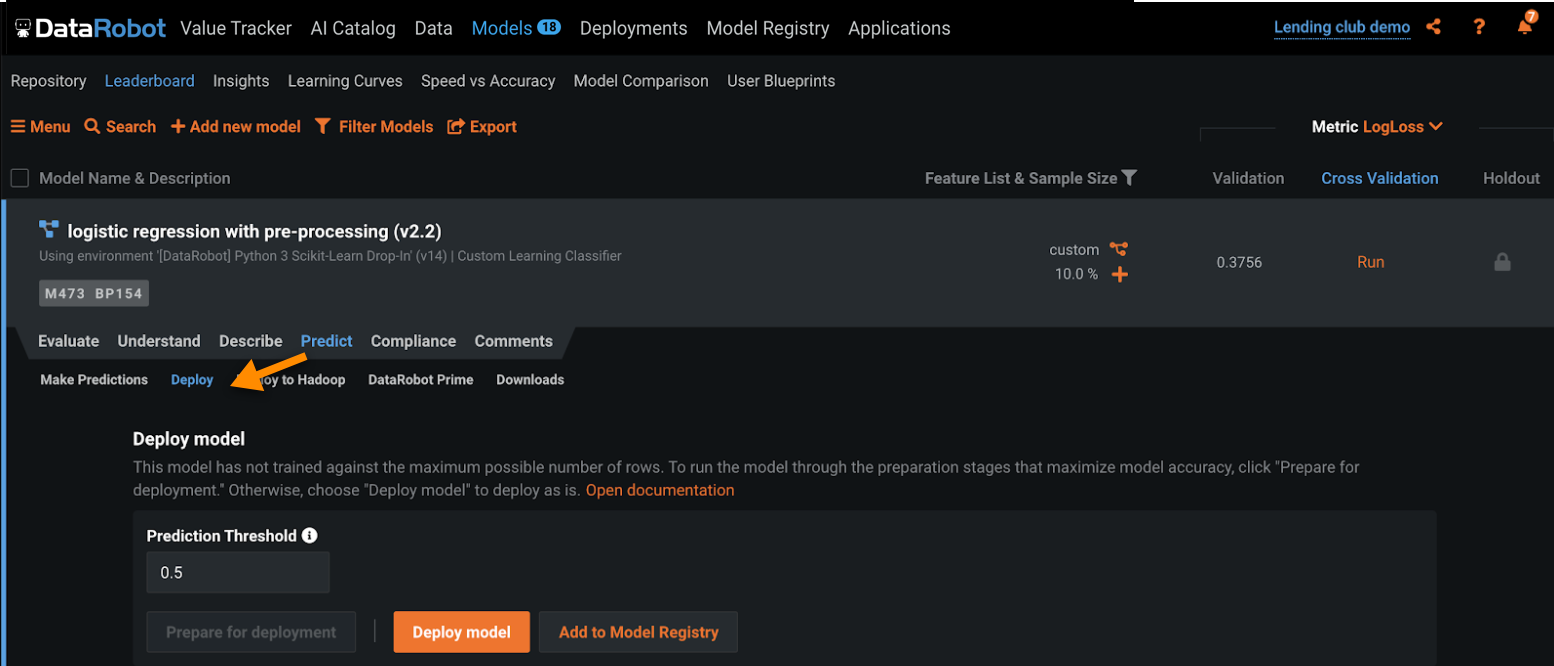
Once a model containing a custom task is trained, it can be deployed, monitored, and governed just like any other DataRobot model.
Download training artifacts
When training a blueprint with a custom task, DataRobot creates an artifact available for download. Any file that is put into output_dir inside fit() of a custom task becomes a part of the artifact. You can use the artifact to:
-
Generate custom insights during training. For this, generate file(s) (such as image or text files) as a part of the
fit()function. Write them tooutput_dir. -
Download a trained model (for example, as a
.pklfile) that you can then load locally to generate additional insights or to deploy outside of DataRobot.
To download an artifact for a model, navigate to Predict > Downloads > Artifact Download.
You can also download the code of any environment you have access to. To download, click on an environment, select the version, and click Download.
Implicit sharing
A task or environment is not available in the model registry to other users unless it was explicitly shared. That does not, however, limit users' ability to use blueprints that include that task. This is known as implicit sharing.
For example, consider a project shared by User A and User B. If User A creates a new task, and then creates a blueprint using that task, User B can still interact with that blueprint (clone, modify, rerun, etc.) regardless of whether they have Read access to any custom task within that blueprint. Because every task is associated with an environment, implicit sharing applies to environments as well. User A can also explicitly share just the task or environment, as needed.
Implicit sharing is unique permission model that grants Execute access to everyone in the custom task author’s organization. When a user has access to a blueprint (but not necessarily explicit access to a custom task in that blueprint) Execute access allows:
-
Interacting with the resulting model. For example, retraining, running Feature Impact and Feature Effects, deploying, and making batch predictions.
-
Cloning and editing a blueprint from the shared project, and then saving the blueprint as their own.
-
Viewing and downloading Leaderboard logs.
Some capabilities that Execute access does not allow include:
-
Downloading the custom task artifact.
-
Viewing, modifying, or deleting the custom task from the model registry.
-
Using the task in another blueprint. (Instead you would clone the blueprint containing the task and edit the blueprint and/or task.)
