Modify a blueprint
This section describes the blueprint editor. A blueprint represents the high-level end-to-end procedure for fitting the model, including any preprocessing steps, modeling, and post-processing steps. The description of the Describe > Blueprints tab provides a detailed explanation of blueprint elements.
When you create your own blueprints, DataRobot validates modifications to ensure that changes are intentional, not to enforce requirements. As such, blueprints with validation warnings are saved and can be trained, despite the warnings. While this flexibility prevents erroneously constraining you, be aware that a blueprint with warnings is not likely to successfully build a model.
How a blueprint works
Before working with the editor, make sure you understand the kind of data processing a blueprint can handle, the components for building a pipeline, and how tasks within a pipeline work.
Blueprint data processing abilities
A blueprint is designed to implement training pipelines, including modeling, calibration, and model-specific preprocessing steps. Other types of data preparation are best addressed using other tools. When deciding where to implement data processing steps, consider that the following aspects apply to all blueprints:
-
Input data is limited to a single post-EDA2 dataset. No joins can be defined inside a blueprint. All joins should be accomplished prior to EDA2 (using, for example, Spark SQL, Feature Discovery,or code.
-
Output data is limited to predictions for the project’s target, as well as information about those predictions (Prediction Explanations).
-
Post-processing that produces output in a different format should be defined outside of the blueprint.
-
No filtering or aggregation is allowed inside a blueprint but can be accomplished with Spark SQL, Feature Discovery, or code.
- When scoring new data, a single prediction can only depend on a single row of input data.
- The number of input and output rows must match.
Blueprint task types
DataRobot supports two types of tasks—estimator and transform.
-
Estimator tasks predict new value(s) (
y) by using the input data (x). The final task in any blueprint must be an estimator. During scoring, the estimator's output must always align with the target format. For example for multiclass blueprints, an estimator must return a probability of each class for each row.Examples of estimator tasks are
LogisticRegression,LightGBM regressor, andCalibrate. -
Transform tasks transform the input data (
x) in some way. Its output is always a dataframe, but unlike estimators, it can contain any number of columns and any data types.Examples of transforms are
One-hot encoding,Matrix n-gram, and more.Both estimator and transform tasks have a
fit()method that is used for training and learning data characteristics. For example, a binning task requiresfit()to define the bins based on training data, and then applies those bins to all future incoming data. While both task types use thefit()method, estimators use ascore()hook while transform tasks use atransform()hook. See the descriptions of these hooks when creating custom tasks for more information.Transform and estimator tasks can each be used as intermediate steps inside a blueprint. For example,
Auto-Tuned N-Gramis an estimator, providing the next task with predictions as input.
How data passes through a blueprint
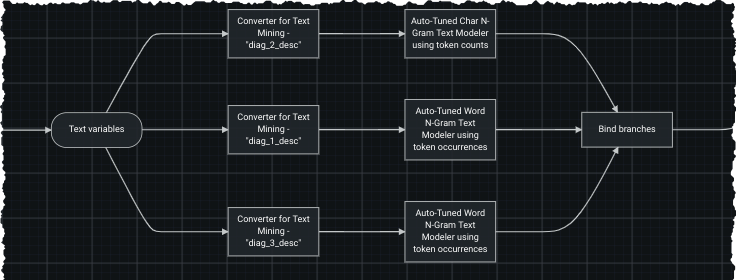
Data is passed through a blueprint sequentially, task by task, left to right. When data is passed to a transform, DataRobot:
- Fits it on the received data.
- Uses the trained transform to transform the same data.
- Passes the result to the next task.
Once passed to an estimator, DataRobot:
- Fits it on the received data.
- Uses the trained estimator to predict on the same data.
- Passes the predictions to the next task. To reduce overfitting, DataRobot passes stacked predictions when the estimator is not the final step in a blueprint.
When the trained blueprint is used to make predictions, data is passed through the same set of steps (with the difference that the fit() method is skipped).
Access the blueprint editor
You can access the blueprint editor from Leaderboard, the Repository, and the AI Catalog.
From the Leaderboard, select a model to use as the basis for further exploration and click to expand (which opens the Describe > Blueprint tab). From the Repository, select and expand a model from the library of modeling blueprints available for a selected project. From the AI Catalog, select the Blueprints tab to list an inventory of user blueprints.
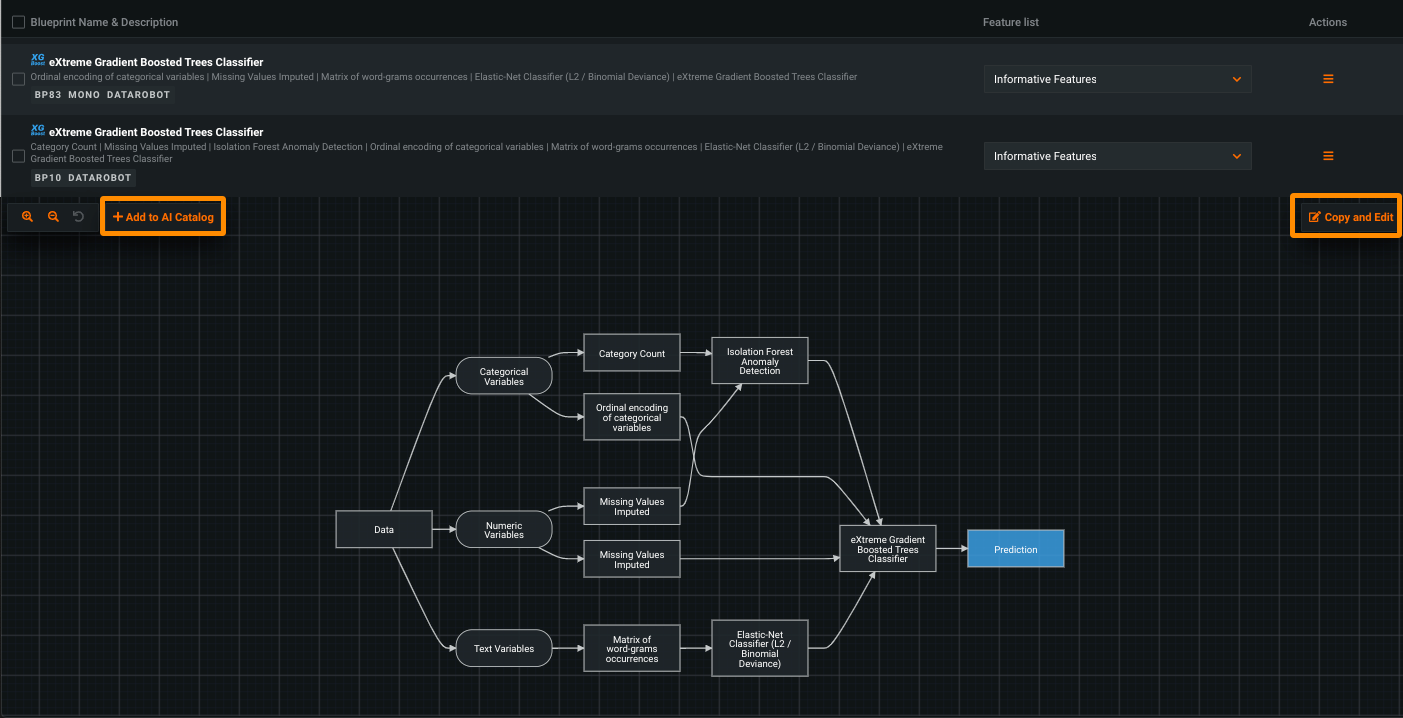
In either method, once the blueprint diagram is open, choose Copy and Edit to open the blueprint editor, which makes a copy of the blueprint.
When you then make modifications, they are made to a copy and the original is left intact (either on the Leaderboard or the Repository, depending on where you opened it from). Click and drag to move the blueprint around on the canvas.
Why is the editable blueprint different from the original?
When a blueprint is generated, it can contain branches for data types that are not present in the current project. Unused branches are pruned (ignored) in that case. These branches are included in the copied blueprint, as they were part of the original (before the pruning) and they may be needed for future projects. For that reason, they are available and visible inside the blueprint editor.
When you have finished editing the blueprint:
- Click +Add to AI Catalog if you want to save it to the AI Catalog for further editing, use in other projects, and sharing.
- Click Train to run the blueprint and add the resulting model to the Leaderboard.
Use the blueprint editor
A blueprint is composed of nodes and connectors:
-
A node is the pipeline step—it takes in data, performs an operation, and outputs the data in its new form. Tasks are the elements that complete those actions. From the editor, you can add, remove, and modify tasks and task hyperparameters.
-
A connector is a representation of the flow of data. From the editor, you can add or remove task connectors.
Work with nodes
The following table describes actions you can take on a node.
| Action | Description | How to |
|---|---|---|
| Modify a node | Change characteristics of the task contained in the node. | Hover over a node and click the associated pencil ( |
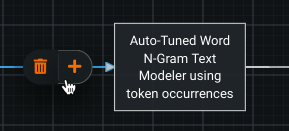
| Add a node | Add a node to the blueprint. | Hover over the node that will serve as the new node's input and click the plus sign ( |
| Connect nodes | Connect tasks to direct the data flow. | Hover over the starting point node, drag the diagonal arrow ( |
| Remove a node | Remove a node and its associated task from the blueprint, as well as downstream nodes. | Hover over a node and click the associated trash can ( |
Note
If an action isn't applicable to a node, the icon for the action is not available.
Click the following buttons to undo and redo edits:
| Action | Description | |
|---|---|---|
| Undo | Cancels the most recent action and resets the blueprint graph to its prior state. | |
| Redo | Restores the most recent action that was undone using the Undo action. |
Work with connectors
The following table describes actions you can take on a connector.
| Action | Description | How to |
|---|---|---|
| Add a node | Add a node to the blueprint. | Hover over the connector and click the plus sign ( |
| Remove a connector | Disconnect two nodes. | Hover over a connector and click the resulting trash can ( |
Note
If an action isn't applicable to a connector, the icon for the action is not available.
Modify a node
Use these steps to change an existing node or to add hyperparameters to a node newly added to the blueprint.
-
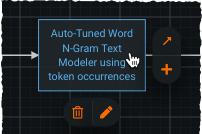
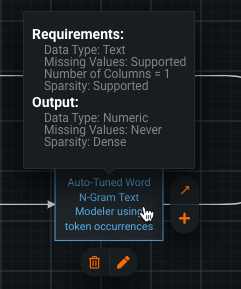
On the node to be changed, hover to display the task requirements and the available actions.
-
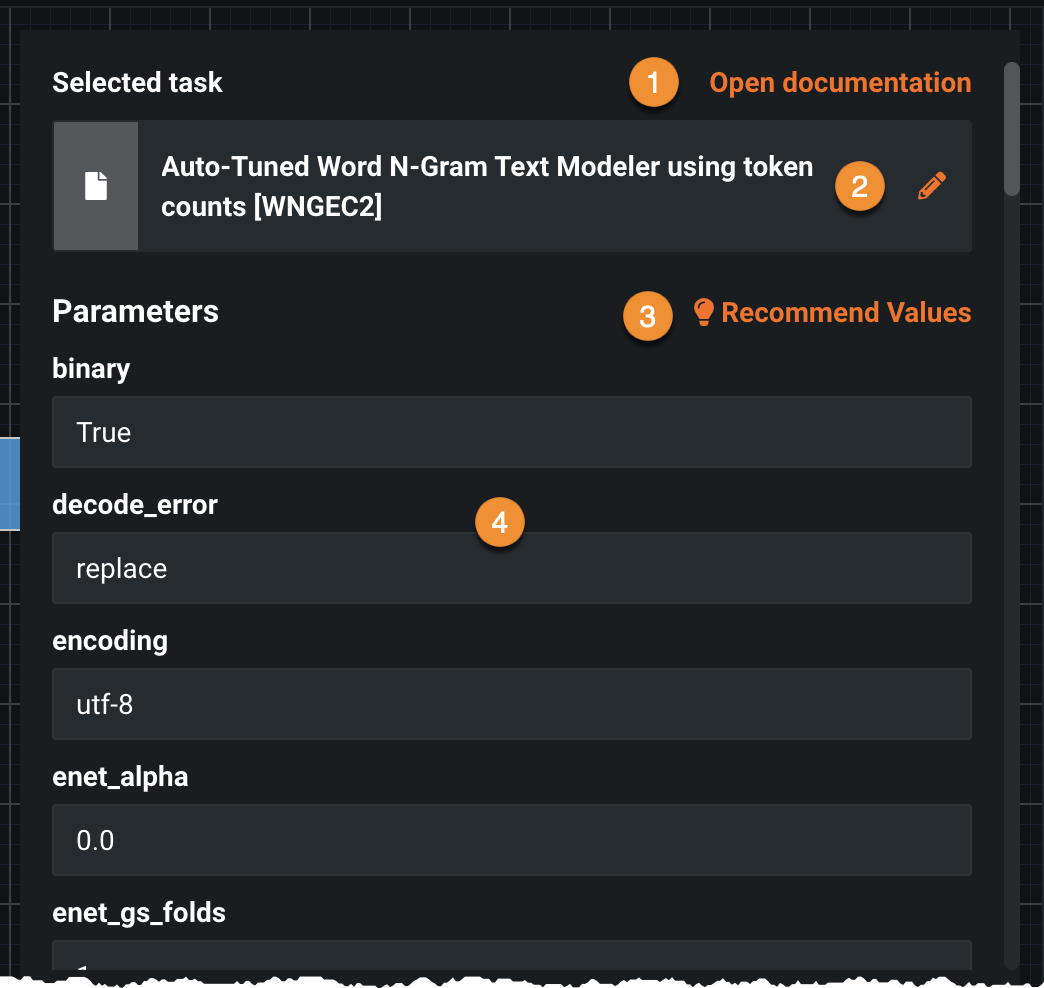
Click the pencil icon to open the task window. DataRobot presents a list of all parameters that define the task.
The following table describes the actions available from the task window:
Element Click to... 1 Open documentation link Open the model documentation to read a description of the task and its parameters. 2 Task selector Choose an alternative task. Click through the options to select or search for a specific task. To learn about a task, use the Open documentation link. 3 Recommended values Reset all parameter values to the safe defaults recommended by DataRobot. 4 Value entry Change a parameter value. When you select a parameter, a dropdown displays acceptable values. Click outside the box to set the new value.
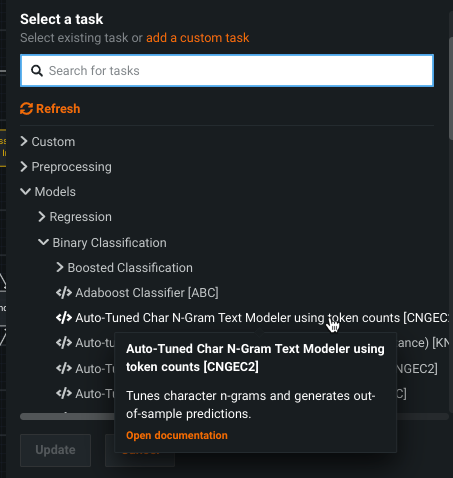
Use the task selector
Click the task name to expand the task finder. Either enter text into the search field or expand the task types to see options listed. If you previously created custom tasks, they also are available in the list. You can also create a task from this modal before proceeding.
When you click to select a new task, the blueprint editor loads that task's parameters for editing (if desired). When you are finished, click Update. DataRobot replaces the task in the blueprint.
Tasks that generate word clouds
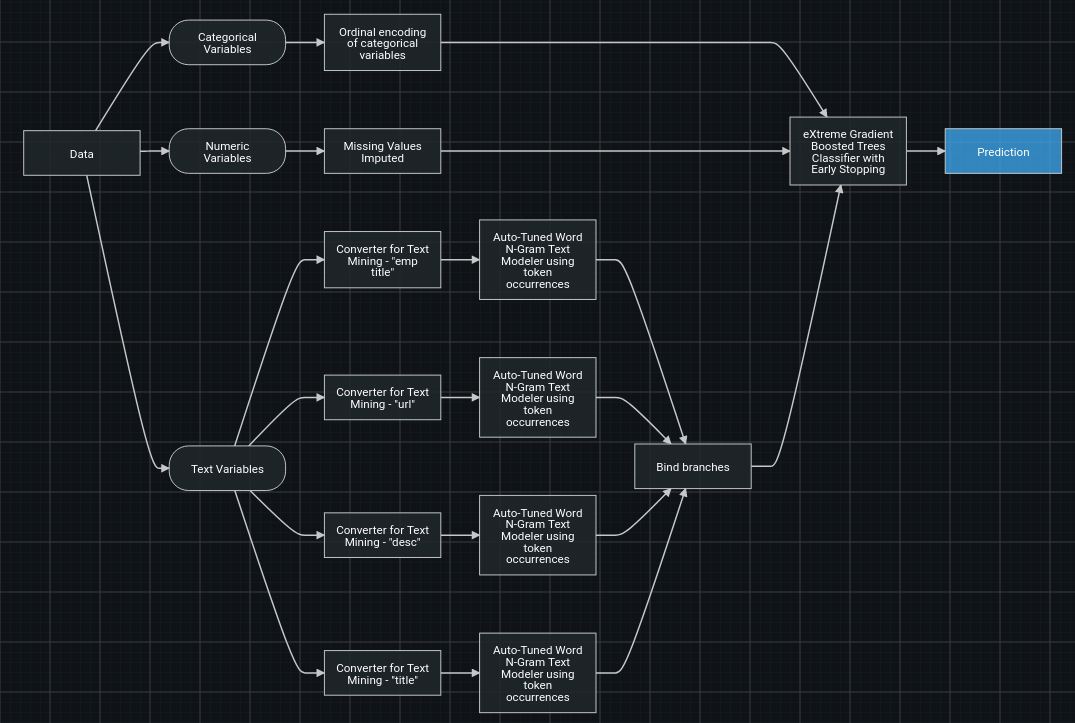
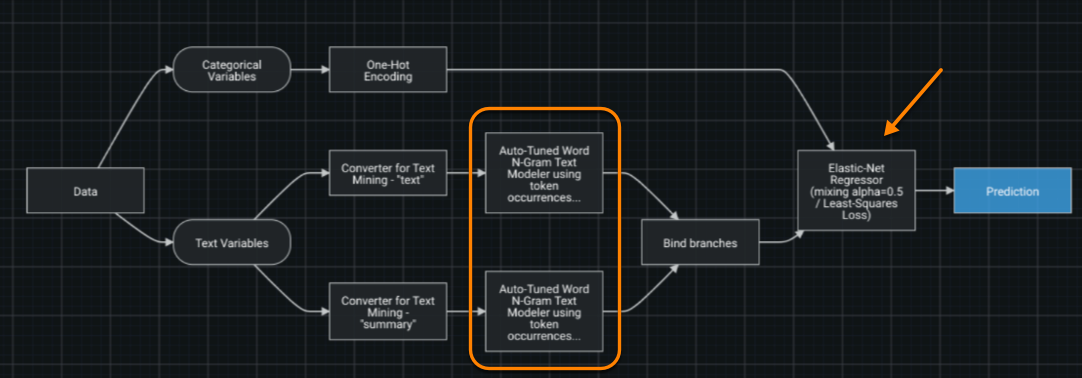
If you create a blueprint that generates a word cloud in both prediction and non-prediction tasks, DataRobot uses the non-prediction vertex to generate the cloud, since that type is always populated with text inputs. For example, in the blueprint below, both the Auto-Tuned Text Model and the Elastic-Net Regressor include a word cloud. In this case, DataRobot defaults to the Auto-Tuned Text Model's non-prediction word cloud.
Launch custom task creation workflow
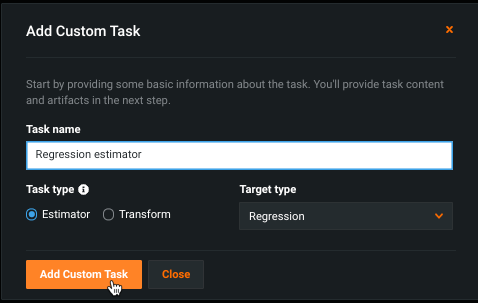
You can access the custom task creation workflow by clicking the add a custom task link at the top of the task selector modal. The Add Custom Task modal opens in a new browser tab, initiating the task creation workflow.
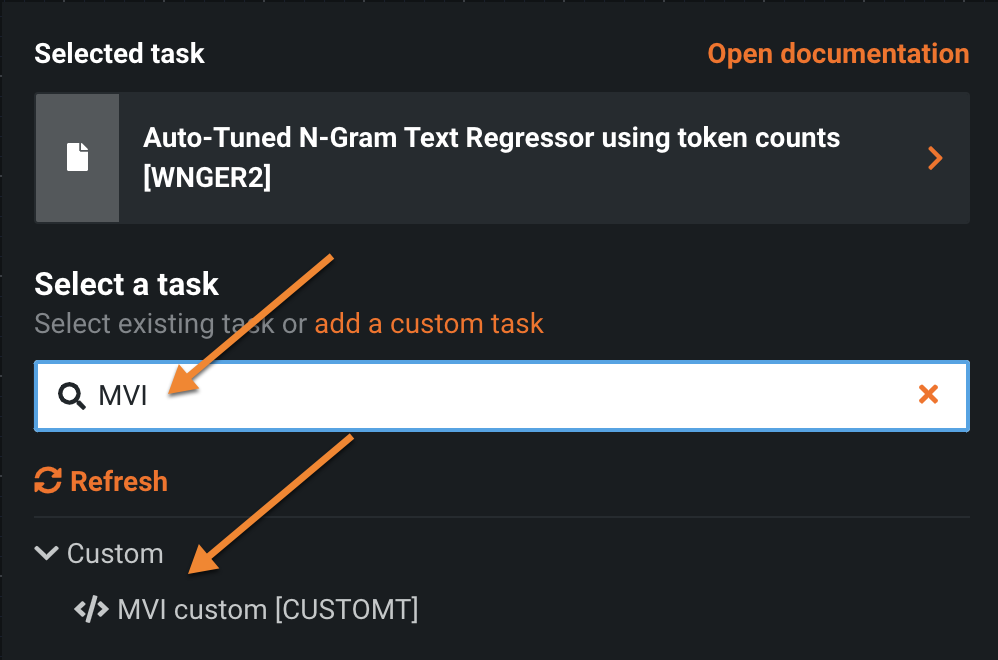
Once the environment is set and the code is uploaded, close the tab. From the Select a task modal, click Refresh to make the new task available. You can find it either by expanding the Custom dropdown or searching:
Add a data type
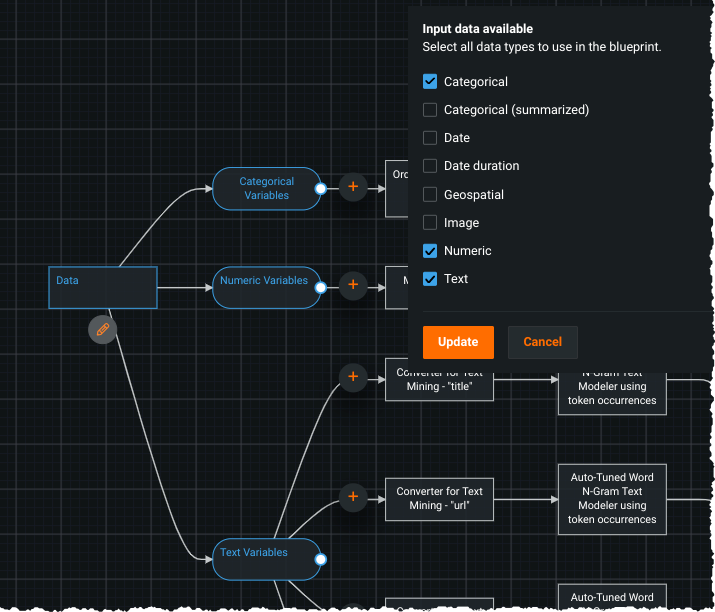
You can change input data types available in a blueprint. Click on the Data node—the editor highlights the node and the included data types. Click the pencil icon to select or remove data types:
Pass selected columns into a task
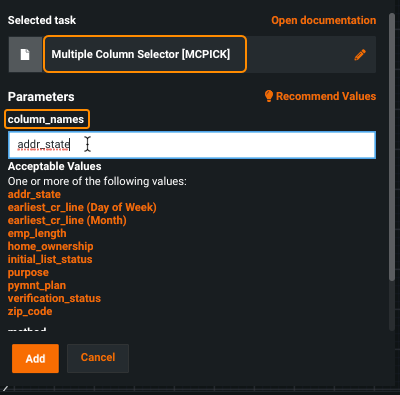
To pass a single or group of columns into a task, use the Task Multiple Column Selector. This task selects specific features in a dataset such that downstream transformations are only applied to a subset of columns. To use this task, add it directly after a data type (for example, directly after “Categorical Variables”), then use the task’s parameters to specify which features should or should not be passed to the next task.
To configure the task, use the column_names parameter to specify columns that should or should not be passed to the next task. Use the method parameter to specify whether those columns should be included or excluded from the input into the next task. Note that if you need to pass all columns of a certain type to a task, you don't need MCPICK, just connect the task to the data type node.
Click Add to see the new task referencing the chosen column(s).
Note that referencing specific columns in a blueprint requires that those columns be present to train the blueprint. DataRobot provides a warning reminder when editing or training a blueprint that the named columns may not be present in the current project.
Blueprint validation
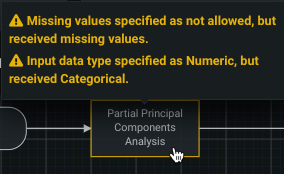
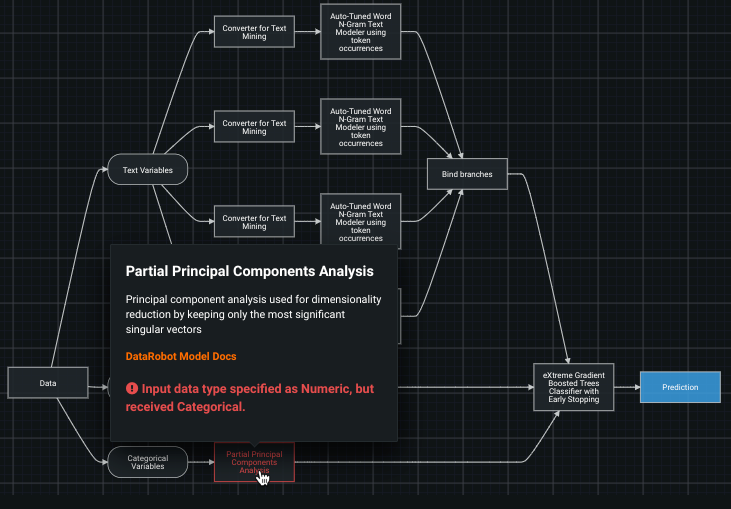
DataRobot validates each node based on the incoming and outgoing edges, checking to ensure that data type, sparse vs. dense data, and shape (number of columns) requirements are met. If you have made changes that cause validation warnings, those affected nodes are displayed in yellow on the blueprint:
Hover on the node to see specifics:
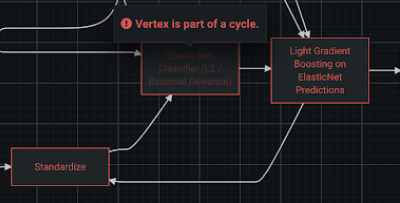
In addition to checking a task's input and output, DataRobot validates that a blueprint doesn't form cycles. If a cycle is introduced, DataRobot provides a warning, indicating which nodes are causing the issue.
Train new models
After changes have been made and saved for a blueprint, the option to train a model using that blueprint becomes available. Click Train to open the window and then select a feature list, sample size, and the number of folds used in cross validation. Then, click Train model.
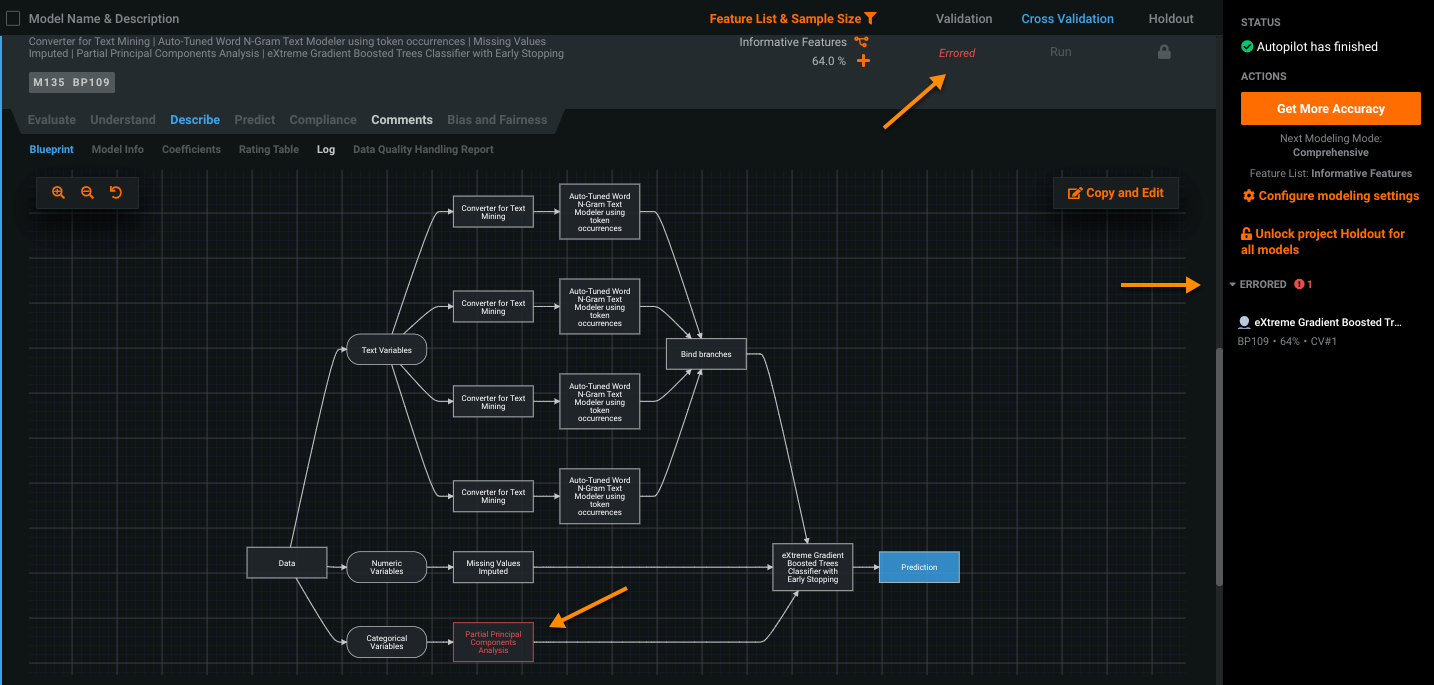
The model becomes available to the project on the model Leaderboard. If errors were encountered during model building, DataRobot provides several indicators.
You can view the errored node from the Describe > Blueprint tab. Click on the problematic task to see the error message or validation warning.
If a custom task fails, you can find the full error traceback in the Describe > Log tab.
Note
You can train a model even if the blueprint has warnings. To do so, click Train with warnings.
More info...
The following sections provide details to help ensure successful blueprint creation.
Boosting
Boosting is a technique that can improve accuracy by training a model using predictions of another model. It uses multiple estimators together, which in turn either use data in multiple forms or help calibrate predictions.
A boosting pipeline has two key components:
-
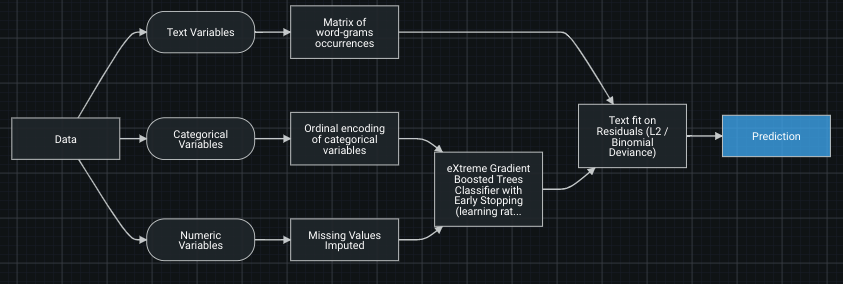
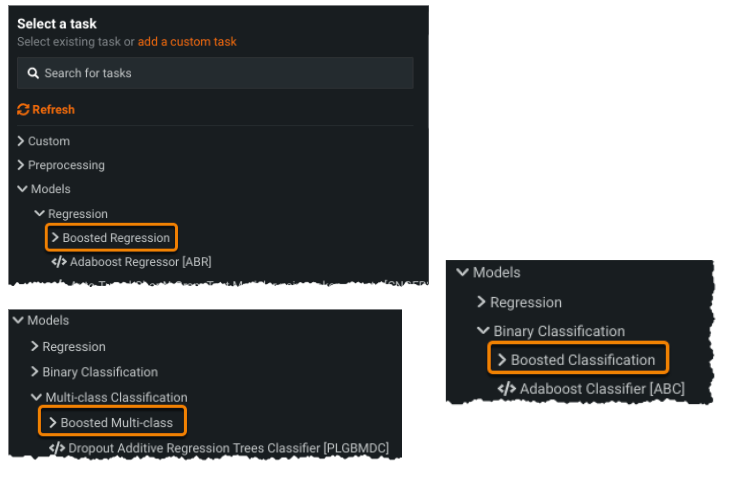
Booster task: A node that boosts the predictions (Text fit on Residuals (L2/Binomial Deviance) in the example above). The list of built-in booster tasks available can be found in the task selector under Models > Regression > Boosted Regression (or similarly under the other Models sub-categories). For example:
-
Boosting input: A node that supplies the prediction to boost (eXtreme Gradient Boosted Trees Classifier with Early stopping in the example) and other tasks that pass extra variables of the booster (Matrix of word-grams occurrences).
It must meet the following criteria:
-
There must be only one task that provides predictions to boost.
-
There must be at least one task providing extra explanatory variables to the booster, other than the predictions (Matrix of word-grams occurrences in the example).
