Deploy DataRobot models
You can register and deploy models you build with DataRobot AutoML using the Model Registry. In most cases, before deployment, you should unlock holdout and retrain your model at 100% to improve predictive accuracy. Additionally, DataRobot automatically runs Feature Impact for the model (this also calculates Prediction Explanations, if available).
Register and deploy a model
To register and deploy a model from the Leaderboard, you must first provide model registration details:
-
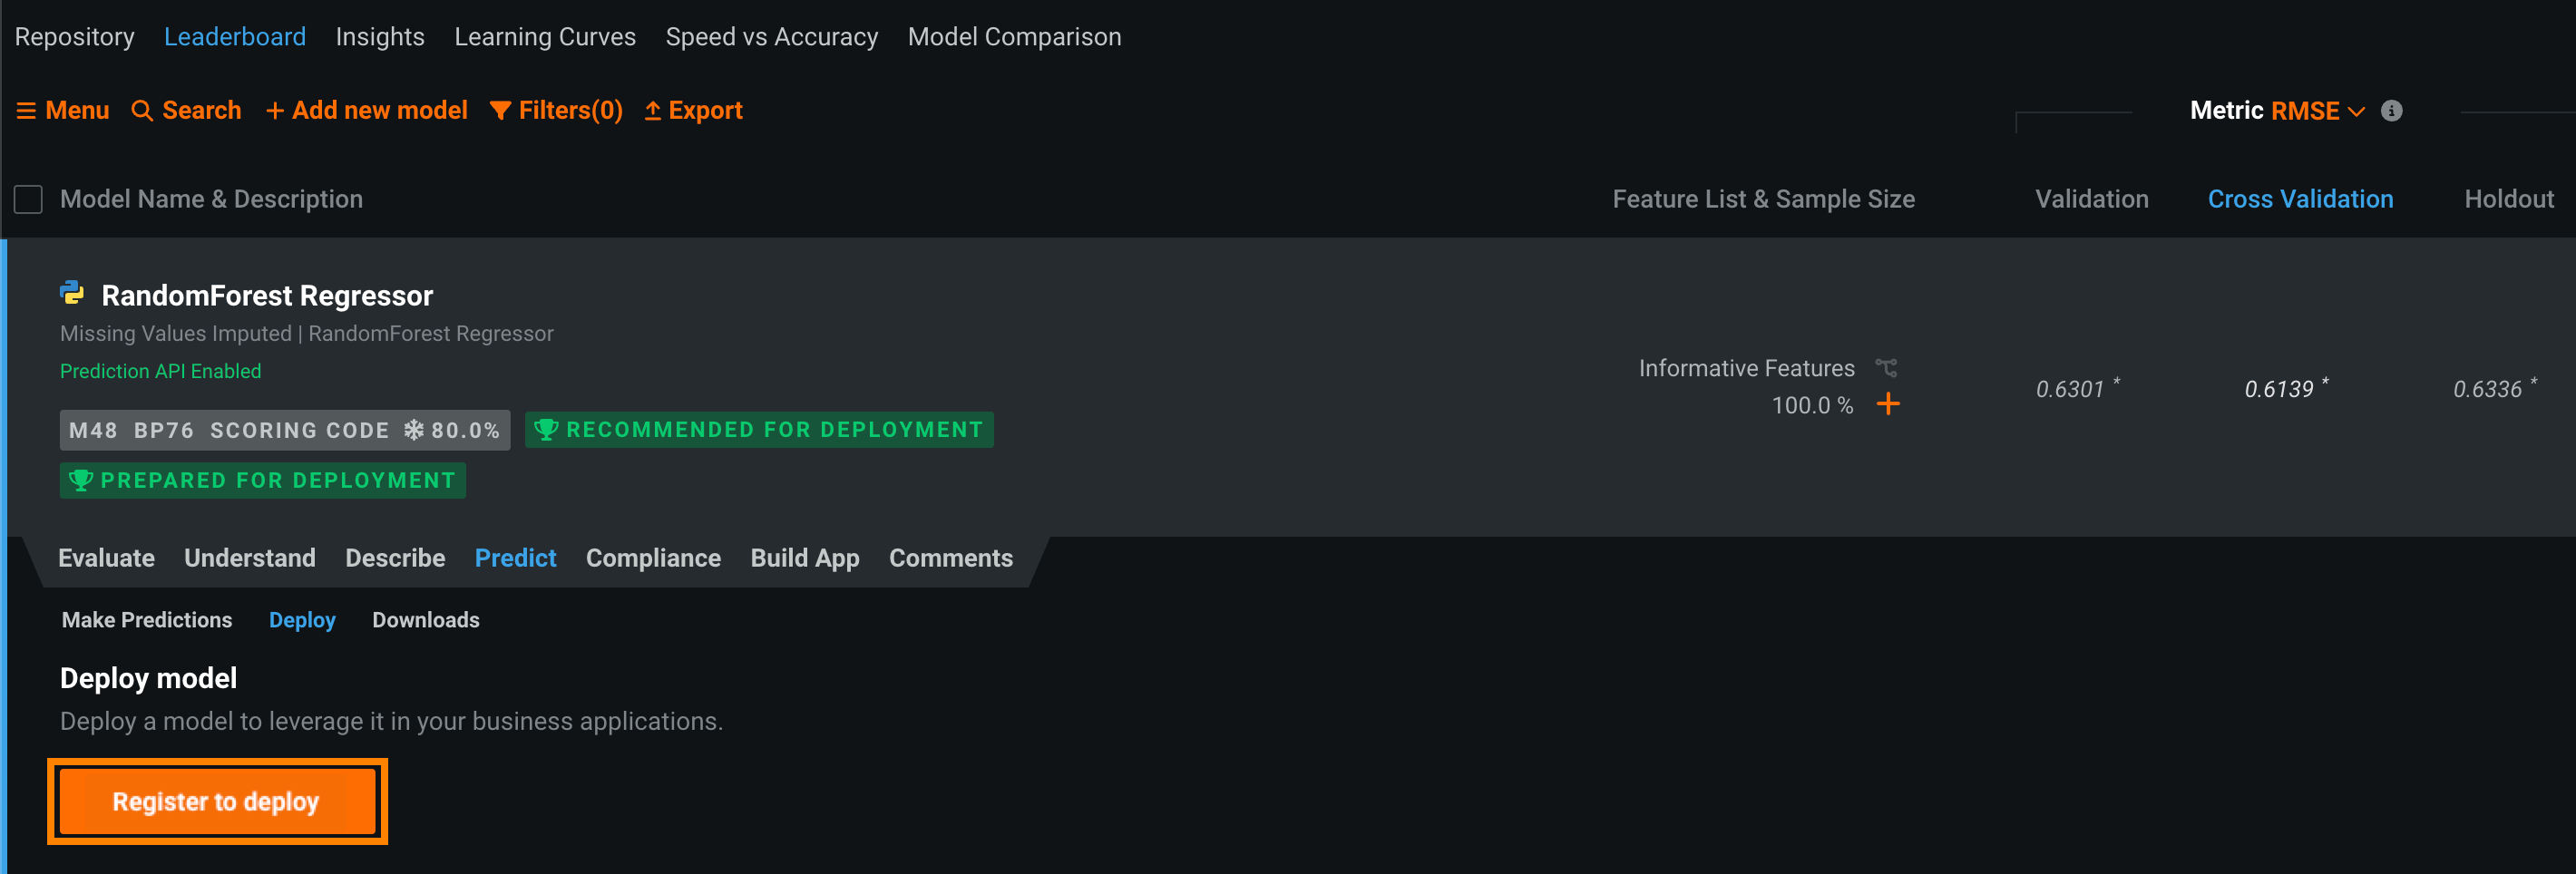
On the Leaderboard, select the model to use for generating predictions. DataRobot recommends a model with the Recommended for Deployment and Prepared for Deployment badges. The model preparation process runs feature impact, retrains the model on a reduced feature list, and trains on a higher sample size, followed by the entire sample (latest data for date/time partitioned projects).
Important
The Deploy tab behaves differently in environments without a dedicated prediction server, as described in the section on shared modeling workers.
-
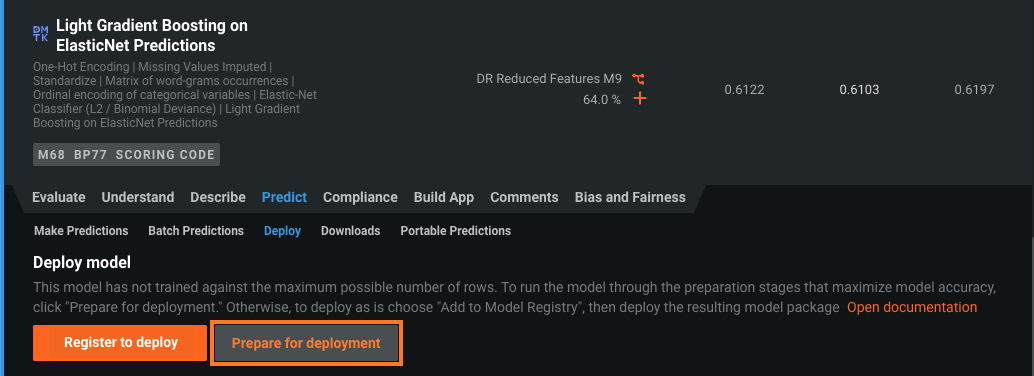
Click Predict > Deploy. If the Leaderboard model doesn't have the Prepare for Deployment badge, DataRobot recommends you click Prepare for Deployment to run the model preparation process for that model.
Tip
If you've already added the model to the Model Registry, the registered model version appears in the Model Versions list. You can click Deploy next to the model and skip the rest of this process.
-
Under Deploy model, click Register to deploy.
-
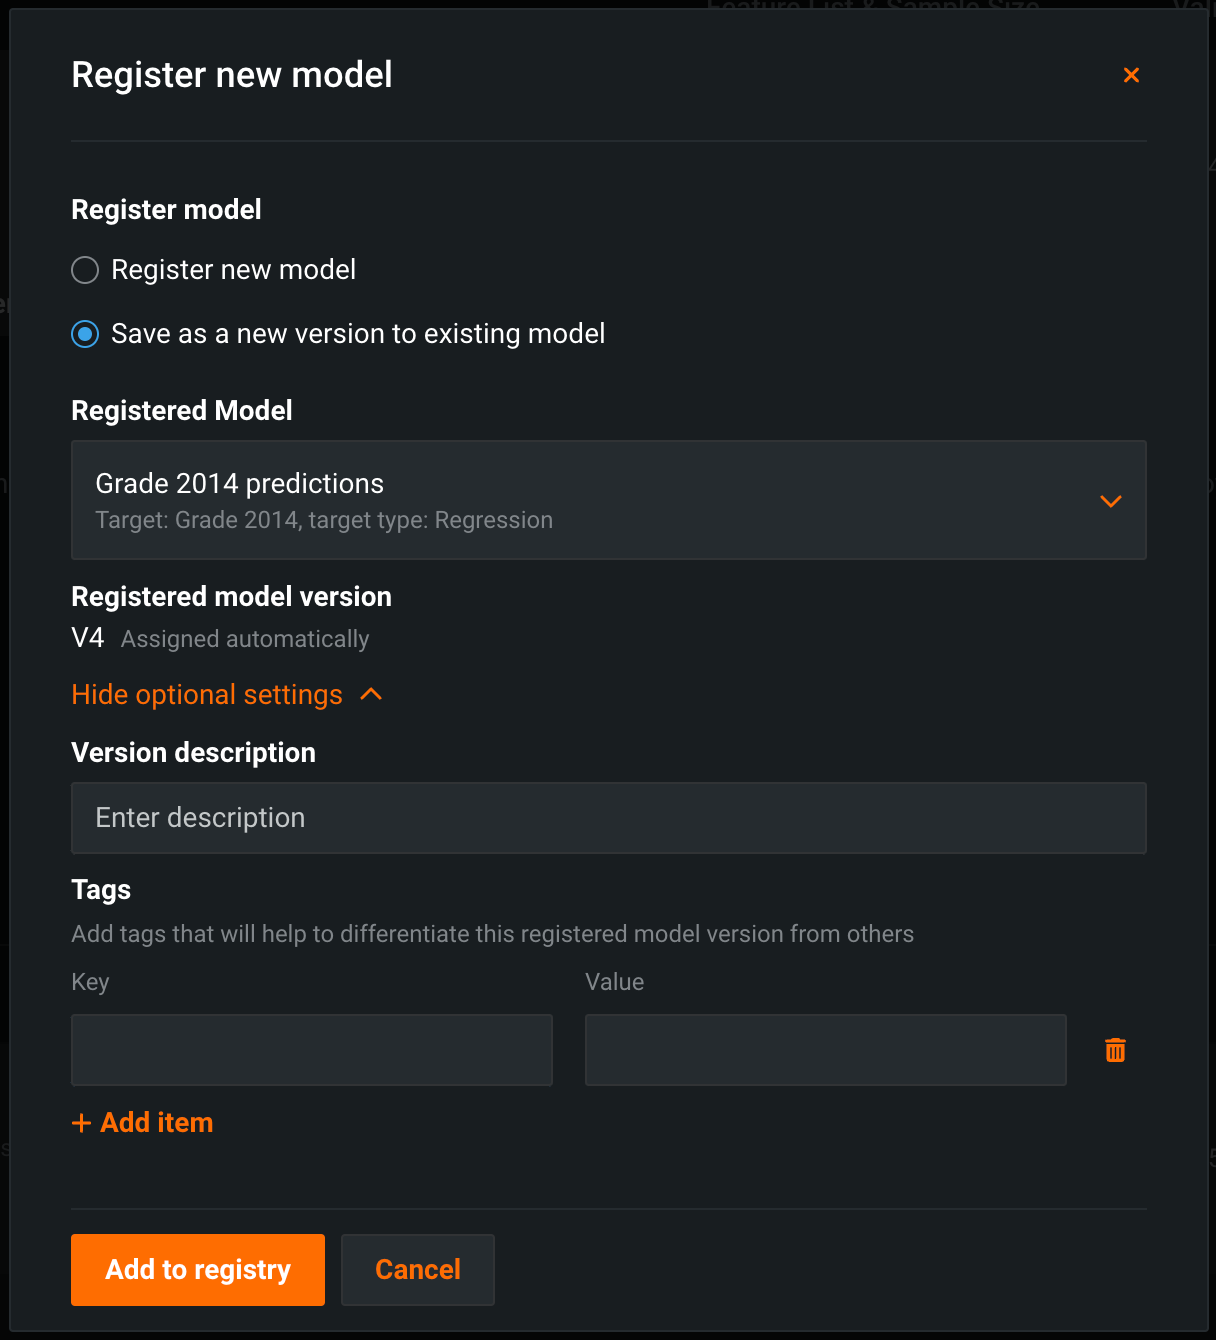
In the Register new model dialog box, provide the following model information:
Field Description Register model Select one of the following: - Register new model: Create a new registered model. This creates the first version (V1).
- Save as a new version to existing model: Create a version of an existing registered model. This increments the version number and adds a new version to the registered model.
Registered model name / Registered Model Do one of the following: - Registered model name: Enter a unique and descriptive name for the new registered model. If you choose a name that exists anywhere within your organization, the Model registration failed warning appears.
- Registered Model: Select the existing registered model you want to add a new version to.
Registered model version Assigned automatically. This displays the expected version number of the version (e.g., V1, V2, V3) you create. This is always V1 when you select Register a new model. Prediction threshold For binary classification models. Enter the value a prediction score must exceed to be assigned to the positive class. The default value is 0.5. For more information, see Prediction thresholds.Optional settings Version description Describe the business problem this model package solves, or, more generally, describe the model represented by this version. Tags Click + Add item and enter a Key and a Value for each key-value pair you want to tag the model version with. Tags do not apply to the registered model, just the versions within. Tags added when registering a new model are applied to V1. Include prediction intervals For time series models. Enable the computation of a model's time series prediction intervals (from 1 to 100). Time series prediction intervals may take a long time to compute, depending on the number of series in the dataset, the number of features, the blueprint, etc. Consider if intervals are required in your deployment before enabling this setting. For more information see, the prediction intervals consideration. Prediction intervals in DataRobot serverless prediction environments
In a DataRobot serverless prediction environment, to make predictions with time-series prediction intervals included, you must include pre-computed prediction intervals when registering the model package. If you don't pre-compute prediction intervals, the deployment resulting from the registered model doesn't support enabling prediction intervals.
Binary classification prediction thresholds
If you set the prediction threshold before the deployment preparation process, the value does not persist. When deploying the prepared model, if you want it to use a value other than the default, set the value after the model has the Prepared for Deployment badge.
Time series prediction intervals consideration
When you deploy a time series model package with prediction intervals, the Predictions > Prediction Intervals tab is available in the deployment. For deployed model packages built without computing intervals, the deployment's Predictions > Prediction Intervals tab is hidden; however, older time series deployments without computed prediction intervals may display the Prediction Intervals tab if they were deployed prior to August 2022.
-
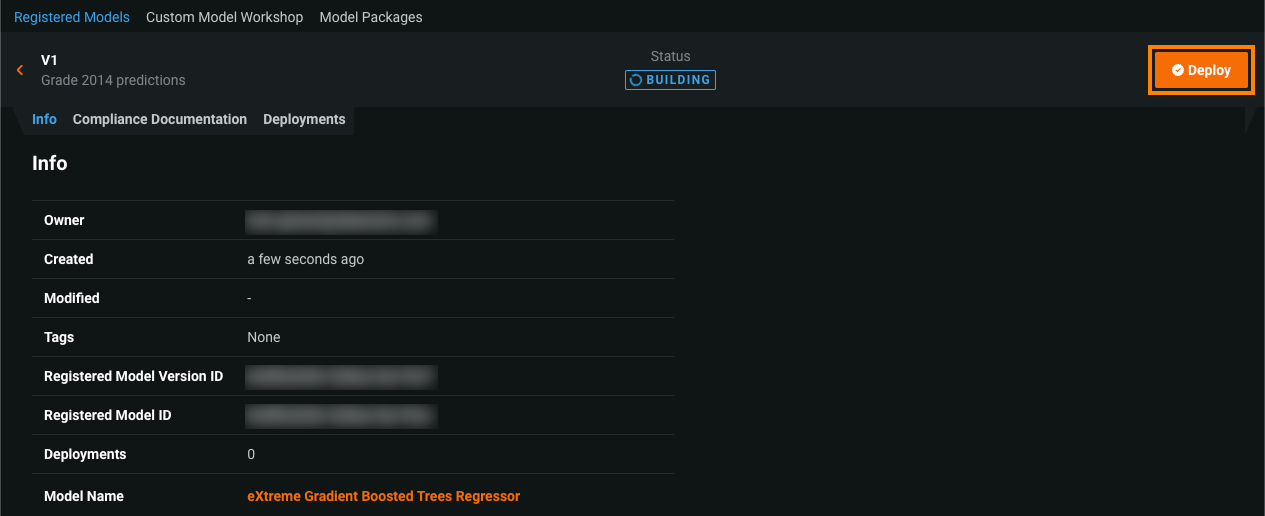
Click Add to registry. The model opens on the Model Registry > Registered Models tab.
-
While the registered model builds, click Deploy and then configure the deployment settings.
-
Click Deploy model.
Deploy a registered model
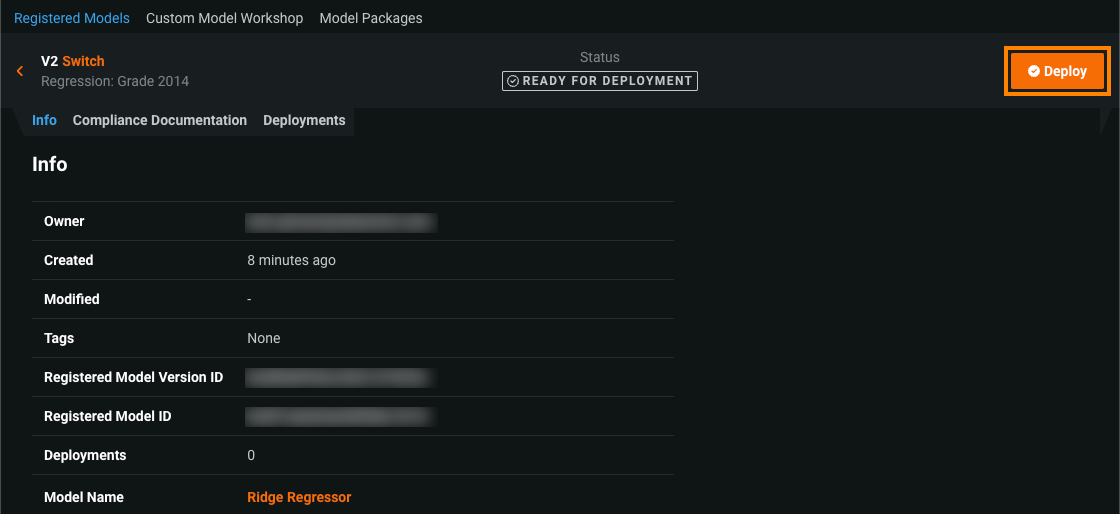
In the Model Registry, you can deploy a registered model at any time from the Registered Models page. To do that, you must open a registered model version:
-
On the Registered Models page, click the registered model containing the model version you want to deploy.
-
To open the registered model version, do either of the following:
-
In the version header, click Deploy, and then configure the deployment settings.
Use shared modeling workers
If you do not have a dedicated prediction server instance, you can use a node that shares workers with your model-building activities.
In this scenario, the deployment workflow has a different interface:
-
From the Leaderboard, select the model to use for generating predictions, and then click Predict > Deploy Model API.
-
Click Show Example to generate and display a usage example and define the following:
Field Description 1 API_TOKENThe API key. 2 PROJECT_ID/MODEL_IDThe project and model IDs, available in the sample. 3 dr.Client(endpoint='https://app.datarobot.com/api/v2', token=API_TOKEN)The shared instance endpoint, available in the sample. The DataRobot Python client uses the API key you set for authentication so no key or username is required. -
To execute the file, follow the instructions in the comments included in the example snippet.

