Work with assets
When you add a dataset, DataRobot ingests the source data and runs EDA1 to register the asset and make it available from the catalog.
This page describes how you can interact with your data once it's registered in DataRobot:
- Update asset details (name, tags, and descriptions).
- View and create feature lists.
- View and manage configured relationships.
- View version history.
- Add comments and have discussions within individual assets.
- Create a snapshot of a dynamic dataset.
- Keep data up-to-date by scheduling snapshots.
- Create a project from a catalog asset.
See also:
Additionally, when Composable ML is enabled, you can save blueprints to the AI Catalog. From the catalog, a blueprint can be edited, used to train models in compatible projects, or shared.
Find existing assets
Once in the AI Catalog, there are a variety of tools to help quickly locate the data assets you want to work with. You can:
Use the dropdown to modify the order of all existing assets.
The default sort option is Creation date, except after searching for a specific asset, in which case the default is Relevance.
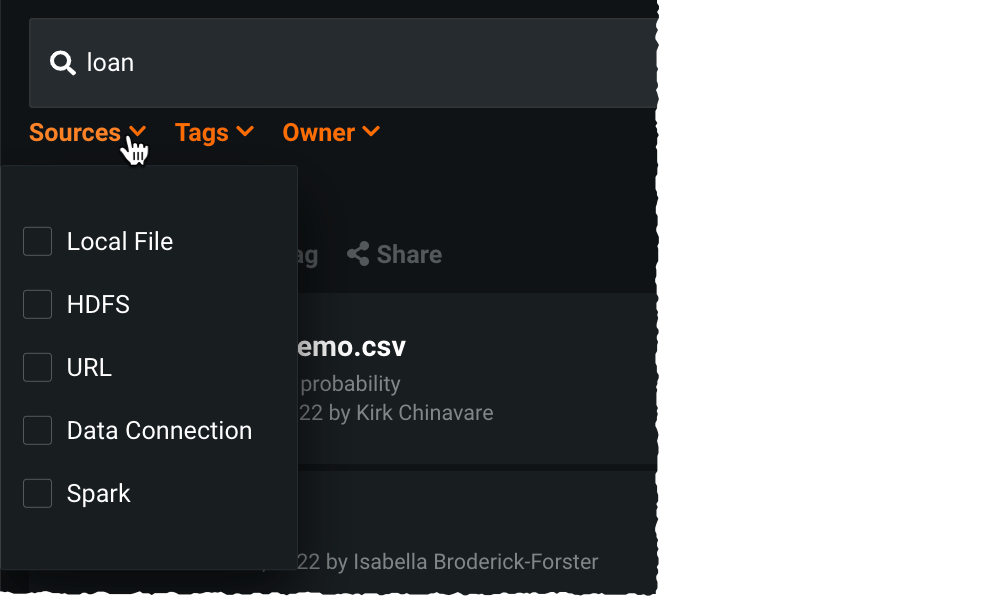
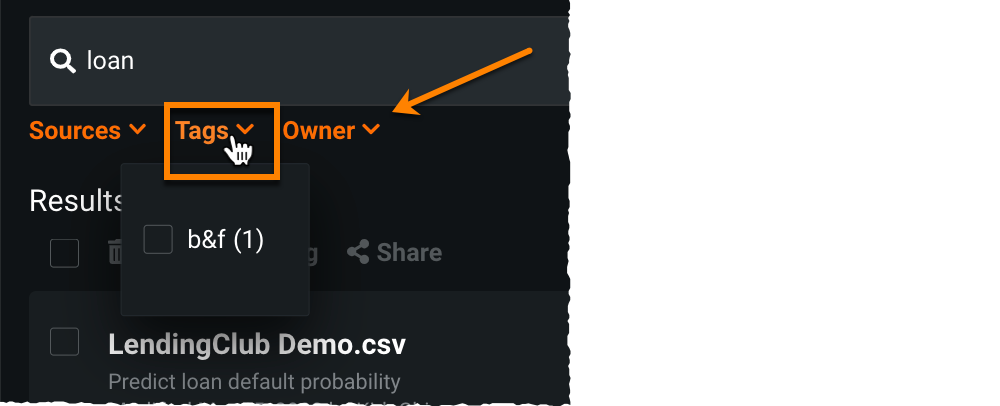
Under the search query box, you can filter assets by Source, Tags, and/or Owner.
For example, you can filter by any tags manually added to an asset:
View asset information
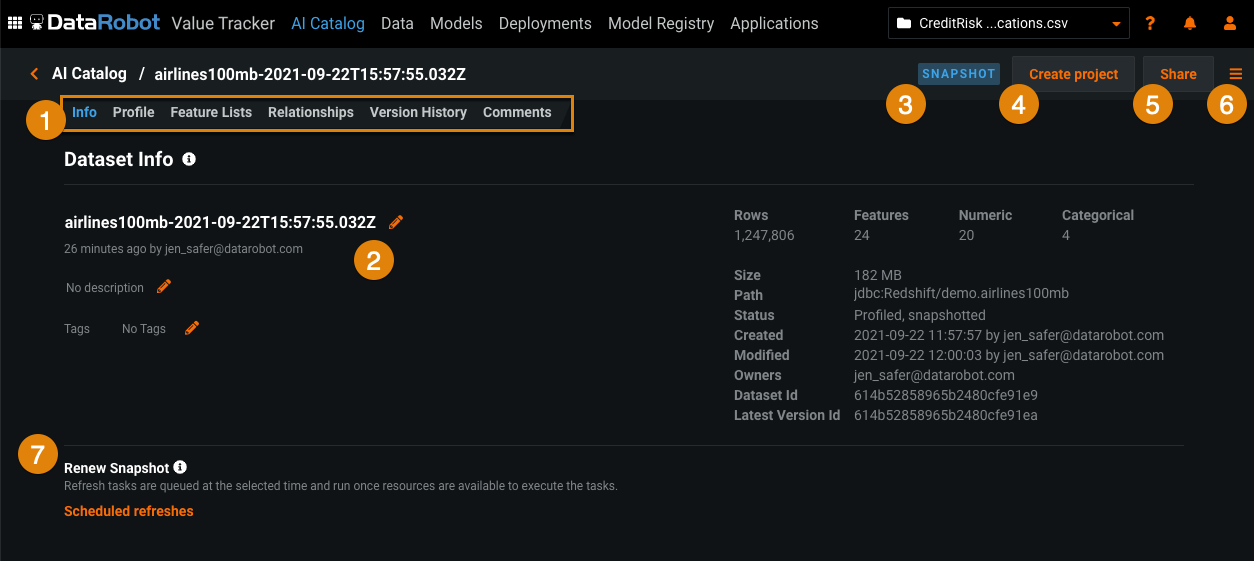
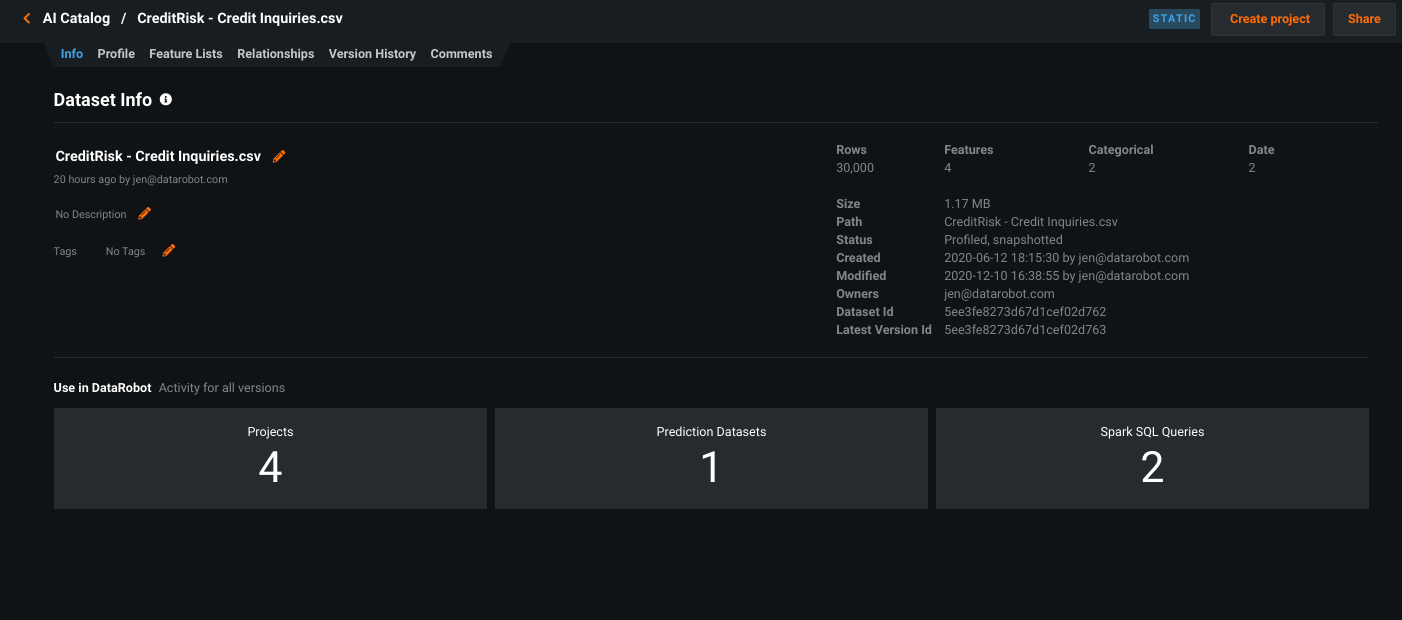
Click an asset in the catalog to view an overview of the asset's details as well as metadata.
| Element | Description | |
|---|---|---|
| 1 | Asset tabs | Select a tab to work with the asset (dataset):
|
| 2 | Dataset Info | Update the name and description, and add tags to use for searches. The number of rows and features display on the right, along with other details. |
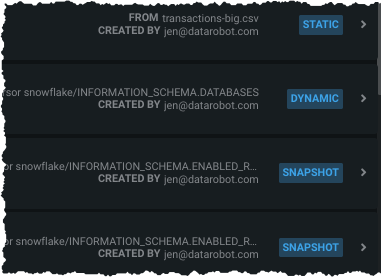
| 3 | State badges | Displayed badges indicate the state of the asset—whether it's in the process of being registered, whether it's static or dynamic, generated from a Spark SQL query, or snapshotted. |
| 4 | Create project | Create a machine learning project from the dataset. |
| 5 | Share | Share assets with other users, groups, and organizations. |
| 6 | Actions menu | Download, delete, or create a snapshot of the dataset. |
| 7 | Renew Snapshot | Add a scheduled snapshot. |
| 8 | Impact analysis | View how other DataRobot entities are related to—or dependent on—the current asset. |
Impact analysis
The AI Catalog serves as a centralized collaboration hub for working with data and related assets. Impact analysis shows how other entities in the application are related to—or dependent on—the current asset. This is useful for a number of reasons, allowing you to:
- View how popular an item is based on the number of projects in which it is used.
- Understand which other entities might be affected if you were to makes changes or deletions.
- Gain understanding on how the entity is used.
All of the following associations are reported (with frequency values) as applicable:
- Projects
- Prediction datasets
- Feature Discovery configurations
- Time series calendars
- Spark SQL queries
- External model packages
- Deployment retraining
To view details, click on the asset title and tiles relevant to the selection display:
Click on a tile for summary details and then click on the associated button for specific detail. For example, click on Project for a summary and Open Project for detail:
In this example, DataRobot opens to the Start screen if EDA1 was the last step completed or the Data page if EDA2 completed.
Each tile-type provides different (self-explanatory) details.
If you do not have permission to access an asset, you can view an entry that represents the asset but the entry does not disclose any additional information.
This functionality is also available from the Version History tab for an asset:
Profile your data
The Profile tab allows you to preview dataset column names and row data. It can be useful for finding or verifying column names when writing Spark SQL statements for blended datasets.
Info tab vs. Profile tab
The Info tab displays the data's total row count, feature count, and size.
The Profile tab only displays a preview of the data based on a 1MB raw sample, and the feature types and details are based on a 500MB sample.
Meaning the row count observed on the Profile tab may not match that displayed in the Info tab.
Note that the preview is a random sample of up to 1MB of the data and may be ordered differently from the original data. To see the complete, original data, use the Download Dataset option.
To preview a dataset, select it in the main catalog and click the pencil icon (![]() ) to access dataset information (if available).
) to access dataset information (if available).
-
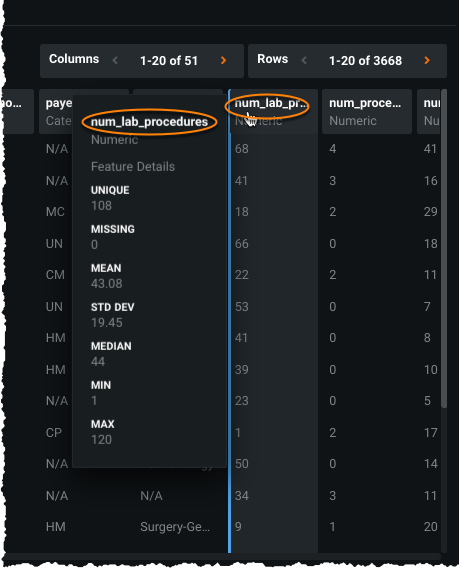
Click the Profile tab to preview the contents of the dataset:
-
Use the Columns dropdown to select the number of columns to display on the page and the scroll bars to scroll through those columns. Additionally, you can use the Rows dropdown to cycle through available data, 20 rows at a time.
The Profile tab also displays details for all features in the dataset. To view details for a particular feature, scroll to it in the display and click. The Feature Details listed in the right panel update to reflect statistics for the feature. (These are the same statistics as those displayed on the Data for EDA1.)
View and create feature lists
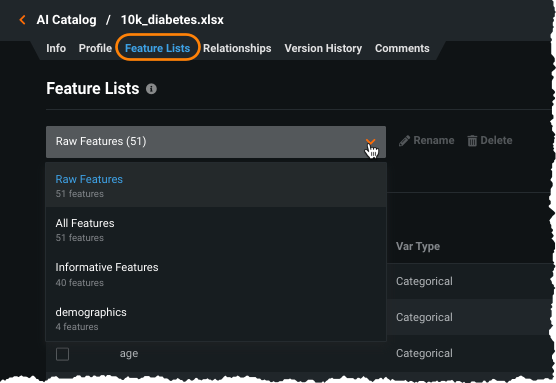
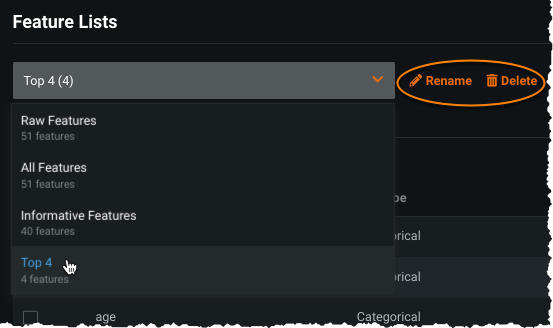
You can create new lists and feature transformations for features of any dataset in the catalog. To work with the tools, select the dataset in the main catalog and Feature Lists in the left panel.
Note
To create feature lists, you must have Owner or Editor access to the dataset.
When you create feature lists, they are copied to a project upon creation. You can then set the list to use for the project from the Feature List dropdown at the top of the Project Data list. See the section on working with Feature Lists for complete details on creating, modifying, and understanding these lists.
The Feature List tab also provides access to a tool for creating variable type feature transformations. While DataRobot bases variable type assignments on the values seen during EDA, there are times when you may need to change the type. Refer to feature transformations documentation for complete details.
To create a feature list:
-
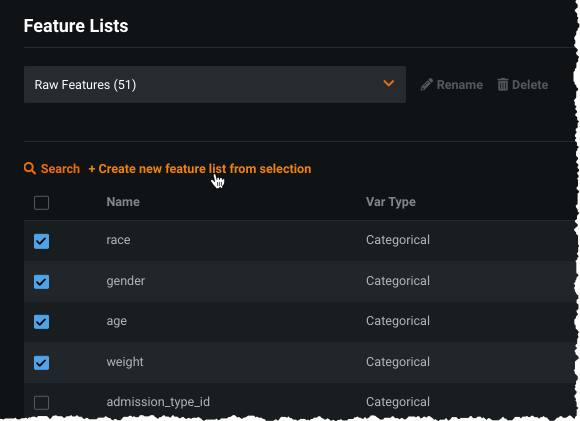
Use the checkboxes to the left of feature names to select a set of features.
-
Click the Create new feature list from selection link, which becomes active after you select the first feature.
-
In the resulting dialog, provide a name for the new list and click Submit. The new list becomes available through the dropdown.
You can delete or rename any feature list you created. You cannot make any changes to the DataRobot default feature lists.
Manage relationships
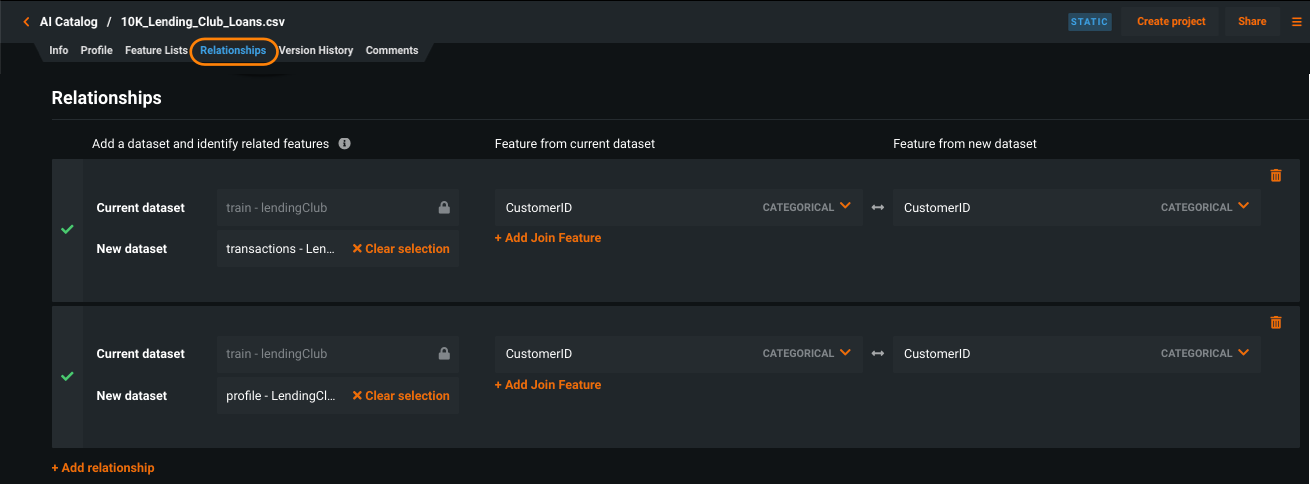
DataRobot’s Feature Discovery capability guides you through creating relationships, which define both the included datasets and how they are related to one another. The end product is a multitude of additional features that are a result of these linkings. The Feature Discovery engine analyzes the included datasets to determine a feature engineering “recipe” and, from that recipe, generates secondary features for training and predictions. Once these relationships are established, you can view them from the catalog.
To view relationships, select the dataset in the main catalog and click the Relationships tab to view, modify, or delete existing relationships:
See complete details of working with relationships before modifying relationship details.
View version history
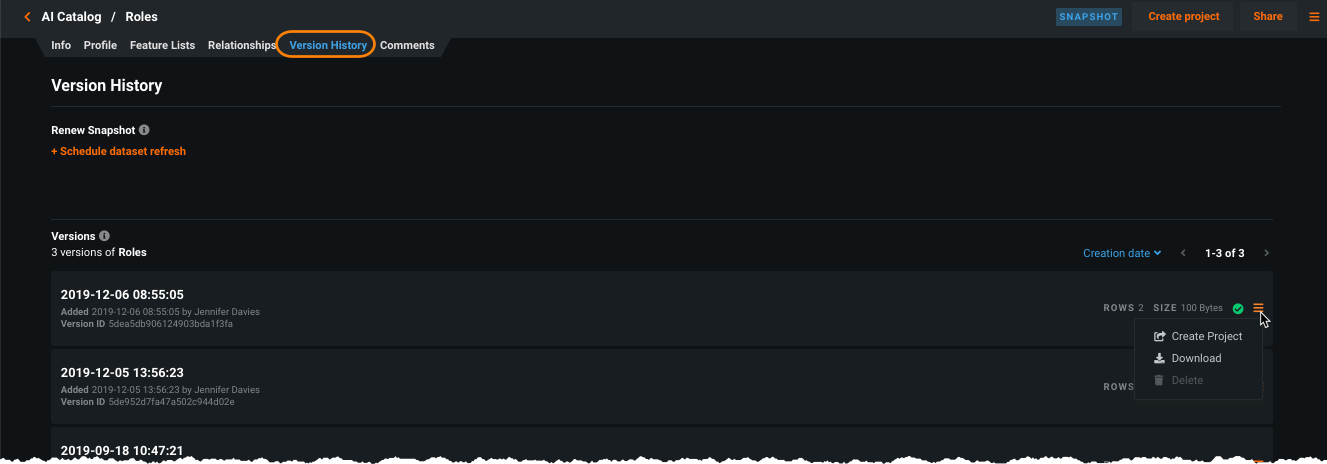
The Version History tab lists all versions of a selected asset. The Status column indicates the snapshot status—green if successful, red if failed, gray if the original version did not have a snapshot.
Click a version to select it. Once selected, you can create a project from the version and download or delete the contents.
Add comments
The Comments tab allows you to add comments to—even host a discussion around—any item in the catalog that you have access to. Comment functionality is available in the AI Catalog (illustrated below), and also as a model tab from the Leaderboard and in use case tracking. With comments, you can:
- Tag other users in a comment; DataRobot will then send them an email notification.
- Edit or delete any comment you have added (you cannot edit or delete other users' comments).
Versioning snapshot assets
Static assets can only be versioned by uploads of the same type; datasets created by local files are versioned from local file uploads, and datasets created from a data stage are versioned from data stage uploads.
Create a snapshot
You can uncheck Create Snapshot when adding external data connections, to meet certain security requirements, for example. Snapshotted materialized data is stored on disk; unmaterialized data is stored remotely as your asset and only downloaded when needed.
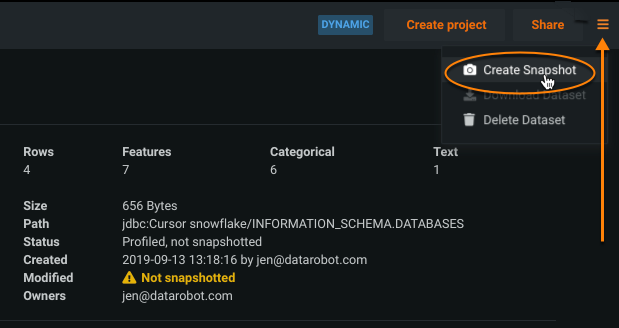
To determine whether an asset has been snapshotted, click on its catalog entry and check the details on the right. If it has been snapshotted, the last snapshot date displays; if not, a notification appears:
To create a snapshot for unmaterialized data:
-
Select the asset from the main catalog listing.
-
Expand the menu in the upper right and select Create Snapshot.
You cannot update the snapshot parameters that were defined when the catalog entry was added; snapshots are based on the original SQL.
-
DataRobot prompts for any credentials needed to access the data source. Click Yes, take snapshot to proceed.
-
DataRobot runs EDA. New snapshots are available from the version history, with the newest ("latest") snapshot becoming the one used by default for the dataset.
Once EDA completes, the displayed status updates to "SNAPSHOT" and a message appears indicating that publishing is complete. If you want the asset to no longer be snapshotted, remove the asset and add it again, making sure to uncheck Create Snapshot.
Create a project
You can create new projects directly from the AI Catalog; you can also use listed datasets as a source for predictions.
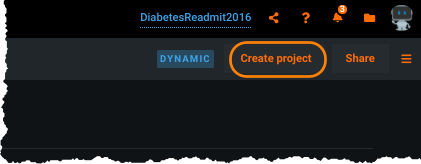
To create a project, from the catalog main listing, click on an asset to select it. In the upper right, click Create project.
DataRobot runs EDA1 and loads the project. When complete, DataRobot displays the Start screen.

