Custom environments
Once uploaded into DataRobot, custom tasks run inside of environments—Docker containers running in Kubernetes. In other words, DataRobot copies the uploaded files defining the custom task into the image container.
In most cases, adding a custom environment is not required because there are a variety of built-in environments available in DataRobot. Python and/or R packages can be easily added to these environments by uploading a requirements.txt file with the task’s code. A custom environment is only required when a custom task:
- Requires additional Linux packages.
- Requires a different operating system.
- Uses a language other than Python, R, or Java.
This document describes how to build a custom environment for these cases.
Prerequisites
To test a custom environment locally, install both Docker Desktop and the DataRobot User Models (DRUM) CLI tool on your machine, as described in the DRUM installation documentation.
Create the environment
Once DRUM is installed, begin your environment creation by copying one of the examples from GitHub. Log in to GitHub before clicking this link. Make sure:
- The environment code stays in a single folder.
- You remove the
env_info.jsonfile.
Add Linux packages
To add Linux packages to an environment, add code in the beginning of dockerfile, immediately after the FROM datarobot… line.
Use dockerfile syntax for an Ubuntu base. For example, the following command tells DataRobot which base to use and then to install packages foo, boo, and moo inside the Docker image:
FROM datarobot/python3-dropin-env-base
RUN apt-get update --fix-missing && apt-get install foo boo moo
Add Python/R packages
In some cases, you might want to include Python/R packages in the environment. To do so, note the following:
-
List packages to install in
requirements.txt. For R packages, do not include versions in the list. -
Do not mix Python and R packages in the same
requirements.txtfile. Instead, create multiple files and adjustdockerfileso DataRobot can find and use them.
See an explanation and examples of requirements.txt files in the custom tasks documentation.
Test the environment locally
The following example illustrates how to quickly test your environment using Docker tools and DRUM.
-
To test a custom task together with a custom environment, navigate to the local folder where the task content is stored.
-
Run the following, replacing placeholder names in
< >brackets with actual names:drum fit --code-dir <path_to_task_content> --docker <path_to_a_folder_with_environment_code> --input <path_to_test_data.csv> --target-type <target_type> --target <target_column_name> --verbose
Use the new environment
To use the tested environment, upload it to DataRobot and apply it to a task. You can also share and download the environment you created.
Upload to DataRobot
Upload a custom environment into DataRobot from Model Registry > Custom Model Workshop > Environments > Add new environment. When you upload an environment, it is only available to you unless you share it with other individuals.
To make changes to an existing environment, create a new version.
Add to task
To use the new environment with a custom task:
-
Navigate to Model Registry > Custom Model Workshop > Tasks and click to select an existing task.
-
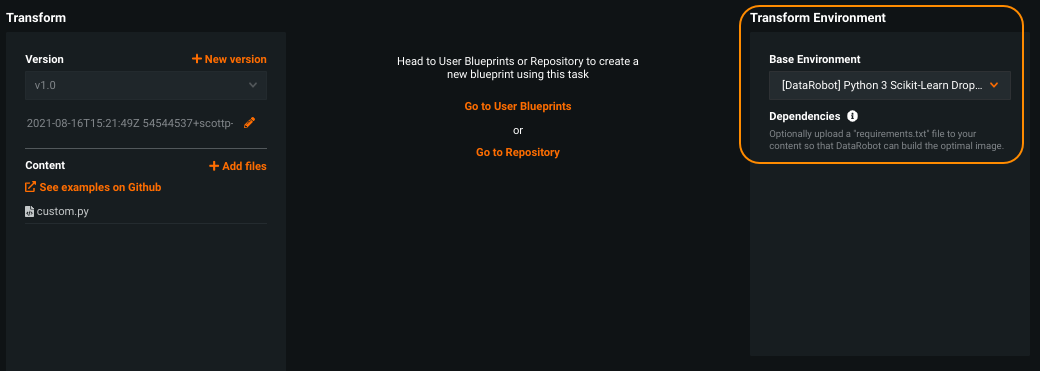
Select the new environment from the Base Environment dropdown.
Work with environments
You can view a variety of information related to each custom and built-in environment, as well as download the content. With custom environments you can also share and delete the content.
Warning
If you delete an environment, you are removing the environment for everyone that it may have been shared with.
View environment information
There is a variety of information available for each custom and built-in environment. To view:
-
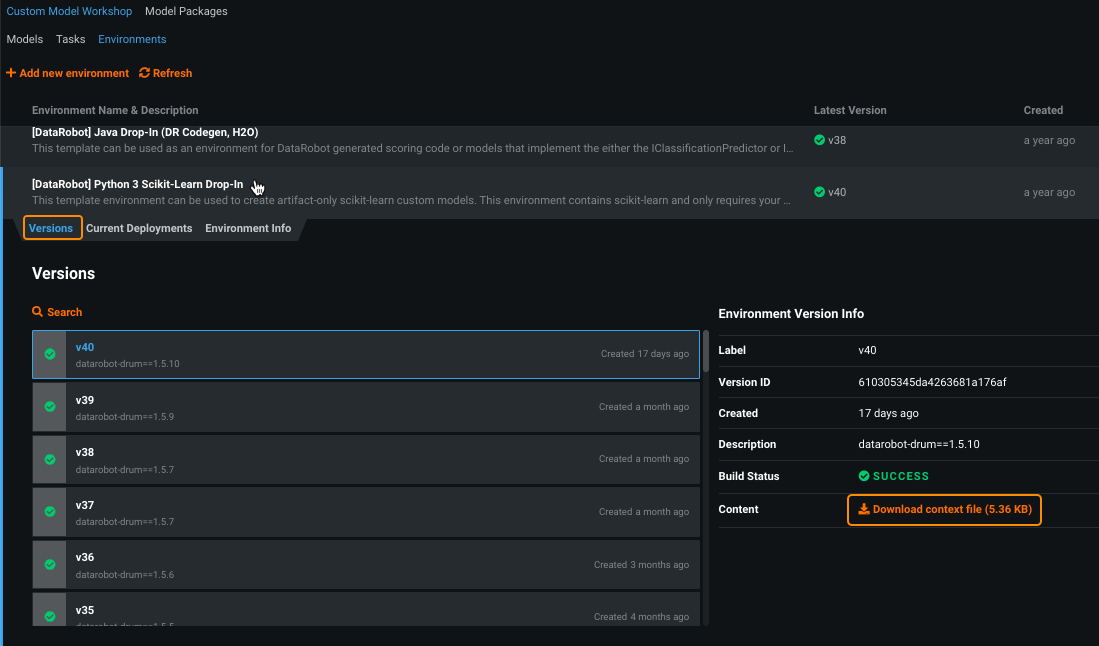
Navigate to Model Registry > Custom Model Workshop > Environments. The resulting list shows all environments available to your account, with summary information.
-
For more information on an individual environment, click to select:
The versions tab lists a variety of version-specific information and provides a link for downloading that version's environment context file.
-
Click Current Deployments to see a list of all deployments in which the current environment has been used.
-
Click Environment Info to view information about the general environment, not including version information.
Share and download
You can share custom environments with anyone in your organization from the menu options on the right. These options are not available to built-in environments because all organization members have access and these environment options should not be removed.
Note
An environment is not available in the model registry to other users unless it was explicitly shared. That does not, however, limit users' ability to use blueprints that include tasks that use that environment. See the description of implicit sharing for more information.
From Model Registry > Custom Model Workshop > Environments, use the menu to share and/or delete any custom environment that you have appropriate permissions for. (Note that the link points to custom model actions, but the options are the same for custom tasks and environments.)


