Custom jobs
Create custom jobs in the Model Registry to implement automation (for example, custom tests) for your models and deployments. Each job serves as an automated workload, and the exit code determines if it passed or failed. You can run the custom jobs you create for one or more models or deployments. The automated workloads you define through custom jobs can make prediction requests, fetch inputs, and store outputs using DataRobot's Public API.
Register and assemble a new job
When you register a custom job, you must assemble the required execution environment and files before running the job. Only the execution environment and an entry point file (typically run.sh) are required; however, you can designate any file you add as the entry point. If you add other files to create your job, the entry point file should reference those files. In addition, to configure runtime parameters, you should create or upload a metadata.yaml file containing the runtime parameter configuration for your job.
To register and assemble a new custom job in the Model Registry:
-
Click Model Registry > Custom Jobs, and then click Register new job.
-
In the Register new job dialog box, enter a Job name and Description (optional) and then click Create new job.
The custom job opens in the Workshop tab.
-
In the Custom Job Workshop for the new job, under Environment and Description, select an Execution Environment for the job and (optionally) edit the Description.
-
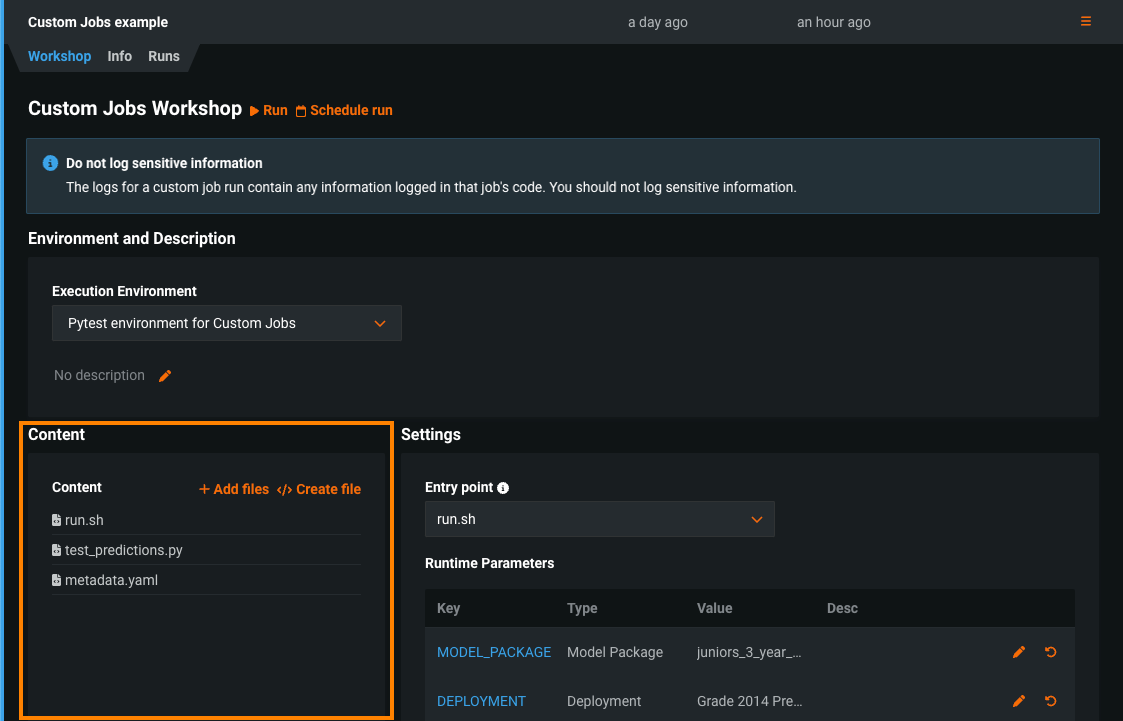
In the Content section, assemble your custom job. You can use the options in this section to create or upload the files required to assemble a custom job:
Option Description Add files Upload existing custom job files ( run.sh,metadata.yaml, etc.).Create file Create a blank file and add contents in DataRobot.
The default file name for a file created this way isrun.sh; however, you can edit that name before saving the file. If you've already added arun.shfile and you create another file without changing the default name, the new file overwrites the previously created or uploadedrun.shfile. -
In the Settings section, define the Entry point file. If you've only added one file (usually
run.sh), that file is the entry point. -
(Optional) In the Settings section, if you uploaded a
metadata.yamlfile, configure the Runtime Parameters.
Run and schedule jobs
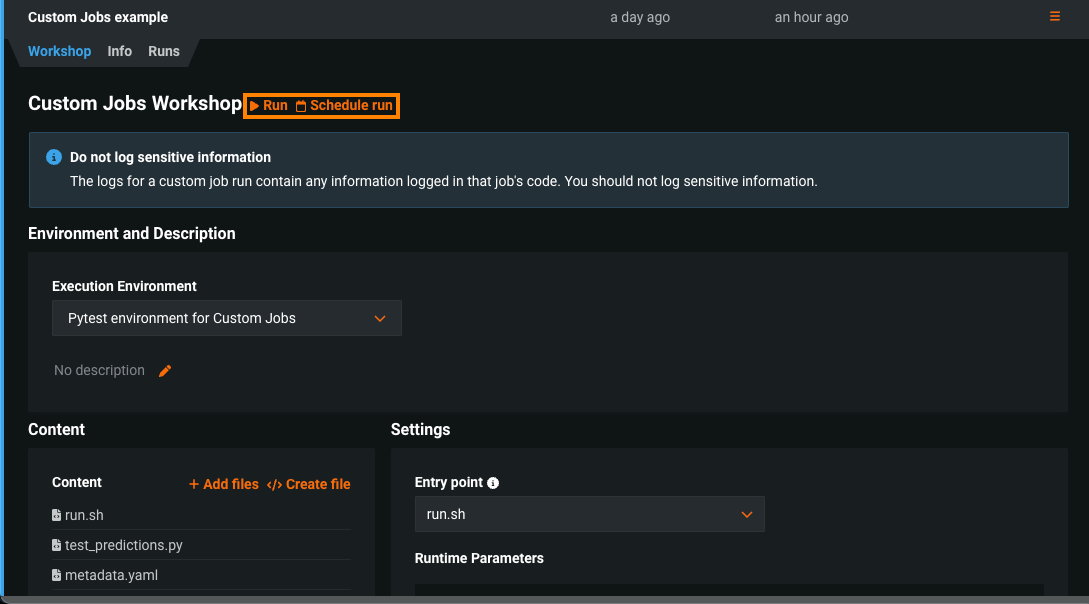
After you register and assemble a custom job with the required environment and files, you can run the job, schedule a run, or both. In the Model Registry, on the Custom Jobs > Workshop tab, locate the run options next to the Custom Jobs Workshop header:
| Option | Description |
|---|---|
| Run | Starts a custom job run immediately and opens the run on the Runs tab, where you can view custom job run information. |
| Schedule run | Opens the Schedule run (UTC) section, where you can select a frequency and enter a time (in UTC) to run your custom job. You can also click Use advanced scheduler to provide a more precise run schedule. Once you've configured a schedule, click Set schedule. |
View and edit jobs info
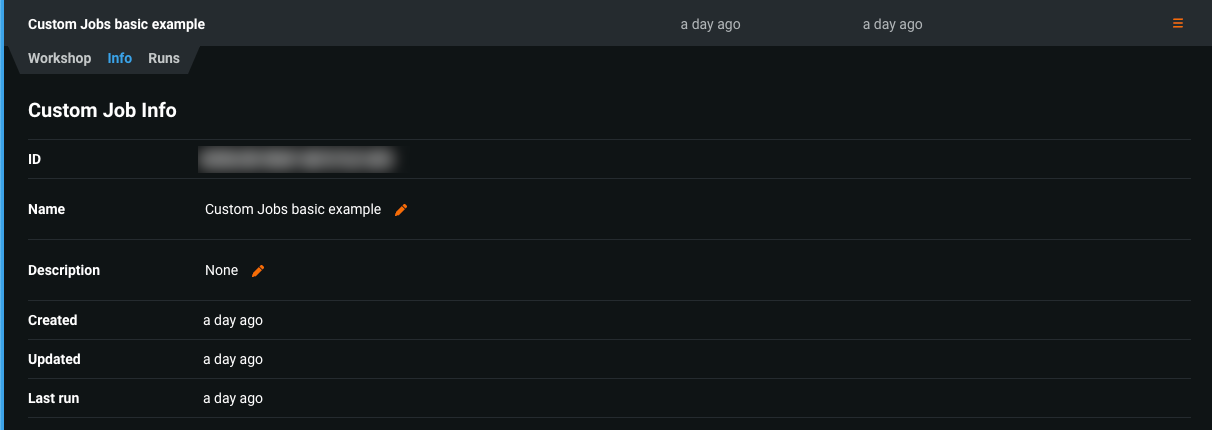
After you register a custom job, you can view and edit the registration info. In the Model Registry, on the Custom Jobs > Info tab, locate the Custom Job Info. You can view the custom job ID, and the created, updated, and last run information. You can also edit the Name and Description of the custom job. To edit those fields, click the edit icon (![]() ) next to the field contents:
) next to the field contents:
View and manage job runs
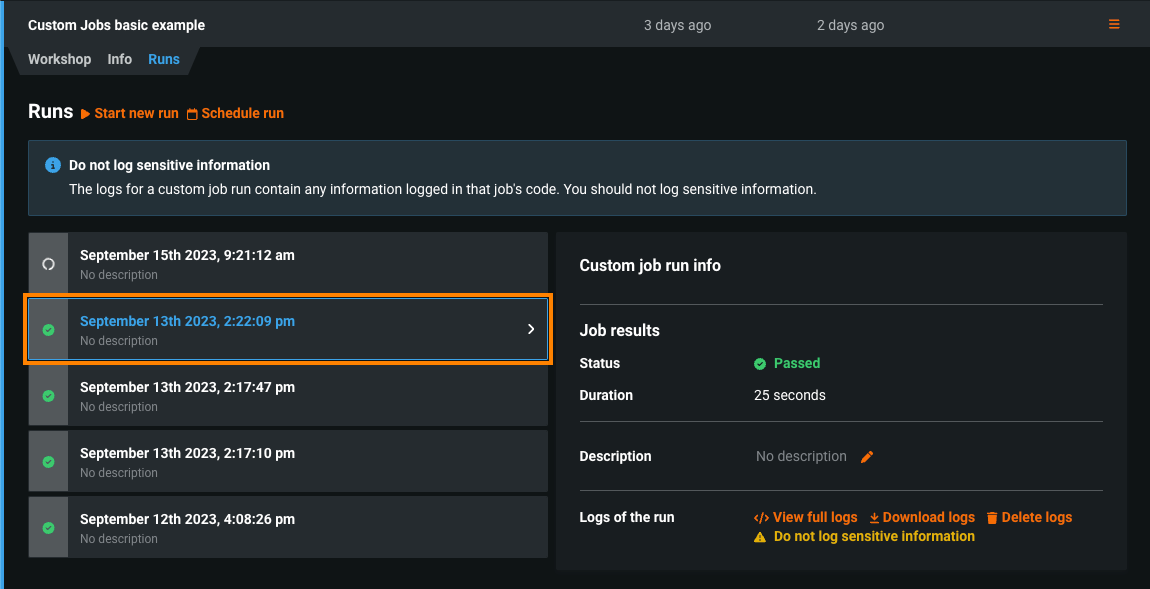
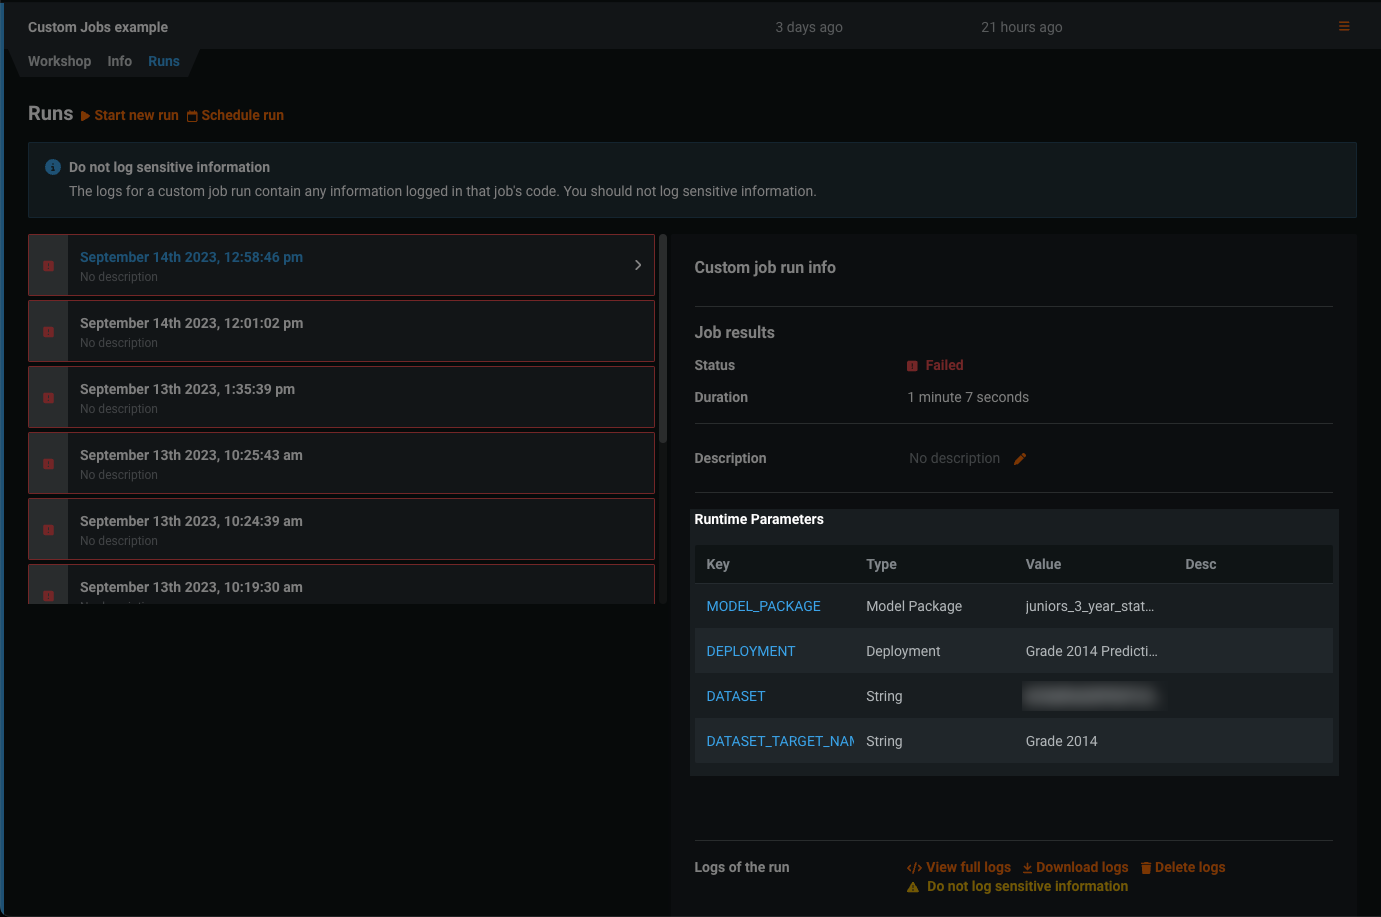
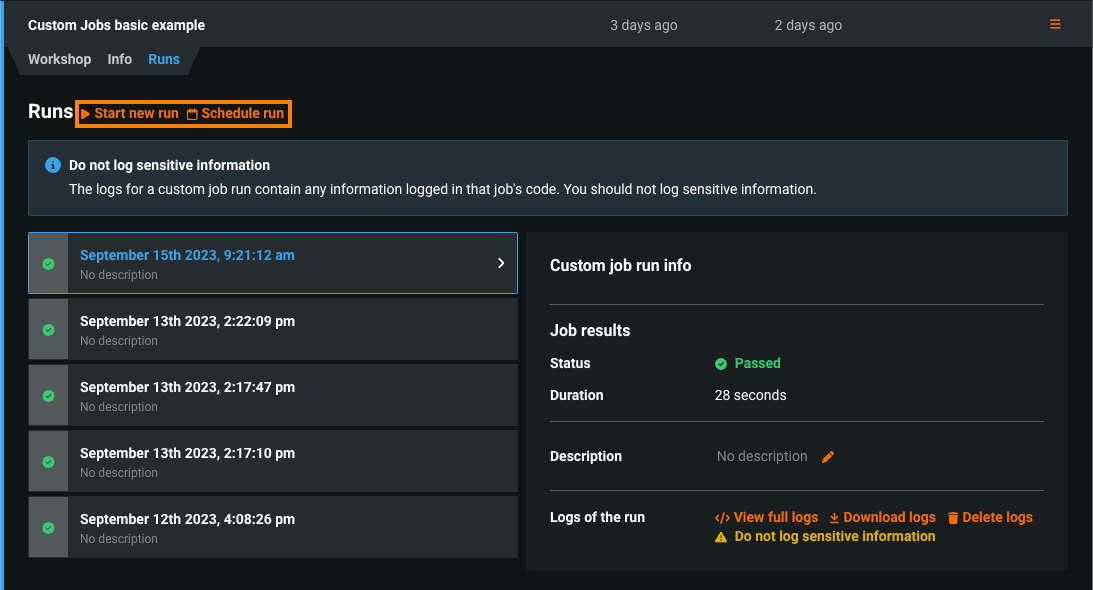
When you run a custom job (or a scheduled run completes), the run information is recorded, allowing you to review the run information and view and manage run logs. This is helpful for diagnosing issues when a run fails. In the Model Registry, on the Custom Jobs > Runs tab, locate and click the run you want to view from the list and review the Custom job run info:
Warning
Do not log sensitive information in your custom job code. The logs for a custom job run contain any information logged in that job's code. If you log sensitive information, you should delete your logs.
If you uploaded a metadata.yaml file and configured Runtime Parameters during the custom jobs assembly process, you can view them in the Runtime Parameters table for a run:
You can also initiate or schedule runs from the Runs tab:
Delete a custom job
To delete a custom job and all of its contents, in the Model Registry, on the Custom Jobs tab, locate the row for the custom job you want to delete, click the action menu (![]() ), and click Delete. Then, in the Delete Custom Job dialog box, click Delete again.
), and click Delete. Then, in the Delete Custom Job dialog box, click Delete again.

