Register workflows
After experimenting in the agentic playground to build a production-ready agentic workflow, register the custom agentic workflow in the Registry workshop, in preparation for deployment to Console.
Register from an agentic playground
To begin registering an agentic workflow from an agentic playground, find the register option in the comparison chat, or a single-agent chat:
Click the actions menu for the agentic workflow you want to register, then click Register agentic workflow.
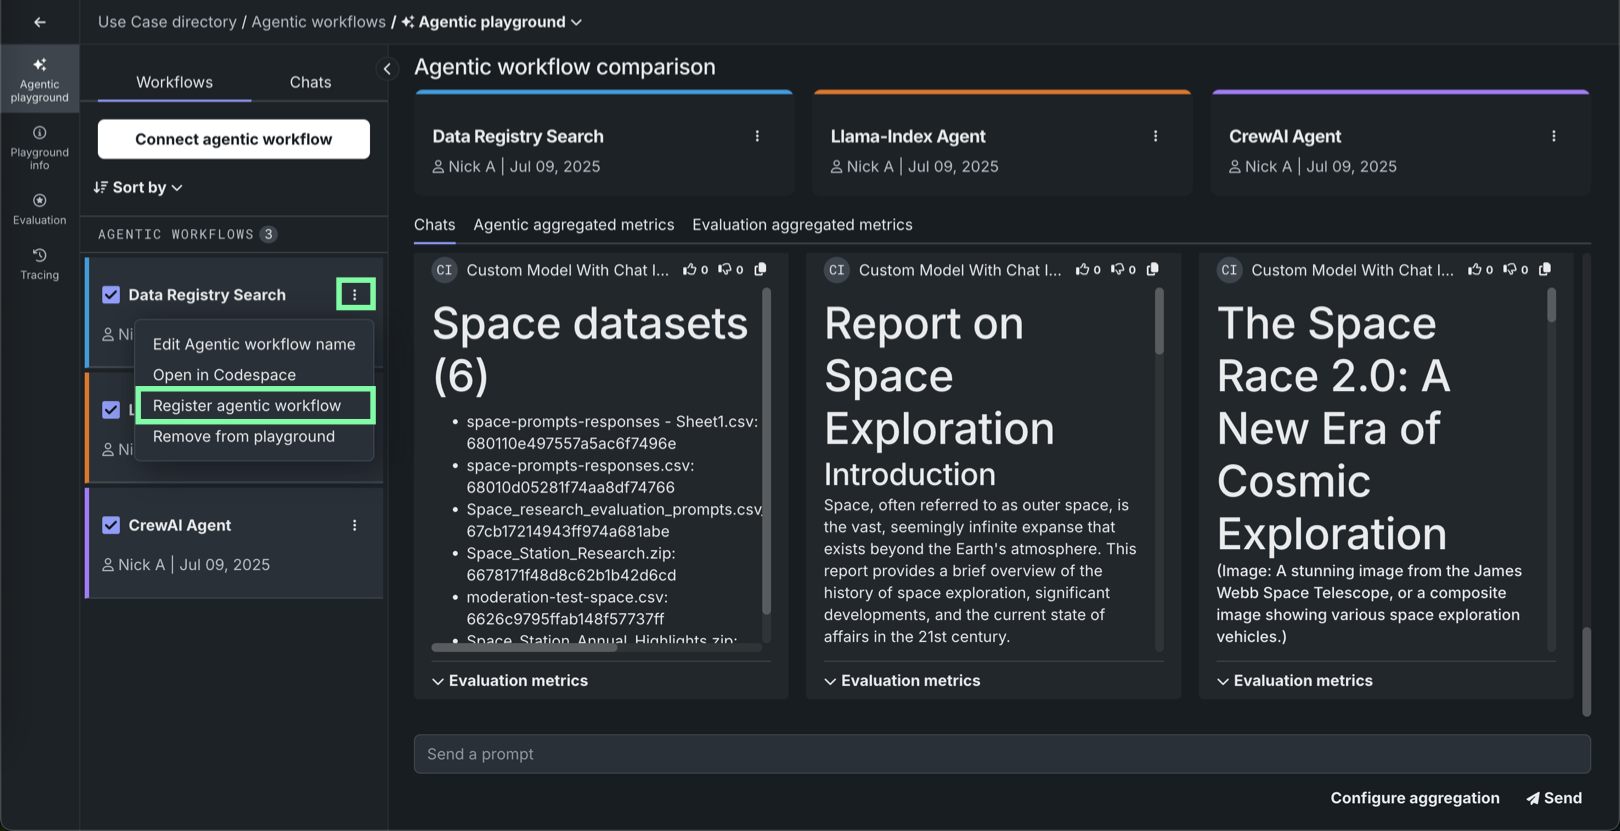
Actions menu locations
The actions menu is always available in the Workflows panel for connected agentic workflows. In addition, when a workflow is selected for comparison, the actions menu is available next to the agentic workflow name in the comparison chat area.
Click Register agentic workflow in the upper-right corner of the single-agent chat window.
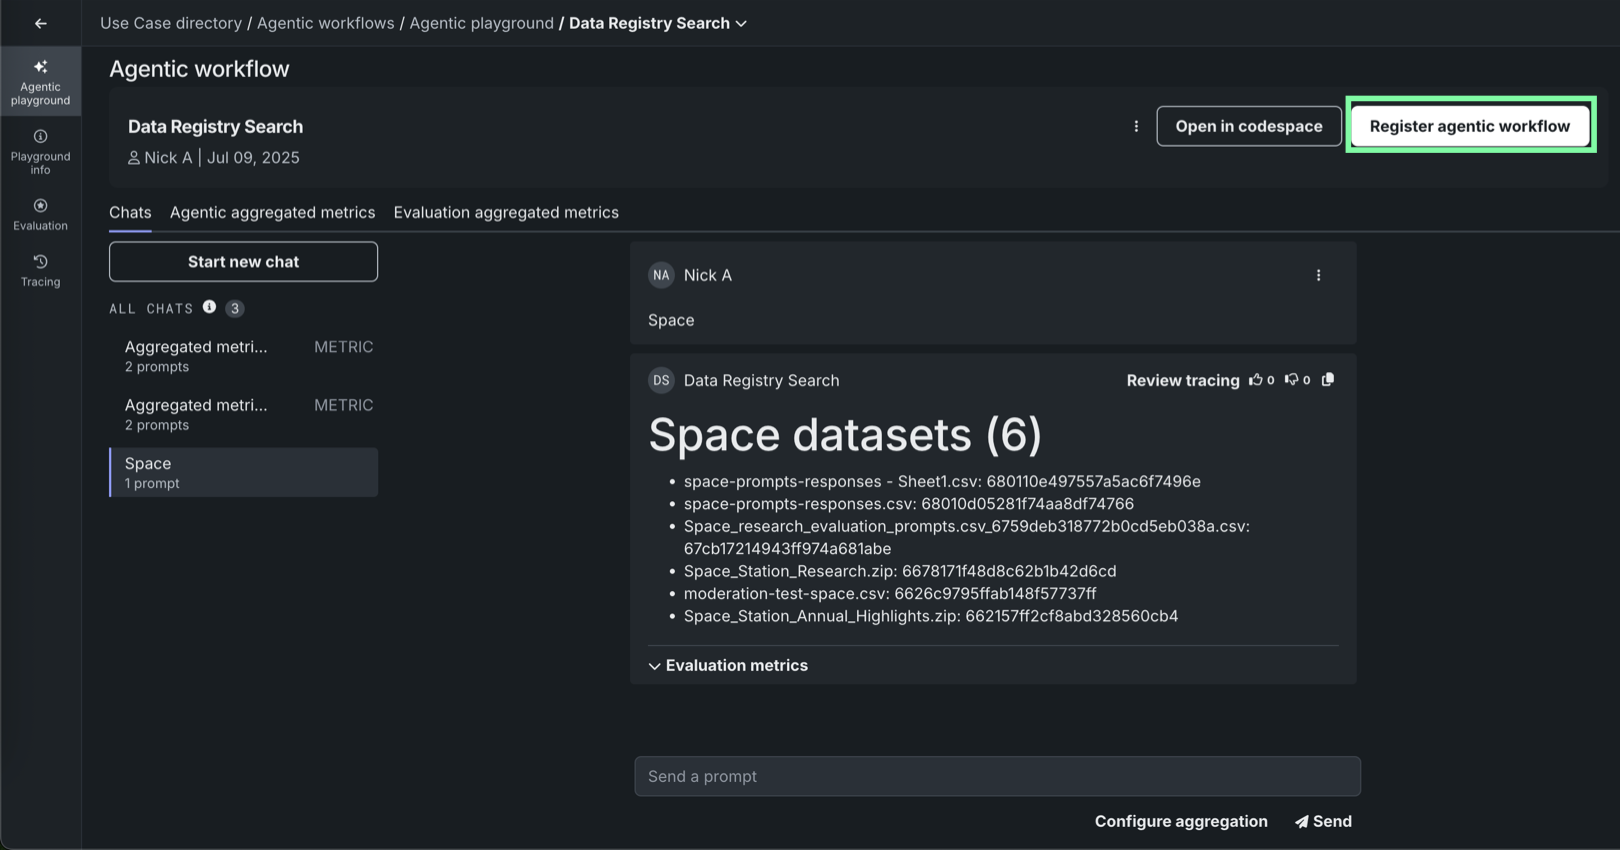
The agentic workflow opens in the Registry Workshop page. Proceed to Register from Workshop.
Register from Workshop
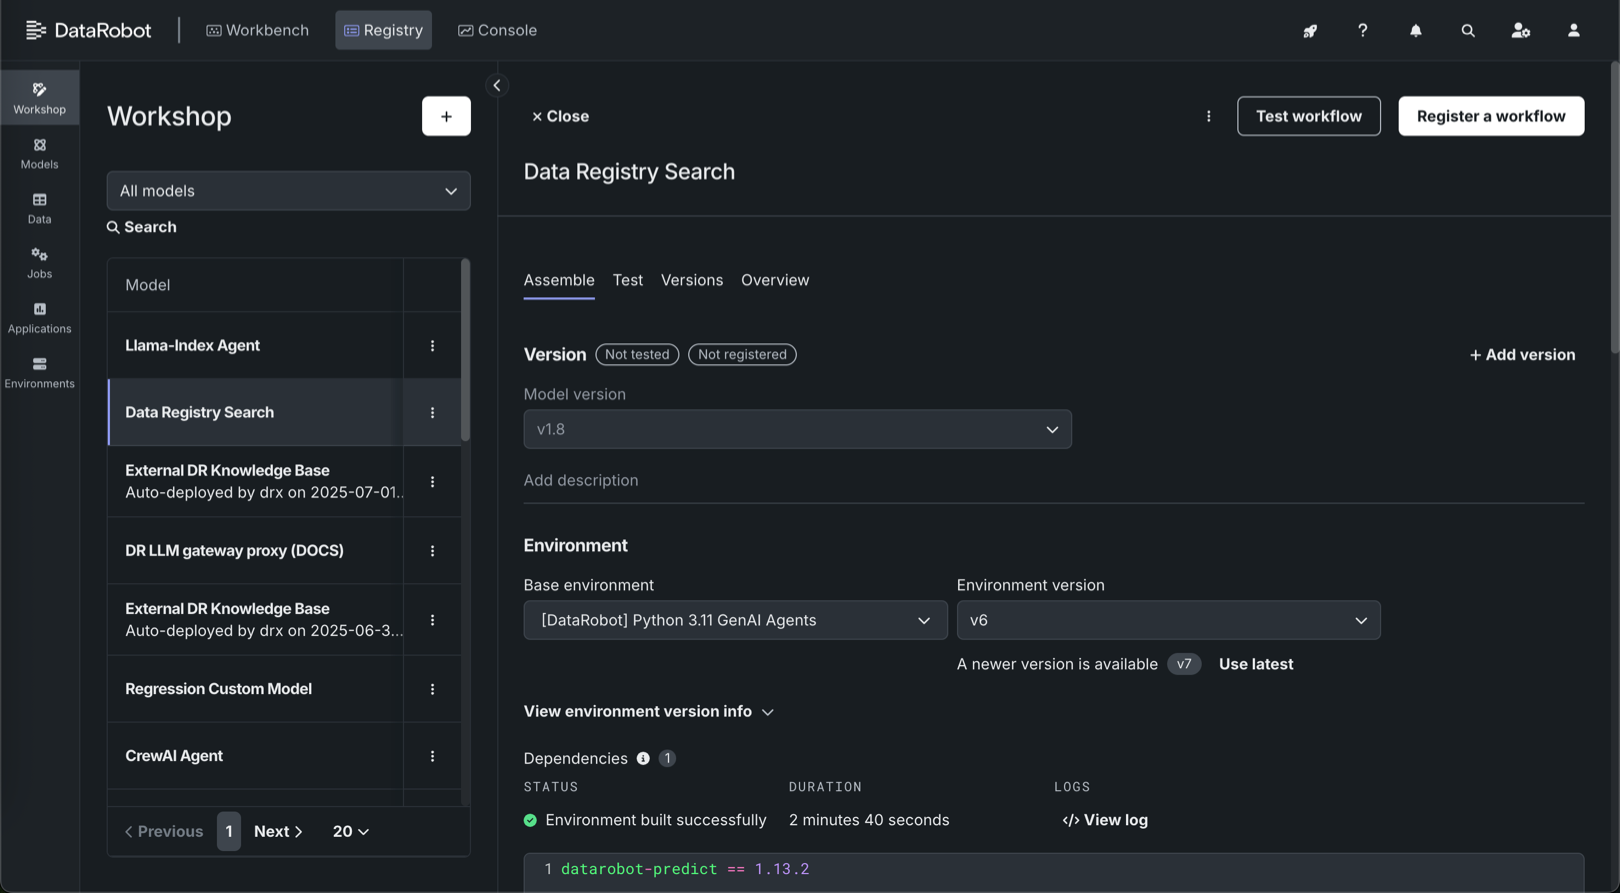
On the Registry > Workshop page, in an open agentic workflow:
-
On the Assemble tab, ensure the agentic workflow is fully assembled by reviewing the following sections:
LLM gateway access runtime parameter requirement
To use the LLM gateway for an agentic workflow, the
ENABLE_LLM_GATEWAY_INFERENCEruntime parameter must be provided in themodel-metadata.yamlfile and set totrue. -
(Optional) Click Test workflow to provide a test dataset and test the agentic workflow response through the chat and/or score hooks.
-
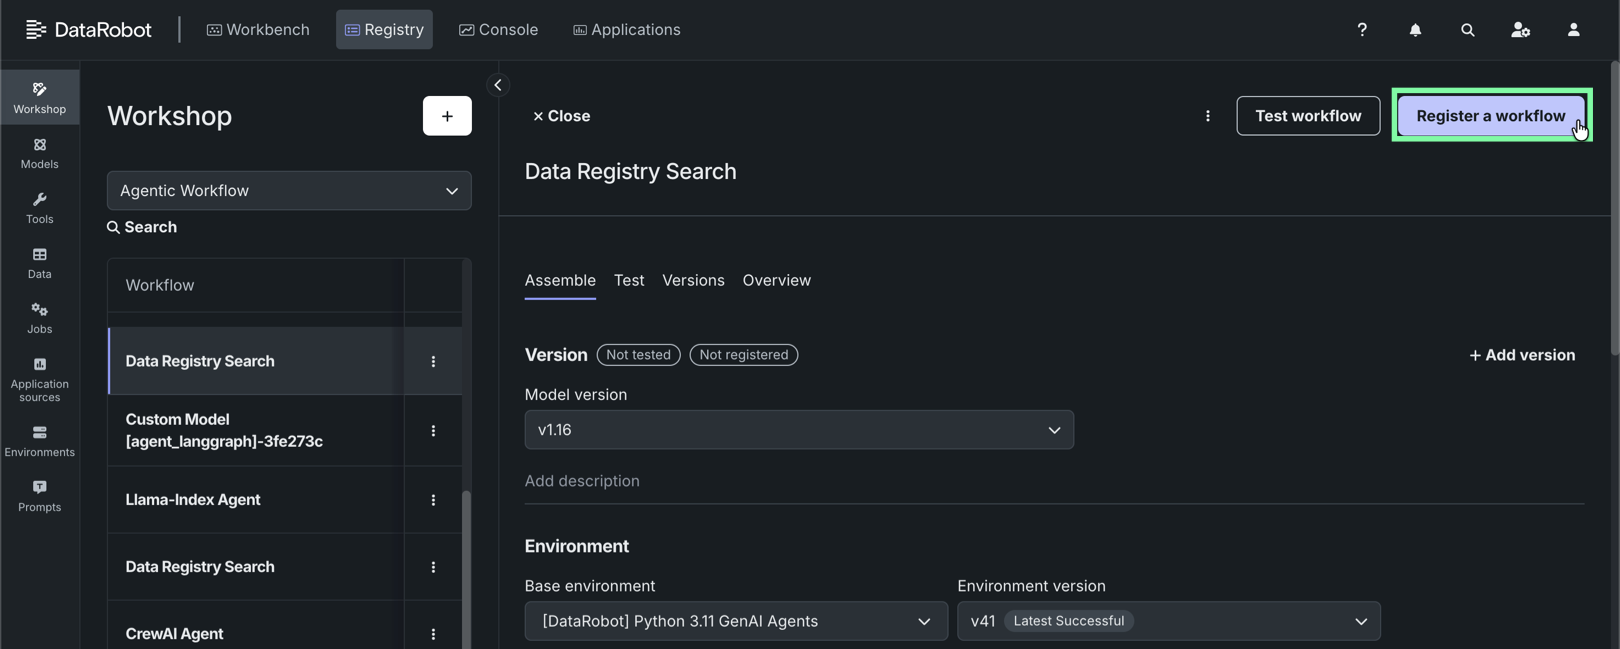
After the workflow is fully assembled, click Register a workflow to open the Register a workflow page.
-
Under Configure the workflow, the Target is set based on the workflow you're registering and the Target type is set to Agentic Workflow. Select one of the following registration options:
-
Add a version to an existing registered workflow: Increment the version number and add a new version to the selected registered workflow.
-
Create a new registered workflow: Create a registered workflow and the first version (V1).
Then, configure the following fields:
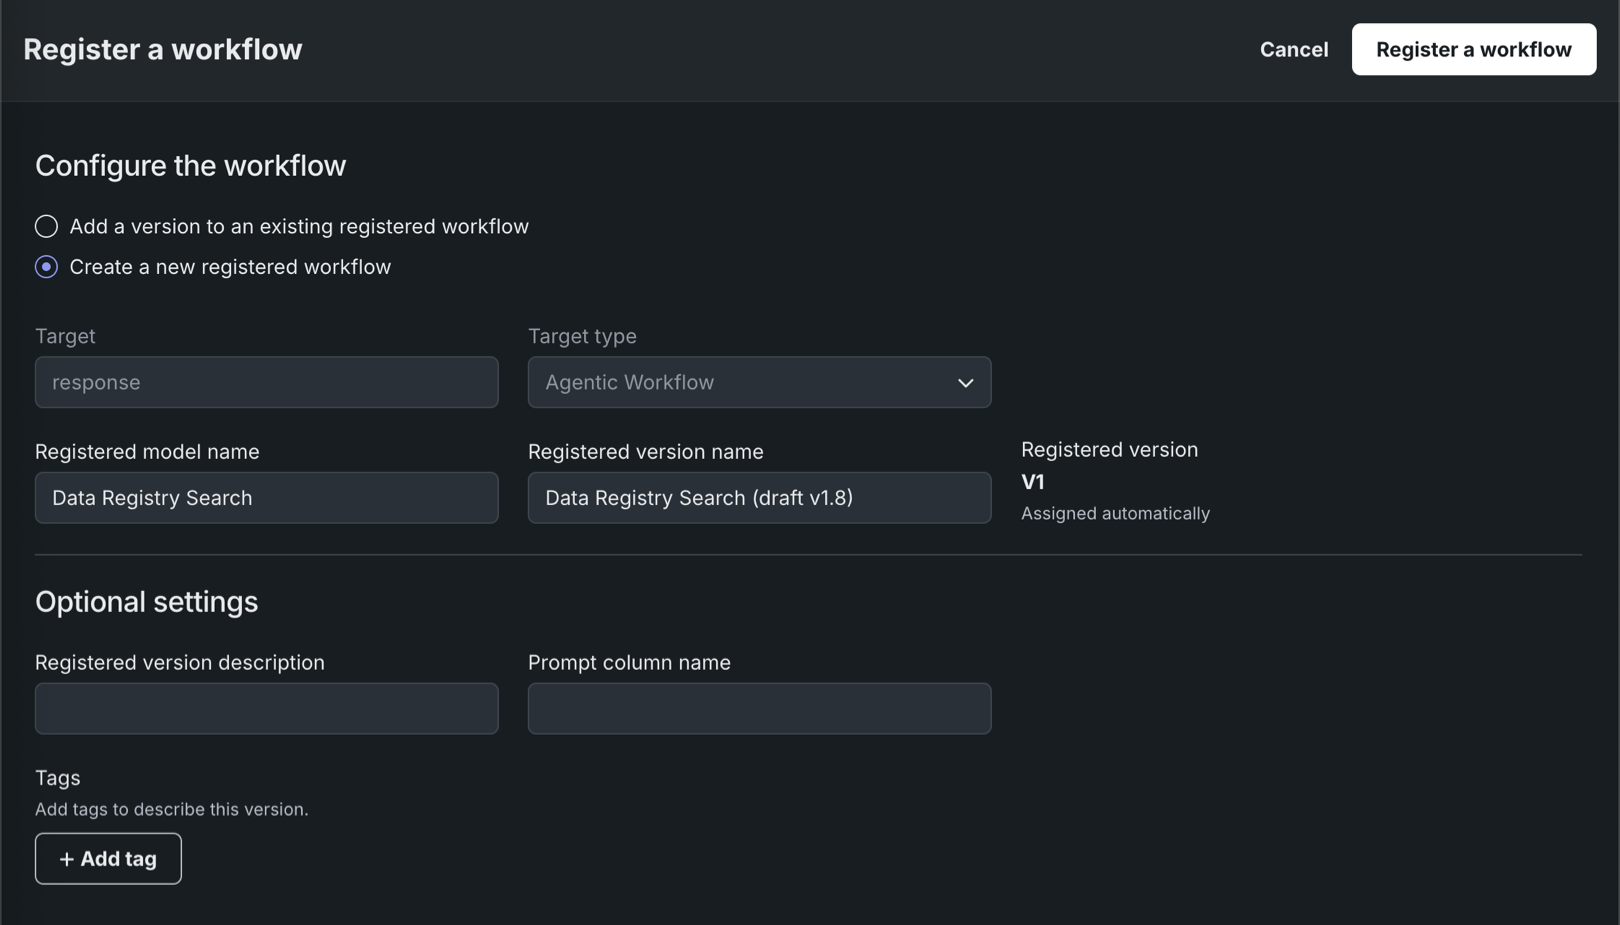
Field Description Registered model name / Registered model Do one of the following: - Registered model name: When registering a new workflow, enter a unique and descriptive name for the new registered workflow. If you choose a name that exists anywhere within your organization, a warning appears.
- Registered model: When saving as a version of an existing workflow, select the existing registered workflow you want to add a new version to.
Registered version name Automatically populated with the workflow name, date, and time. Change or modify the name as necessary. Registered version Assigned automatically. This displays the expected version number of the version (e.g., V1, V2, V3) you create. This is always V1 when you select Register as a new model. Optional settings Registered version description Enter a description of the business problem this workflow solves, or, more generally, describe the workflow represented by this version. Tags Click + Add tag and enter a Key and a Value for each key-value pair you want to tag the workflow version with. Tags added when registering a new workflow are applied to V1. Note
If you click Cancel on this page to return to the Registry, you lose the configuration progress on this page.
-
-
Click Register a workflow.
The agentic workflow version opens on the Registry > Models page with a Building status.
Register from the Models page
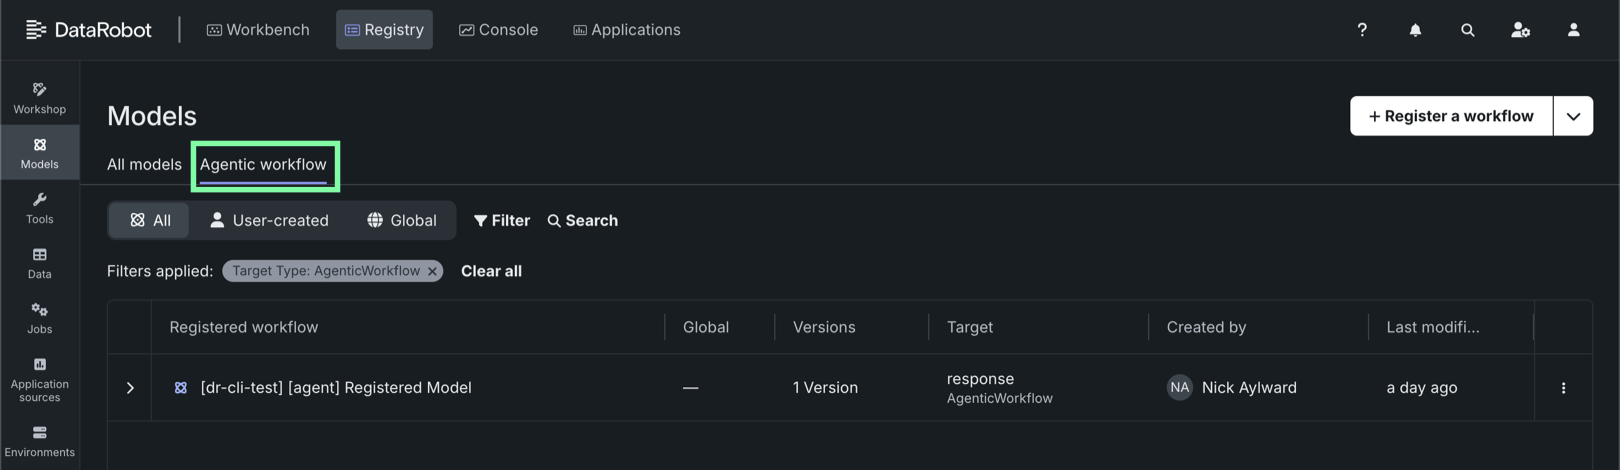
On the Registry > Models page, to register a fully configured agentic workflow:
-
Click the Agentic workflow tab, to filter the Models page on agentic workflows.
-
Click + Register a workflow (or the button when the registered model or version info panel is open):
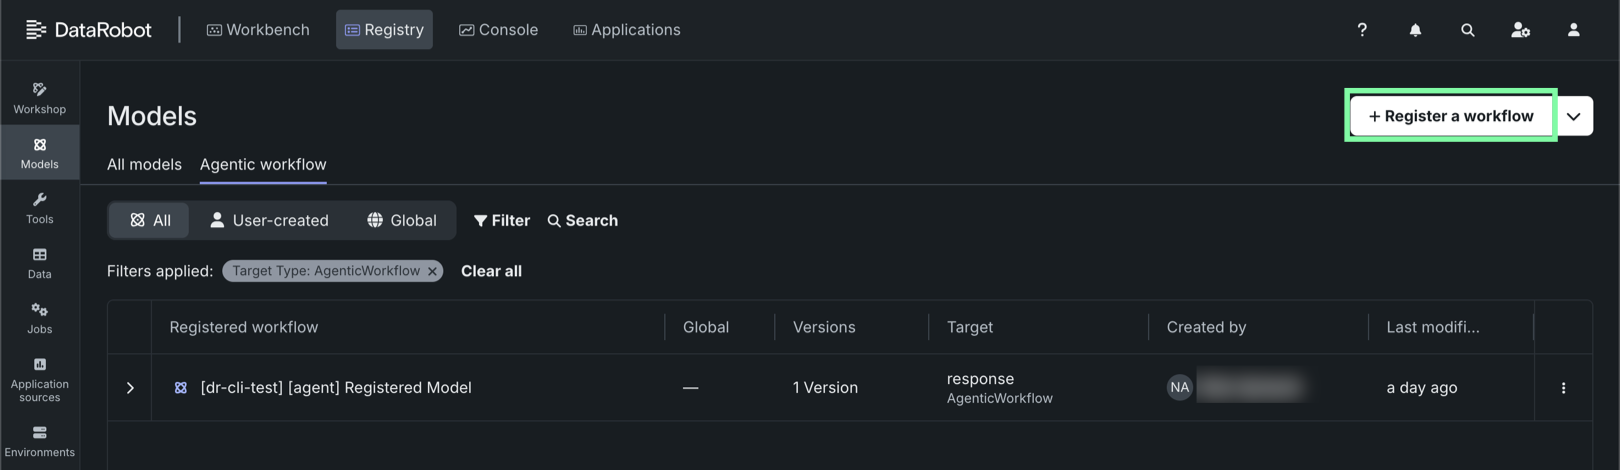
The Register a model panel opens to the External model tab.
-
Click the Custom model tab and then, under Configure the model, select one of the following options:
-
Add a version to an existing registered workflow: Increment the version number and add a new version to the selected registered workflow.
-
Create a new registered workflow: Create a registered workflow and the first version (V1).
Then, configure the following fields:
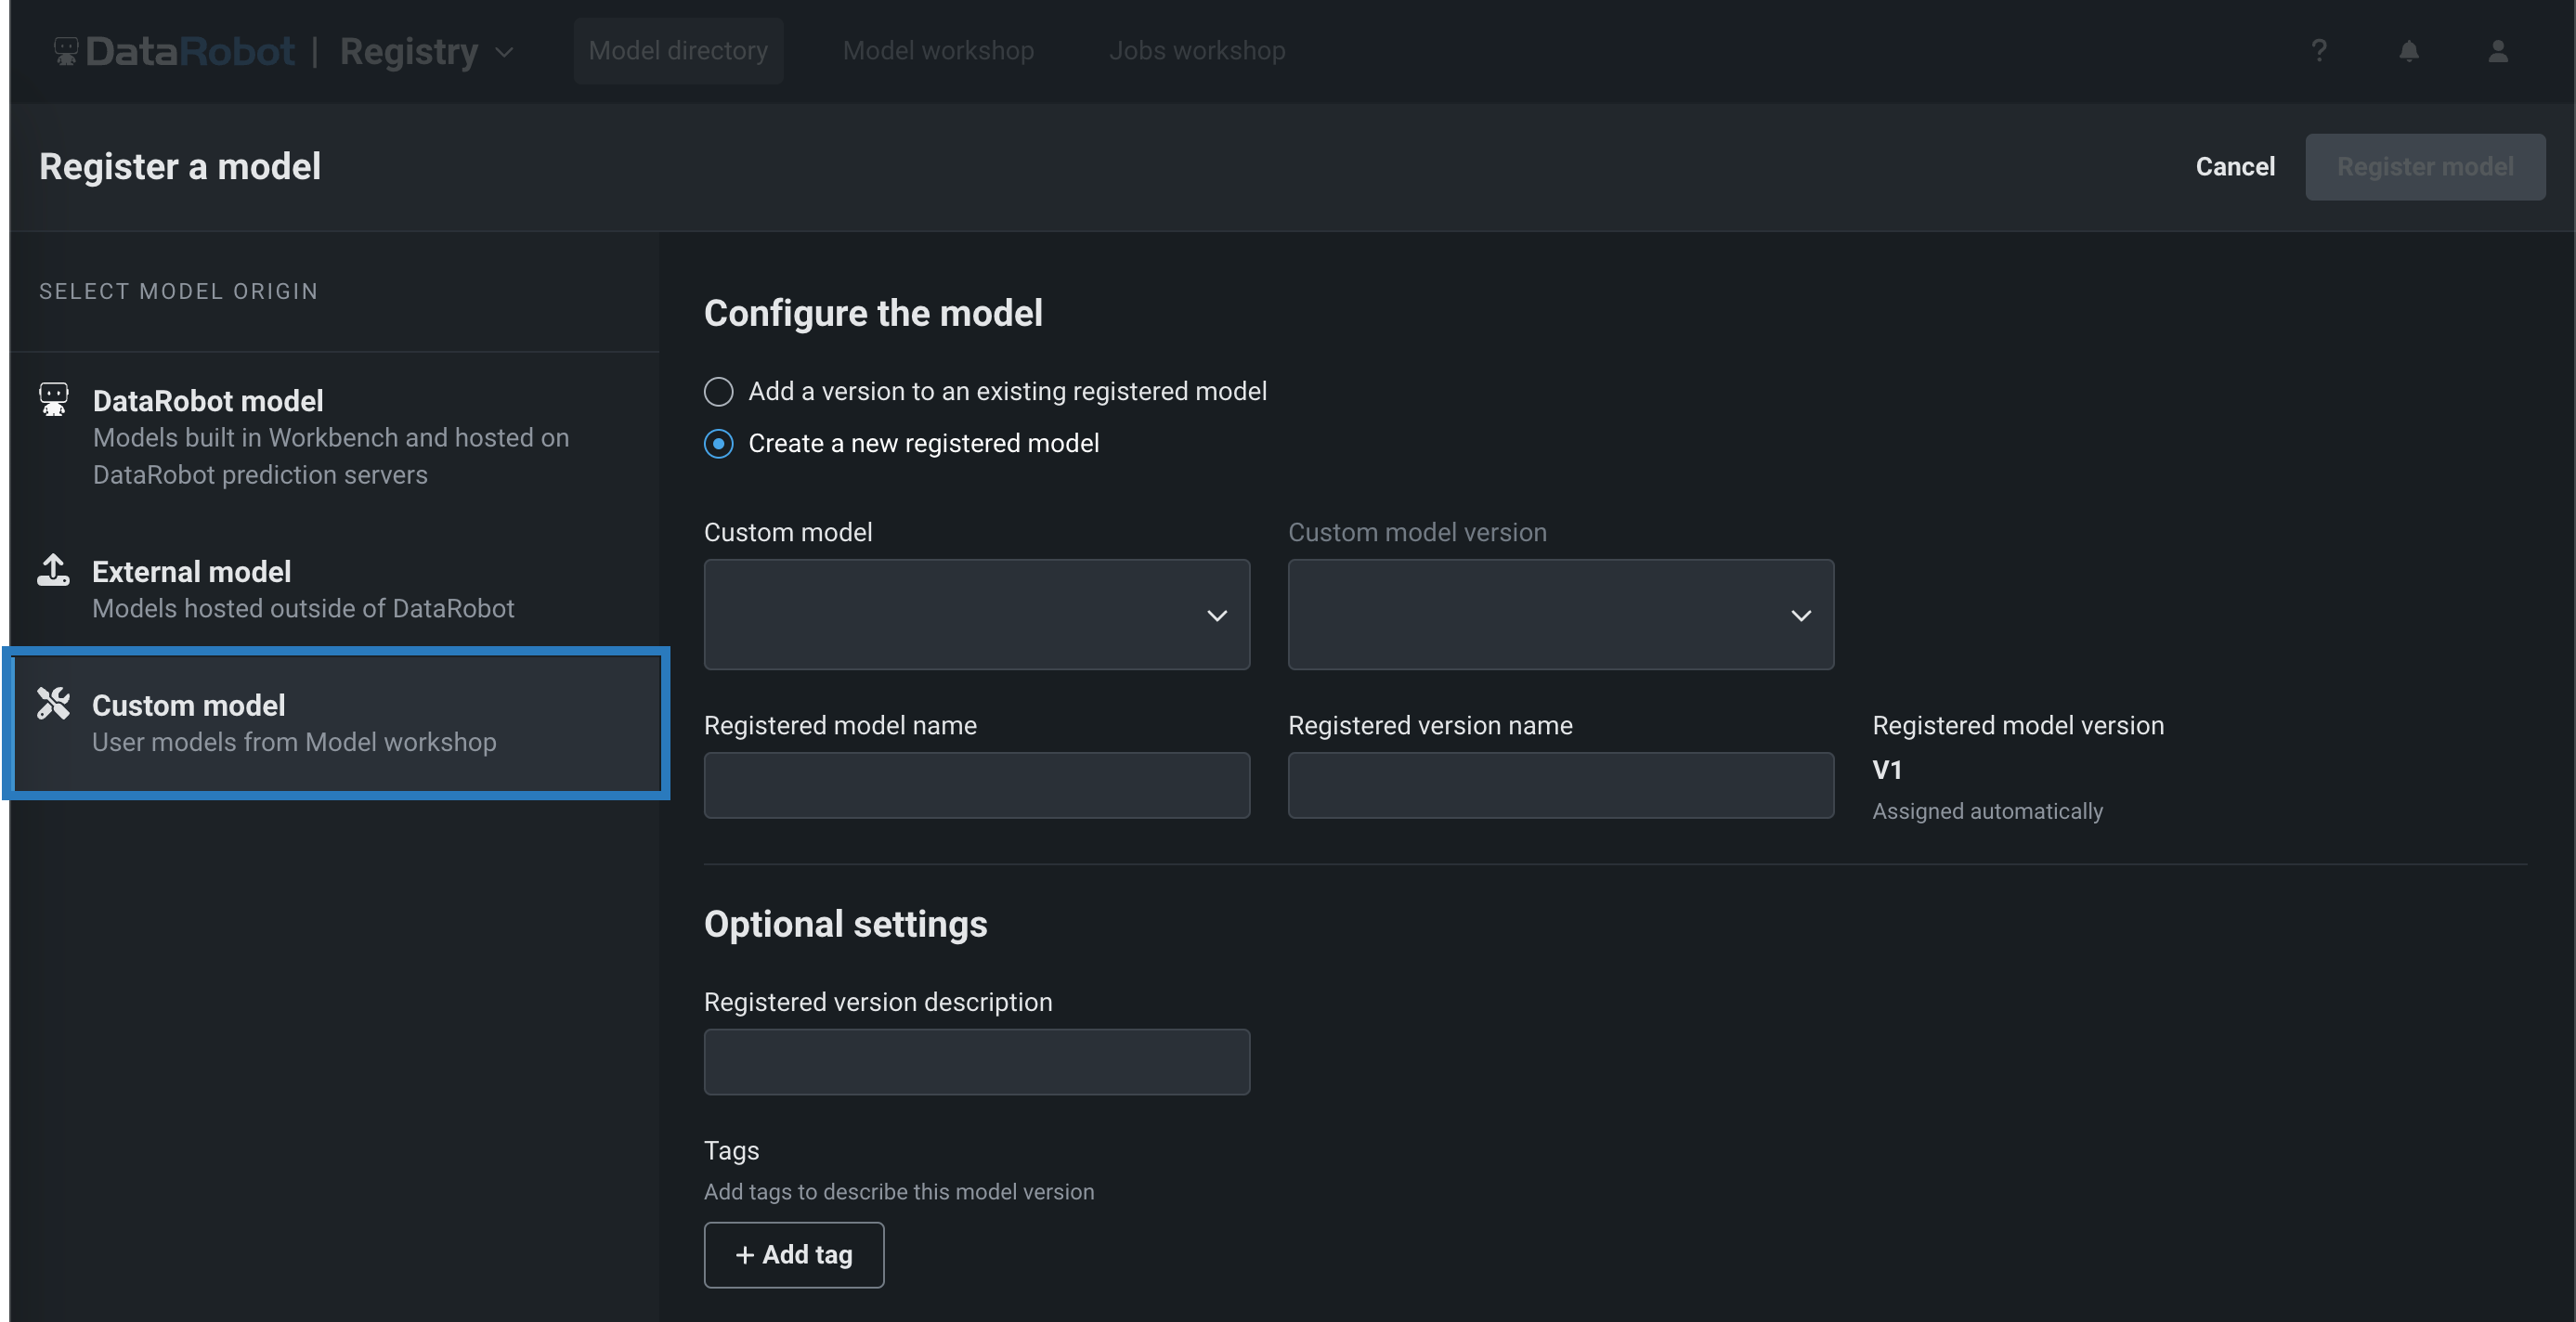
Field Description Custom model Select the custom workflow you want to register from the workshop. Custom model version Select the version of the custom workflow to register. Registered model name / Registered model Do one of the following: - Registered model name: When registering a new model, enter a unique and descriptive name for the new registered model. If you choose a name that exists anywhere within your organization, a warning appears.
- Registered model: When saving as a version of an existing model, select the existing registered model you want to add a new version to.
Registered version name Automatically populated with the model name, date, and time. Change or modify the name as necessary. Registered model version Assigned automatically. This displays the expected version number of the version (e.g., V1, V2, V3) you create. This is always V1 when you select Register as a new model. Optional settings Registered version description Enter a description of the business problem this model package solves, or, more generally, describe the model represented by this version. Tags Click + Add tag and enter a Key and a Value for each key-value pair you want to tag the model version with. Tags added when registering a new model are applied to V1. Note
If you click Cancel on this page to return to the Registry, you lose the configuration progress on this page.
-
-
Click Register model.
The agentic workflow version opens on the Registry > Models page with a Building status.
Custom agentic workflow build troubleshooting
If the custom workflow build completes with a Build failed status, you can troubleshoot the failure using the model logs. To access the model logs, in the Insight computation failed warning, click Open the workshop:

The Workshop opens to the Versions tab for the custom workflow you registered, with the version panel open to the Insights section. Next to Status, find Logs, then click Model logs to open the model logs console:

In the Console Log: Model logs modal, review the timestamped log entries:

| Information | Description | |
|---|---|---|
| 1 | Date / time | The date and time the model log event was recorded. |
| 2 | Status | The status the log entry reports:
|
| 3 | Message | The description of the successful operation (INFO), or the reason for the failed operation (ERROR). This information can help you troubleshoot the root cause of the error. |
Model logs consideration
In the Registry, a model package's Model logs only report the operations of the underlying model, not the model package operations (e.g., model package deployment time).
If you can't locate the log entry for the error you need to fix, it may be an older log entry not shown in the current view. Click Load older logs to expand the Model logs view.
View older logs
Look for the older log entries at the top of the Model logs; they are added to the top of the existing log history.