How-to: GenAI with governance
This generative AI use case compares multiple retrieval-augmented generation (RAG) pipelines. When completed, you'll have multiple end-to-end pipelines with built-in evaluation, assessment, and logging, providing governance and guardrails. Watch a video version on YouTube.
Learn more
To learn more about generative AI at DataRobot, visit the GenAI section of the documentation. There you can find an overview and information about vector databases, playgrounds, and metrics, using both the UI and code.
Assets for download
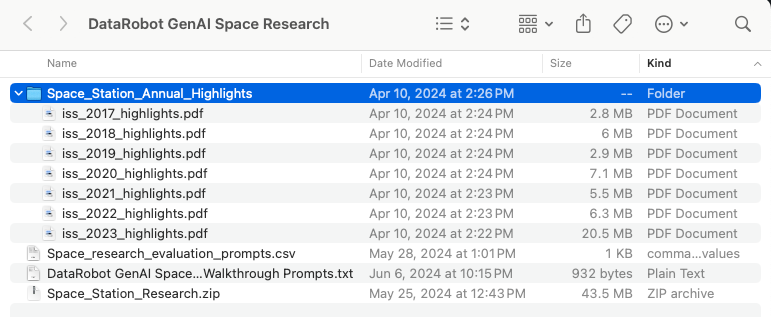
To build this experiment as you follow along, first download the file DataRobot+GenAI+Space+Research.zip and unzip the archive. Inside you will find a TXT file, a CSV file, and another ZIP file, Space_Station_Research.zip. Do not unzip this inner ZIP archive.
1. Create a Use Case
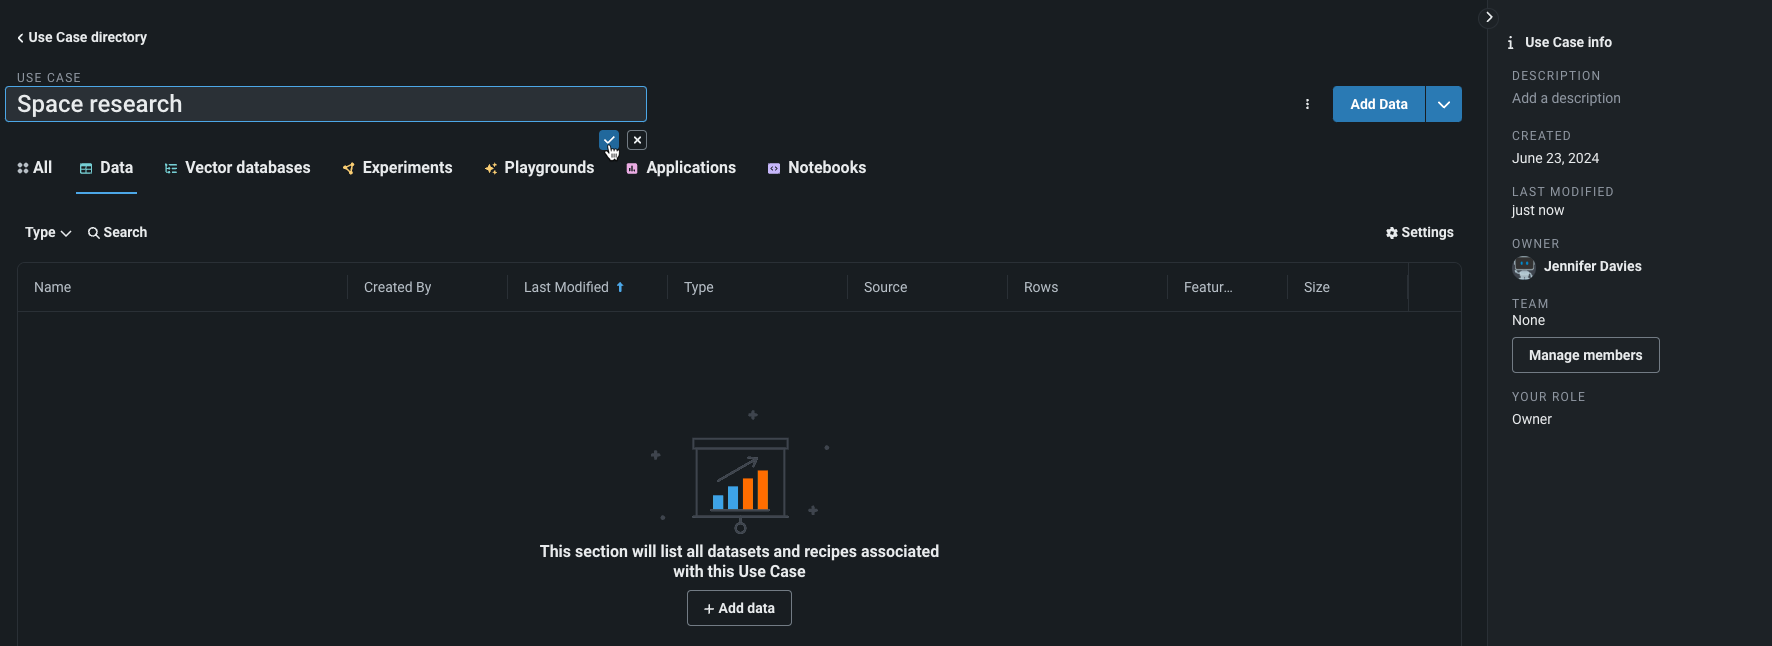
From the Workbench directory, click Create Use Case in the upper right: and name it Space research.
Read more: Working with Use Cases
2. Upload data
Click Add data and then Upload on the resulting screen. From the assets you downloaded, upload the file named Space_Station_Research.zip. Do not unzip it. This is not the ZIP file you downloaded, but a ZIP within the original downloaded archive. DataRobot will begin registering the dataset.
You can use this time to look at the documents you downloaded that are inside the ZIP file. Locally, unzip Space_Station_Research.zip and expand Space_Station_Annual_Highlights, which contains PDFs sharing highlights from the International Space Station's research programs from the last few years.
Read more: Upload local files
3. Create a vector database
After you upload data, you can create a vector database to enrich prompts with relevant context before they are sent to the LLM. To create a vector database:
-
There are two paths to creating a vector database‐both open the same creation page. You can use the Add dropdown on the right and click Vector database > Create vector database or, from the Vector database tab, click Create vector database.
-
Set the configuration using the following settings:
| Field | Setting | Notes |
|---|---|---|
| Name | Jina 256/20 |
This name was selected to reflect the settings, but could be anything. |
| Data source | Space_Station_Research.zip |
All valid datasets uploaded to the Use Case will be available in the dropdown. |
| Embedding model | jinaai/jina-embedding-t-en-v1 |
Choose the recommended embedding model, Jina, for this exercise. |

-
Text chunking is the process of splitting text documents into smaller text chunks that are then used to generate embeddings. You can use separator rules to divide content, set chunk overlap, and set the maximum number of tokens in each chunk. For this walkthrough, only change the chunk overlap percentage; leave Max tokens per chunk on the recommended value of 256.
Move the chunk overlap slider to 20%:
-
Click Create Vector Database; you are returned to the Use Case directory. While the vector database is building, add a second vector database for comparison purposes.
This time, use
intfloat/e5-base-v2as the embedding model. To compare it against theJinamodel, make the Chunk overlap and Max tokens per chunk settings the same as those you set in step 2. That is, chunk overlap of 20% and max tokens of 256.
Create any number of vector databases by iterating through this process. The best settings will depend on the type of text that you're working with and the objective of your use case.
Read more:
4. Add a playground
The playground is where you create and compare LLM blueprints, configure metrics, and compare LLM blueprint responses before deployment. Create a playground using one of two methods.
Read more: Playground overview
5. Build an LLM blueprint
Once in the playground, create an LLM blueprint:
-
In the Playground, on the LLM blueprints panel, click Create LLM blueprint:
-
In the Configuration panel, LLM tab, set the following:
| Field | Setting | Notes |
|---|---|---|
| LLM | Azure OpenAI GPT-3.5 Turbo |
Alternatively, you can add a deployed LLM to the playground, which, when validated, is added to the Use Case and available to all associated playgrounds. |
| Max completion tokens | 1024 (default) |
The maximum number of tokens allowed in the completion. |
| Temperature | .1 |
Controls the randomness of model output. Change this to focus on truthfulness for scientific research papers. |
| Top P | 1 (default) |
Sets a threshold that controls the selection of words included in the response based on a cumulative probability cutoff for token selection |

-
From the Vector database tab, choose the first vector database built,
Jina 256/20and use the default configuration. -
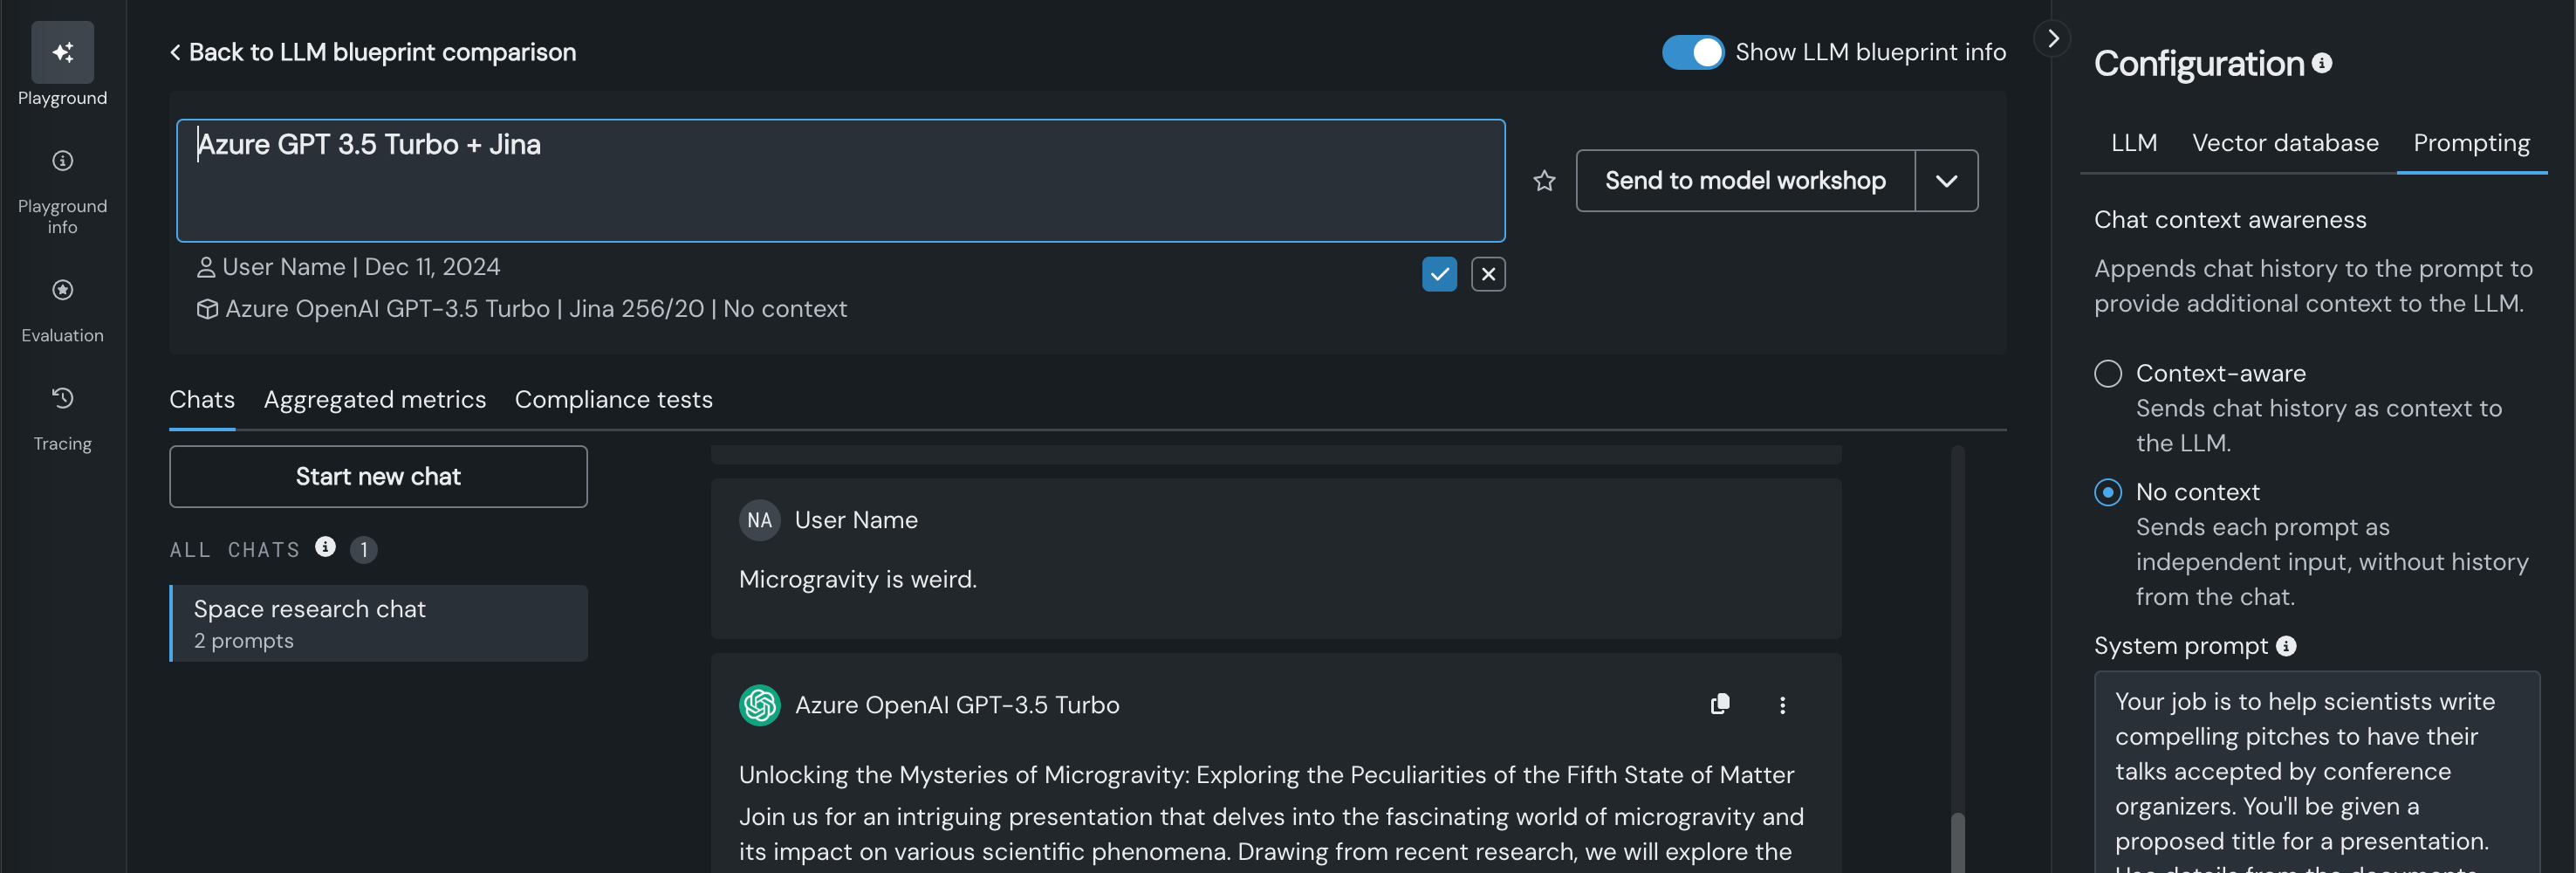
From the Prompting tab, choose No context. Context states control whether chat history is sent with the prompt to include relevant context for responses. No context sends each prompt as independent input, without history from the chat.
Then, enter the following prompt and then save the configuration:
Your job is to help scientists write compelling pitches to have their talks accepted by conference organizers. You'll be given a proposed title for a presentation. Use details from the documents provided to write a one paragraph persuasive pitch for the presentation.
Read more:
6. Test the LLM blueprint
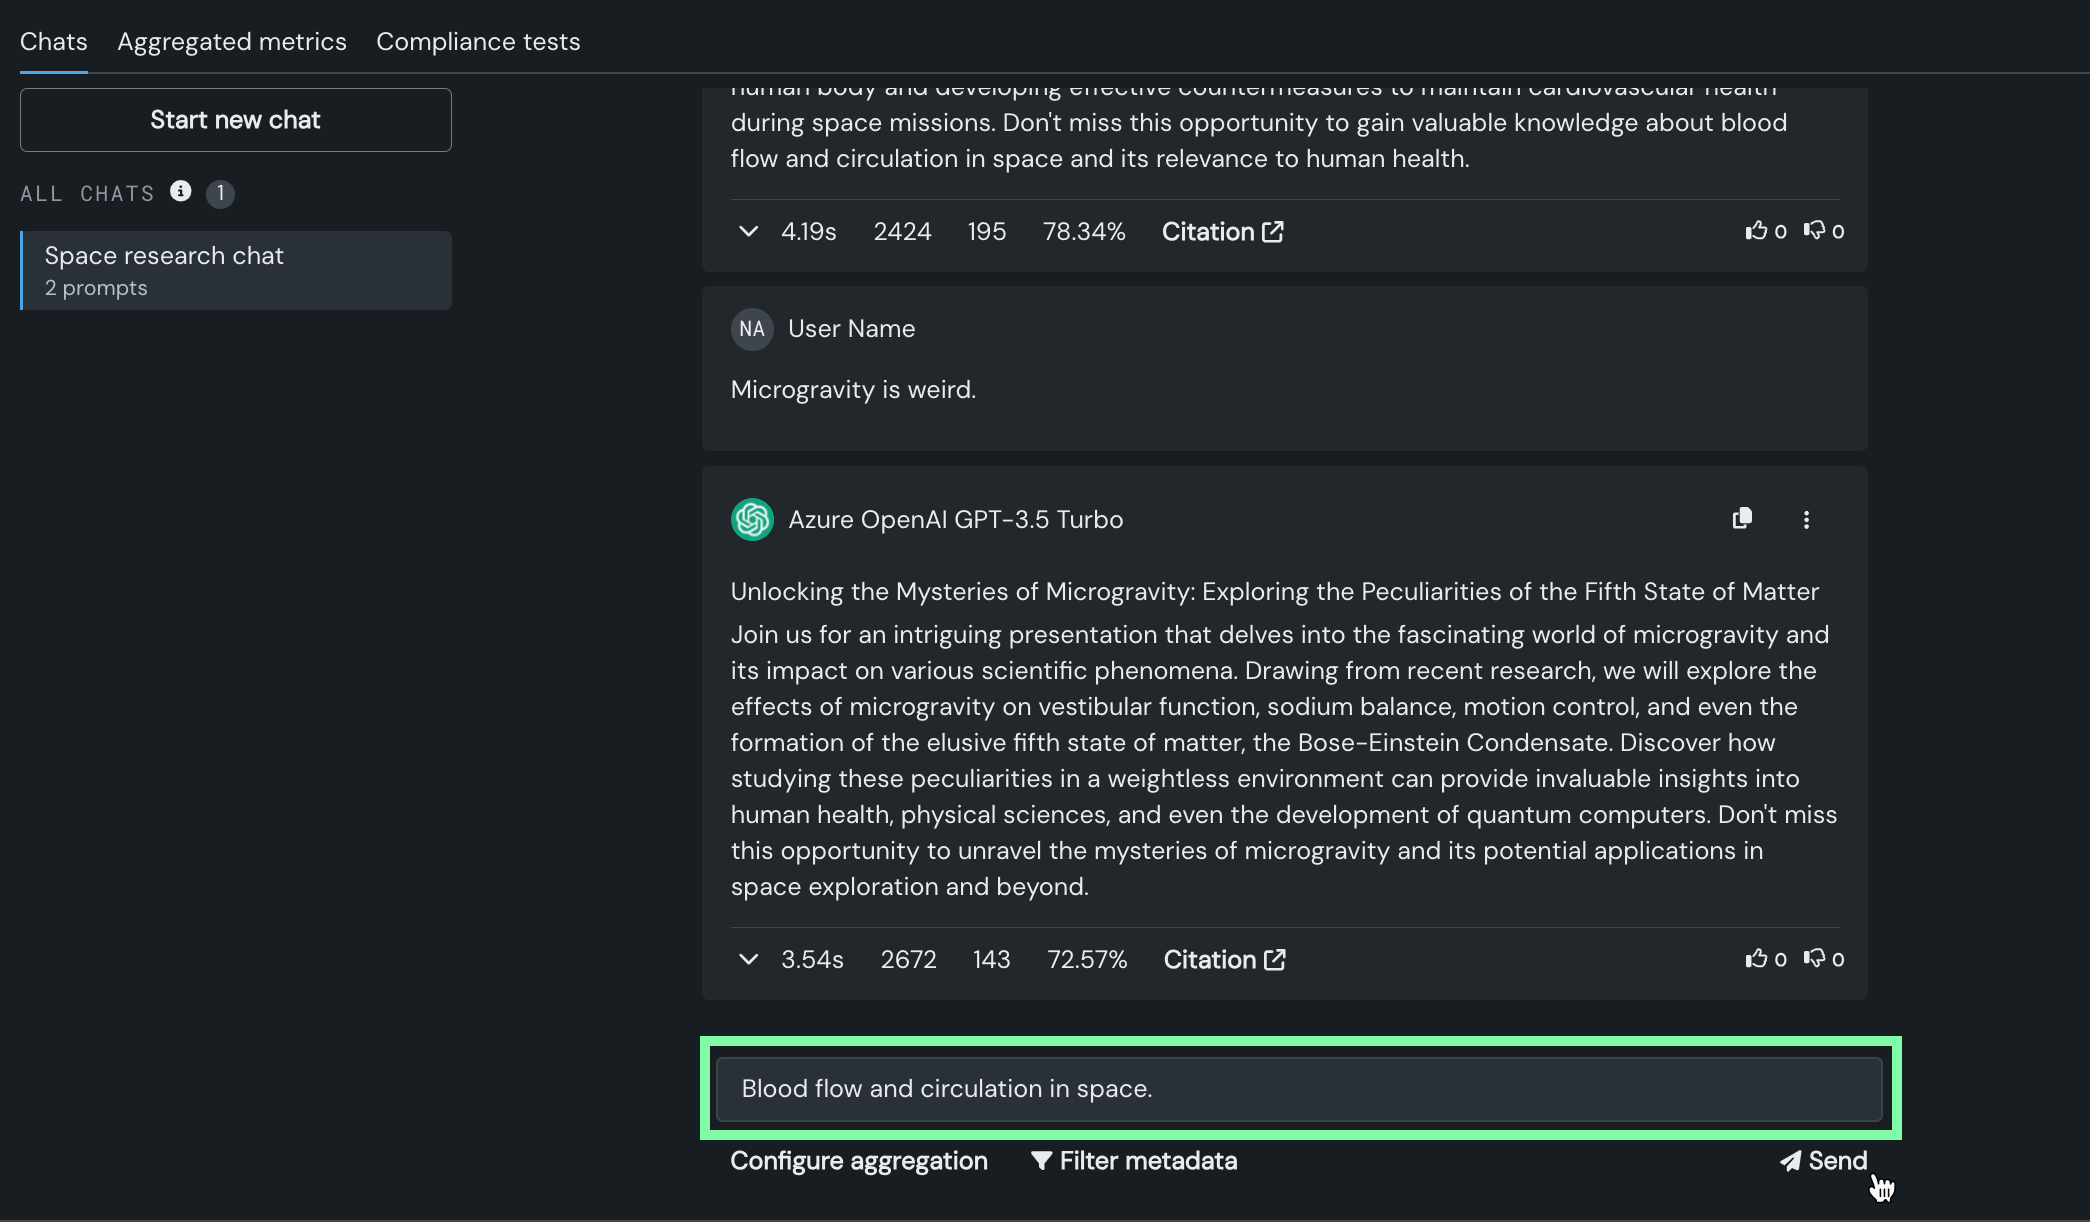
Once saved, test the configuration with prompting (also known as "chatting"). Ideas are provided in the TXT file you downloaded. For example try these two prompts asking for a conference pitch in the Send a prompt dialog:
- Blood flow and circulation in space.
- Microgravity is weird.
Next, click the edit icon next to the blueprint name to make it more descriptive, for example Azure GPT 3.5 Turbo + Jina, then click confirm .
Read more: Chatting with a single LLM blueprint
7. Create comparison blueprints
To compare configuration settings, you must first create additional blueprints. To do this you can:
- Follow the steps above to create a new LLM blueprint.
- Make a copy of the existing blueprint and change one or more settings.
You can do either of these actions from both the blueprint configuration area or the LLM blueprints panel. Because the intent is to compare blueprints, the following process copies the blueprint on the LLM blueprints panel of the Playground tile ![]() .
.
Note
You can navigate through the playground using the icons in the far left.
-
From the named LLM blueprint, click the Actions menu and select Copy to new LLM blueprint. All settings from the first blueprint are carried over.
-
Change the vector database (1), save the configuration (2), and name the new blueprint
Azure GPT 3.5 Turbo + E5(3). -
Return to the LLM blueprints panel to create a third blueprint. From the new LLM blueprint,
Azure GPT 3.5 + E5, click Copy to new LLM blueprint and this time change the LLM. For this walkthrough, chooseAmazon Titanand set the Temperature value to0.1. Name the blueprintAmazon Titan + E5.
Read more: Copy LLM blueprints
8. Compare blueprints
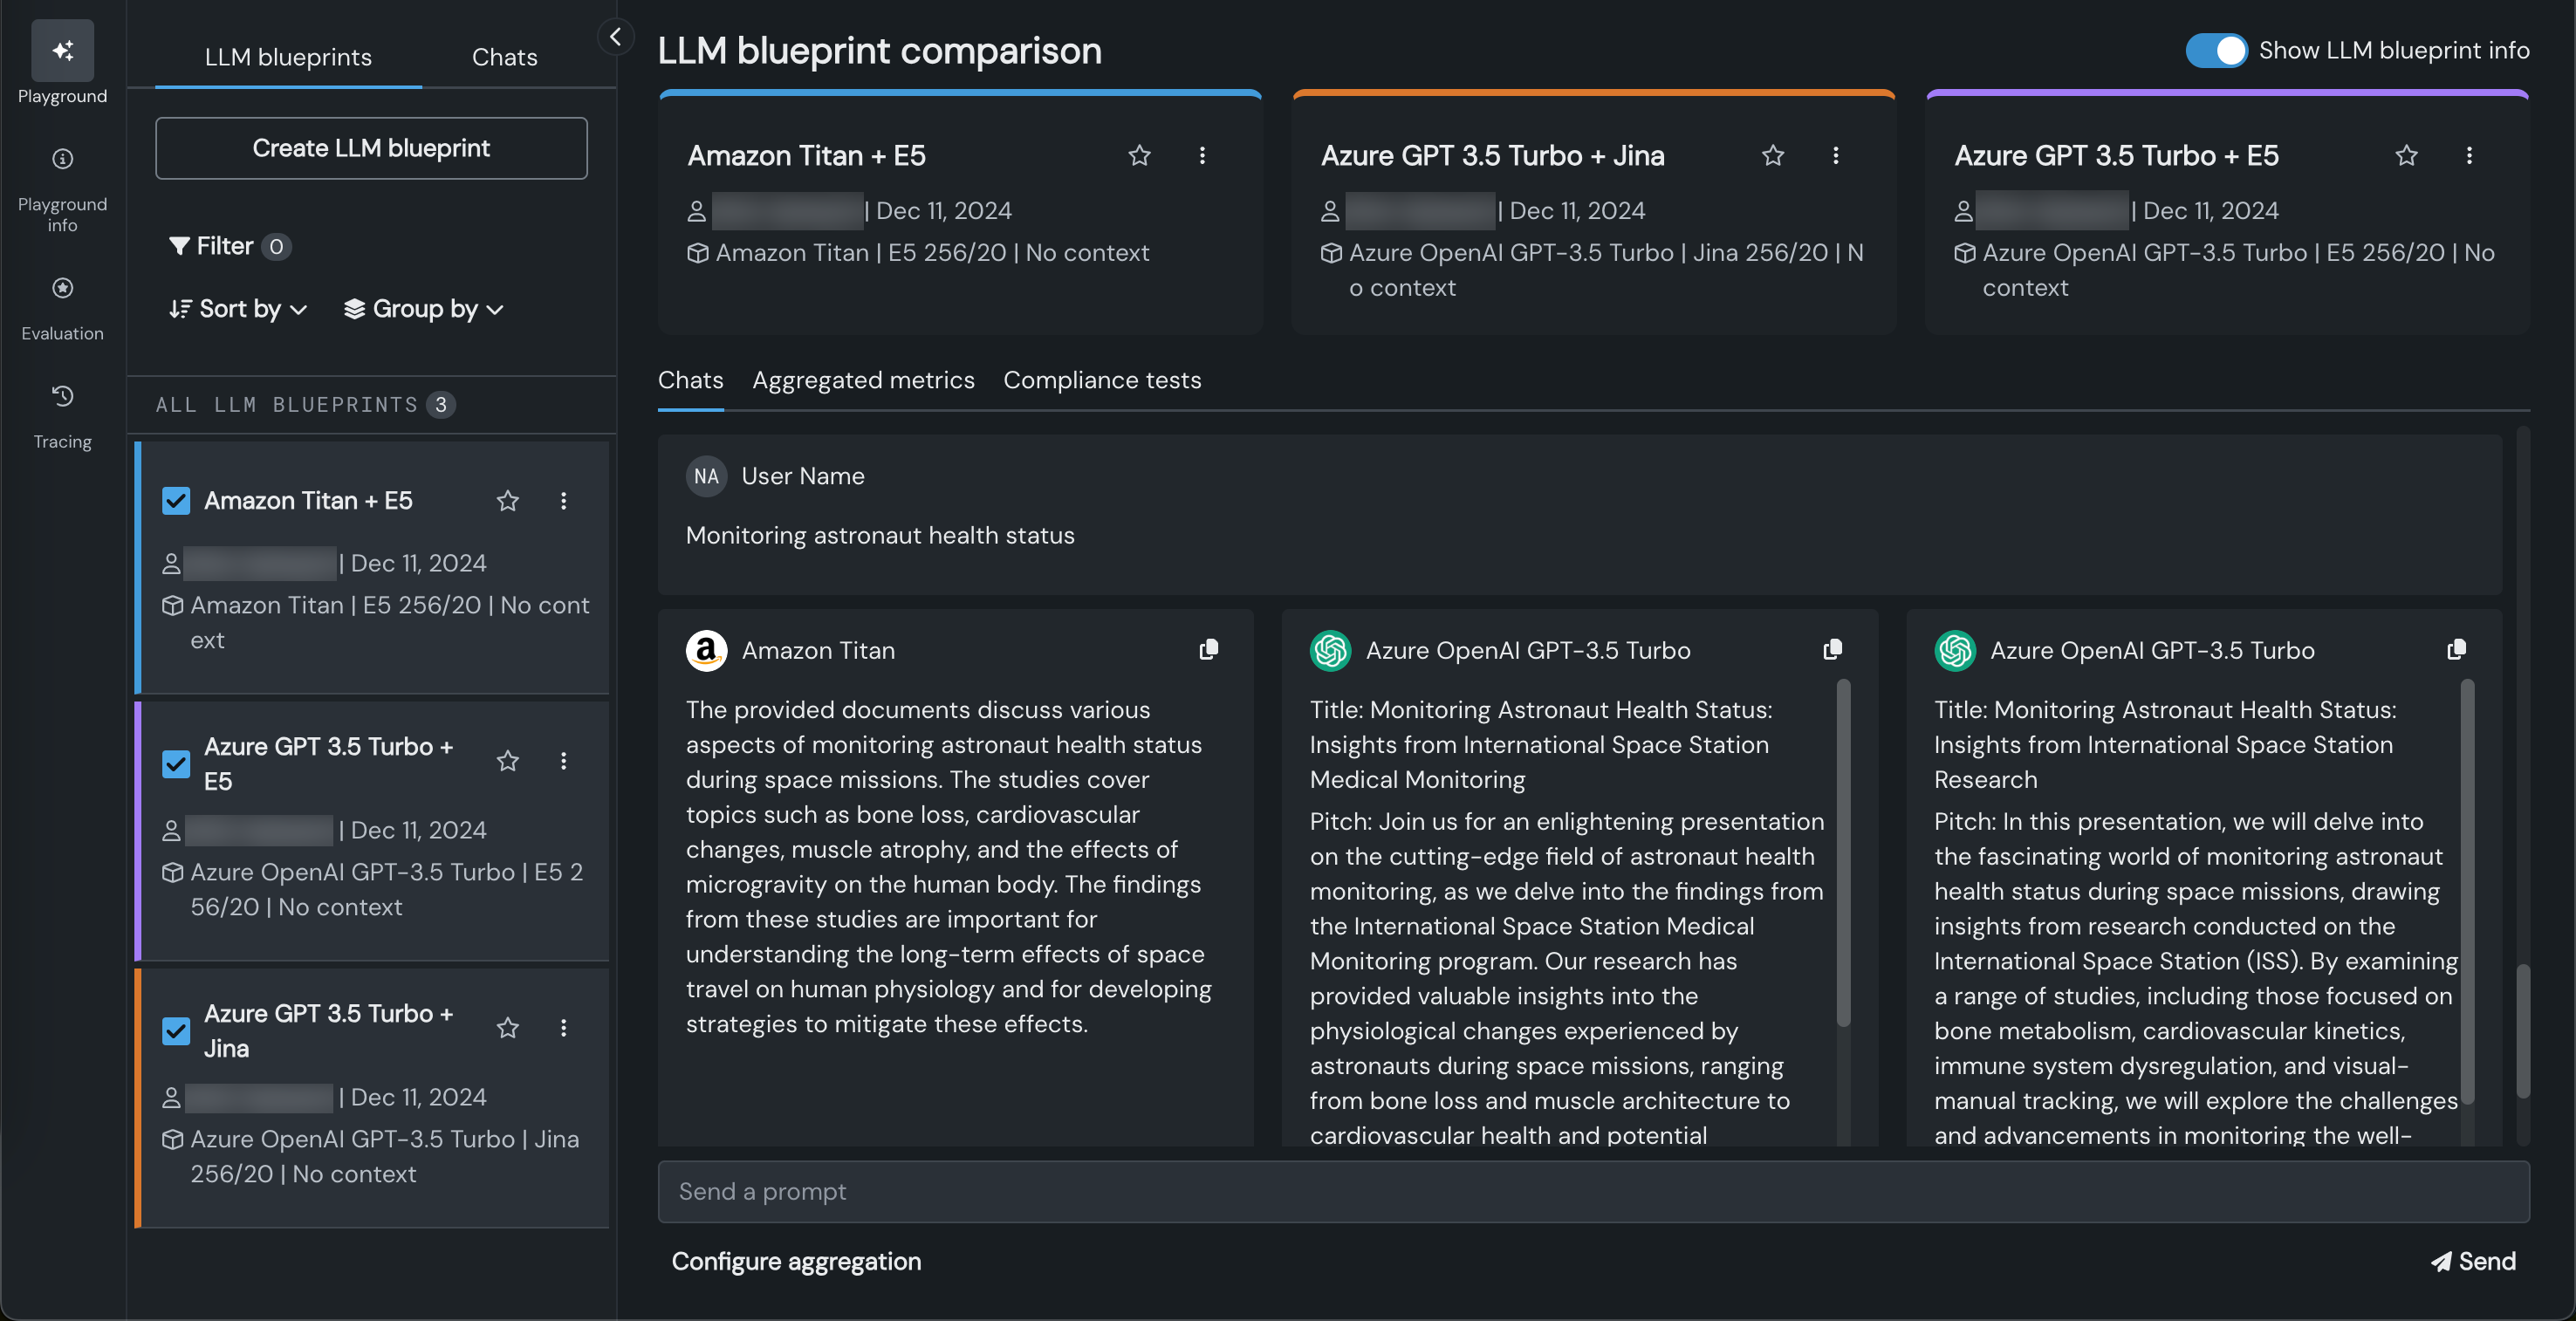
You can compare chats (responses) for up to three LLM blueprints from a single screen. The LLM blueprints tab lists all blueprints available for comparison—with filtering provided to simplify finding what you are interested in—as well as provides quick access to the chat history.
To start the comparison, select all three blueprints by checking the box to the left of the name. Notice that a summary is available for each. Enter a new topic for exploration in the Send a prompt field. For example: Monitoring astronaut health status.
Try a different prompt, for example, Applications of ISS science results on earth. The response that you prefer is subjective and depends on the use case, but there are some quantitative metrics to help you evaluate.
Read more: Compare LLMs
9. Evaluate responses
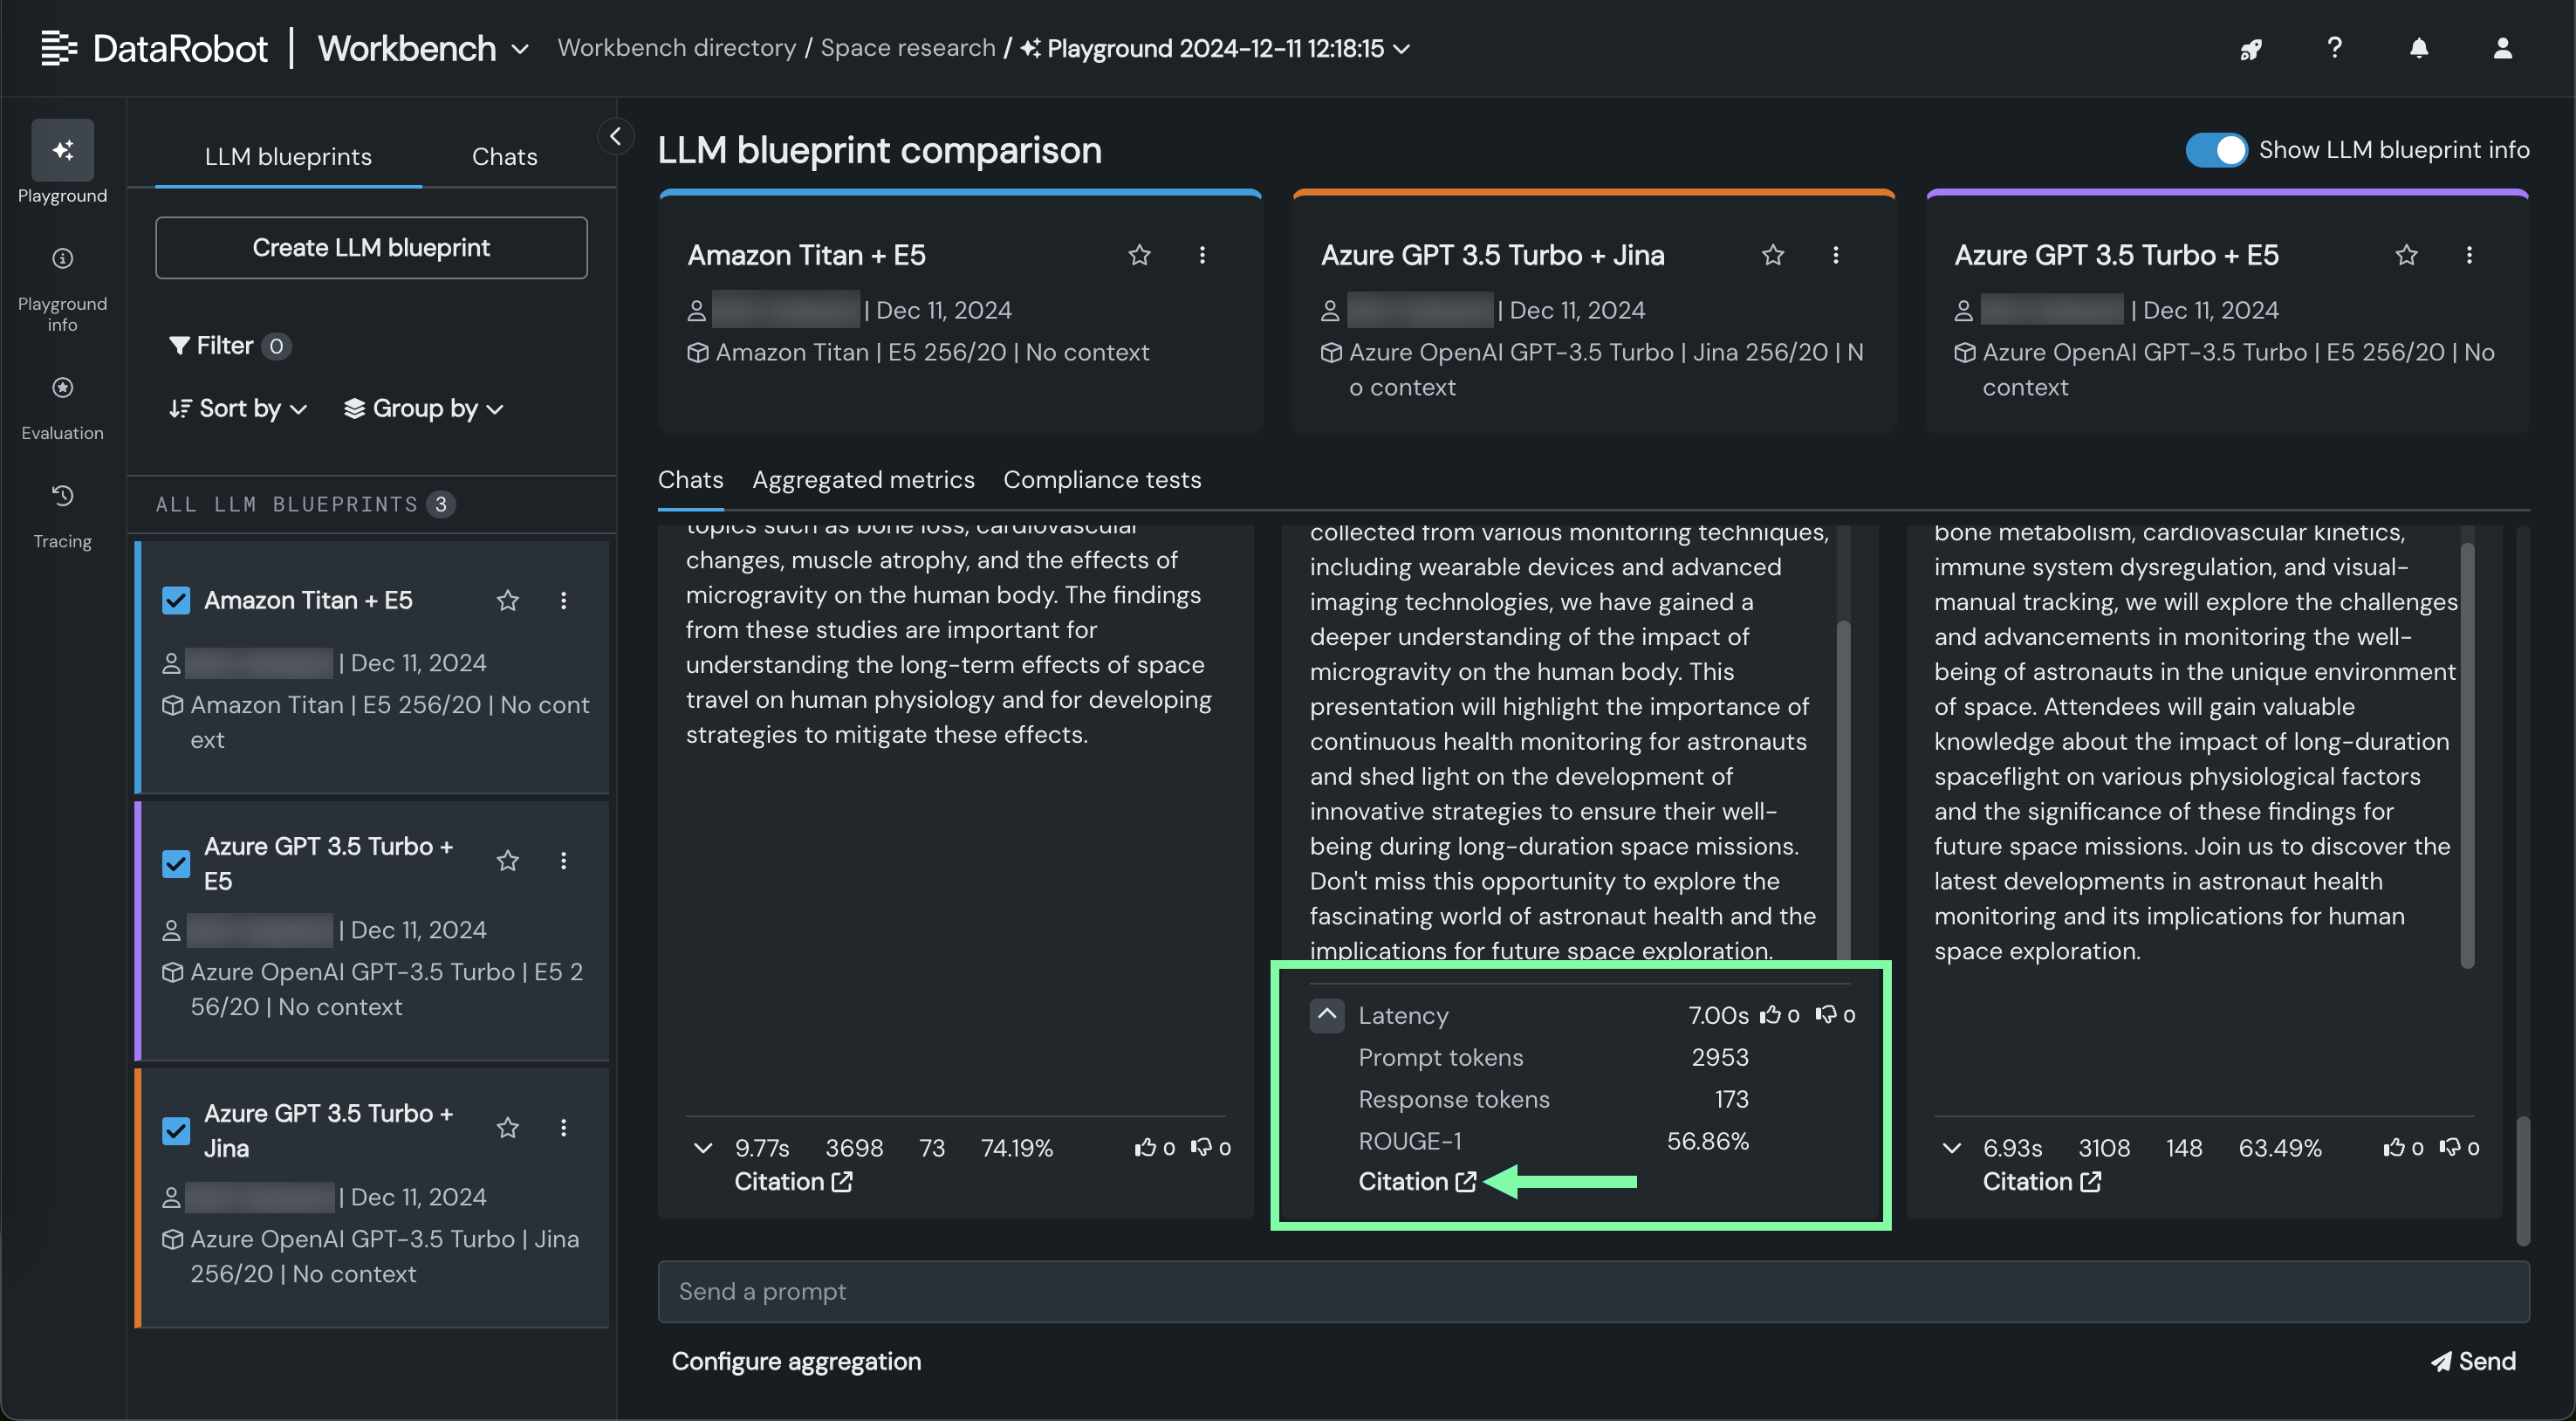
One method of evaluating a response is to look at the basic information DataRobot returns with each prompt, summarized below the response. Expand the information panel for the LLM blueprint that used the Jina vector database; you can see that the response took seven seconds, had 173 response tokens, and scored 56.86% on the ROUGE-1 confidence metric. The ROUGE-1 metric represents how similar this LLM answer is to the citations provided to aid in its generation.
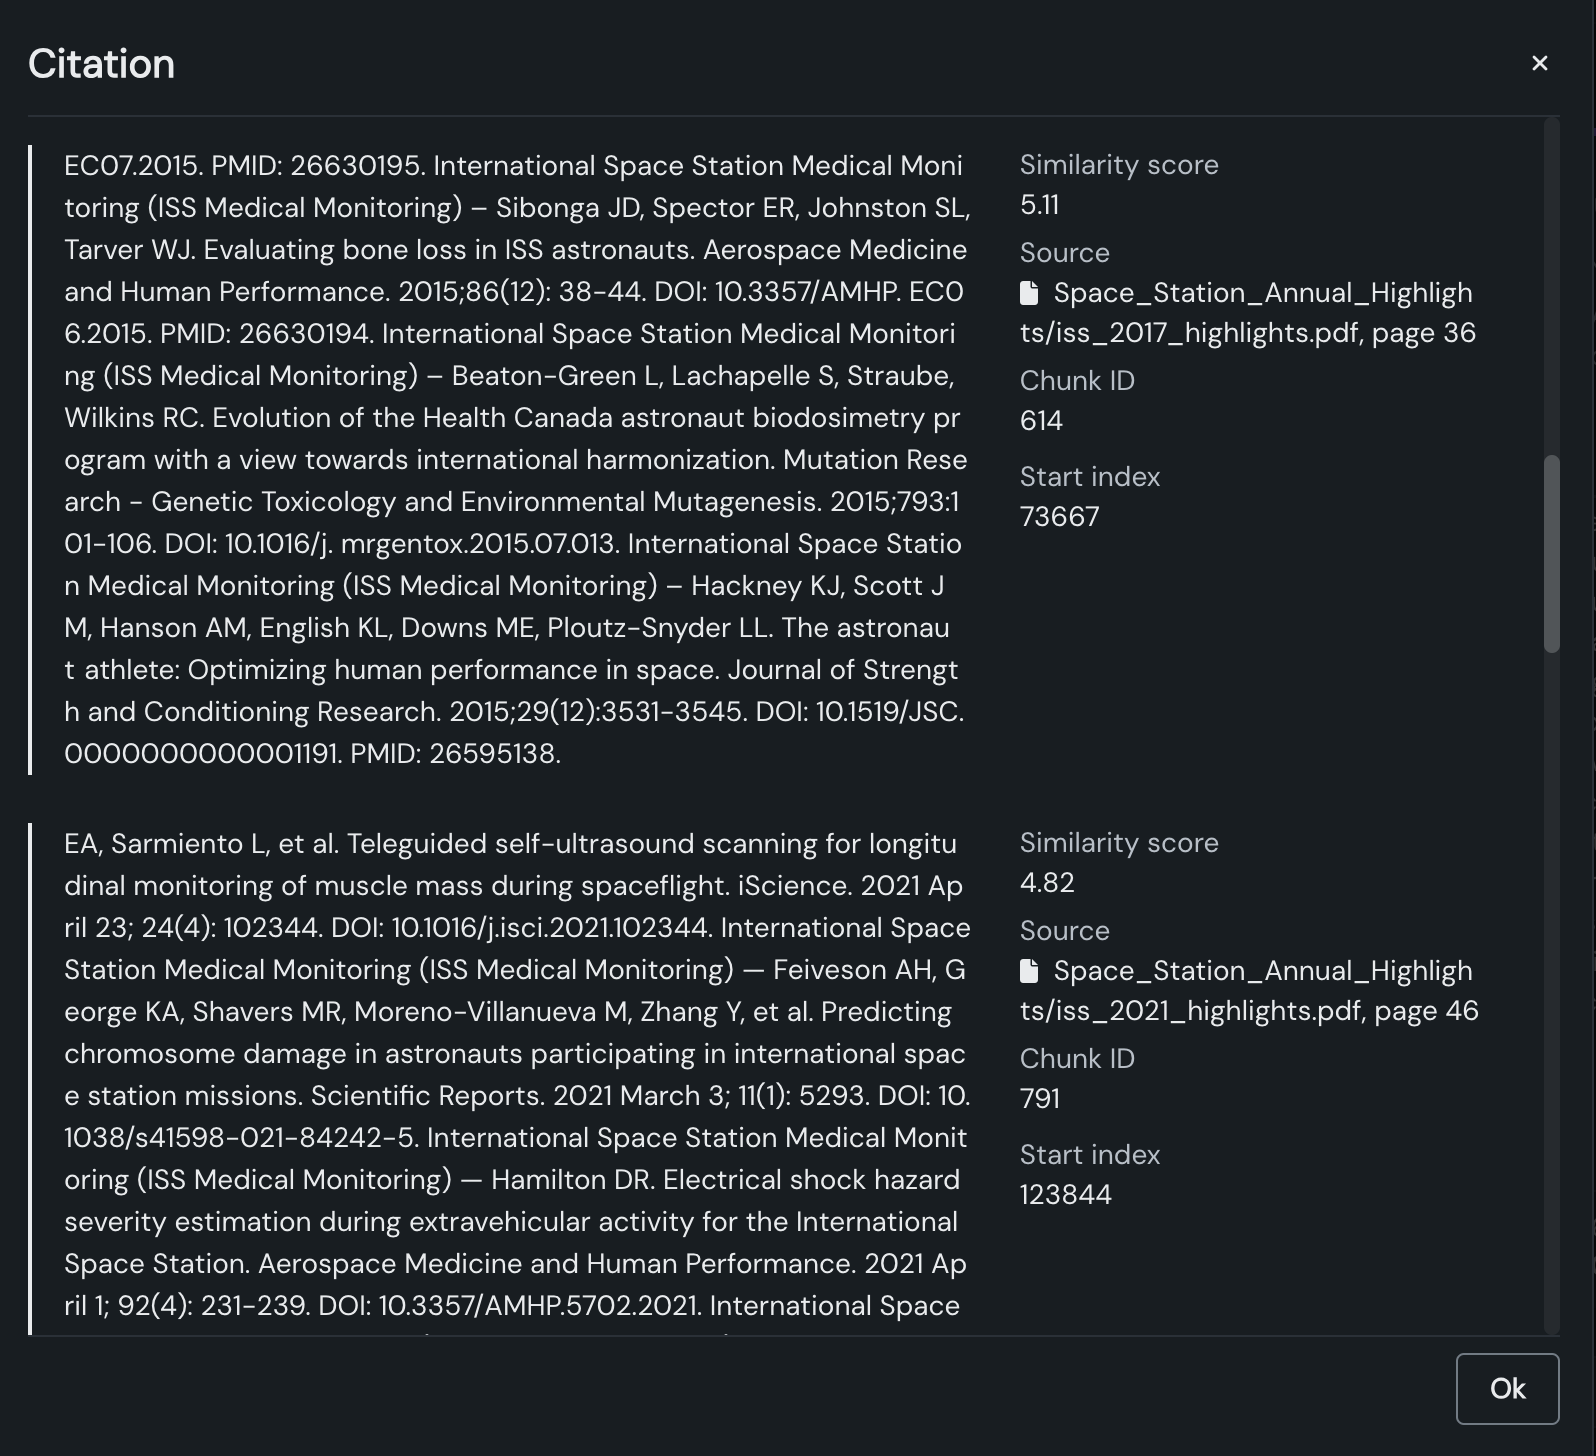
To better understand the results, look at the citations. You can see a list of the chunks the generated answer from the LLM is based on:
Scroll and read a few of the citations. This is the stage where you can see the impact of the chunk size you selected when you created the vector database. You may get better results with longer or shorter chunks, and could test that by creating additional vector databases.
Read more: Citations
10. Add an evaluation dataset
The metrics described in the step above correspond to one LLM blueprint response, but only so much can be learned from evaluating a single prompt/response. To evaluate which LLM blueprint is the best overall, you will want aggregated metrics. Aggregation combines metrics across many prompts and/or responses, which helps to evaluate a blueprint at a high level and provides a more comprehensive approach to evaluation.
First, in this step, you will add an evaluation dataset, which is required for aggregation. You will configure aggregation in step 11.
-
Click the LLM evaluation icon in the upper left navigation.
-
From the LLM evaluation page, click the Evaluation datasets tab and then Add evaluation dataset.
-
From the Add evaluation dataset panel, click the dataset named
Space_research_evaluation_prompts.csv, which contains some additional conference titles to be used as a standard reference set. -
Next, define the Prompt column name and the Response (target) column name, as shown below. Then, click Add evaluation dataset.
| Field | Setting |
|---|---|
| Prompt column name | question |
| Response (target) column name | answer |

DataRobot returns to the **Evaluation dataset metrics** configuration page.
Read more: Evaluation datasets
11. Configure aggregated metrics
After you add an evaluation dataset, to configure aggregation:
-
Click the Playground icon
 to return to the LLM blueprint comparison, then, in the bottom left under the responses, click Configure aggregation.
 -
In the configuration section, define a Chat name and select the Evaluation dataset added in the previous section.
-
The Generate aggregated metrics page opens. Set the Latency and ROUGE-1 metrics to Average. Then, click Generate metrics.
A notification in the lower right confirms that the aggregation job is queued. It can take some time for the aggregation request to process, but the metrics will appear as they complete.
Read more: Aggregated metrics
12. Interpret aggregated metrics
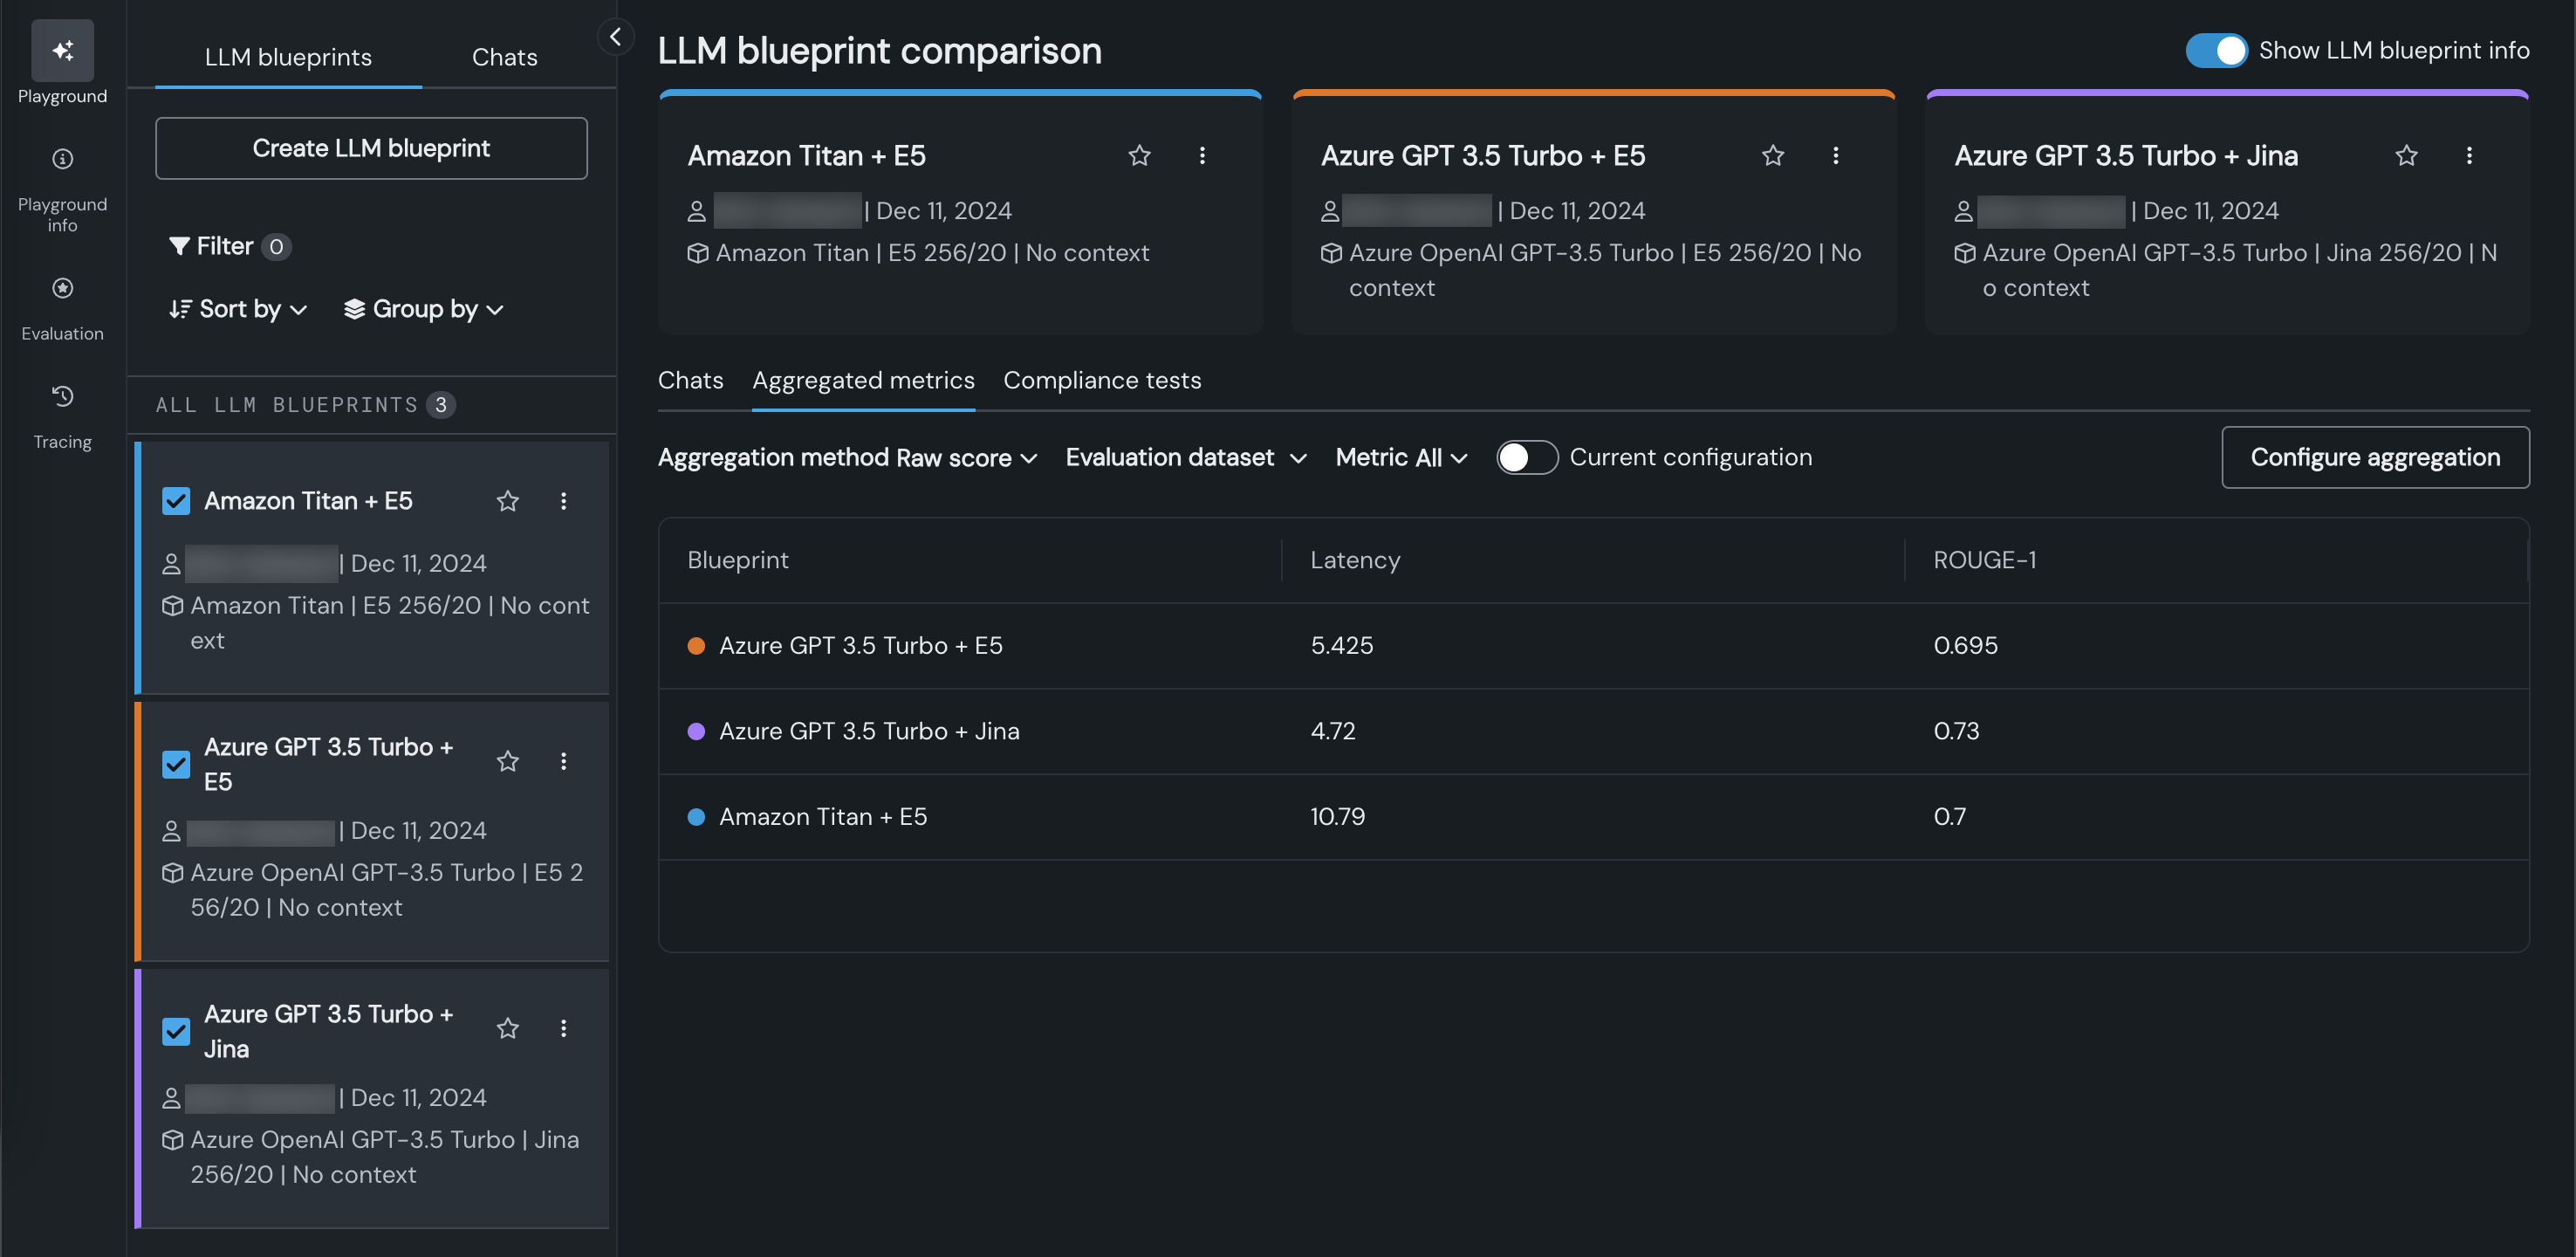
When the aggregation job completes, on the LLM blueprint comparison page, open the Aggregated metrics tab. Note that these aggregate metrics are based on the rows in the evaluation dataset.
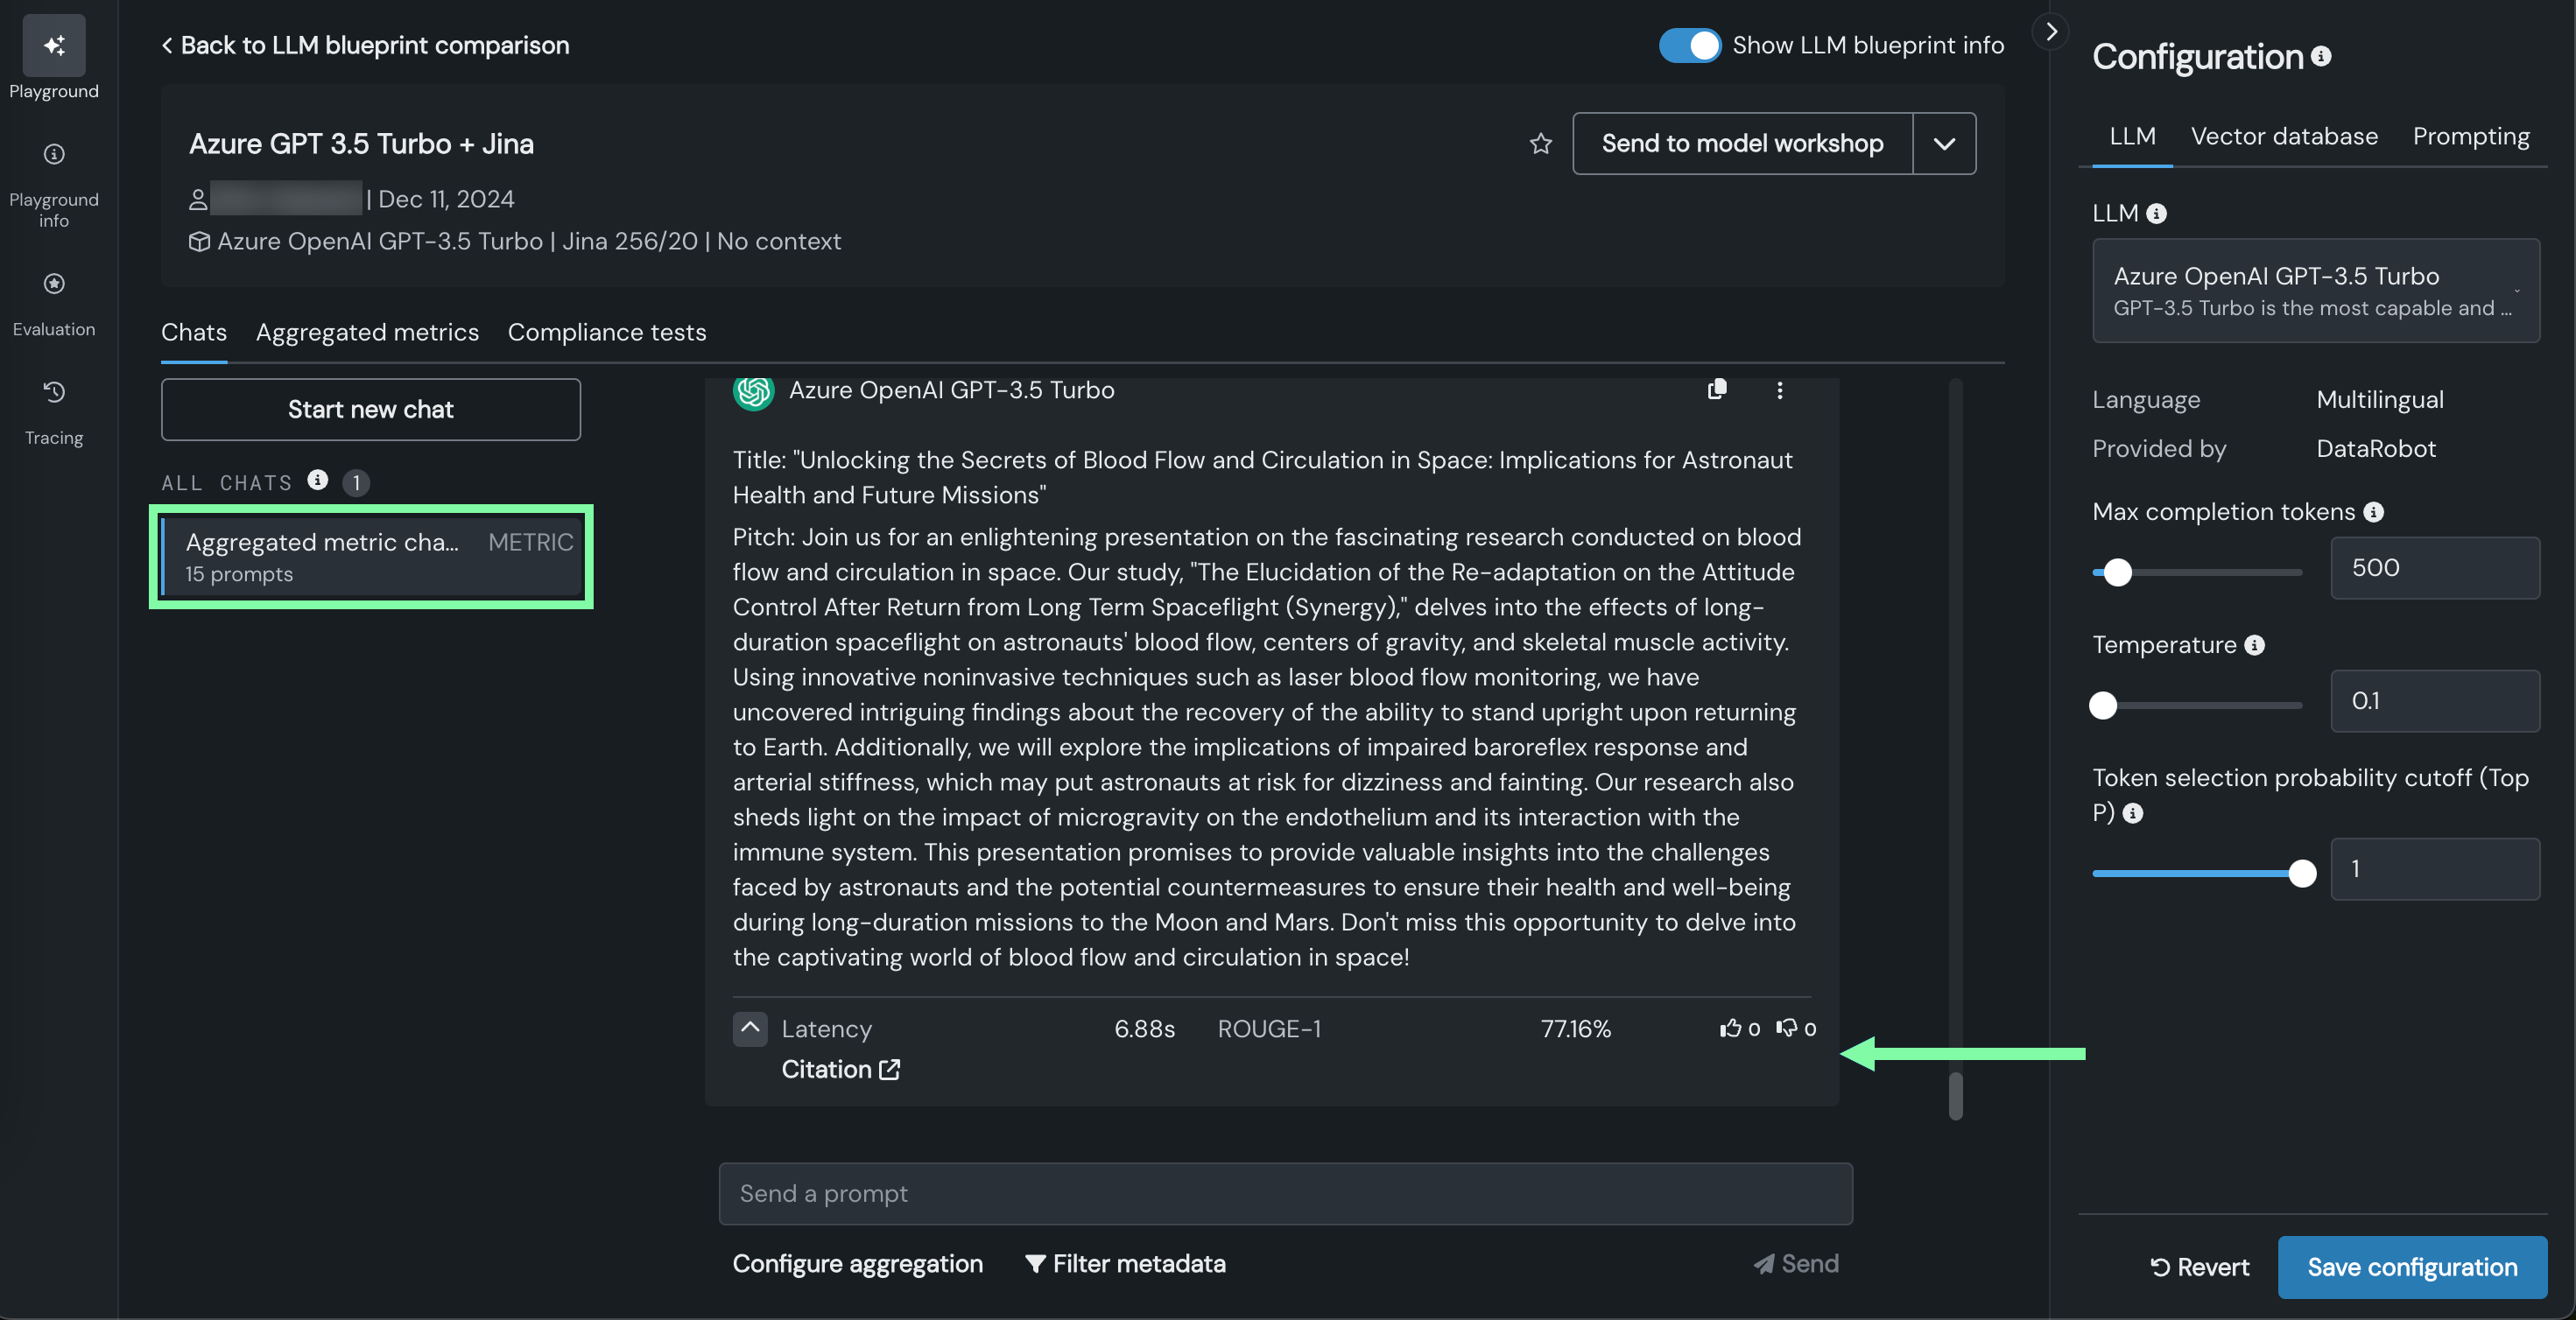
To see the row-level details that contributed to these values, click an LLM blueprint. Notice on the left panel of the Chats tab, there is an entry named Aggregated metric chat (or a different chat name, as defined in the previous section), which contains all the responses to the prompts in the evaluation dataset.
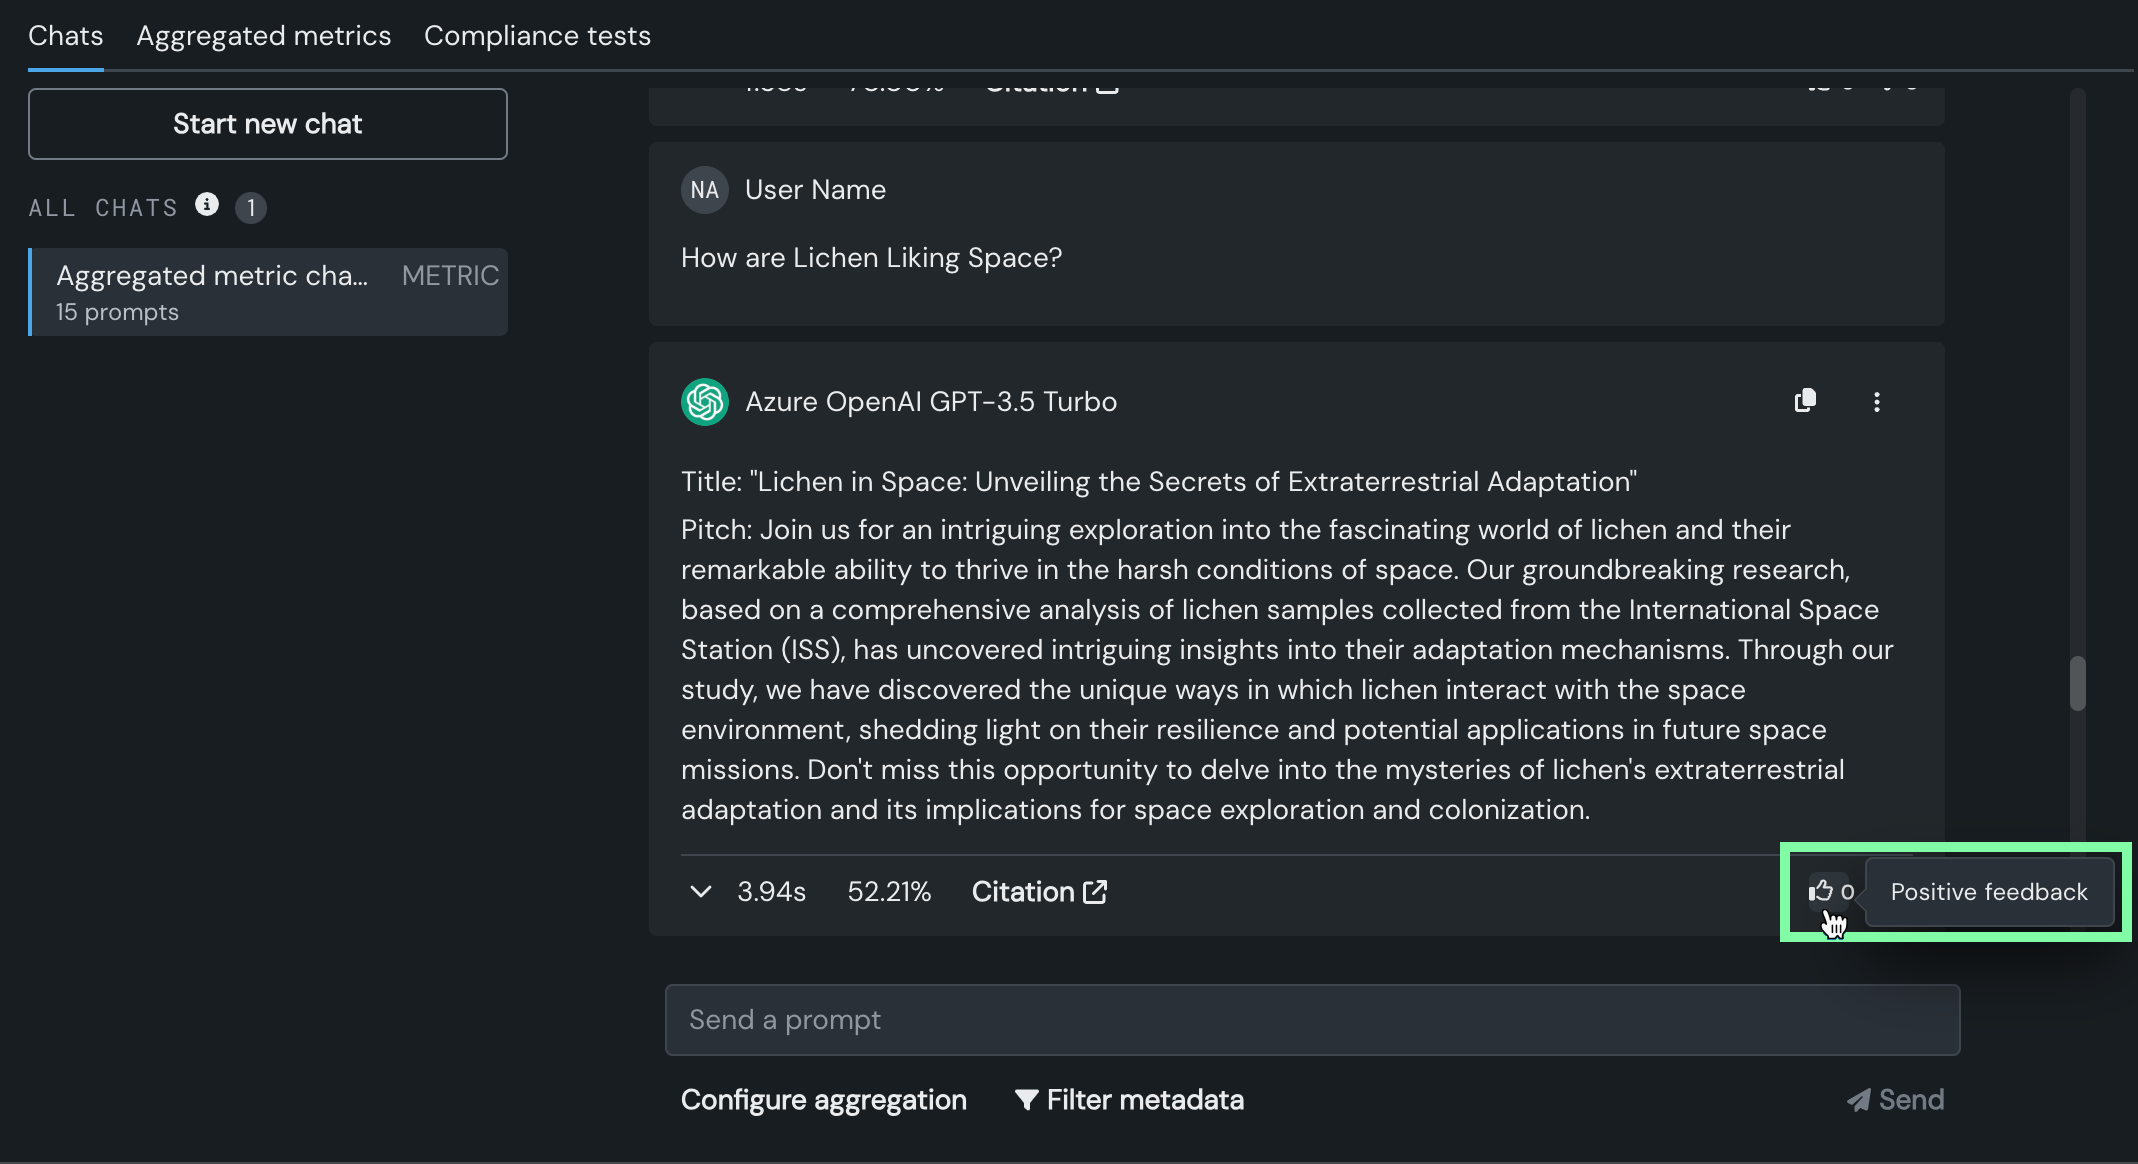
Scroll through the results to view the conference talks. You can provide feedback with the "thumbs" emojis. For example, for the question (prompt column name) "How are Lichen Liking Space?", give the response some positive feedback (thumbs up):
13. Tracing
Tracing the execution of LLM blueprints is a powerful tool for understanding how most parts of the GenAI stack work. The tracing tab provides a log of all components and prompting activities used in generating LLM responses in the playground.
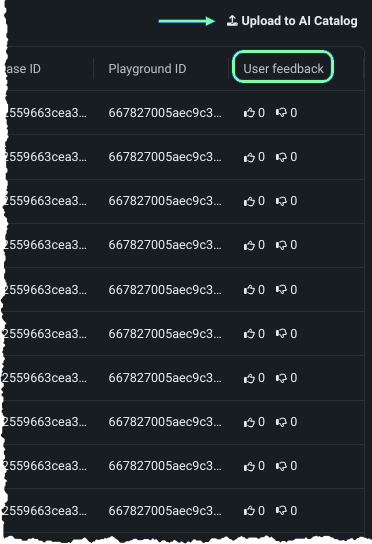
Click the Tracing icon in the upper left navigation to access a log of all the components used in the LLM response generation. The table traces exactly which LLM parameters, which vector database, which system prompt, and which user prompt resulted in a particular generated response.
Scroll the page to the far right to see the user feedback. You can use this information for LLM fine-tuning.
You can also export the log to the DataRobot AI Catalog. From there, you can work with it in other ways, such as writing it to a database table or downloading it.
Read more: Tracing
Next steps
After completing this walkthough, some suggested next steps are:
- Deploy an LLM from the playground.
- Create an end-to-end GenAI experiment with code

