How-to: GenAI basic
This walkthrough shows you how to work with generative AI (GenAI) in DataRobot, where you can generate text content using a variety of pre-trained large language models (LLMs). Or, the content can be tailored to your domain-specific data by building vector databases and leveraging them in the LLM prompts.
In this walkthrough, you will:
- Create a playground.
- Create a vector database.
- Build and then compare LLM blueprints.
Note
All LLMs available in playground are available out-of-the-box. If you encounter any errors or permissions issues, contact DataRobot support.
Prerequisites
Download the following demo dataset based on the DataRobot documentation to try out the GenAI functionality:
1. Add a playground
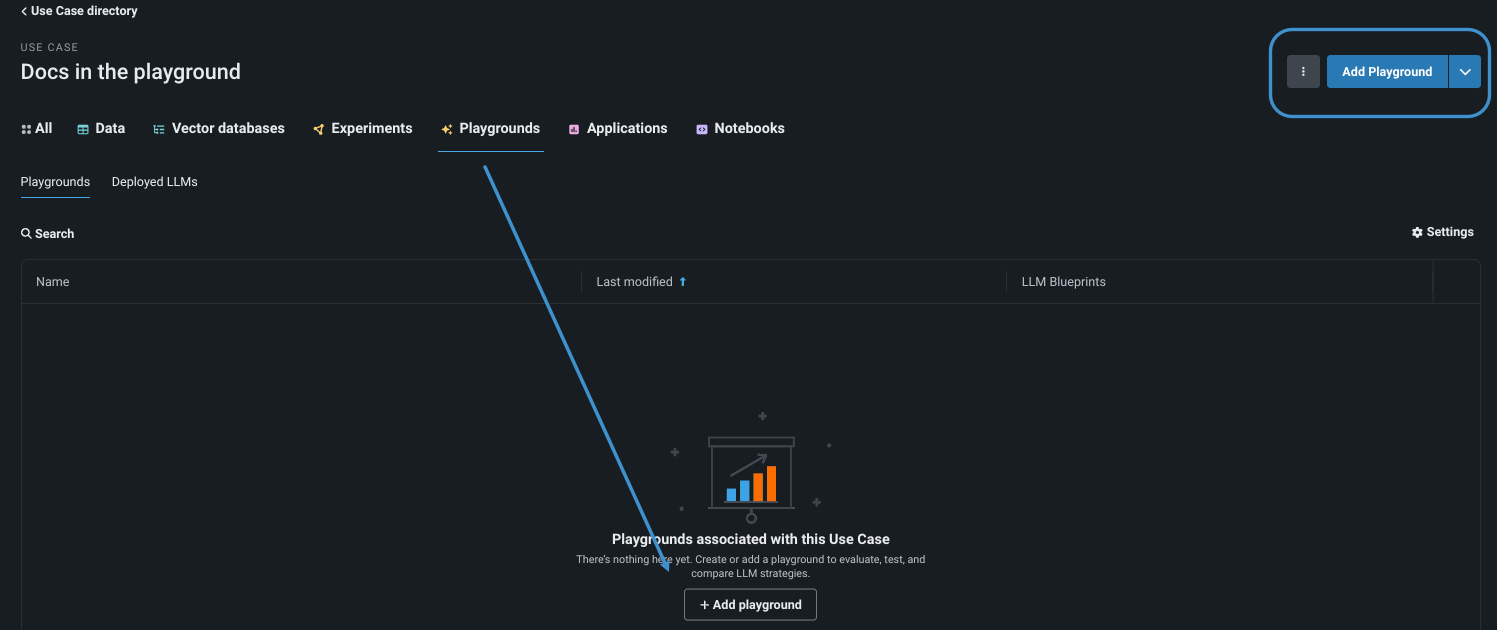
A playground, another type of Use Case asset, is the space for creating and interacting with LLM blueprints, comparing the response of each to determine which to use in production. In Workbench, create a Use Case and then add a playground via the Playgrounds tab or the Add dropdown:
Read more: Create a Use Case, Add a playground
2. Add internal data for the vector database
To tailor results using domain-specific data, assign data to an LLM blueprint for leverage during RAG operations. (You can also test LLM blueprint responses without any grounding knowledge provided by a vector database. To do so, skip ahead to step 4 to configure the LLM blueprint.)
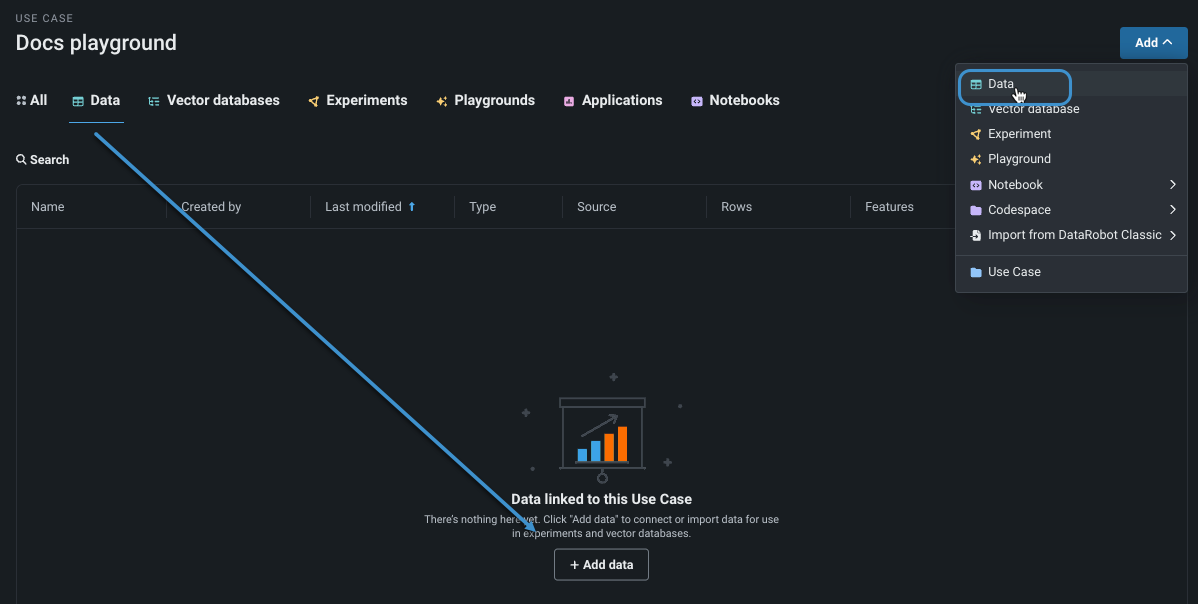
You can add data directly to a Use Case either from a local file or data connections or from the AI Catalog. This walkthrough adds the data directly.
Add datarobot_english_documentation_5th_December.zip, the data you downloaded above, to the Use Case you created.
Read more: Add internal data, import from the AI Catalog
3. Add the vector database
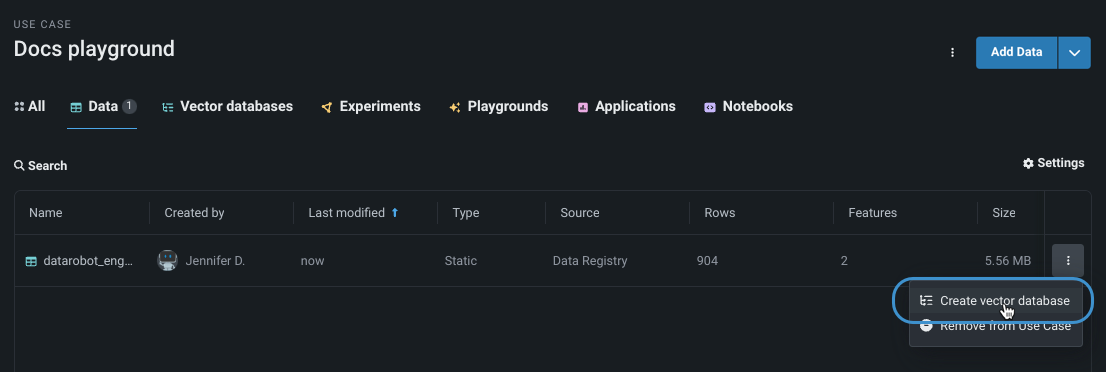
If you do not add a vector database, prompt responses are not augmented with relevant DataRobot documentation; the LLM response contains only details it was able to capture from its training on data found on the internet. Instead, associate the data you added above for more complete information.
There are a variety of methods for adding a vector database. For example, from the Data tab in a Use Case:
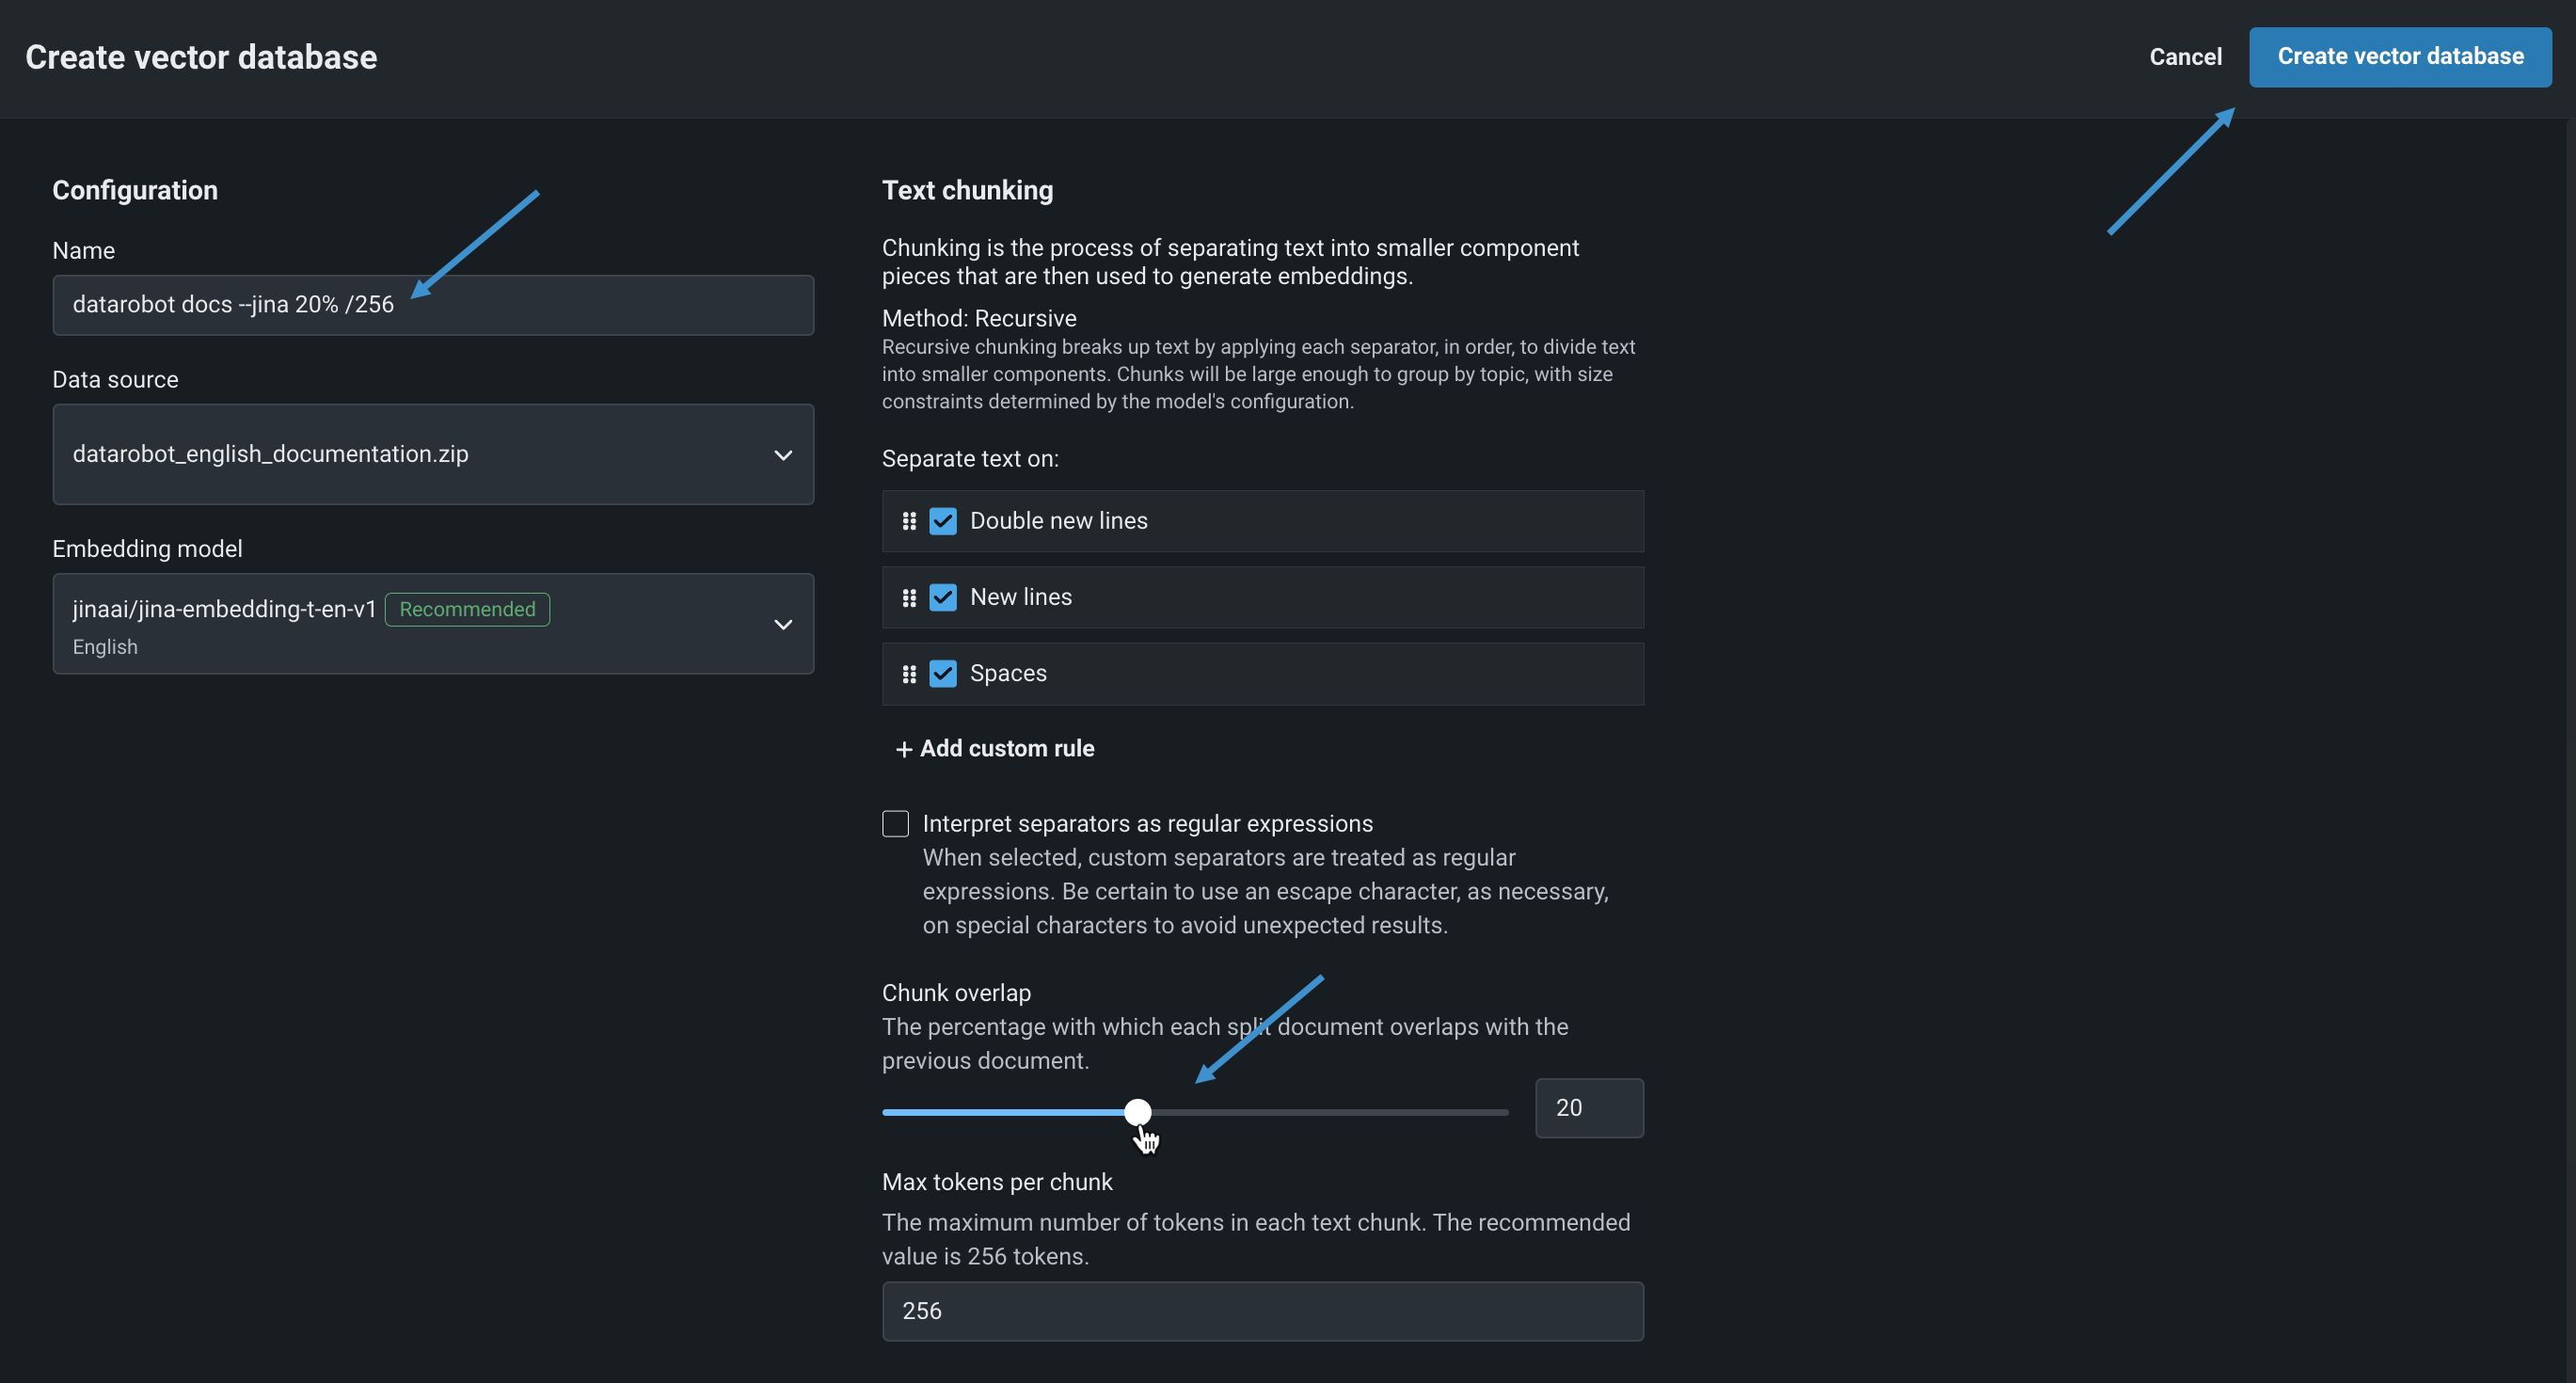
On the resulting Create vector database page, set or confirm the following and then click Create vector database:
| Setting | Description | Set to... |
|---|---|---|
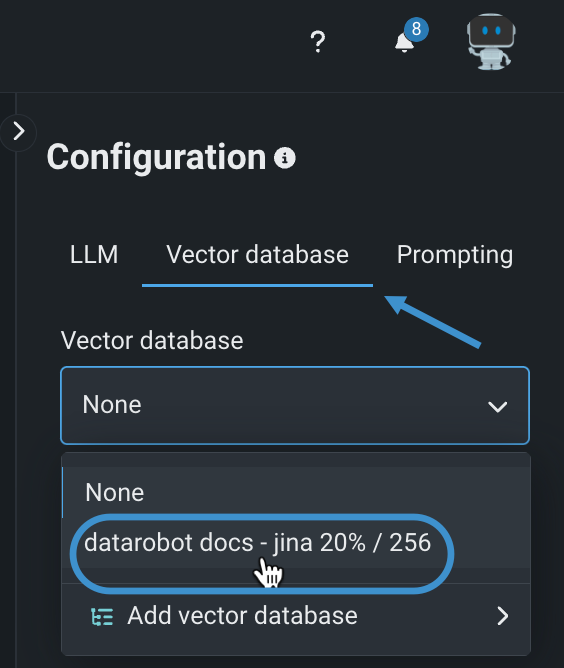
| Name | Change the vector database name to reflect the settings. | datarobot docs --jina 20% / 256 |
| Data source | Confirm this is the data you uploaded. | datarobot_english_documentation_5th_December.zip |
| Embedding model | Use the recommended by model by keeping the pre-selected option. | jinaai/jina-embedding-t-en-v1 |
| Chunk overlap | This value will help to maintain continuity when the DataRobot documentation is grouped into smaller chunks of text to embed in the vector database. | 20% |
Read more: Add a vector database, embeddings
4. Add and configure an LLM blueprint
Open the playground you created in step 1—it is from here that you access the controls for creating LLM blueprints, interacting with and fine-tuning them, and saving them for comparison and potential future deployment. From the playground, choose Create LLM blueprint and begin the configuration.
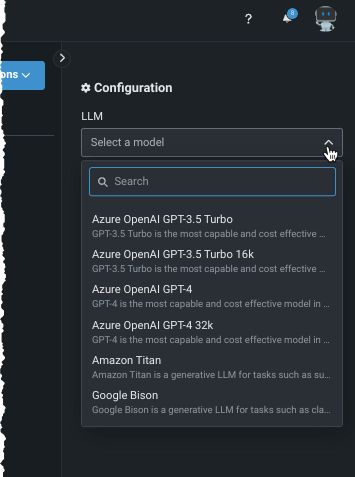
Select an LLM from the Configuration dropdown to serve as the base model. This walkthrough uses Azure OpenAI GPT-3.5 Turbo model. Optionally, modify configuration settings.
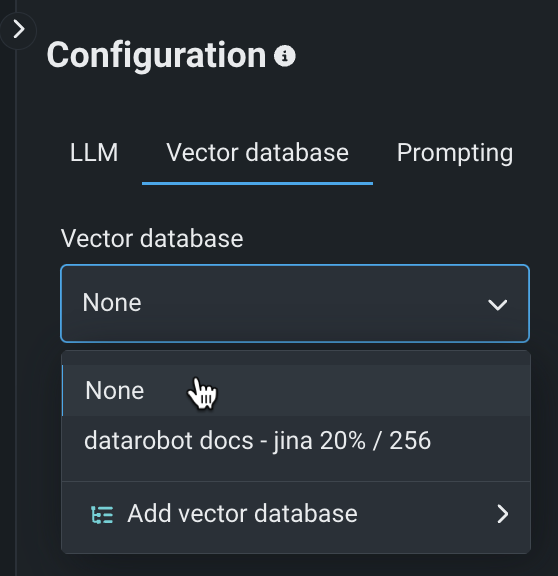
From the Vector database tab, choose the vector database you added in step 3.
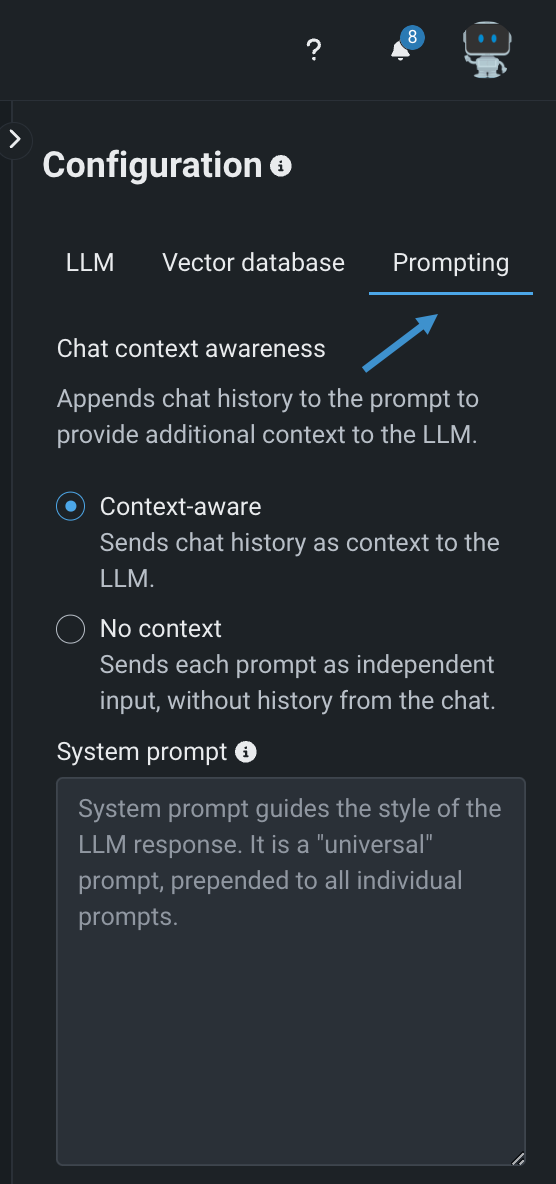
From the Prompting tab, optionally add a system prompt and change context awareness. This example leaves the blueprint configuration as context-aware, the default.
Read more: LLM blueprint configuration settings, context-awareness
Save the configuration.
5. Send a prompt
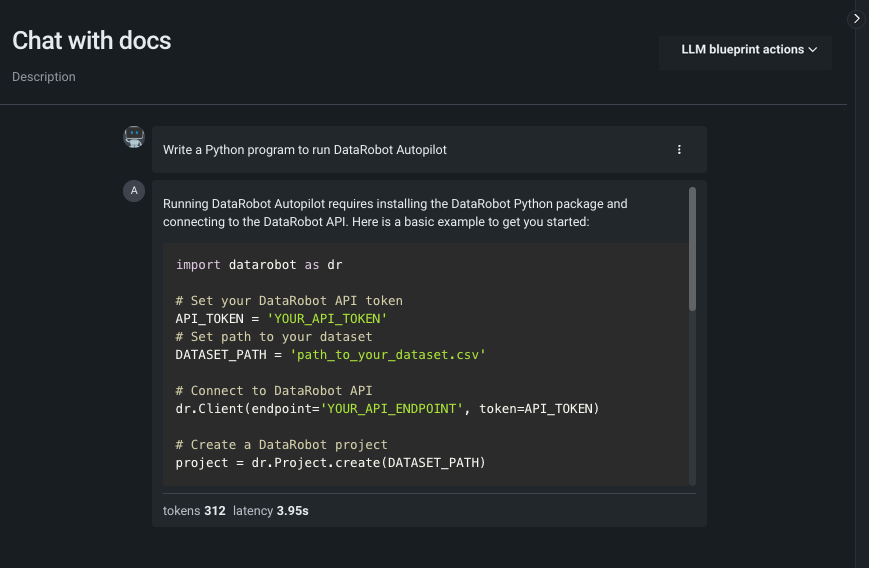
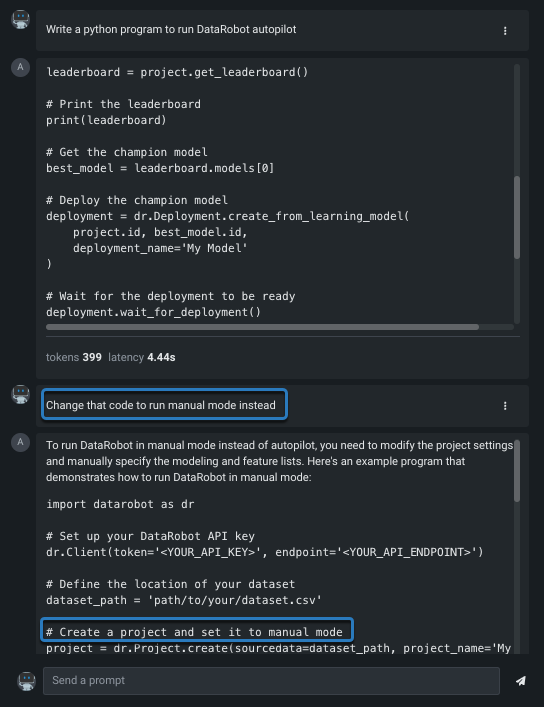
Chatting is the activity of sending prompts and receiving responses from the LLM. Once you have set the configuration for your LLM, on the Chats tab, send it a prompt (from the entry box in the lower center panel).
For example: Write a Python program to run DataRobot Autopilot.
Read more: Chatting
6. Follow-up with additional prompts
In the playground, you can ask follow-up questions to determine if configuration refinements are needed before saving the LLM blueprint. Because the LLM is context-aware, you can reference earlier conversation history to continue the "discussion" with additional prompts.
From within the previous conversation, ask the LLM to make a change to "that code":
ROUGE scores and citations reported with the response help provide a trust measure for the response.
Read more: ROUGE scores
7. Test and tune
Use the configuration area to test and tune prompts until you are satisfied with the system prompt and settings. (You must save the configuration before submitting the first prompt.) Then, click the edit icon next to the blueprint name to make it more descriptive, for example GPT 3.5 with VDB, then click confirm .
Read more: Blueprint actions
8. Create a comparison LLM blueprint
Create one or more LLM blueprints to run a comparison. (You can send prompts to a single blueprint in the comparison view.) These steps create an LLM blueprint that does not use a vector database.
Click on the menu for the LLM blueprint you just built and select Copy to new LLM blueprint:
Rename the copy, for example, GPT3.5 without VDB, and remove the vector database that is assigned.
Click Save configuration.
9. Set up LLM blueprint comparison
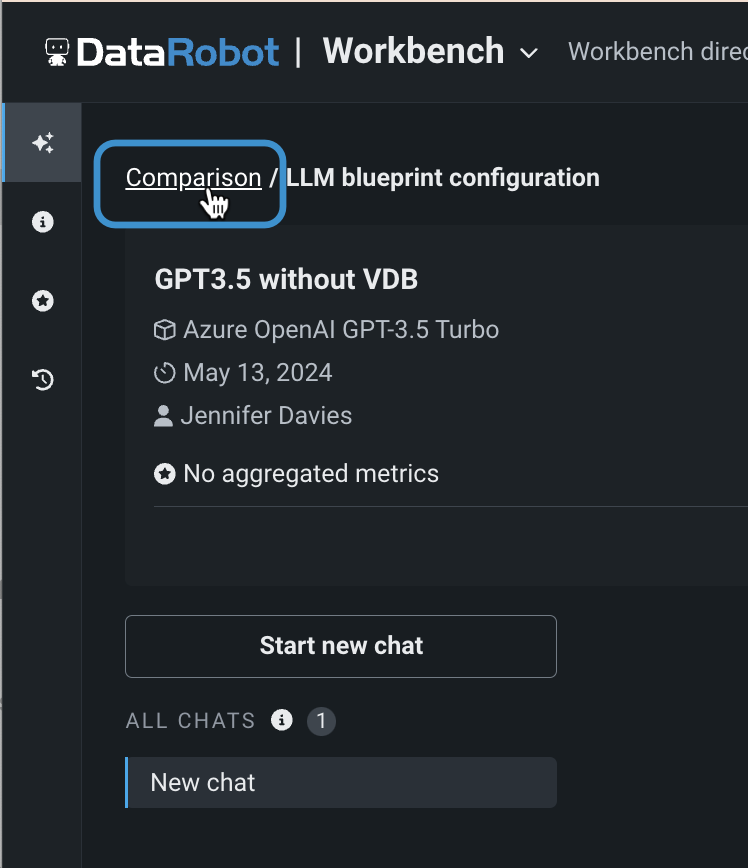
Now, with more than one LLM blueprint in your playground, you can compare responses side-by-side. Click Back to LLM blueprint comparison:
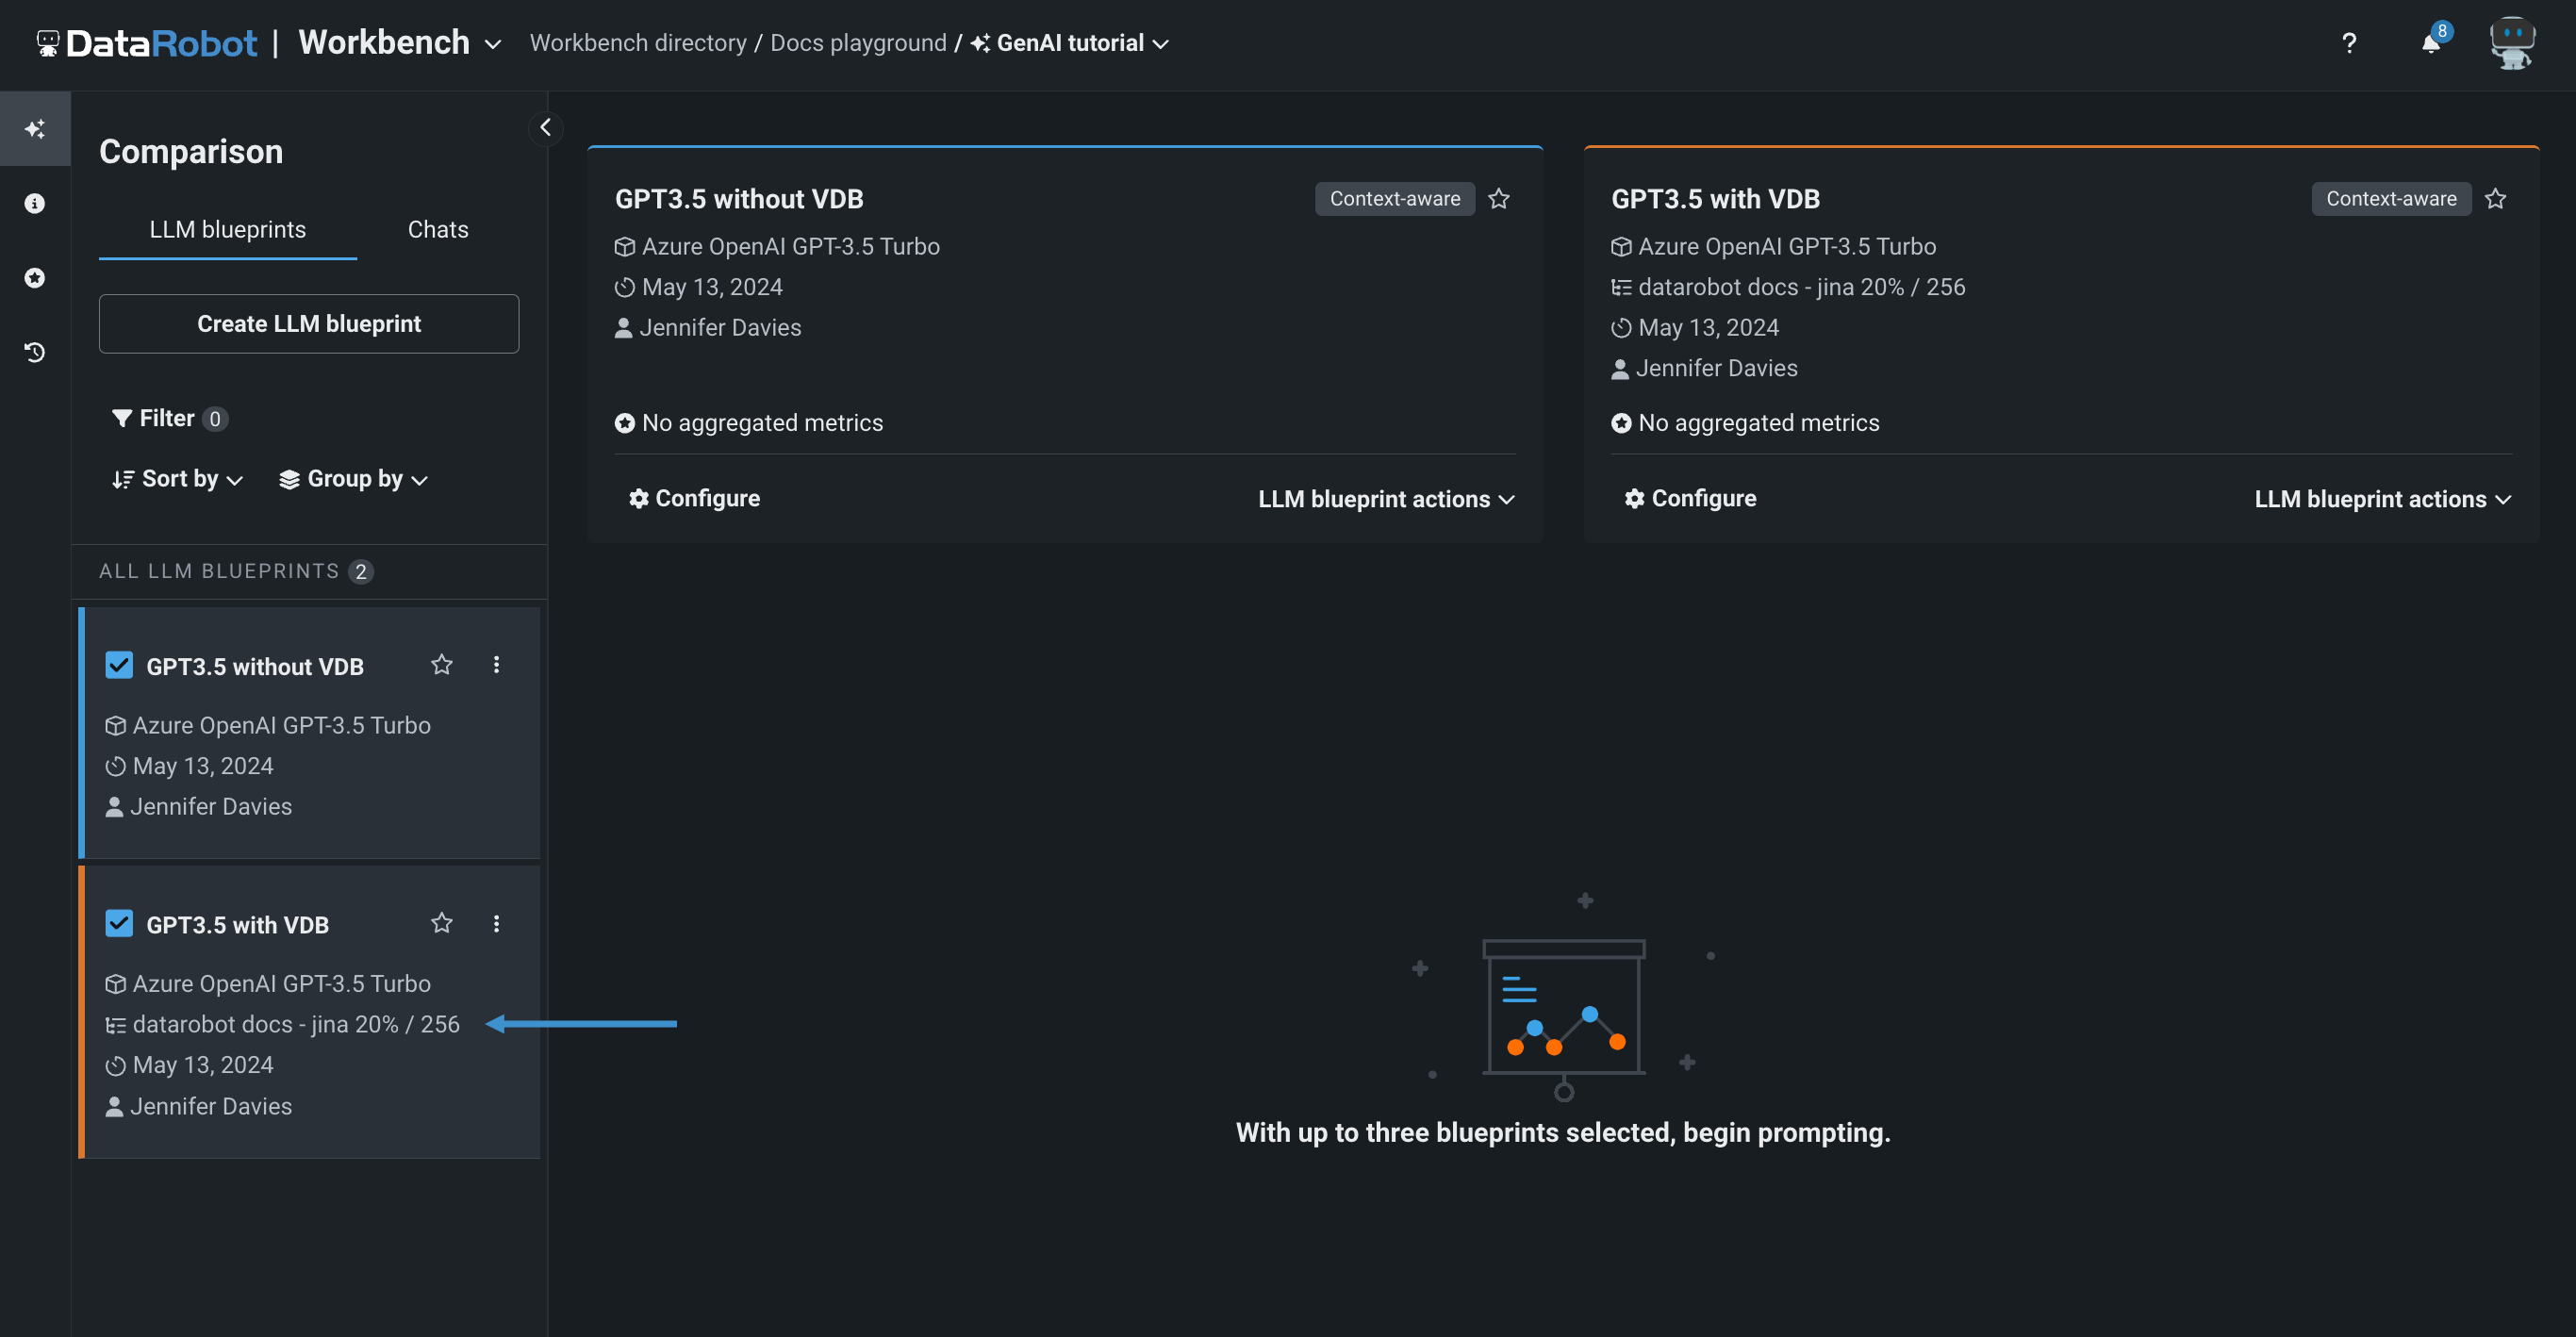
Select up to three blueprints to compare.
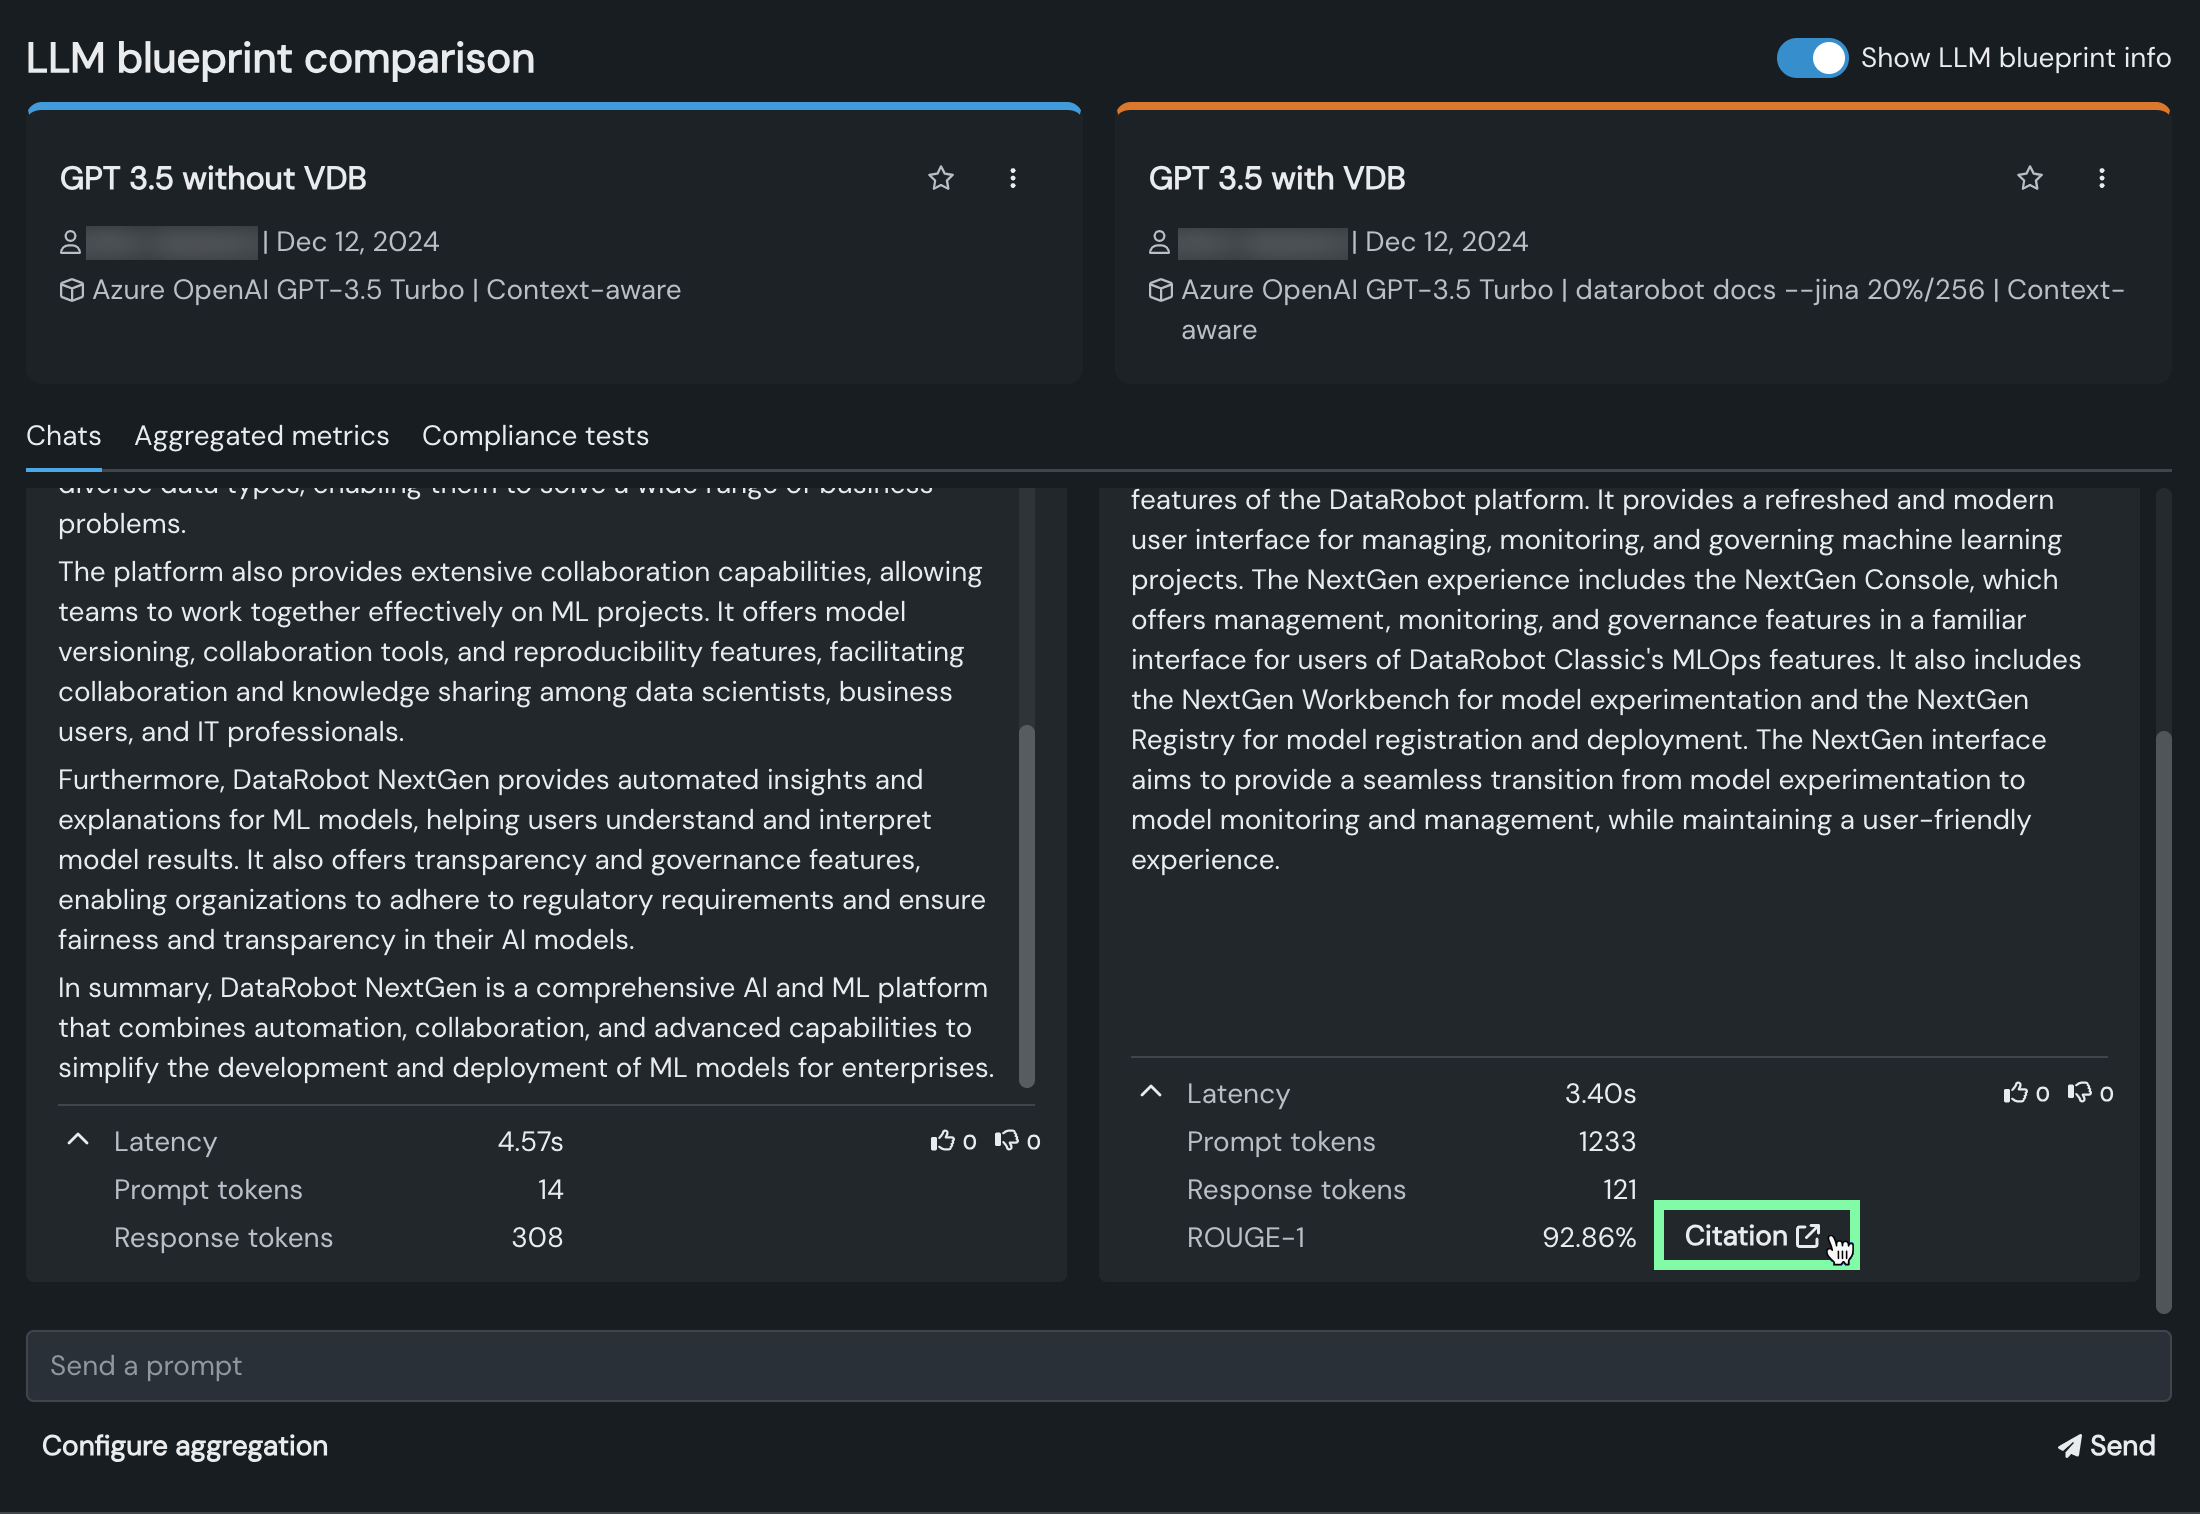
Notice that the LLM blueprint information indicates the version that does not leverage a vector database.
Read more: Compare blueprints
10. Compare LLM blueprints
To start the comparison, send a prompt to both blueprints. The responses show that the blueprint with grounding knowledge from the vector database provides a more comprehensive and useful response.
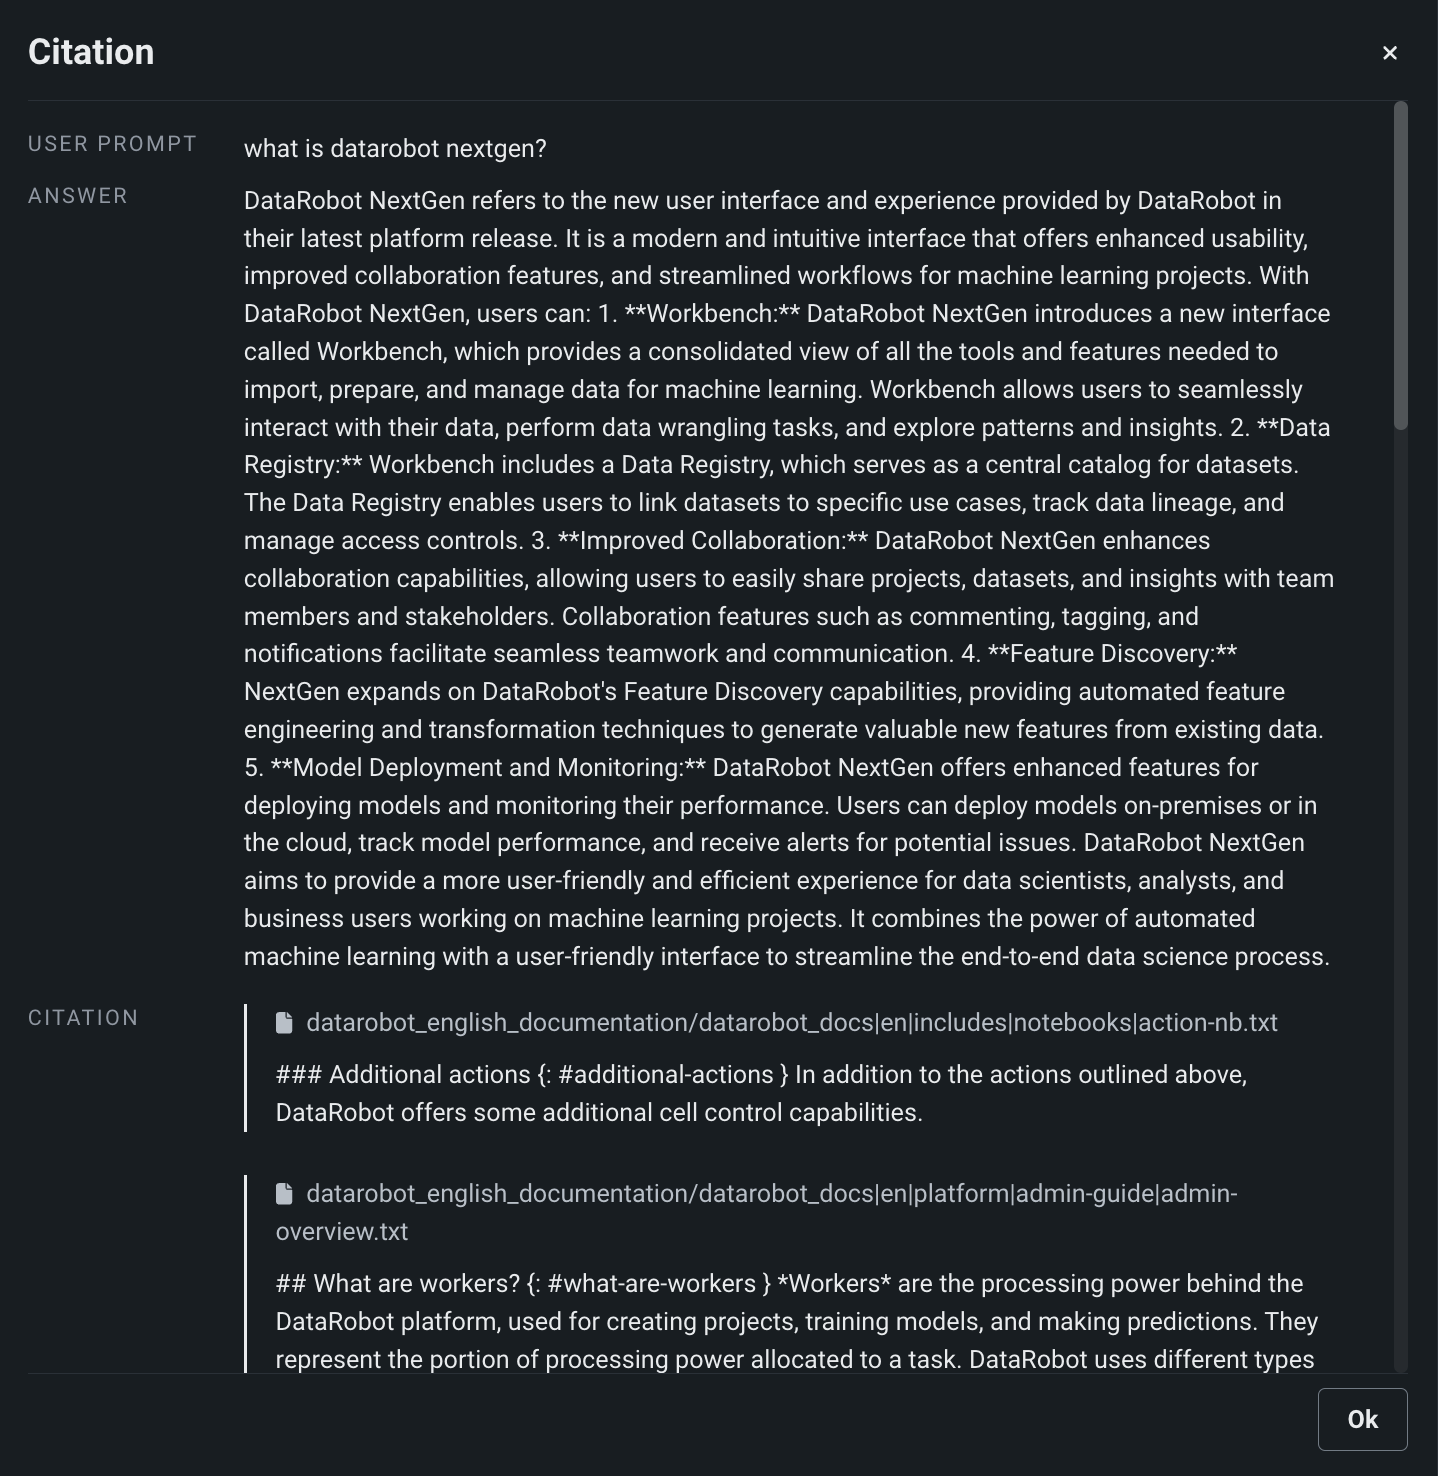
Notice that the response from the LLM blueprint that uses a vector database includes a citation link. Click the link to view the text chunks that the LLM blueprint retrieved to augment the prompt sent to the LLM.
When you are satisfied with the LLM blueprint results, you can choose Send to the workshop from the LLM blueprint actions dropdown to register and ultimately deploy it.
Read more: Deploy an LLM
