Configure capacity
The Capacity tab provides controls for managing and enforcing usage on deployments. Deployment owners can protect shared deployment infrastructure and guarantee minimum throughput for critical agents and users when multiple consumers share one deployment.
Set capacity and the utilization threshold for the deployment as a whole; those are global to the deployment. Quotas—the default rules and optional per-entity limits below—define what happens when utilization reaches that threshold:
-
Default throughput configuration: Configure a deployment's capacity, utilization threshold, and baseline usage rules that apply to any entity that can access the deployment. Entities without their own overrides use these defaults.
-
Entity rate limits: Rate limits are optional settings that provide a higher priority for specific deployments, users, or groups. Use reserved capacity to guarantee a share of deployment capacity for each entity, or per-entity rate limits to control the total deployment throughput.
Learn more
For decision guidance, load test examples, and sizing recommendations—including when rate limits alone are sufficient—see Rate limiting vs. quota reservations: a practical guide for platform teams on the DataRobot blog.
Rate limit application
Rate limit changes may take up to 5 minutes to apply. This delay occurs because the gateway updates its quota cache every 5 minutes.
Capacity configuration
Capacity is the throughput you expect a deployment to sustain expressed as units per time window (e.g., requests per minute or tokens per minute). It defines the baseline “pipe size” used for deployment-wide quota enforcement and for sizing reservations.
When choosing capacity values, common inputs include:
- Load tests that measure how the deployment behaves under target traffic.
- Model or hosting limits imposed by the model, runtime, or infrastructure.
- Latency budgets you need to meet at expected concurrency and payload sizes.
- Operational experience from comparable deployments or historical usage.
Throughput configuration governs how a deployment applies limits:
- It sets capacity as the overall ceiling for requests or tokens.
- It sets the utilization threshold as how full that capacity can get before the deployment enforces its default quota behavior.
- Below the threshold, it relaxes enforcement so the gateway can allow short bursts and treat traffic more permissively.
- Above the threshold, it applies the deployment's quota rules dynamically as utilization rises.
- With reserved capacity, it guarantees entitled entities a share when consumers compete for the deployment.
- Under sustained overload, it can reject excess traffic to protect the model and shared infrastructure.
To configure capacity:
-
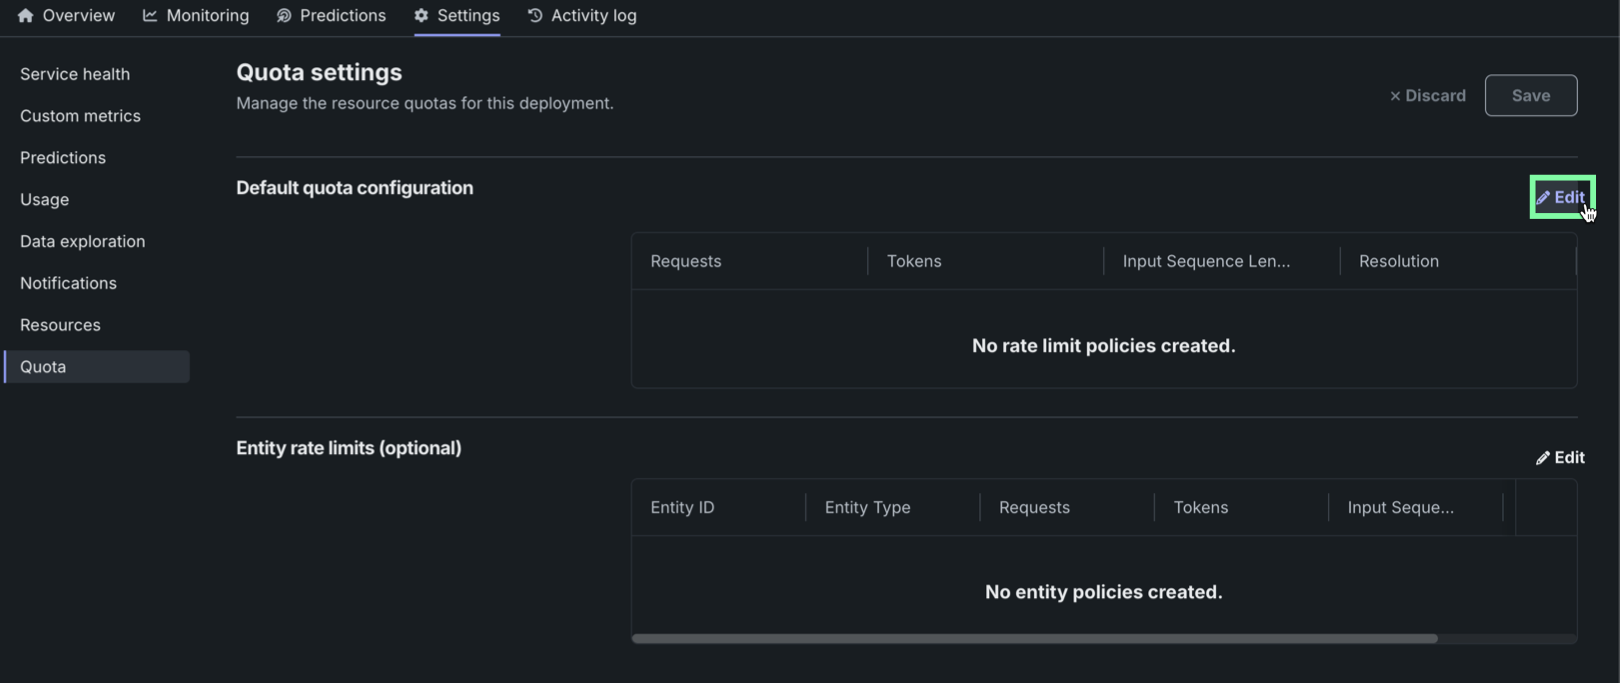
Click Set throughput to configure the capacity settings for a deployment.
-
Choose a metric to track (requests per minute or tokens per minute).
-
Define the capacity of requests or tokens per minute by providing a value. These values are not inferred automatically by DataRobot, so plan these values accordingly based on deployment usage.
-
Set the utilization threshold as a percentage of the capacity. DataRobot recommends setting thresholds at 70–80% as a common starting point. This leaves room for bursts of usage before enforcement tightens.
-
After configuring each capacity setting, click Save.
Reserved capacity
Reserved capacity is configured per entity (agent deployment, user, or group). It defines how much of the deployment’s capacity you guarantee to the selected entity when utilization is above the utilization threshold and consumers compete for the deployment.
- Floor, not a ceiling: A reservation guarantees a minimum share; an entity can often use more than its reserved portion when spare capacity exists.
- Leave unreserved headroom: Keep part of deployment capacity unreserved (often 10–20%) so ad-hoc traffic, new consumers, and overflow still have room.
To configure reserved capacity, you must already have the Capacity settings configured.
-
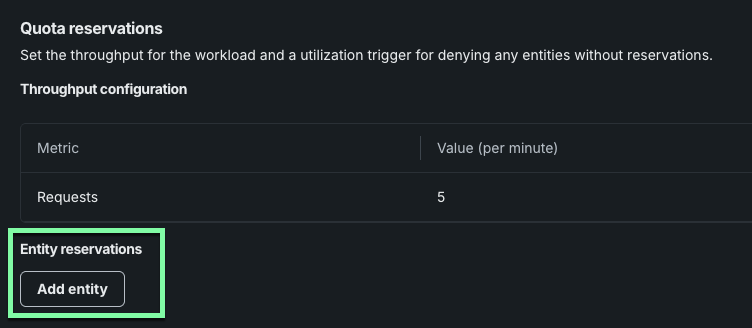
Once capacity settings are configured, click Add entity.
-
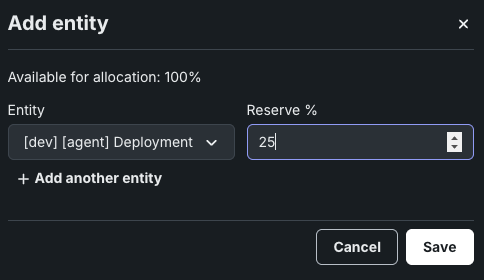
Select an entity from the Deployments, Users, or Groups list.
Deployments require their own API key
If you reserve capacity for a Deployment entity, that deployment must call in using its own agent API key, not the personal API key of the user who owns or triggers it. Agent API keys are generated automatically for agentic workflow deployments and are listed on the API keys and tools page. Calls authenticated with a personal API key aren't attributed to the deployment entity, so its reserved capacity isn't applied.
-
Set the percentage of the capacity to reserve for the selected entity.
-
Perform this process for one or more entities (depending on your organization's needs) and click Save.
Set rate limits
On the Capacity page, manage per-entity settings in the Rate limits section:
-
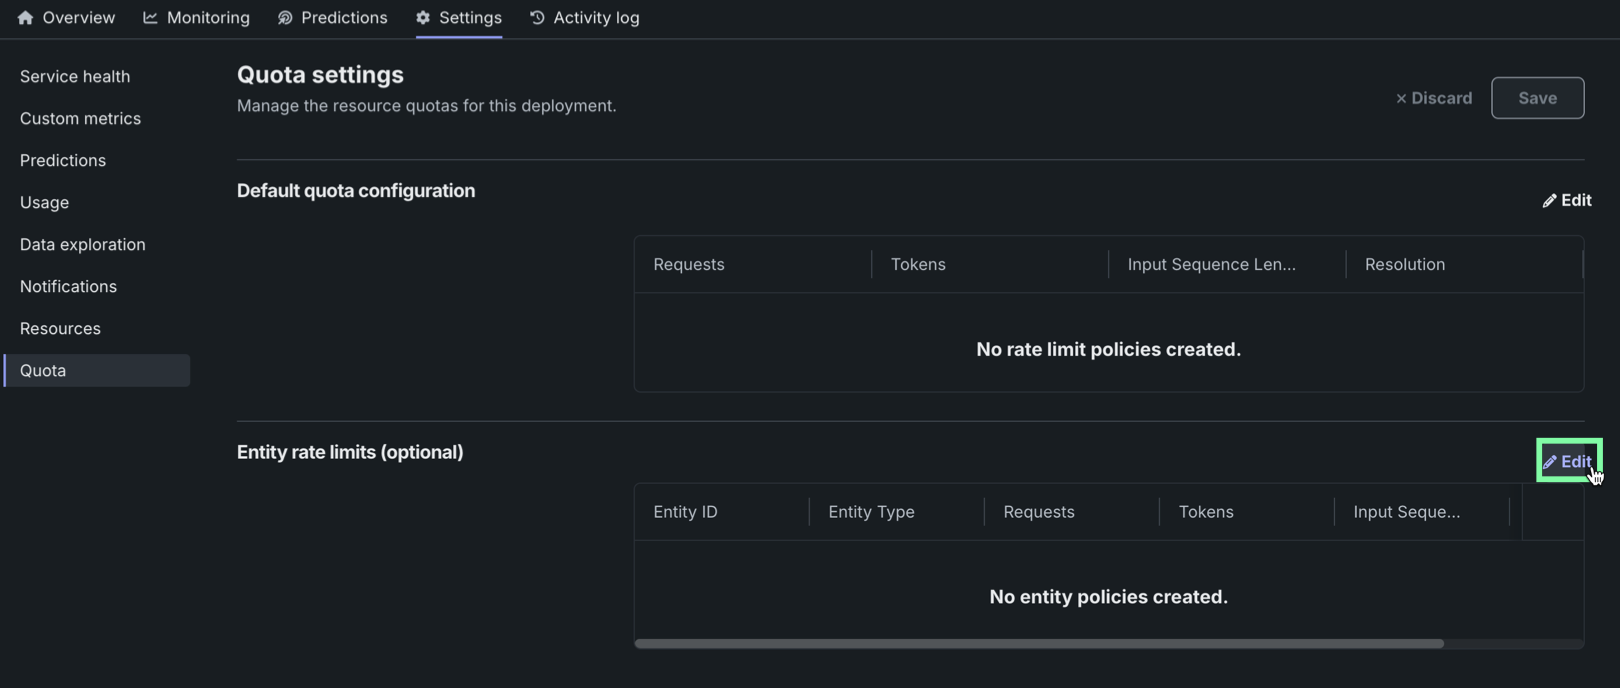
Click Add policy to modify the rate limit settings for the deployment.
-
Click Add metric to begin configuration.
Adding metrics
A new policy row appears each time you click Add metric, until a row is present for every metric available.
-
In the new row, select a Metric, enter a Limit, and choose a time Interval. The selected resolution applies to each metric-based policy defined here. The policy settings allow defining limits on three key metrics:
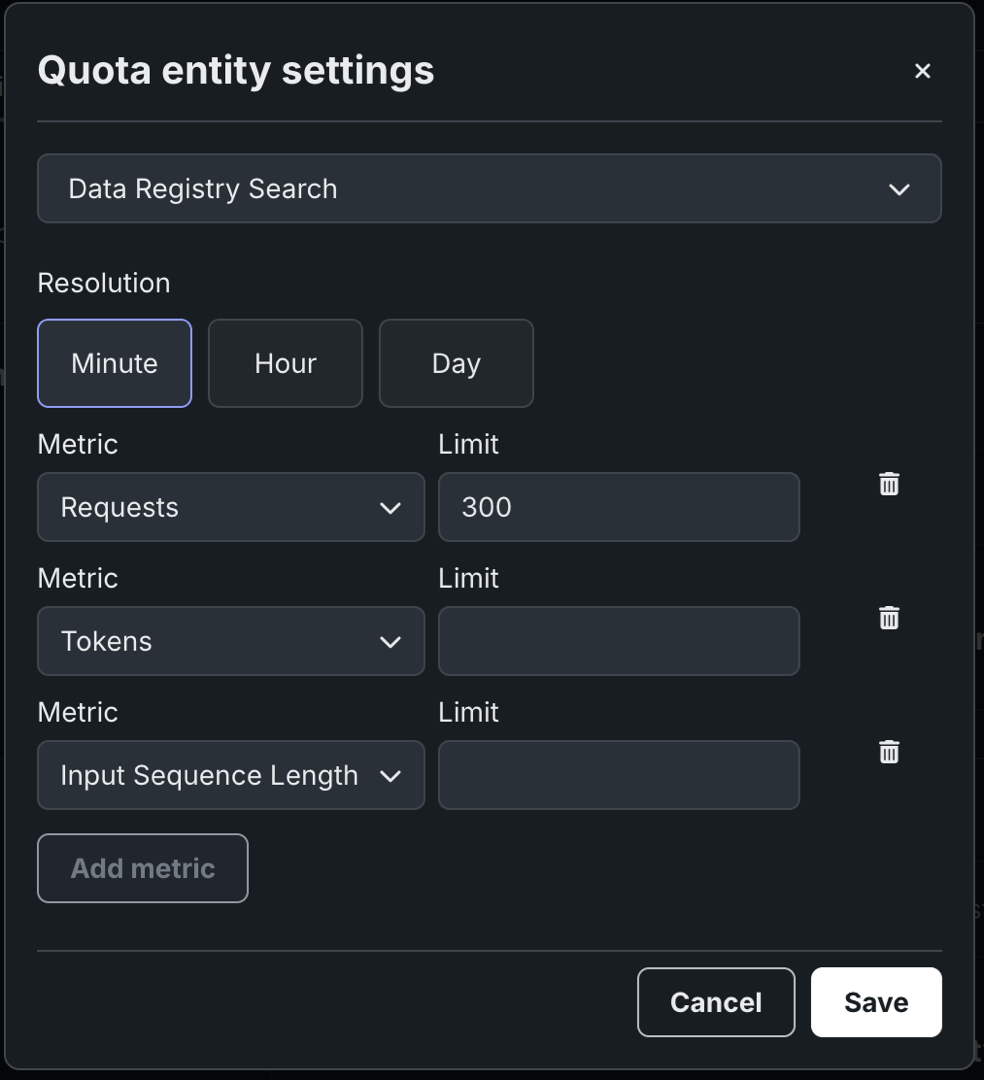
Metric Description Requests Controls the number of prediction requests a deployed model can handle in the selected time window, defined by the resolution setting. The default is 300 requests per minute. Tokens Controls how many tokens a deployed model can process in the selected time window, defined by the resolution setting. This limit includes all types of tokens (input and output). Input sequence length Controls the number of tokens in the prompt or query sent to the model. Concurrent requests Controls the number of prediction requests a deployed model can process at the same time. The default is 50 concurrent requests. -
Perform this process for one or more metrics (depending on your organization's needs) and click Save.
Per-entity exceptions
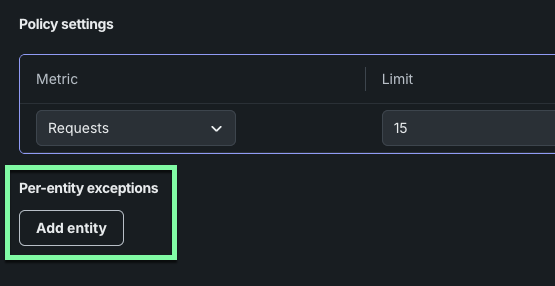
You can make exceptions to rate limits for specific entities.
To configure per-entity exceptions:
-
Click Add entity.
-
Select an entity from the Deployments, Users, or Groups list.
Deployments require their own API key
Rate limit exceptions for a Deployment entity only apply when that deployment calls in using its own agent API key. See Reserved capacity for details.
-
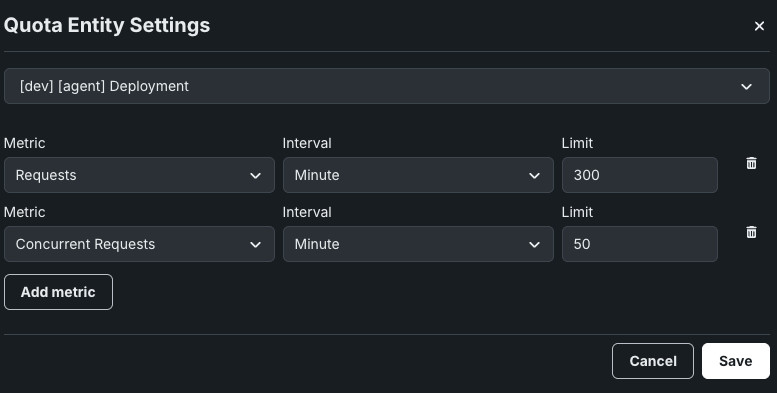
Click Add metric to begin configuration.
-
In the new row, select a Metric, enter a Limit, and choose a time Interval. The selected resolution applies to each metric-based quota defined here. For more information, see Set rate limits.
-
Perform this process for one or more metrics (depending on the entity's required configuration) and click Save.
Next steps
After configuring capacity and rate limits, monitor how the deployment is using its allotted resources.
- Usage: Review prediction volume and actuals processing against the capacity and rate limits you configured.
- Service health: Check response time and error rates to see how the deployment performs under its configured throughput.
- Manage prediction environments: Review the prediction environment hosting this deployment, since infrastructure limits can also affect achievable throughput.