Make batch predictions with Google Cloud storage
The DataRobot Batch Prediction API allows you to take in large datasets and score them against deployed models running on a prediction server. The API also provides flexible options for the intake and output of these files.
In this tutorial, you will learn how to use the DataRobot Python Client package (which calls the Batch Prediction API) to set up a batch prediction job. The job reads an input file for scoring from Google Cloud Storage (GCS) and then writes the results back to GCS.
Requirements
In order to use the code provided in this tutorial, make sure you have the following:
- Python 2.7 or 3.4+
- The DataRobot Python package (version 2.21.0+)
- A DataRobot deployment
- A GCS bucket
- A service account with access to the GCS bucket (detailed below)
- A scoring dataset that lives in the GCS bucket to use with your DataRobot deployment
Configure a GCP service account
Running batch prediction jobs requires the appropriate credentials to read and write to GCS. You must create a service account within the Google Cloud Platform that has access to the GCS bucket, then download a key for the account to use in the batch prediction job.
-
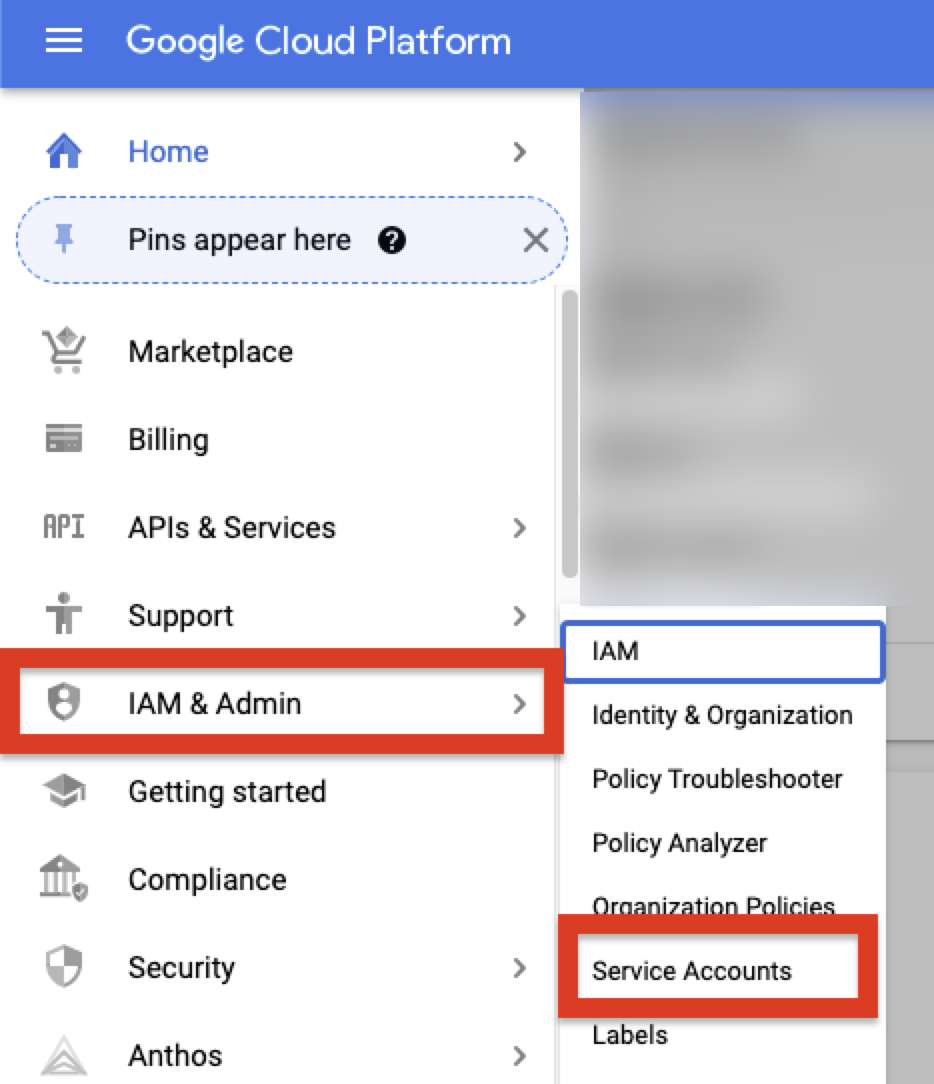
To retrieve these credentials, log into the Google Cloud Platform console and select IAM & Admin > Service Accounts from the sidebar.
-
Click Create Service Account. Provide a name and description for the account, then click Create > Done.
-
On the Service Account page, find the account that you just created, navigate to the Details page, and click Keys.
-
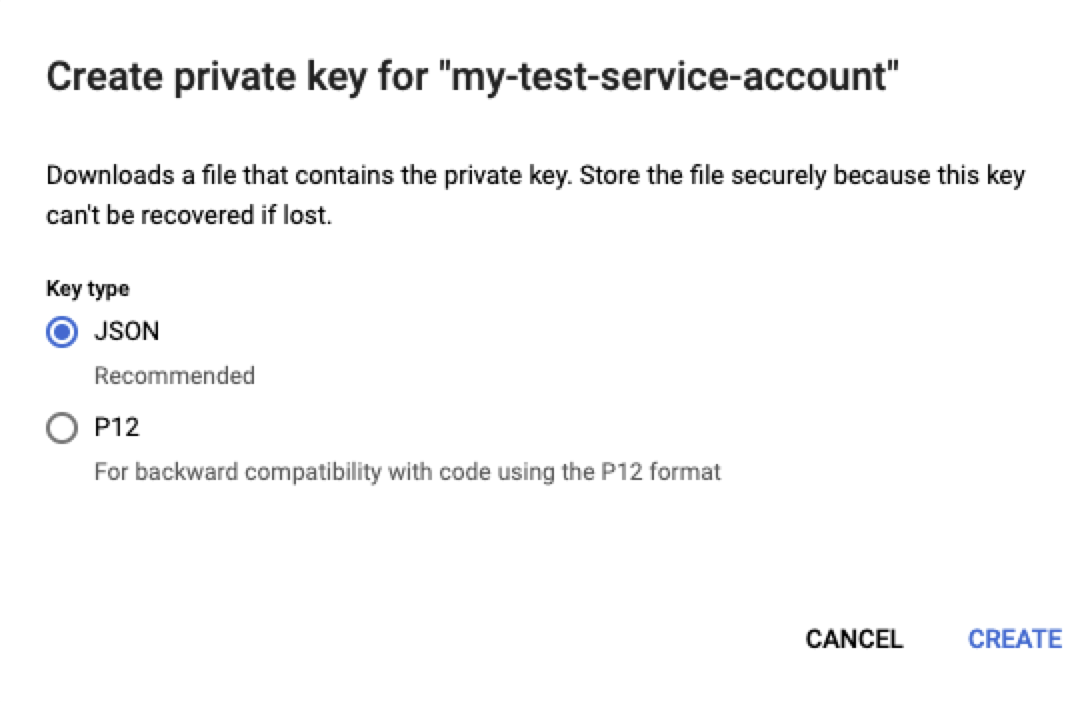
Go to the Add Key menu and click Create new key. Select JSON for the key type and click Create to generate a key and download a JSON file with the information required for the batch prediction job.
-
Return to your GCS bucket and navigate to the Permissions tab. Click Add, enter the email address for the service account user you created, and give the account the “Storage Admin” role. Click Save to confirm the changes. This grants your GCP service account access to the GCS bucket.
Create stored credentials
After downloading the JSON key, use the following code to create a new credential object within DataRobot. The credentials will be used in the batch prediction job to connect to the GCS bucket. Open the JSON key file and copy its contents into the key variable. The DataRobot Python client reads the JSON data as a dictionary and parses it accordingly.
# Set name for GCP credential in DataRobot
DR_CREDENTIAL_NAME = "YOUR GCP DATAROBOT CREDENTIAL NAME"
# Create a GCP-specific Credential
# NOTE: This cannot be done from the UI

# This can be generated and downloaded ready to drop in from within GCP
# 1. Go to IAM & Admin -> Service Accounts
# 2. Search for the Service Account you want to use (or create a new one)
# 3. Go to Keys
# 4. Click Add Key -> Create Key
# 5. Selection JSON key type
# 6. copy the contents of the json file into the gcp_key section of the credential code below
key = {
       "type": "service_account",
       "project_id": "**********",
       "private_key_id": "***************",
       "private_key": "-----BEGIN PRIVATE KEY-----\n********\n-----END PRIVATE KEY-----\n",
       "client_email": "********",
       "client_id": "********",
       "auth_uri": "https://accounts.google.com/o/oauth2/auth",
       "token_uri": "https://oauth2.googleapis.com/token",
       "auth_provider_x509_cert_url": "https://www.googleapis.com/oauth2/v1/certs",
       "client_x509_cert_url": "https://www.googleapis.com/robot/v1/metadata/x509/*********"
   }

credential = dr.Credential.create_gcp(
   name=DR_CREDENTIAL_NAME,
   gcp_key=key
)
# Use this code to look up the ID of the credential object created.
credential_id = None
for cred in dr.Credential.list():
   if cred.name == DR_CREDENTIAL_NAME:
       credential_id = cred.credential_id
       break
print(credential_id)
Run the prediction job
With a credential object created, you can now configure the batch prediction job. Set the intake_settings and output_settings to the gcp type. Provide both attributes with the URL to the files in GCS that you want to read and write to (the output file does not need to exist already). Additionally, provide the ID of the credential object that was created above. The code below creates and runs the batch prediction job. Once finished, it provides the status of the job. This code also demonstrates how to configure the job to return both Prediction Explanations and passthrough columns for the scoring data.
Note
You can find the deployment ID in the sample code output of the Deployments > Predictions > Prediction API tab (with Interface set to "API Client").
DEPLOYMENT_ID = 'YOUR DEPLOYMENT ID'

# Set GCP Info
GCP_BUCKET_NAME = "YOUR GCS BUCKET NAME"
GCP_INPUT_SCORING_FILE = "YOUR INPUT SCORING FILE NAME"
GCP_OUTPUT_RESULTS_FILE = "YOUR OUTPUT RESULTS FILE NAME"

# Set up the batch prediction job
# Input: Google Cloud Storage
# Output: Google Cloud Storage

job = dr.BatchPredictionJob.score(
   deployment=DEPLOYMENT_ID,
   intake_settings={
       'type': 'gcp',
       'url': "gs://{}/{}".format(GCP_BUCKET_NAME,GCP_INPUT_SCORING_FILE),
       "credential_id": credential_id
   },
   output_settings={
       'type': 'gcp',
       'url': "gs://{}/{}".format(GCP_BUCKET_NAME,GCP_OUTPUT_RESULTS_FILE),
       "credential_id": credential_id
   },
   # If explanations are required, uncomment the line below
   max_explanations=5,

   # If passthrough columns are required, use this line
   passthrough_columns=['column1','column2']
)

job.wait_for_completion()
job.get_status()
When the job completes successfully, you will see the output file in the GCS bucket.