Make Visual AI predictions via the API
This tutorial outlines how to make predictions on Visual AI projects with API calls. To complete this tutorial, you must have trained and deployed a visual AI model.
Takeaways
This tutorial shows how to:
- Configure scripting code for making batch predictions via the API
- Make an API call to get batch predictions for a visual AI model
- Format images to a base64 format
Predictions workflow
-
Prepare your data for Visual AI. Before making predictions, convert the images you want to score to base64 format (the standard format for handling images in API calls). Note that when the model returns prediction results, images will return in base64 format. To convert data, use DataRobot's Python package, described in the guide Preparing binary data for predictions.
-
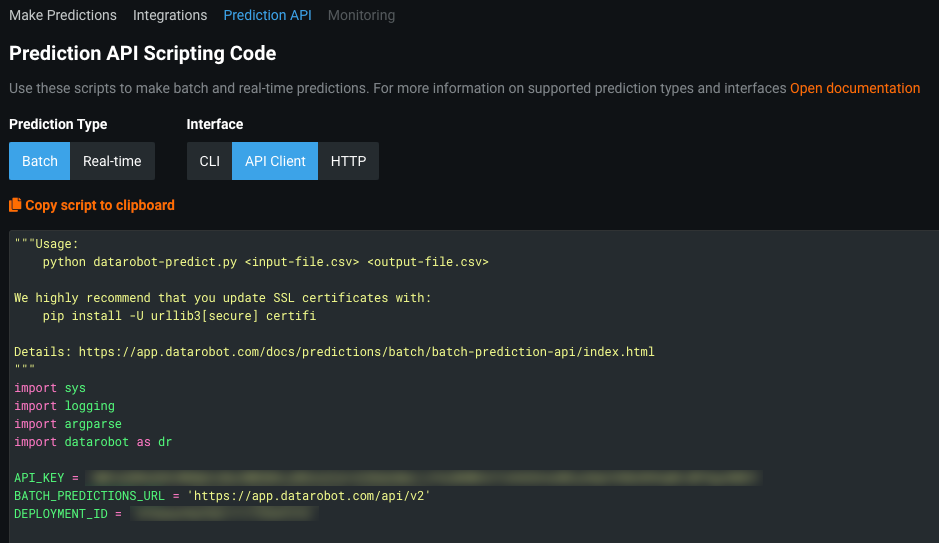
After training and deploying a Visual AI model, navigate to the deployment and access the Predictions > Prediction API tab. This tab provides the scripting code used to make predictions via the API.
-
To configure the scripting code, select Batch as the prediction type and API Client as the interface type.

-
Copy the code and save it as a Python script (e.g.,
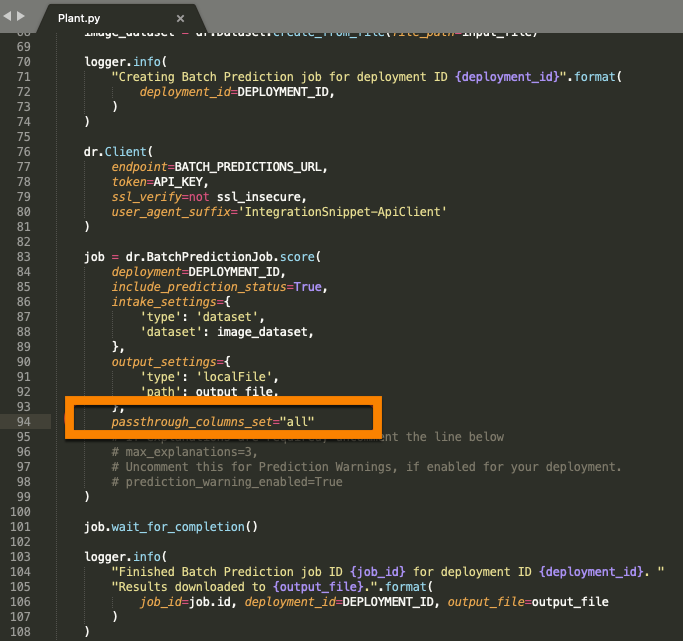
datarobot-predict.py). You can edit the script to incorporate additional steps. For example, add thepassthrough_columns_setargument toBatchPredictionJobif you would like to include columns from the input file (e.g.,image_id) to the output file.
-
Using the scripting code from step two and a base64-converted image file (
InputDataConverted.csv), make an API call to get predictions from the deployed model:python datarobot-predict.py InputDataConverted.csv Predictions.csv -
Access the output file (
Predictions.csv) to view prediction results.

Learn More
Additional tools
Reference the DataRobot Community GitHub pages for data prep tools, including a script to help with the base64 conversion process. Log in to GitHub before clicking this link.
For more information on the scripting code used in this tutorial, refer to the Python Package documentation.
Multiclass example
For the multiclass classification problem's prediction results in step 6, note that the prediction output file includes the probability of the image falling under each class, the class name with the highest probability, and all the other optional columns requested from the Python scoring script (such as prediction_status and image_id).