Notification channels and policies
Although notifications are visible to all users, their configuration is limited to system and organization admins with permission to manage policies.
-
System-level admins are exclusive to Self-Managed AI Platform users.
-
Organization admins are exclusive to managed AI Platform users.
This page describes how to configure various webhook, email, and Slack elements.
For notification channels, you can:
- Create a notification channel.
- Edit a notification channel.
- View notification logs.
- Delete a notification channel.
For notification policies, you can:
- Create a notification policy.
- Edit a notification policy.
- Enable or disable a notification policy.
- Delete a notification policy.
Before proceeding, review the considerations.
Create a channel
Notification channels are mechanisms for delivering notifications created by admins. DataRobot supports email, webhook, and Slack notifications. You may want to set up several channels for each type of notification; for example, a webhook with a URL for deployment-related events, and a webhook for all project-related events.
To create a notification channel:
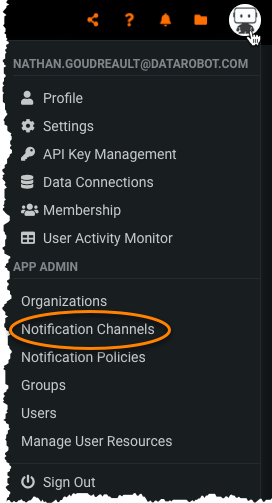
Click on your user icon and navigate to the Notification Channels dashboard. This page is also accessible from the app administrator page.
Select Add channel. Before proceeding, select the channel type: webhook, email, or Slack. Then, fill out the corresponding fields.
Add a webhook channel
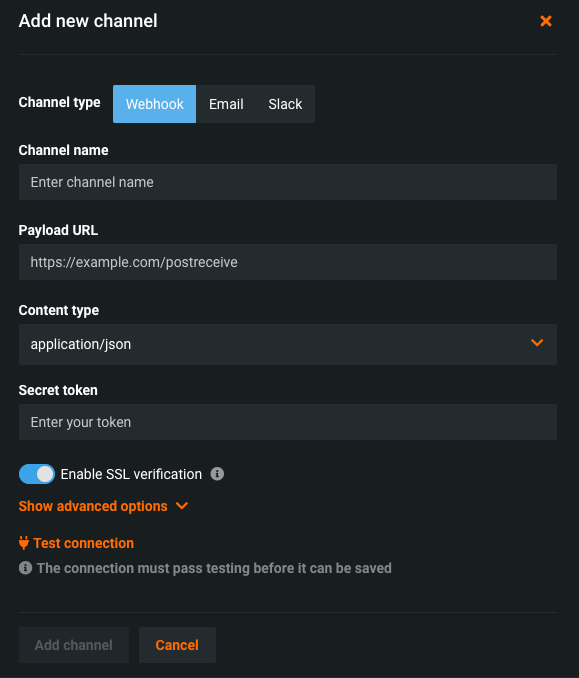
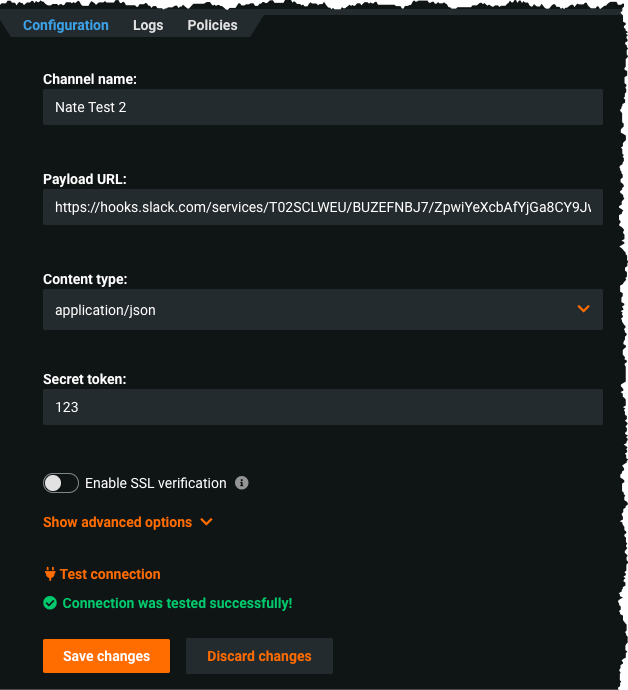
A dialog box prompts you to provide information about the new webhook channel.
| Field | Description |
|---|---|
| Channel name | The name of the notification channel being added. |
| Payload URL | The URL of the server that will receive the webhook POST requests. For example: http://localhost:3527/payload |
| Content type | Method for serializing the payload. Webhooks can be sent as different content types: json delivers the JSON payload directly as the body of the POST request form sends the JSON payload as a form parameter called payload. |
| Secret token | A hashed secret token used to secure the connection of the webhook. It ensures that POST requests sent to the payload URL are from DataRobot. |
| Enable SSL verification | Toggle on for DataRobot to validate SSL certificates against a certificate authority. Toggle off to allow unvalidated (or “self-signed”) certificates. |
Note that these settings can be configured at a later time after the channel is saved.
Select Show advanced options to add a custom header. Custom headers allow you to describe the event type that triggered the webhook delivery, provide a way to identify the delivery, and more. Select Add header and provide a name and value for the header you want to add.
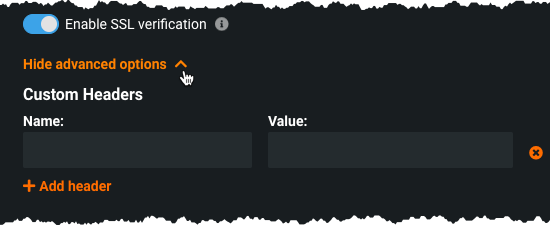
For example, you can use a custom header to detail a specific dataset with loan information being shared. The header would be formatted as:
loan-dataset-shared: 1
When your fields are completed, click the Test connection link. DataRobot tests the webhook connection and allows you to view the results before saving the completed fields. For the connection test, the body of the POST serves as the event template merged with placeholder values; you are unable to modify this content. The webhook will not be saved until it is successfully called in the test.
When you have completed the required fields and passed the connection test, click Add channel. Your channel is available for use in the Notification Channels dashboard.
Secret tokens
Secret tokens help verify that notification requests are authentic and coming from DataRobot. To use secret tokens for your notification channel:
- Create a secret key that will be known only to DataRobot and the client-side (where you need to make sure notifications are coming from DataRobot).
- Add the created token to your notification channel configuration in DataRobot.
- Implement additional logic on the client-side to implement HMAC digest creation using the SHA-1 hash function and the digest function (
hexdigest()if you use python) that returns hexadecimal digits as a result. - When a notification comes in, the new algorithm takes the secret token and the content of the received message, and passes them to the HMAC digest method.
- Compare the result of the digest method with the
DR-Signatureheader that comes with the notification. It should be done with the recommended function of HMAC (compare_digest()if you use Python) instead of standard boolean operators to reduce the vulnerability to timing attacks. If they match, that means the notification was sent by DataRobot.
Example
If you use Python, you can use the hmac module and the following code example:
import hmac
import hashlib

hexdigest = hmac.new(string_to_bytes(secret_token), string_to_bytes(msg), hashlib.sha1).hexdigest()
result = hmac.compare_digest(hexdigest, dr_signature):
You must convert secret_token and msg to bytes before using hmac.new.
Add an email channel
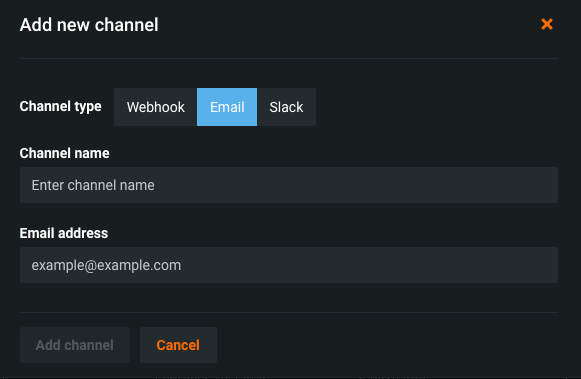
Select the Email tab and a dialog box prompts you to provide information about the new email channel.
| Field | Description |
|---|---|
| Channel name | The name of the notification channel being added. |
| Email address | The email address that receives notifications. Only one email address can be entered into this field. If you need to send notifications to multiple emails, you must set up separate notification channels for each address. |
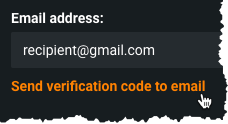
You must verify the recipient email address. Click Send verification code to email.
After receiving the email with the verification code, enter it in the corresponding field and click Verify.
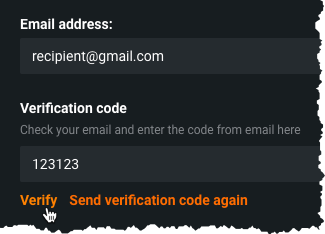
When you have completed the required fields and verified the email address, click Add channel. Your channel is available for use in the Notification Channels dashboard.
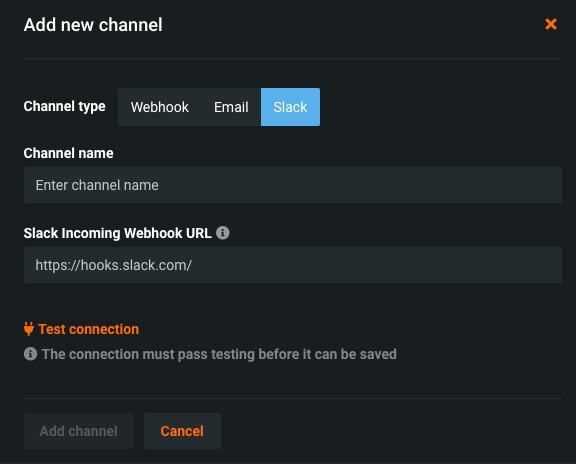
Add a Slack channel
Select the Slack tab. A dialog box prompts you to provide information about the new Slack notification channel.
| Field | Description |
|---|---|
| Channel name | The name of the notification channel being added. |
| Slack Incoming Webhook URL | A URL generated by Slack, found on Slack's workspace settings page, that DataRobot uses to send notifications to a specific workspace. On Slack's workplace settings, indicate a Slack app and a Slack channel where DataRobot will send notifications. Reference the Slack documentation for more information. |
When your fields are completed, click the Test connection link. DataRobot tests the Slack workspace connection and allows you to view the results before saving the completed fields. If configured successfully, DataRobot delivers a Slack notification (connection test) to the channel you configured on the Slack workplace settings page.. The channel does not save until the connection test successfully passes. If the test fails, verify that the Webhook URL is correct and verify the Slack workspace settings.
When the connection test notification is successful, click Add channel. Your channel is available for use in the Notification Channels dashboard.
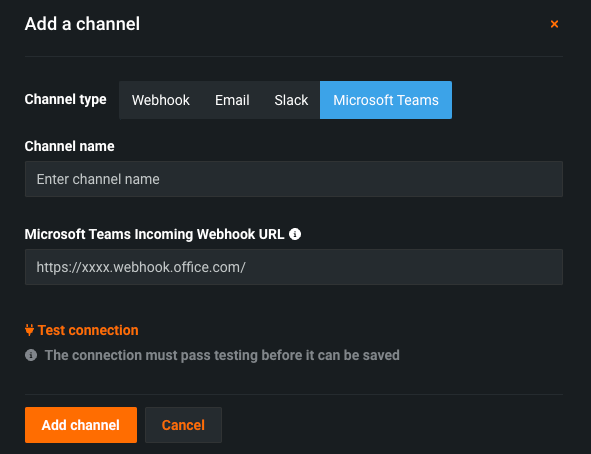
Add a Microsoft Teams channel
Select the Microsoft Teams tab. A dialog box prompts you to provide information about the new Microsoft Teams notification channel.
| Field | Description |
|---|---|
| Channel name | A display name for the notification channel being added. |
| Microsoft Teams Incoming Webhook URL | A URL generated by Microsoft Teams, found on the Microsoft Teams channel settings page. DataRobot uses the URL to send notifications to a specific workspace. On the Microsoft Teams channel settings page, indicate an Incoming Webhook app and a Webhook name to where DataRobot will send notifications. Reference the Microsoft Teams documentation for more information. |
When your fields are completed, click the Test connection link. DataRobot tests the Microsoft Teams workspace connection and allows you to view the results before saving the completed fields. If configured successfully, DataRobot delivers a notification (connection test) to the channel you configured on the Microsoft Teams channel settings page. The channel does not save until the connection test successfully passes. If the test fails, verify that the Webhook URL is correct and verify the Teams channel settings.
When the connection test notification is successful, click Add channel. Your channel is available for use in the Notification Channels dashboard.
Edit a channel
You can edit the fields for an existing channel by selecting it and navigating to the Configuration tab. Make the desired changes and either retest your connection (for webhook notifications) or verify the new email address (for email notifications). When your test passes, click Save Changes.
View notification logs
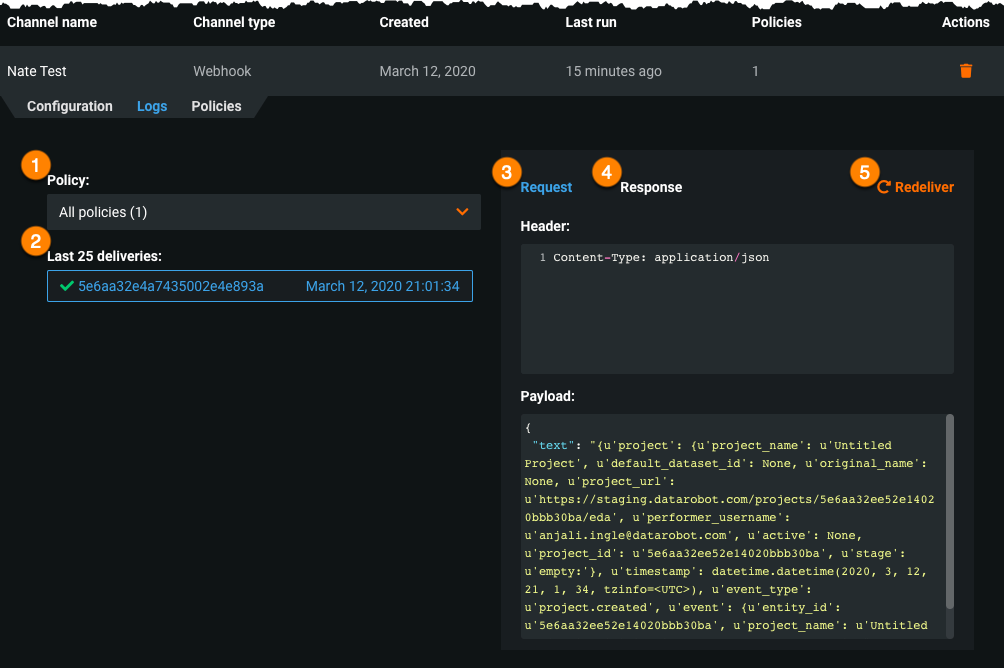
Notification logs allow you to view the status of any system using a specific webhook, the number of times the system transmitted an event, and whether the transmission was successful. Notification logs are essential for debugging webhooks. Note that notification logs are not available for email notification channels. The notification logs list the 25 most recent trigger events with their send date and time. Logs also include a copy of the HTTP request, the response code, and time to delivery.
You can view notification logs for a channel by selecting it and navigating to the Logs tab. This tab lists every policy using the channel (1), the last 25 notification deliveries (2), and the header and payload for requests (3) and responses (4). If you have a failed delivery, you can choose to redeliver that notification (5).
Delete a channel
If you no longer wish to use a notification channel, you can remove it from the dashboard. Locate the channel you want to remove and select the trash can icon ![]() to delete it.
to delete it.
Create a notification policy
A notification policy is a group of one or more alert conditions. A policy has two settings that apply to all of its conditions—incident preference and notification channels. Order of activity is as follows:
- Create a notification channel.
- Create a notification policy.
- Add policy conditions.
Policies can be organized by:
-
Architecture: Organizational-based policy structure. For example, Production website, Staging website, Production databases.
-
Teams: Team-based policy structure. For example, Team: Data Scientists, Team: IT Ops, Team: Model Validators.
-
Individuals: Notification policies set up for specific individuals. This configuration is useful for when users want to personally track a particular resource or metric.
To create a notification policy:
Click on your user icon and navigate to the Notification Channels dashboard. This page is also accessible from the app administrator page.

Select Add policy. A dialog box prompts you to provide information to configure the new policy.
Choose a trigger
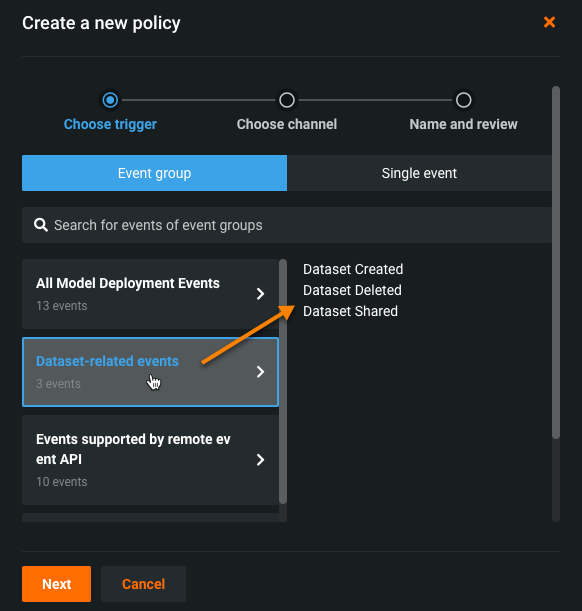
Choose a single event or a group of events that will trigger a notification.
- The Event group tab displays groups of events organized by type. Select a group if you want the notification policy to be triggered by any of the events that belong to it. For example, the event group "Dataset-related events" consists of dataset creation, dataset sharing, and dataset deletion events.
- The Single event tab displays every individual event available as a trigger for the notification policy. You can only select one.
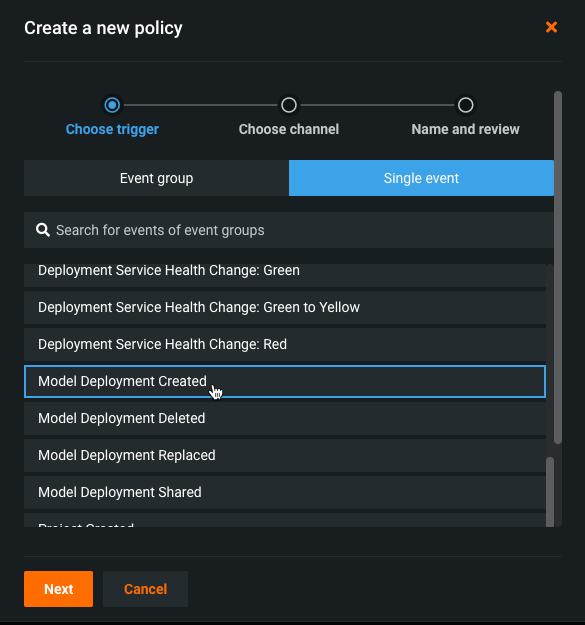
Once you have selected the event group or single event you wish to use to configure the notification policy, click Next.
Choose a channel
Select the notification channel for the policy to use from the dropdown. All notification channels that have been created or shared with you are available for selection (1). You can use the search bar (2) to find specific channels.
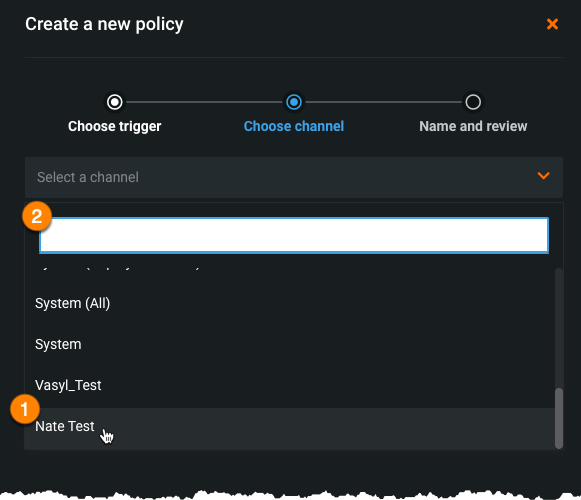
When you have selected the channel you want to use, click Next.
Name and review a policy
Review the selected trigger and channel for the policy you are creating. If you want to go back and edit either of the selections, click the edit icon (![]() ) next to each selection. Then provide a name for your new policy.
) next to each selection. Then provide a name for your new policy.
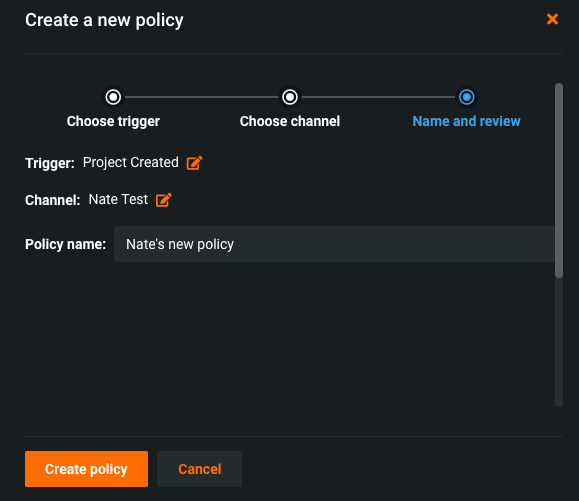
When you are satisfied with your policy configuration, click Create policy. Your policy is available for use in the Notification Channels dashboard.
Edit a policy
You can edit an existing policy to re-configure the trigger and channel it uses, or to rename it. Locate the policy in the Notification Policies dashboard, and select the edit icon (![]() ). You can make any desired edits from the dialog box that appears.
). You can make any desired edits from the dialog box that appears.
Enable or disable a policy
Policies can be enabled or disabled at any time, allowing you to prevent notification fatigue, or bring attention to additional events. Locate the policy in the Notification Policies dashboard. Select the play icon to enable a policy and the pause icon to disable it.
Delete a policy
If you no longer wish to use a policy, you can remove it from the dashboard. Locate the policy you want to remove and select the trash can icon ![]() to delete it.
to delete it.