Manage projects
Each DataRobot project includes a dataset, which is the source used for training, and any models built from that dataset. Use the Projects dropdown to view information about the current project, to quickly switch between recently accessed projects, and to view the Manage Projects page, which provides a complete listing of projects and tools to work with them.
Projects dropdown
When you click the folder icon, DataRobot displays a dropdown of the 10 most recently accessed projects.
Listed projects are either active or inactive. An active project is either the current project or any project that has models in progress. Inactive projects have no workers assigned to them (and you cannot change the number of workers for inactive models from this interface). No project status is reported. DataRobot displays up to nine inactive projects (based on most recent activity) in the Projects dropdown; to see a complete list of inactive projects, click the Manage Projects link. Note that projects that failed to complete are not included in the Manage Projects dropdown but are included in the full inventory.
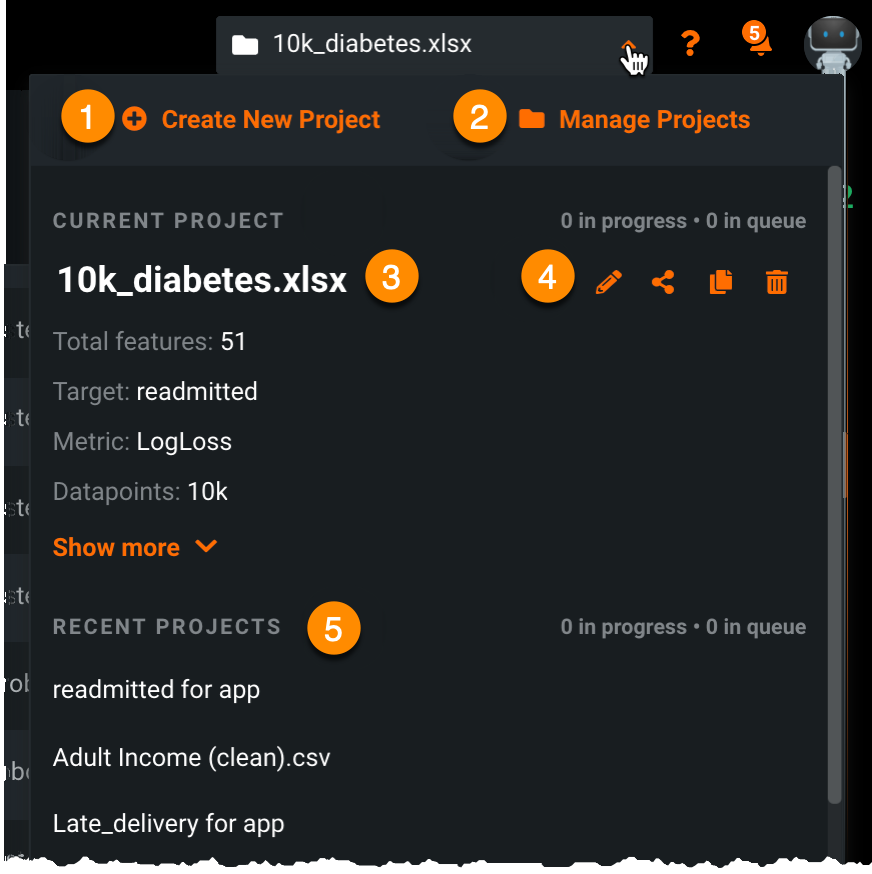
The Projects dropdown provides the following information, as well as worker usage information:
| Component | Description | |
|---|---|---|
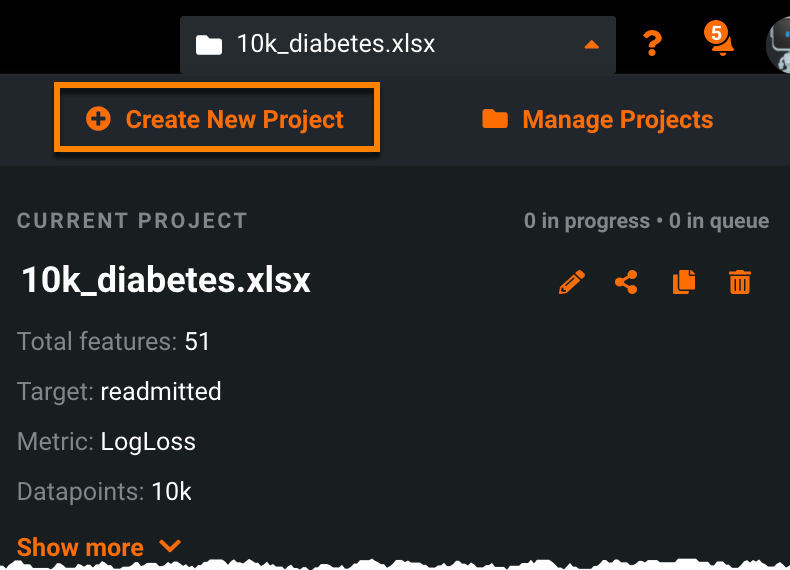
| 1 | Create New Project | Opens the data ingest page, the first step in building a DataRobot project. |
| 2 | Manage Projects control center | Opens the projects inventory page, which lists all projects created by or shared with the logged in user. By default, projects are listed by creation date, but click a column header to change the display. From this page you can rename, share, copy, and tag projects, as well as unlock a project's holdout. |
| 3 | Current Project | Displays details for the current project. This is the project with content displayed on the Data page and Leaderboard, as applicable. The dropdown displays summary information about the current project. |
| 4 | Edit, share, duplicate, and delete | Provides input for editing the project name in place, sharing the project with others in your organization, duplicating a project, or deleting a project. |
| 5 | Recent Projects | Lists the last nine most recently visited projects. Clicking a project makes it the current project. |
Project summaries
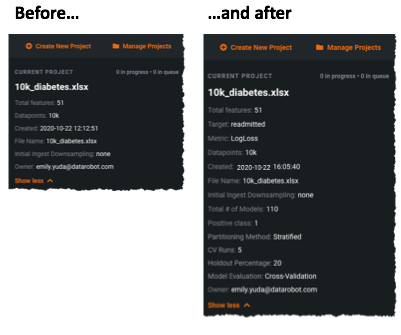
The project summary report is useful for providing an at-a-glance picture of the current project, including:
- General and dataset information (the number of features, data points, and models built).
- Project settings.
- Model statistics.
- User and permissions settings.
Use the Show more or Show less arrows to control the display.
Prior to building models, the summary only reports general information about the project, dataset, and user. After you have built models for a project, the summary reports additional information, including project settings and statistics.
Control worker usage from the Projects dropdown
The project dropdown reports the number of workers, both in use and available, for the:
- Current project.
- Most recent projects.
- Total across all projects.
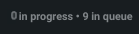
When there is no activity, you will see:

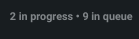
As EDA2 completes, you can see status as models queue:
And as they start to build:
If you were to start a project build and then switch to another project—making the destination project current and the building project "recent"—you may see something like the following. The controls allow you to increase or decrease the number of workers assigned to the project and pause model building:
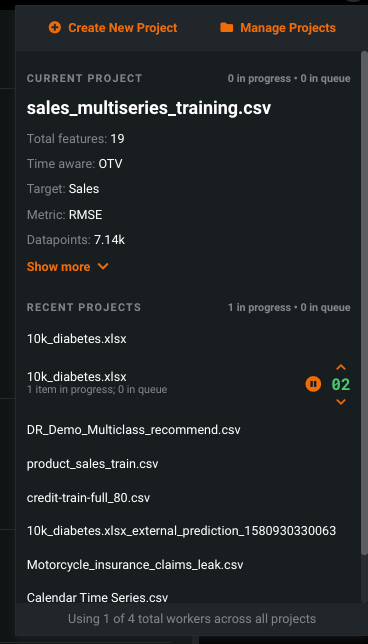
The bottom of the dropdown interface provides a worker summary:
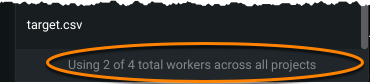
The summary indicates the number of workers DataRobot is using across all active projects. The values displayed report:
- The number of workers actually being used by (not just assigned to) your models in progress.
- The total number of workers you are configured for, across all projects.
Create a new project
There are two ways to create a new DataRobot project from Manage Projects. Click the DataRobot logo in the upper left corner and then the folder icon in the upper right corner to open the Projects dropdown:
-
Click the Create New Project link.
-
Click Manage Projects link and click the Create New Project link.

Once the data ingest page is open, you can either drag a data file onto it or select the appropriate button to import from an external data source, a URL, HDFS, or a local file.
Manage Projects control center
The project management control center provides many new features to help identify and classify projects. This is particularly useful when you have many projects that use the same dataset (or datasets with the same name). The new page not only annotates each project with a variety of metadata (dataset name, model type, target, number of models built, and more) but also extends filtering capabilities by allowing you to filter by the newly surfaced metadata.
Access the control center by clicking the Manage Projects link from the Projects dropdown:
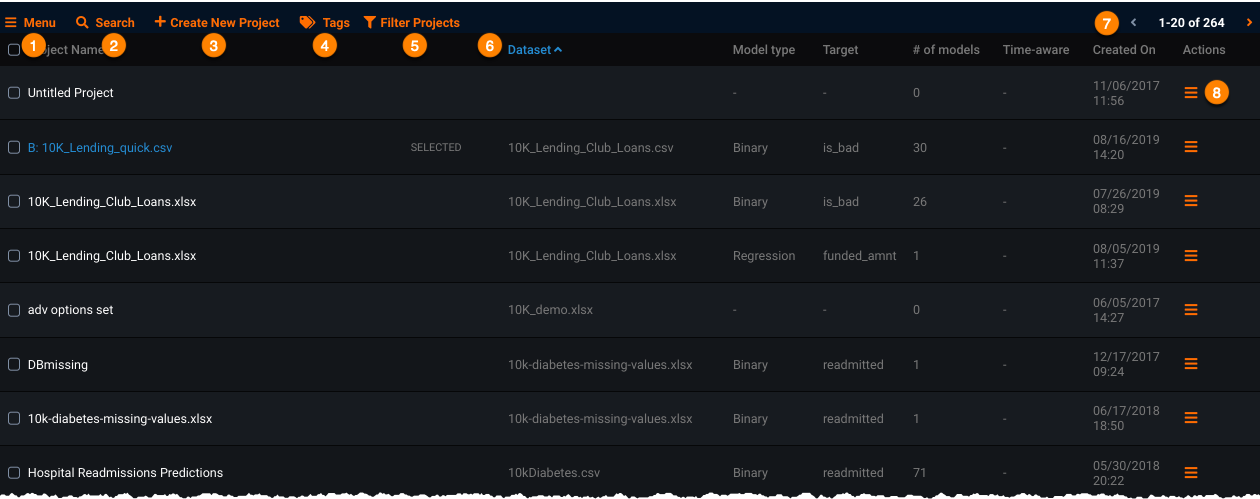
The following table lists the functions available from the Manage Projects control center.
| Component | Description |
|---|---|
| Batch delete or share (1) | Delete or share multiple projects at once via the Menu dropdown. |
| Search (2) | Search the page for text matching the entered text string. DataRobot redisplays the page showing only those projects with metadata matching the string. |
| Create New Project (3) | Open the data ingest page. From there you can drag a data file onto the page, import from an external data source, URL, HDFS, or a local file, or access the AI Catalog to start a project. |
| Tags (4) | Search, create, or filter by tags. |
| Filter Projects (5) | Filter project display by job status, model type, time-aware-status, and/or owner. |
| Sort (6) | Click the Dataset header to sort project listings alphabetically based on the header. Click Created On to sort by time stamp. Click again to reverse the order. By default, projects are listed by creation date. |
| Page View (7) | Click the right and left arrows to page through the list of projects. |
| Actions Menu (8) | Take action on an individual project. |
Batch deletion and sharing
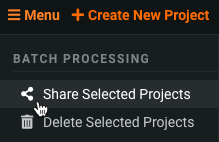
Simplify batch deletion and sharing using the Menu dropdown options. You can:
- Individually select projects by checking the box to the left of the project name.
- Use the menu to select or deselect all projects.
- Click in the Project Name box to select all, or deselect all selected, projects.
Once projects are selected, use the menu dropdown to delete or share the selected projects:
Alternatively, you can use the Delete or Share methods in the Actions menu to modify projects individually.
Warning
On the managed AI Platform, deleted projects cannot be recovered. For Self-Managed AI Platform deployments, if you delete a project it can only be recovered by the system administrator.
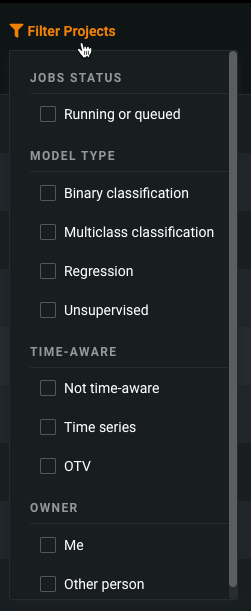
Filter Projects
Use the Filter Projects link to modify the listing so that it only shows those projects matching the selected criteria. You can apply multiple filters.
The following table describes the filter options:
| Filter | When selected... | When none selected |
|---|---|---|
| JOBS STATUS | Displays running or queued. Helps to identify which projects are using worker resources. | Displays running, queued, and completed projects. |
| MODEL TYPE | Displays only the selected model type(s). | Displays regression, binary classification, multiclass classification, and unsupervised models. |
| TIME-AWARE | Displays only projects containing models of the selected (mutually exclusive) type. | Displays non-time-aware, time series, and out-of-time validation (OTV) models. |
Tag a project
You can assign a tag name and color to specific projects so that you can later filter your project list. To assign a tag:
-
From the project listing, select all projects you want tagged together by checking the box to the left of the project name.
-
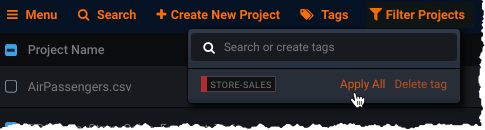
From the top bar, select Tags:

-
Enter a tag name and select a color, then click the plus sign or press Enter.
-
Mouse over the tag name and then click Apply All.
Once assigned, you can filter the projects list by tag name. Alternatively, filter by projects with no tags.
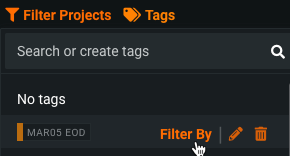
The new tag displays next to the project name in the project list. To remove tags, select Tags and select the trash can icon (![]() ):
):
- Remove: Removes the tag from the selected model.
- Remove All: Removes the tag from all selected models.
- Delete tag: Deletes the configured tag from the project and all tagged models.
To edit a tag's title or color, select the pencil icon (![]() ). After making any changes, click Save.
). After making any changes, click Save.
Project actions menu
The project actions menu provides access to a variety of actions for an individual project.

From the menu you can:
| Menu item | Description |
|---|---|
| Edit Info | Opens an editing box for the current project name, allowing you to enter a new name (up to a total of 100 characters), provide a description, and manage the associated tags. |
| Duplicate Project | Duplicate the dataset of the original project into a new project. Copying a project is a faster way to work with your dataset as there is no need to re-upload the data. |
| Share Project | Invite other users, user groups, and organizations to view or collaborate on your project(s). |
| Leave Project | Change your role on the project so that you no longer are a participant. DataRobot removes the selected project from your project center inventory. |
| Delete Project | Remove the project from the project control center and make the data unavailable. On the managed AI Platform, deleted projects cannot be recovered. For Self-Managed AI Platform deployments, if you delete a project it can only be recovered by the system administrator. |
Note
Be certain to read and understand the implications of unlocking holdout before answering yes to the Are you sure? prompt.
Duplicate a project
You can duplicate the dataset of a project into a new project as a faster method to work with your data than re-uploading it.
-
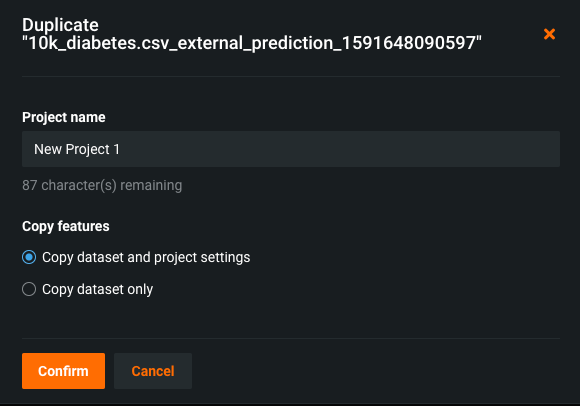
Click the Actions menu and select Duplicate Project.
-
In the resulting dialog, enter a project name and select whether to copy only the dataset or to copy the dataset, the target, and advanced settings and custom feature lists of the original project.
For time-aware projects, duplication also:
- Clones the feature derivation and forecast window values.
- Clones any selected calendars, KA features, and series IDs.
- If cloning a segmented modeling project created from a clustering project, it clones the clustering model package.
- If you used the data prep tool to address irregular time step issues, cloning uses the modified dataset (which is the dataset used for model building in the parent project.)
-
When complete, DataRobot opens to the target selection page so that you can begin the model building process.
See also the AI Catalog for efficient ways to reuse your data.
Share a project
You can invite other users, user groups, and organizations to view or collaborate on your project. When you share a project, DataRobot assigns the default role of User to each selected target. You can change project access roles to the selected targets to control how they can use that project.
-
Click the Actions menu and select Share Project.
-
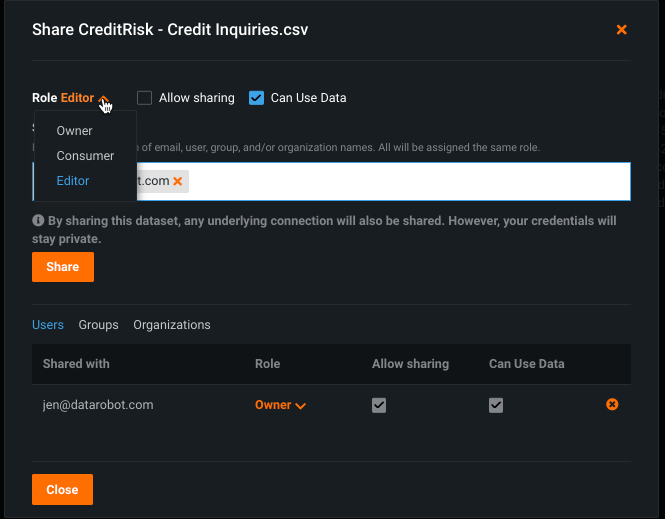
In the resulting dialog, type the name of the user, group, or organization you would like to share the project with. As you type, names with similar characters are displayed for your selection. DataRobot returns names of users (1), user groups (2), and organizations (3) that contain the characters you type.
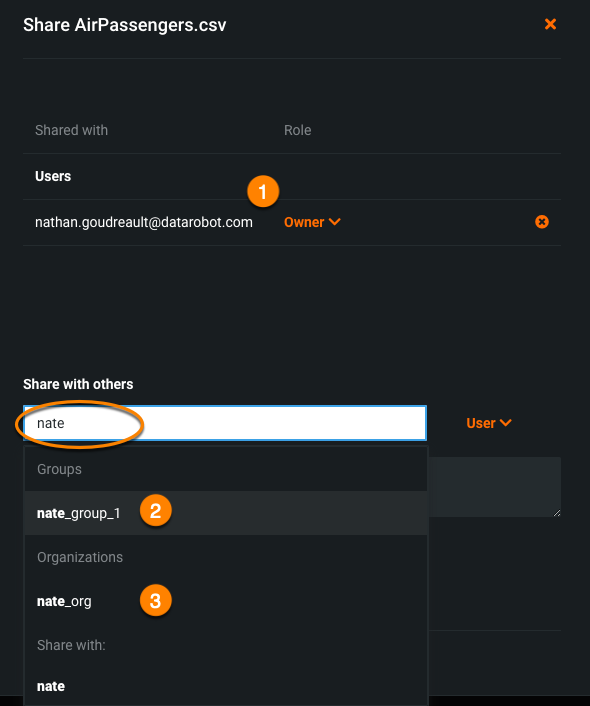
-
Select the users, user groups, and/or organizations to share the project with. If you share with multiple targets at the same time, all will have the same role. (After sharing the project, you can modify the role assignments.)
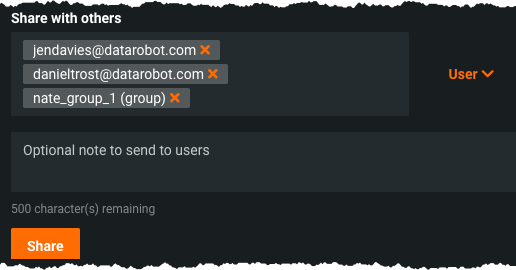
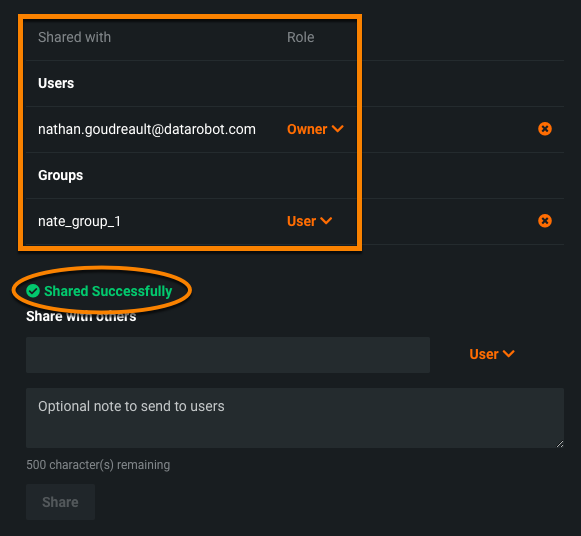
-
Assign a role to the selection (or leave the default) and, optionally, include a custom note with the email invitation. Then click Share. When successful you see the message "Shared Successfully" and the dialog shows all targets for the project.
DataRobot sends email invitations to join the project to any individual users selected; members of user groups or organizations selected can find the shared project in the Manage Projects page.
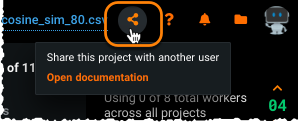
Alternatively, you can share a project by clicking the Share icon (![]() ) in the top menu.
) in the top menu.
Once shared, you can change the role (1) or remove the user from the project (2):
See the role and permissions page for help in determining the best role to assign and to make sure your project role allows sharing.