Manage organizations
Required permission
“Can manage users”
Set an organization for users if you wish to restrict access to workers. See the overview for a description of the organization functionality in DataRobot. Some notes on using organizations:
-
Organization membership is not a requirement for DataRobot users.
-
Users can belong to only one organization at a time; if you add a user to a new organization, they are automatically removed from the existing organization.
-
Assigning a parent organization to a group limits group membership to members of the parent organization (i.e., you are restricted to adding only users who are members of that parent organization).
-
You cannot change a group's parent organization once assigned.
Create organizations
Follow these steps to create an organization:
-
Expand the profile icon located in the upper right and click APP ADMIN > Organizations. The displayed page lists all existing organizations. From here you create and manage organizations.
-
Click Create new organization.
-
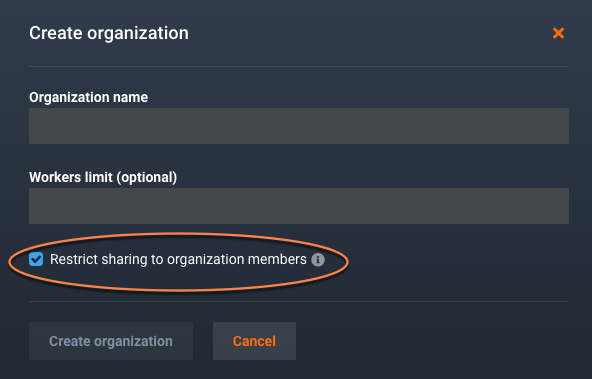
In the displayed dialog, enter a name and the number of workers to assign to the organization.
-
If you want to restrict users in this organization to sharing projects only with other users and groups within this organization, select Restrict sharing to organization members.
-
Click Create Organization. The All Organizations profile lists the new organization.
-
Click an organization to see its profile. In the below image, for example, the new ACME3 organization is allocated a maximum of 14 workers and members of the organization can share projects with users and groups outside of the ACME3 organization.

Note
The worker resource allocation ("Workers limit") is independent from your cluster configuration. To avoid worker resource issues, don’t oversubscribe the physical capacity of the cluster.
Add users to organizations
You can add one or more users to (or remove users from) any defined organization using the Organizations pages. You can add or remove individual users from the User Profile > Membership page.
-
Open the Organizations page and select the organization to which you want to add a user. The profile page for that organization opens.
-
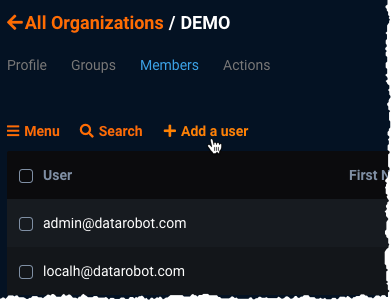
Click Members to list all members of that organization.
-
Click Add a user and from the displayed dialog, start typing the name of a user to add. As you type, DataRobot shows usernames containing those characters.
-
Select the intended user and repeat for each user you want to add. When done, click Add users.
The displayed list shows all members of the organization and information for each, including first name, last name, and status (active/inactive in DataRobot).
Delete organizations
You can only delete an organization once all the members have been removed. Any projects previously shared with the organization (and therefore, to each user in the organization), are no longer shared with those (ex) members. If needed, re-share projects with individual users.
To delete an organization:
-
Expand the profile icon located in the upper right and click APP ADMIN > Manage Organizations. In the displayed list of organizations, check the Total Members column for the organization you want to delete to determine whether there are members assigned it. If the organization has members, you must remove them before you can delete the organization.
-
If the organization has members, do the following:
- Select that organization to open its profile and click Members.
-
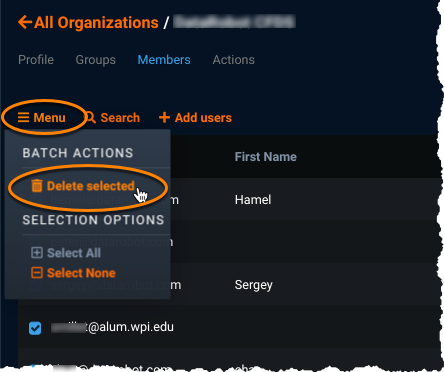
From Menu click Select All, then click Delete selected.
-
In the displayed Confirm Removal window, click Remove members. Removed members are removed from the list of organizations only.
-
When the organization has no members, view the Organizations page and do one of the following:
- If you want to delete a single organization—locate the organization, select the Actions menu, and click Delete organization. (You could also delete the organization from the organization profile, using Actions > Delete.)
- If you want to delete multiple organizations—select the check boxes for those organizations (or select the check box next to the Organization heading), click Menu, and then select Delete selected.
-
In the displayed Confirm Delete window, click Delete organization (or Delete organizations if shown). Deleted organizations are removed from the list of organizations.
Configure organization permissions
You can configure permissions and apply them to all users in an existing organization in addition to managing each user individually. This allows for easier tracking and management of permissions for larger organizations.
Note
Note that a user's effective permissions are the union of those granted to their organization, any user groups they are a member of, and permissions granted to the user directly. A user who is added to an organization obtains all permissions of that organization. A user who is removed from an organization does not maintain any permissions that were granted to them by the organization. However, a user may still have the permissions granted by that organization if a group they belong to also grants those permissions.
-
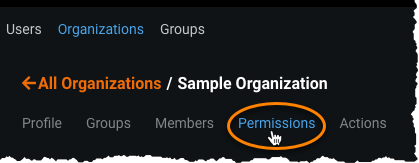
To configure permissions for an organization, select it from the Organizations page and navigate to the Permissions tab.
-
The Permissions tab displays the premium products, optional products, preview features, and admin settings available for configuration for your organization. Select the desired permissions to grant your organization from the list.
-
When you have finished selecting the desired permissions for your organization, click Save Changes.
Once saved, all existing users in your organization and those added to it in the future are granted the configured permissions. A user can view their permissions on the Settings page. Hover over a permission to see what group(s) or organization(s) enabled it.

Configure organization details
Understand restricted sharing
You can use a "restricted sharing" setting to prevent organization members from sharing projects from the organization to users or groups outside of it. This setting does not prevent users outside the organization from sharing projects to the organization. Users outside of a "restricted sharing" organization can share projects with any members and groups.
After creating an organization, you can change its restricted sharing policy from the organization profile. If you set Restrict sharing to organization members after the organization was created, any project sharing that already exists is not affected; making this change only prevents the ability to start new project sharing with users or groups outside of the organization.
Set custom model resource allocation
For DataRobot MLOps users, you can determine the resources allocated for each custom inference model within an organization. Configuring these resources facilitates smooth deployment and minimizes potential environment errors in production.
To manage these resources for an organization, navigate to the organization's Profile page and find Custom model resource allocation settings. Configure the fields:
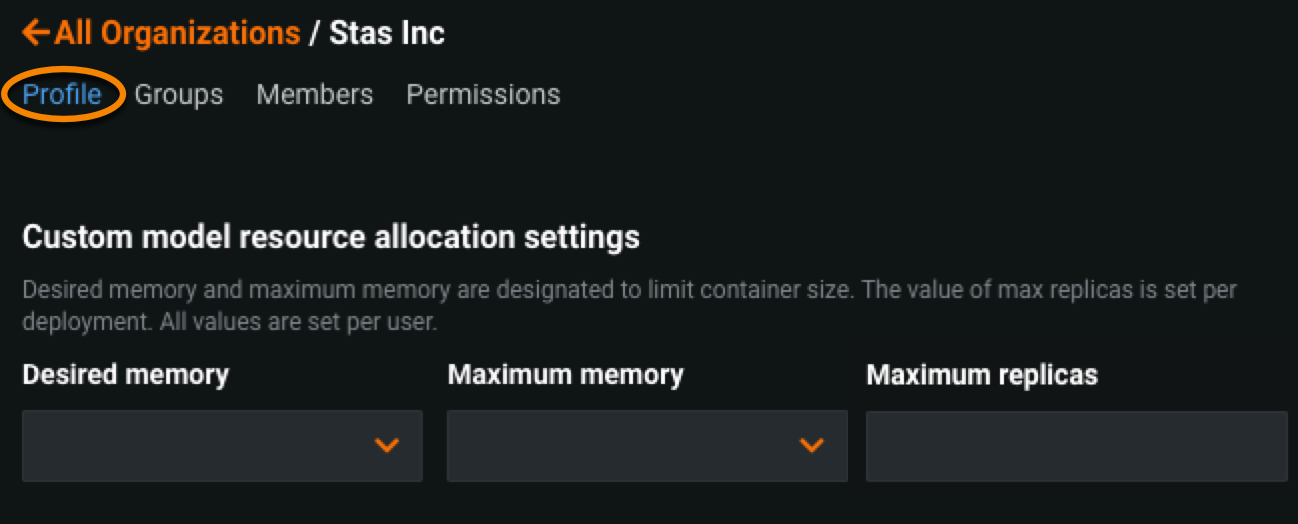
| Resource | Description |
|---|---|
| Desired memory | Determines the minimum reserved memory for the Docker container used by the custom inference model. |
| Maximum memory | Determines the maximum amount of memory that may be allocated for a custom inference model. Note that if a model allocates more than the configured maximum memory value, it is evicted by the system. If this occurs during testing, the test is marked as a failure. If this occurs when the model is deployed, the model is automatically launched again by kubernetes. |
| Maximum replicas | Sets the maximum number of replicas executed in parallel to balance workloads when a custom model is running. |
When you have fully configured the resource settings, click Save.
Set execution environment limits
The execution environment limit allows you to control how many custom model environments a user can add to the Custom Model Workshop. In addition, the execution environment version limit allows you to control how many versions a user can add to each of those environments. These limits can be:
-
Directly applied to the user: Set in a user's permissions. Overrides the limits set in the group and organization permissions.
-
Inherited from a user group: Set in the permissions of the group a user belongs to. Overrides the limits set in organization permissions.
-
Inherited from an organization: Set in the permissions of the organization a user belongs to.
If the environment or environment version limits are defined for an organization or a group, the users within that organization or group inherit the defined limits. However, a more specific definition of those limits at a lower level takes precedence. For example, an organization may have the environment limits set to 5, a group to 4, and the user to 3; in this scenario, the final limit for the individual user is 3.
For more information on adding custom model execution environments, see the Custom model environments documentation.
To manage the execution environment limits in the platform settings:
-
Click your profile avatar (or the default avatar
 ) in the upper-right corner of DataRobot, and then, under APP ADMIN, click Organizations.
 -
To configure permissions for an organization, select it from the Organizations page and then click Permissions.
Important
If you access the Members tab to set these permissions, you are setting the permissions on an individual user level, not the organization level.
-
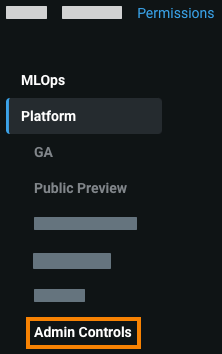
On the Permissions tab, click Platform, and then click Admin Controls.
-
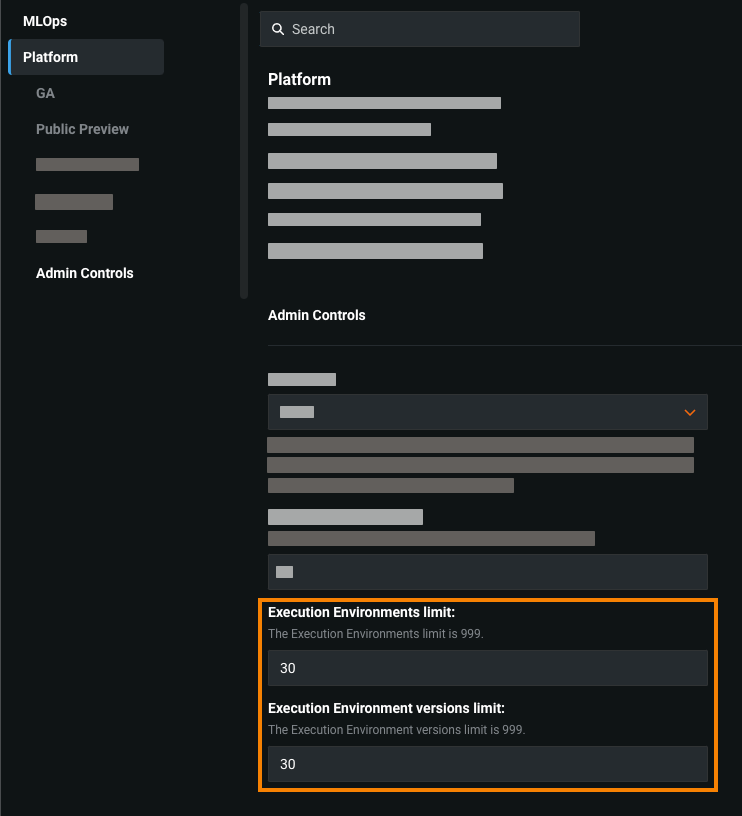
Under Admin Controls, set either or both of the following settings:
-
Execution Environments limit: The maximum number of custom model execution environments a user in this organization can add. This limit setting can't exceed 999.
-
Execution Environments versions limit: The maximum number of versions a user in this organization can add to each custom model execution environment. This limit setting can't exceed 999.
-
-
Click Save changes.
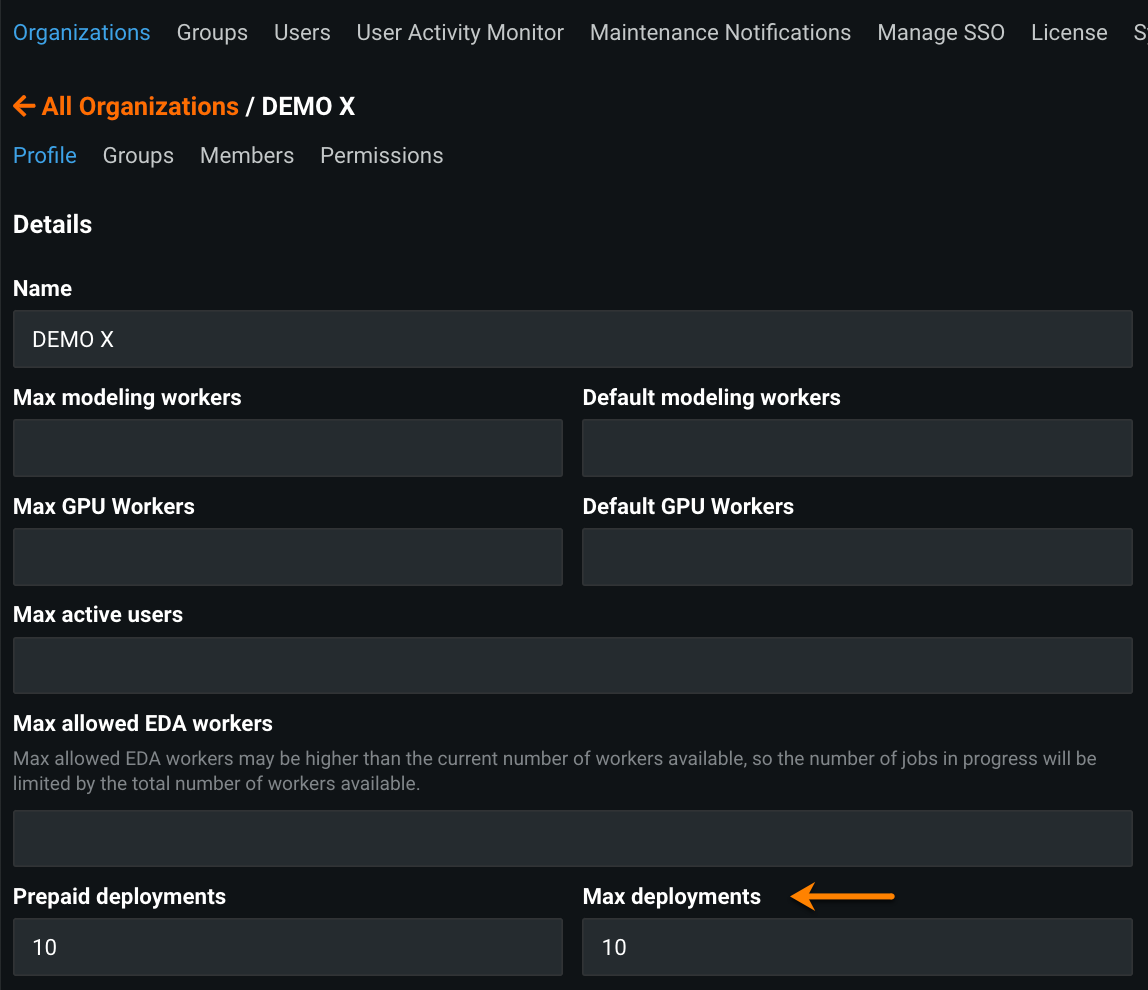
Set deployment limits
For DataRobot MLOps users, you can determine the maximum number of active deployments users are allotted within an organization.
To manage these resources for an organization:
- Navigate to the organization's Profile page and locate Max deployments.
-
In the field, enter the number of active deployments allotted for users in the organization. This number cannot exceed the number listed under Prepaid deployments.