Developer quickstart
Use this page to get started with the DataRobot CLI, Python API client, REST API, and Agent Assist. The following sections include ways to supply credentials, install these tools, and a hands-on modeling lab that trains, deploys, and scores predictions.
| Tool | What it is | Best for |
|---|---|---|
| Python API client and REST API | Ways to programmatically interact with DataRobot. | Scripting, notebooks, CI pipelines, custom pipelines |
DataRobot CLI (dr) |
An open source tool for working with DataRobot from your terminal. | Local development, templates, dr run, dr task, agentic projects |
Agent Assist (dr assist) |
An interactive AI assistant optimized for the development of AI agents. | Designing, coding, and deploying agents |
Prerequisites
You need the following on your machine, depending on the tools you want to use:
- Python 3.7 or later for the
datarobotpackage (Python 3.10+ is required if you also use Agent Assist or related agentic tooling) - A DataRobot account
pip
curljq(optional, for readable JSON in examples)- A DataRobot account
- DataRobot account: Access to a DataRobot instance (cloud or Self-Managed). If you don't have an account, sign up at DataRobot or contact your organization's DataRobot administrator.
- Git: For cloning templates (version 2.0+). Install Git from git-scm.com if not already installed. Verify installation:
git --version - Task: For running tasks. Install Task from taskfile.dev if not already installed. Verify installation:
task --version - Terminal: For CLI access.
- macOS/Linux: Use Terminal, iTerm2, or your preferred terminal emulator.
- Windows: Use PowerShell, Command Prompt, or Windows Terminal.
- Operating system: macOS or Linux (Windows requires WSL or another supported environment)
- Python: 3.10 or higher
| Tool | Version | Description | Installation |
|---|---|---|---|
| dr-cli | >= 0.2.50 | The DataRobot CLI. | dr-cli installation |
| git | >= 2.30.0 | Version control. | git installation |
| uv | >= 0.9.0 | Python package manager. | uv installation |
| Pulumi | >= 3.163.0 | Infrastructure as Code. | Pulumi installation |
| Taskfile | >= 3.43.3 | Task runner. | Taskfile installation |
| Node.js | >= 24 | JavaScript runtime (for example, for template frontend). | Node.js installation |
On macOS, several tools can be installed at once:
brew install datarobot-oss/taps/dr-cli uv pulumi/tap/pulumi go-task node git python
Configure your environment
This section is the long-form reference for keys, regions, and credentials. You can work through it in parallel with Install methods if you are bringing up the CLI and Python packages first. You will use what you set here in Verify your setup.
Configure API keys (your identity on the platform), the regional API endpoint (where your tenant lives), and how your tools read credentials (drconfig.yaml, environment variables, or explicit code).
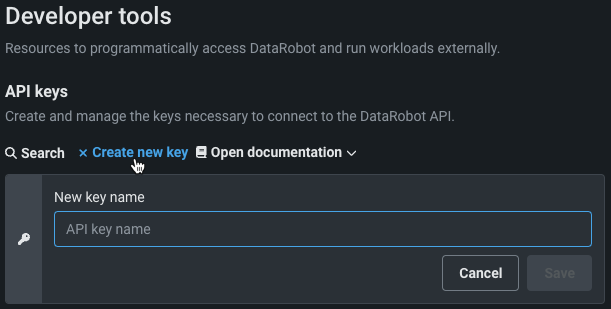
Create a DataRobot API key
For local scripts, notebooks, and general API access, create a key on the Personal API keys tab. In the DataRobot UI, open the user menu and choose API keys and tools (sometimes listed under account or developer settings). Step-by-step UI detail and screenshots are in API keys and tools.
Direct link (US SaaS)
If you sign in at https://app.datarobot.com, you can open Developer tools, select Personal API keys, then Create new key. For EU or JP, replace the hostname with the same domain you use in the browser (for example app.eu.datarobot.com or app.jp.datarobot.com).
-
From the DataRobot UI, click the user icon and select API keys and tools.
-
Stay on Personal API keys and click Create new key.
-
Name the key and confirm creation. The key is active immediately.
The API keys and tools page can show more than one key type. Use the tab that matches your needs:
| Tab | Use it for |
|---|---|
| Personal API keys | This developer quickstart—Python, cURL, local development, most automation. Inherits your user permissions. |
| Application API keys | Custom applications (for example Streamlit or React apps) calling DataRobot on behalf of users. Scoped to a registered application. See Application API keys. |
| Agent API keys | Deployed agents and agentic workflows making service-to-service calls. See Agent API keys if you build agents. |
If you are running code from a terminal or IDE, start with a personal API key. Switch key types when you ship an app or a deployed agent that needs its own scoped credential.
Each personal key lists:

| Label | Element | Description |
|---|---|---|
| 1 | Name | Editable label for the key. |
| 2 | Key | Secret value used in the Authorization header. |
| 3 | Date created | Creation date; unused keys may show "—". |
| 4 | Last used | Last time the key was used. |
Retrieve the API endpoint
Every request uses a base URL that ends with /api/v2. Use the same hostname you use to open DataRobot in the browser, then append /api/v2.
| Region | Example UI URL | API endpoint root |
|---|---|---|
| AI Platform (US) | https://app.datarobot.com | https://app.datarobot.com/api/v2 |
| AI Platform (EU) | https://app.eu.datarobot.com | https://app.eu.datarobot.com/api/v2 |
| AI Platform (JP) | https://app.jp.datarobot.com | https://app.jp.datarobot.com/api/v2 |
| Self-Managed AI Platform | Your organization's URL | https://{your-datarobot-host}/api/v2 |
Configure API authentication
Your code or shell needs an endpoint and a bearer token (personal API key). Common options include:
A drconfig.yaml file is the default for DataRobot's Python client. Typical location: ~/.config/datarobot/drconfig.yaml. You can use other paths and pass them explicitly to the client.
endpoint: 'https://app.datarobot.com/api/v2'
token: 'token-string'
Python (default path):
import datarobot as dr
Python (custom path):
import datarobot as dr
dr.Client(config_path="<file-path-to-drconfig.yaml>")
cURL (read values into environment variables):
export DATAROBOT_ENDPOINT=$(grep 'endpoint:' ~/.config/datarobot/drconfig.yaml | cut -d "'" -f2)
export DATAROBOT_API_TOKEN=$(grep 'token:' ~/.config/datarobot/drconfig.yaml | cut -d "'" -f2)
curl --location -X GET "${DATAROBOT_ENDPOINT}/projects" --header "Authorization: Bearer ${DATAROBOT_API_TOKEN}"
Windows:
setx DATAROBOT_ENDPOINT "https://app.datarobot.com/api/v2"
setx DATAROBOT_API_TOKEN "your_api_token"
Close and reopen the terminal. To persist through the UI, search for "Environment Variables", then add DATAROBOT_ENDPOINT and DATAROBOT_API_TOKEN under system variables.
macOS and Linux:
export DATAROBOT_ENDPOINT="https://app.datarobot.com/api/v2"
export DATAROBOT_API_TOKEN="your_api_token"
Add the same lines to ~/.zshrc, ~/.bashrc, or ~/.bash_profile if you want them in every session.
Python:
import datarobot as dr
dr.Project.list()
cURL:
curl --location -X GET "${DATAROBOT_ENDPOINT}/projects" --header "Authorization: Bearer ${DATAROBOT_API_TOKEN}"
Optional and convenient for experiments. Never commit secrets to Git.
Python:
import datarobot as dr
dr.Client(endpoint='https://app.datarobot.com/api/v2', token='token-string')
cURL:
curl --location --request GET 'https://app.datarobot.com/api/v2/projects/' \
--header 'Authorization: Bearer <YOUR_API_TOKEN>'
Optional: DataRobot CLI (dr auth login)
If you use the DataRobot CLI, run dr auth login to complete browser-based authentication and store settings under ~/.config/datarobot/drconfig.yaml (see Authentication management). The Python client can read that file, so you may not need a separate manual drconfig.yaml step.
Credential resolution order
DataRobot tools typically resolve credentials in this order:
DATAROBOT_API_TOKENandDATAROBOT_ENDPOINTenvironment variables- A
.envfile in the current working directory (when the tool you use loads it) ~/.config/datarobot/drconfig.yaml(for example afterdr auth login)~/.config/datarobot/agent_assist_config.yamlfor some Agent Assist flows
For drconfig.yaml layout and cURL examples, see Configure API authentication.
Install methods
The following sections outline various methods for installing DataRobot's code-first tools.
CLI installer
macOS / Linux: Installs the DataRobot CLI. Then add the Python packages and Agent Assist yourself:
curl https://cli.datarobot.com/install | sh
pip install datarobot datarobot-predict
dr plugin install assist
Windows (PowerShell): From CLI installation:
irm https://cli.datarobot.com/winstall | iex
After install, run pip install datarobot datarobot-predict and dr plugin install assist in an environment where Python is available. If you have not set an endpoint and token yet, work through Configure API authentication (for example with dr auth login and Authentication management), then Verify your setup.
For Homebrew, pinned versions, or binaries, see Getting started with DataRobot CLI.
Setup via AI coding tool
Paste the block below into Claude Code, Cursor, or another agentic coding tool with an empty or disposable directory. It links to install and auth topics on docs.datarobot.com so the agent can install prerequisites, configure credentials, and verify with a live API call.
You are helping me set up DataRobot for local development. Do all of the following:

1. Read the following docs and follow the install steps exactly:
   - https://docs.datarobot.com/en/docs/api/dev-learning/api-quickstart.html
   - https://docs.datarobot.com/en/docs/agentic-ai/cli/getting-started.html
   - https://docs.datarobot.com/en/docs/agentic-ai/agent-assist/installation.html

2. Detect my OS (macOS / Linux / WSL). On macOS use Homebrew where the docs recommend it; on Linux use the documented installers.

3. Install: Python 3.10 or later, git, uv, dr-cli, Pulumi, go-task, and Node.js 24 (or the minimum versions described in those docs and the manual table below).

4. Install the Python SDK: `pip install datarobot datarobot-predict`

5. Prompt me for my DataRobot Personal API key. If I don't have one, open
   https://app.datarobot.com/account/developer-tools and tell me to use the
   "Personal API keys" tab (not Application or Agent keys).

6. Run `dr auth login` to persist credentials in `~/.config/datarobot/drconfig.yaml`
   and, if I want shell persistence, add `DATAROBOT_ENDPOINT` and `DATAROBOT_API_TOKEN` to my shell rc file.

7. Install Agent Assist as a CLI plugin: `dr plugin install assist`

8. Verify everything works by:
   - Running `dr --version`, `dr plugin list`, and `dr assist --help`
   - Executing this Python snippet and printing the first three project names:

     ```python
     import datarobot as dr
     dr.Client()
     for p in dr.Project.list()[:3]:
         print(p.project_name)
     ```

9. Print a summary of what was installed and the config file locations.

Do not run `dr assist` yet — only install and verify.
Manual install: Python packages for full agentic stack
macOS
brew install datarobot-oss/taps/dr-cli uv pulumi/tap/pulumi go-task node git python
pip install datarobot datarobot-predict
dr plugin install assist
Linux / WSL — install each tool from its official installer (see the table), then:
pip install datarobot datarobot-predict
dr plugin install assist
| Tool | Minimum version | Install |
|---|---|---|
dr-cli |
0.2.50 | datarobot-oss/cli installation |
| Git | 2.30.0 | git-scm.com/downloads |
| uv | 0.9.0 | Install uv |
| Pulumi | 3.163.0 | Download and install |
| Task | 3.43.3 | Task installation |
| Node.js | 24 | Node.js download |
| Python | 3.10 | python.org/downloads |
Native Windows is not supported for Agent Assist; use WSL, a Linux VM, or a DataRobot Codespace. See Prerequisites and installation.
Install packages for building blueprints
pip install datarobot datarobot-predict
(Optional) If you would like to build custom blueprints programmatically, install two additional packages: graphviz and blueprint-workshop.
For Windows users:
Download the graphviz installer
For Ubuntu users:
sudo apt-get install graphviz
For Mac users:
brew install graphviz
Once graphviz is installed, install the workshop:
pip install datarobot-bp-workshop
Verify your setup
After keys and endpoint are configured, confirm that your session can reach the API. Use the subsections for the path you care about.
Python SDK
import datarobot as dr

dr.Client()  # reads env vars or drconfig.yaml
projects = dr.Project.list()
print(f"Connected. You can see {len(projects)} project(s).")
cURL
Requires DATAROBOT_ENDPOINT and DATAROBOT_API_TOKEN in the shell.
curl -s "${DATAROBOT_ENDPOINT}/projects/" \
  -H "Authorization: Bearer ${DATAROBOT_API_TOKEN}" | head
CLI
dr --version
dr plugin list          # should include assist
dr task --help
CLI sanity check
With the CLI installed: dr --version. For Agent Assist as a plugin, see Prerequisites and installation (dr plugin install assist).
Agent Assist
Agent Assist clones a template into the current directory, so use a fresh folder:
mkdir my-first-agent && cd my-first-agent
dr assist
On first run, Agent Assist checks dependencies, verifies auth, and starts an interactive session. Describe the agent you want in plain language.
If you'd like to start working with Agent Assist now, go to Workflows and prompting.
Troubleshooting
| Symptom | What to check |
|---|---|
401 Unauthorized |
Personal API key value; endpoint region matches where you log in (US vs EU vs JP); key not expired or revoked. Regenerate a key from Developer tools (US SaaS) or API keys and tools. |
dr: command not found |
dr-cli is not on your PATH. Install the CLI, reopen the terminal, or on macOS with Homebrew run brew link dr-cli. On Linux, add the install location from the release to PATH. |
dr plugin install assist fails |
Check dr --version is at least 0.2.50; older CLIs may not expose the plugin index. See Prerequisites and installation. |
| Agent Assist: directory not empty | Run dr assist only from an empty directory; the assistant clones a template and refuses to overwrite files. |
| Windows and Agent Assist | Agent Assist targets macOS/Linux; on Windows use WSL2 or a codespace per installation. |
Hands-on: Build and deploy a first model
The section below is a compact modeling lab you can run locally: same steps many teams automate later in production. Examples use Python or cURL. You will predict miles per gallon from the classic Auto MPG dataset.
Note
The Python snippets use client 3.x APIs (Dataset, registered model deployment flow). Upgrade the package if anything fails to import. If you use the Self-Managed AI Platform, see the Self-Managed AI Platform API resources page to confirm supported client versions for your installation.
For more code-first samples, see AI accelerators.
You will:
- Upload a dataset and create a project.
- Train with Autopilot and pick the recommended model.
- Deploy that model to a serverless prediction environment.
- Predict on a holdout CSV using the deployment.
Upload a dataset
Download auto-mpg.csv and auto-mpg-test.csv from this zip archive.
The Python tab below uses config_path="./drconfig.yaml" next to the script so the lab is self-contained. The same client also picks up the default ~/.config/datarobot/drconfig.yaml (or your environment variables) as described in Configure API authentication, if you prefer that layout.
import datarobot as dr
dr.Client(config_path="./drconfig.yaml")

# Set to the location of your auto-mpg.csv and auto-mpg-test.csv data files
# Example: dataset_file_path = '/Users/myuser/Downloads/auto-mpg.csv'
training_dataset_file_path = './auto-mpg.csv'
test_dataset_file_path = './auto-mpg-test.csv'
print("--- Starting DataRobot Model Training Script ---")

# Load dataset
training_dataset = dr.Dataset.create_from_file(training_dataset_file_path)

# Create a new project based on dataset
project = dr.Project.create_from_dataset(training_dataset.id, project_name='Auto MPG DR-Client')
DATAROBOT_API_TOKEN=${DATAROBOT_API_TOKEN}
DATAROBOT_ENDPOINT=${DATAROBOT_ENDPOINT}
DATASET_FILE_PATH="./auto-mpg.csv"
location=$(curl -Lsi \
  -X POST \
  -H "Authorization: Bearer ${DATAROBOT_API_TOKEN}" \
  -F 'projectName="Auto MPG"' \
  -F "file=@${DATASET_FILE_PATH}" \
  "${DATAROBOT_ENDPOINT}"/projects/ | grep -i 'Location: .*$' | \
  cut -d " " -f2 | tr -d '\r')
echo "Uploaded dataset. Checking status of project at: ${location}"
while true; do
  project_id=$(curl -Ls \
    -X GET \
    -H "Authorization: Bearer ${DATAROBOT_API_TOKEN}" "${location}" \
    | grep -Eo 'id":\s"\w+' | cut -d '"' -f3 | tr -d '\r')
  if [ "${project_id}" = "" ]
  then
    echo "Setting up project..."
    sleep 10
  else
    echo "Project setup complete."
    echo "Project ID: ${project_id}"
    break
  fi
done
Train models
DataRobot Autopilot trains many candidate models and surfaces a recommended model for your target (mpg here). See model recommendation in the UI documentation for how that choice is made.
Note
This code can open a browser window on the classic project experience. Use the NextGen UI menu and open Console if you prefer the newer navigation.

# Use training data to build models
from datarobot import AUTOPILOT_MODE

# Set the project's target and initiate Autopilot (runs in Quick mode unless a different mode is specified)
project.analyze_and_model(target='mpg', worker_count=-1, mode=AUTOPILOT_MODE.QUICK)
print("\nAutopilot is running. This may take some time...")
project.wait_for_autopilot()
print("Autopilot has completed!")

# Open the project in a web browser to view progress
print("Opening the project in your default web browser to view real-time events...")
project.open_in_browser()

# Get the recommended model (the best model for deployment)
print("\nRetrieving the best model from the Leaderboard...")
best_model = project.recommended_model()
print(f"Best Model Found:")
print(f"  - Model Type: {best_model.model_type}")
print(f"  - Blueprint ID: {best_model.blueprint_id}")
response=$(curl -Lsi \
  -X PATCH \
  -H "Authorization: Bearer ${DATAROBOT_API_TOKEN}" \
  -H "Content-Type: application/json" \
  --data '{"target": "mpg", "mode": "quick"}' \
  "${DATAROBOT_ENDPOINT}/projects/${project_id}/aim" | grep 'location: .*$' \
  | cut -d " " | tr -d '\r')
echo "AI training initiated. Checking status of training at: ${response}"
while true; do
  initial_project_status=$(curl -Ls \
  -X GET \
  -H "Authorization: Bearer ${DATAROBOT_API_TOKEN}" "${response}" \
  | grep -Eo 'stage":\s"\w+' | cut -d '"' -f3 | tr -d '\r')
  if [ "${initial_project_status}" = "" ]
  then
    echo "Setting up AI training..."
    sleep 10
  else
    echo "Training AI."
    echo "Grab a coffee or catch up on email."
    break
  fi
done

echo "Polling for Autopilot completion..."
while true; do
  autopilot_done=$(curl -s \
    -X GET \
    -H "Authorization: Bearer ${DATAROBOT_API_TOKEN}" \
    "${DATAROBOT_ENDPOINT}/projects/${project_id}/" \
    | grep -Eo '"autopilotDone":\s*(true|false)' | cut -d ':' -f2 | tr -d ' ')

  if [ "${autopilot_done}" = "true" ]; then
    echo "Autopilot training complete. Model ready to deploy."
    break
  else
    echo "Autopilot training in progress... checking again in 60 seconds."
    sleep 60
  fi
done

# Get the recommended model ID
recommended_model_id=$(curl -s \
  -X GET \
  -H "Authorization: Bearer ${DATAROBOT_API_TOKEN}" \
  "${DATAROBOT_ENDPOINT}/projects/${project_id}/recommendedModels/recommendedModel/" \
  | grep -Eo 'modelId":\s"\w+' | cut -d '"' -f3 | tr -d '\r')
echo "Recommended model ID: ${recommended_model_id}"
Deploy the model
A deployment serves predictions from a trained model in a managed environment. See the deployment overview for concepts and options.
# Deploy the model to a serverless prediction environment
print("\nDeploying the model to a serverless prediction environment...")

# Find or create a serverless prediction environment
serverless_env = None
for env in dr.PredictionEnvironment.list():
    if env.platform == 'datarobotServerless':
        serverless_env = env
        break

if serverless_env is None:
    print("Creating a new serverless prediction environment...")
    serverless_env = dr.PredictionEnvironment.create(
        name="Auto MPG Serverless Environment",
        platform='datarobotServerless'
    )

# First, register the model to create a registered model version
print("Registering the model...")

# Check if the registered model already exists
registered_model_name = "Auto MPG Registered Model"
existing_models = [m for m in dr.RegisteredModel.list() if m.name == registered_model_name]

if existing_models:
    print(f"Using existing registered model: {registered_model_name}")
    registered_model = existing_models[0]
    # Create a new version of the existing model
    registered_model_version = dr.RegisteredModelVersion.create_for_leaderboard_item(
        best_model.id,
        name="Auto MPG Model",
        registered_model_id=registered_model.id
    )
else:
    print(f"Creating new registered model: {registered_model_name}")
    # Create a new registered model
    registered_model_version = dr.RegisteredModelVersion.create_for_leaderboard_item(
        best_model.id,
        name="Auto MPG Model",
        registered_model_name=registered_model_name
    )
    # Retrieve the newly created registered model object by ID
    registered_model = dr.RegisteredModel.get(registered_model_version.registered_model_id)

# Wait for the model build to complete
print("Waiting for model build to complete...")
while True:
    current_version = registered_model.get_version(registered_model_version.id)
    if current_version.build_status in ('READY', 'complete'):
        print("Model build completed successfully!")
        registered_model_version = current_version  # Update our reference
        break
    elif current_version.build_status == 'FAILED':
        raise Exception("Model build failed. Please check the model registration.")
    else:
        print(f"Build status: {current_version.build_status}. Waiting...")
        import time
        time.sleep(30)  # Wait 30 seconds before checking again

# Deploy the model to the serverless environment using the registered model version
deployment = dr.Deployment.create_from_registered_model_version(
    registered_model_version.id,
    label="Auto MPG Predictions",
    description="Deployed with DataRobot client for Auto MPG predictions",
    prediction_environment_id=serverless_env.id
)

print(f"Model deployed successfully! Deployment ID: {deployment.id}")
# Use the recommended model ID from training section
echo "Using recommended model ID: ${recommended_model_id}"

# Find or create a serverless prediction environment
echo "Looking for serverless prediction environment..."
serverless_env_id=$(curl -s -X GET \
-H "Authorization: Bearer ${DATAROBOT_API_TOKEN}" \
"${DATAROBOT_ENDPOINT}/predictionEnvironments/" \
| grep -Eo '"id":"[^"]*".*"platform":"datarobotServerless"' \
| grep -Eo '"id":"[^"]*"' | cut -d '"' -f4 | head -1)

if [ -z "${serverless_env_id}" ]; then
    echo "Creating new serverless prediction environment..."
    serverless_env_response=$(curl -s -X POST \
    -H "Authorization: Bearer ${DATAROBOT_API_TOKEN}" \
    -H "Content-Type: application/json" \
    --data '{"name":"Auto MPG Serverless Environment","platform":"datarobotServerless"}' \
    "${DATAROBOT_ENDPOINT}/predictionEnvironments/")
    serverless_env_id=$(echo "$serverless_env_response" | grep -Eo '"id":"[^"]*"' | cut -d '"' -f4)
    echo "Created serverless environment ID: ${serverless_env_id}"
else
    echo "Using existing serverless environment ID: ${serverless_env_id}"
fi

# Check if registered model already exists
registered_model_name="Auto MPG Registered Model"
existing_model_id=$(curl -s -X GET \
-H "Authorization: Bearer ${DATAROBOT_API_TOKEN}" \
"${DATAROBOT_ENDPOINT}/registeredModels/" \
| grep -Eo '"id":"[^"]*".*"'${registered_model_name}'"' \
| grep -Eo '"id":"[^"]*"' | cut -d '"' -f4 | head -1)

if [ -n "${existing_model_id}" ]; then
    echo "Using existing registered model: ${registered_model_name}"
    # Create new version of existing model
    model_version_response=$(curl -s -X POST \
    -H "Authorization: Bearer ${DATAROBOT_API_TOKEN}" \
    -H "Content-Type: application/json" \
    --data "{\"name\":\"Auto MPG Model\",\"registeredModelId\":\"${existing_model_id}\",\"leaderboardItemId\":\"${recommended_model_id}\"}" \
    "${DATAROBOT_ENDPOINT}/registeredModels/${existing_model_id}/versions/")
else
    echo "Creating new registered model: ${registered_model_name}"
    # Create new registered model
    model_response=$(curl -s -X POST \
    -H "Authorization: Bearer ${DATAROBOT_API_TOKEN}" \
    -H "Content-Type: application/json" \
    --data "{\"name\":\"${registered_model_name}\"}" \
    "${DATAROBOT_ENDPOINT}/registeredModels/")
    existing_model_id=$(echo "$model_response" | grep -Eo '"id":"[^"]*"' | cut -d '"' -f4)

    # Create first version
    model_version_response=$(curl -s -X POST \
    -H "Authorization: Bearer ${DATAROBOT_API_TOKEN}" \
    -H "Content-Type: application/json" \
    --data "{\"name\":\"Auto MPG Model\",\"registeredModelId\":\"${existing_model_id}\",\"leaderboardItemId\":\"${recommended_model_id}\"}" \
    "${DATAROBOT_ENDPOINT}/registeredModels/${existing_model_id}/versions/")
fi

model_version_id=$(echo "$model_version_response" | grep -Eo '"id":"[^"]*"' | cut -d '"' -f4)
echo "Model version ID: ${model_version_id}"

# Wait for model build to complete
echo "Waiting for model build to complete..."
while true; do
    build_status=$(curl -s -X GET \
    -H "Authorization: Bearer ${DATAROBOT_API_TOKEN}" \
    "${DATAROBOT_ENDPOINT}/registeredModels/${existing_model_id}/versions/${model_version_id}/" \
    | grep -Eo '"buildStatus":"[^"]*"' | cut -d '"' -f4)

    if [ "${build_status}" = "READY" ] || [ "${build_status}" = "complete" ]; then
        echo "Model build completed successfully!"
        break
    elif [ "${build_status}" = "FAILED" ]; then
        echo "Model build failed. Please check the model registration."
        exit 1
    else
        echo "Build status: ${build_status}. Waiting..."
        sleep 30
    fi
done

# Deploy the model using the registered model version
echo "Deploying the model to the serverless environment..."
deployment_response=$(curl -s -X POST \
-H "Authorization: Bearer ${DATAROBOT_API_TOKEN}" \
-H "Content-Type: application/json" \
--data "{\"label\":\"Auto MPG Predictions\",\"description\":\"Deployed with cURL for Auto MPG predictions\",\"predictionEnvironmentId\":\"${serverless_env_id}\",\"registeredModelVersionId\":\"${model_version_id}\"}" \
"${DATAROBOT_ENDPOINT}/deployments/fromRegisteredModelVersion/")

deployment_id=$(echo "$deployment_response" | grep -Eo '"id":"[^"]*"' | cut -d '"' -f4)
echo "Model deployed successfully! Deployment ID: ${deployment_id}"

# Get the prediction URL for the deployment
echo "Retrieving prediction URL for deployment..."
prediction_url=$(curl -s -X GET \
  -H "Authorization: Bearer ${DATAROBOT_API_TOKEN}" \
  "${DATAROBOT_ENDPOINT}/deployments/${deployment_id}/" \
  | grep -Eo '"predictionUrl":"[^"]*"' | cut -d '"' -f4)
echo "Prediction URL: ${prediction_url}"
Make predictions against the deployed model
Use the Prediction API to score new rows. That path unlocks model management features such as drift and accuracy tracking. See prediction methods for an overview. In the UI, open Deployments → your deployment → Predictions → Prediction API for a copy-paste snippet.
This example scores auto-mpg-test.csv using datarobot-predict.
# Make predictions on test data
print("\nMaking predictions on test data...")

# Read the test data directly
import pandas as pd
from datarobot_predict.deployment import predict

test_data = pd.read_csv(test_dataset_file_path)

# Use datarobot-predict for deployment predictions
predictions, response_headers = predict(deployment, test_data)

# Display the results
print("\nPrediction Results:")
print(predictions.head())
print(f"\nTotal predictions made: {len(predictions)}")
# Use the prediction URL from deployment section
TEST_DATASET_FILE_PATH="./auto-mpg-test.csv"

# Make predictions by sending the CSV data directly
predictions=$(curl -s -X POST \
  -H "Authorization: Bearer ${DATAROBOT_API_TOKEN}" \
  -H "Content-Type: text/csv; charset=UTF-8" \
  --data-binary "@${TEST_DATASET_FILE_PATH}" \
  "${prediction_url}")

echo "Prediction Results:"
echo "$predictions" | jq '.'

prediction_count=$(echo "$predictions" | jq '.data | length')
echo "Total predictions made: ${prediction_count}"
Next steps
Keep exploring the developer learning section for notebooks and task-based tutorials. Try AI accelerators for modular workflows, and use the reference documentation for the REST API and Python client.
| If you want to... | Go to |
|---|---|
| Run the hands-on modeling lab | Hands-on: Build and deploy a first model |
| Use Agent Assist to build an agent | Agent workflows and prompting |
| Configure LLM providers for agentic work | Agentic LLM providers |
| Connect Cursor, Claude Code, or other MCP clients | Agentic MCP clients |
Learn dr commands |
CLI quick reference |
| Browse Agent Assist docs | Agent Assist |