Run Batch Prediction jobs from Azure Blob Storage
The DataRobot Batch Prediction API allows users to take in large datasets and score them against deployed models running on a Prediction Server. The API also provides flexible options for file intake and output.
This page shows how you can set up a Batch Prediction job—using the DataRobot Python Client package to call the Batch Prediction API—that will score files from Azure Blob storage and write the results back to Azure Blob storage. This method also works for Azure Data Lake Storage Gen2 accounts because the underlying storage is the same.
All the code snippets on this page are part of a Jupyter Notebook that you can download to get started.
Prerequisites
To run this code, you will need the following:
-
Python 2.7 or 3.4+
-
A DataRobot deployment
-
An Azure storage account
-
An Azure storage container
-
A Scoring dataset (to use for scoring with your DataRobot deployment in the storage container)
Create stored credentials in DataRobot
The Batch Prediction job requires credentials to read and write to Azure Blob storage, including the name of the Azure storage account and an access key.
To obtain these credentials:
-
In the Azure portal for the Azure Blob Storage account, click Access keys.
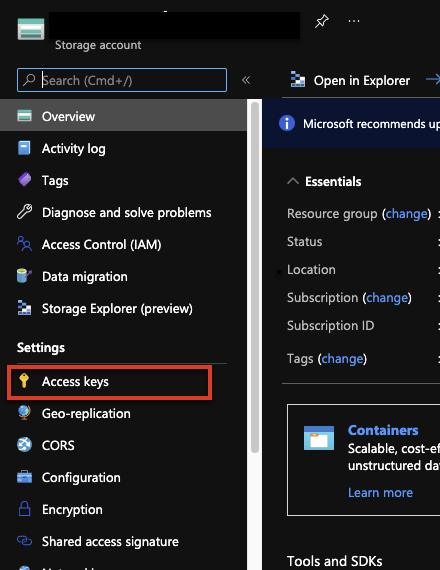
-
Click Show keys to reveal the values of your access keys. You can use either of the keys shown (key1 or key2).
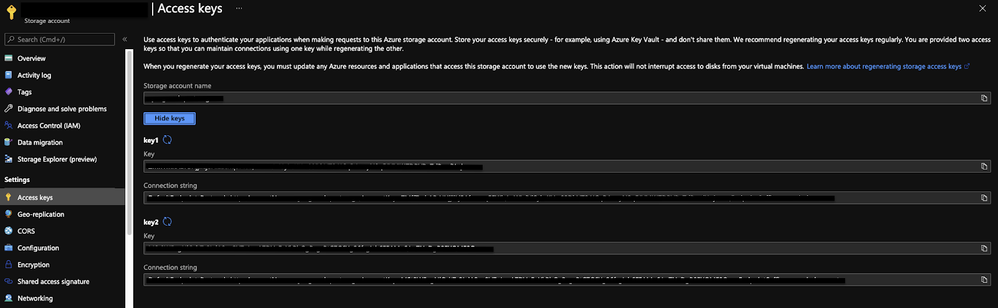
-
Use the following code to create a new credential object within DataRobot, used by the Batch Prediction job to connect to your Azure storage account.
AZURE_STORAGE_ACCOUNT = "YOUR AZURE STORAGE ACCOUNT NAME"
AZURE_STORAGE_ACCESS_KEY = "AZURE STORAGE ACCOUNT ACCESS KEY"

DR_CREDENTIAL_NAME = f"Azure_{AZURE_STORAGE_ACCOUNT}"

# Create an Azure-specific Credential
# The connection string is also found below the access key in Azure if you want to copy that directly.

credential = dr.Credential.create_azure(
    name=DR_CREDENTIAL_NAME,
    azure_connection_string=f"DefaultEndpointsProtocol=https;AccountName={AZURE_STORAGE_ACCOUNT};AccountKey={AZURE_STORAGE_ACCESS_KEY};"
)

# Use this code to look up the ID of the credential object created.
credential_id = None
for cred in dr.Credential.list():
    if cred.name == DR_CREDENTIAL_NAME:
        credential_id = cred.credential_id
        break

print(credential_id)
Set up and run a Batch Prediction job
After creating a credential object, you can set up the Batch Prediction job. Set the intake settings and output settings to the azure type. Provide both attributes with the URL to the files in Blob storage that you want to read and write to (the output file does not need to exist already) and the ID of the credential object that previously set up. The code below creates and runs the Batch Prediction job and, and when finished, provide the status of the job. This code also demonstrates how to configure the job to return both Prediction Explanations and passthrough columns for the scoring data.
DEPLOYMENT_ID = 'YOUR DEPLOYMENT ID'
AZURE_STORAGE_ACCOUNT = "YOUR AZURE STORAGE ACCOUNT NAME"
AZURE_STORAGE_CONTAINER = "YOUR AZURE STORAGE ACCOUNT CONTAINER"
AZURE_INPUT_SCORING_FILE = "YOUR INPUT SCORING FILE NAME"
AZURE_OUTPUT_RESULTS_FILE = "YOUR OUTPUT RESULTS FILE NAME"

# Set up your batch prediction job
# Input: Azure Blob Storage
# Output: Azure Blob Storage

job = dr.BatchPredictionJob.score(
   deployment=DEPLOYMENT_ID,
   intake_settings={
       'type': 'azure',
       'url': f"https://{AZURE_STORAGE_ACCOUNT}.blob.core.windows.net/{AZURE_STORAGE_CONTAINER}/{AZURE_INPUT_SCORING_FILE}",
       "credential_id": credential_id
   },
   output_settings={
       'type': 'azure',
       'url': "https://{AZURE_STORAGE_ACCOUNT}.blob.core.windows.net/{AZURE_STORAGE_CONTAINER}/{AZURE_OUTPUT_RESULTS_FILE}",
       "credential_id": credential_id
   },
   # If explanations are required, uncomment the line below
   max_explanations=5,

   # If passthrough columns are required, use this line
   passthrough_columns=['column1','column2']
)

job.wait_for_completion()
job.get_status()
When the job is complete, the output file is displayed in your Blob storage container. You now have a Batch Prediction job that can read and write from Azure Blob Storage via the DataRobot Python client package and the Batch Prediction API.