Real-time predictions
Once data is ingested, DataRobot provides several options for scoring model data. The most tightly integrated and feature-rich scoring method is using the Prediction API. The API can be leveraged and scaled horizontally to support both real-time scoring requests and batch scoring. A single API request can be sent with a data payload of one or more records, and many requests can be sent concurrently. DataRobot keeps track of data coming in for scoring requests and compares it to training data used to build a model as well. Using model management, technical performance statistics around the API endpoint are delivered along with data drift and model drift (associated with the health of the model itself). See the DataRobot Prediction API documentation for more information.
The information required to construct a successful API request can be collected from several places within DataRobot, although the quickest way to capture all values required is from the Predictions > Prediction API tab. A sample Python script with relevant fields completed is available in the tab.
The API endpoint accepts CSV and JSON data. The Content-Type header value must be set appropriately for the type of data being sent ( text/csv or application/json); the raw API request responds with JSON by default. To return CSV instead of JSON for real-time predictions, use -H "Accept: text/csv".
The following provides several examples of scoring data from Snowflake via a client request—from both a local or standing-server environment.
Use the Prediction API
Note the values in the following integration script:
API_KEY = 'YOUR API KEY'
DEPLOYMENT_ID = 'YOUR DEPLOYMENT ID'
DATAROBOT_KEY = 'YOUR DR KEY'
| Field | Description |
|---|---|
USERNAME |
Apply privileges associated with the named user. |
API_KEY |
Authenticate web requests to the DataRobot API and Prediction API. |
DEPLOYMENT_ID |
Specify the unique ID of the DataRobot deployment; this value sits in front of the model. |
DATAROBOT_KEY |
(Managed AI Platform users only) Supply an additional engine access key. Self-Managed AI Platform installations can remove this option. |
DR_PREDICTION_HOST |
(Self-Managed AI Platform users only) Supply the application host for locally installed clusters. (For Managed AI Platform users, the host defaults to app.datarobot.com or app.eu.datarobot.com.) |
Content-Type |
Identify the type of input data being sent, either CSV and JSON, under headers. |
URL |
Identify the hostname for scoring data. Typically, this is a load balancer in front of one or more prediction engines. |
The following script snippet shows how to extract data from Snowflake via the Python connector and send it to DataRobot for scoring. It creates a single thread with a single request. Maximizing speed involves creating parallel request threads with appropriately sized data payloads to handle input of any size.
Consider this basic example of creating a scoring request and working with results.
import snowflake.connector
import datetime
import sys
import pandas as pd
import requests
from pandas.io.json import json_normalize

# snowflake parameters
SNOW_ACCOUNT = 'dp12345.us-east-1'
SNOW_USER = 'your user'
SNOW_PASS = 'your pass'
SNOW_DB = 'TITANIC'
SNOW_SCHEMA = 'PUBLIC'

# create a connection
ctx = snowflake.connector.connect(
          user=SNOW_USER,
          password=SNOW_PASS,
          account=SNOW_ACCOUNT,
          database=SNOW_DB,
          schema=SNOW_SCHEMA,
          protocol='https',
          application='DATAROBOT',
)

# create a cursor
cur = ctx.cursor()

# execute sql
sql = "select passengerid, pclass, name, sex, age, sibsp, parch, fare, cabin, embarked " \
    + " from titanic.public.passengers"
cur.execute(sql)

# fetch results into dataframe
df = cur.fetch_pandas_all()
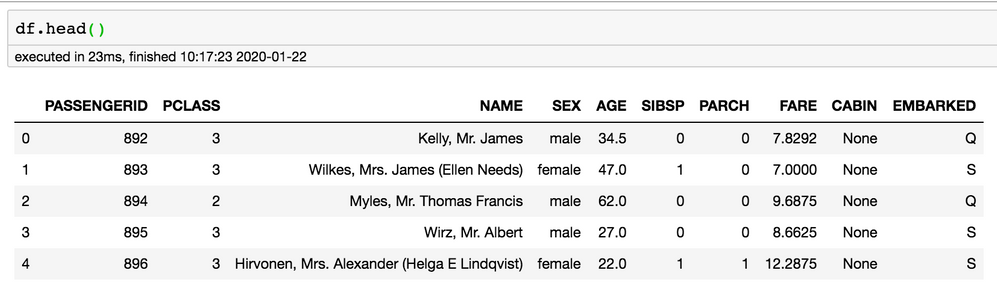
Fields are all capitalized in accordance with ANSI standard SQL. Because DataRobot is case-sensitive to feature names, ensure that the fields in DataRobot match the data provided. Depending on the model-building workflow used, this may mean that database extractions via SQL require aliasing of the columns to match model-feature case. At this point, the data is in a Python script. Any pre-processing that occurred outside of DataRobot before model building can now be applied to the scoring. Once the data is ready, you can begin model scoring.
# datarobot parameters
API_KEY = 'YOUR API KEY'
USERNAME = 'mike.t@datarobot.com'
DEPLOYMENT_ID = 'YOUR DEPLOYMENT ID'
DATAROBOT_KEY = 'YOUR DR KEY'
# replace with the load balancer for your prediction instance(s)
DR_PREDICTION_HOST = 'https://app.datarobot.com'
# replace app.datarobot.com with application host of your cluster if installed locally

headers = {
   'Content-Type': 'text/csv; charset=UTF-8',
   'Datarobot-Key': DATAROBOT_KEY,
   'Authorization': 'Bearer {}'.format(API_KEY)
}

predictions_response = requests.post(
    url,
    data=df.to_csv(index=False).encode("utf-8"),
    headers=headers,
    params={'passthroughColumns' : 'PASSENGERID'}
)

if predictions_response.status_code != 200:
    print("error {status_code}: {content}".format(status_code=predictions_response.status_code, content=predictions_response.content))
    sys.exit(-1)

# first 3 records json structure
predictions_response.json()['data'][0:3]
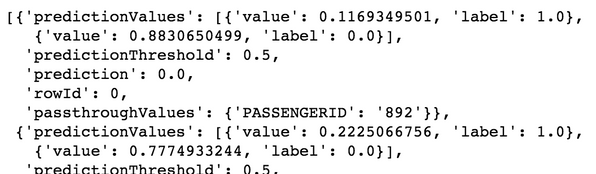
The above is a basic, straightforward call with little error handling; it is intended only as an example. The request includes a parameter value to request the logical or business key for the data being returned, along with the labels and scores. Note that df.to_csv(index=False) is required to remove the index column from the output, and .encode("utf-8") is required to convert the Unicode string to UTF-8 bytes (charset specified in Content-Type).
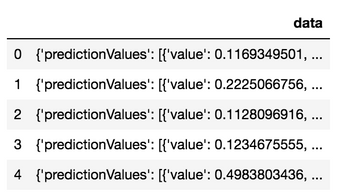
The API always returns records in JSON format. Snowflake is flexible when working with JSON, allowing you to simply load the response into the database.
df_response = pd.DataFrame.from_dict(predictions_response.json())
df_response.head()
The following code creates a table and inserts the raw JSON. Note that it only does so with an abbreviated set of five records. For the sake of this demonstration, the records are being inserted one at a time via the Python Snowflake connector. This is not a best practice and is provided for demonstration only; when doing this yourself, make sure Snowflake instead ingests data via flat files and stage objects.
ctx.cursor().execute('create or replace table passenger_scored_json(json_rec variant)')

df_head =  df_response.head()

# this is not the proper way to insert data into snowflake, but is used for quick demo convenience.
# snowflake ingest should be done via snowflake stage objects.
for _ind_, row in df5.iterrows():
    escaped = str(row['data']).replace("'", "''")
    ctx.cursor().execute("insert into passenger_scored_json select parse_json('{rec}')".format(rec=escaped))
    print(row['data'])
Use Snowflake's native JSON functions to parse and flatten the data. The code below retrieves all scores towards the positive class label 1 for survival from the binary classification model.
select json_rec:passthroughValues.PASSENGERID::int as passengerid
, json_rec:prediction::int as prediction
, json_rec:predictionThreshold::numeric(10,9) as prediction_threshold
, f.value:label as prediction_label
, f.value:value as prediction_score
from titanic.public.passenger_scored_json
, table(flatten(json_rec:predictionValues)) f
where f.value:label = 1;
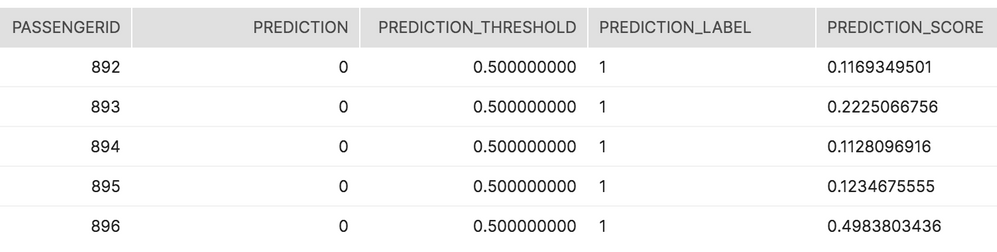
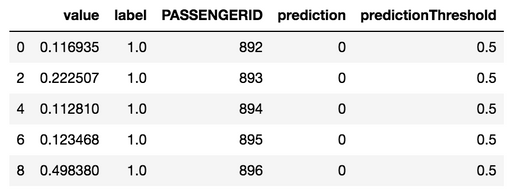
You can use a raw score and the output it provides against the threshold. In this example, passenger 892's chance of survival (11.69%) was less than the 50% threshold. As a result, the prediction towards the positive class survival label 1 was 0 (i.e., non-survival).
The original response in Python can be flattened within Python as well.
df_results = json_normalize(data=predictions_response.json()['data'], record_path='predictionValues',
    meta = [['passthroughValues', 'PASSENGERID'], 'prediction', 'predictionThreshold'])
df_results = df_results[df_results['label'] == 1]
df_results.rename(columns={"passthroughValues.PASSENGERID": "PASSENGERID"}, inplace=True)
df_results.head()
The above dataframe can be written to one or more CSVs or provided as compressed files in a Snowflake stage environment for ingestion into the database.