Deploy models on SageMaker
This article showcases how to make predictions and monitor external models deployed on AWS SageMaker using DataRobot’s Scoring Code and MLOps agent.
DataRobot automatically runs Scoring Code generation for models that support it and indicates code availability with an icon on the Leaderboard. This option allows you to download validated Java Scoring Code for a model without approximation; the code is easily deployable in any environment and is not dependent on the DataRobot application.
Why deploy on AWS SageMaker
While DataRobot provides its own scalable prediction servers that are fully integrated with the platform, there are multiple reasons why someone would want to deploy on AWS SageMaker:
- Company policy or governance decision.
- Custom functionality on top of the DataRobot model.
- Low-latency scoring without the overhead of API calls. Java code is typically faster than scoring through the Python API.
- The ability to integrate models into systems that can’t necessarily communicate with the DataRobot API.
Note that data drift and accuracy tracking are unavailable out-of-the-box unless you configure the MLOps agent.
You can leverage AWS SageMaker as a deployment environment for your Scoring Code. AWS SageMaker allows you to bring in your machine learning models (in several supported formats) and expose them as API endpoints. DataRobot packages the MLOps agent along with the model in a Docker container which will be deployed on AWS SageMaker.
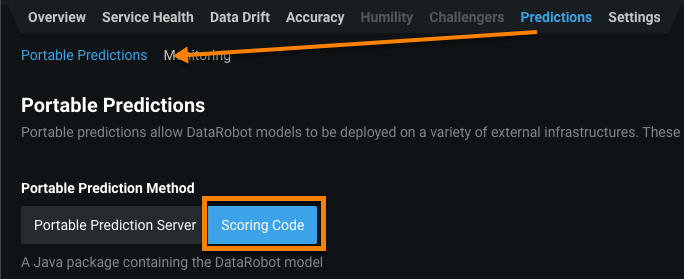
Download Scoring Code
The first step to deploying a DataRobot model to AWS Sagemaker is to download the Scoring Code JAR file from the Leaderboard or the deployment found under the Downloads tab from within the model menu.
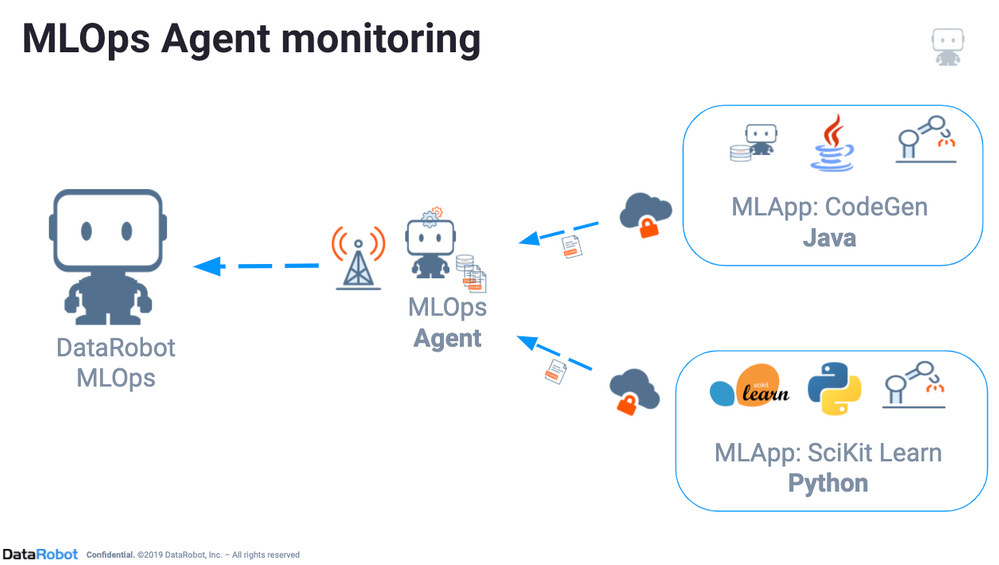
Configure the MLOps agent
The MLOps library provides a way for you to get the same monitoring features with your own models as you can with DataRobot models. The MLOps library provides an interface that you can use to report metrics to the MLOps service; from there, you can monitor deployment statistics and predictions, track feature drift, and get other insights to analyze model performance. For more information, reference the MLOps agent documentation.
You can use the MLOps library with any type of model, including Scoring Code models downloaded from DataRobot. DataRobot supports versions of the MLOps library in Java or Python (Python3).
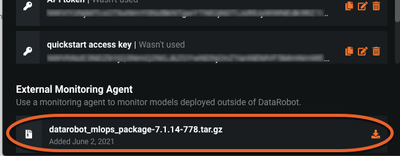
The MLOps agent can be downloaded using the DataRobot API, or as a tarball from the DataRobot UI.
From the application, select your user icon and navigate to the Developer Tools page to find the tarball available for download.

- Install the DataRobot MLOps agent and libraries.
- Configure the agent.
- Start the agent service.
- Ensure that the agent buffer directory (
MLOPS_SPOOLER_DIR_PATHin the config file) exists. - Configure the channel you want to use for reporting metrics. (Note that the MLOps agent can be configured to work with a number of channels, including SQS, Google Pub Sub, Spool File and RabbitMQ. This example uses SQS.
- Use the MLOps library to report metrics from your deployment.
The MLOps library buffers the metrics locally, which enables high throughput without slowing down the deployment. It also forwards the metrics to the MLOps service so that you can monitor model performance via the deployment inventory.
Create a deployment
Helper scripts for creating deployments are available in the examples directories of the MLOps agent tarball.
Every example has its own script to create the related deployment, and the tools/create_deployment.py script is available to create your own deployment.
Deployment creation scripts interact with the MLOps service directly, so they must run on a machine with connectivity to the MLOps service.
Every example has a description file ( <name>_deployment_info) and a script to create a deployment.
- Edit the description file to configure your deployment.
- If you want to enable or disable feature drift tracking, configure the description file by adding or excluding the
trainingDatasetfield. - Create a new deployment by running the script,
<name>_create_deployment.sh.
Running this script returns a deployment ID and initial model ID that can be used to instrument your deployment. Alternatively, create the deployment from the DataRobot GUI.
To create a deployment from the DataRobot GUI, use the the following steps:
- Log in to the DataRobot GUI.
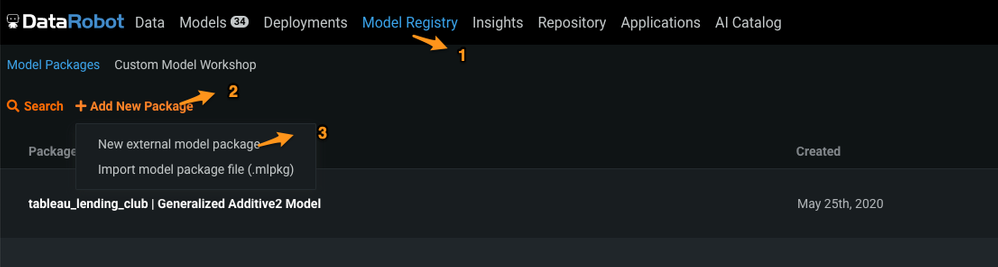
- Select Model Registry (1) and click Add New Package (2).
-
In the dropdown, select New external model package (3).
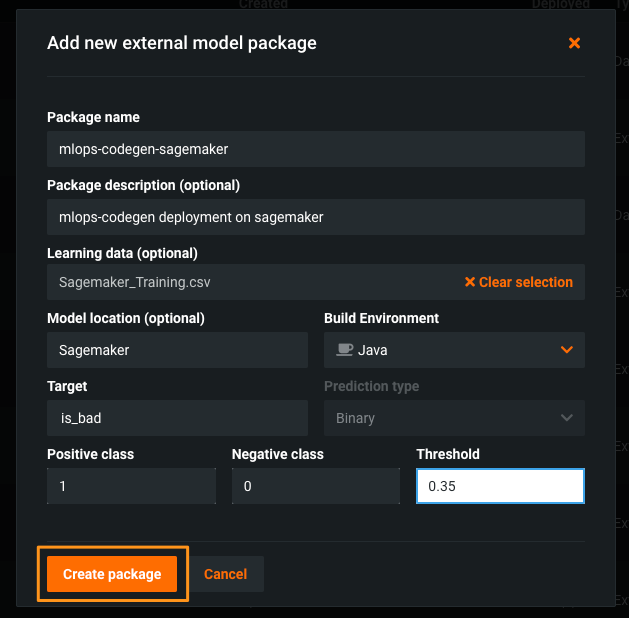
-
Complete all the information needed for your deployment, and then click Create package.
-
Select the Deployments tab and click Deploy Model Package, validate the details on this page, and click Create deployment (right-hand side at the top of the page).
-
You can use the toggle buttons to enable drift tracking, segment analysis of predictions, and more deployment settings.
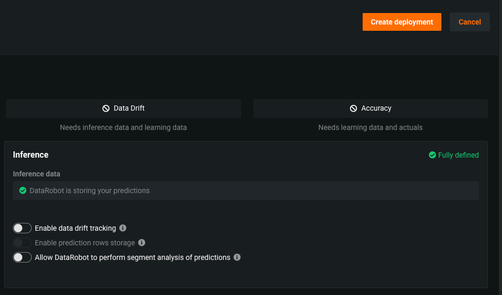
-
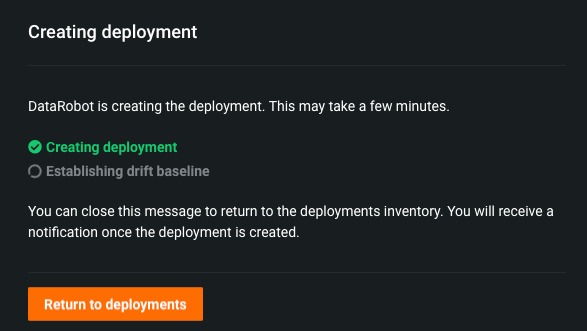
Once you click Create Deployment after providing necessary details, the following dialog box appears.
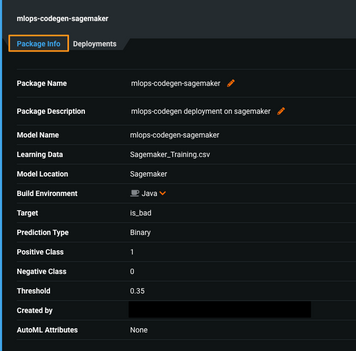
-
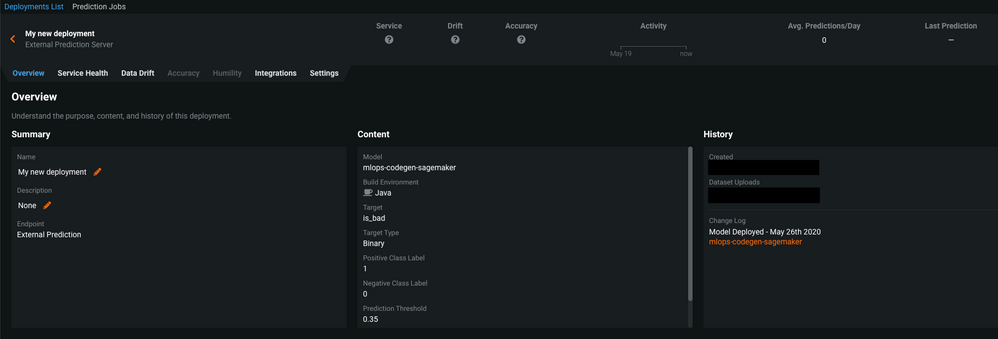
You can see the deployment details of the newly created deployment.
If you select the Integrations tab for the deployment, you can see the monitoring code.
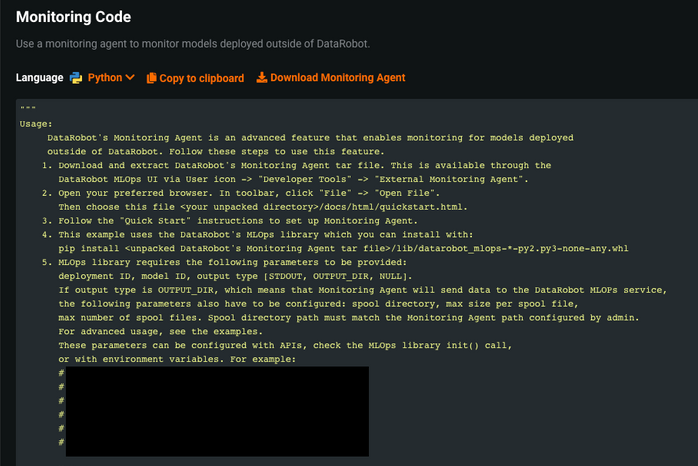
When you scroll down through this monitoring code, you can see
DEPLOYMENT_IDandMODEL_IDwhich are used by the MLOps library to monitor the specific model deployment.
Upload Scoring Code
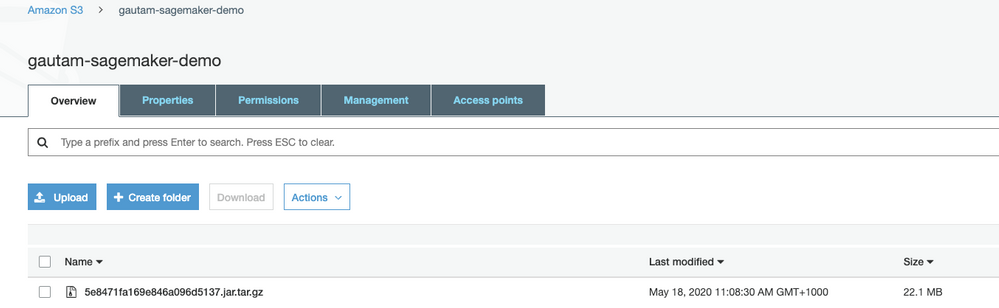
After downloading the Scoring Code JAR file, upload it to an AWS S3 bucket that is accessible to SageMaker.
SageMaker expects a tar.gz archive format to be uploaded to the S3 bucket. Compress your model (the Scoring Code JAR file) using the following command:
tar -czvf 5e8471fa169e846a096d5137.jar.tar.gz 5e8471fa169e846a096d5137.jar
Note that if you are using macOS, the tar command adds hidden files in the tar.gzpackage that create problems during deployment; use the below command instead of the one shared above:
COPYFILE_DISABLE=1 tar -czvf 5e8471fa169e846a096d5137.jar.tar.gz 5e8471fa169e846a096d5137.jar
Once you have created the tar.gz archive, upload it to the S3 bucket.
Customize the Docker image
DataRobot has a published Docker image (scoring-inference-code-SageMaker:latest) which contains the inference code to the Amazon ECR. You can use this Docker image as the base image, and then add a customized Docker container layer containing the MLOps agent.
FROM datarobotdev/scoring-inference-code-sagemaker
RUN apk add --no-cache curl tar bash procps
RUN apk add --no-cache --upgrade bash
COPY agent-6.1.0.jar /agent/
COPY stdout.log4j2.properties /conf/
COPY mlops.agent.conf.yaml /conf/
COPY agent-entrypoint.sh /
RUN chmod 755 /agent-entrypoint.sh
ENTRYPOINT sh /agent-entrypoint.sh
The agent-entrypoint.sh shell script runs the Scoring Code as a JAR file and starts the MLOps agent JAR.
java -Dlog.file=${AGENT_LOG_PATH} \
    -Dlog4j.configurationFile=file:${AGENT_LOG_PROPERTIES} \
    -cp ${AGENT_JAR_PATH} com.datarobot.mlops.agent.Agent \
    --config ${AGENT_CONFIG_YAML} Collapse &

java -jar /opt/scoring/sagemaker-api.jar
By default, the MLOps configuration file reports metrics in the Amazon SQS service. Provide the URL for accessing SQS in the mlops.agent.conf.yaml:
- type: SQS_SPOOL
- details: {name: "sqsSpool", queueUrl: " [https://sqs.us-east-1.amazonaws.com/123456789000/mlops-agent-sqs](https://sqs.us-east-1.amazonaws.com/123456789000/mlops-agent-sqs%C2%A0) "}
Now, create a Docker image from Dockerfile. Go to the directory containing the Dockerfile and run the following command:
docker build -t codegen-mlops-SageMaker
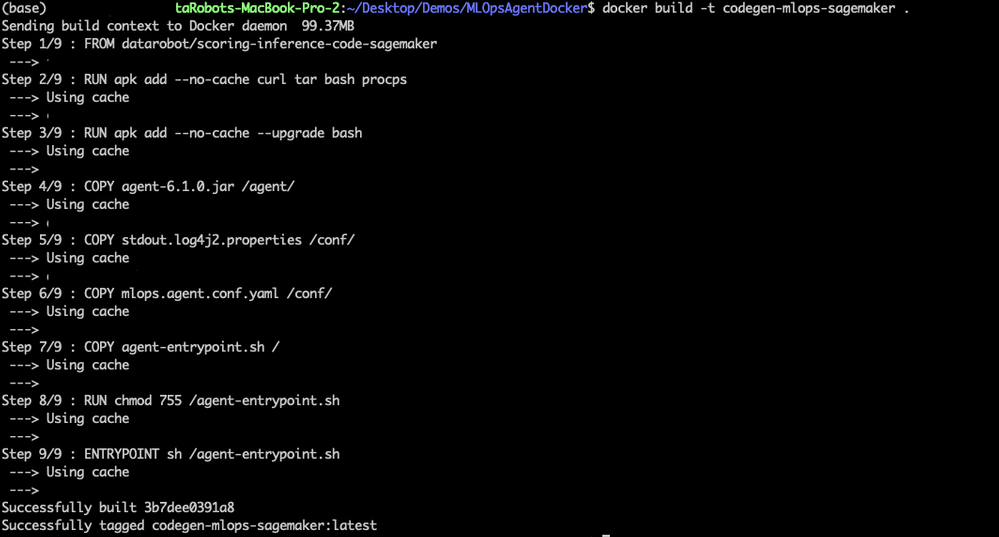
This creates a Docker image from the Dockerfile (a reference Dockerfile is shared with the source code).
Publish the Docker image to Amazon ECR
Next, publish the Docker image to the Amazon ECR:
-
Authenticate your Docker client to the Amazon ECR registry to which you intend to push the image. Authentication tokens must be obtained for each registry used, and the tokens are valid for 12 hours. You can refer to Amazon documentation for the various authentication options listed in this example.
-
This example uses token-based authentication:
TOKEN=$(aws ecr get-authorization-token --output text --query 'authorizationData[].authorizationToken') curl -i -H "Authorization: Basic $TOKEN" <https://123456789000.dkr.ecr.us-east-1.amazonaws.com/v2/SageMakertest/tags/list> -
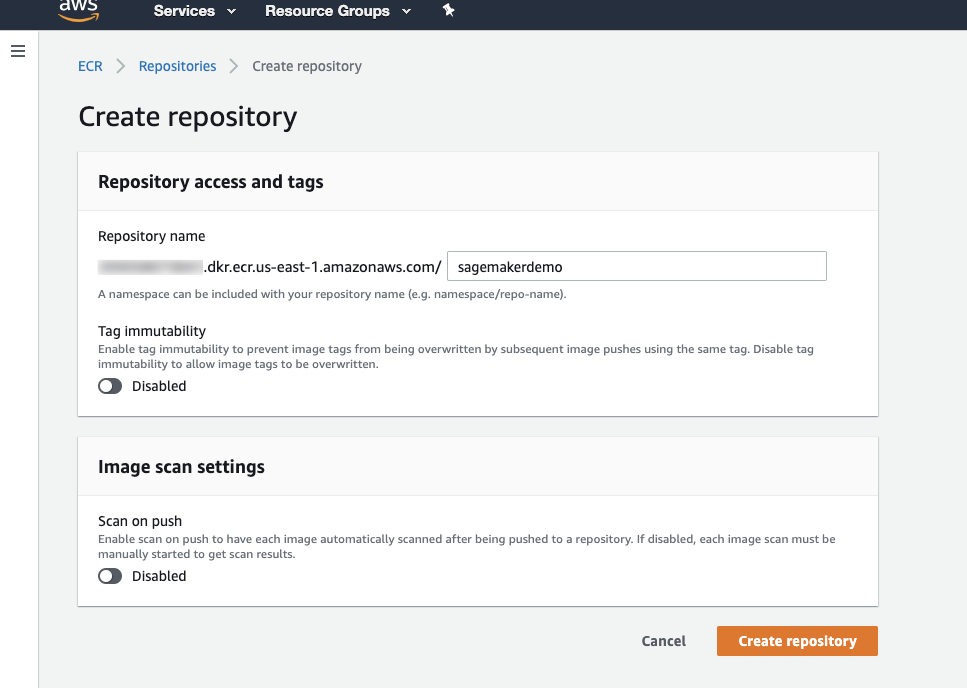
Create an Amazon ECR registry where you can push your image:
aws ecr create-repository --repository-name SageMakerdemoThis results in the output as shown below:
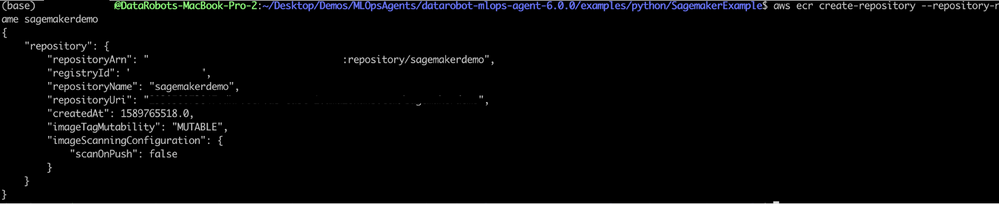
You can also create a registry from the AWS Management console, from ECR Service > Create Repository (you must provide the repository name).
-
Identify the image to push. Run the Docker images command to list the images on your system:
docker image ls -
Tag the image to push to AWS ECR. Find the Docker image's ID containing the inference code and the MLOps agent.
-
Tag the image with the Amazon ECR registry, repository, and the optional image tag name combination to use. The registry format is
aws_account_id.dkr.ecr.region.amazonaws.com. The repository name should match the repository that you created for your image. If you omit the image tag, DataRobot uses the latest tag:docker tag <image_id> "${account}.dkr.ecr.${region}.amazonaws.com/SageMakerdemo"
-
Push the image:
docker push ${account}.dkr.ecr.${region}.amazonaws.com/SageMakermlopsdockerized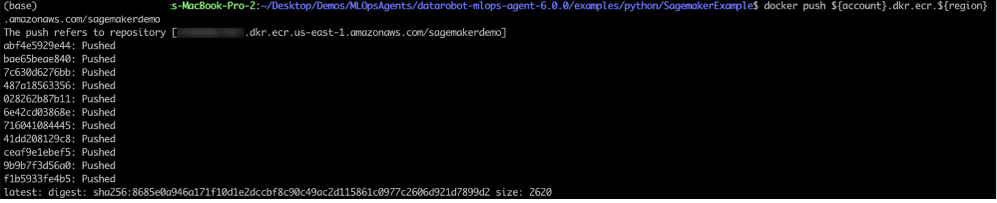
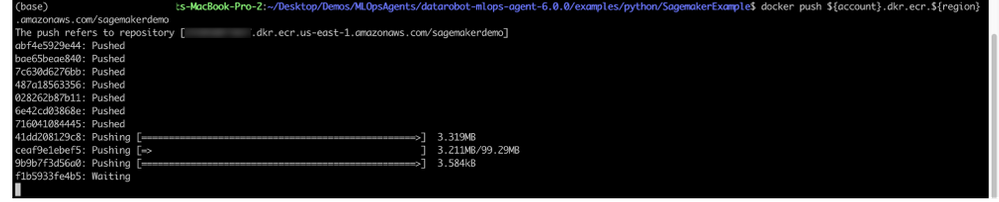
Once the image is pushed, you can validate from the AWS management console.

Create a model
-
Sign into AWS and enter “SageMaker” in the search bar. Select the first result (Amazon SageMaker) to enter the SageMaker console and create a model.
-
In the IAM role field, select Create a new role from the dropdown if you do not have an existing role on your account. This option creates a role with the required permissions and assigns it to your instance.
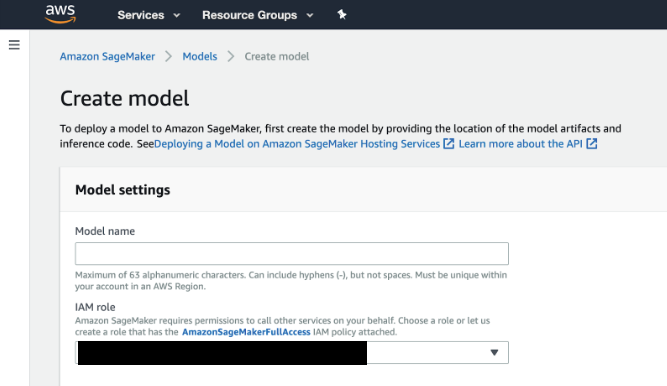
-
Select Amazon SageMaker > Models > Create model.
-
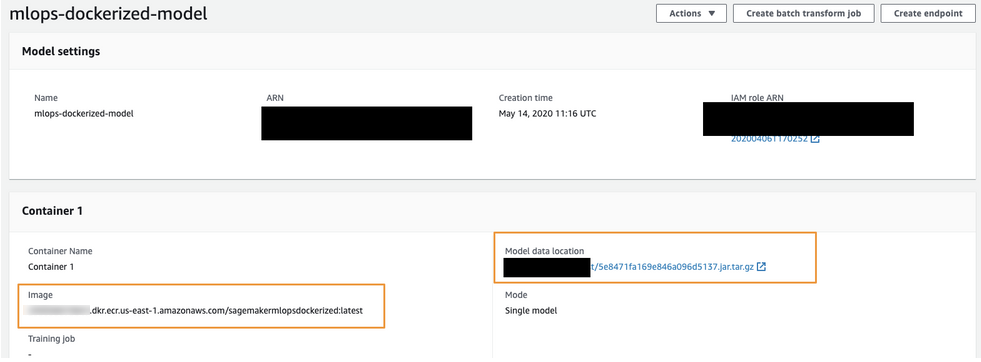
For the Container input options field (1), select Provide model artifacts and inference image location. Specify the location of the Scoring Code image (your model) in the S3 bucket (2) and the registry path to the Docker image containing the inference code (3).
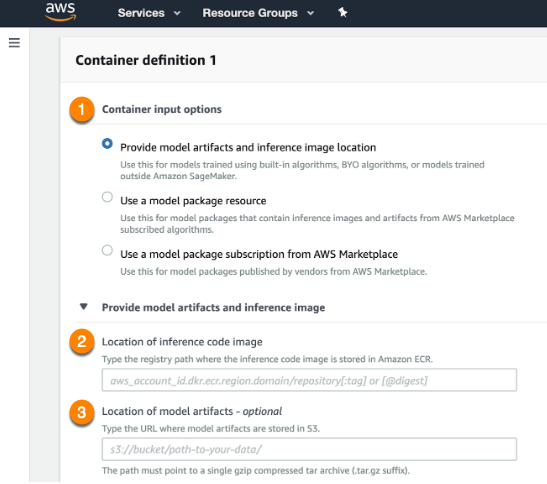
-
Click Add container below the fields when complete.
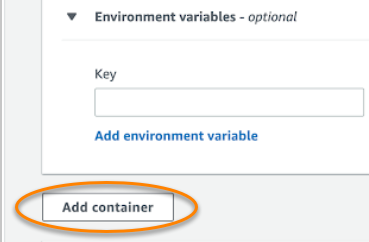
Finally, your model configuration will look like this:
-
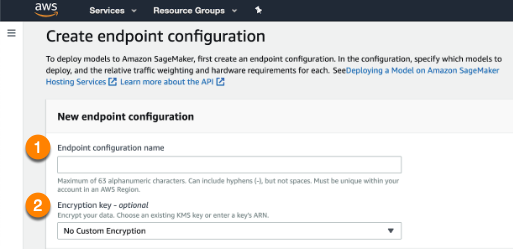
Open the dashboard on the left side and navigate to the Endpoint configurations page to create a new endpoint configuration. Select the model you have uploaded.
-
Name the endpoint configuration (1) and provide an encryption key (2), if desired. When complete, select the Create endpoint configuration at the bottom of the page.
-
Use the dashboard to navigate to Endpoints and create a new endpoint:

-
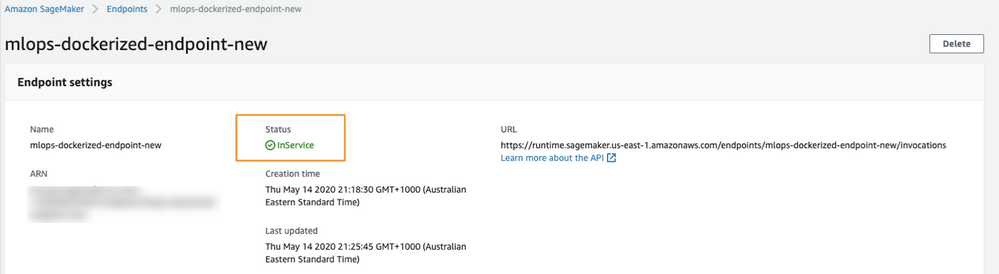
Name the endpoint (1) and opt to use an existing endpoint configuration (2). Select the configuration you just created (3) and click Select endpoint configuration. When endpoint creation is complete, you can make prediction requests with your model. When the endpoint is ready to service requests, the Status will change to InService.
Making predictions
Once the SageMaker endpoint status changes to InService, you can start making predictions against this endpoint. This example tests predictions using the Lending Club data.
Test the endpoint from the command line to make sure the endpoint is responding.
Use the following command to make test predictions and pass data into the body of a CSV string. Before using it, make sure you have installed AWS CLI.
aws SageMaker-runtime invoke-endpoint --endpoint-name mlops-dockerized-endpoint-new

You can also use a Python script (outlined below) to make predictions. This script uses the DataRobot MLOps library to report metrics back to the DataRobot application which you can see from the deployment you created.
import time
import random
import pandas as pd
import json
import boto3
from botocore.client import Config
import csv
import itertools
from datarobot_mlops.mlops import MLOps
import os
from io import StringIO

"""
This is sample code and may not be production ready
"""

runtime_client = boto3.client('runtime.sagemaker')
endpoint_name = 'mlops-dockerized-endpoint-new'
cur_dir = os.path.dirname(os.path.abspath(__file__))
#dataset_filename = os.path.join(cur_dir, "CSV_10K_Lending_Club_Loans_cust_id.csv")
dataset_filename = os.path.join(cur_dir, "../../data/sagemaker_mlops.csv")


def _feature_df(num_samples):
    df = pd.read_csv(dataset_filename)

    return pd.DataFrame.from_dict(df)


def _predictions_list(num_samples):
    with open(dataset_filename, 'rb') as f:
        payload = f.read()

    result = runtime_client.invoke_endpoint(
        EndpointName=endpoint_name,
        Body=payload,
        ContentType='text/csv',
        Accept='Accept'
    )

    str_predictions = result['Body'].read().decode()
    df_predictions = pd.read_csv(StringIO(str_predictions))
    #list_predictions = df_predictions['target_1_PREDICTION'].values.tolist()
    list_predictions = df_predictions.values.tolist()
    print("number of predictions made are : ",len(list_predictions))
    return list_predictions


def main():
    num_samples = 10

    # MLOPS: initialize mlops library
    # If deployment ID is not set, it will be read from MLOPS_DEPLOYMENT_ID environment variable.
    # If model ID is not set, it will be ready from MLOPS_MODEL_ID environment variable.
    mlops = MLOps().init()

    features_df = _feature_df(num_samples)
    #print(features_df.info())

    start_time = time.time()
    predictions_array = _predictions_list(num_samples)
    print(len(predictions_array))
    end_time = time.time()

    # MLOPS: report the number of predictions in the request and the execution time.
    mlops.report_deployment_stats(len(predictions_array), (end_time - start_time) * 1000)

    # MLOPS: report the prediction results.
    mlops.report_predictions_data(features_df=features_df, predictions=predictions_array)

    # MLOPS: release MLOps resources when finished.
    mlops.shutdown()


if __name__ == "__main__":
    main()
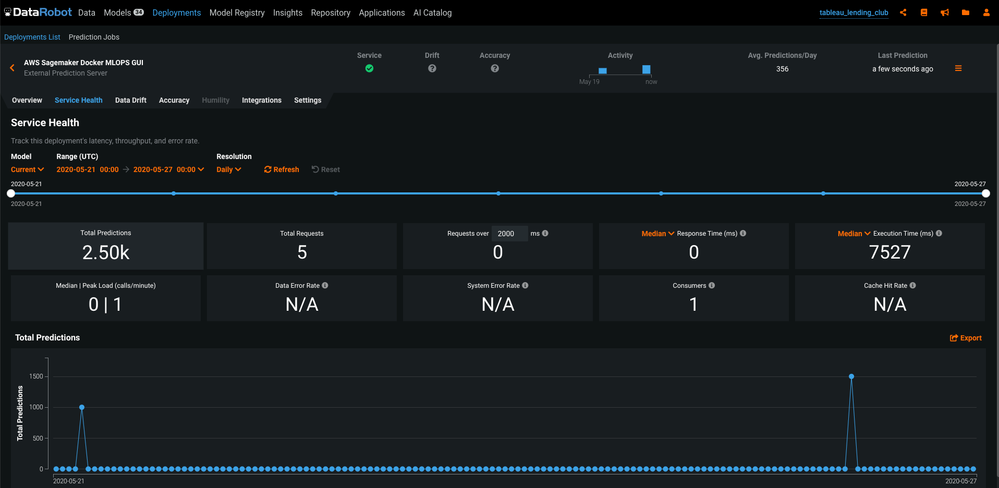
Model monitoring
Return to the deployment and check the Service Health tab to monitor the model. In this case, the MLOps Library is reporting predictions metrics to the Amazon SQS channel. The MLOps agent deployed on SageMaker along with Scoring Code reads these metrics from the SQS channel and reports them to the Service Health tab.