Deploy and monitor DataRobot models in Azure Kubernetes Service
Availability information
The MLOps model package export feature is off by default. Contact your DataRobot representative or administrator for information on enabling this feature for DataRobot MLOps.
Feature flag: Enable MMM model package export
This page shows how to deploy machine learning models on Azure Kubernetes Services (AKS) to create production scoring pipelines with DataRobot's MLOps Portable Prediction Server (PPS).

DataRobot Automated Machine Learning provides a dedicated prediction server as a low-latency, synchronous REST API suitable for real-time predictions. The DataRobot MLOps PPS extends this functionality to serve ML models in container images, giving you portability and control over your ML model deployment architecture.
A containerized PPS is well-suited to deployment in a Kubernetes cluster, allowing you to take advantage of this deployment architecture's auto-scaling and high availability. The combination of PPS and Kubernetes is ideal for volatile, irregular workloads such as those you can find in IoT use cases.
Create a model
The examples on this page use the public LendingClub dataset to predict the loan amount for each application.
-
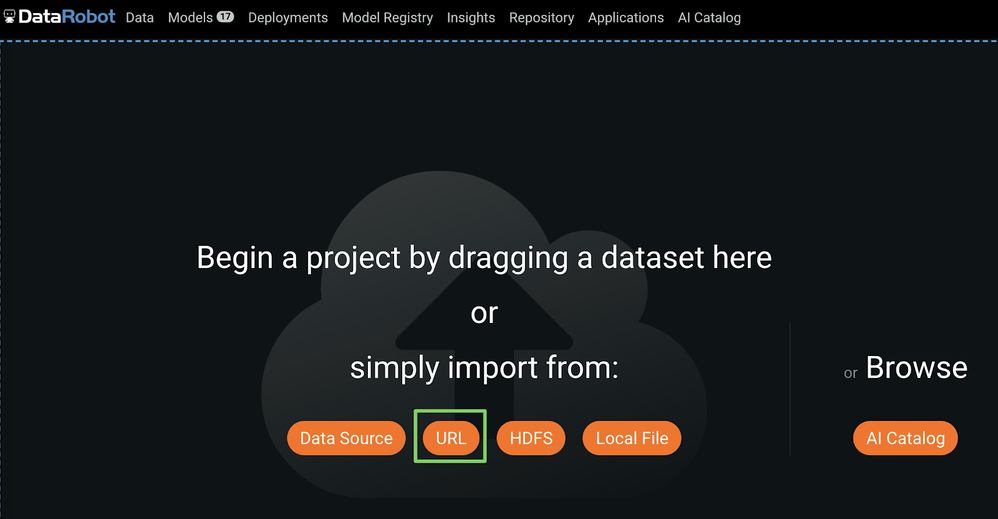
To upload the training data to DataRobot, do either of the following:
-
Click Local File, and then select the LendingClub dataset CSV file from your local file system.
-
Click URL to open the Import URL dialog box and copy the LendingClub dataset URL above:
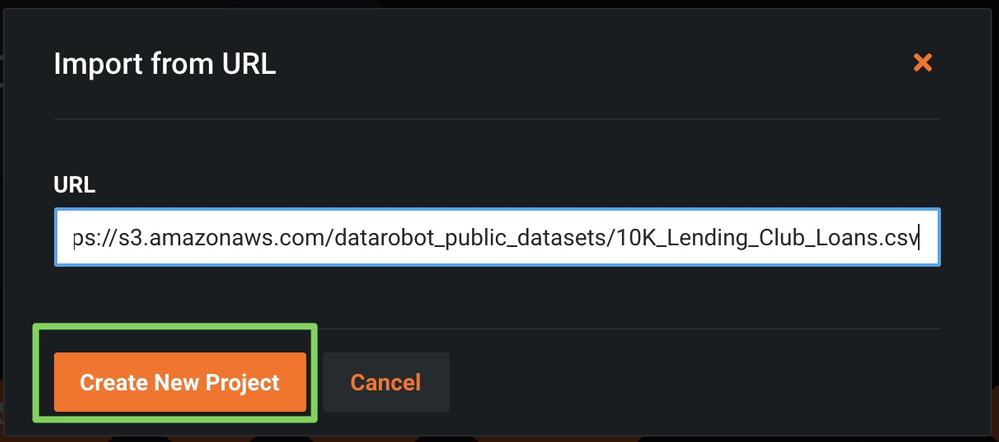
In the Import URL dialog box, paste the LendingClub dataset URL and click Import from URL:
-
-
Enter
loan_amtas your target (what you want to predict)(1) and click Start (2) to run Autopilot.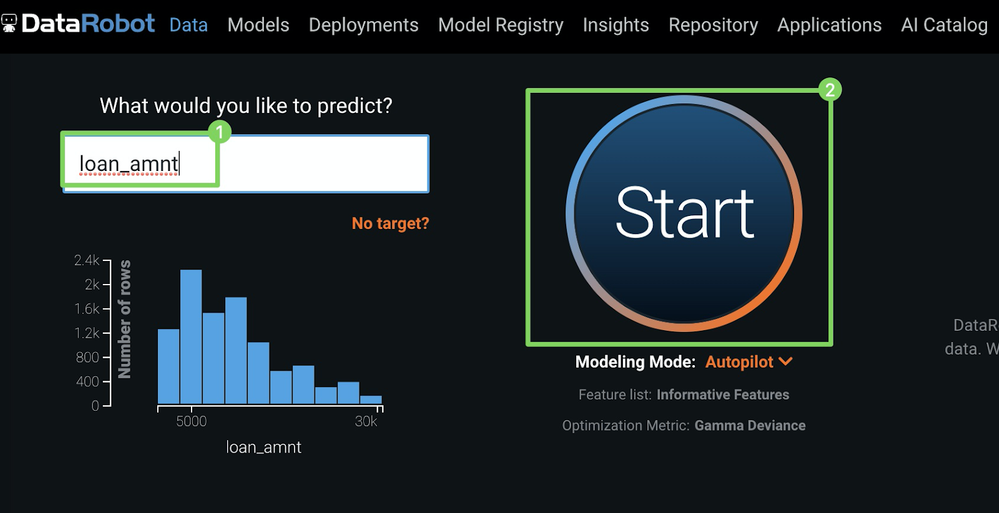
-
After Autopilot finishes, click Models and select a model at the top of the Leaderboard.
-
Under the model you selected, click Predict > Deploy to access the Get model package download.
-
Click Download .mlpkg to start the
.mlpkgfile download.
Note
For more information, see the documentation on the Portable Prediction Server.
Create an image with the model package
After you obtain the PPS base image, create a new version of it by creating a Dockerfile with the content below:
FROM datarobot/datarobot-portable-prediction-api:<TAG> AS build

COPY . /opt/ml/model
Note
For more information on how to structure this Docker command, see the Docker build documentation.
For the COPY command to work, you must have the .mlpkg file in the same directory as the Dockerfile. After creating your Dockerfile, run the command below to create a new image that includes the model:
docker build . --tag regressionmodel:latest
Create an Azure Container Registry
Before deploying your image to AKS, push it to a container registry such as the Azure Container Registry (ACR) for deployment:
-
In the Azure Portal, click Create a resource > Containers, then click Container Registry.
-
On the Create container registry blade, enter the following:
Field Description Registry name Enter a suitable name Subscription Select your subscription Resource group Use your existing resource group Location Select your region Admin user Enable SKU Standard -
Click Create.
-
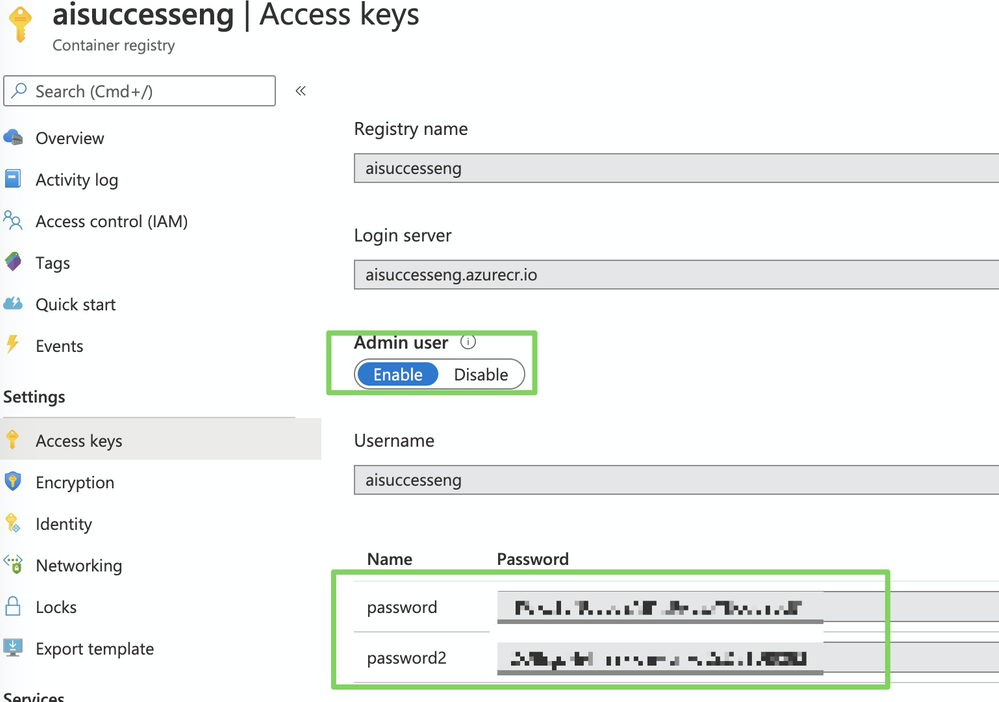
Navigate to your newly-generated registry and select Access Keys.
-
Copy the admin password to authenticate with Docker and push the
.mlpkgimage to this registry.
Push the model image to ACR
To push your new image to Azure Container Registry (ACR), log in with the following command (replace <DOCKER_USERNAME> with your previously-selected repository name):
docker login <DOCKER_USERNAME>.azurecr.io
The password is the administrator password you created with the Azure Container Registry (ACR).
Once logged in, make sure your Docker image is correctly tagged, and then push it to the repo with the following command (replace <DOCKER_USERNAME> with your previously selected repository name):
docker tag regressionmodel <DOCKER_USERNAME>.azurecr.io/regressionmodel
docker push <DOCKER_USERNAME>.azurecr.io/regressionmodel
Create an AKS cluster
This section assumes you are familiar with AKS and Azure's Command Line Interface (CLI).
Note
For more information on AKS, see Microsoft's Quickstart tutorial.
-
If you don't have a running AKS cluster, create one:
RESOURCE_GROUP=ai_success_eng CLUSTER_NAME=AIEngineeringDemo az aks create \ --resource-group $RESOURCE_GROUP \ --name $CLUSTER_NAME \ -s Standard_B2s \ --node-count 1 \ --generate-ssh-keys \ --service-principal XXXXXX \ --client-secret XXXX \ --enable-cluster-autoscaler \ --min-count 1 \ --max-count 2 -
Create a secret Docker registry so that AKS can pull images from the private repository. In the command below, replace the following with your actual credentials:
-
<SECRET_NAME> -
<YOUR_REPOSITORY_NAME> -
<DOCKER_USERNAME> -
<YOUR_SECRET_ADMIN_PW>
kubectl create secret docker-registry <SECRET_NAME> --docker-server=<YOUR_REPOSITORY_NAME>.azurecr.io --docker-username=<DOCKER_USERNAME> --docker-password=<YOUR_SECRET_ADMIN_PW> -
-
Deploy your Portable Prediction Server image. There are many ways to deploy applications, but the easiest method is via the Kubernetes dashboard. Start the Kubernetes dashboard with the following command:
az aks browse --resource-group $RESOURCE_GROUP --name $CLUSTER_NAME
Deploy a model to AKS
To install and deploy the PPS containing your model:
- Click CREATE > CREATE AN APP.
-
On the CREATE AN APP page, specify the following:
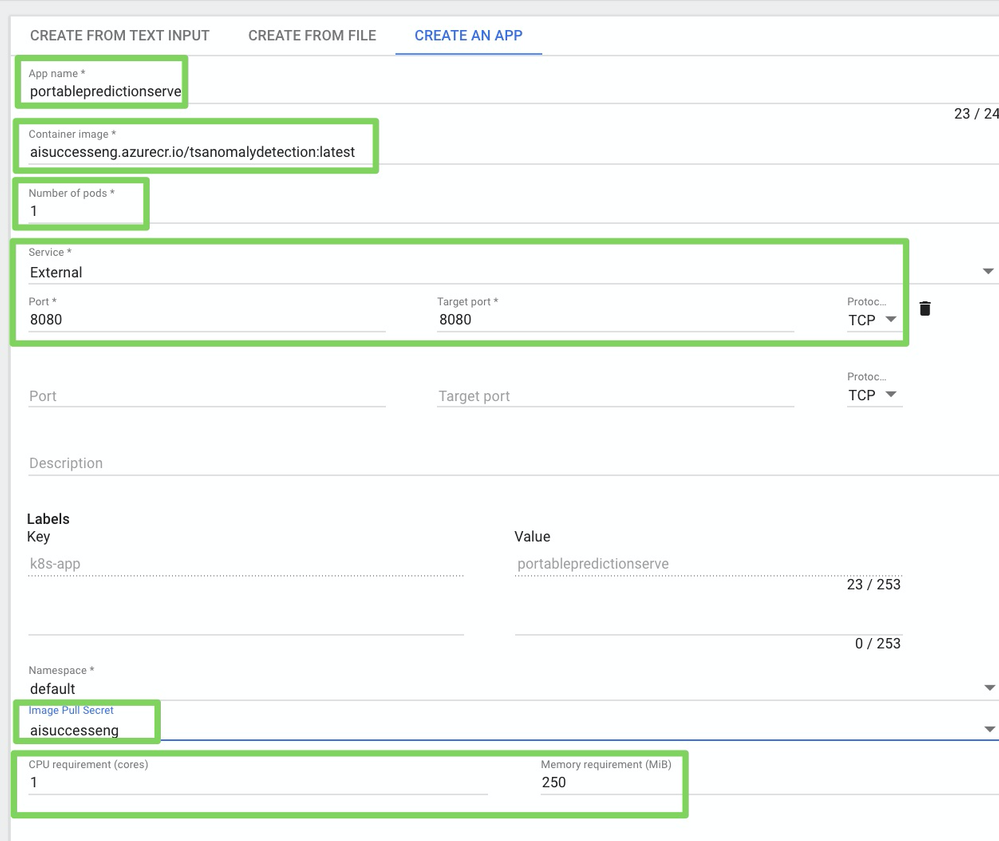
Field Value App name e.g., portablepredictionserverContainer image e.g., aisuccesseng.azurecr.io/regressionmodel:latestNumber of pods e.g., 1Service ExternalPort, Target port, and Protocol 8080,8080, andTCPImage pull secret previously created CPU requirement (cores) 1Memory requirement (MiB) 250 -
Click Deploy—it may take several minutes to deploy.
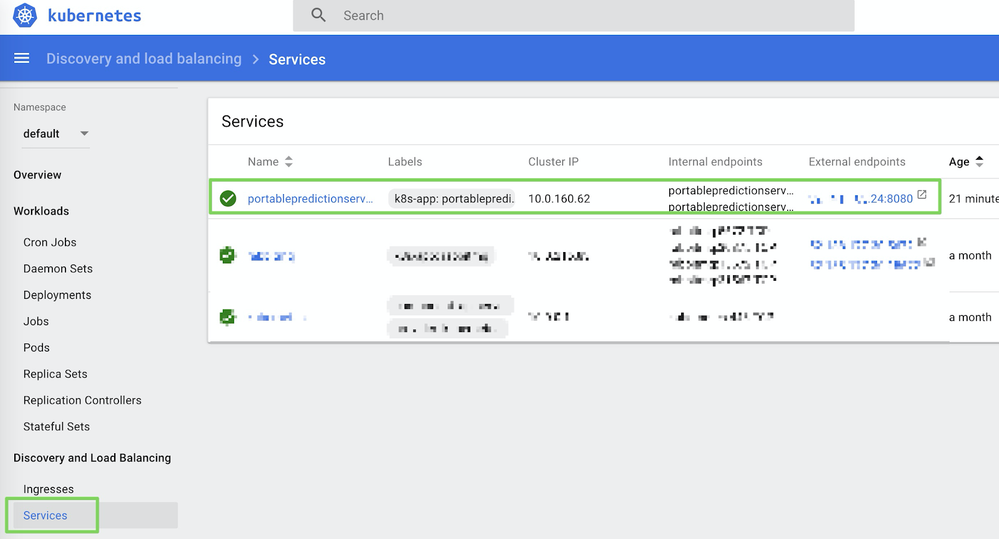
Score predictions with Postman
To test the model, download the DataRobot PPS Examples a Postman Collection, and update the hostname from localhost to the external IP address assigned to your service. You can find the IP address in the Services tab on your Kubernetes dashboard:
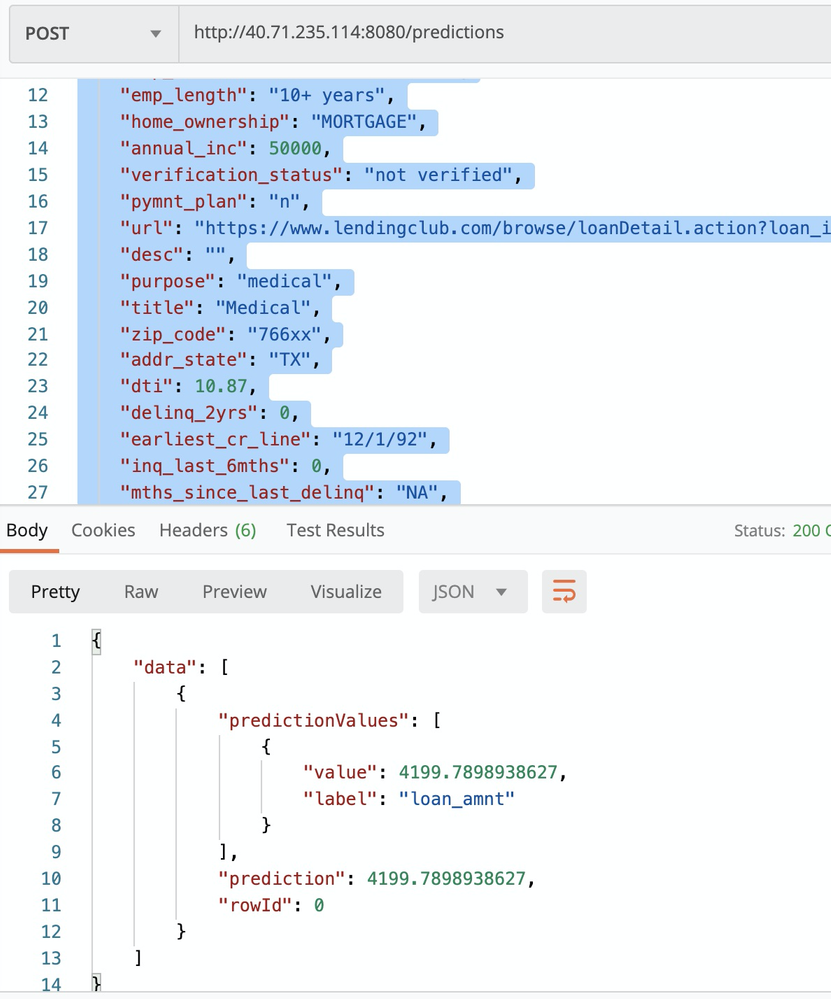
To make a prediction, execute the make predictions request:
Configure autoscaling and high availability
Kubernetes supports horizontal pod autoscaling to adjust the number of pods in a deployment depending on CPU utilization or other selected metrics. The Metrics Server provides resource utilization to Kubernetes and is automatically deployed in AKS clusters.
In the previous sections, you deployed one pod for your service and defined only the minimum requirement for CPU and memory resources.
To use the autoscaler, you must define CPU requests and utilization limits.
By default, the Portable Prediction Server spins up one worker, which means it can handle only one HTTP request simultaneously. The number of workers you can run, and thus the number of HTTP requests that it can handle simultaneously, is tied to the number of CPU cores available for the container.
Because you set the minimum CPU requirement to 1, you can now set the limit to 2 in the patchSpec.yaml file:
apiVersion: apps/v1
kind: Deployment
metadata:
  name: portablepredictionserver
spec:
  selector:
    matchLabels:
      app: portablepredictionserver
  replicas: 1
  template:
    metadata:
      labels:
        app: portablepredictionserver
    spec:
      containers:
      - name: portablepredictionserver
        image: aisuccesseng.azurecr.io/regressionmodel:latest
        ports:
        - containerPort: 8080
        resources:
          requests:
            cpu: 1000m
          limits:
            cpu: 2000m
      imagePullSecrets:
      - name: aisuccesseng
Then run the following command:
kubectl patch deployment portablepredictionserver --patch "$(cat patchSpec.yaml)"
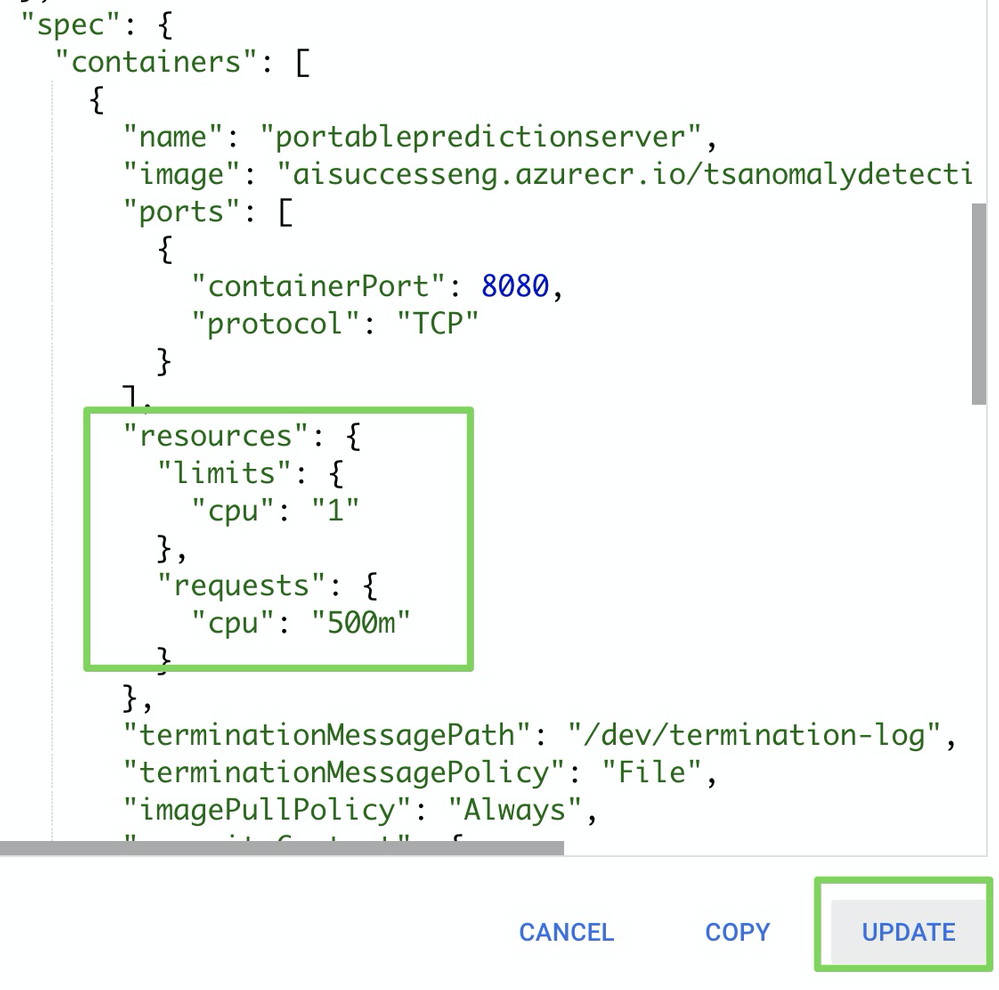
Alternatively, you can update the deployment directly in the Kubernetes dashboard by editing the JSON as shown below and clicking UPDATE.
Now that the CPU limits are defined, you can configure autoscaling with the following command:
kubectl autoscale deployment portablepredictionserver --cpu-percent=50 --min=1 --max=10
portablepredictionserver deployment. If the average CPU utilization across all pods exceeds 50% of their requested usage, the autoscaler increases the pods from a minimum of one instance up to ten instances.
To run a load test, download the sample JMeter test plan below and update the URLs/ authentication. Run it with the following command:
jmeter -n -t LoadTesting.jmx -l results.csv
The output will look similar to the following example:

Report usage to DataRobot MLOps via monitoring agents
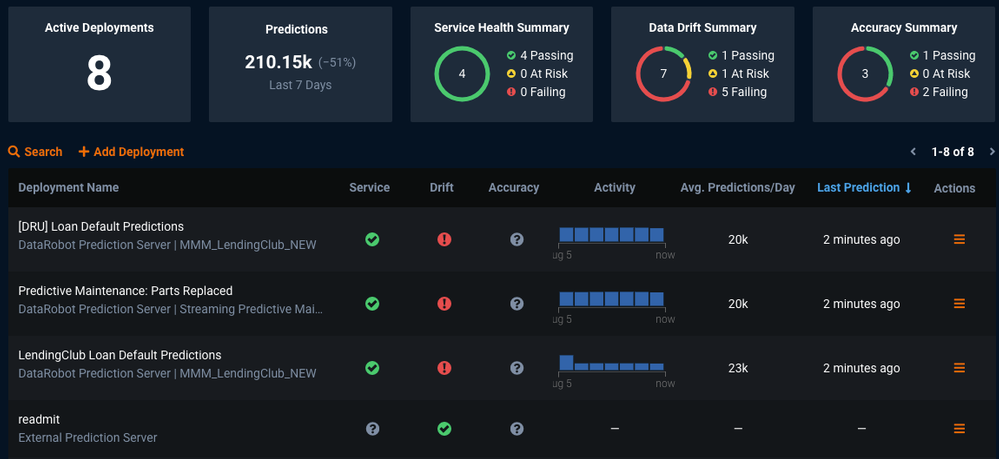
After deploying your model to AKS, you can monitor this model, along with all of your other models, in one central dashboard by reporting the telemetrics for these predictions to your DataRobot MLOps server and dashboards.
-
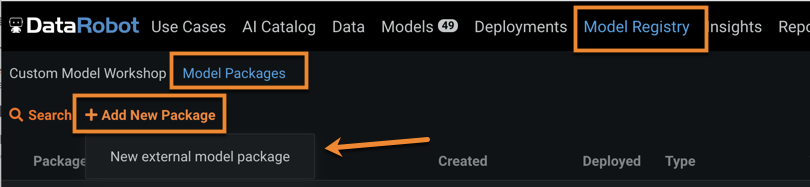
Navigate to the Model Registry > Model Packages > Add New Package and follow the instructions in the documentation.
-
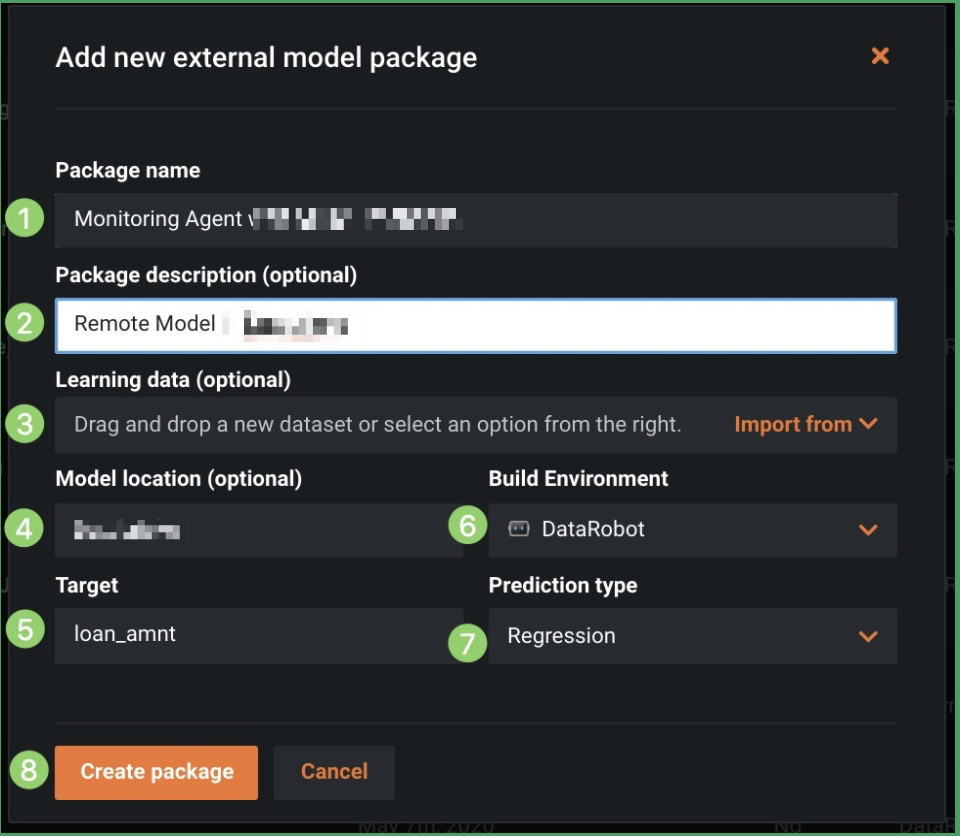
Select Add new external model package and specify a package name and description (1 and 2), upload the corresponding training data for drift tracking (3), and identify the model location (4), target (5), environment (6), and prediction type (7), then click Create package (8).
-
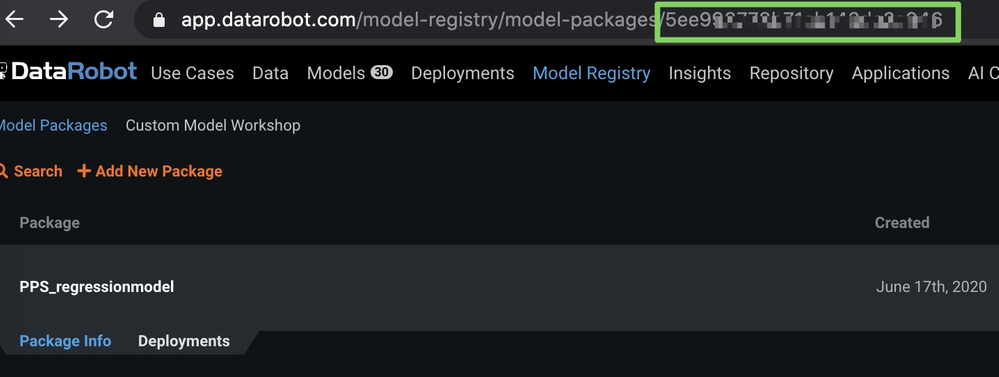
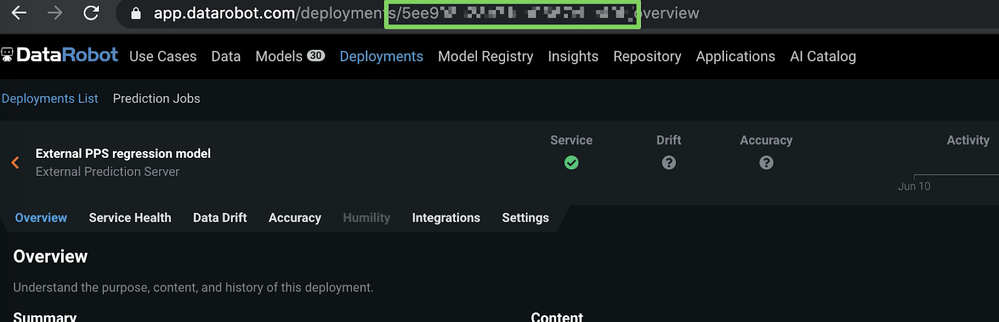
After creating the external model package, note the model ID in the URL as shown below (blurred in the image for security purposes).
-
While still on the Model Registry page and within the expanded new package, select the Deployments tab and click Create new deployment.
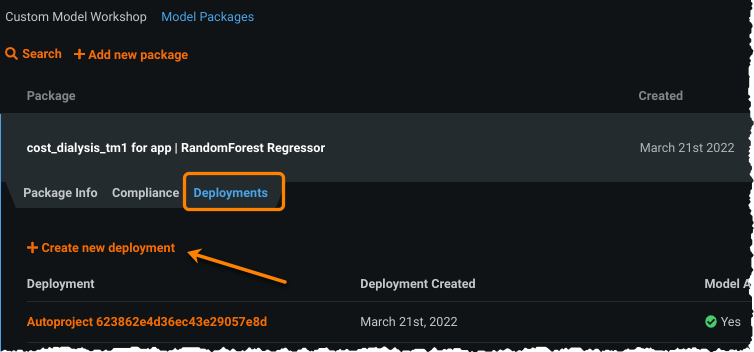
The deployment page loads prefilled with information from the model package you created.
-
Complete any missing information for the deployment and click Create deployment.
-
Navigate to Deployments > Overview and copy the deployment ID (from the URL).
Now that you have your model ID and deployment ID, you can report predictions as described in the next section.
Report prediction details
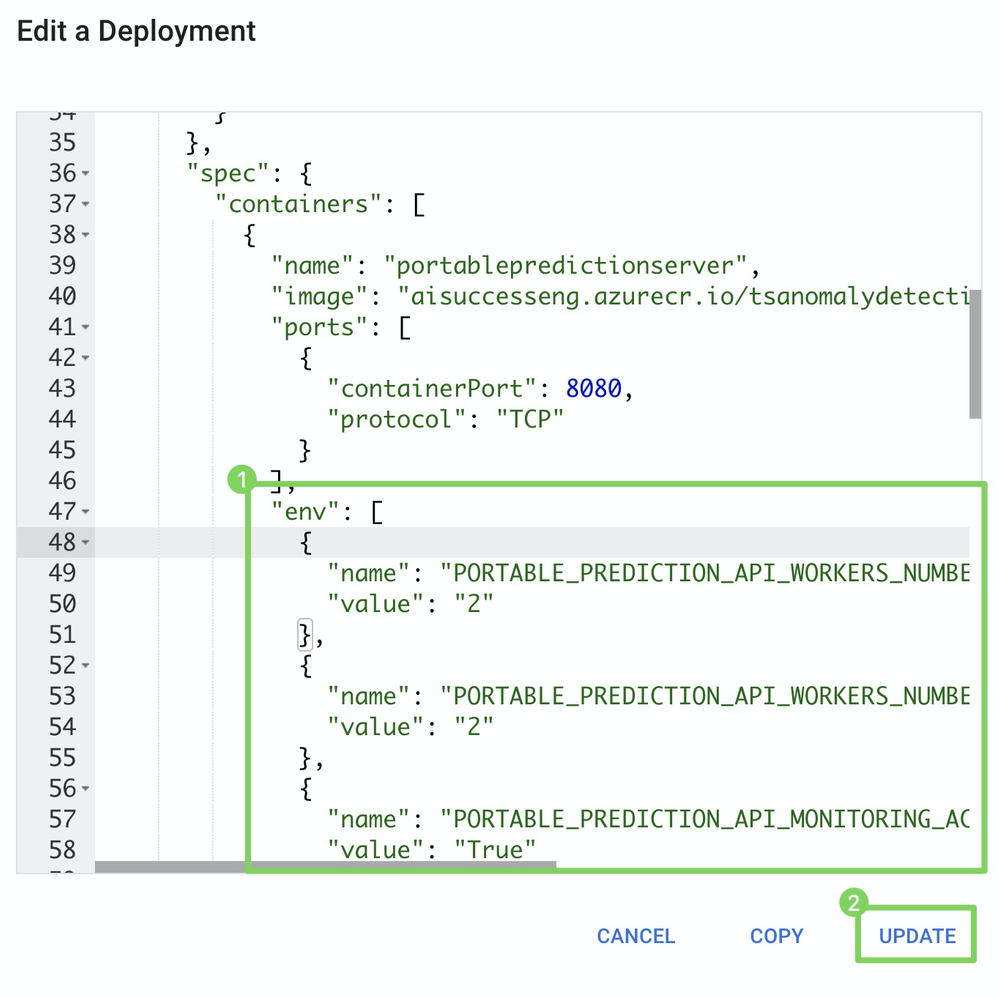
To report prediction details to DataRobot, you need to provide a few environment variables to your Portable Prediction Server container.
Update the deployment directly in the Kubernetes dashboard by editing the JSON and then clicking UPDATE:
"env": [
             {
                "name": "PORTABLE_PREDICTION_API_WORKERS_NUMBER",
                "value": "2"
              },
              {
                "name": "PORTABLE_PREDICTION_API_MONITORING_ACTIVE",
                "value": "True"
              },
              {
                "name": "PORTABLE_PREDICTION_API_MONITORING_SETTINGS",
                "value": "output_type=output_dir;path=/tmp;max_files=50;file_max_size=10240000;model_id=<modelId>;deployment_id=<deployment_id>"
              },
              {
                "name": "MONITORING_AGENT",
                "value": "False"
              },
              {
                "name": "MONITORING_AGENT_DATAROBOT_APP_URL",
                "value": "https://app.datarobot.com/"
              },
              {
                "name": "MONITORING_AGENT_DATAROBOT_APP_TOKEN",
                "value": "<YOUR TOKEN>"
              }
]
Even though you deployed a model outside of DataRobot on a Kubernetes cluster (AKS), you can monitor it like any other model and track service health and data drift in one central dashboard (see below).