開発者クイックスタート
このページを使用して、DataRobot CLI、Python APIクライアント、REST API、およびAgent Assistを使い始めます。 以下のセクションには、資格情報の提供方法、これらのツールのインストール方法、およびトレーニング、デプロイ、予測のスコアリングを行うハンズオンモデリングラボが含まれています。
| ツール | 説明 | 最適な用途 |
|---|---|---|
| Python APIクライアントとREST API | DataRobotとプログラム的にやり取りする方法。 | スクリプト、ノートブック、CIパイプライン、カスタムパイプライン |
DataRobot CLI (dr) |
ターミナルからDataRobotを操作するためのオープンソースツール。 | ローカル開発、テンプレート、dr run、dr task、エージェントプロジェクト |
Agent Assist (dr assist) |
AIエージェントの開発に最適化された対話型AIアシスタント。 | エージェントの設計、コーディング、デプロイ |
前提条件
使用したいツールに応じて、マシンに以下が必要です。
datarobotパッケージ用のPython 3.7以降(Agent Assistまたは関連するエージェントツールも使用する場合はPython 3.10以降が必要)- A DataRobot account
pip
curljq(オプション、サンプル中のJSONを読みやすくするため)- A DataRobot account
- DataRobotアカウント:DataRobotインスタンス(クラウドまたはセルフマネージド)へのアクセス。 If you don't have an account, sign up at DataRobot or contact your organization's DataRobot administrator.
- Git:テンプレートのクローン用(バージョン2.0以降)。 Install Git from git-scm.com if not already installed. Verify installation:
git --version - Task:タスク実行用。 Install Task from taskfile.dev if not already installed. Verify installation:
task --version - ターミナル:CLIアクセス用。
- macOS/Linux: Use Terminal, iTerm2, or your preferred terminal emulator.
- Windows: Use PowerShell, Command Prompt, or Windows Terminal.
- Operating system: macOS or Linux (Windows requires WSL or another supported environment)
- Python: 3.10 or higher
| ツール | バージョン | 説明 | インストール |
|---|---|---|---|
| dr-cli | >= 0.2.50 | DataRobot CLI。 | dr-cli installation |
| git | >= 2.30.0 | Version control. | git installation |
| uv | >= 0.9.0 | Python package manager. | uv installation |
| Pulumi | >= 3.163.0 | Infrastructure as Code. | Pulumi installation |
| Taskfile | >= 3.43.3 | Task runner. | Taskfile installation |
| Node.js | >= 24 | JavaScript runtime (for example, for template frontend). | Node.js installation |
On macOS, several tools can be installed at once:
brew install datarobot-oss/taps/dr-cli uv pulumi/tap/pulumi go-task node git python
環境設定
このセクションは、キー、リージョン、および資格情報に関する詳細なリファレンスです。 CLIとPythonパッケージを最初にセットアップする場合は、インストール方法と並行して進めることができます。 ここで設定した内容は、セットアップの検証で使用します。
APIキー(プラットフォーム上のあなたのID)、リージョンAPIエンドポイント(テナントが存在する場所)、およびツールが資格情報を読み取る方法(drconfig.yaml、環境変数、または明示的なコード)を設定します。
DataRobot APIキーの作成
ローカルスクリプト、ノートブック、および一般的なAPIアクセスのために、個人APIキータブでキーを作成します。 DataRobot UIで、ユーザーメニューを開き、APIのキーとツールを選択します(アカウントまたは開発者設定の下に表示されることもあります)。 ステップバイステップのUIの詳細とスクリーンショットは、APIのキーとツールにあります。
直接リンク(US SaaS)
https://app.datarobot.comにサインインしている場合は、開発者ツールを開き、個人APIキーを選択し、新しいキーを作成をクリックできます。 EUまたはJPの場合は、ブラウザーで使用しているのと同じドメイン(例:app.eu.datarobot.comまたはapp.jp.datarobot.com)にホスト名を置き換えます。
-
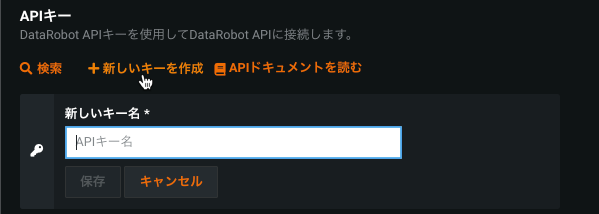
DataRobot UIから、ユーザーアイコンをクリックし、APIのキーとツールを選択します。
-
個人APIキーのままにして、新しいキーを作成をクリックします。
-
キーに名前を付けて、作成を確認します。 キーはすぐにアクティブになります。
APIのキーとツールのページには、複数のキータイプを表示できます。 ニーズに合ったタブを使用します。
| タブ | 用途 |
|---|---|
| 個人APIキー | この開発者クイックスタート—Python、cURL、ローカル開発、ほとんどの自動化。 ユーザー権限を継承します。 |
| アプリケーションのAPIキー | ユーザーに代わってDataRobotを呼び出すカスタムアプリケーション(例:StreamlitまたはReactアプリ)。 登録されたアプリケーションにスコープが設定されています。 アプリケーションのAPIキーを参照してください。 |
| エージェントのAPIキー | サービス間呼び出しを行うデプロイされたエージェントおよびエージェントワークフロー。 エージェントを構築する場合は、エージェントのAPIキーを参照してください。 |
ターミナルまたはIDEからコードを実行している場合は、個人APIキーから始めます。 独自のスコープ付き資格情報を必要とするアプリまたはデプロイ済みエージェントをリリースする際にキータイプを切り替えます。
各個人キーには以下が記載されています。

| ラベル | 要素 | 説明 |
|---|---|---|
| 1 | 名前 | キーの編集可能なラベル。 |
| 2 | キー | Authorizationヘッダーで使用されるシークレット値。 |
| 3 | 作成日 | 作成日。未使用のキーは「—」と表示される場合があります。 |
| 4 | 最後の使用 | キーが最後に使用された時刻。 |
APIエンドポイントの取得
すべてのリクエストは/api/v2で終わるベースURLを使用します。 ブラウザーでDataRobotを開くのに使用するのと同じホスト名を使用し、/api/v2を追加します。
| 地域 | UI URLの例 | APIエンドポイントルート |
|---|---|---|
| AIプラットフォーム(US) | https://app.datarobot.com | https://app.datarobot.com/api/v2 |
| AIプラットフォーム(EU) | https://app.eu.datarobot.com | https://app.eu.datarobot.com/api/v2 |
| AIプラットフォーム(JP) | https://app.jp.datarobot.com | https://app.jp.datarobot.com/api/v2 |
| セルフマネージドAIプラットフォーム | 組織のURL | https://{your-datarobot-host}/api/v2 |
APIの認証設定
コードまたはシェルには、エンドポイントとベアラートークン(個人APIキー)が必要です。 一般的なオプションには以下が含まれます。
drconfig.yamlファイルはDataRobotのPythonクライアントのデフォルトです。 一般的な場所:~/.config/datarobot/drconfig.yaml。 他のパスを使用して、明示的にクライアントに渡すこともできます。
endpoint: 'https://app.datarobot.com/api/v2'
token: 'token-string'
Python(デフォルトパス):
import datarobot as dr
Python(カスタムパス):
import datarobot as dr
dr.Client(config_path="<file-path-to-drconfig.yaml>")
cURL(値を環境変数に読み込む):
export DATAROBOT_ENDPOINT=$(grep 'endpoint:' ~/.config/datarobot/drconfig.yaml | cut -d "'" -f2)
export DATAROBOT_API_TOKEN=$(grep 'token:' ~/.config/datarobot/drconfig.yaml | cut -d "'" -f2)
curl --location -X GET "${DATAROBOT_ENDPOINT}/projects" --header "Authorization: Bearer ${DATAROBOT_API_TOKEN}"
Windows:
setx DATAROBOT_ENDPOINT "https://app.datarobot.com/api/v2"
setx DATAROBOT_API_TOKEN "your_api_token"
ターミナルを閉じて再度開きます。 UIで永続化するには、「環境変数」を検索し、システム変数の下にDATAROBOT_ENDPOINTとDATAROBOT_API_TOKENを追加します。
macOSとLinux:
export DATAROBOT_ENDPOINT="https://app.datarobot.com/api/v2"
export DATAROBOT_API_TOKEN="your_api_token"
すべてのセッションで必要な場合は、同じ行を~/.zshrc、~/.bashrc、または~/.bash_profileに追加します。
Python:
import datarobot as dr
dr.Project.list()
cURL:
curl --location -X GET "${DATAROBOT_ENDPOINT}/projects" --header "Authorization: Bearer ${DATAROBOT_API_TOKEN}"
オプションで、エクスペリメントに便利です。 シークレットをGitにコミットしないでください。
Python:
import datarobot as dr
dr.Client(endpoint='https://app.datarobot.com/api/v2', token='token-string')
cURL:
curl --location --request GET 'https://app.datarobot.com/api/v2/projects/' \
--header 'Authorization: Bearer <YOUR_API_TOKEN>'
オプション:DataRobot CLI(dr auth login)
DataRobot CLIを使用する場合は、dr auth loginを実行してブラウザーベースの認証を完了し、設定を~/.config/datarobot/drconfig.yamlに保存します(認証管理を参照)。 Pythonクライアントはそのファイルを読み取ることができるため、別途手動でdrconfig.yamlを作成する手順は不要な場合があります。
資格情報の解決順序
DataRobotツールは、通常、次の順序で資格情報を解決します。
DATAROBOT_API_TOKENとDATAROBOT_ENDPOINTの環境変数- 現在の作業ディレクトリにある
.envファイル(使用するツールがそれを読み込む場合) ~/.config/datarobot/drconfig.yaml(例:dr auth loginの後)- 一部のAgent Assistフロー用の
~/.config/datarobot/agent_assist_config.yaml
drconfig.yamlの配置とcURLの例については、APIの認証設定を参照してください。
インストール方法
以下のセクションでは、DataRobotのコードファーストツールをインストールするためのさまざまな方法を説明します。
CLIインストーラー
macOS / Linux:DataRobot CLIをインストールします。 次に、PythonパッケージとAgent Assistを自分で追加します。
curl https://cli.datarobot.com/install | sh
pip install datarobot datarobot-predict
dr plugin install assist
Windows(PowerShell):CLIインストールから:
irm https://cli.datarobot.com/winstall | iex
インストール後、Pythonが利用可能な環境でpip install datarobot datarobot-predictおよびdr plugin install assistを実行します。 エンドポイントとトークンをまだ設定していない場合は、APIの認証設定(例:dr auth loginと認証管理を使用)を行ってから、セットアップの検証を行います。
Homebrew、固定バージョン、またはバイナリーについては、DataRobot CLIを使い始めるを参照してください。
AIコーディングツールによるセットアップ
空または使い捨てのディレクトリで、以下のブロックをClaude Code、Cursor、または別のエージェントコーディングツールに貼り付けます。 これはdocs.datarobot.comのインストールおよび認証トピックにリンクしており、エージェントが前提条件をインストールし、資格情報を設定し、ライブAPI呼び出しで検証できるようにします。
You are helping me set up DataRobot for local development. Do all of the following:

1. Read the following docs and follow the install steps exactly:
   - https://docs.datarobot.com/en/docs/api/dev-learning/api-quickstart.html
   - https://docs.datarobot.com/en/docs/agentic-ai/cli/getting-started.html
   - https://docs.datarobot.com/en/docs/agentic-ai/agent-assist/installation.html

2. Detect my OS (macOS / Linux / WSL). On macOS use Homebrew where the docs recommend it; on Linux use the documented installers.

3. Install: Python 3.10 or later, git, uv, dr-cli, Pulumi, go-task, and Node.js 24 (or the minimum versions described in those docs and the manual table below).

4. Install the Python SDK: `pip install datarobot datarobot-predict`

5. Prompt me for my DataRobot Personal API key. If I don't have one, open
   https://app.datarobot.com/account/developer-tools and tell me to use the
   "Personal API keys" tab (not Application or Agent keys).

6. Run `dr auth login` to persist credentials in `~/.config/datarobot/drconfig.yaml`
   and, if I want shell persistence, add `DATAROBOT_ENDPOINT` and `DATAROBOT_API_TOKEN` to my shell rc file.

7. Install Agent Assist as a CLI plugin: `dr plugin install assist`

8. Verify everything works by:
   - Running `dr --version`, `dr plugin list`, and `dr assist --help`
   - Executing this Python snippet and printing the first three project names:

     ```python
     import datarobot as dr
     dr.Client()
     for p in dr.Project.list()[:3]:
         print(p.project_name)
     ```

9. Print a summary of what was installed and the config file locations.

Do not run `dr assist` yet — only install and verify.
手動インストール:完全なエージェントスタック用のPythonパッケージ
macOS
brew install datarobot-oss/taps/dr-cli uv pulumi/tap/pulumi go-task node git python
pip install datarobot datarobot-predict
dr plugin install assist
Linux / WSL — 各ツールを公式インストーラーからインストールし(表を参照)、次の手順を実行します。
pip install datarobot datarobot-predict
dr plugin install assist
| ツール | Minimum version | インストール |
|---|---|---|
dr-cli |
0.2.50 | datarobot-oss/cliのインストール |
| Git | 2.30.0 | git-scm.com/downloads |
| uv | 0.9.0 | uvのインストール |
| Pulumi | 3.163.0 | ダウンロードしてインストール |
| タスク | 3.43.3 | Taskのインストール |
| Node.js | 24 | Node.jsのダウンロード |
| Python | 3.10 | python.org/downloads |
Agent AssistではネイティブWindowsはサポートされていません。WSL、Linux VM、またはDataRobot Codespaceを使用してください。 See Prerequisites and installation.
ブループリント構築用のパッケージのインストール
pip install datarobot datarobot-predict
(オプション)カスタムブループリントをプログラム的に構築したい場合は、graphvizとblueprint-workshopの2つの追加パッケージをインストールします。
Windows
Ubuntu
sudo apt-get install graphviz
Mac
brew install graphviz
graphvizをインストールしたら、ワークショップをインストールします。
pip install datarobot-bp-workshop
セットアップの検証
キーとエンドポイントが設定されたら、セッションがAPIに到達できることを確認します。 関心のあるパスのサブセクションを使用します。
Python SDK
import datarobot as dr

dr.Client()  # reads env vars or drconfig.yaml
projects = dr.Project.list()
print(f"Connected. You can see {len(projects)} project(s).")
cURL
シェルにDATAROBOT_ENDPOINTとDATAROBOT_API_TOKENが必要です。
curl -s "${DATAROBOT_ENDPOINT}/projects/" \
  -H "Authorization: Bearer ${DATAROBOT_API_TOKEN}" | head
CLI
dr --version
dr plugin list          # should include assist
dr task --help
CLIサニティチェック
CLIがインストールされている場合:dr --version。 プラグインとしてのAgent Assistについては、前提条件とインストール(dr plugin install assist)を参照してください。
Agent Assist
Agent Assistは現在のディレクトリにテンプレートをクローンするため、新しいフォルダーを使用します。
mkdir my-first-agent && cd my-first-agent
dr assist
初回実行時、Agent Assistは依存関係をチェックし、認証を検証し、対話型セッションを開始します。 希望するエージェントを平易な言葉で説明します。
今すぐAgent Assistの使用を開始したい場合は、ワークフローとプロンプティングにアクセスします。
トラブルシューティング
| Symptom | 確認事項 |
|---|---|
401 Unauthorized |
個人APIキーの値。エンドポイントリージョンがログイン場所(US、EU、JP)と一致していること。キーが期限切れまたは取り消されていないこと。 開発者ツール(US SaaS)またはAPIのキーとツールからキーを再生成します。 |
dr: command not found |
dr-cliがPATHにないこと。 CLIをインストールし、ターミナルを再度開くか、Homebrewを使用しているmacOSではbrew link dr-cliを実行します。 Linuxでは、リリースのインストール場所をPATHに追加します。 |
dr plugin install assistが失敗する |
dr --versionが少なくとも0.2.50であることを確認します。古いCLIではプラグインインデックスが公開されない可能性があります。 See Prerequisites and installation. |
| Agent Assist:ディレクトリが空ではない | dr assistは空のディレクトリからのみ実行します。アシスタントはテンプレートをクローンし、ファイルの上書きを拒否します。 |
| WindowsとAgent Assist | Agent AssistはmacOS/Linuxを対象としています。Windowsではインストールに従ってWSL2またはcodespaceを使用します。 |
ハンズオン:最初のモデルを構築してデプロイする
以下のセクションは、ローカルで実行できるコンパクトなモデリングラボです。多くのチームが後に本番環境で自動化するのと同じ手順です。 例ではPythonまたはcURLを使用します。 定番のAuto MPGデータセットから、ガロンあたりのマイル数を予測します。
備考
Pythonスニペットはクライアント3.x API(Dataset、登録済みモデルデプロイフロー)を使用します。 インポートに失敗した場合は、パッケージをアップグレードしてください。 セルフマネージドAIプラットフォームを使用する場合は、セルフマネージドAIプラットフォームAPIリソースページを参照して、インストールでサポートされているクライアントバージョンを確認してください。
さらにコードファーストのサンプルについては、AIアクセラレーターを参照してください。
以下の操作を行います。
- データセットをアップロードしてプロジェクトを作成します。
- オートパイロットでトレーニングし、推奨モデルを選択します。
- そのモデルをサーバーレス予測環境にデプロイします。
- デプロイを使用してホールドアウトCSVで予測します。
データセットのアップロード
このzipアーカイブからauto-mpg.csvとauto-mpg-test.csvをダウンロードします。
以下のPythonタブでは、ラボが自己完結型になるように、スクリプトと同じディレクトリにあるconfig_path="./drconfig.yaml"を使用しています。 同じクライアントは、APIの認証設定で説明されているように、その配置を好む場合、デフォルトの~/.config/datarobot/drconfig.yaml(または環境変数)も取得します。
import datarobot as dr
dr.Client(config_path="./drconfig.yaml")

# Set to the location of your auto-mpg.csv and auto-mpg-test.csv data files
# Example: dataset_file_path = '/Users/myuser/Downloads/auto-mpg.csv'
training_dataset_file_path = './auto-mpg.csv'
test_dataset_file_path = './auto-mpg-test.csv'
print("--- Starting DataRobot Model Training Script ---")

# Load dataset
training_dataset = dr.Dataset.create_from_file(training_dataset_file_path)

# Create a new project based on dataset
project = dr.Project.create_from_dataset(training_dataset.id, project_name='Auto MPG DR-Client')
DATAROBOT_API_TOKEN=${DATAROBOT_API_TOKEN}
DATAROBOT_ENDPOINT=${DATAROBOT_ENDPOINT}
DATASET_FILE_PATH="./auto-mpg.csv"
location=$(curl -Lsi \
  -X POST \
  -H "Authorization: Bearer ${DATAROBOT_API_TOKEN}" \
  -F 'projectName="Auto MPG"' \
  -F "file=@${DATASET_FILE_PATH}" \
  "${DATAROBOT_ENDPOINT}"/projects/ | grep -i 'Location: .*$' | \
  cut -d " " -f2 | tr -d '\r')
echo "Uploaded dataset. Checking status of project at: ${location}"
while true; do
  project_id=$(curl -Ls \
    -X GET \
    -H "Authorization: Bearer ${DATAROBOT_API_TOKEN}" "${location}" \
    | grep -Eo 'id":\s"\w+' | cut -d '"' -f3 | tr -d '\r')
  if [ "${project_id}" = "" ]
  then
    echo "Setting up project..."
    sleep 10
  else
    echo "Project setup complete."
    echo "Project ID: ${project_id}"
    break
  fi
done
モデルのトレーニング
DataRobotオートパイロットは多くの候補モデルをトレーニングし、ターゲット(ここではmpg)に対する推奨モデルを表示します。 選択方法については、UIドキュメントのモデル推奨を参照してください。
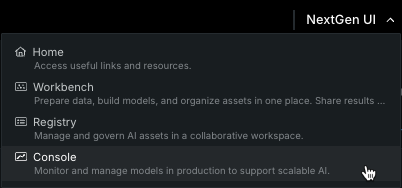
備考
このコードは、Classicのプロジェクトでブラウザーウィンドウを開くことができます。 新しいナビゲーションを希望する場合は、NextGen UIメニューを使用してコンソールを開きます。
# Use training data to build models
from datarobot import AUTOPILOT_MODE

# Set the project's target and initiate Autopilot (runs in Quick mode unless a different mode is specified)
project.analyze_and_model(target='mpg', worker_count=-1, mode=AUTOPILOT_MODE.QUICK)
print("\nAutopilot is running. This may take some time...")
project.wait_for_autopilot()
print("Autopilot has completed!")

# Open the project in a web browser to view progress
print("Opening the project in your default web browser to view real-time events...")
project.open_in_browser()

# Get the recommended model (the best model for deployment)
print("\nRetrieving the best model from the Leaderboard...")
best_model = project.recommended_model()
print(f"Best Model Found:")
print(f"  - Model Type: {best_model.model_type}")
print(f"  - Blueprint ID: {best_model.blueprint_id}")
response=$(curl -Lsi \
  -X PATCH \
  -H "Authorization: Bearer ${DATAROBOT_API_TOKEN}" \
  -H "Content-Type: application/json" \
  --data '{"target": "mpg", "mode": "quick"}' \
  "${DATAROBOT_ENDPOINT}/projects/${project_id}/aim" | grep 'location: .*$' \
  | cut -d " " | tr -d '\r')
echo "AI training initiated. Checking status of training at: ${response}"
while true; do
  initial_project_status=$(curl -Ls \
  -X GET \
  -H "Authorization: Bearer ${DATAROBOT_API_TOKEN}" "${response}" \
  | grep -Eo 'stage":\s"\w+' | cut -d '"' -f3 | tr -d '\r')
  if [ "${initial_project_status}" = "" ]
  then
    echo "Setting up AI training..."
    sleep 10
  else
    echo "Training AI."
    echo "Grab a coffee or catch up on email."
    break
  fi
done

echo "Polling for Autopilot completion..."
while true; do
  autopilot_done=$(curl -s \
    -X GET \
    -H "Authorization: Bearer ${DATAROBOT_API_TOKEN}" \
    "${DATAROBOT_ENDPOINT}/projects/${project_id}/" \
    | grep -Eo '"autopilotDone":\s*(true|false)' | cut -d ':' -f2 | tr -d ' ')

  if [ "${autopilot_done}" = "true" ]; then
    echo "Autopilot training complete. Model ready to deploy."
    break
  else
    echo "Autopilot training in progress... checking again in 60 seconds."
    sleep 60
  fi
done

# Get the recommended model ID
recommended_model_id=$(curl -s \
  -X GET \
  -H "Authorization: Bearer ${DATAROBOT_API_TOKEN}" \
  "${DATAROBOT_ENDPOINT}/projects/${project_id}/recommendedModels/recommendedModel/" \
  | grep -Eo 'modelId":\s"\w+' | cut -d '"' -f3 | tr -d '\r')
echo "Recommended model ID: ${recommended_model_id}"
モデルのデプロイ
デプロイは、マネージド環境でトレーニング済みモデルから予測を提供します。 コンセプトとオプションについては、デプロイの概要を参照してください。
# Deploy the model to a serverless prediction environment
print("\nDeploying the model to a serverless prediction environment...")

# Find or create a serverless prediction environment
serverless_env = None
for env in dr.PredictionEnvironment.list():
    if env.platform == 'datarobotServerless':
        serverless_env = env
        break

if serverless_env is None:
    print("Creating a new serverless prediction environment...")
    serverless_env = dr.PredictionEnvironment.create(
        name="Auto MPG Serverless Environment",
        platform='datarobotServerless'
    )

# First, register the model to create a registered model version
print("Registering the model...")

# Check if the registered model already exists
registered_model_name = "Auto MPG Registered Model"
existing_models = [m for m in dr.RegisteredModel.list() if m.name == registered_model_name]

if existing_models:
    print(f"Using existing registered model: {registered_model_name}")
    registered_model = existing_models[0]
    # Create a new version of the existing model
    registered_model_version = dr.RegisteredModelVersion.create_for_leaderboard_item(
        best_model.id,
        name="Auto MPG Model",
        registered_model_id=registered_model.id
    )
else:
    print(f"Creating new registered model: {registered_model_name}")
    # Create a new registered model
    registered_model_version = dr.RegisteredModelVersion.create_for_leaderboard_item(
        best_model.id,
        name="Auto MPG Model",
        registered_model_name=registered_model_name
    )
    # Retrieve the newly created registered model object by ID
    registered_model = dr.RegisteredModel.get(registered_model_version.registered_model_id)

# Wait for the model build to complete
print("Waiting for model build to complete...")
while True:
    current_version = registered_model.get_version(registered_model_version.id)
    if current_version.build_status in ('READY', 'complete'):
        print("Model build completed successfully!")
        registered_model_version = current_version  # Update our reference
        break
    elif current_version.build_status == 'FAILED':
        raise Exception("Model build failed. Please check the model registration.")
    else:
        print(f"Build status: {current_version.build_status}. Waiting...")
        import time
        time.sleep(30)  # Wait 30 seconds before checking again

# Deploy the model to the serverless environment using the registered model version
deployment = dr.Deployment.create_from_registered_model_version(
    registered_model_version.id,
    label="Auto MPG Predictions",
    description="Deployed with DataRobot client for Auto MPG predictions",
    prediction_environment_id=serverless_env.id
)

print(f"Model deployed successfully! Deployment ID: {deployment.id}")
# Use the recommended model ID from training section
echo "Using recommended model ID: ${recommended_model_id}"

# Find or create a serverless prediction environment
echo "Looking for serverless prediction environment..."
serverless_env_id=$(curl -s -X GET \
-H "Authorization: Bearer ${DATAROBOT_API_TOKEN}" \
"${DATAROBOT_ENDPOINT}/predictionEnvironments/" \
| grep -Eo '"id":"[^"]*".*"platform":"datarobotServerless"' \
| grep -Eo '"id":"[^"]*"' | cut -d '"' -f4 | head -1)

if [ -z "${serverless_env_id}" ]; then
    echo "Creating new serverless prediction environment..."
    serverless_env_response=$(curl -s -X POST \
    -H "Authorization: Bearer ${DATAROBOT_API_TOKEN}" \
    -H "Content-Type: application/json" \
    --data '{"name":"Auto MPG Serverless Environment","platform":"datarobotServerless"}' \
    "${DATAROBOT_ENDPOINT}/predictionEnvironments/")
    serverless_env_id=$(echo "$serverless_env_response" | grep -Eo '"id":"[^"]*"' | cut -d '"' -f4)
    echo "Created serverless environment ID: ${serverless_env_id}"
else
    echo "Using existing serverless environment ID: ${serverless_env_id}"
fi

# Check if registered model already exists
registered_model_name="Auto MPG Registered Model"
existing_model_id=$(curl -s -X GET \
-H "Authorization: Bearer ${DATAROBOT_API_TOKEN}" \
"${DATAROBOT_ENDPOINT}/registeredModels/" \
| grep -Eo '"id":"[^"]*".*"'${registered_model_name}'"' \
| grep -Eo '"id":"[^"]*"' | cut -d '"' -f4 | head -1)

if [ -n "${existing_model_id}" ]; then
    echo "Using existing registered model: ${registered_model_name}"
    # Create new version of existing model
    model_version_response=$(curl -s -X POST \
    -H "Authorization: Bearer ${DATAROBOT_API_TOKEN}" \
    -H "Content-Type: application/json" \
    --data "{\"name\":\"Auto MPG Model\",\"registeredModelId\":\"${existing_model_id}\",\"leaderboardItemId\":\"${recommended_model_id}\"}" \
    "${DATAROBOT_ENDPOINT}/registeredModels/${existing_model_id}/versions/")
else
    echo "Creating new registered model: ${registered_model_name}"
    # Create new registered model
    model_response=$(curl -s -X POST \
    -H "Authorization: Bearer ${DATAROBOT_API_TOKEN}" \
    -H "Content-Type: application/json" \
    --data "{\"name\":\"${registered_model_name}\"}" \
    "${DATAROBOT_ENDPOINT}/registeredModels/")
    existing_model_id=$(echo "$model_response" | grep -Eo '"id":"[^"]*"' | cut -d '"' -f4)

    # Create first version
    model_version_response=$(curl -s -X POST \
    -H "Authorization: Bearer ${DATAROBOT_API_TOKEN}" \
    -H "Content-Type: application/json" \
    --data "{\"name\":\"Auto MPG Model\",\"registeredModelId\":\"${existing_model_id}\",\"leaderboardItemId\":\"${recommended_model_id}\"}" \
    "${DATAROBOT_ENDPOINT}/registeredModels/${existing_model_id}/versions/")
fi

model_version_id=$(echo "$model_version_response" | grep -Eo '"id":"[^"]*"' | cut -d '"' -f4)
echo "Model version ID: ${model_version_id}"

# Wait for model build to complete
echo "Waiting for model build to complete..."
while true; do
    build_status=$(curl -s -X GET \
    -H "Authorization: Bearer ${DATAROBOT_API_TOKEN}" \
    "${DATAROBOT_ENDPOINT}/registeredModels/${existing_model_id}/versions/${model_version_id}/" \
    | grep -Eo '"buildStatus":"[^"]*"' | cut -d '"' -f4)

    if [ "${build_status}" = "READY" ] || [ "${build_status}" = "complete" ]; then
        echo "Model build completed successfully!"
        break
    elif [ "${build_status}" = "FAILED" ]; then
        echo "Model build failed. Please check the model registration."
        exit 1
    else
        echo "Build status: ${build_status}. Waiting..."
        sleep 30
    fi
done

# Deploy the model using the registered model version
echo "Deploying the model to the serverless environment..."
deployment_response=$(curl -s -X POST \
-H "Authorization: Bearer ${DATAROBOT_API_TOKEN}" \
-H "Content-Type: application/json" \
--data "{\"label\":\"Auto MPG Predictions\",\"description\":\"Deployed with cURL for Auto MPG predictions\",\"predictionEnvironmentId\":\"${serverless_env_id}\",\"registeredModelVersionId\":\"${model_version_id}\"}" \
"${DATAROBOT_ENDPOINT}/deployments/fromRegisteredModelVersion/")

deployment_id=$(echo "$deployment_response" | grep -Eo '"id":"[^"]*"' | cut -d '"' -f4)
echo "Model deployed successfully! Deployment ID: ${deployment_id}"

# Get the prediction URL for the deployment
echo "Retrieving prediction URL for deployment..."
prediction_url=$(curl -s -X GET \
  -H "Authorization: Bearer ${DATAROBOT_API_TOKEN}" \
  "${DATAROBOT_ENDPOINT}/deployments/${deployment_id}/" \
  | grep -Eo '"predictionUrl":"[^"]*"' | cut -d '"' -f4)
echo "Prediction URL: ${prediction_url}"
デプロイされたモデルを使った予測
予測APIを使用して新しい行をスコアリングします。 そのパスは、ドリフトや精度追跡などのモデル管理機能を有効にします。 概要については、予測方法を参照してください。 UIで、デプロイ → 自分のデプロイ → 予測 → 予測APIを開いてコピー&ペースト用のスニペットを取得します。
この例では、datarobot-predictを使用してauto-mpg-test.csvをスコアリングします。
# Make predictions on test data
print("\nMaking predictions on test data...")

# Read the test data directly
import pandas as pd
from datarobot_predict.deployment import predict

test_data = pd.read_csv(test_dataset_file_path)

# Use datarobot-predict for deployment predictions
predictions, response_headers = predict(deployment, test_data)

# Display the results
print("\nPrediction Results:")
print(predictions.head())
print(f"\nTotal predictions made: {len(predictions)}")
# Use the prediction URL from deployment section
TEST_DATASET_FILE_PATH="./auto-mpg-test.csv"

# Make predictions by sending the CSV data directly
predictions=$(curl -s -X POST \
  -H "Authorization: Bearer ${DATAROBOT_API_TOKEN}" \
  -H "Content-Type: text/csv; charset=UTF-8" \
  --data-binary "@${TEST_DATASET_FILE_PATH}" \
  "${prediction_url}")

echo "Prediction Results:"
echo "$predictions" | jq '.'

prediction_count=$(echo "$predictions" | jq '.data | length')
echo "Total predictions made: ${prediction_count}"
次のステップ
ノートブックとタスクベースのチュートリアルについては、開発者向け学習セクションを引き続きご覧ください。 モジュラーワークフローにはAIアクセラレーターを試し、REST APIとPythonクライアントについてはリファレンスドキュメントを使用します。
| 次のことを実行したい場合... | 移動先 |
|---|---|
| ハンズオンモデリングラボを実行する | ハンズオン:最初のモデルを構築してデプロイする |
| Agent Assistを使用してエージェントを構築する | エージェントワークフローとプロンプティング |
| エージェント作業用にLLMプロバイダーを設定する | エージェントLLMプロバイダー |
| Cursor、Claude Code、またはその他のMCPクライアントを接続する | エージェントMCPクライアント |
drコマンドを学ぶ |
CLIクイックリファレンス |
| Agent Assistドキュメントを参照する | Agent Assist |