Azure Blobストレージを使用してバッチ予測を行う
DataRobotのバッチ予測APIを使用すると、大規模なデータセットを取り込んで、予測サーバーで実行されているデプロイ済みモデルに対してスコアを付けることができます。 APIは、これらのファイルの入力と出力のための柔軟なオプションも提供します。
このチュートリアルでは、DataRobot Pythonクライアントパッケージ(バッチ予測APIを呼び出す)を使用してバッチ予測ジョブを設定する方法を学習します。 このジョブは、Azure Blobストレージからスコアリング用の入力ファイルを読み取り、その結果をAzureに書き戻します。 このアプローチは、基盤となるストレージが同じであるため、Azure Data Lake Storage Gen2アカウントでも機能します。
要件
このチュートリアルで提供されているコードを使用するには、次のものがあることを確認してください。
- Python 2.7または3.4+
- The DataRobot Python package (2.21.0+) (pypi) (conda)
- DataRobotのデプロイ
- Azureストレージアカウント
- Azureストレージコンテナ
- A scoring dataset in the storage container to use with your DataRobot deployment
保存された資格情報の作成
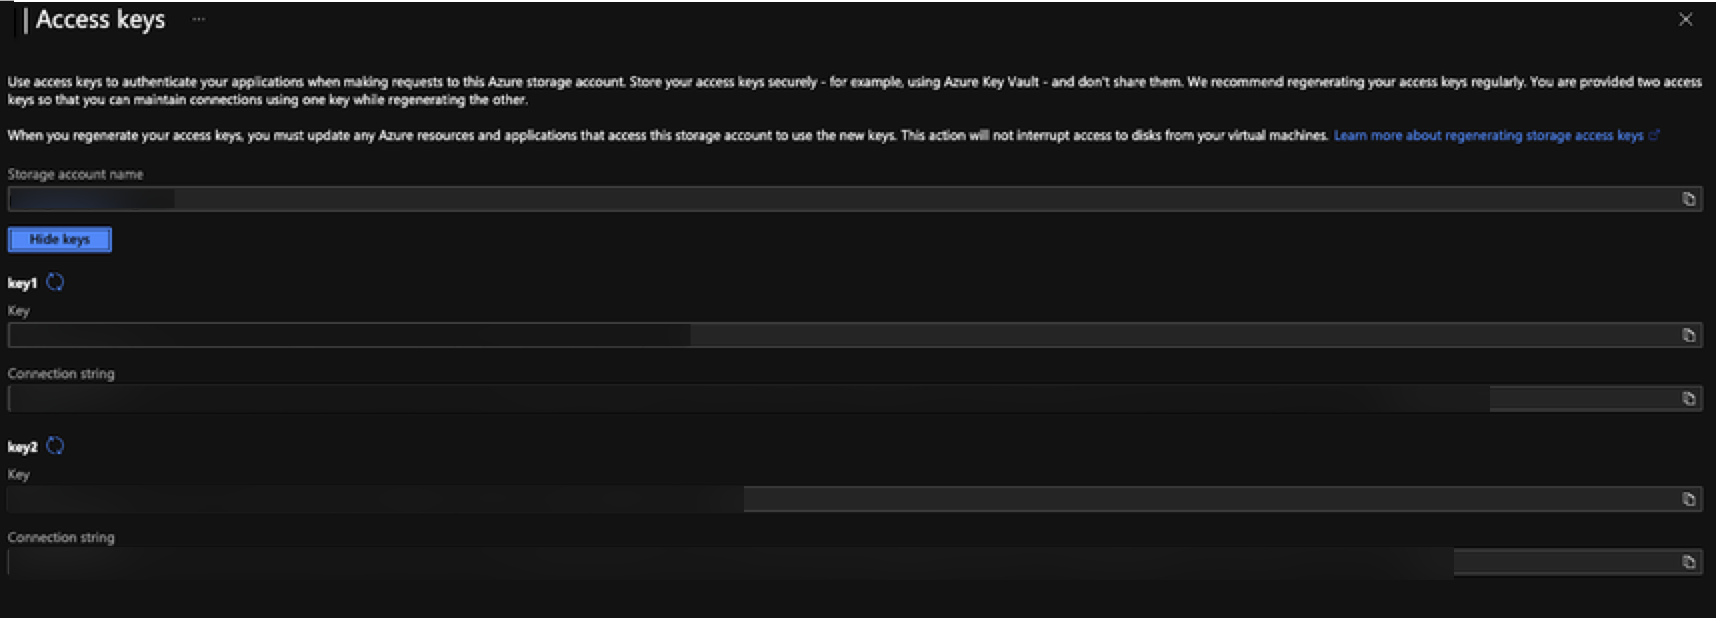
バッチ予測ジョブを実行するには、Azure Blobストレージの読み取りと書き込みに適切な資格情報が必要です。 Azureストレージアカウントの名前とアクセスキーを指定する必要があります。
-
To retrieve these credentials, select the Access keys menu in the Azure portal.

-
Click Show keys to retrieve an access key. 表示されているキー(key1またはkey2)のいずれかを使用できます。
-
Use the following code to create a new credential object within DataRobot that can be used in the batch prediction job to connect to your Azure storage account.
AZURE_STORAGE_ACCOUNT = "YOUR AZURE STORAGE ACCOUNT NAME"
AZURE_STORAGE_ACCESS_KEY = "AZURE STORAGE ACCOUNT ACCESS KEY"

DR_CREDENTIAL_NAME = "Azure_{}".format(AZURE_STORAGE_ACCOUNT)

# Create Azure-specific credentials
# You can also copy the connection string, which is found below the access key in Azure.

credential = dr.Credential.create_azure(
  name=DR_CREDENTIAL_NAME,
  azure_connection_string="DefaultEndpointsProtocol=https;AccountName={};AccountKey={};".format(AZURE_STORAGE_ACCOUNT, AZURE_STORAGE_ACCESS_KEY)
)

# Use this code to look up the ID of the credential object created.
credential_id = None
for cred in dr.Credential.list():
  if cred.name == DR_CREDENTIAL_NAME:
    credential_id = cred.credential_id
break

print(credential_id)
予測ジョブを実行する
資格情報オブジェクトが作成されたら、以下のコードサンプルに示すようにバッチ予測ジョブを設定できます。
-
Set
intake_settingsandoutput_settingsto theazuretype. -
For
intake_settingsandoutput_settings, seturlto the files in Blob storage that you want to read and write to (the output file does not need to exist already). -
Provide the ID of the credential object that was created above.
コードサンプルは、バッチ予測ジョブを作成して実行します。 完了すると、ジョブのステータスが表示されます。 このコードは、スコアリングデータに対して予測の説明とパススルー列の両方を返すようにジョブを設定する方法も示しています。
備考
デプロイIDは、デプロイ > 予測 > 予測APIタブのサンプルコード出力(インターフェイスを「APIクライアント」に設定)で確認できます。
DEPLOYMENT_ID = 'YOUR DEPLOYMENT ID'
AZURE_STORAGE_ACCOUNT = "YOUR AZURE STORAGE ACCOUNT NAME"
AZURE_STORAGE_CONTAINER = "YOUR AZURE STORAGE ACCOUNT CONTAINER"
AZURE_INPUT_SCORING_FILE = "YOUR INPUT SCORING FILE NAME"
AZURE_OUTPUT_RESULTS_FILE = "YOUR OUTPUT RESULTS FILE NAME"

# Set up our batch prediction job
# Input: Azure Blob Storage
# Output: Azure Blob Storage

job = dr.BatchPredictionJob.score(
   deployment=DEPLOYMENT_ID,
   intake_settings={
       'type': 'azure',
       'url': "https://{}.blob.core.windows.net/{}/{}".format(AZURE_STORAGE_ACCOUNT, AZURE_STORAGE_CONTAINER,AZURE_INPUT_SCORING_FILE),
       "credential_id": credential_id
   },
   output_settings={
       'type': 'azure',
       'url': "https://{}.blob.core.windows.net/{}/{}".format(AZURE_STORAGE_ACCOUNT, AZURE_STORAGE_CONTAINER,AZURE_OUTPUT_RESULTS_FILE),
       "credential_id": credential_id
   },
   # If explanations are required, uncomment the line below
   max_explanations=5,

   # If passthrough columns are required, use this line
   passthrough_columns=['column1','column2']
)

job.wait_for_completion()
job.get_status()
ジョブが正常に完了すると、Azure Blobストレージコンテナーに出力ファイルが表示されます。