Add DataRobot Serverless prediction environments
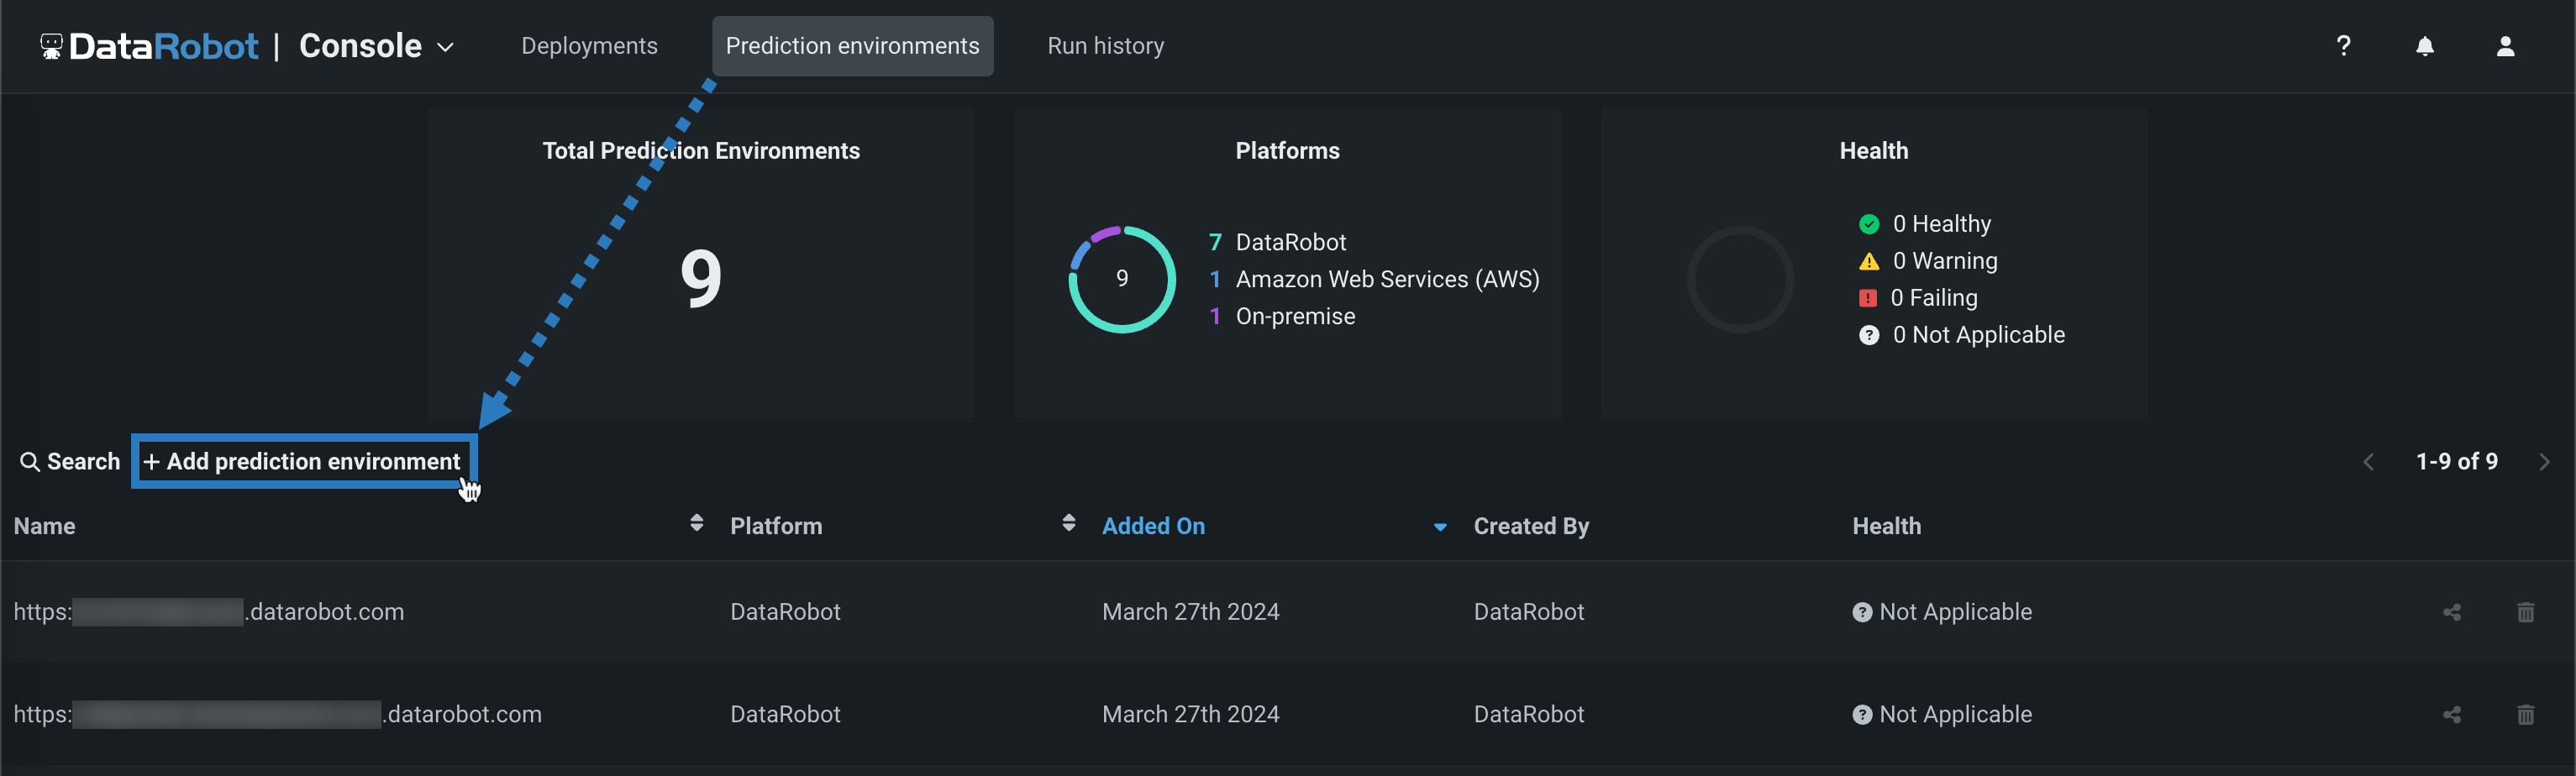
On the Prediction Environments page, you can review the DataRobot prediction environments available to you and create DataRobot Serverless prediction environments to make scalable predictions with configurable compute instance settings.
Pre-provisioned DataRobot Serverless environments
Organizations created after November 2024 have access to a pre-provisioned DataRobot Serverless prediction environment on the Prediction Environments page.
Pre-provisioned DataRobot Serverless environments
Trial accounts have access to a pre-provisioned DataRobot Serverless prediction environment on the Prediction Environments page.
Pre-provisioned DataRobot Serverless environments
New Self-Managed organizations running DataRobot 10.2+ installations have access to a pre-provisioned DataRobot Serverless prediction environment on the Prediction Environments page.
Prediction intervals in DataRobot serverless prediction environments
In a DataRobot serverless prediction environment, to make predictions with time-series prediction intervals included, you must include pre-computed prediction intervals when registering the model package. If you don't pre-compute prediction intervals, the deployment resulting from the registered model doesn't support enabling prediction intervals.
To add a DataRobot Serverless prediction environment:
-
In the Console, click Prediction environments and then click + Add prediction environment.
-
In the Add prediction environment dialog box, complete the following fields:
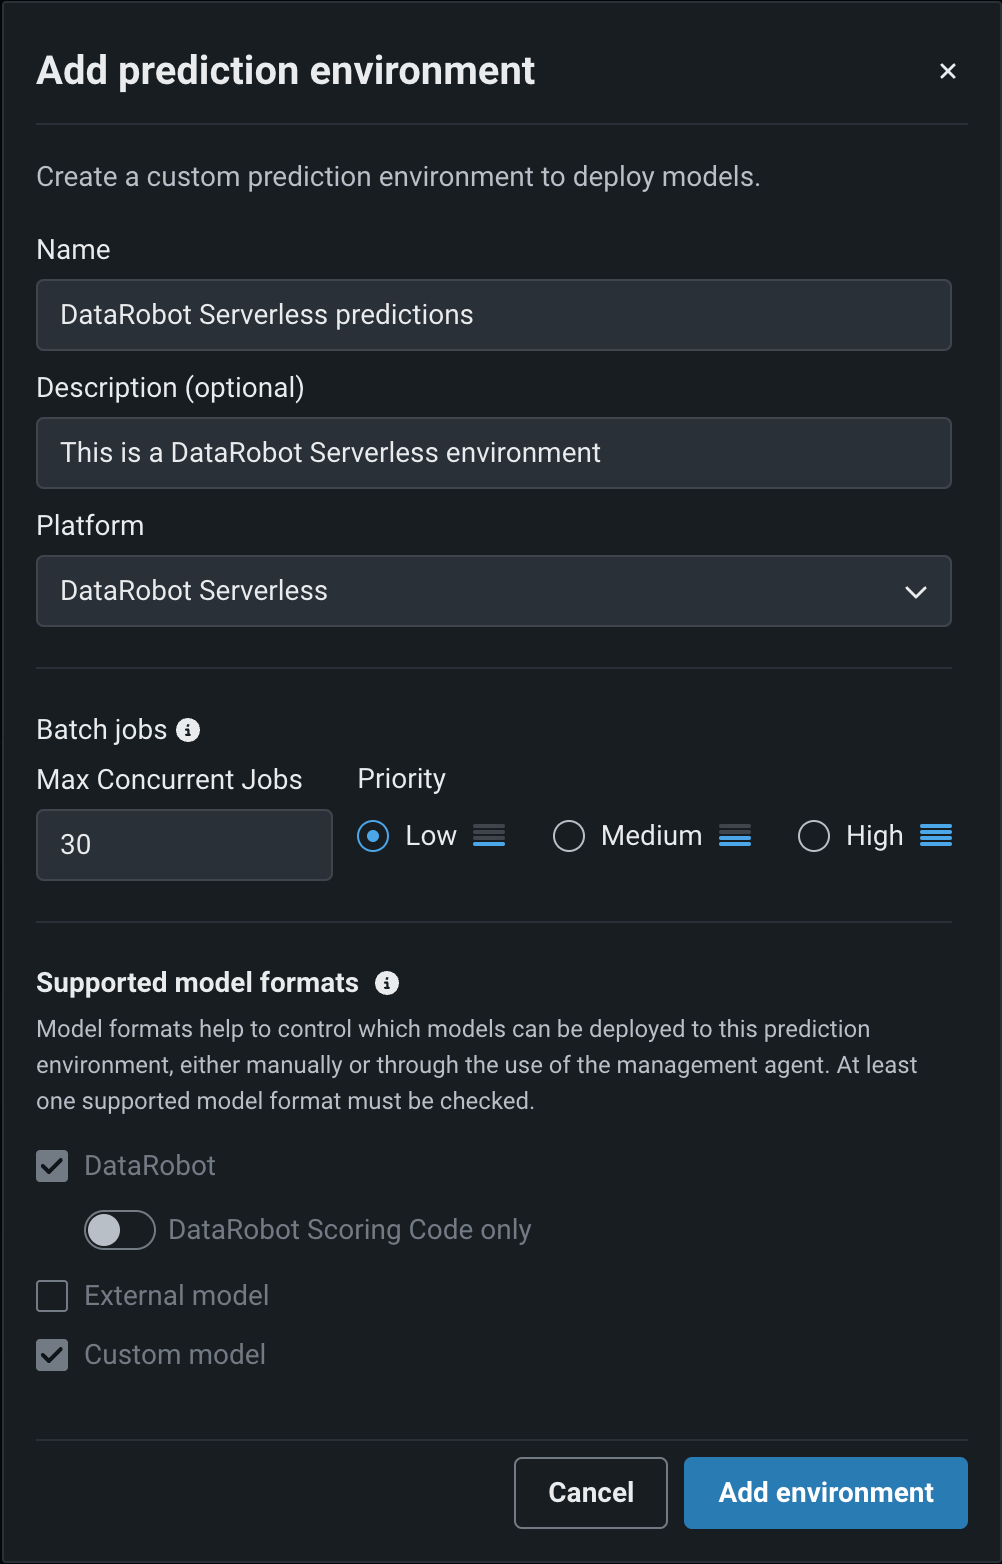
Field Description Name Enter a descriptive name for the prediction environment. Description (Optional) Enter a description of the external prediction environment. Platform Select DataRobot Serverless. Batch jobs Max Concurrent Jobs Decrease the maximum number of concurrent jobs for this Serverless environment from the organization's defined maximum. Priority Set the importance of batch jobs on this environment. Maintenance window Enable weekly maintenance window Enable a weekly, four-hour maintenance window. Enter the Start time (UTC) and Day to define the environment's maintenance window. How is the maximum concurrent job limit defined?
There are two limits on max concurrent jobs and these limits depend on the details of your DataRobot installation. Each batch job is subject to both limits, meaning that the conditions of both must be satisfied for a batch job to run on the prediction environment. The first limit is the organization-level limit (default of
30for Self-Managed installations or10for SaaS) defined by an organization administrator; this should be the higher limit. The second limit is the environment-level limit defined here by the prediction environment creator; this limit should be lower than the organization-level limit. -
Once you configure the environment settings, click Add environment.
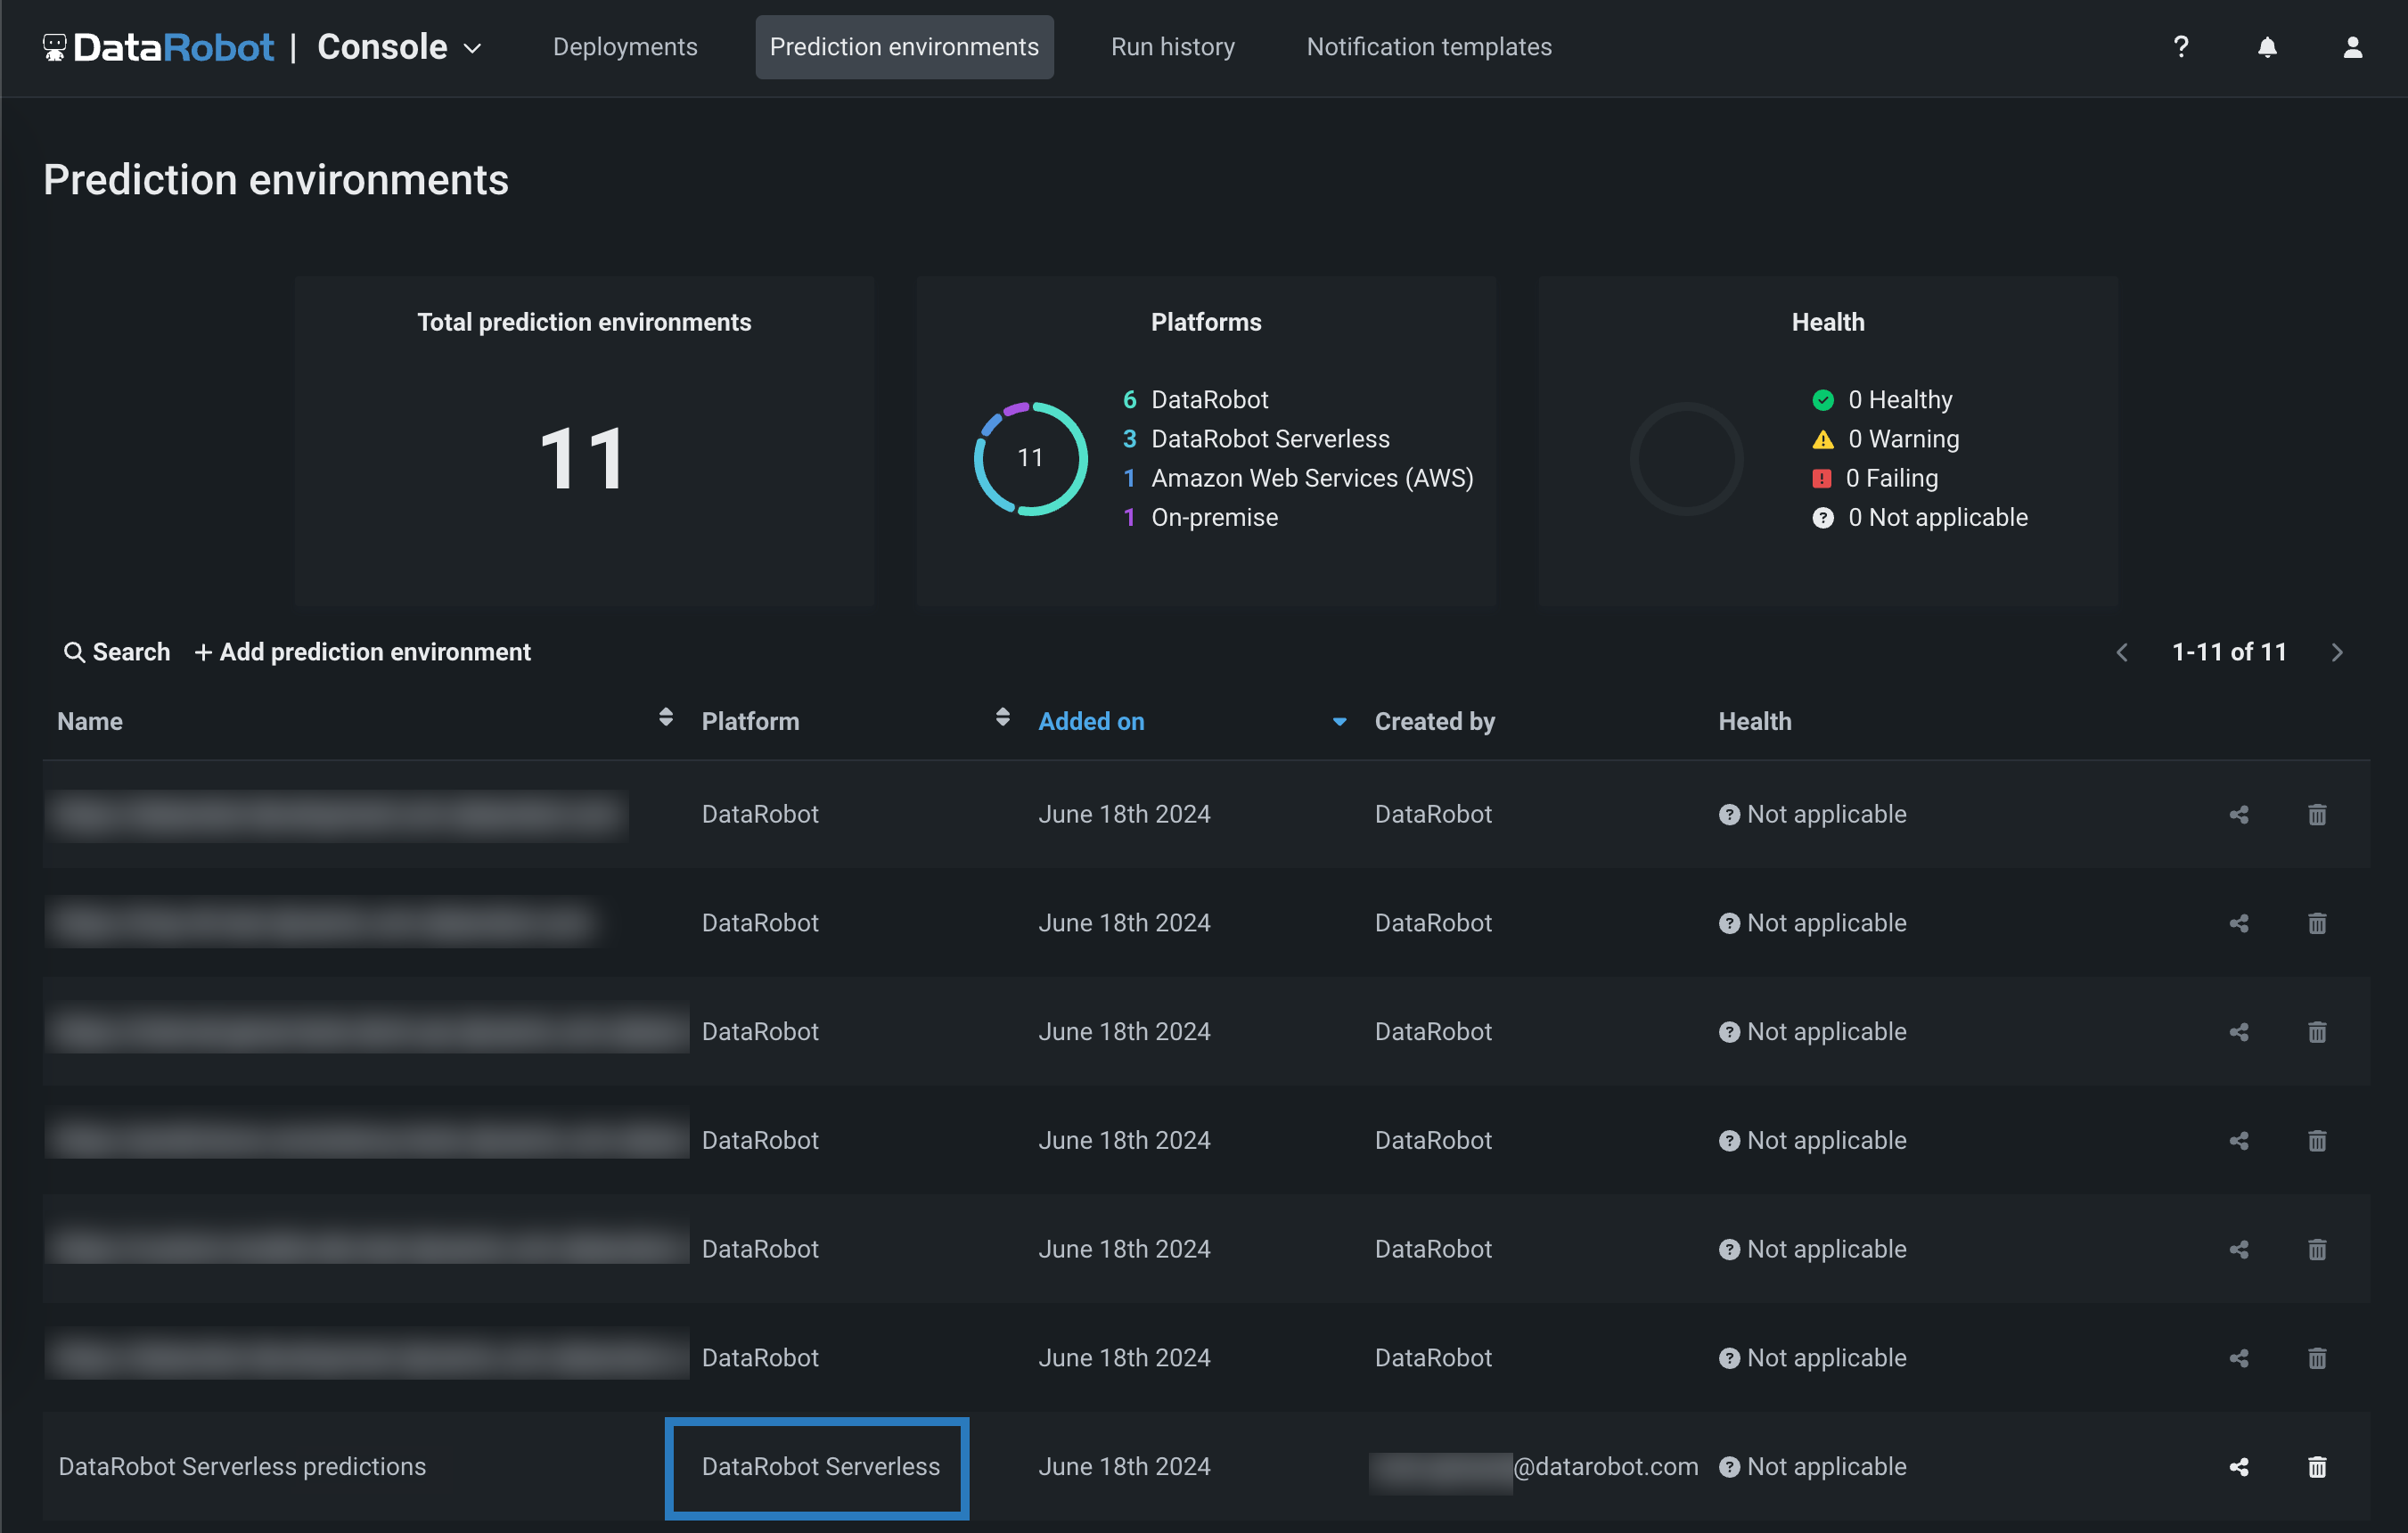
The environment is now available from the Prediction environments page.
Deploy a model to the DataRobot Serverless prediction environment
Using the pre-provisioned DataRobot Serverless environment, or a Serverless environment you created, you can deploy a model to make predictions.
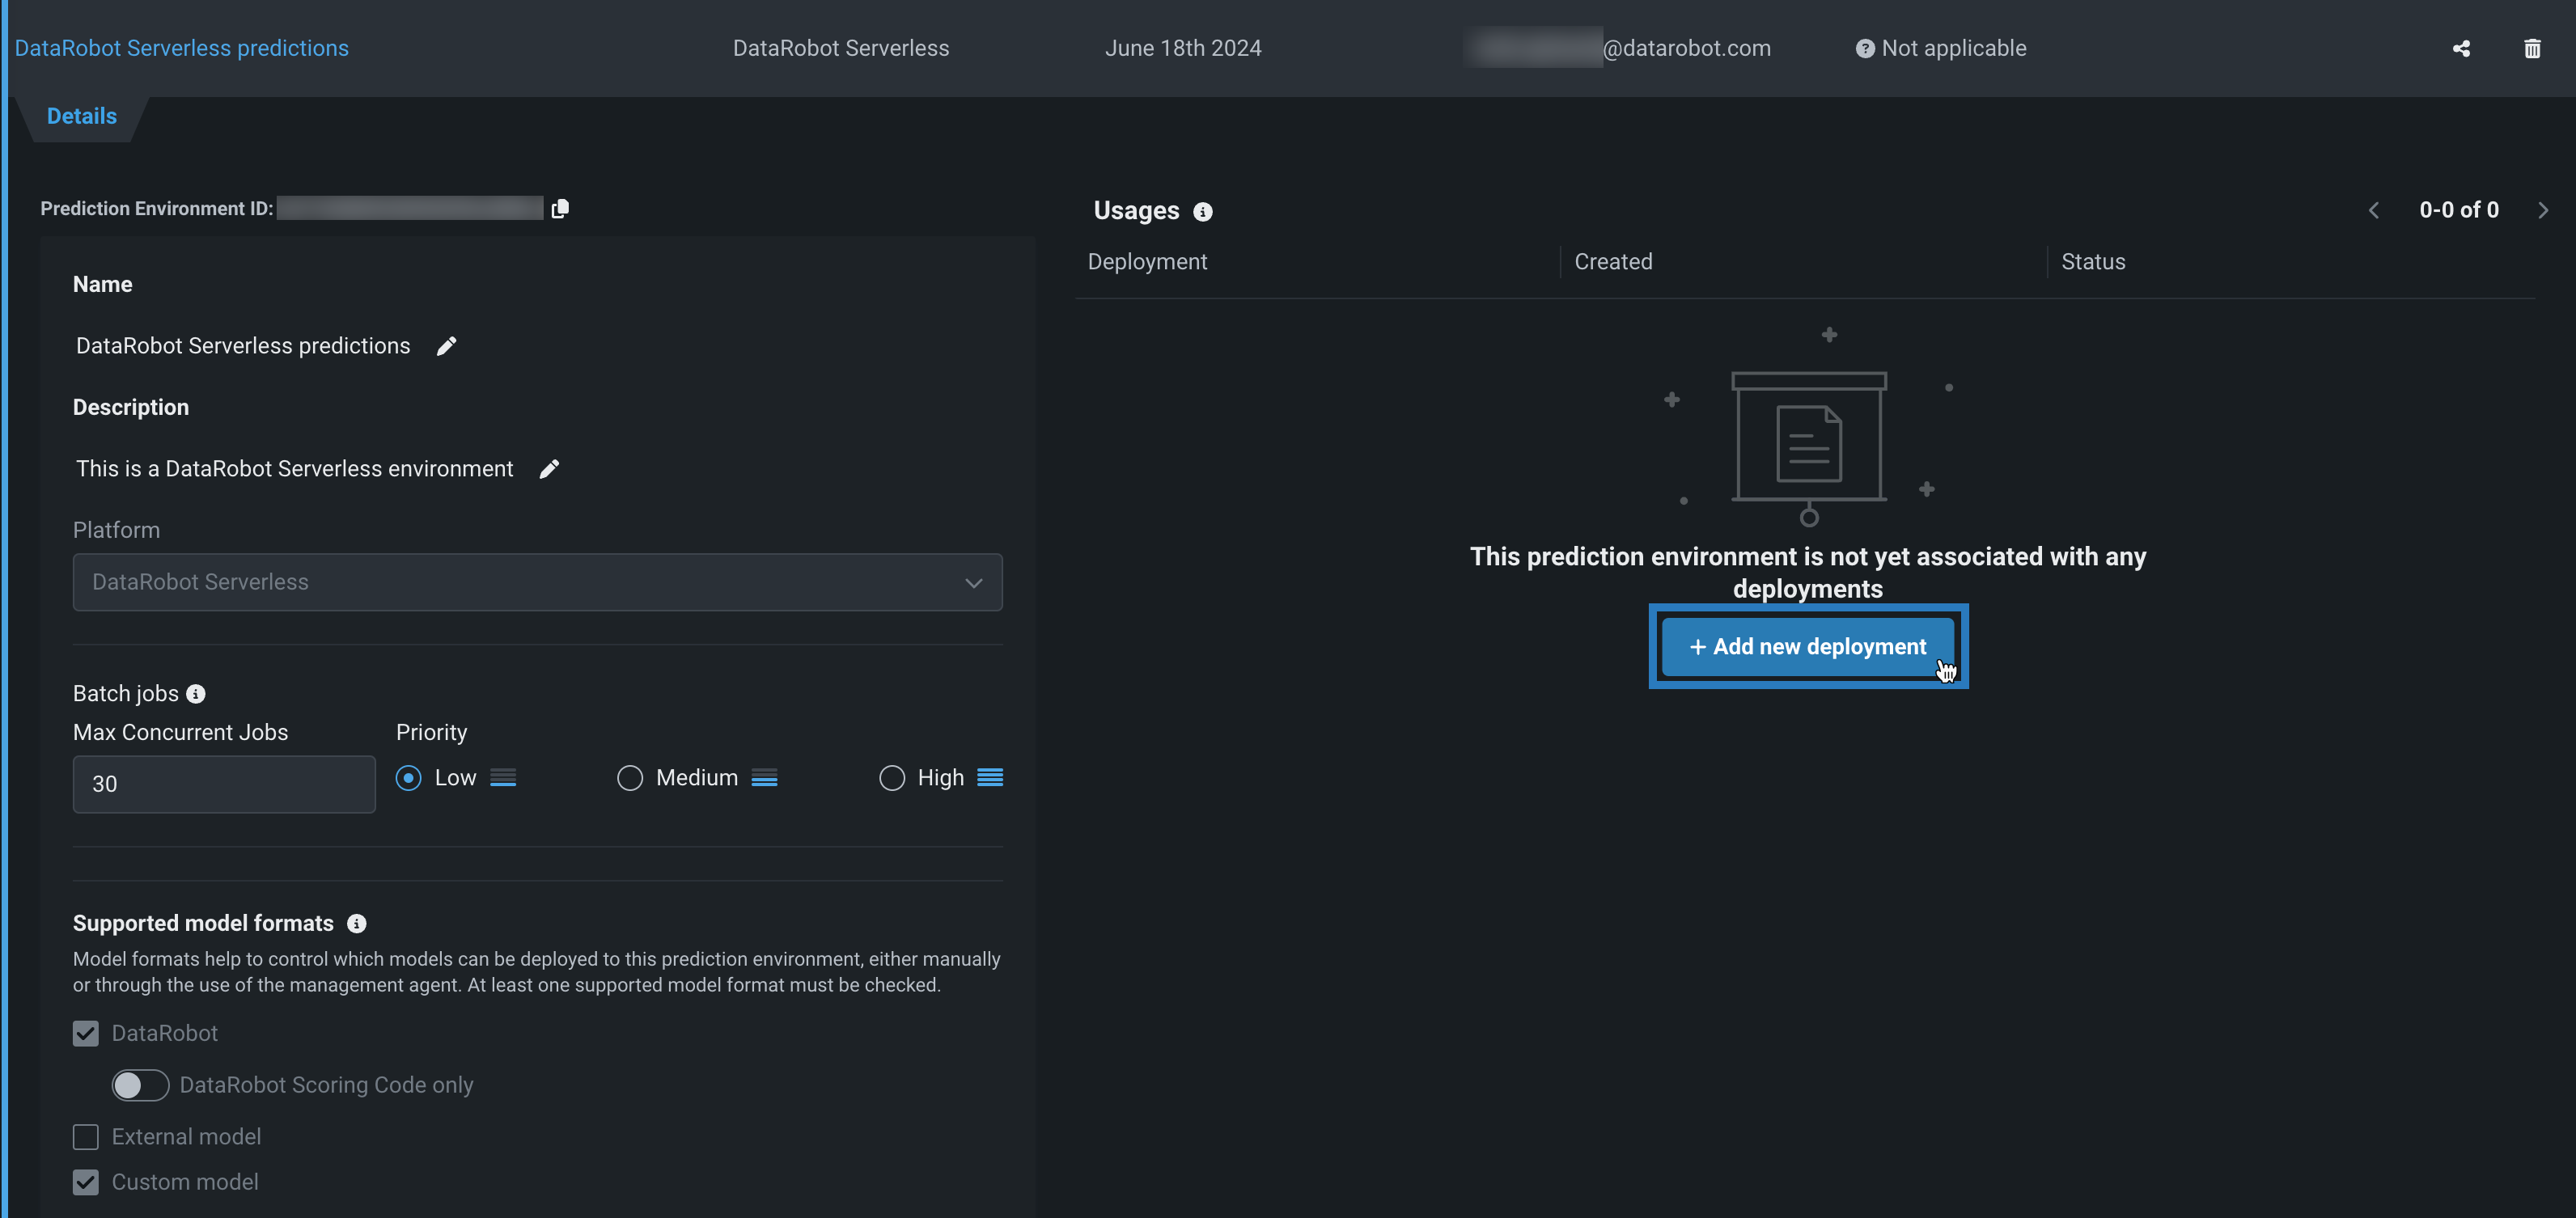
To deploy a model to the DataRobot Serverless prediction environment:
-
On the Prediction environments page, in the Platform row, locate the DataRobot Serverless prediction environments, and click the environment you want to deploy a model to.
-
On the Details tab, under Usages, in the Deployment column, click + Add new deployment.
-
In the Select a compatible model package to deploy dialog box, enter the name of the model you want to deploy in the Search box, click the model, and then click the DataRobot model version you want to deploy.
-
Click Select model package and then configure the deployment settings.
-
To configure on-demand predictions on this environment, click Show advanced options, scroll down to Advanced Predictions Configuration, set the following Autoscaling options, and click Deploy model:
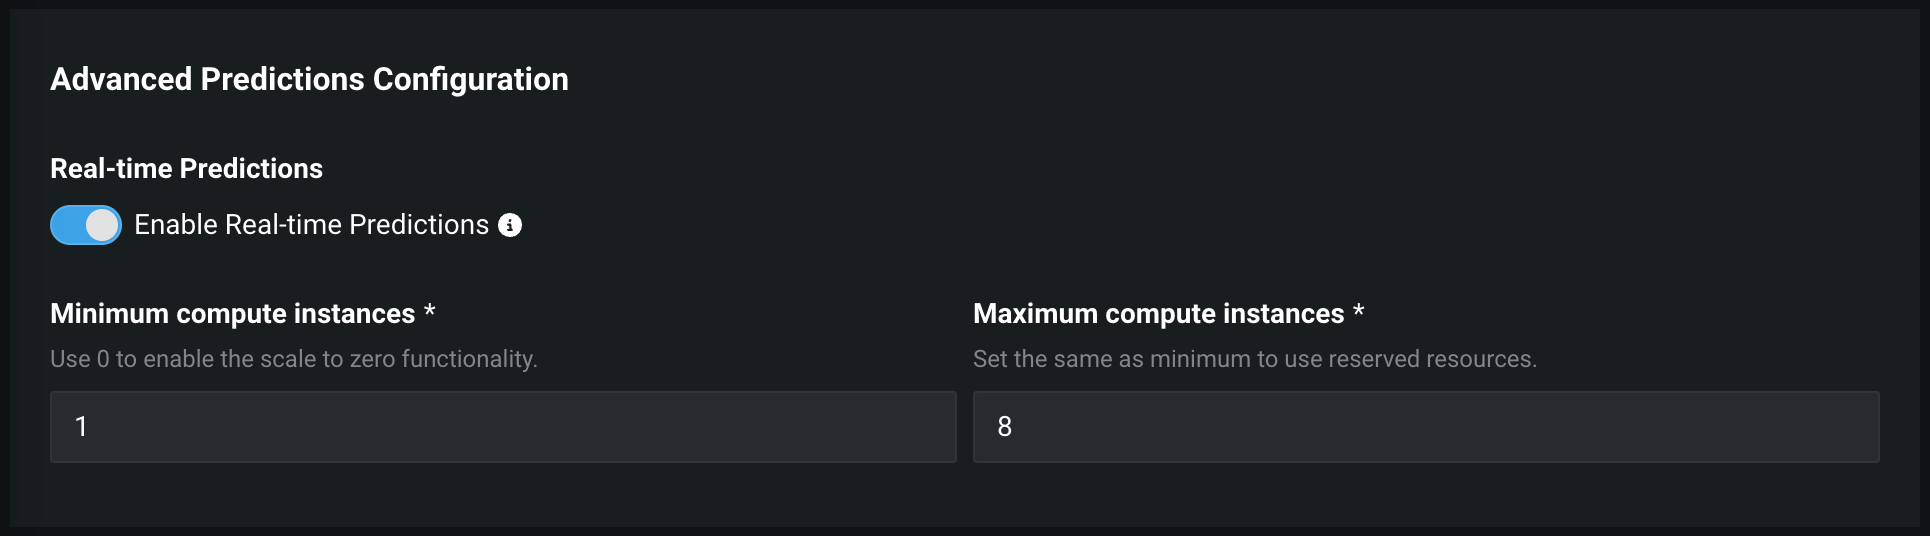
Autoscaling automatically adjusts the number of replicas in your deployment based on incoming traffic. During high-traffic periods, it adds replicas to maintain performance. During low-traffic periods, it removes replicas to reduce costs. This eliminates the need for manual scaling while ensuring your deployment can handle varying loads efficiently.
To configure autoscaling, modify the following settings. Note that for DataRobot models, DataRobot performs autoscaling based on CPU usage at a 40% threshold.:

| Field | Description |
|---|---|
| Minimum compute instances | (Premium feature) Set the minimum compute instances for the model deployment. If your organization doesn't have access to "always-on" predictions, this setting is set to 0 and isn't configurable. With the minimum compute instances set to 0, the inference server will be stopped after an inactivity period of 7 days. The minimum and maximum compute instances depend on the model type. For more information, see the compute instance configurations note. |
| Maximum compute instances | Set the maximum compute instances for the model deployment to a value above the current configured minimum. To limit compute resource usage, set the maximum value equal to the minimum. The minimum and maximum compute instances depend on the model type. For more information, see the compute instance configurations note. |
To configure autoscaling, select the metric that will trigger scaling:
-
CPU utilization: Set a threshold for the average CPU usage across active replicas. When CPU usage exceeds this threshold, the system automatically adds replicas to provide more processing power.
-
HTTP request concurrency: Set a threshold for the number of simultaneous requests being processed. For example, with a threshold of 5, the system will add replicas when it detects 5 concurrent requests being handled.
When your chosen threshold is exceeded, the system calculates how many additional replicas are needed to handle the current load. It continuously monitors the selected metric and adjusts the replica count up or down to maintain optimal performance while minimizing resource usage.
Review the settings for CPU utilization below.
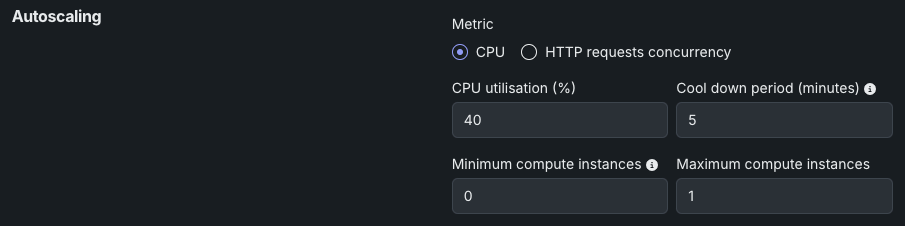
| Field | Description |
|---|---|
| CPU utilization (%) | Set the target CPU usage percentage that triggers scaling. When CPU utilization reaches this threshold, the system adds more replicas. |
| Cool down period (minutes) | Set the wait time after a scale-down event before another scale-down can occur. This prevents rapid scaling fluctuations when metrics are unstable. |
| Minimum compute instances | (Premium feature) Set the minimum compute instances for the model deployment. If your organization doesn't have access to "always-on" predictions, this setting is set to 0 and isn't configurable. With the minimum compute instances set to 0, the inference server will be stopped after an inactivity period of 7 days. The minimum and maximum compute instances depend on the model type. For more information, see the compute instance configurations note. |
| Maximum compute instances | Set the maximum compute instances for the model deployment to a value above the current configured minimum. To limit compute resource usage, set the maximum value equal to the minimum. The minimum and maximum compute instances depend on the model type. For more information, see the compute instance configurations note. |
Review the settings for HTTP request concurrency below.
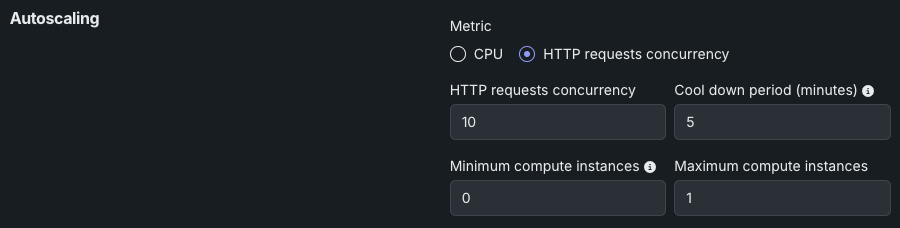
| Field | Description |
|---|---|
| HTTP request concurrency | Set the number of simultaneous requests required to trigger scaling. When concurrent requests reach this threshold, the system adds more replicas. |
| Cool down period (minutes) | Set the wait time after a scale-down event before another scale-down can occur. This prevents rapid scaling fluctuations when metrics are unstable. |
| Minimum compute instances | (Premium feature) Set the minimum compute instances for the model deployment. If your organization doesn't have access to "always-on" predictions, this setting is set to 0 and isn't configurable. With the minimum compute instances set to 0, the inference server will be stopped after an inactivity period of 7 days. The minimum and maximum compute instances depend on the model type. For more information, see the compute instance configurations note. |
| Maximum compute instances | Set the maximum compute instances for the model deployment to a value above the current configured minimum. To limit compute resource usage, set the maximum value equal to the minimum. The minimum and maximum compute instances depend on the model type. For more information, see the compute instance configurations note. |
Premium feature: Always-on predictions
Always-on predictions are a premium feature. Deployment autoscaling management is required to configure the minimum compute instances setting. Contact your DataRobot representative or administrator for information on enabling the feature.
Feature flag: Enable Deployment Auto-Scaling Management
Compute instance configurations
For DataRobot model deployments:
- The default minimum is 0 and default maximum is 3.
- The minimum and maximum limits are taken from the organization's
max_compute_serverless_prediction_apisetting.
For custom model deployments:
- The default minimum is 0 and default maximum is 1.
- The minimum and maximum limits are taken from the organization's
max_custom_model_replicas_per_deploymentsetting. - The minimum is always greater than 1 when running on GPUs (for LLMs).
Additionally, for high-availability scenarios:
- The minimum compute instances setting must be greater than or equal to 2.
- This requires business critical or consumption-based pricing.
Depending on the availability of compute resources, it can take a few minutes after deployment for a prediction environment to be available for predictions.
Update compute instances settings
If you need to update the number of compute instances available to the model after deployment, you can change these settings on the Settings > Predictions tab.
Make predictions
After you've created a DataRobot Serverless environment and deployed a model to that environment you can make real-time or batch predictions.
Payload size limit
The maximum payload size for real-time deployment predictions on Serverless prediction environments is 50MB. For batch predictions, see batch prediction limits.
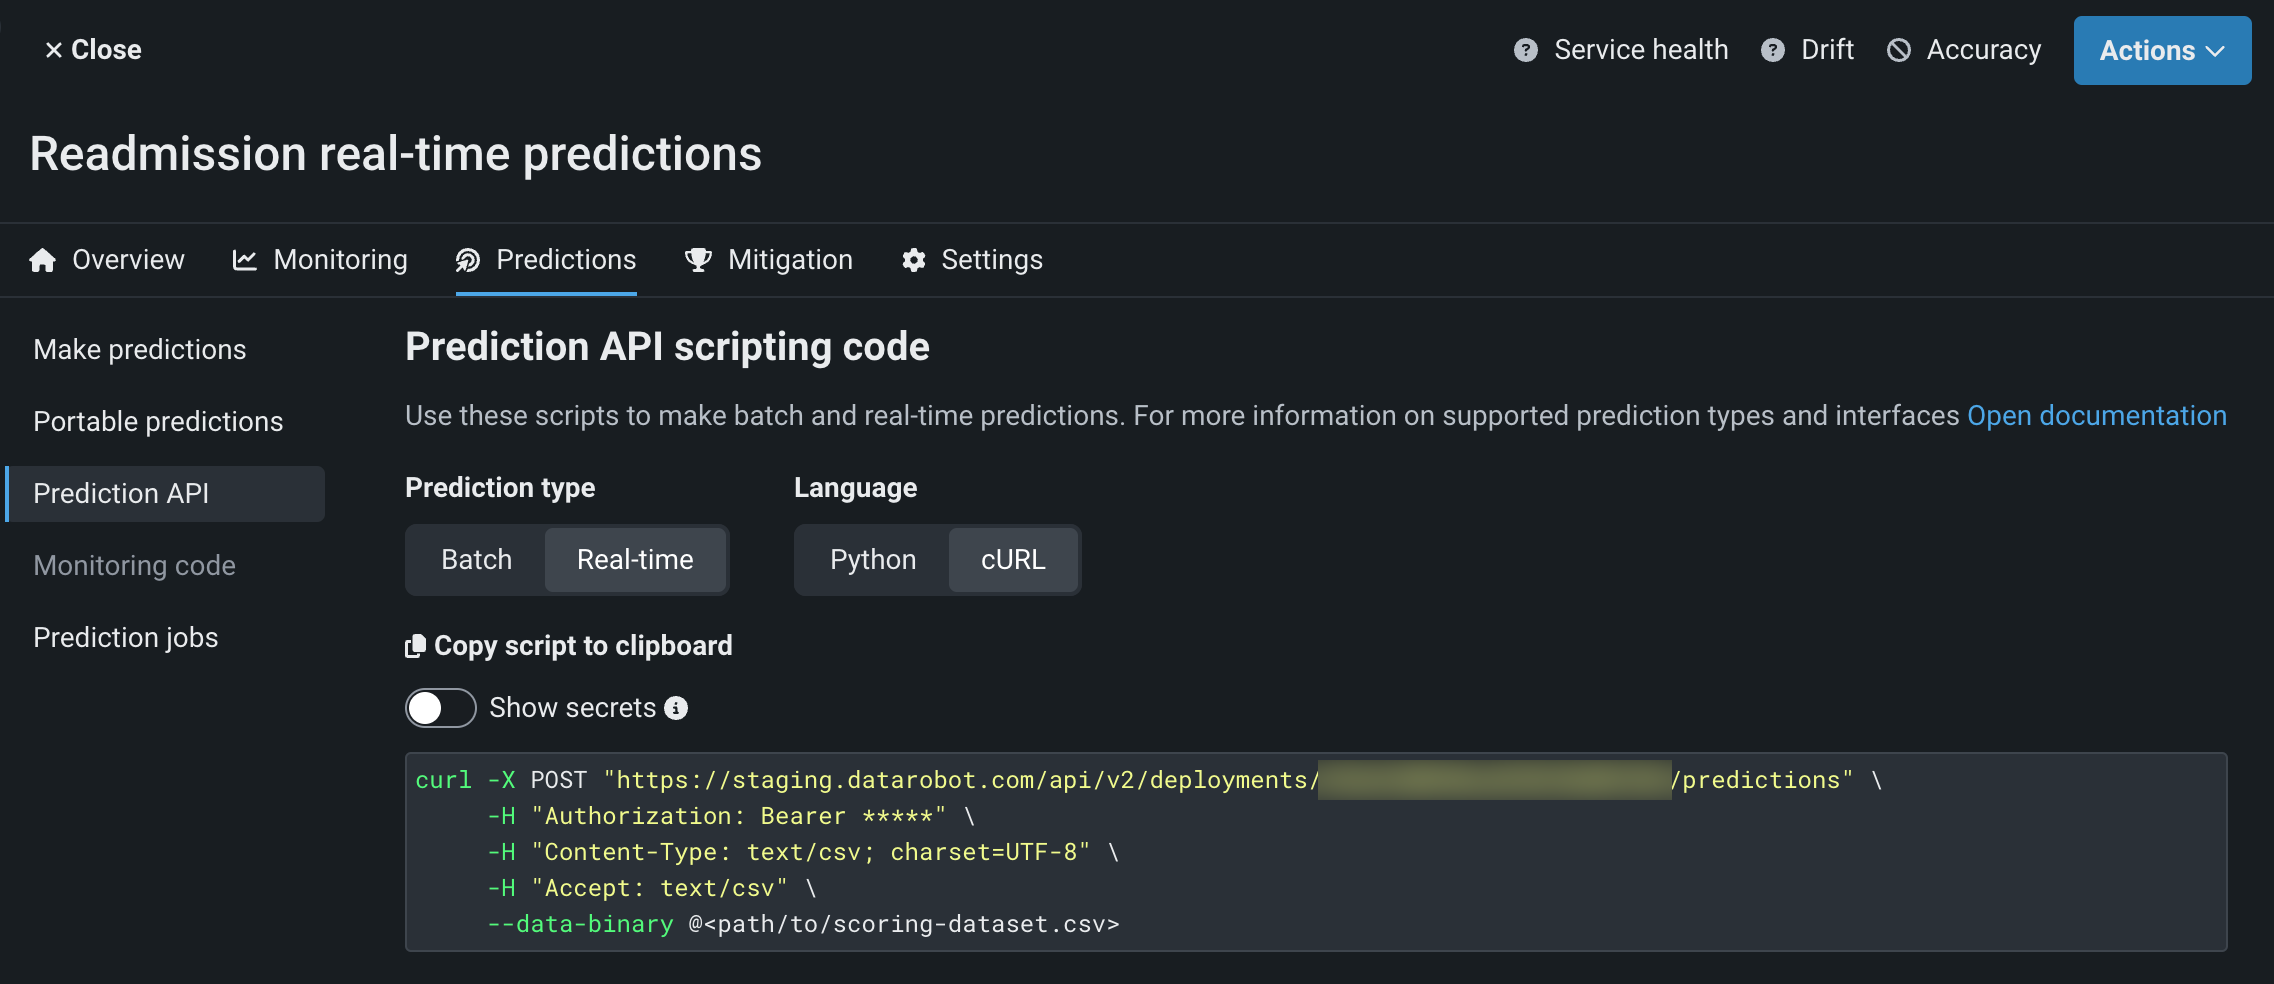
To make real-time predictions on the DataRobot Serverless prediction environment:
-
In the Deployments inventory, locate and open a deployment associated with a DataRobot Serverless environment. To do this, click Filter, select DataRobot Serverless, and then click Apply filters.

-
In a deployment associated with a DataRobot Serverless prediction environment, click Predictions > Prediction API.
-
On the Prediction API Scripting Code page, under Prediction Type, click Real-time.
-
Under Language, select Python or cURL, optionally enable Show secrets, and click Copy script to clipboard.
-
Run the Python or cURL snippet to make a prediction request to the DataRobot Serverless deployment.
To make batch predictions on the DataRobot Serverless prediction environment, follow the standard process for UI batch predictions or Prediction API scripting predictions.