Environment management
This page outlines how to configure and start the notebook environment.
Manage the notebook environment
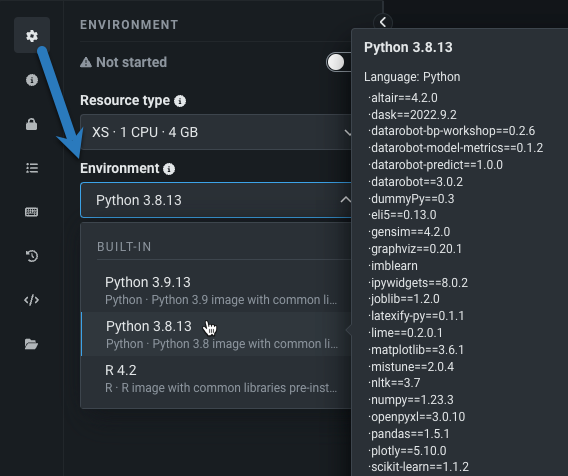
Before you create and execute code, click the environment icon to configure the notebook's environment. The environment image determines the coding language, dependencies, and open-source libraries used in the notebook. The default image for the DataRobot Notebooks is a pre-built Python image, but other options include GPU-optimized built-in environments. To see the list of all packages available in the default image, hover over that image in the Environment tab:
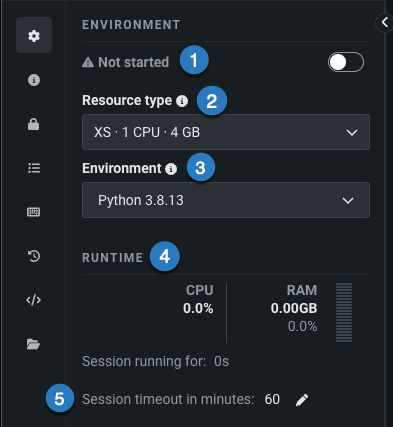
The screenshot and table below outline the configuration options available for a notebook environment.
| Element | Description | |
|---|---|---|
| 1 | Start environment toggle | Starts or stops the notebook environment's kernel, which allows you to execute the notebook's code cells. |
| 2 | Resource type | Represents a machine preset, specifying the CPU and RAM you have on your machine where the environment's kernel runs. |
| 3 | Environment | Determines the coding language and associated libraries that the notebook uses. |
| 4 | Runtime | Indicates the CPU usage, RAM usage, and elapsed runtime for the notebook's environment during an active session. |
| 5 | Inactivity timeout | Limits the amount of inactivity time allowed before the environment stops running and the underlying machine is shut down. The default timeout on inactivity is 60 minutes; the maximum configurable timeout is 180 minutes. |
| 6 | Exposed ports | Enables port forwarding to access web applications launched by tools and libraries like MLflow and Streamlit. When developing locally, the web application is accessible at http://localhost:PORT; however, when developing in a hosted DataRobot environment, the port that the web application is running on (in the session container) must be forwarded to access the application. For more information, see Manage exposed ports. |
Manage session status
To begin a notebook session where you create and run code, start the environment by toggling it on in the toolbar.

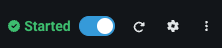
Wait a moment for the environment to initialize, and once it displays the Started status, you can begin editing.
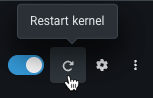
If you upgrade any of the existing packages in the notebook environment during your session and want the upgraded version to be recognized, you need to restart the kernel. To do so, click the circular arrow icon in the toolbar.
Note that restarting the kernel is different than restarting the environment session: when you stop the environment session (using the session toggle), this will stop the container your notebook is running in. The notebook state and any packages installed at runtime will be lost, as the next time you start the session, a new container will be spun up.
Note that the session will automatically shut down on inactivity when the timeout is reached. The session is considered inactive when the notebook has no running cells and no changes have been made to the notebook contents in the time set by the session timeout value.
Manage exposed ports
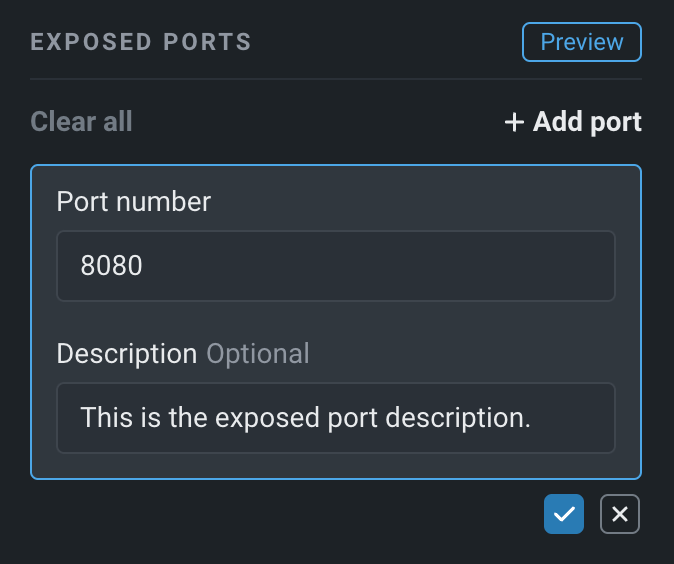
To create a port for port forwarding, click + Add port, enter a Port number and optional Description, and then click the accept icon :
Port limits
The maximum port number you can specify is 65535, and the minimum port number is 1024. Ports 8888, 8889, and 8022 are reserved and not allowed for use. You can expose up to five ports in one notebook or codespace. Self-managed users can override this limit.
The port number dropdown includes options for the default port number options commonly used by OSS tools (MLFlow, Streamlit, etc.):

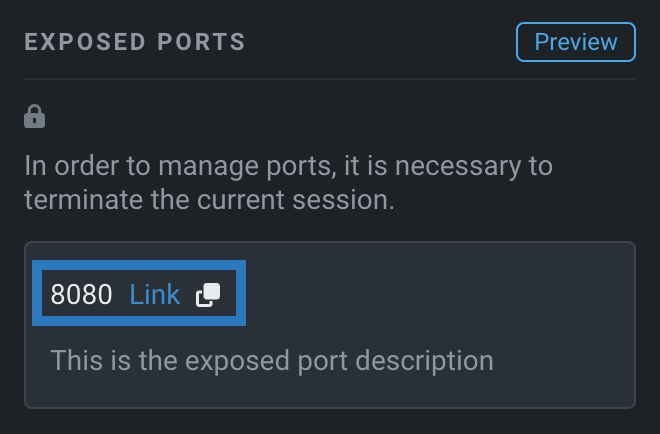
Once you have added the port to forward, you can start the container session for the notebook or codespace. After launching a web application, access the web application via the URL for the port listed in the Exposed ports list:
-
Click Link to open a new browser tab with your application running.
-
Click the copy icon to copy the web application URL.
-
To access the URL for the web application running on a specified port, you must have access to the corresponding notebook or codespace.
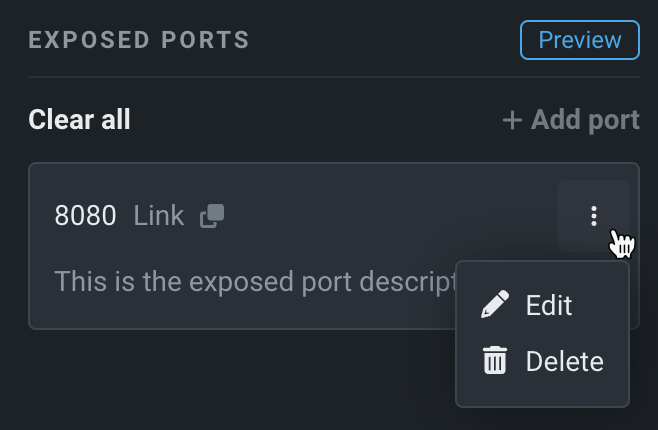
To change a port number, edit the port description or stop forwarding that port, click the actions menu :
-
Click Edit to modify the Port number and Description.
-
Click Delete to remove the exposed port, ending session forwarding to that port.
Modify exposed ports
You can only modify (add, edit, or delete) forwarded ports when the notebook or codespace session is offline.
Feature considerations and FAQ
Review the following considerations and frequently asked questions before configuring port forwarding:
-
Your server application must be bound to
0.0.0.0. Web servers launched by many libraries default to accepting connections only from thelocalhost/127.0.0.1. While this configuration works when using the library locally, it doesn't work in a DataRobot-hosted session. To allow the web server to accept connections from other machines, specify0.0.0.0as the host. For example, to launch the MLflow Tracking UI, you would run the following command from the DataRobot terminal:mlflow ui --host 0.0.0.0 -
The port specified to run a web server must match the port exposed in the notebook or codespace environment configuration; otherwise, you will not be able to access the web application at the URL of the exposed port. For example, consider if you have enabled forwarding to port
8080in the notebook or codespace environment configuration—MLflow's Tracking UI defaults to port5000. To access the MLflow Tracking UI in your web browser, override the default--portargument when launching the MLflow application from the DataRobot terminal:mlflow ui --port 8080 --host 0.0.0.0. -
Only one server process can run on a given port at a time. For example, if you have the MLflow Tracking UI running on exposed port
8080, terminate that process before running a new server to test a Streamlit application on that same port.
How do I write the contents of a script into a standalone notebook session?
The Jupyter kernel provides the %%writefile command to save the content of a cell as a file:
%%writefile app.py
from fastapi import FastAPI
from pydantic import BaseModel

app = FastAPI()

@app.get("/")
async def echo():
    return {"message": "Hello, world!"}
How do I access Streamlit in a DataRobot Notebook session?
The default port for Streamlit is 8501.
If you exposed that port, use the following command:
streamlit run app.py
If you want to override the port, use the server.port argument:
streamlit run app.py --server.port 8080
How do I access MLFlow in a DataRobot Notebook session?
The default port for MLflow's Tracking UI is 5000.
If you enabled forwarding to port 8080 in the notebook or codespace environment configuration, to access the MLflow Tracking UI in your web browser, override the default --port argument when launching the MLflow application from the DataRobot terminal:
mlflow ui --port 8080 --host 0.0.0.0
MLFlow starts a separate set of processes to handle incoming connections. Sometimes these processes are not correctly terminated (for example, you run mlflow ui via terminal session and then abruptly close the session without stopping the process first). If the server processes are left in place, you can't reuse the port. To clean up these processes, use the following command:
pkill -f mlflow.server
How do I access Shiny in a DataRobot Notebook session?
Shiny uses a random port and localhost.
To override the default port, use the following command:
options(shiny.port = 7775)
options(shiny.host = "0.0.0.0")

ui <- fluidPage(
"Hello, world!"
)

server <- function(input, output, session) {
}

shinyApp(ui, server)
How do I run Kedro-Viz in a DataRobot Notebook session?
The default port for Kedro-Viz is 4141.
!kedro viz run --host 0.0.0.0
How do I run TensorBoard in a DataRobot Notebook session?
The default port for TensorBoard is 6006.
tensorboard --bind_all --logdir .
How do I run a Gradio application in a DataRobot Notebook session?
The default port for the Gradio UI is localhost:7680.
Before running the Gradio application, use the following code to mount it as a sub-application of another FastAPI application:
import gradio as gr
from fastapi import FastAPI


def greet(name, intensity):
    return "Hello, " + name + "!" * int(intensity)

demo = gr.Interface(
    fn=greet,
    inputs=["text", "slider"],
    outputs=["text"],
)


fapp = FastAPI(root_path="/notebook-sessions/{NOTEBOOK_ID}/ports/{YOUR_PORT}")

gr.mount_gradio_app(fapp, demo, f"/", root_path="/notebook-sessions/{NOTEBOOK_ID}/ports/{YOUR_PORT}")
Then, run the script (in this example, app.py) with uvicorn:
uvicorn app:fapp --host 0.0.0.0 --port 7860 --reload
How do I run a NiceGUI application in a DataRobot Notebook session?
The default port for the NiceGUI is 8080.
Use the following code to create a NiceGUI demo application:
from nicegui import ui

class Demo:
    def __init__(self):
        self.number = 1

demo = Demo()
v = ui.checkbox('visible', value=True)
with ui.column().bind_visibility_from(v, 'value'):
    ui.slider(min=1, max=3).bind_value(demo, 'number')
    ui.toggle({1: 'A', 2: 'B', 3: 'C'}).bind_value(demo, 'number')
    ui.number().bind_value(demo, 'number')

ui.run()
Then, run the script (in this example, app.py):
!python app.py
Can I access a custom server?
You can write and run your own TCP/HTTP servers. For example, the following creates a simple custom server written with FastAPI:
from fastapi import FastAPI
from pydantic import BaseModel
app = FastAPI()
@app.get("/")
async def echo():
    return {"message": "Hello there"}
Then, run the app with uvicorn:
!uvicorn app:app --host 0.0.0.0 --port 8501 --reload
Custom environment images
DataRobot Notebooks is integrated with DataRobot custom environments, allowing you to define reusable custom Docker images for running notebook sessions. Custom environments provide full control over the environment configuration and the ability to leverage reproducible dependencies beyond those available in the built-in images. Note that only Python and R custom environments are supported for DataRobot Notebooks.
Create a custom environment
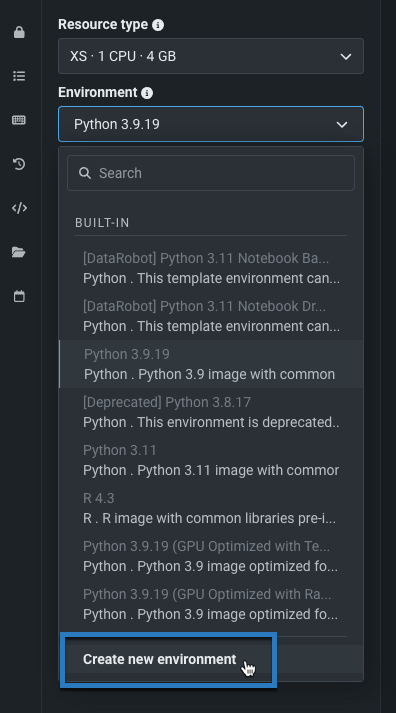
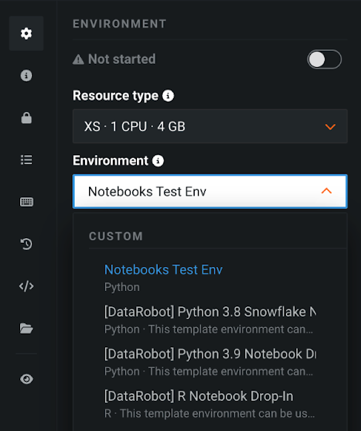
To add a custom environment, navigate to the Environment tab (![]() ) in the notebook sidebar and expand the Environment field dropdown. Scroll to the bottom of the list and select Create new environment. This brings you to the Environments page in Registry.
) in the notebook sidebar and expand the Environment field dropdown. Scroll to the bottom of the list and select Create new environment. This brings you to the Environments page in Registry.
On the Environments page, you can create and access environments for both notebooks and models. To create a new custom environment for a notebook and configure its details, click + Add environment.

DataRobot strongly recommends accessing the notebook built-in environment templates to reference the requirements needed to create a Docker context that is compatible with running DataRobot Notebooks.
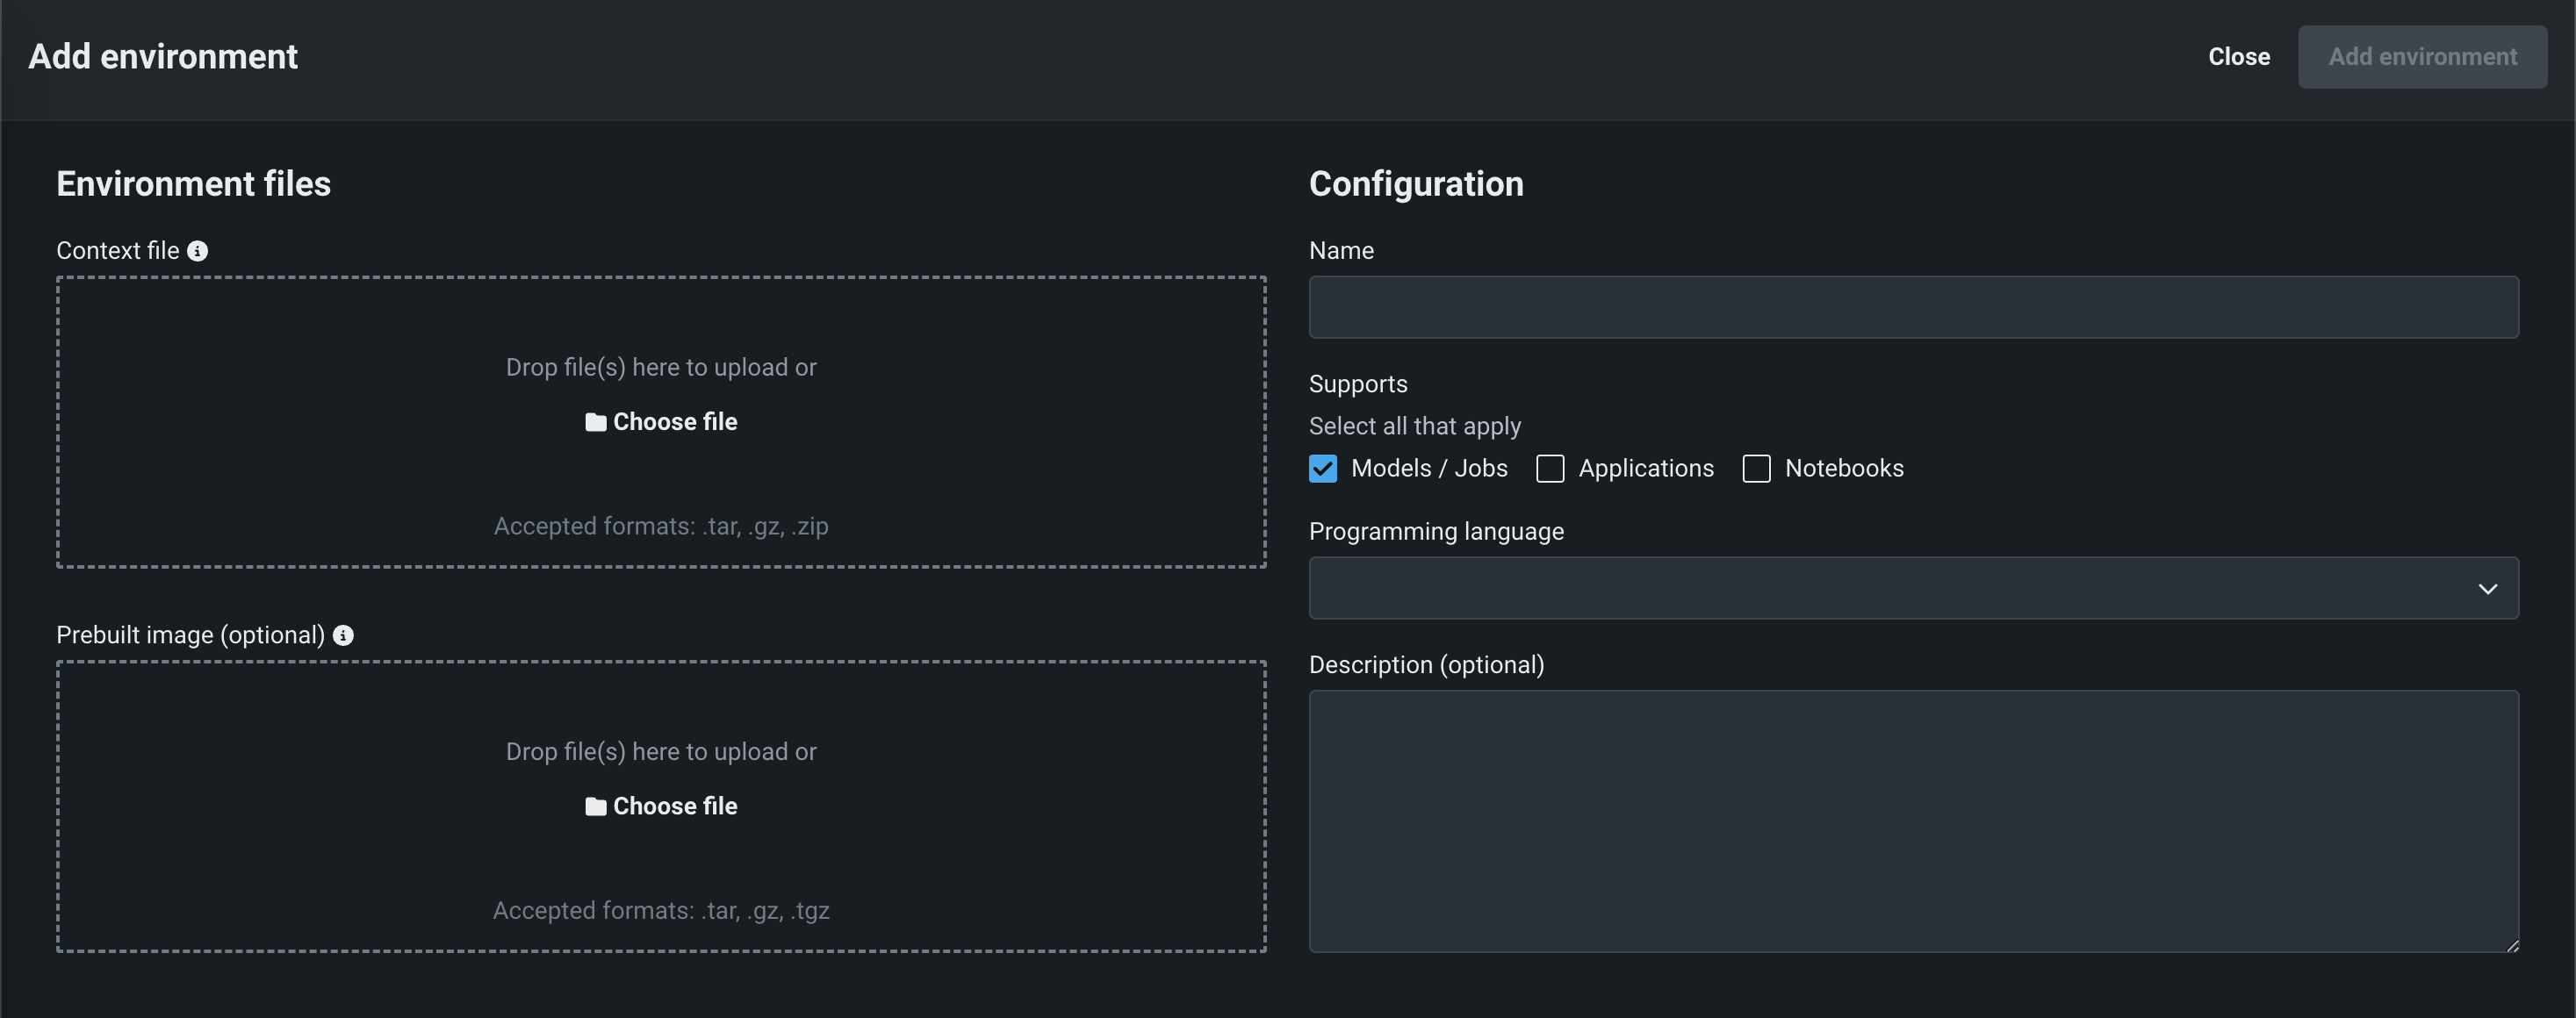
In the Add environment version panel, provide the following:
| Field | Description |
|---|---|
| Environment files | |
| Context file | The archive containing a Dockerfile and any other files needed to build the environment image. This file is not required if you supply a prebuilt image. |
| Prebuilt image | (Optional) A prebuilt environment image saved as a tarball using the Docker save command. |
| Configuration | |
| Name | The name of the environment. |
| Supports | The DataRobot artifact types supported by the environment: Models and Jobs, Applications, and Notebooks. |
| Programming Language | The language in which the environment was made. |
| Description | (Optional) A description of the custom environment. |
When all fields are configured, click Add environment. The custom environment is ready for use.
After you upload an environment, it is only available to you unless you share it with other individuals. To make changes to an existing environment, create a new version. You can click the Current Notebooks tab to view a list of any DataRobot notebooks that are configured to use versions of the custom environment as the notebook container image.
To use the newly created custom environment with a notebook, return to the Environment tab (![]() ) in the notebook sidebar and expand the Environment field dropdown again. This time, you can select the custom environment listed under the CUSTOM header in the dropdown list.
) in the notebook sidebar and expand the Environment field dropdown again. This time, you can select the custom environment listed under the CUSTOM header in the dropdown list.

Use a custom environment for a notebook session
To use a custom environment as the image to run for a notebook container session, open the notebook you want to use and navigate to the Environment tab (![]() ) in the notebook sidebar.
) in the notebook sidebar.
In the Environment field dropdown, you can see all custom environments that you have access to that are compatible with DataRobot Notebooks. Select the custom environment you’d like to use. In the Version field, you can select the version of the environment to use. By default, the latest version of the environment is selected. Once you’ve configured your environment selection, you can start the notebook session.
Built-in environment images
DataRobot maintains a set of built-in Docker images that you can select from to use as the container image for a given notebook.
DataRobot provides the following images:
-
Python 3.13 image: Contains Python version 3.13, the DataRobot Python client, and a suite of common data science libraries.
-
Python 3.11 image: Contains Python version 3.11, the DataRobot Python client, and a suite of common data science libraries.
-
Python 3.9 image: Contains Python version 3.9, the DataRobot Python client, and a suite of common data science libraries.
-
R 4.3 image: Contains R version 4.3, the DataRobot R client, and a suite of common data science libraries.
Environment variables
If you need to reference sensitive strings in a notebook, rather than storing them in plain text within the notebook you can use environment variables to securely store the values. These values are stored encrypted by DataRobot. Environment variables are useful if you need to specify credentials for connecting to an external data source within your notebook, for instance.
Whenever you start a notebook session, DataRobot sets the notebook's associated environment variables in the container environment, so you can reference them from your notebook code using the following code:
import os
KEY = os.environ['KEY']  # KEY variable now references your VALUE
KEY = Sys.getenv("KEY")
To access environment variables, click the lock icon in the sidebar.
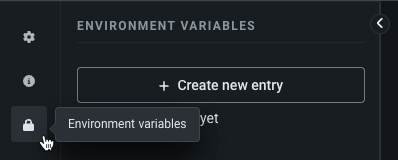
Click Create new entry.
In the dialog box, enter the key and value for a single entry, and provide an optional description.
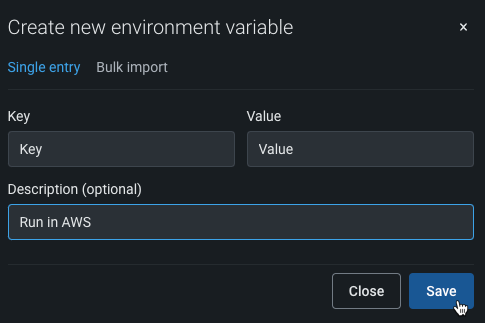
If you want to add multiple variables, select Bulk import. Use the following format on each line in the field:
KEY=VALUE # DESCRIPTION

Note
Any existing environment variable with the same key will have its value overwritten by the new value specified.
When you have finished adding environment variables, click Save.
Edit existing variables
You can also edit and delete a notebook’s associated environment variables from the Environment variables panel:
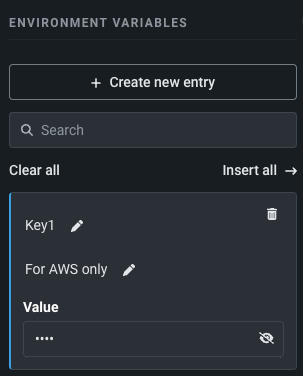
- Click the pencil icon on a variable to edit it.
- Select the eye icon to view a hidden value.
- Click the trash can icon to delete a variable.
- Click Insert all to insert a code snippet that retrieves all of the notebook's environment variables and includes them in the notebook.