Manage data assets
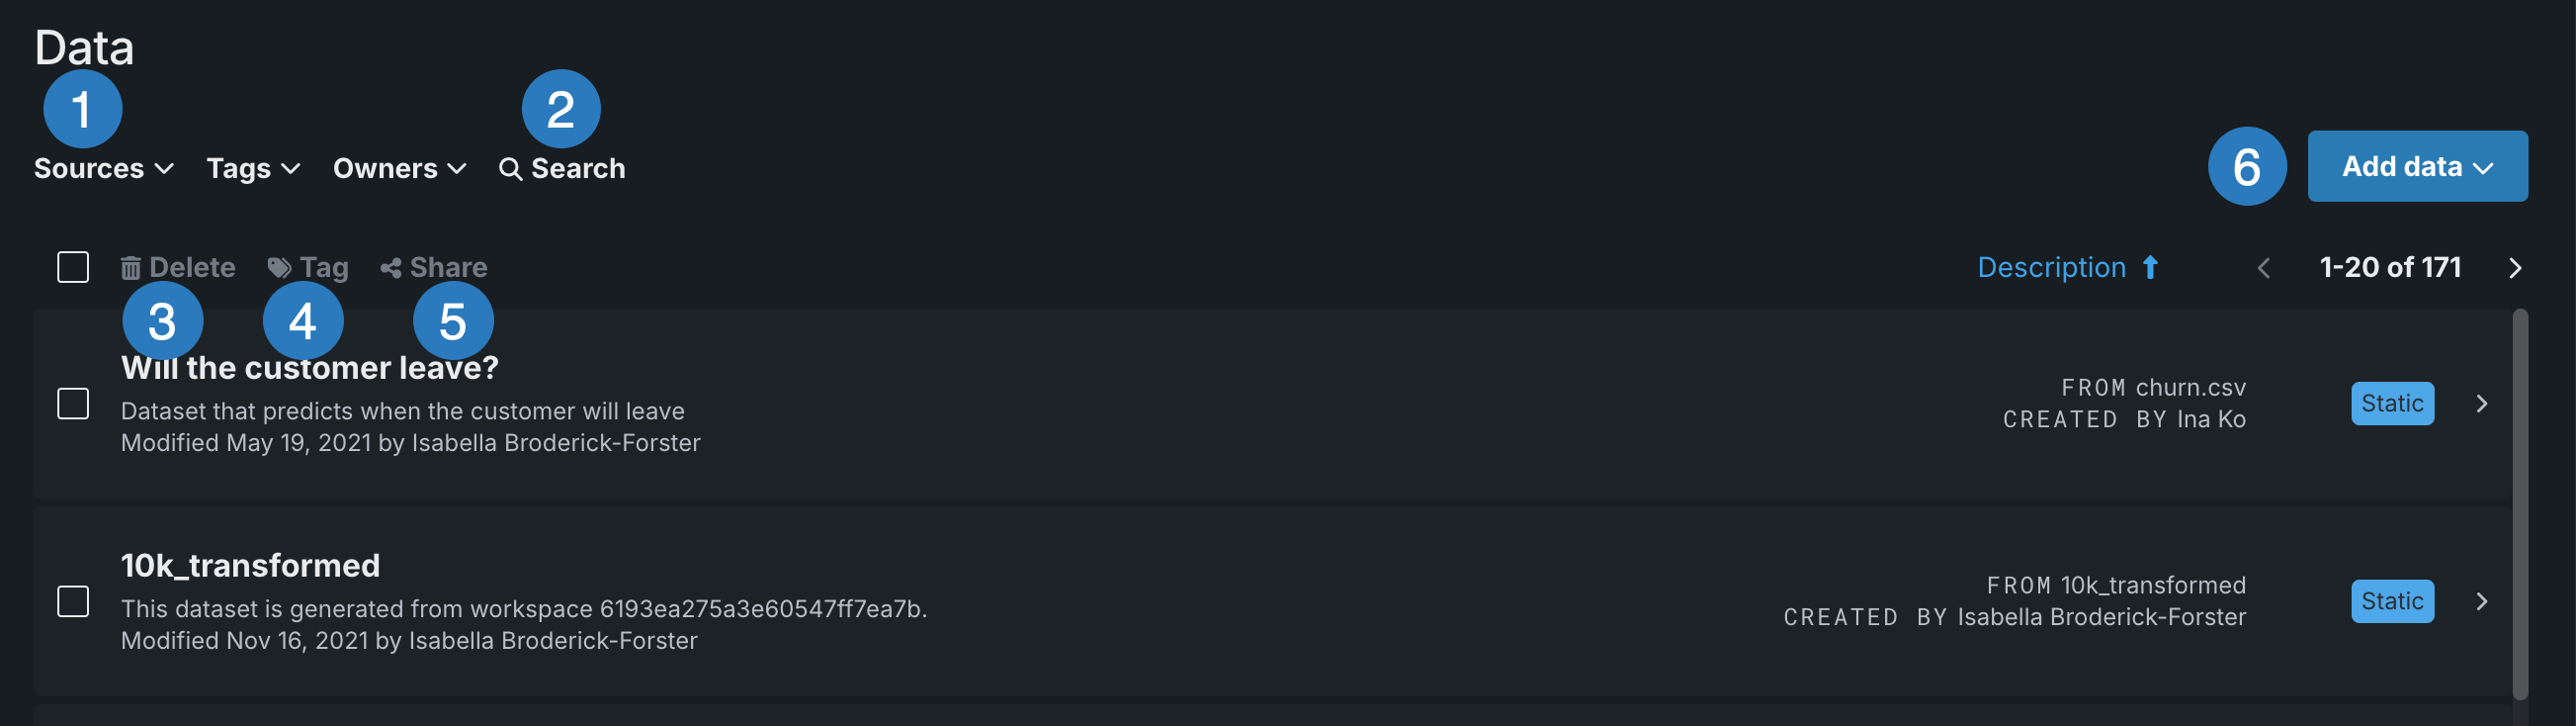
On the Data Registry page, there are a number of ways you can manage and interact with your data:
| Element | Description | |
|---|---|---|
| 1 | Filters | Filter your data assets by data source—local file, URL, data connection, or Spark;—, tags, and owners. |
| 2 | Search | Click to search for specific data assets using key words. |
| 3 | Delete | Delete one or more data assets from the Data Registry page. |
| 4 | Tag | Add tags to one or more data assets to help find them in the future. |
| 5 | Share | Share one or more datasets with a user, group, and/or organization in DataRobot, as well as link specific datasets to a Use Case. |
| 6 | Add data | Click to add data using a data connection, local file, or URL. |
Delete
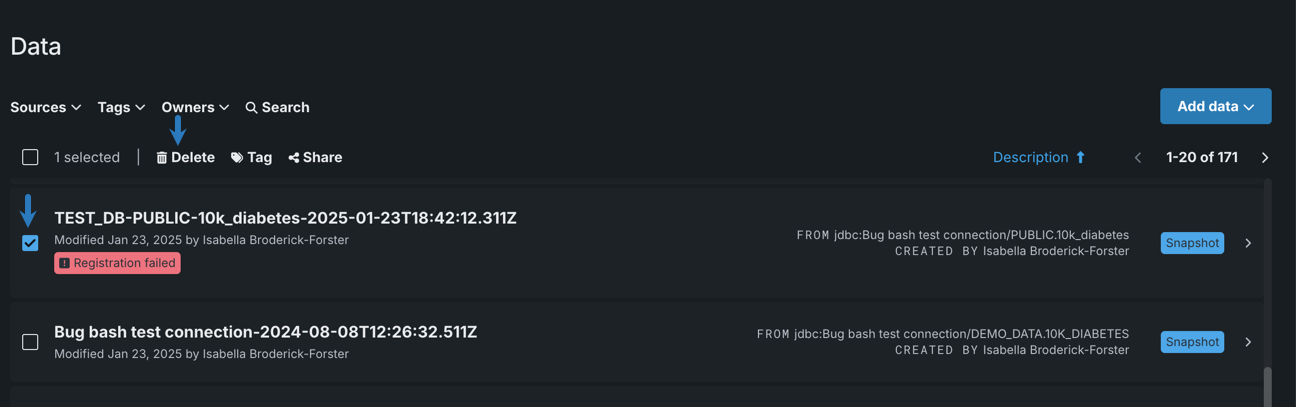
You can delete one or more datasets from the Data Registry page. Doing so also removes the data from any Use Case associated with it.
To delete a dataset:
-
Click the box next to the dataset(s) you want to delete. Then click the trash icon.
-
A message appears warning you that by proceeding, you will no longer be able to access the dataset in the Data Registry page. Click Delete.
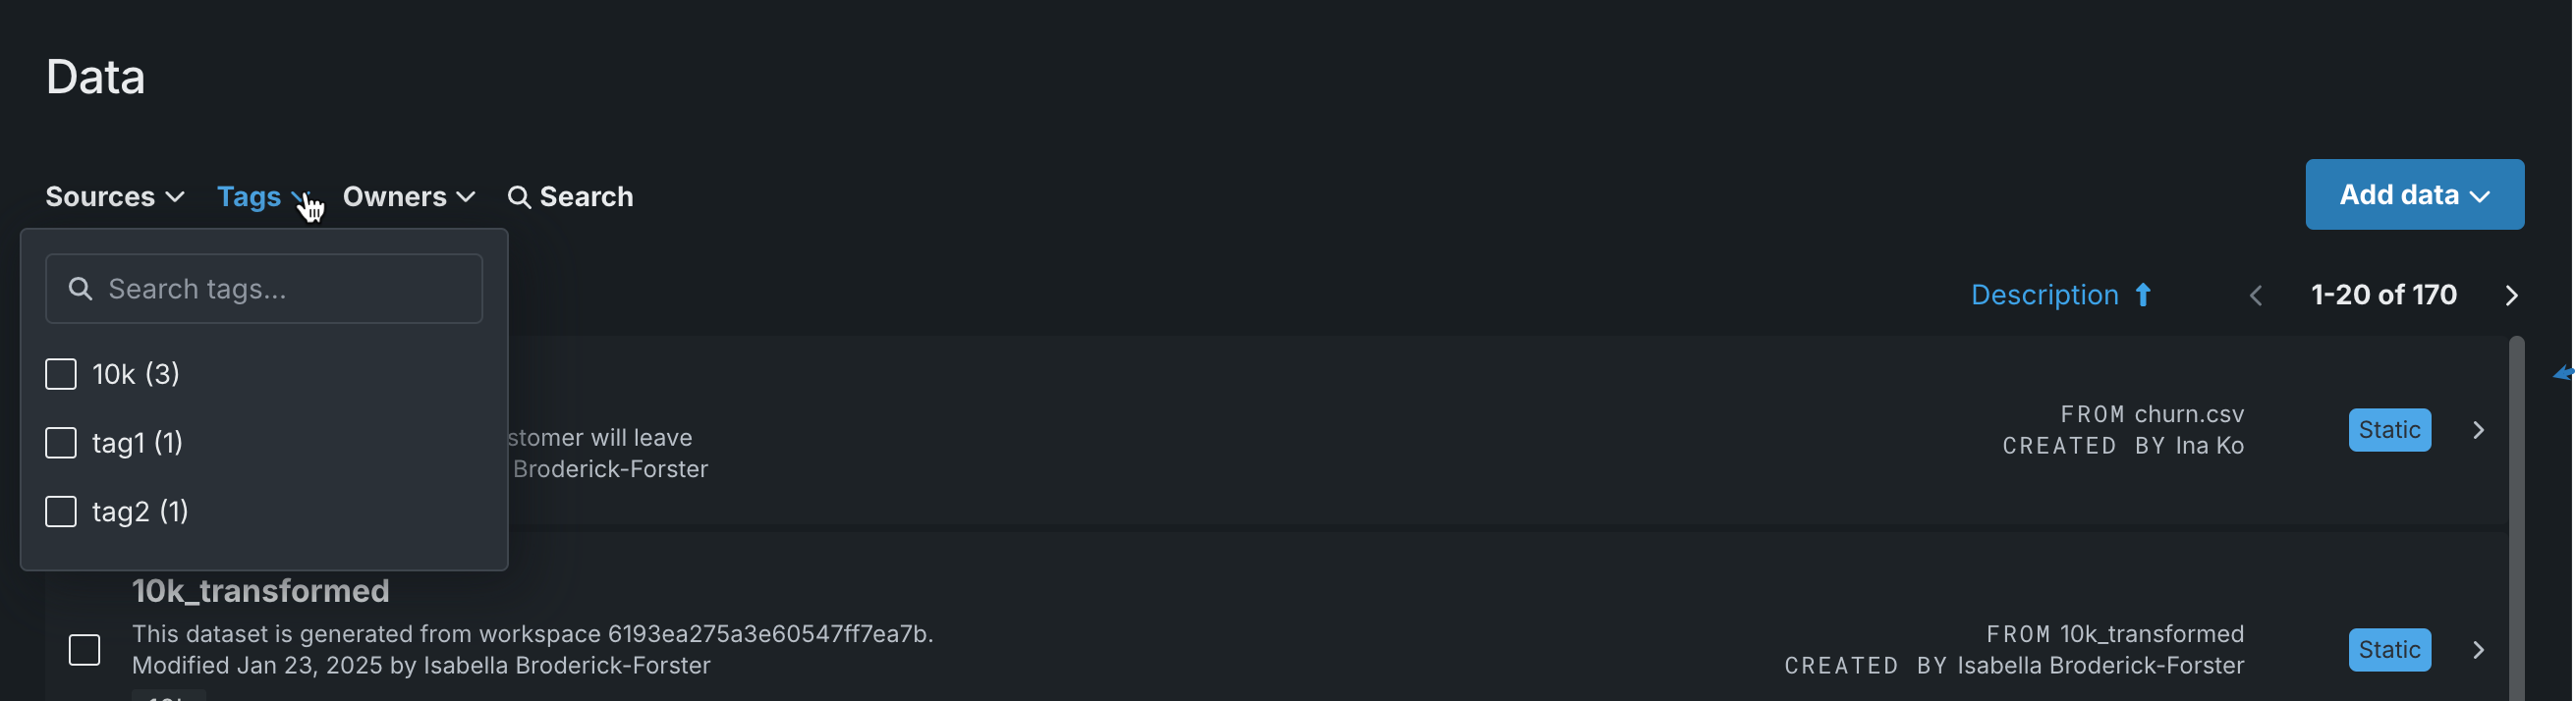
Tag
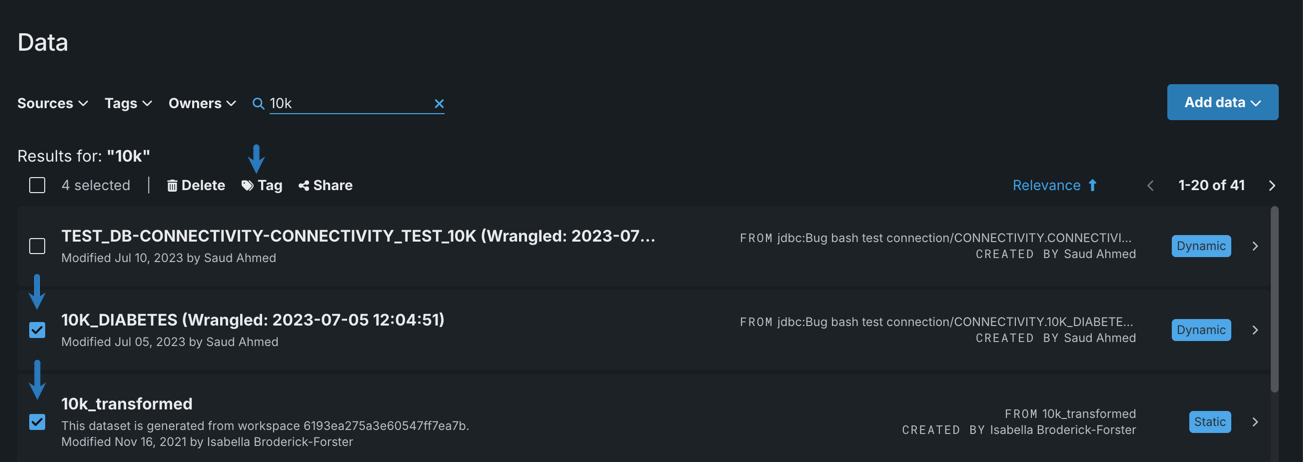
You can apply tags to one or more datasets in the Data Registry page. This is helpful to organize and find datasets in the future. You must have at least write access to the dataset to add a tag.
To add a tag to a dataset:
-
Click the box next to the dataset(s) and click the tag icon.
-
Begin typing the name of the tag you want to add:
- If the tag exists, it will appear in the dropdown below the field.
- If the tag doesn't exist, you have the option to add a new tag.
-
Select the tag(s) you want to apply and click Add tags.
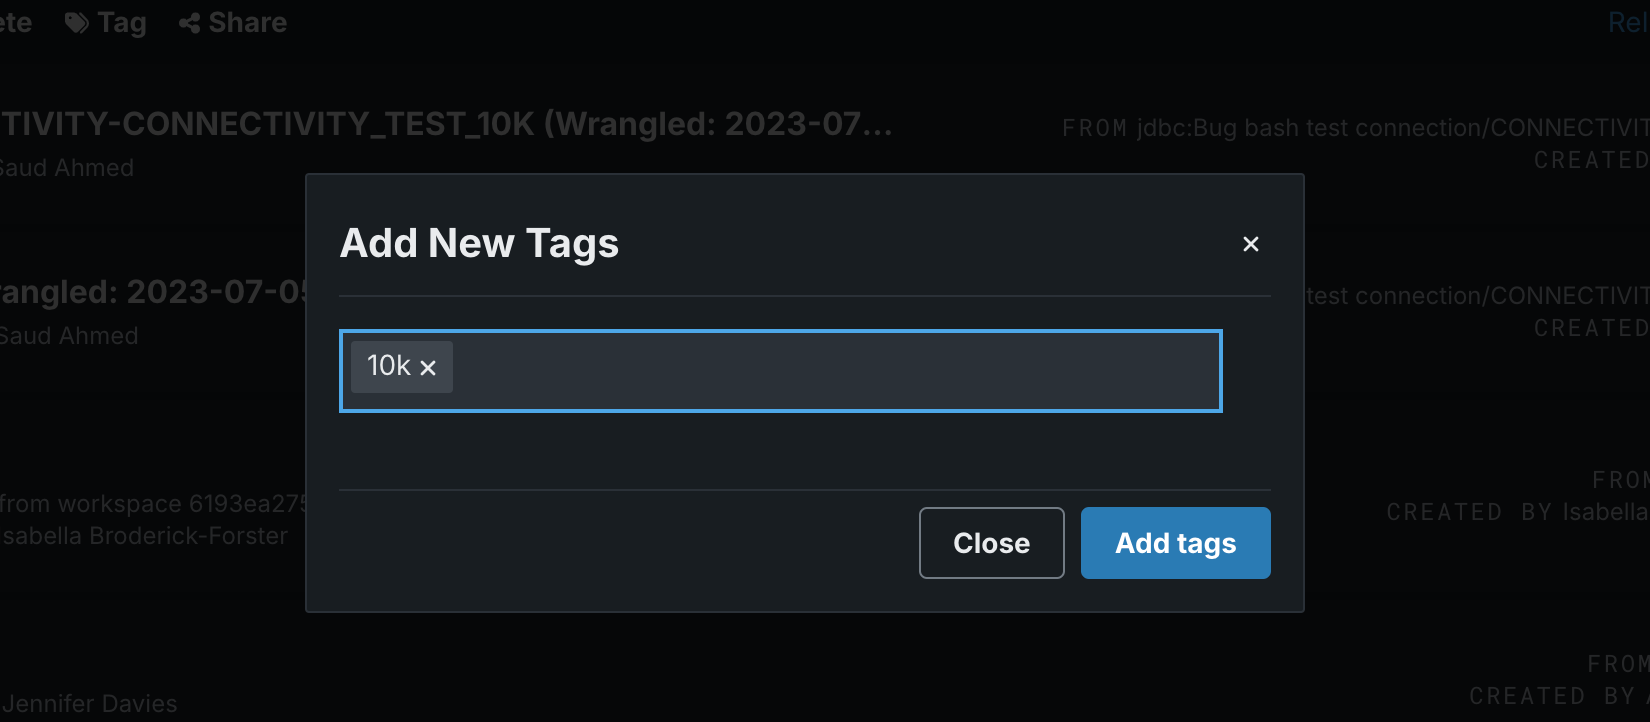
You can now use these tags to filter your datasets on the Data Registry page.
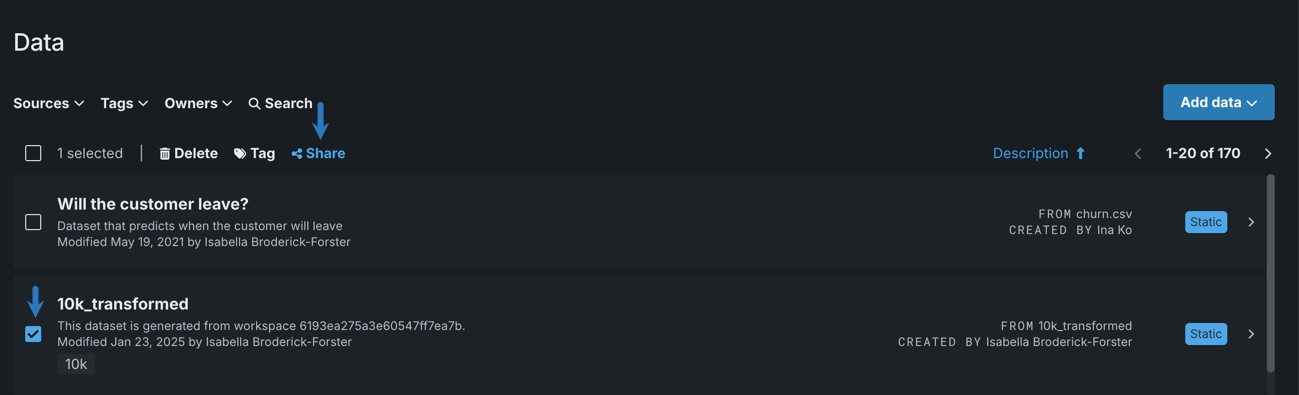
Share datasets
From the Data Registry page, you can share individual datasets with specific users, groups, or organizations within DataRobot.
To share a dataset:
-
Click the box next to the dataset(s) you want to share and click the share icon.
-
Configure the sharing permissions:
Permission Description Allow sharing If selected, users will also be able to share this dataset. Can use data If selected, the dataset can be wrangled, be used to run experiments , etc. -
Select the role you want the users to have: Owner, Consumer, or Editor.
-
Enter the user(s), group(s), and/or organization(s) in the field and click Share.
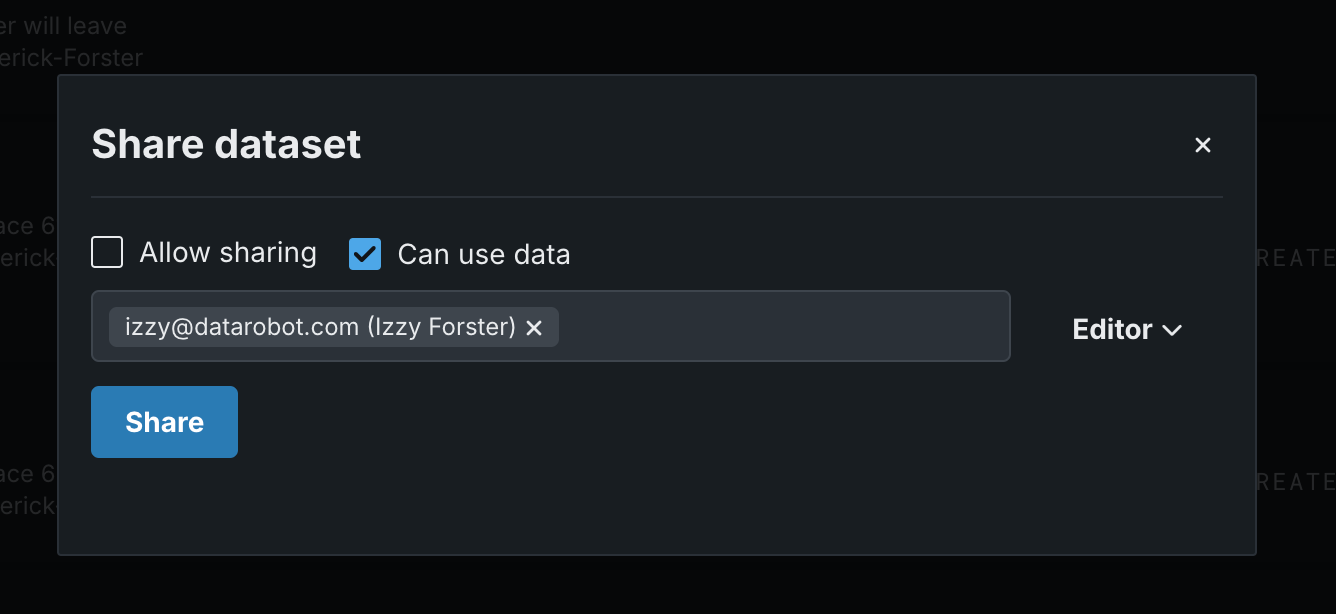
Once a notification appears below the field indicating the share was successful, you can close the window.
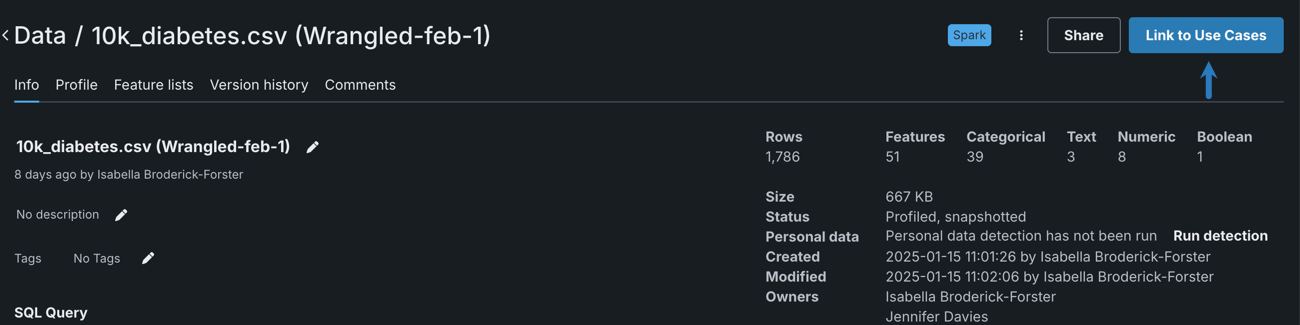
Link data to a Use Case
When you're exploring an dataset, you can link that dataset to a Use Case, sharing it with all the members of the Use Case.
To link a dataset to a Use Case:
-
Click on the dataset you want to add to a Use Case.
-
Click Link to Use Cases.
-
In the Link to Use Case modal, you have three options:
Click the dropdown to view a list of available Use Cases and select the Use Case you want to add the dataset to. Then, click Link to Use Case. When you link data to a Use Case that has other members, that data will also be added to their Data Registry.
This tab allows you to create a new Use Case with the selected dataset. Enter a name and description (optional), and then click Create Use Case.
This tab displays all of the Use Cases the dataset is currently linked to. Click the icon to the right of the dataset to remove the link and click Unlink selected. Unlinking the dataset only removes it from the Use Case; it is still accessible from the Data Registry page.