Manage a Use Case
Use Cases organize, provide a permission control mechanism, and are a collaborative space where teams can comment and review each other’s work. Working with Use Cases also includes both creating new Use Cases and working with projects migrated from DataRobot Classic.
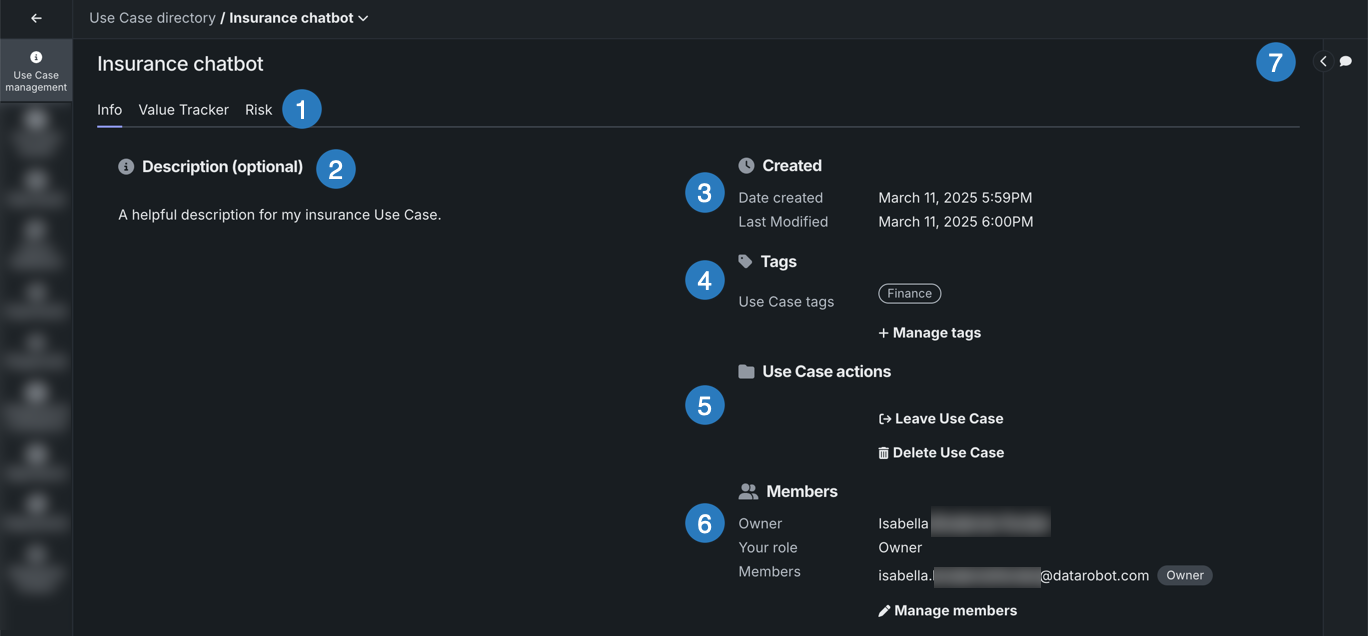
To manage a Use Case, including its members, open a Use Case from the directory and click Use Case management .
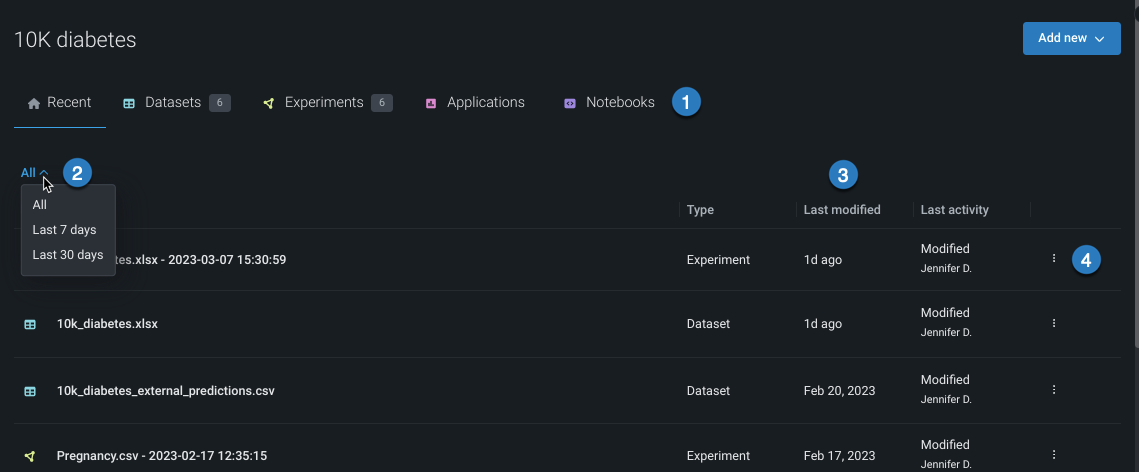
| Element | Description | |
|---|---|---|
| 1 | Use Case management tabs | The Use Case management page has the following tabs:
|
| 2 | Description | Enter a helpful description for the Use Case. |
| 3 | Use Case metadata | Reports the creation date and last modification date. |
| 4 | Tags | View assigned tags and via the manage option, delete tags or add new tags to help categorize and search for a Use Case in the directory. |
| 5 | Use Case actions | Provides options for working with the Use Case:
|
| 6 | Manage members | Opens the share modal that allows you to add and remove users, as well as modify member roles. |
| 7 | Comments | Expand to add comments to the Use Case that are visible to all other members. |
Manage members
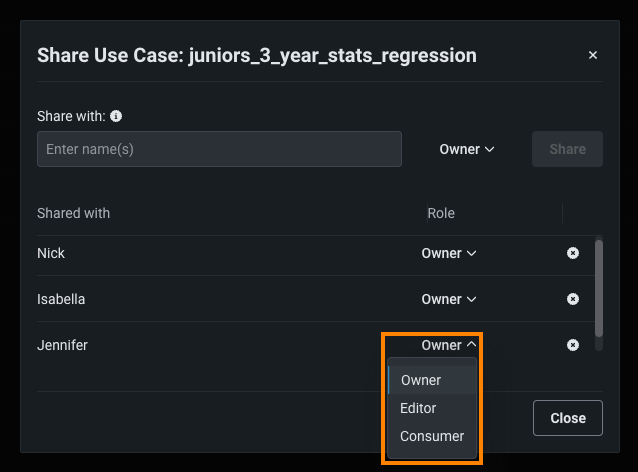
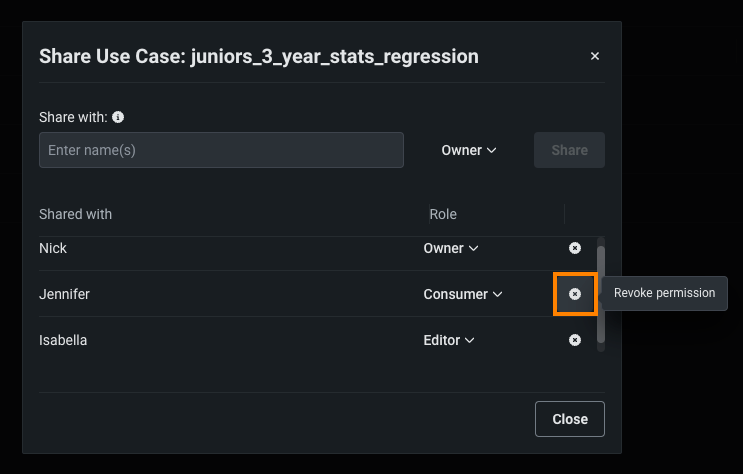
As a Use Case Owner, you can edit a team member's role (permissions level) or remove them from the Use Case:
-
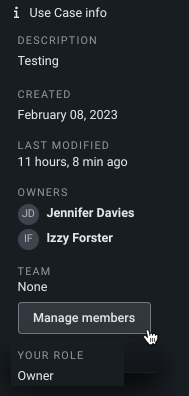
From the Info tab in Use Case management, click Manage members.
-
In the Share dialog box, in the Role column, you can:
-
Click Close to return to the Use Case.
Share
With Workbench, when you share a Use Case, the recipient gets access to all the associated assets.
Supported entities
Currently, you can only share Use Cases with individual users and organizations—group sharing is not supported.
To share a Use Case:
-
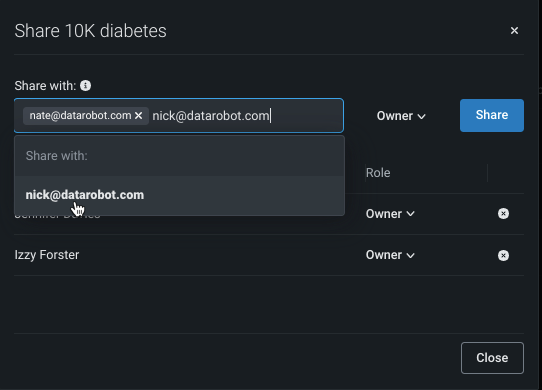
From the Info tab, click Manage members.
-
A sharing modal opens. Enter one or more team member email address(es), click the name on the associated dropdown, and set the desired permissions level (role).
-
Click Share.
Comments
On the Use Case management page, you can post comments to host discussions with other team members or leave a note for yourself. Note that the Comment panel is only visible on this page.
To post a comment:
-
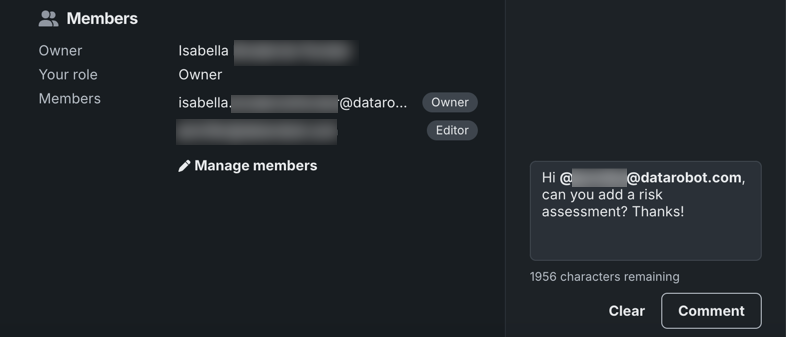
Click to expand the Comment panel.
-
Enter your comment in the text box. You can tag other users by typing
@followed by their username. -
When you're done, click Comment.
Delete a Use Case
To delete a Use Case, you can either:
-
In the Use Case directory, click the Actions menu to the right of the Use Case you want to remove and select Delete Use Case.
-
In a Use Case, on the Use Case management tile, click Delete Use Case.
A window appears describing how Use Case deletion affects associated assets. The window lists all assets that will be permanently deleted (Assets to permanently delete), and assets that are associated with Use Case asset, but are not affected by its deletion (Assets unaffected). Click an asset type to display specifically which assets are affected. To proceed with deletion, click Yes, delete.
The Assets unaffected section may list, for example, an experiment model you registered or deployed into production. In this case, the experiment will be deleted, however, the registered model and deployment will persist.
Deleted assets
A variety of assets can be associated with a Use Case and not all are handled the same way when a Use Case is deleted. See the table below to review how each asset is handled:
| Asset | Handling upon Use Case deletion |
|---|---|
| Data assets | The dataset is not deleted from the Data Registry; however, the link from the dataset to the Use Case is severed. |
| Vector databases | All vector databases are deleted. |
| Experiments | All experiments are deleted and any deployments associated with the experiments are deactivated. |
| Playgrounds | All playgrounds are deleted. |
| Notebooks and codespaces | All codespaces are deleted. |
