Codespace sessions
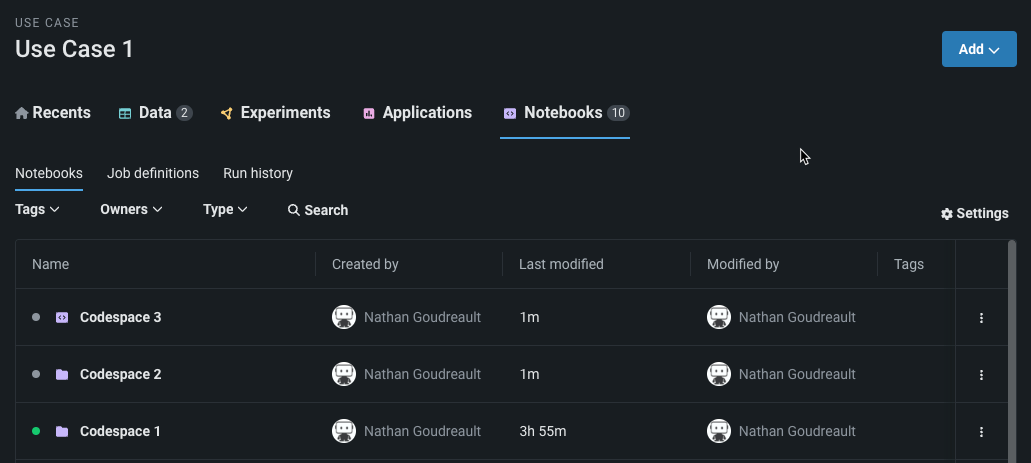
This page outlines how to start a codespace session, upload files to a codespace, and manage its contents. You can view and manage codespaces from the Notebooks tab of the Use Case home page.
Although you cannot share individual codespaces directly with other users, in Workbench you can share Use Cases that contain codespaces. Therefore, to share a codespace with another user, you must share the entire Use Case so that they have access to all associated assets.
Start a codespace session
To manage the contents of the codespace file system or edit and execute its files, you must first start the codespace's environment. Click the environment icon to configure the environment. The environment image determines the coding language, dependencies, and open-source libraries used in the notebook. The default image for a codespace is a pre-built Python image. To see the list of all packages available in the default image, hover over that image in the Environment tab:
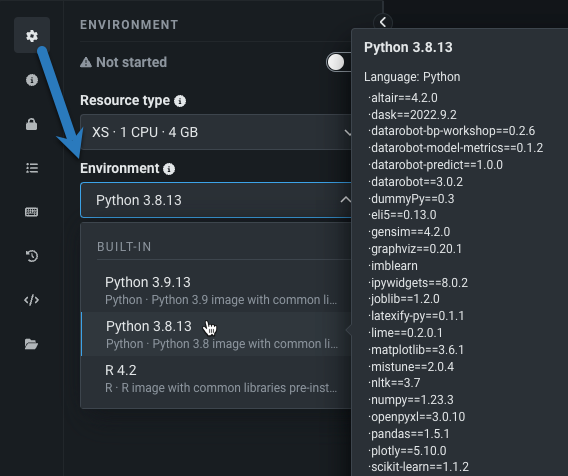 In addition to built-in environments, you can also use a custom environment for the codespace session by selecting it from the Environment dropdown.
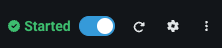
To begin a codespace session, start the environment by toggling it on in the toolbar.

Wait a moment for the environment to initialize, and once it displays the Started status, you can begin working with the codespace. When the codespace session begins, the file system volume is mounted to the path /home/notebooks/storage/.
When the container session is started, the file system volume will be mounted. You can upload and manage files and folders to the file system in the side panel. You can also create new folders, notebook files, and non-notebook files from the file browser UI. As seen in the following screenshots, you can a new notebook by clicking on the “Create notebook” icon:
For AI Platform users (Self-Managed users excluded), DataRobot provides backup functionality and retention policies for codespaces. DataRobot takes snapshots of the codespace volume on session shutdown and on codespace deletion and will retain the contents for 30 days if you want to restore the codespace data.
Codespace environment variables
For codespace entities, environment variables are defined at the codespace level and not the individual notebook file level. When a codespace session is started, DataRobot sets all environment variables defined in the Environment Variables tab. You can retrieve these environment variables, via code, from any notebooks in the codespace file system.
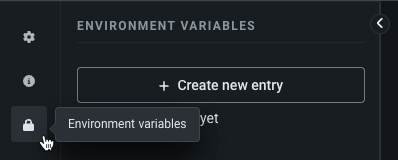
To access environment variables, click the lock icon in the sidebar. Then click Create new entry.
In the dialog box, enter the key and value for a single entry; optionally provide a description.
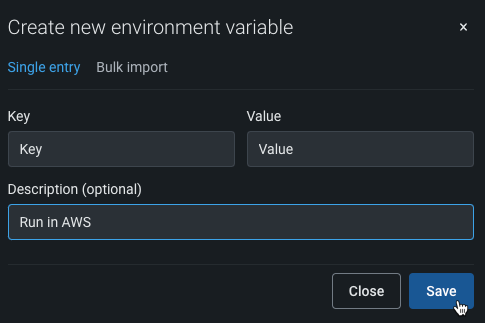
To add multiple variables, select Bulk import. In the entry window, enter each variable, on a new line, in the following format:
KEY=VALUE # DESCRIPTION

Note
Any existing environment variable with the same key will have its value overwritten by the new value specified.
When you have finished adding environment variables, click Save.
Add files to a codespace
Each codespace consists of its own persistent file system. You can upload any number of files and folders to the codespace filesystem using the file browser in the side panel. To work with notebooks, upload .ipynb files.
You must start the codespace's environment before uploading files to it. For more information on how to configure an environment, see the Manage the notebook environment documentation.
After starting the environment, upload files or folders from your local machine by dragging and dropping them into the upload modal, or by clicking Upload and selecting File or Folder.

Create files
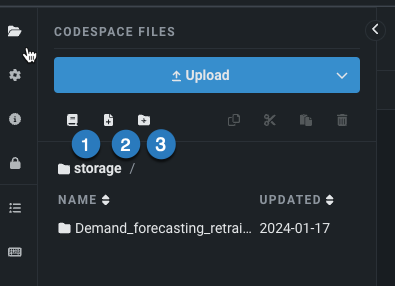
You can create new folders, notebook files, and non-notebook files directly from a codespace. Navigate to the Codespace files panel, and use the icons highlighted below.
To create new files, navigate to the Codespace files panel, and use the icons highlighted below.
| Field | Description | |
|---|---|---|
| 1 | Create notebook | Creates an executable .ipynb file. Provide a name for the notebook file. |
| 2 | Create file | Creates a new file in the current folder of the codespace. Provide a name and specify the file type with an extension. |
| 3 | Create directory | Creates a folder within the current folder of the codespace. Provide a name for the folder. |
After creating a file, it appears as part of the codespace folder.
Manage files
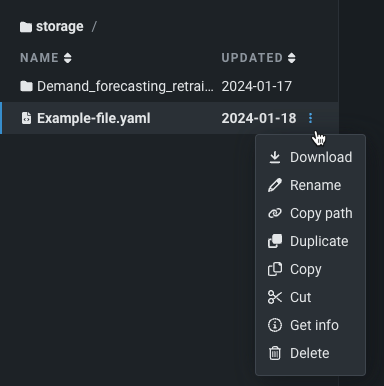
You can manage and edit files from directly within a codespace. Select the Actions menu to the right of the file you want to edit to view the available actions.
Work with notebooks in a codespace
To edit and execute a notebook within a codespace, double click on a notebook file (.ipynb) in the file browser to open it.

The codespace interface supports a tabbed experience, so you can open, view, and edit multiple files at the same time. Similar to Jupyter, opening a notebook file will start a kernel process for that notebook. Each opened notebook will run in its own kernel.

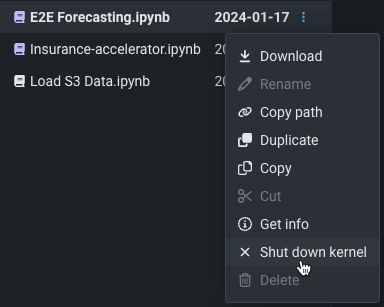
DataRobot indicates which notebooks are running in active kernels with the purple notebook icon in the file browser. Inactive notebooks use a white icon.

To shut down a kernel, open the Actions menu for a notebook file and select Shut down kernel.
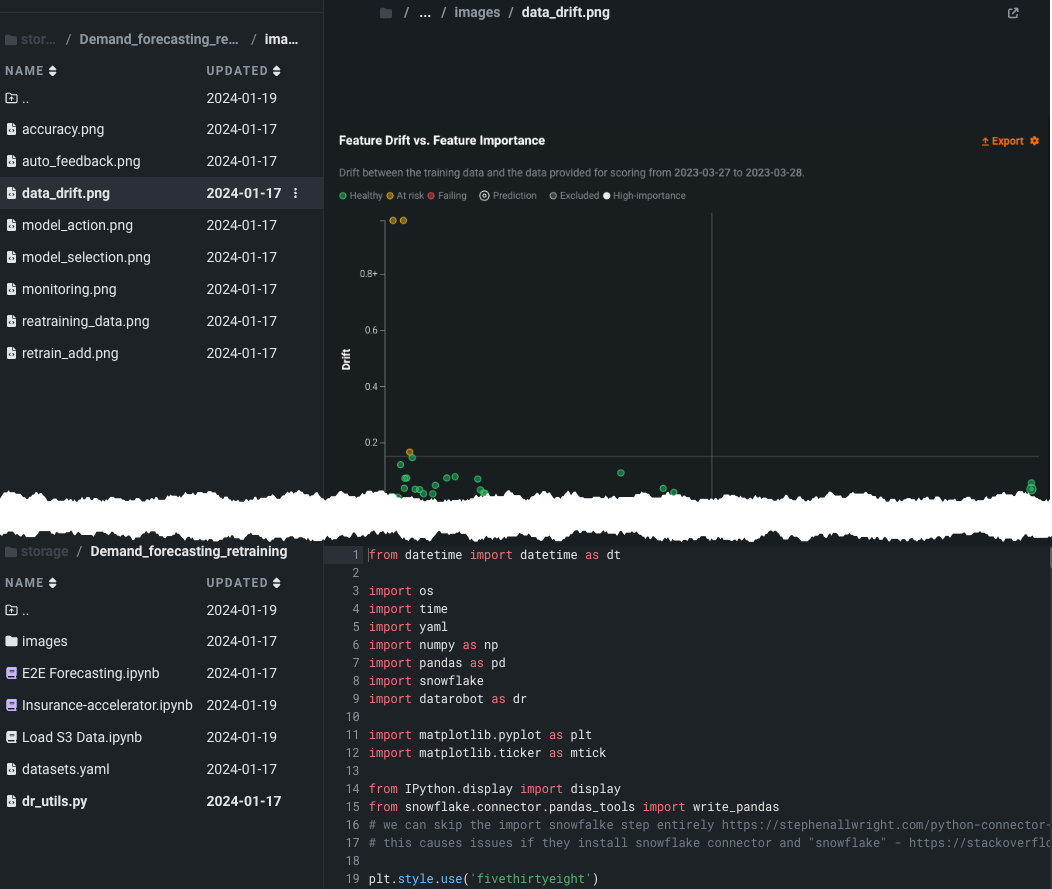
Work with non-notebook files
In addition to editing and executing notebooks, codespaces offer a text editor for you to also view and edit other file types. For example, as shown below, you can view image files and edit Python utility scripts.
Use Git with codespaces
Notebooks are represented as .ipynb files in a codespace, which allows you to version both your notebook and non-notebook files using an external Git repository. In addition to initializing a new codespace from a Git repo, you can directly use the Git CLI in a codespace's integrated terminal during an active session. DataRobot integrates with Git providers for you to version your code and collaborate with your team when developing code in a codespace.
Integrate with a Git provider
Integrate DataRobot with your Git provider so that DataRobot can access your repositories using the OAuth 2.0 standard.
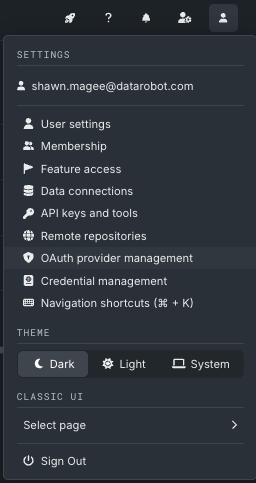
To integrate with your Git provider, click your user icon and select the OAuth provider management page.
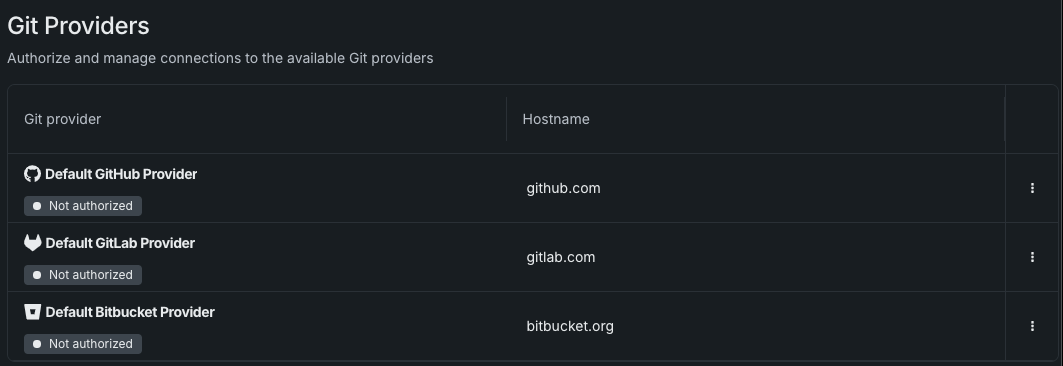
From the OAuth provider management page, select the provider that you want to integrate with. DataRobot supports integrations with GitHub Cloud, GitLab Cloud, Bitbucket Cloud, Microsoft's Azure Repos, and GitLab Enterprise Self-Managed (for on-prem and STS deployments). You only need to complete this integration setup once per Git provider account. The example below outlines authentication with GitHub Cloud.
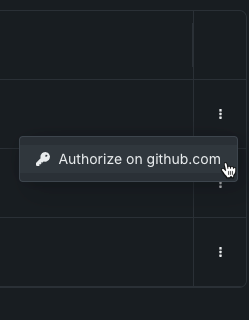
After choosing a provider, click the actions menu icon () and select Authorize on github.com (the URL will change depend on the provider selected).
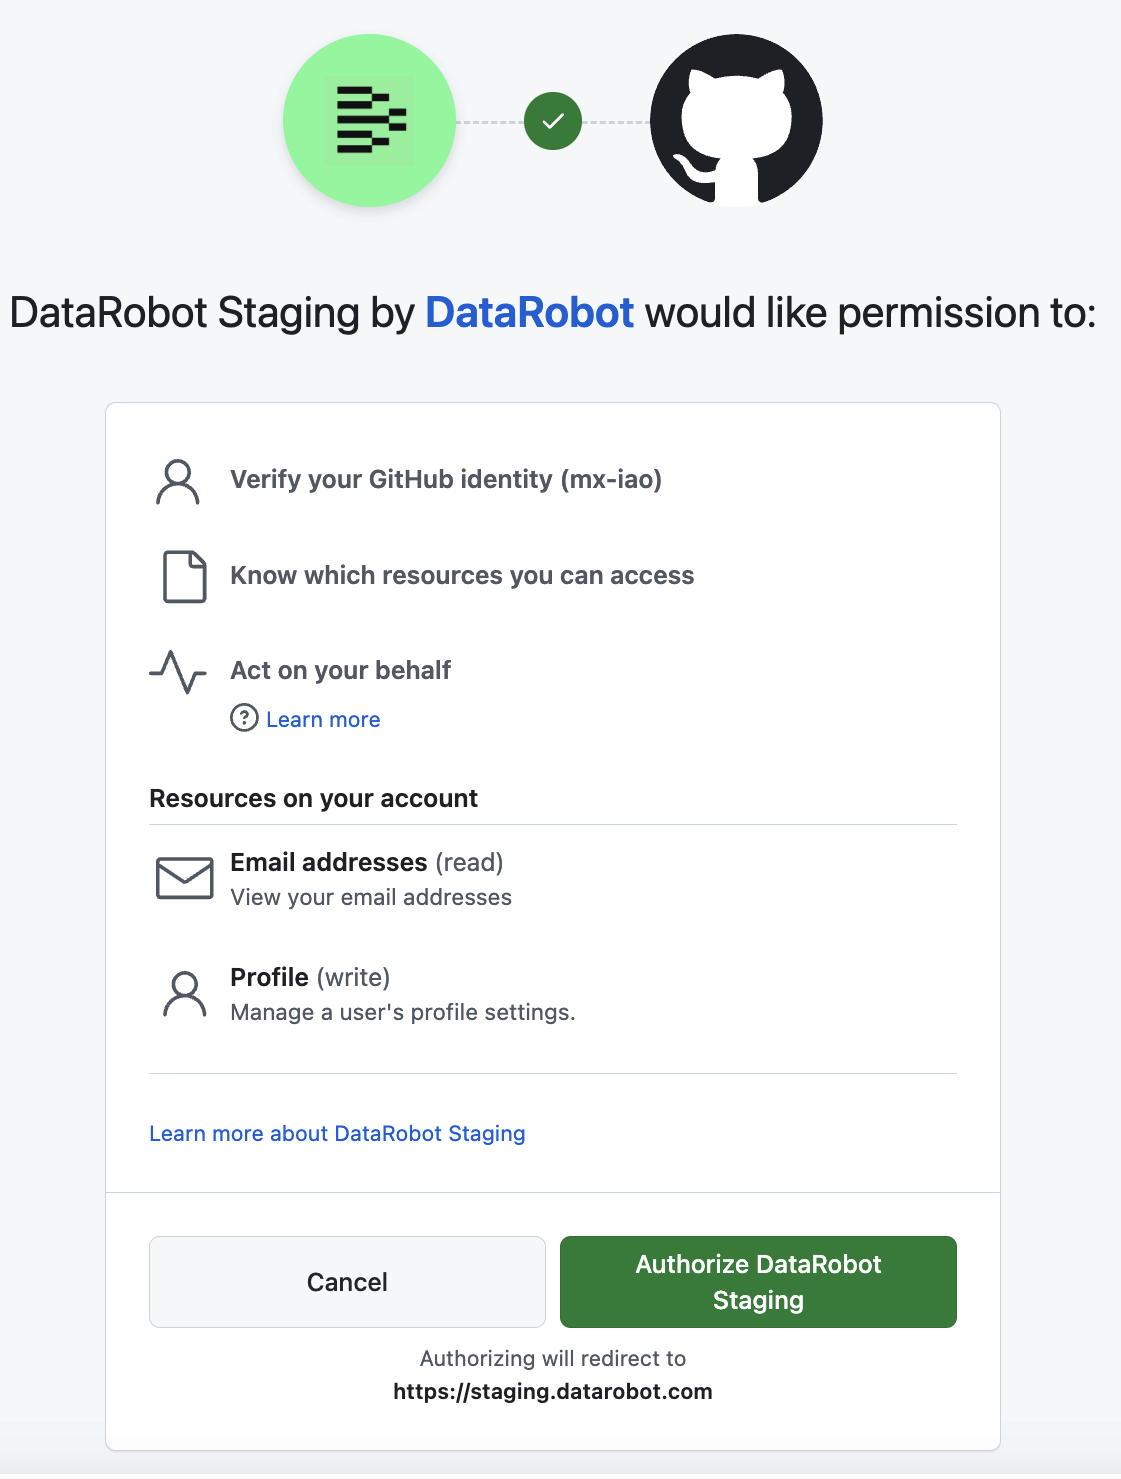
DataRobot redirects you to the provider's login page. Sign in to your account and authorize DataRobot's access.
Once authorized, DataRobot redirects you back to the Git providers page.
Additional GitHub configuration
GitHub configuration requires an additional step after authorization. Authorizing DataRobot to GitLab or Bitbucket accounts does not require this additional configuration step.
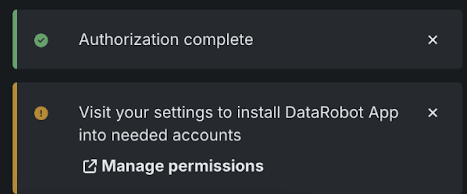
When you return to the Git providers page, DataRobot notifies you to visit the settings page on GitHub to install the DataRobot App. Click Manage Permissions in the notification to get redirected to GitHub.
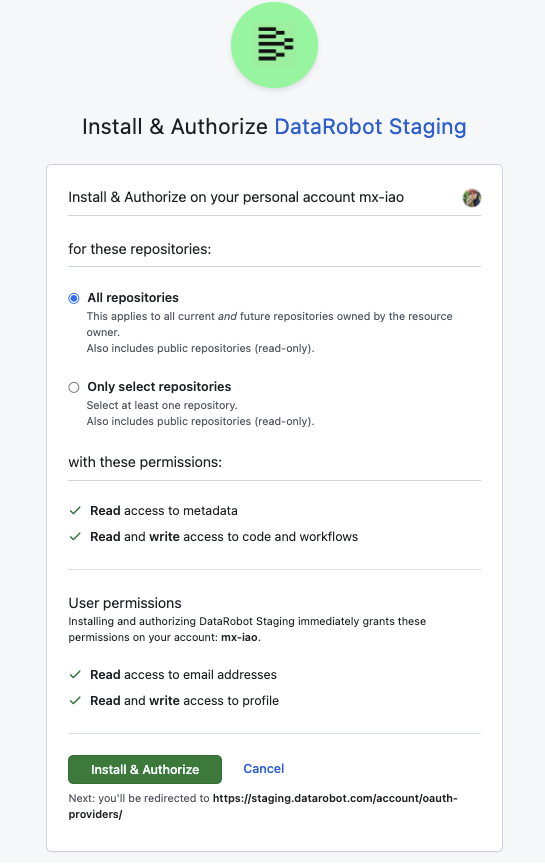
Install the DataRobot GitHub app on your personal GitHub account and any organization accounts to work with the repositories that belong to them. Select the account you want to integrate with and specify whether you want to install and authorize the DataRobot App for all repositories belonging to that account, or only select repositories. If the DataRobot app is not installed on your personal GitHub account, you will not be able to use the Git integration with your private repositories. After selecting the repositories to authorize, click Install & Authorize.
Manage Git provider integrations
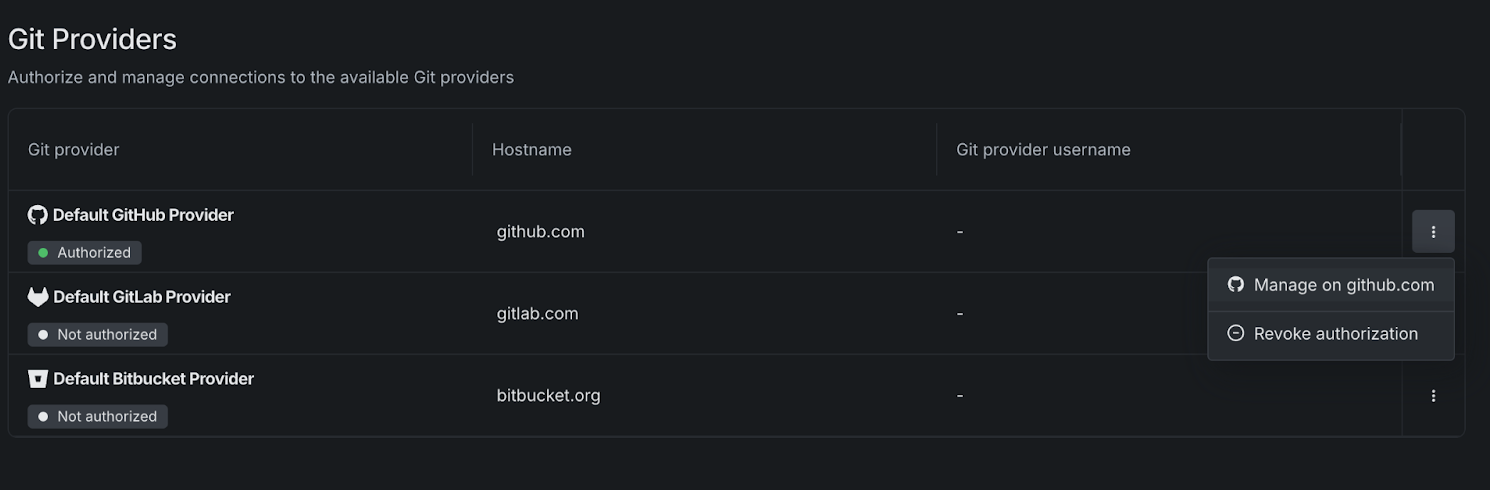
To view and manage the permissions for the DataRobot App installed on your Git provider account, navigate to the menu icon for that corresponding provider and click Manage on github.com (the URL will change depend on the provider selected). This redirects you to the corresponding Git provider site to view your authorizations and permissions settings.
The table below provides a list of locations to manage authorization for common OAuth providers.
| Provider | App location | Notes |
|---|---|---|
| GitHub | Github application installation settings page and GitHub application authorizations | The App Authorization section helps to configure and revoke your account authorization, while the Installation settings page helps to configure Github App permissions to repositories for your account. Use the OAuth Management interface to go to the specific application settings page where you can find application configurations for other organizations. |
| GitLab | Gitlab application settings | View the authorized applications table for configuration details. |
| Bitbucket | Bitbucket app authorizations | N/A |
| Microsoft | Microsoft app authorizations | N/A |
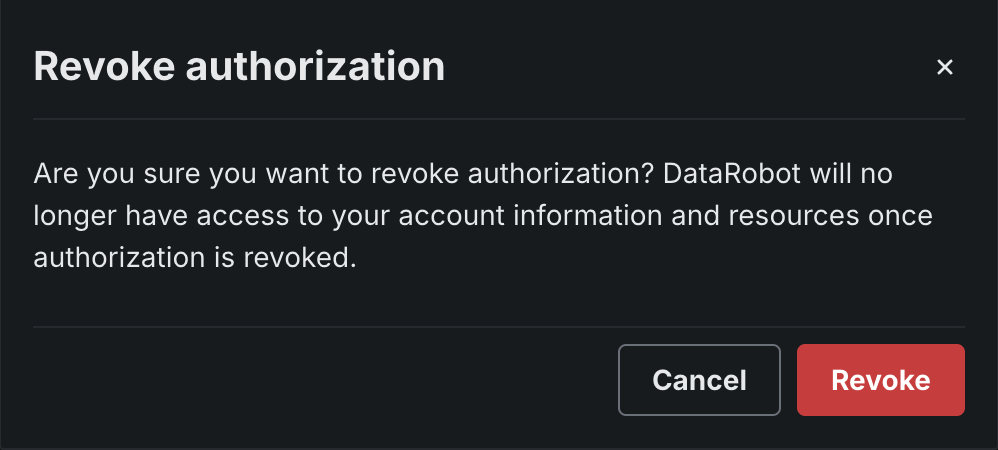
If you no longer want to have DataRobot authorized to your Git provider account, click Revoke authorization. DataRobot will no longer have access to your account and will delete any associated metadata. However, the DataRobot App may still appear in the Git provider's authenticated app, due to API limitations that prevent DataRobot from fully revoking authorization.
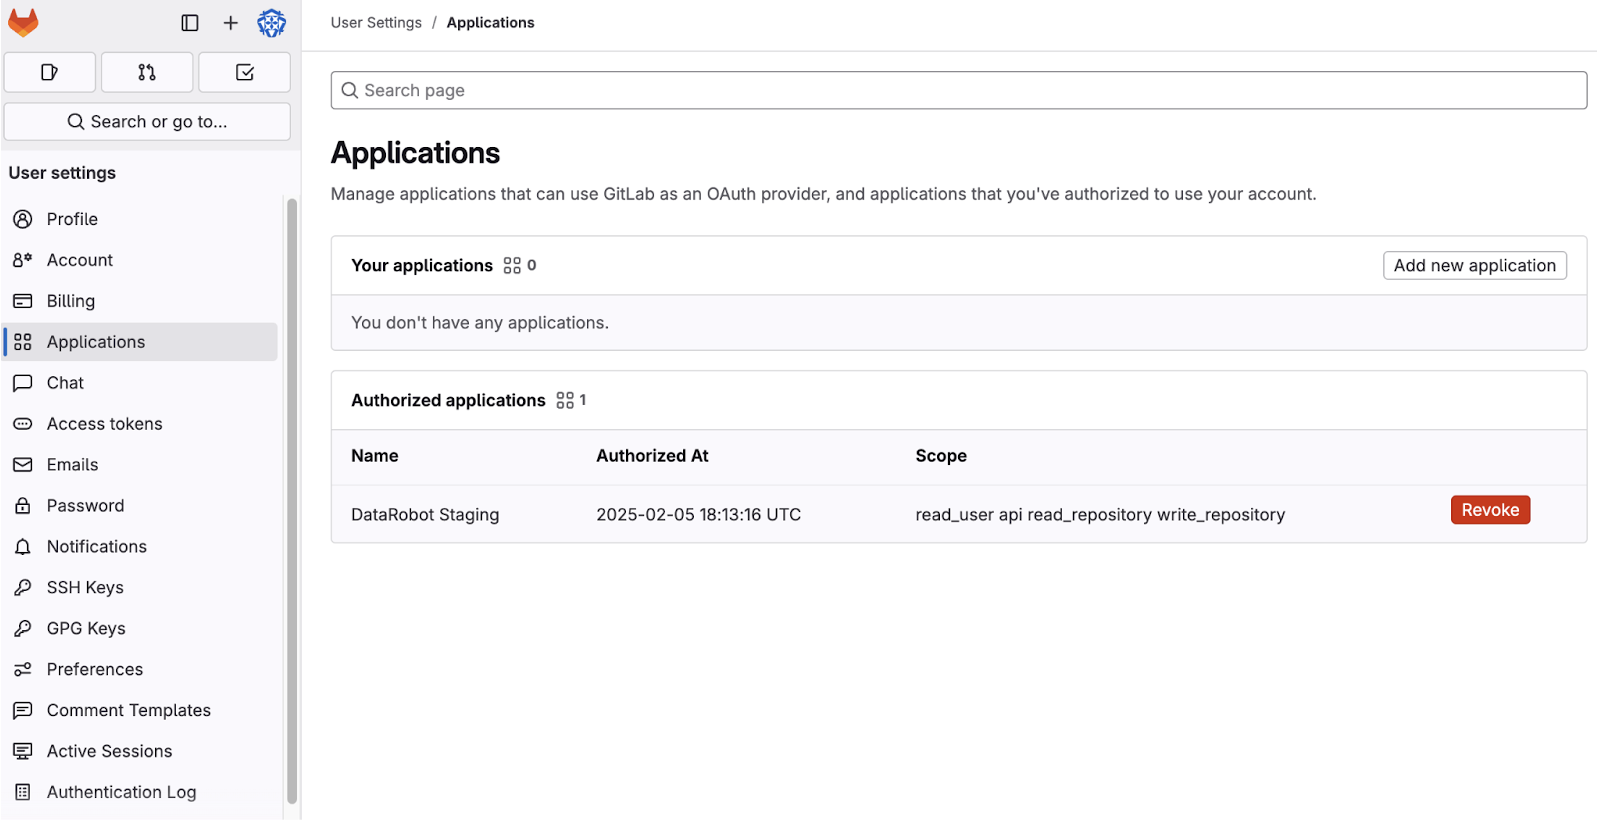
For GitLab and Bitbucket, once you’ve revoked authorization, you will need to complete an additional step in the Git provider's settings to revoke authorization of the DataRobot OAuth app. For example, in GitLab, revoke the authorization on the Applications page in the GitLab user settings.
In the case where you have revoked authorization on your Git provider’s site but not in DataRobot settings, the authorization will be detected as expired the next time you use Git operations in a codespace for a repository in that corresponding Git account. You will need to re-authorize DataRobot to that Git provider account in order to use this integration again.
Manage additional providers
For more information on managing authentication provider integrations in DataRobot, see Manage OAuth providers.
Develop with Git CLI
Once you have authorized DataRobot to your Git provider, you can start using the Git CLI in your codespace sessions from the terminal. You will not need to manually authenticate to your Git account using a personal access token (PAT) each time you run a Git CLI command, as DataRobot automatically handles authentication on your behalf. Behind the scenes, DataRobot uses a custom Git credential helper to accomplish this.
Git CLI authentication
This automatic authentication flow is currently only supported for the Git CLI, and not the GitHub CLI. If you want to use the GitHub CLI in a codespace, you will need to manually authenticate with your personal access token (PAT) when using gh commands in the terminal. You can set your PAT as a GH_TOKEN or GITHUB_TOKEN environment variable. gh will authenticate using that environment variable value.
Git authentication is handled at the individual user level. Even if multiple use case members have access to the same shared codespace in a use case, DataRobot will only attempt to authenticate on behalf of the user who has started the active codespace session based on that user’s authorized Git provider account(s).
You can simply clone remote Git repos and push and pull changes to and from those repos without any additional authentication steps required:
git clone https://github.com/<my-account>/<my-repo>
git pull
If you are using a codespace with a custom environment, Git integration functionality requires the custom environment image to include the DataRobot Git helper binary for private Git authentication:
# Install the Git helper binary used for private git authentication in notebooks and codepaces
RUN curl -L -o drgithelper https://github.com/datarobot-oss/drgithelper/releases/download/v0.0.9/drgithelper && chmod +x drgithelper
You can use a sample environment template as an end-to-end example of how to configure the Dockerfile for configuring a custom environment.
Create a codespace from a Git repository
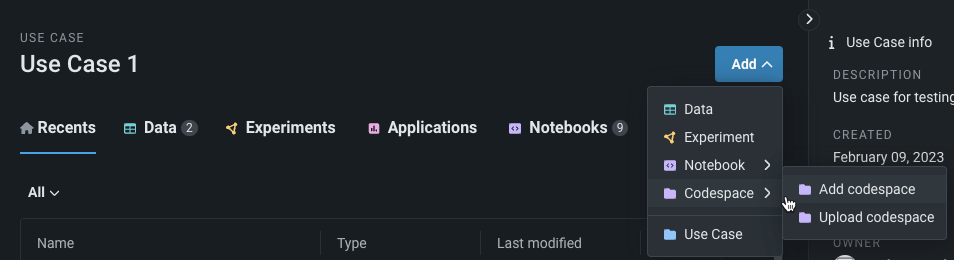
If you would like to create a new codespace instantiated with code from an existing external Git repository, navigate to a Use Case and select Add > Codespace > Upload codespace.
If you are cloning a public repo, provide the Git clone URL (this does not require you to have added an integration with the corresponding Git provider).
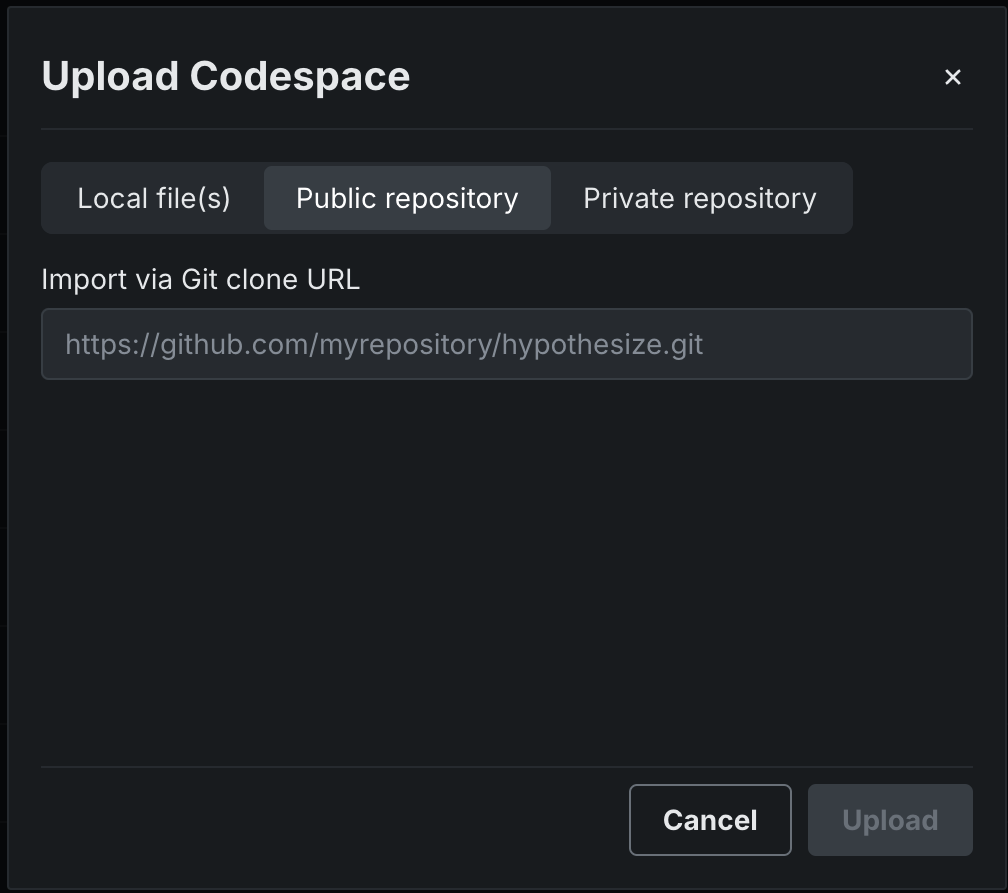
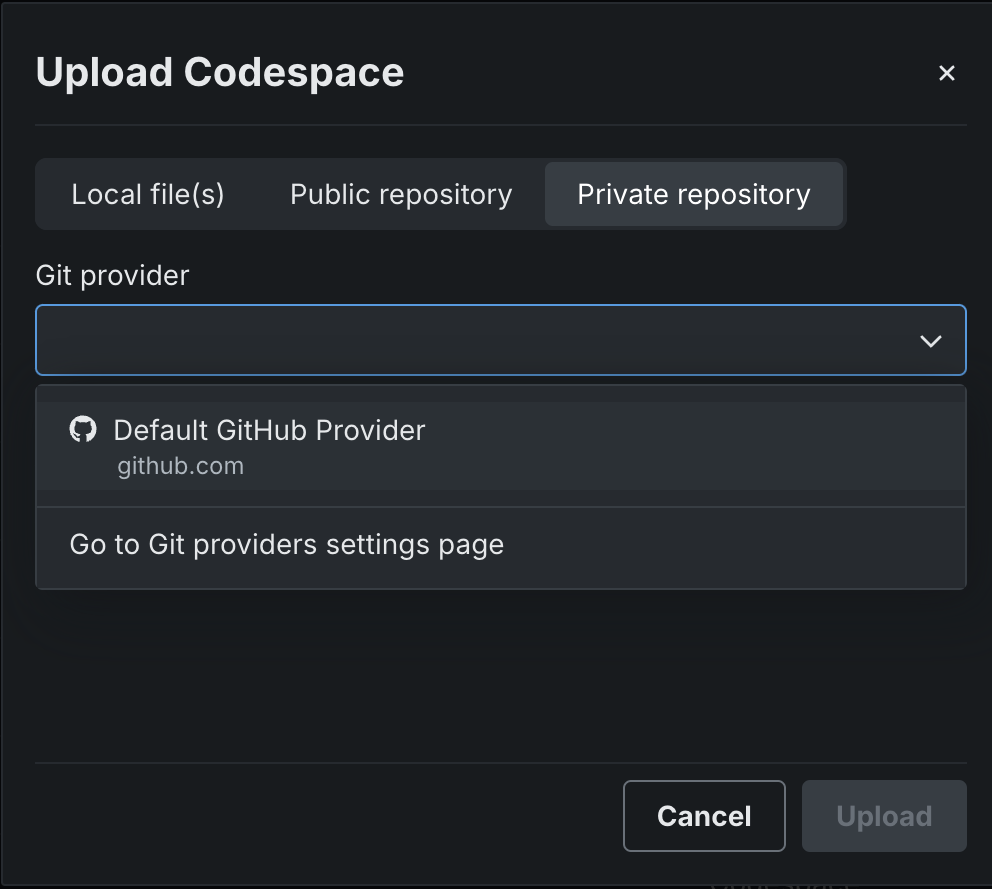
To create a codespace from a private repository, select the Private repository tab and choose the provider from the dropdown. Only providers that you have already authorized appear here.
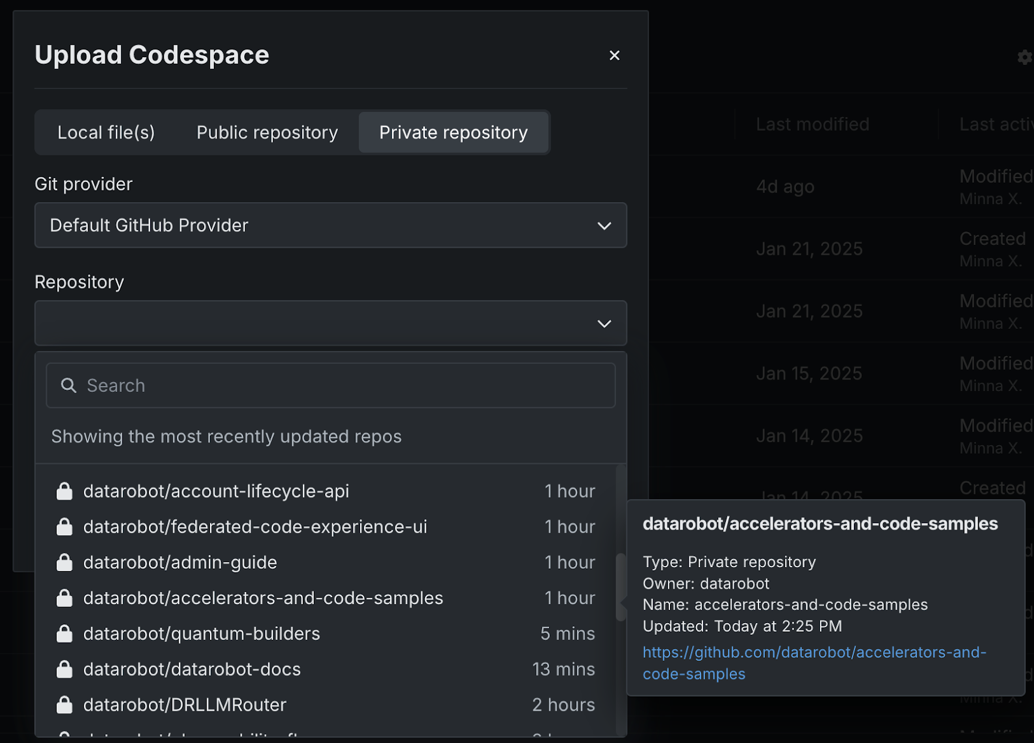
Select the repository you wish to clone. By default, DataRobot displays the most recently updated repositories in the Repository dropdown. Type in the search field to find a specific repository.
In addition to creating a new codespace from a Git repo, you can also directly clone a Git repo into an existing codespace using the Git CLI in the codespace terminal.
Persistent dependency installations
When you install runtime custom dependencies into a codespace during an active session, Python and pip dependencies and HuggingFace artifacts can persist across sessions if they are installed to the user's virtual env. This persistent dependency installation capability is only supported when Python-based images are used for the codespace session.
A codespace has two virtual environments:
-
The user virtual environment,
(/home/notebooks/storage/.venv): A new user virtual environment that persists any custom dependencies that are installed at runtime throughout codespace sessions. This venv is associated with the codespace (since it's persisted in the codespace file system), so all users who have access to the codespace will be able to access the same set of persisted pip installations when they start the codespace session. -
The kernel virtual environment,
(/etc/system/kernel/.venv): A built-in image virtual environment that holds all dependencies that DataRobot provides as a part of the selected notebook environment image. This virtual environment does not maintain any custom dependencies that you install; it maintains them for the duration of the session.
Although you cannot directly access the user virtual environment from the UI (it is not shown in the codespace file system panel), you can access it via the terminal. This is where you can install custom dependencies that will persist across sessions via !pip install <PACKAGE_NAME>.
By default, all new dependencies you install via !pip install will go into the user venv. The user venv takes precedence if you install a different version of a library DataRobot provides as a part of the built-in notebook image.
Disable persistent dependency installations
If you want to disable persistent dependency installation for a given codespace, first add a new environment variable NOTEBOOKS_NO_PERSISTENT_DEPENDENCIES=1 to the codespace. Then, run rm -rf /home/notebooks/storage/.venv from the codespace terminal to remove the existing user venv. After that, restart your codespace session. Any Python dependencies installed at runtime will no longer be persisted between sessions.
Dependency installation considerations
DataRobot packages
If you use the dependency installation feature to install the datarobotx package or newer versions of the datarobot package (newer than the version preinstalled in the built-in images), you can corrupt the preinstalled datarobot package included with other DataRobot packages (e.g., datarobot-mlops-connected-client). This is because when you install a new package or a new version of an existing package in an active codespace session, it’s installed into the user's virtual environment which takes precedence over the kernel virtual environment. Installing the datarobotx package creates the datarobot package in the user's virtual environment, preventing the correct installation in the kernel environment. This interferes with the successful installation of packages such as the datarobot-mlops-connected-client; however, pip (or your package manager of choice) still registers the package as installed.
To resolve this error, run pip install with --force-reinstall for all shadowed libraries extending the datarobot package (e.g., datarobot-mlops-connected-client). For example pip install datarobot-mlops-connected-client --force-reinstall.
Updating dependencies
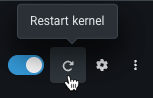
After importing a dependency, you may upgrade it over time. However, DataRobot will not automatically recognize dependency changes in a codespace. You need to restart the kernel in order for DataRobot to recognize any changes to a dependency. To do so, click the restart icon (the circular arrow) in the toolbar.
Check import locations
To check where a dependency was imported from, run the following command in a notebook cell or in the terminal.
pip list -v
Package                          Version      Location                                             Installer
-------------------------------- ------------ ---------------------------------------------------- ---------
...
datarobot                        3.3.0        /etc/system/kernel/.venv/lib/python3.9/site-packages pip
...
To check the size of a user virtual environment, run the following command in the terminal.
(.venv) [notebooks@kernel ~/storage]$ du -h . -d 1
14M     ./.venv
14M     .
If your user virtual environment seems broken and you want to recreate it, run the following command in the terminal.
rm -rf /home/notebooks/storage/.venv
python -m venv /home/notebooks/storage/.venv