Automated deployment and replacement in Sagemaker
Premium
Automated deployment and replacement of custom models and Scoring Code in Sagemaker is a premium feature. Contact your DataRobot representative or administrator for information on enabling this feature.
Feature flag: Enable the Automated Deployment and Replacement of Custom Models in Sagemaker (Premium feature)
Create a DataRobot-managed Sagemaker prediction environment to deploy custom models and Scoring Code in Sagemaker with real-time inference and serverless inference. With DataRobot management enabled, the external Sagemaker deployment has access to MLOps management, including automatic model replacement.
Service health information for external models and monitoring jobs
Service health information is unavailable for external agent-monitored deployments and deployments with predictions uploaded through a prediction monitoring job.
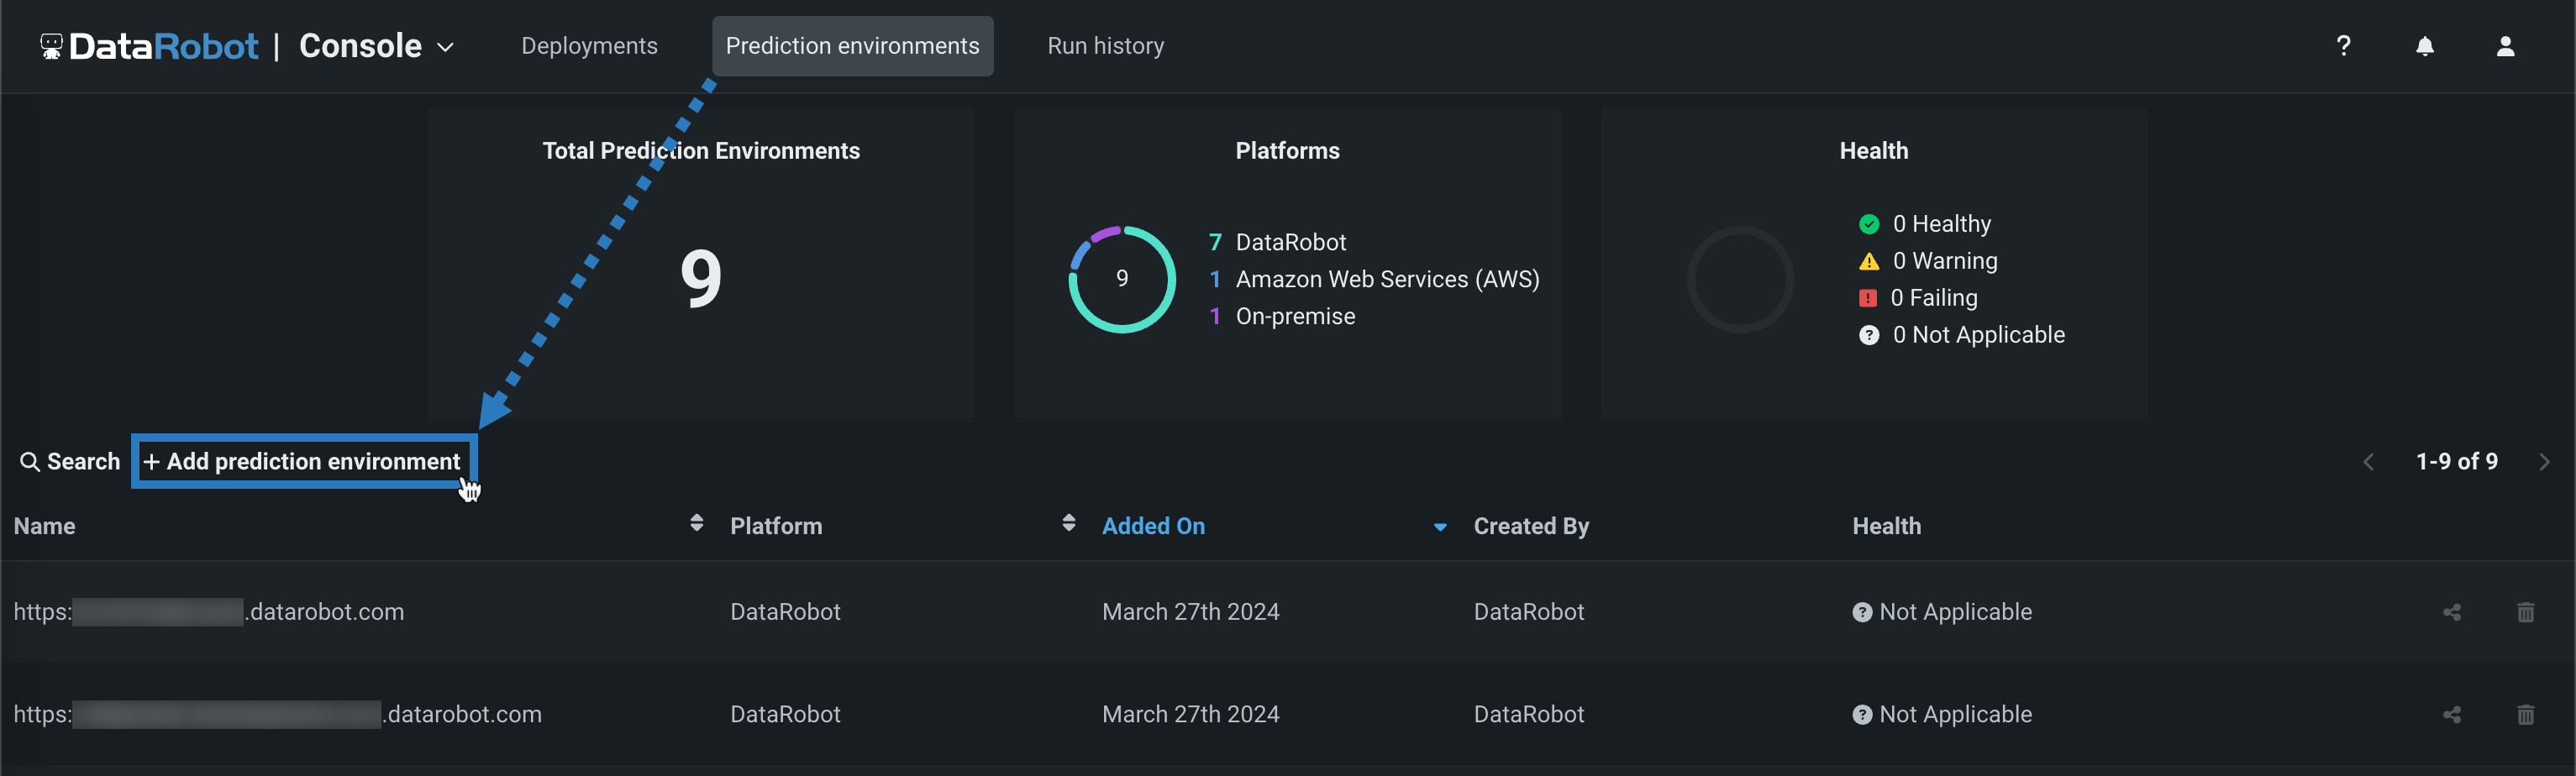
Create a Sagemaker prediction environment
To deploy a model in Sagemaker, first create a custom Sagemaker prediction environment:
-
Open the Console > Prediction environments page and then click + Add prediction environment.
-
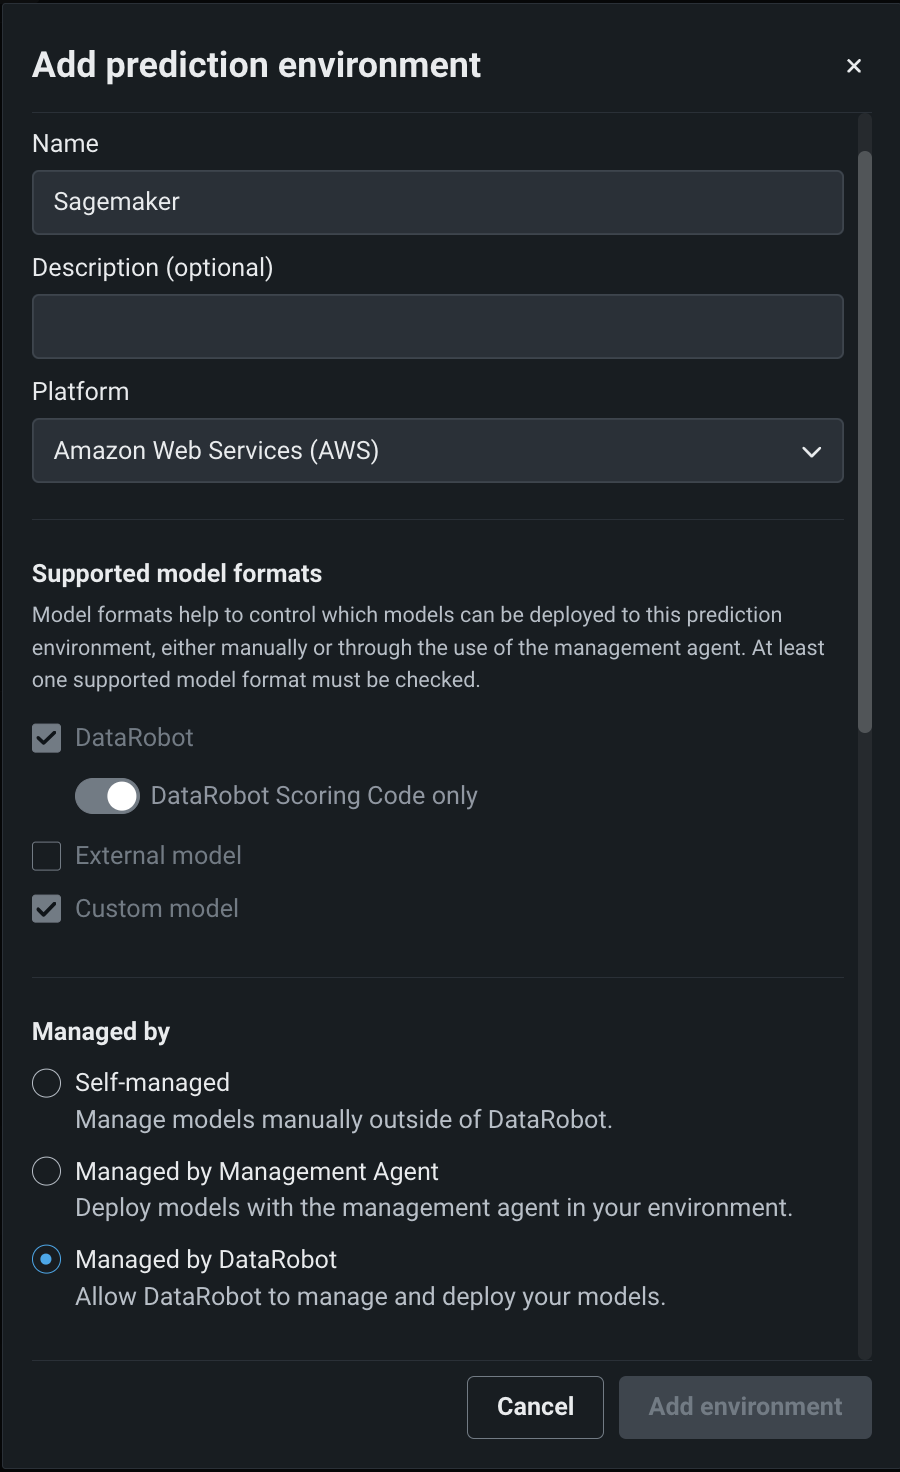
In the Add prediction environment dialog box, configure the prediction environment settings:
-
Enter a descriptive Name and an optional Description of the prediction environment.
-
Select Amazon Web Services (AWS) from the Platform dropdown.
-
Select the Managed by DataRobot option to allow this prediction environment to automatically package and deploy DataRobot custom and Scoring Code models through the Management Agent.
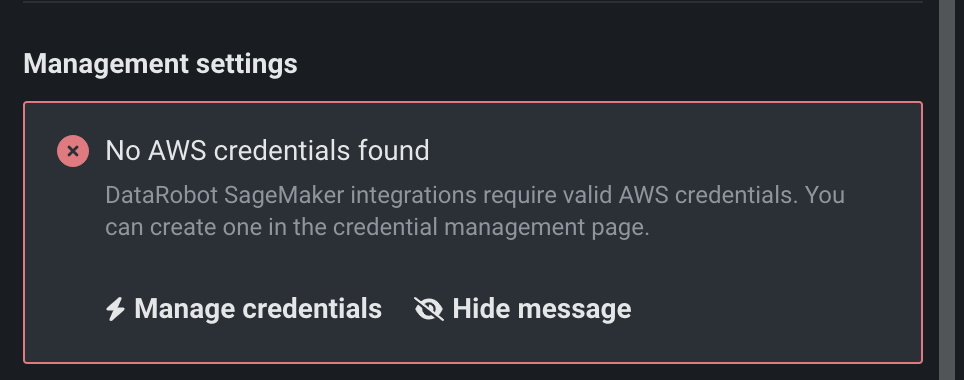
AWS credentials required
DataRobot management of Scoring Code in Sagemaker requires an existing data connection to Sagemaker with stored credentials. If you don't have an existing Sagemaker data connection, the No Data Connections found alert appears, directing you to go to your data connections to create a Sagemaker connection.
-
-
In the Management settings, select the related AWS Credentials and specify a Region. Once provided, DataRobot automatically fetches the available roles. Configure the following:
-
SageMaker IAM Role: Configure the Sagemaker roles for the prediction environment. Reference the Sagemaker documentation to configure the IAM execution role. The execution role must have the following Amazon SQS permissions:
"sqs:SendMessage""sqs:GetQueueUrl""sqs:GetQueueAttributes""sqs:ListQueues"
-
CodeBuild IAM Role: Configure the AWS CodeBuild service role required for CodeBuild to build model images. Create a CodeBuild service role by using the CodeBuild or AWS CodePipeline consoles (to do so, reference the AWS documentation). The CodeBuild service role must have the following Amazon SQS permissions:
"ecr:ListImages""iam:GetRole""iam:PassRole""sts:AssumeRole"
-
ECR Repository: Reference the AWS documentation for creating an ECR Repository.
-
ECR Cache: Reference the AWS documentation for creating an ECR Repository Cache for Docker Hub.
-
S3 Bucket: Select the S3 Bucket.
-
Add AWS tags: (Optional) Add tags to help differentiate your AWS Workspace. Empty keys are not allowed and are removed when saved.
-
-
(Optional) To connect to and retrieve data from Amazon SQS for monitoring, in the Monitoring settings section, click Enable monitoring and configure the AWS Credentials, Region, and SQS Queue fields. You can optionally define a Visibility timeout (in seconds) to set how long the message persists before it is deleted from the SQS queue.
You can also click Environment variables and then + New environment variables to add environment variables to the prediction environment.
-
After configuring the environment settings, click Add environment.
The Sagemaker environment is now available from the Prediction environments page.
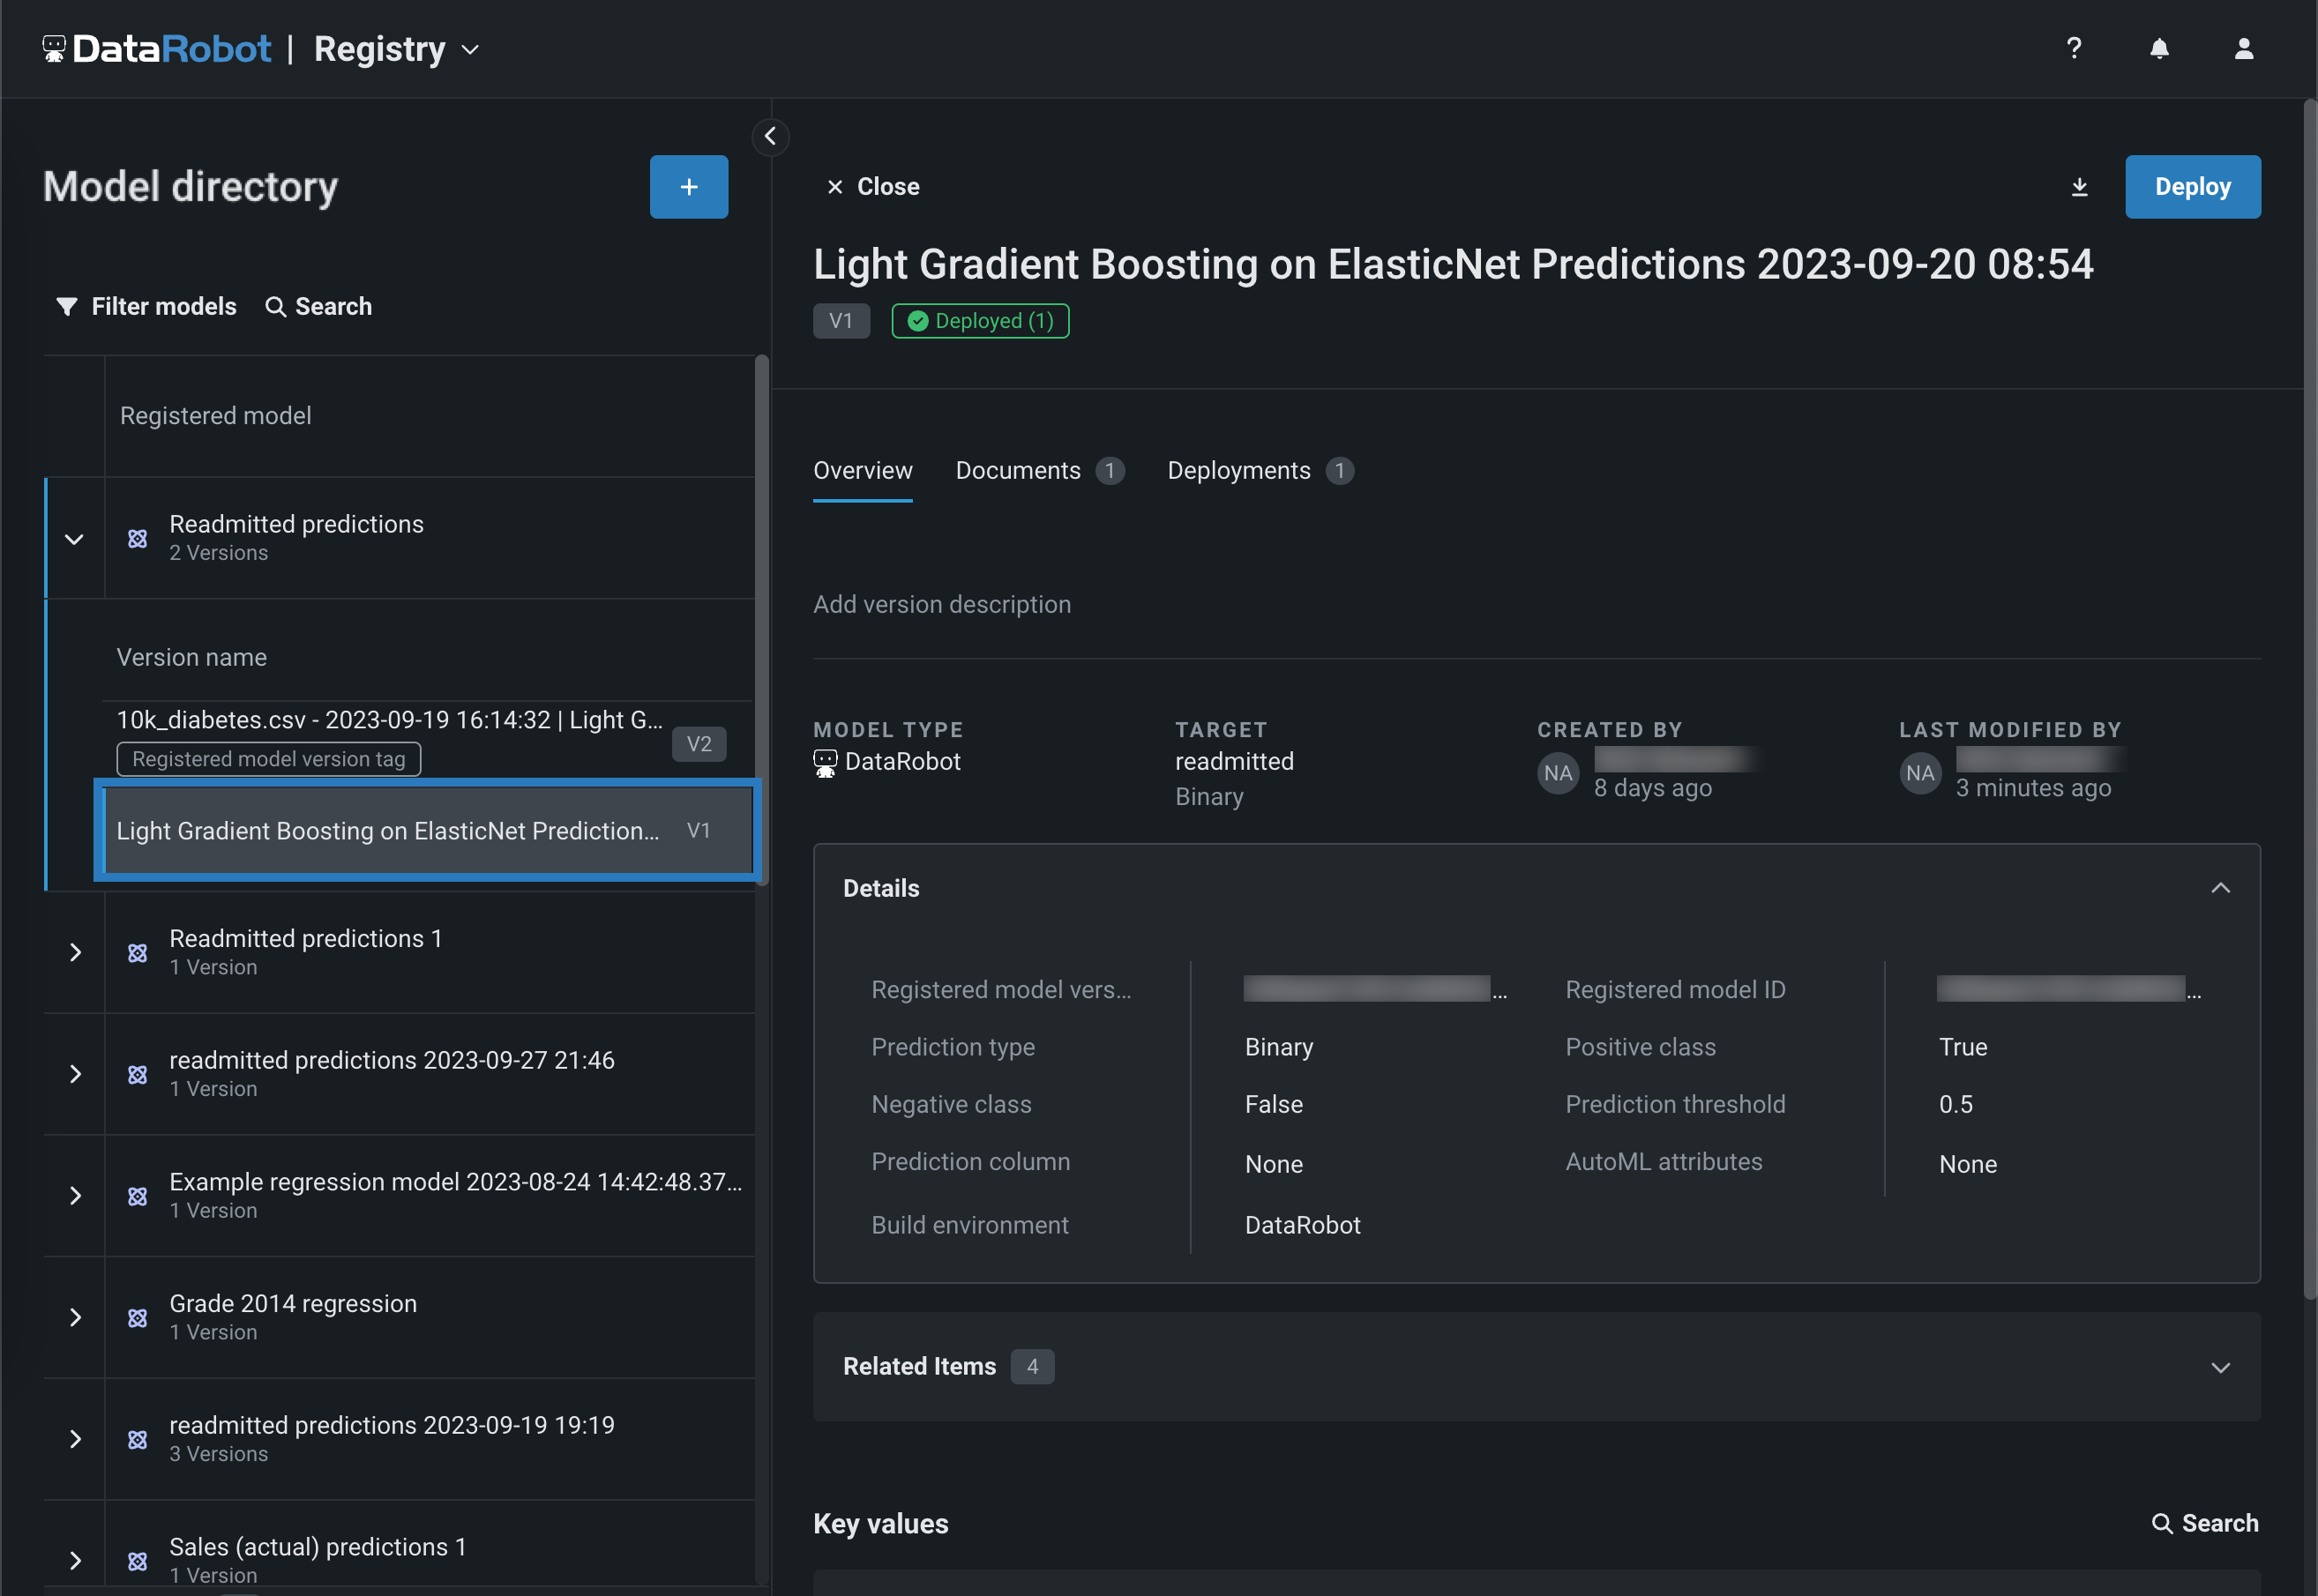
Deploy a model to the Sagemaker prediction environment
Once you've created a Sagemaker prediction environment, you can deploy a model to it:
-
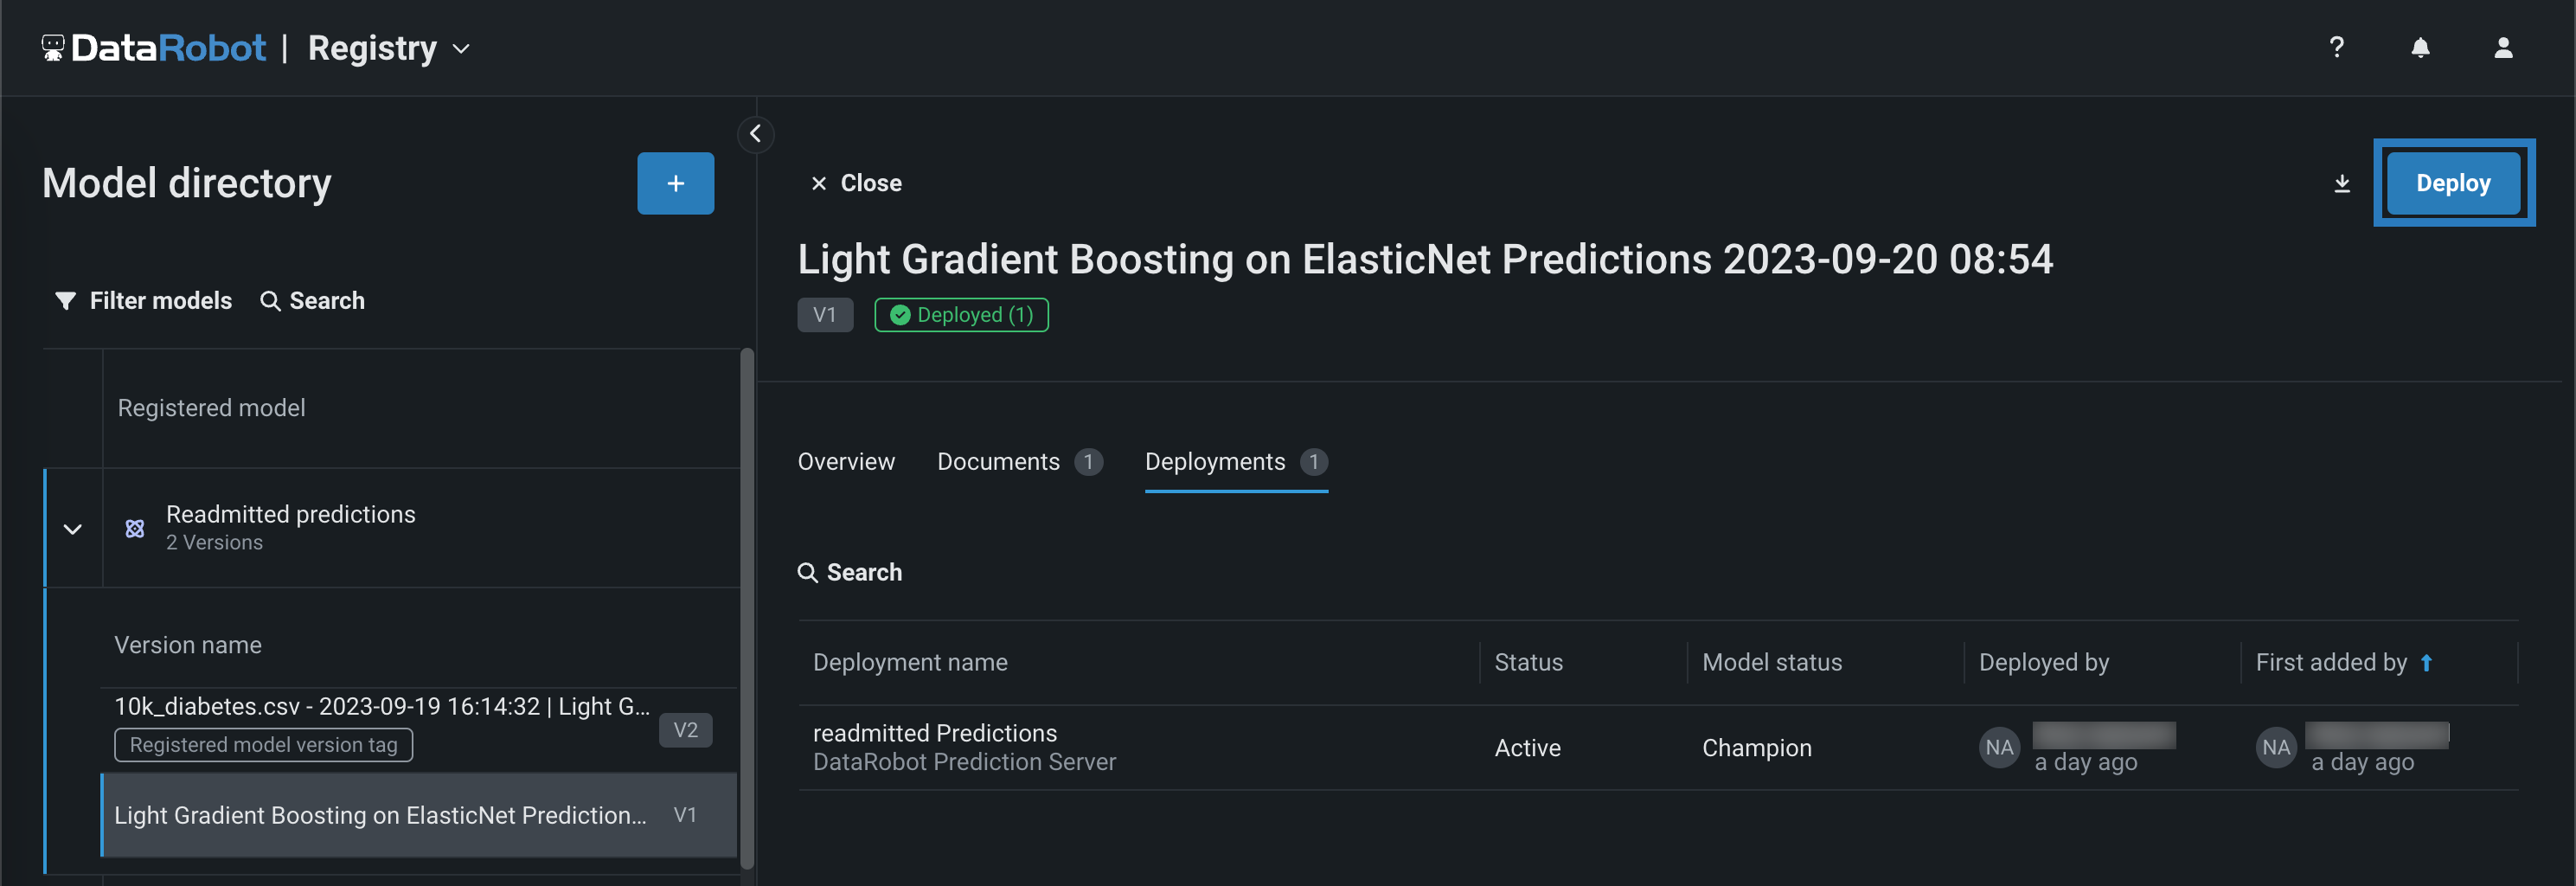
On the Registry > Models tab, in the table of registered models, click the registered model containing the version you want to deploy, opening the list of versions.
-
From the list of versions, click the custom model or Scoring Code enabled version you want to deploy, opening the registered model version panel.
-
In the upper-right corner of any tab in the registered model version panel, click Deploy.
-
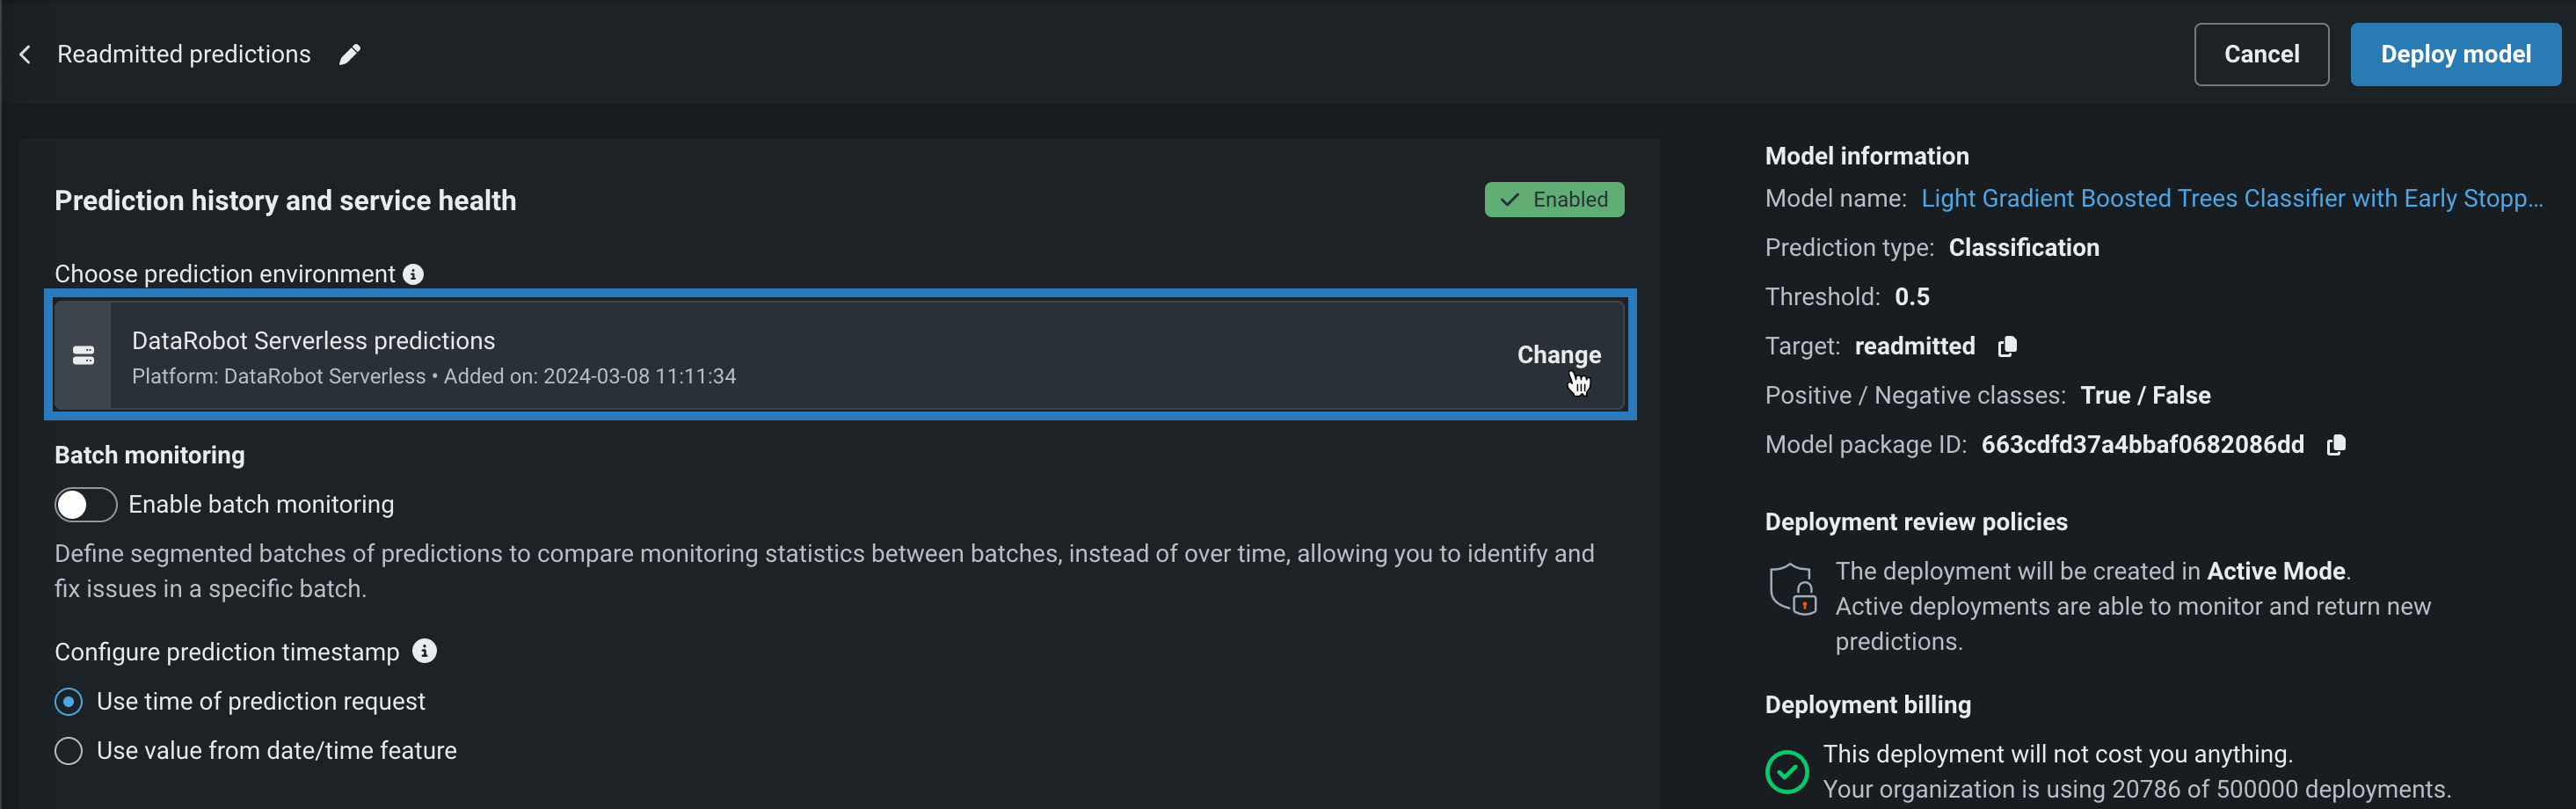
In the Prediction history and service health settings, under Choose prediction environment, click Change.
-
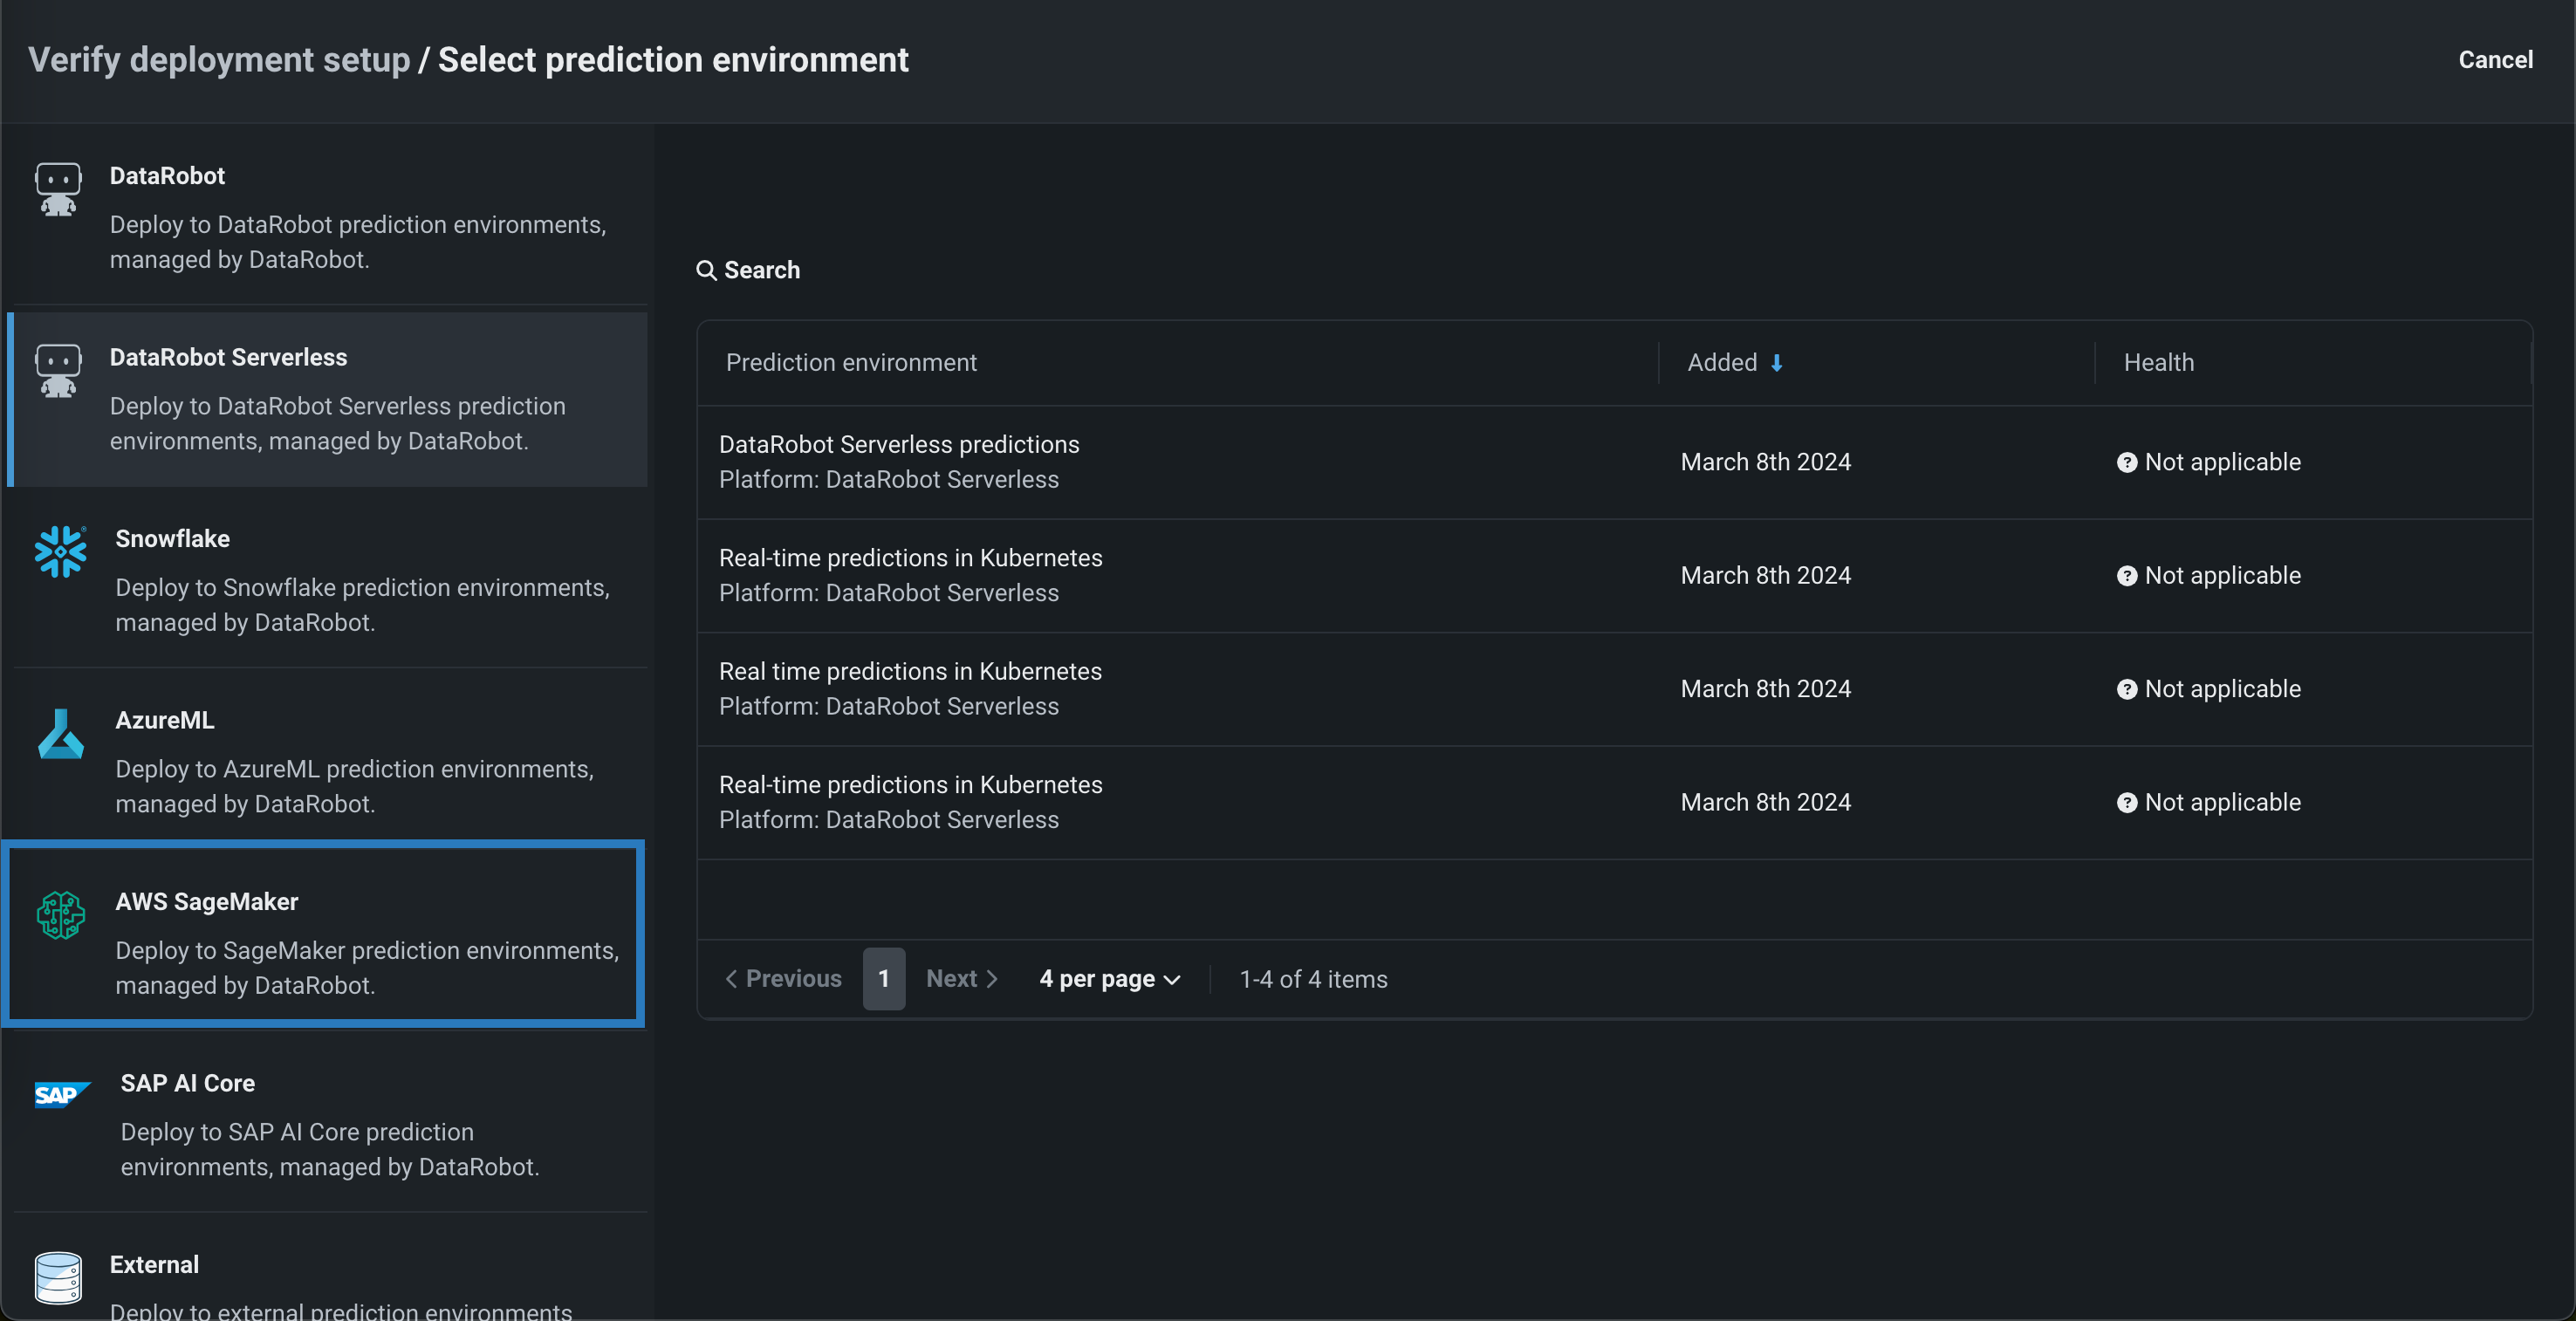
In the Select prediction environment panel, click AWS Sagemaker, and then click the prediction environment you want to deploy to.
-
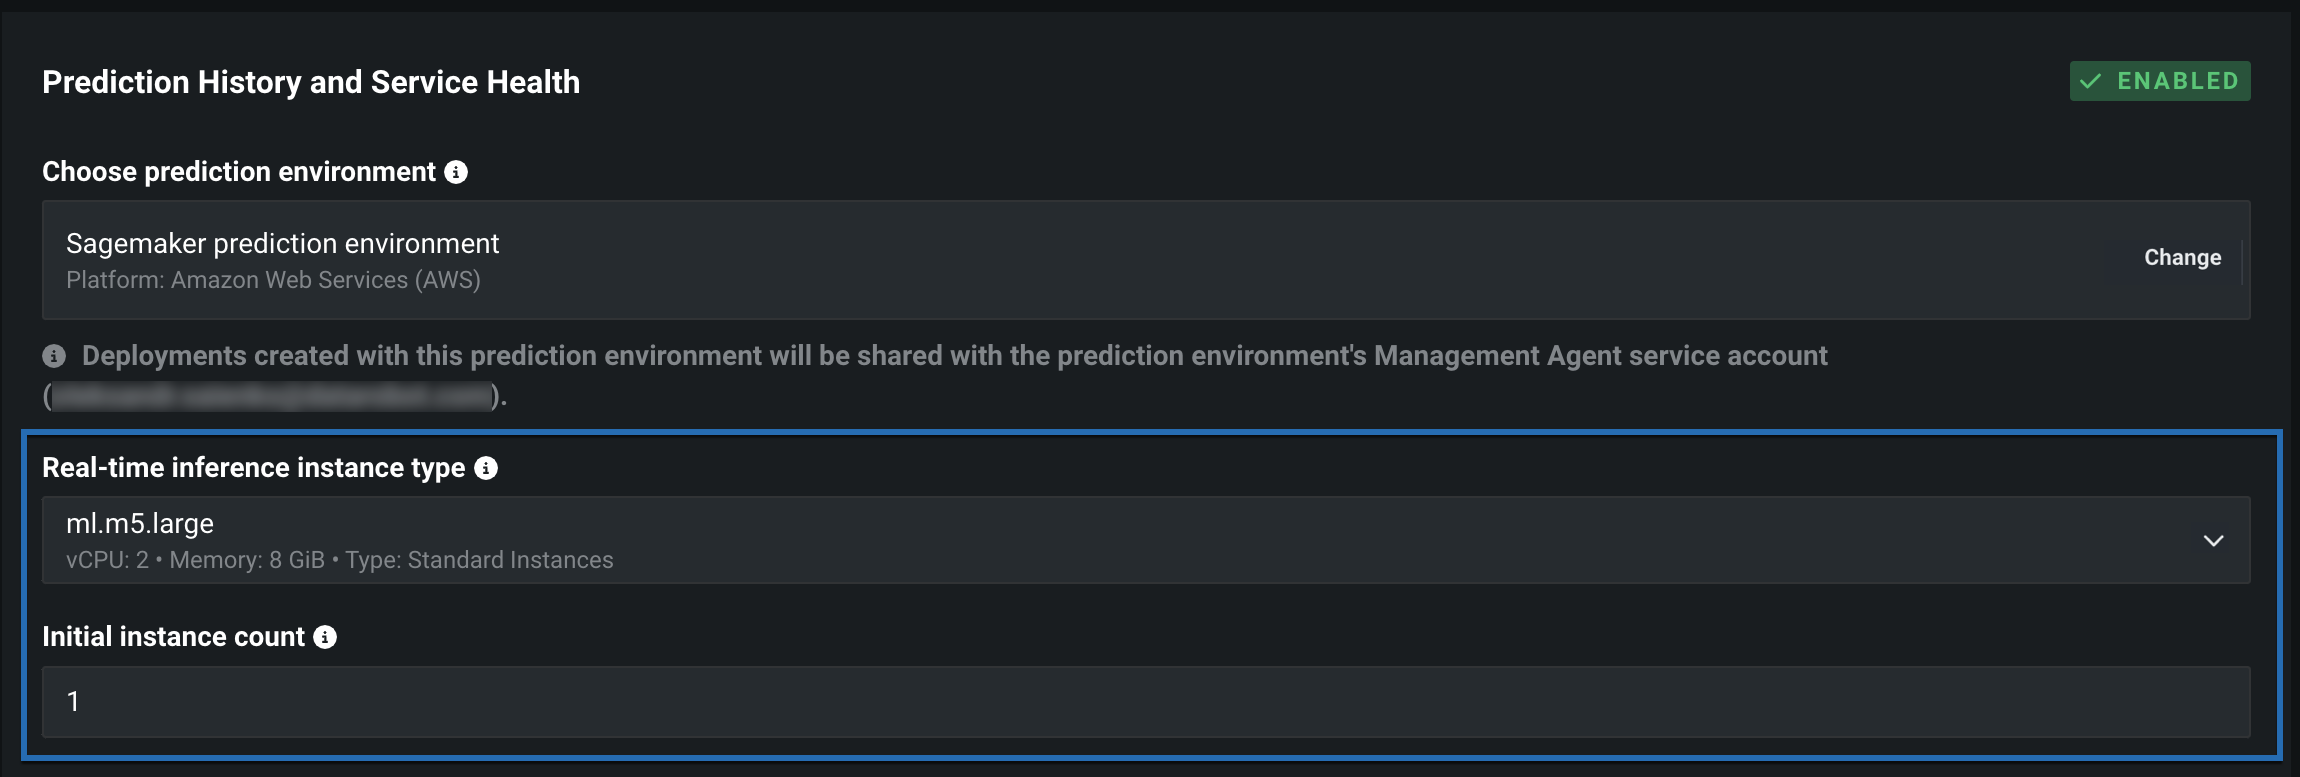
With a Sagemaker environment selected, in the Prediction history and service health section, set the Real-time inference instance type and Initial instance count fields.
-
(Optional) Open the Advanced environment settings and define additional Environment key-value pairs to provide extra parameters to the Sagemaker deployment interface.
-
Configure the remaining deployment settings. When deployment configuration is complete, click Deploy model.
Once the model is deployed to Sagemaker, you can use the Score your data code snippet from the Predictions > Portable predictions tab to score data in Sagemaker.
Restart a Sagemaker prediction environment
When you update database settings or credentials for the Sagemaker data connection used by the prediction environment, restart the environment to apply those changes to the environment:
-
Click Deployments > Prediction environments page, and then select the Sagemaker prediction environment from the list.
-
Below the prediction environment settings, under Service Account, click Restart Environment.