Add an execution environment
To add an execution environment, you must upload a compressed folder in .tar, .tar.gz, or .zip format. Be sure to review the guidelines for preparing an execution environment folder before proceeding. You may also consider creating a custom drop-in environment by adding Scoring Code and a start_server.sh file to your environment folder.
Environment and version limits
Next to the + Add environment and the + Add version buttons, there is a User-created environments badge indicating how many environments (or environment versions) you've added and how many environments (or environment versions) you can add in total. With the correct permissions, an administrator can set these limits at a user or group level. The following status categories are available in this badge.
Environment and version limits
Next to the + Add environment and the + Add version buttons, there is a User-created environments badge indicating how many environments (or environment versions) you've added and how many environments (or environment versions) you can add in total. With the correct permissions, an administrator can set these limits at a user, group, or organization level. The following status categories are available in this badge.
Navigate to the Registry and click the Environments tab. Click + Add environment to configure the environment details and add it to the workshop.
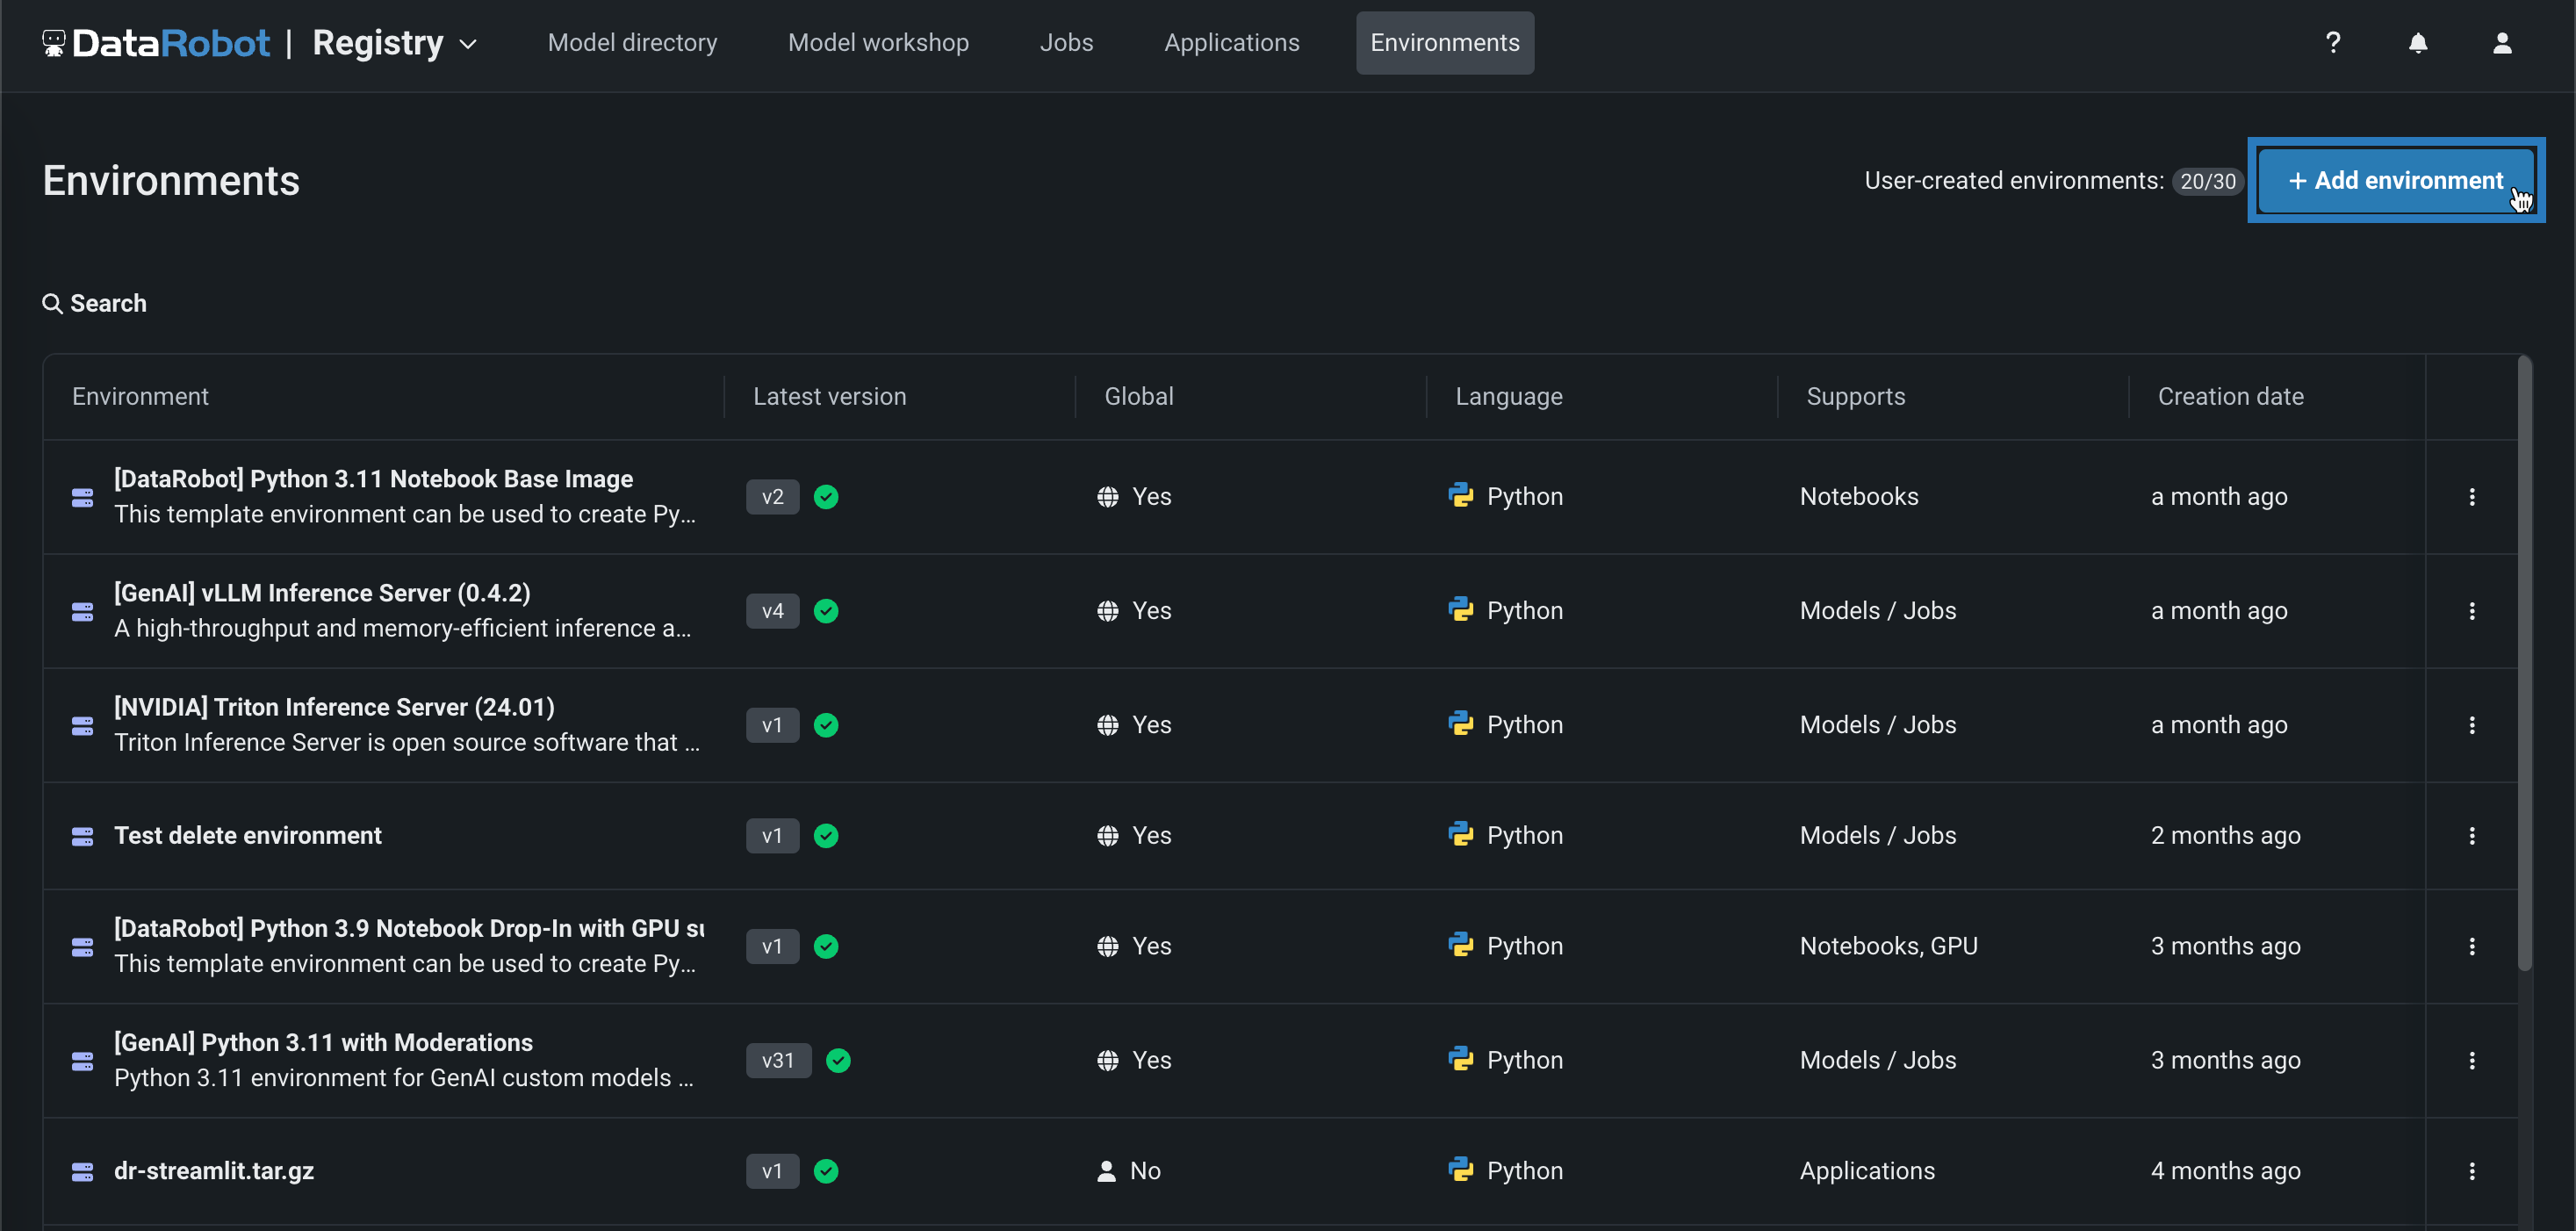
In the Add environment panel, under Environment files, select one of the following options:
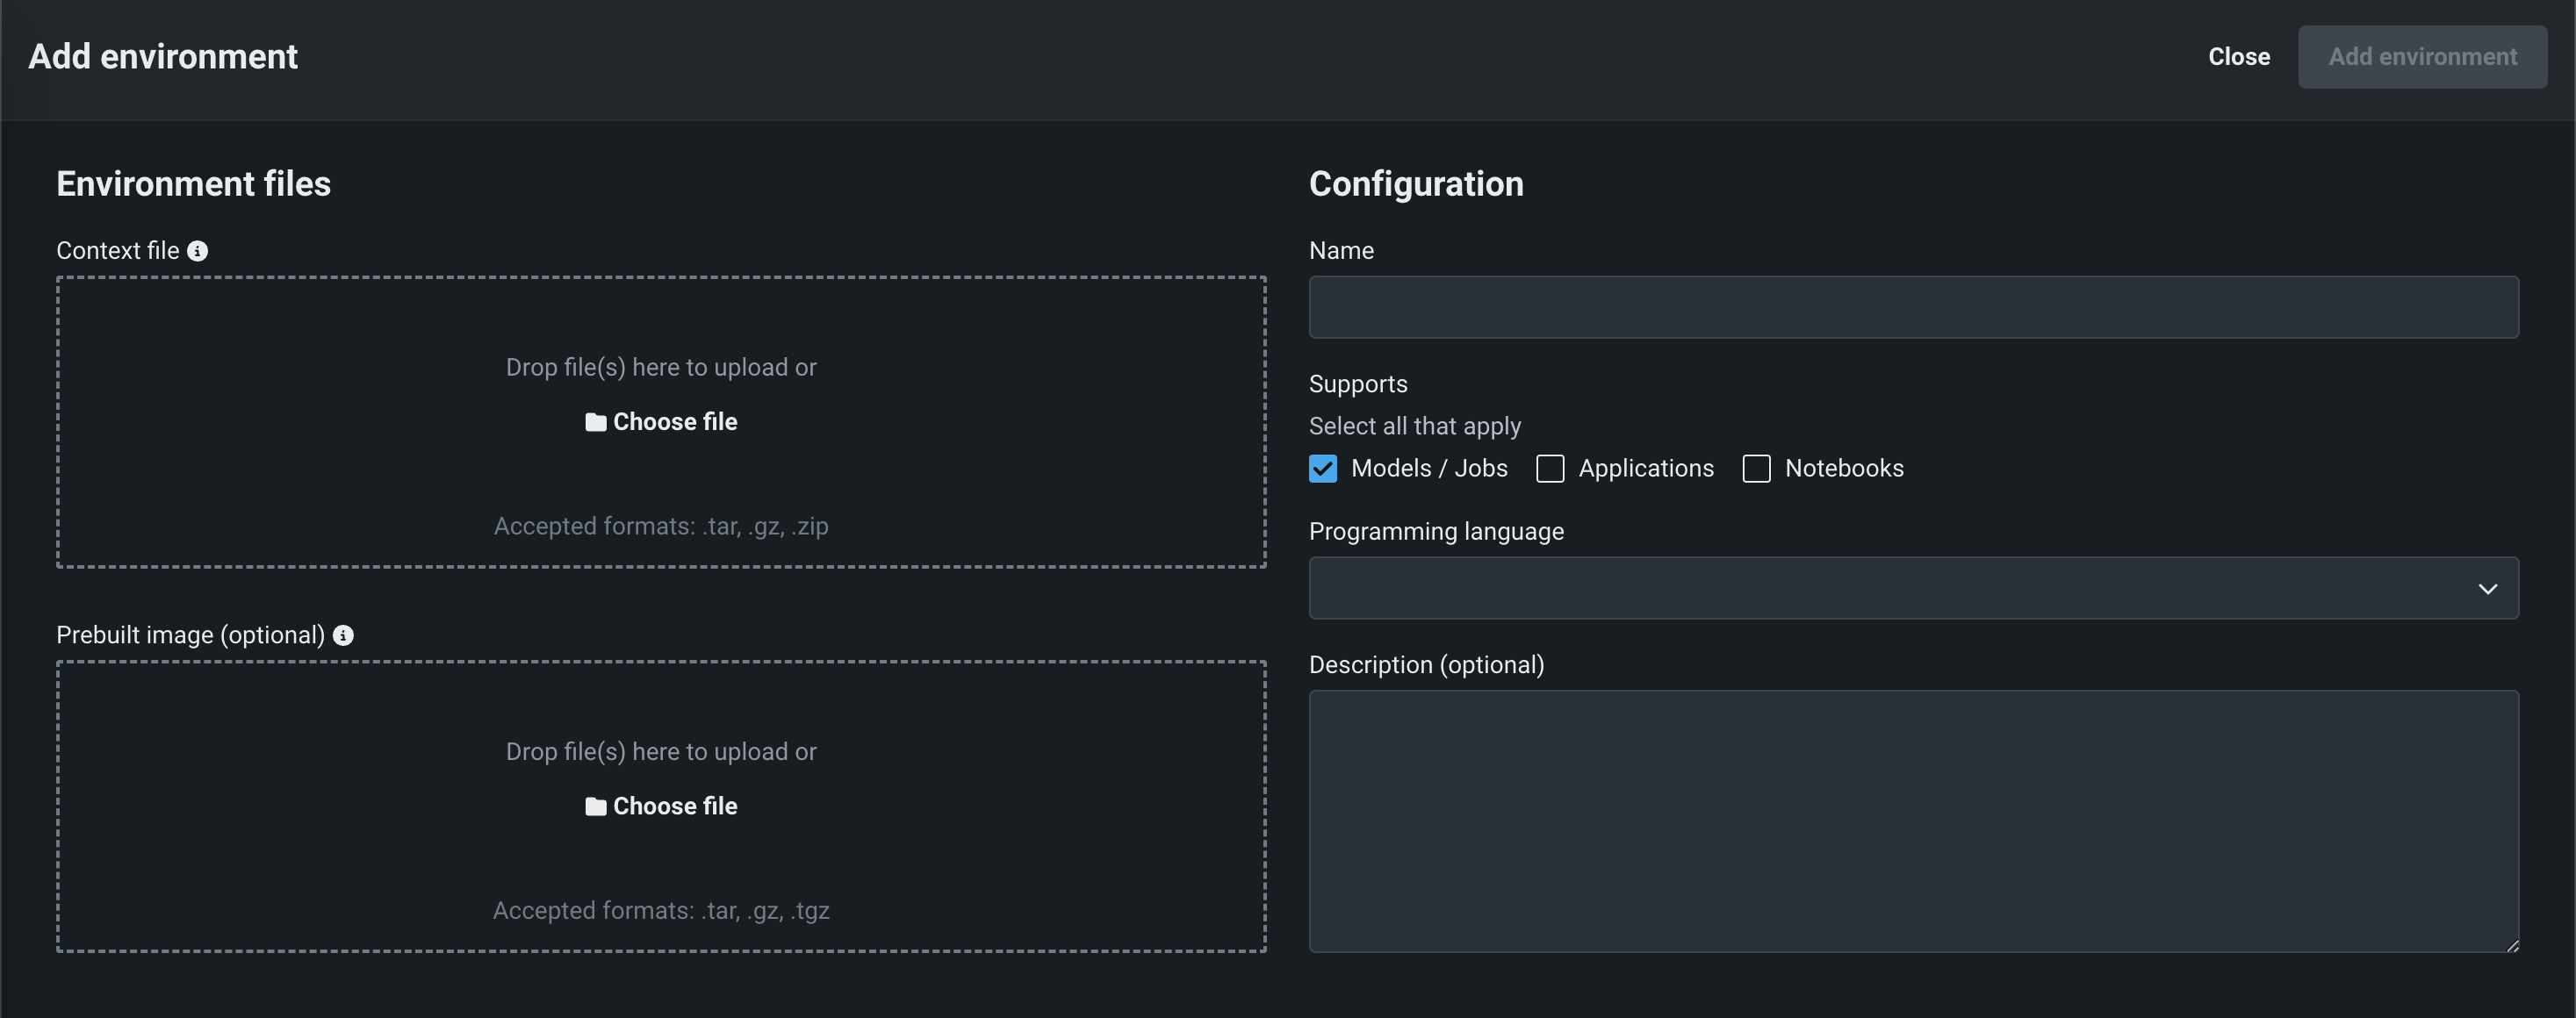
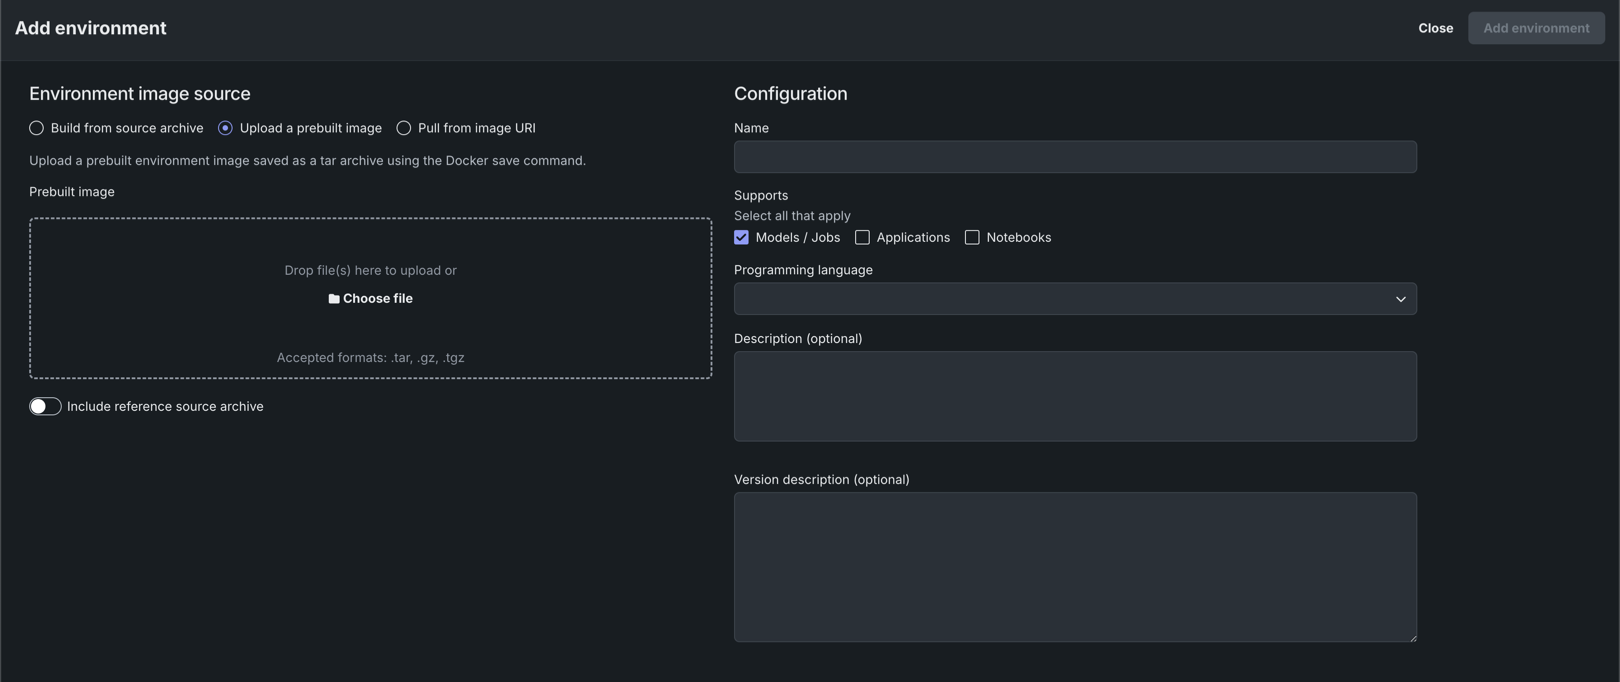
Image URI filtering
When adding an environment as an image URI, URI filtering allows only the URIs defined for your organization. If the URI you provide isn't allowed, a warning appears as helper text under the Image URI field. Hover over the helper text to view the URI filtering details. URI filtering is not enforced for API administrators.
| Option | Description |
|---|---|
| Build from source archive | Provide the archive containing a Dockerfile and any other files needed to build the environment image. |
| Upload a prebuilt image | Provide a prebuilt environment image saved as a tarball using the Docker save command. Optionally, you can also click Include reference source archive to upload the source archive used to build the image for reference purposes. This source archive is not used to build the environment. |
| Pull from image URI | Provide a URI for an environment image published to a container registry. The provided URI must be public or published in a registry accessible to DataRobot. Optionally, you can also click Include reference source archive to upload the source archive used to build the image for reference purposes. This source archive is not used to build the environment. |
Context file and environment image upload
If you upload both a context and an image file, the priority is given to the image file. Even though a context file is not required when you upload an image file, you should still upload the context file, as your workflow flow may include functionality that requires context.
After you provide the environment files, provide the following information under Configuration:
| Field | Description |
|---|---|
| Name | The name of the environment. |
| Supports | The DataRobot artifact types supported by the environment: Models and Jobs, Applications, and Notebooks. |
| Programming Language | The language in which the environment was made. |
| Description | (Optional) A description of the execution environment. |
| Version description | (Optional) A description of the first execution environment version. |
When all fields are configured, click Add environment. The execution environment is ready for use. After you upload an environment, it is only available to you unless you share it with other individuals. To make changes to an existing environment, create a new version.
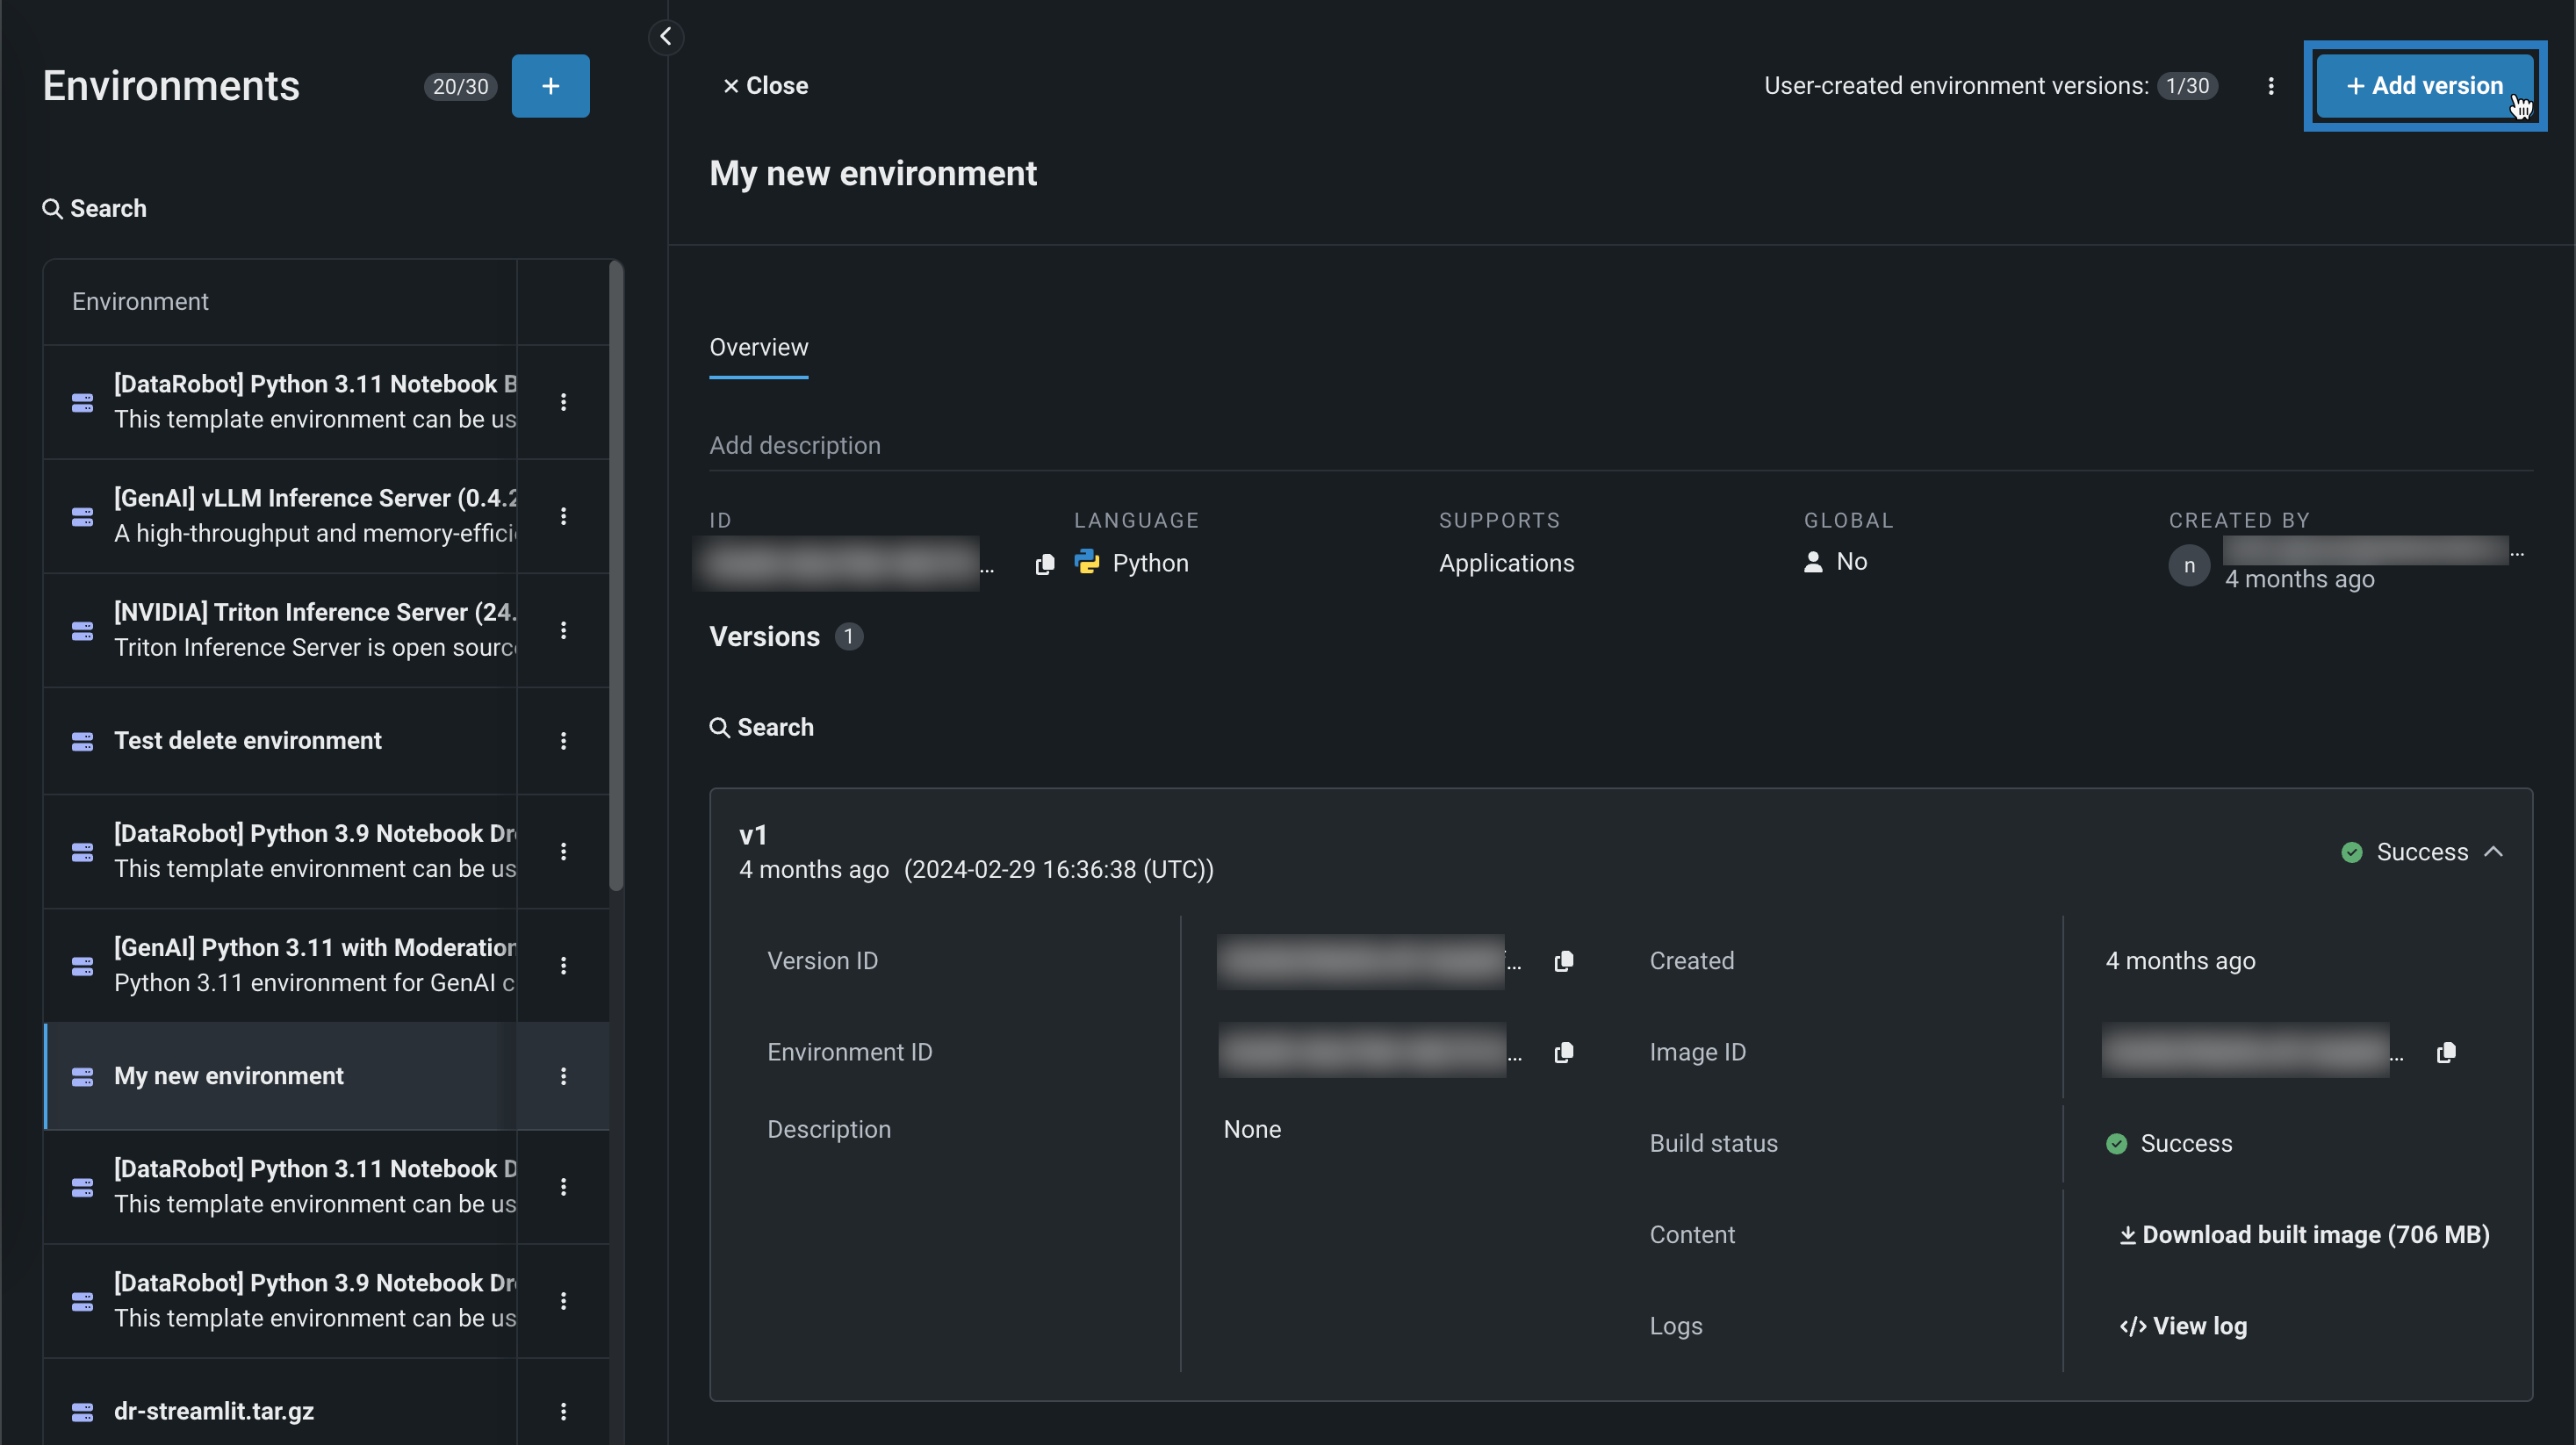
Add an environment version
Troubleshoot or update an execution environment by adding a new version of it to the environment workshop. Navigate to the Registry and click the Environments tab. Click an execution environment, then + Add version to configure the environment details and add it to the workshop.
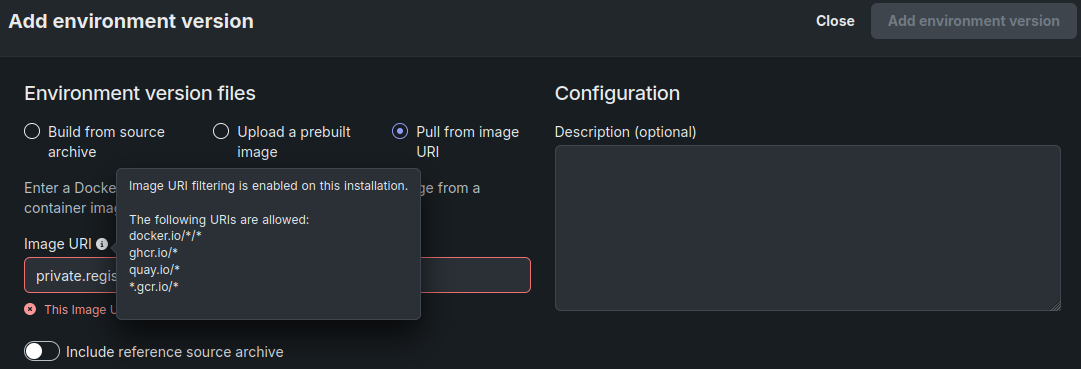
In the Add environment version panel, select one of the following options:
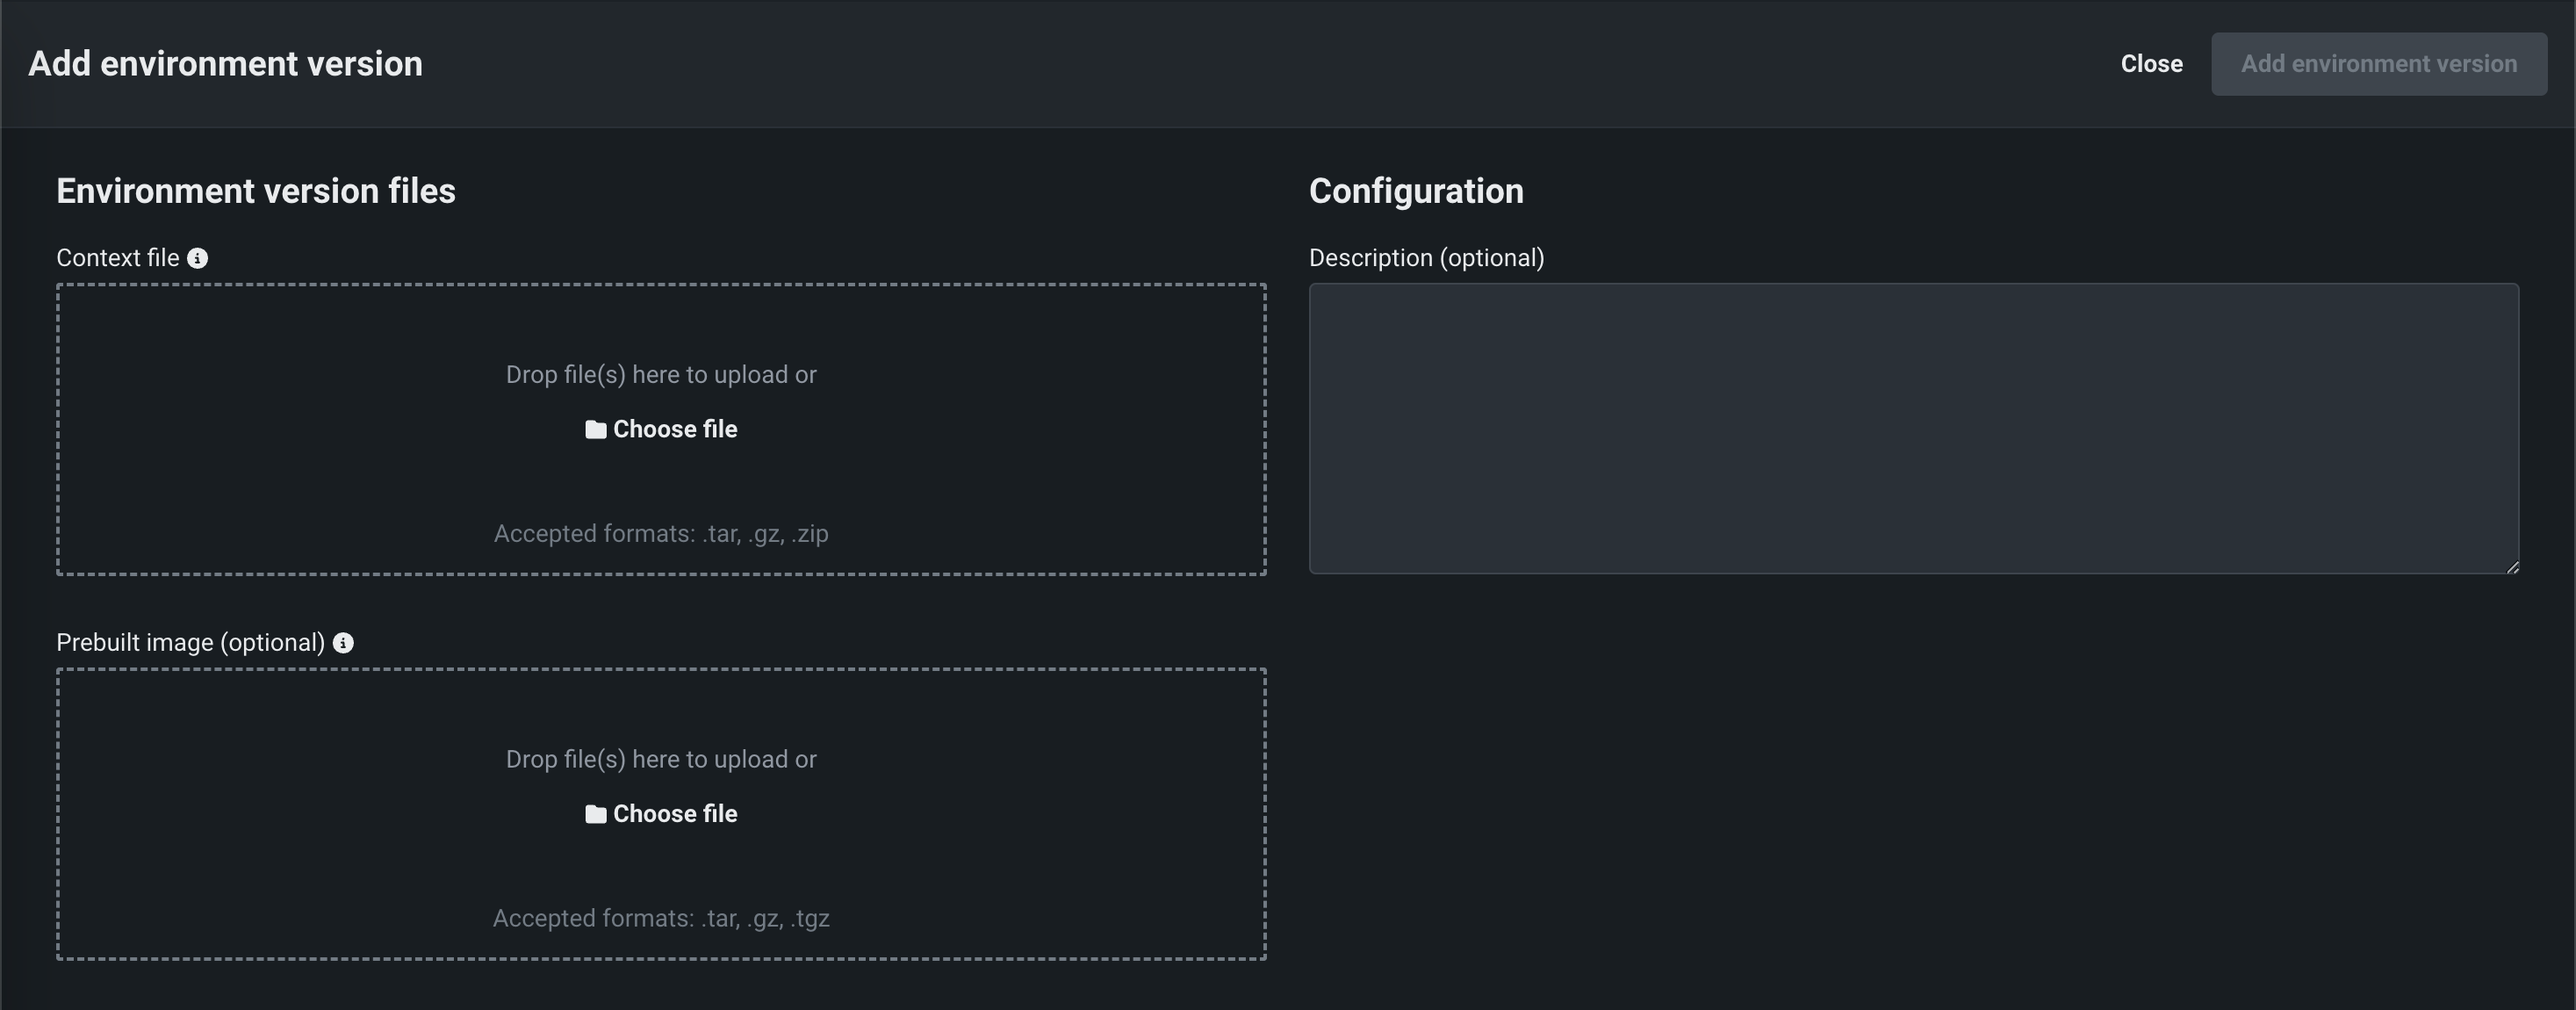

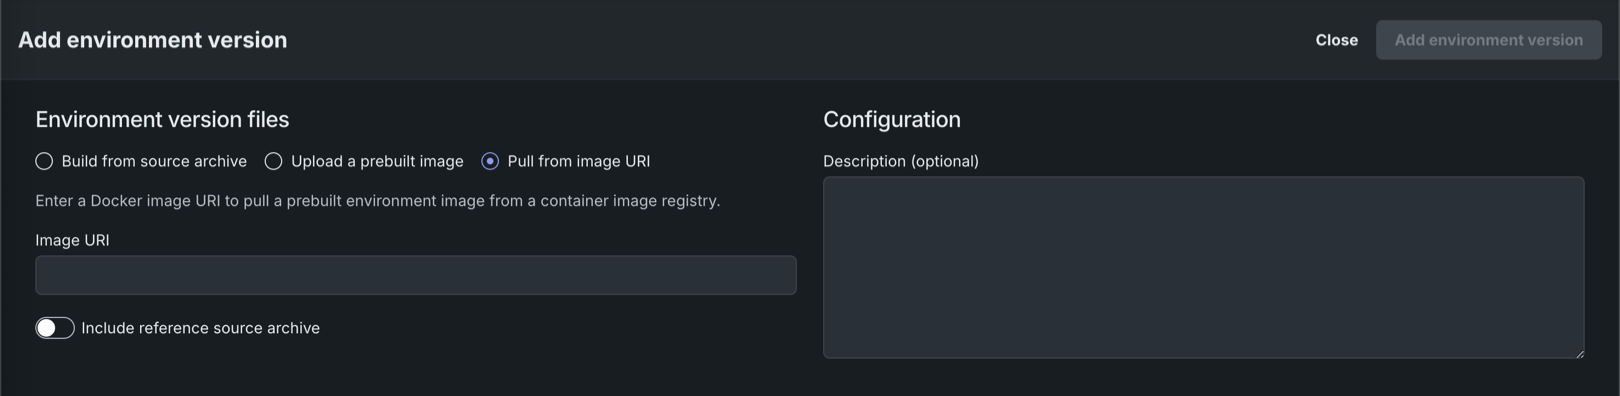
Image URI filtering
When adding an environment as an image URI, URI filtering allows only the URIs defined for your organization. If the URI you provide isn't allowed, a warning appears as helper text under the Image URI field. Hover over the helper text to view the URI filtering details. URI filtering is not enforced for API administrators.
| Option | Description |
|---|---|
| Environment files | |
| Build from source archive | Provide the archive containing a Dockerfile and any other files needed to build the environment image. |
| Upload a prebuilt image | Provide a prebuilt environment image saved as a tarball using the Docker save command. Optionally, you can also click Include reference source archive to upload the source archive used to build the image for reference purposes. This source archive is not used to build the environment. |
| Pull from image URI | Provide a URI for an environment image published to a container registry. The provided URI must be public or published in a registry accessible to DataRobot. Optionally, you can also click Include reference source archive to upload the source archive used to build the image for reference purposes. This source archive is not used to build the environment. |
| Configuration | |
| Description | (Optional) A description of the execution environment version. |
Context file and environment image upload
If you upload both a context and an image file, the priority is given to the image file. Even though a context file is not required when you upload an image file, you should still upload the context file, as your workflow flow may include functionality that requires context.
All past environment versions are saved, providing an accessible history of the execution environment. By default, when creating a model version, if the selected execution environment does not change, the version of that execution environment persists from the previous custom model version, even if a newer environment version is available. For more information on how to ensure the custom model version uses the latest version of the execution environment, see Trigger base execution environment update.
Trigger base execution environment update
To override the default behavior for execution environment version selection, where the execution environment version persists between custom model versions even when a new environment version is available, you must temporarily change the Base Environment setting. To do this, create a new custom model version using a different Base Environment setting, then create a new custom model version, switching back to the intended Base Environment. After this change, the latest version of the custom model uses the latest version of the execution environment.
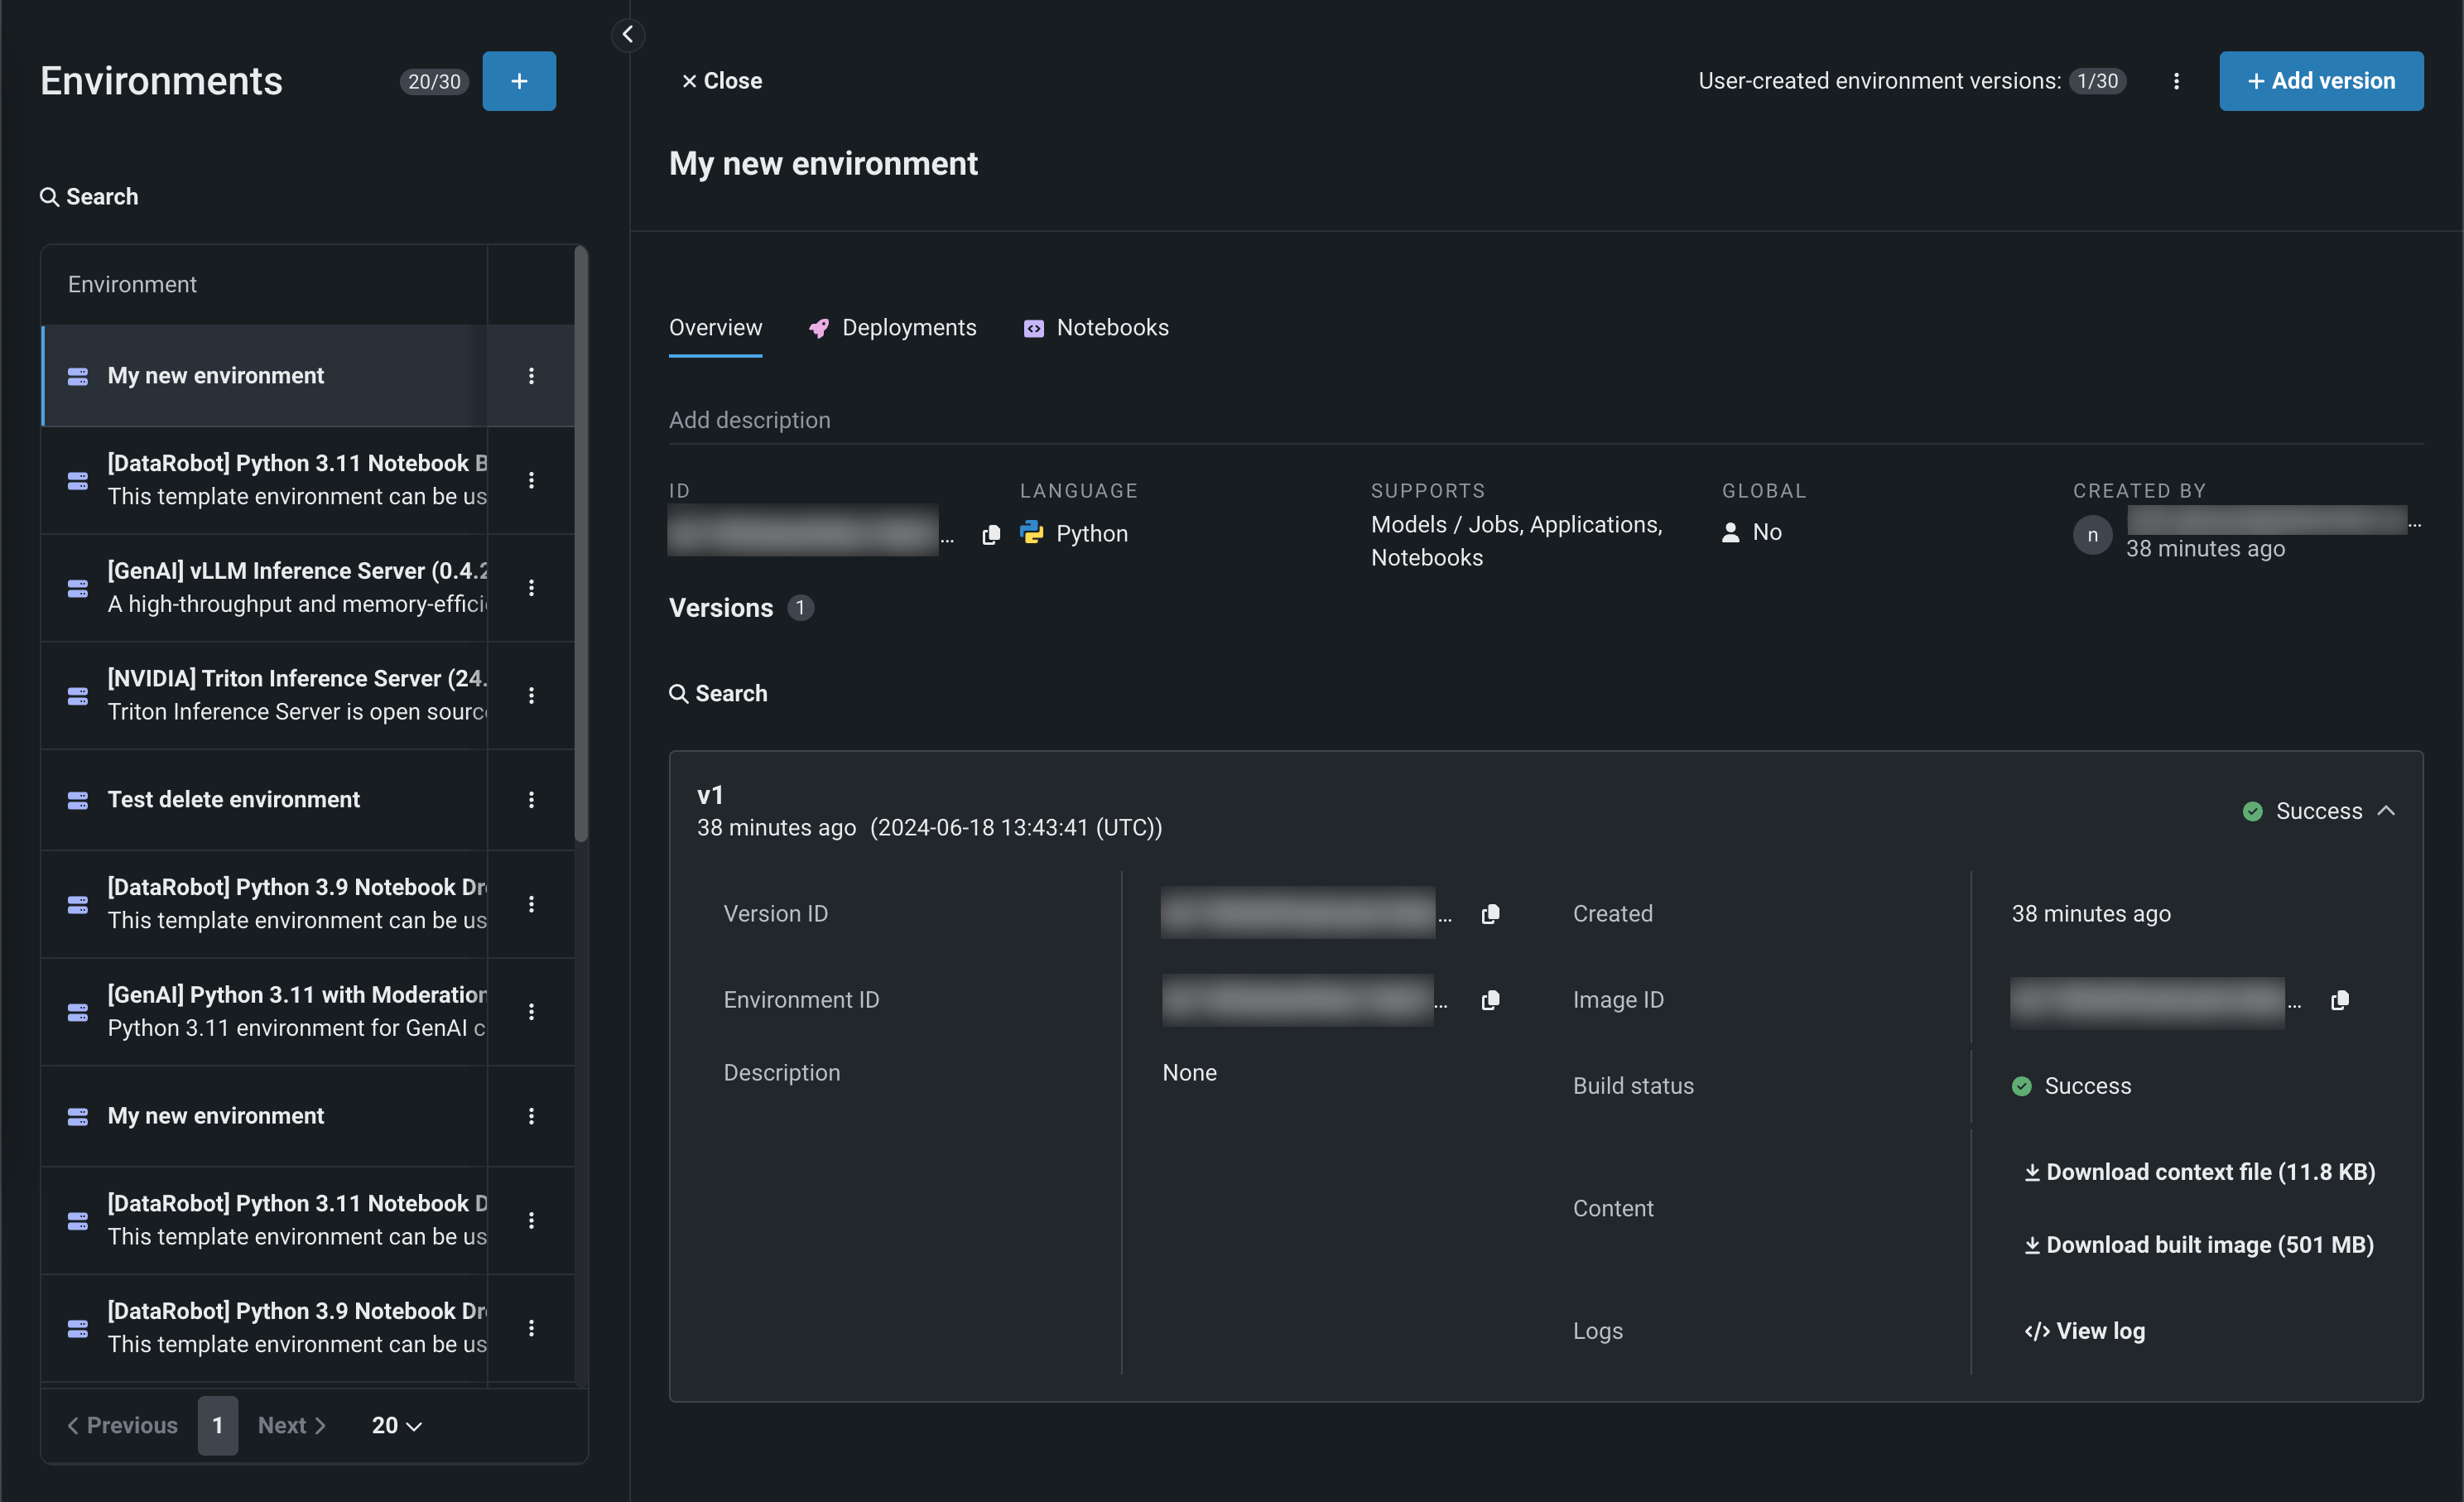
View environment information
There is a variety of information available for each custom and built-in environment. Navigate to the Registry and then click the Environments tab. Click an execution environment, and access the following tabs:

Access the image URI
When you provide an image as an image URI, you can view the link to the source files under the Build status. In addition, if you need to download the built image, you can click Prepare image for download to build the image. Then, after the Preparing image step finishes, click Download built image. The Build ID appears after the image build finishes. You don't need to build the image if you don't intend to download it.
| Tab | Description |
|---|---|
| Overview | View environment information including:
|
| Deployments | For environments supporting custom models and jobs, view any associated deployments. |
| Notebooks | For environments supporting notebooks, view any associated notebooks. |
Manage environments
You can manage execution environments from the Actions menu in the environment list or panel. From the actions menu, you can Share execution environments with anyone in your organization or Delete the execution environment:

Implicit sharing of environments
An environment is not available in the registry for other users unless it was explicitly shared. That does not, however, limit users' ability to use blueprints that include tasks that use that environment. See the description of implicit sharing for more information.