Create custom model proxies for external models
To create a custom model as a proxy for an external model, you can add a new proxy model to the Workshop. A proxy model contains proxy code created to connect with an external model, allowing you to use features like compliance documentation, challenger analysis, and custom model tests with a model running on infrastructure outside DataRobot.
To create a proxy model:
-
(Optional) Add runtime parameters to the custom model through the model metadata (
model-metadata.yaml). -
Add proxy code to the custom model through the custom model file (
custom.py). -
Create a proxy model and assemble the model files in the Workshop.
Add proxy code
The custom model you create as a proxy for an external model should contain custom code in the custom.py file to connect the proxy model with the externally hosted model; this code is the proxy code. See the custom model assembly documentation for more information on writing custom model code.
The proxy code in the custom.py file should do the following:
-
Import the necessary modules and, optionally, the runtime parameters from
model-metadata.yaml. -
Connect the custom model to an external model via an HTTPS connection or the network protocol required by your external model.
-
Request predictions and convert prediction data as necessary.
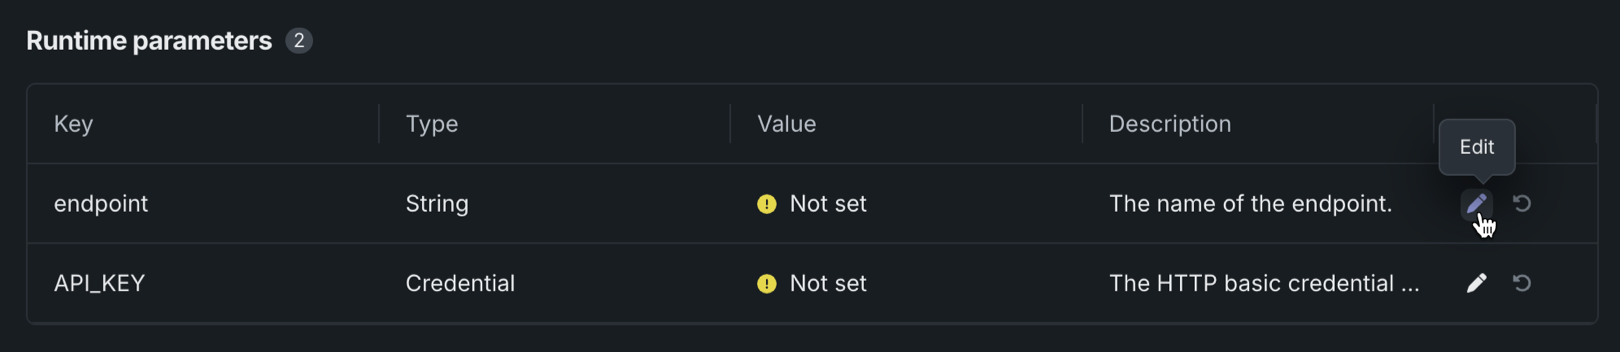
To simplify the reuse of proxy code, you can add runtime parameters through your model metadata in the model-metadata.yaml file:
name: runtime-parameter-example
type: inference
targetType: regression
runtimeParameterDefinitions:
- fieldName: endpoint
  type: string
  description: The name of the endpoint.
- fieldName: API_KEY
  type: credential
  description: The HTTP basic credential containing the endpoint's API key in the password field (the username field is ignored).
If you define runtime parameters in the model metadata, you can import them into the custom.py file to use in your proxy code. After importing these parameters, you can assign them to variables in your proxy code. This allows you to create a prediction request to connect to and retrieve prediction data from the external model. The following example outlines the basic structure of a custom.py file:
# Import modules required to make a prediction request.
import json
import ssl
import urllib.request
import pandas as pd
# Import SimpleNamespace to create an object to store runtime parameter variables.
from types import SimpleNamespace
# Import RuntimeParameters to use the runtime parameters set in the model metadata.
from datarobot_drum import RuntimeParameters

# Override the default load_model hook to read the runtime parameters.
def load_model(code_dir):
    # Assign runtime parameters to variables.
    api_key = RuntimeParameters.get("API_KEY")["password"]
    endpoint = RuntimeParameters.get("endpoint")

    # Create scoring endpoint URL.
    url = f"https://{endpoint}.example.com/score"

    # Return an object containing the variables necessary to make a prediction request.
    return SimpleNamespace(**locals())

# Write proxy code to request and convert scoring data from the external model.
def score(data, model, **kwargs):
    # Call make_remote_prediction_request.
    # Convert prediction data as necessary.

def make_remote_prediction_request(payload, url, api_key):
    # Connect to the scoring endpoint URL.
    # Request predictions from the external model.
Create a proxy model
To create a custom model as a proxy for an external model, you can add a new proxy model to the Workshop. A proxy model contains the proxy code you created to connect with your external model.
To add a proxy model through the Model Workshop:
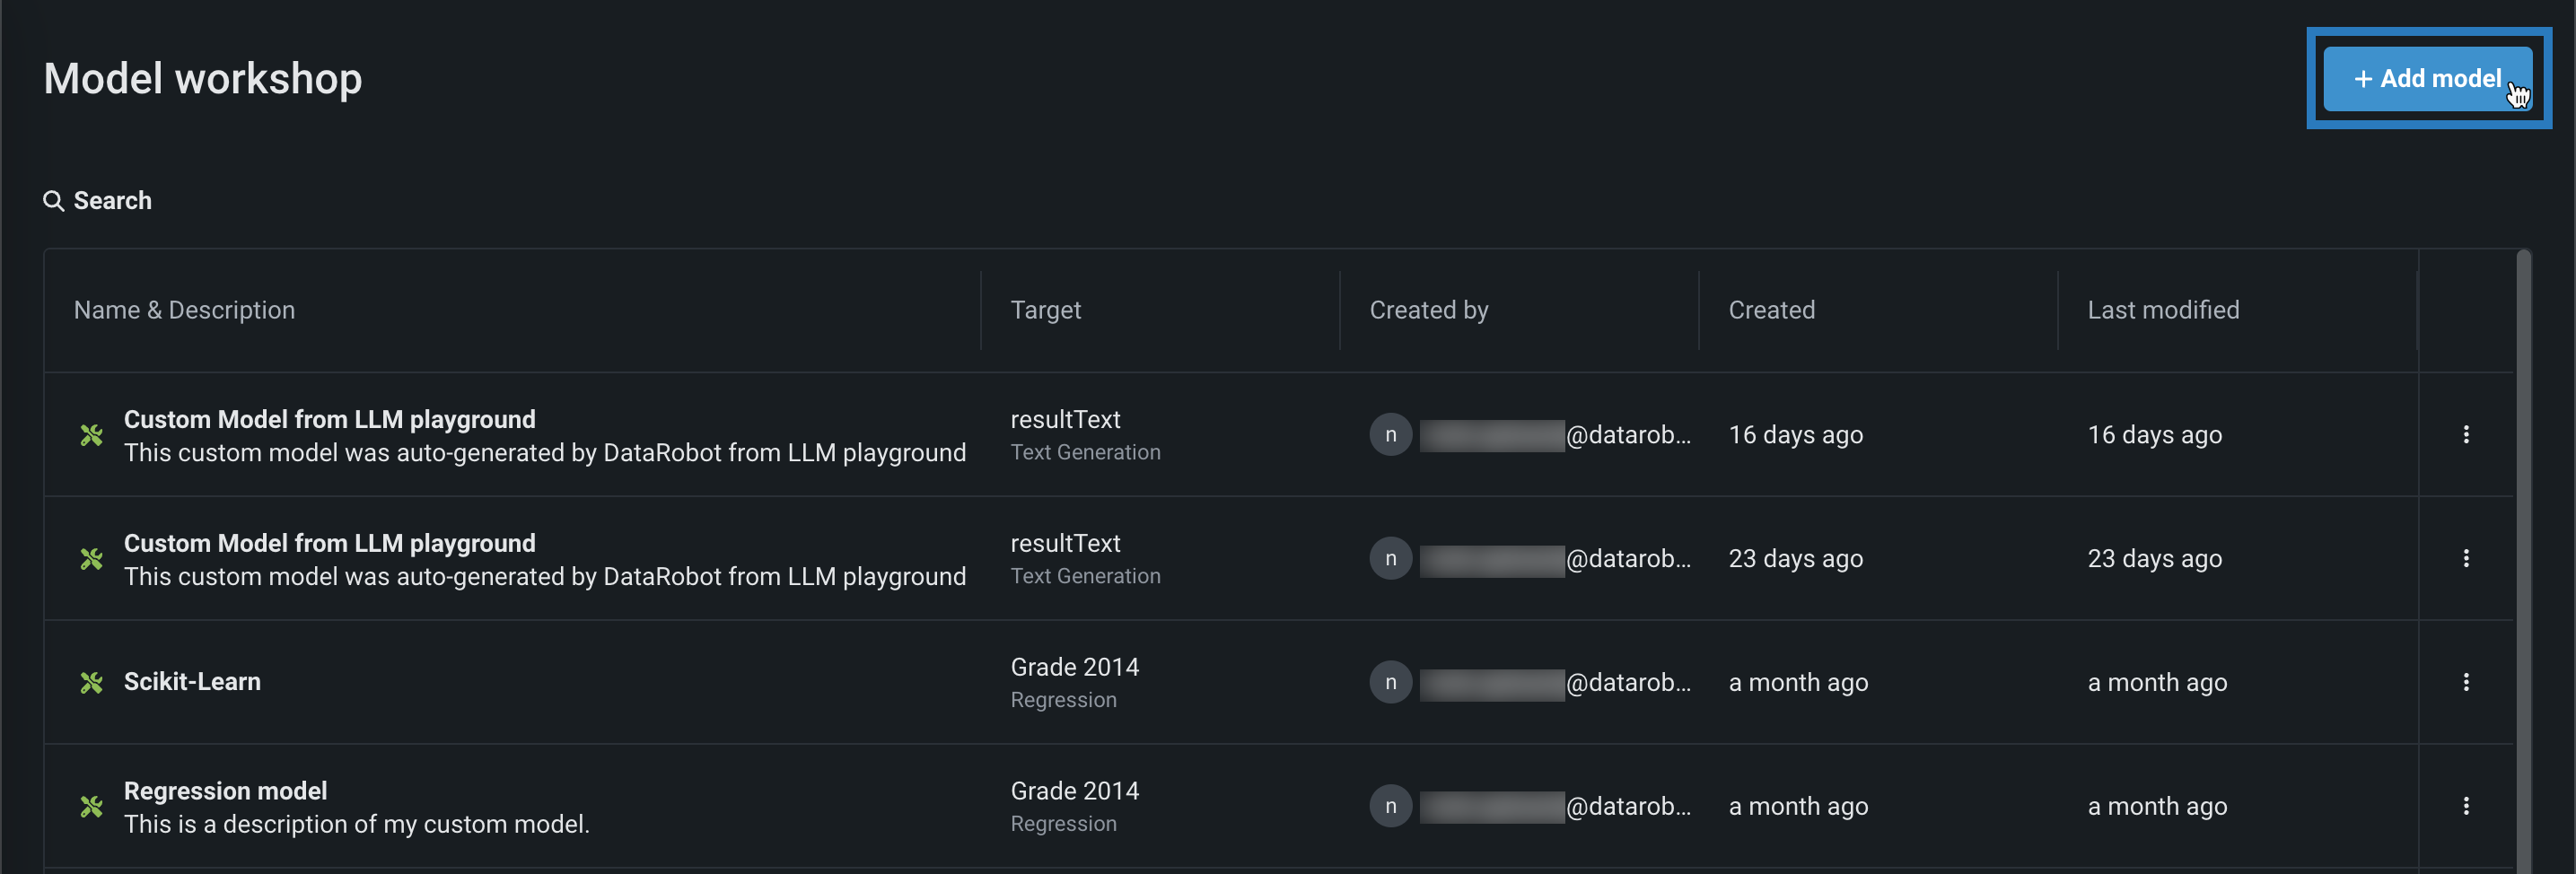
-
Click Registry > Workshop.
-
On the Workshop tab, click + Add model.
-
In the Add a model panel, select Proxy, and then add the model information:
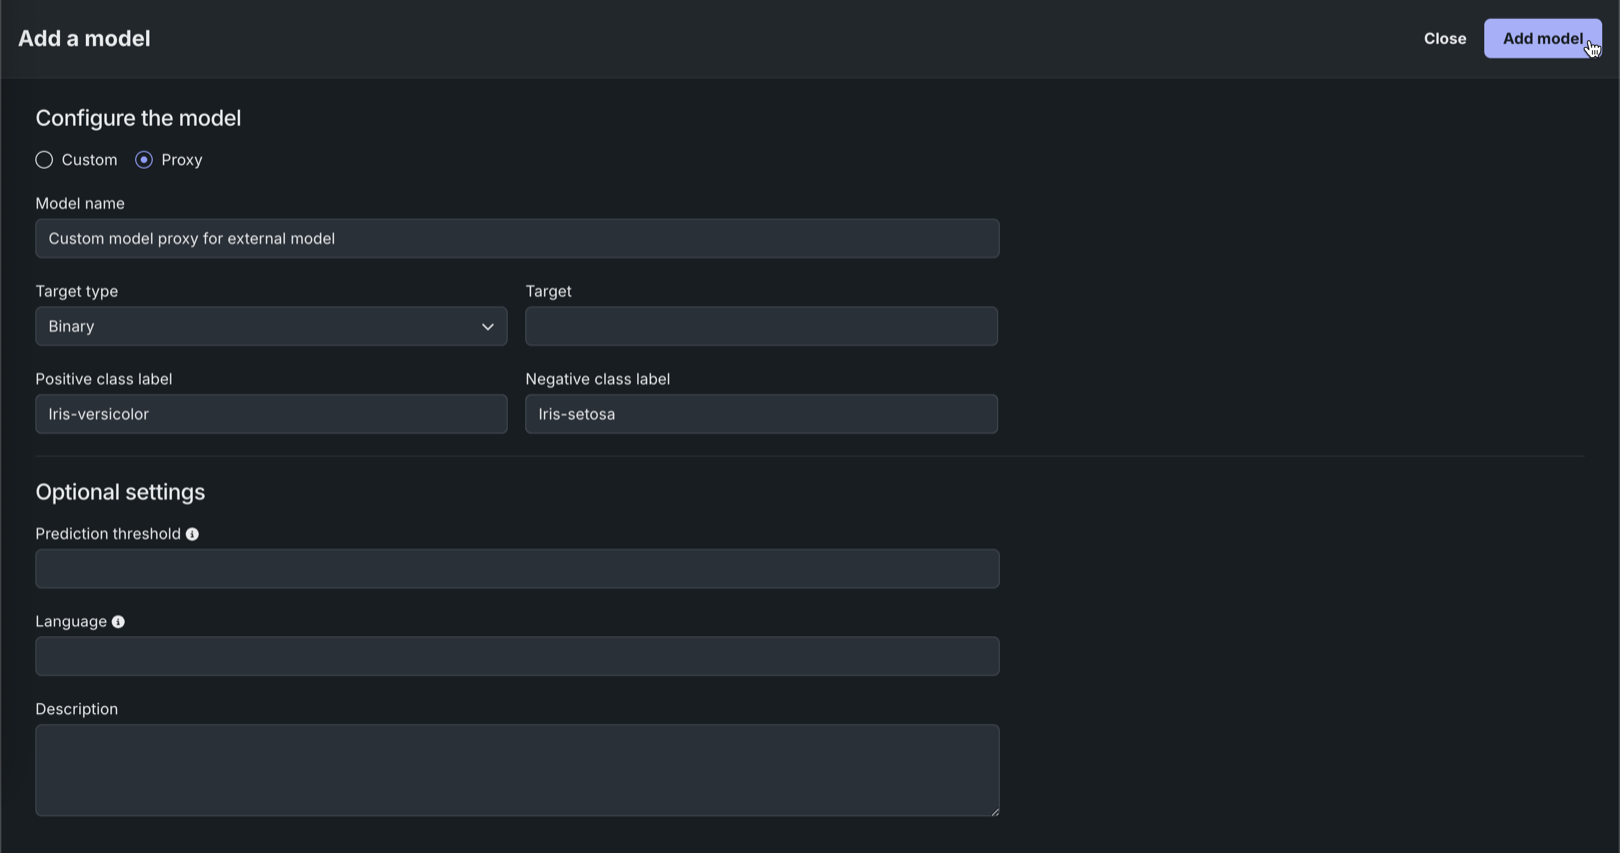
Field Description Model name A descriptive name for the custom model. Target type The type of prediction the model makes. Depending on the prediction type, you must configure additional settings: - Binary: For a binary classification model, enter the Positive class label and Negative class label. Then, optionally, enter a Prediction threshold.
- Regression: No additional settings.
- Time Series (Binary): Preview feature. For a binary classification model, enter the Positive class label and the Negative class label and configure the time series settings. Then, optionally, enter a Prediction threshold.
- Time Series (Regression): Preview feature Configure the time series settings.
- Multiclass: For a multiclass classification model, enter or upload (
.csv,.txt) the Target classes for your target, one class per line. To ensure that the classes are applied correctly to your model's predictions, enter classes in the same order as your model's predicted class probabilities. - Multilabel: For a multilabel classification model, enter or upload (
.csv,.txt) the Target labels for your target, one label per line. To ensure that the labels are applied correctly to your model's predictions, enter labels in the same order as your model's predicted label probabilities. - Text Generation: Premium feature. No additional settings.
- Anomaly Detection: No additional settings.
- Vector Database: Preview feature No additional settings.
- Location: Premium feature. No additional settings.
- Agentic Workflow: Premium feature. No additional settings.
- MCP Server: Premium feature. No additional settings. An MCP server is a tool that allows you to expose the DataRobot API as a tool that can be used by agents.
Target name The dataset column the model predicts. Required for target types that use a target column, including multiclass and multilabel. This field isn't available for anomaly detection models. Optional settings Prediction threshold For binary classification models, a decimal value ranging from 0 to 1. Any prediction score exceeding this value is assigned to the positive class. Language The programming language used to build the model. Description A description of the model's contents and purpose. -
After completing the fields, click Add model.
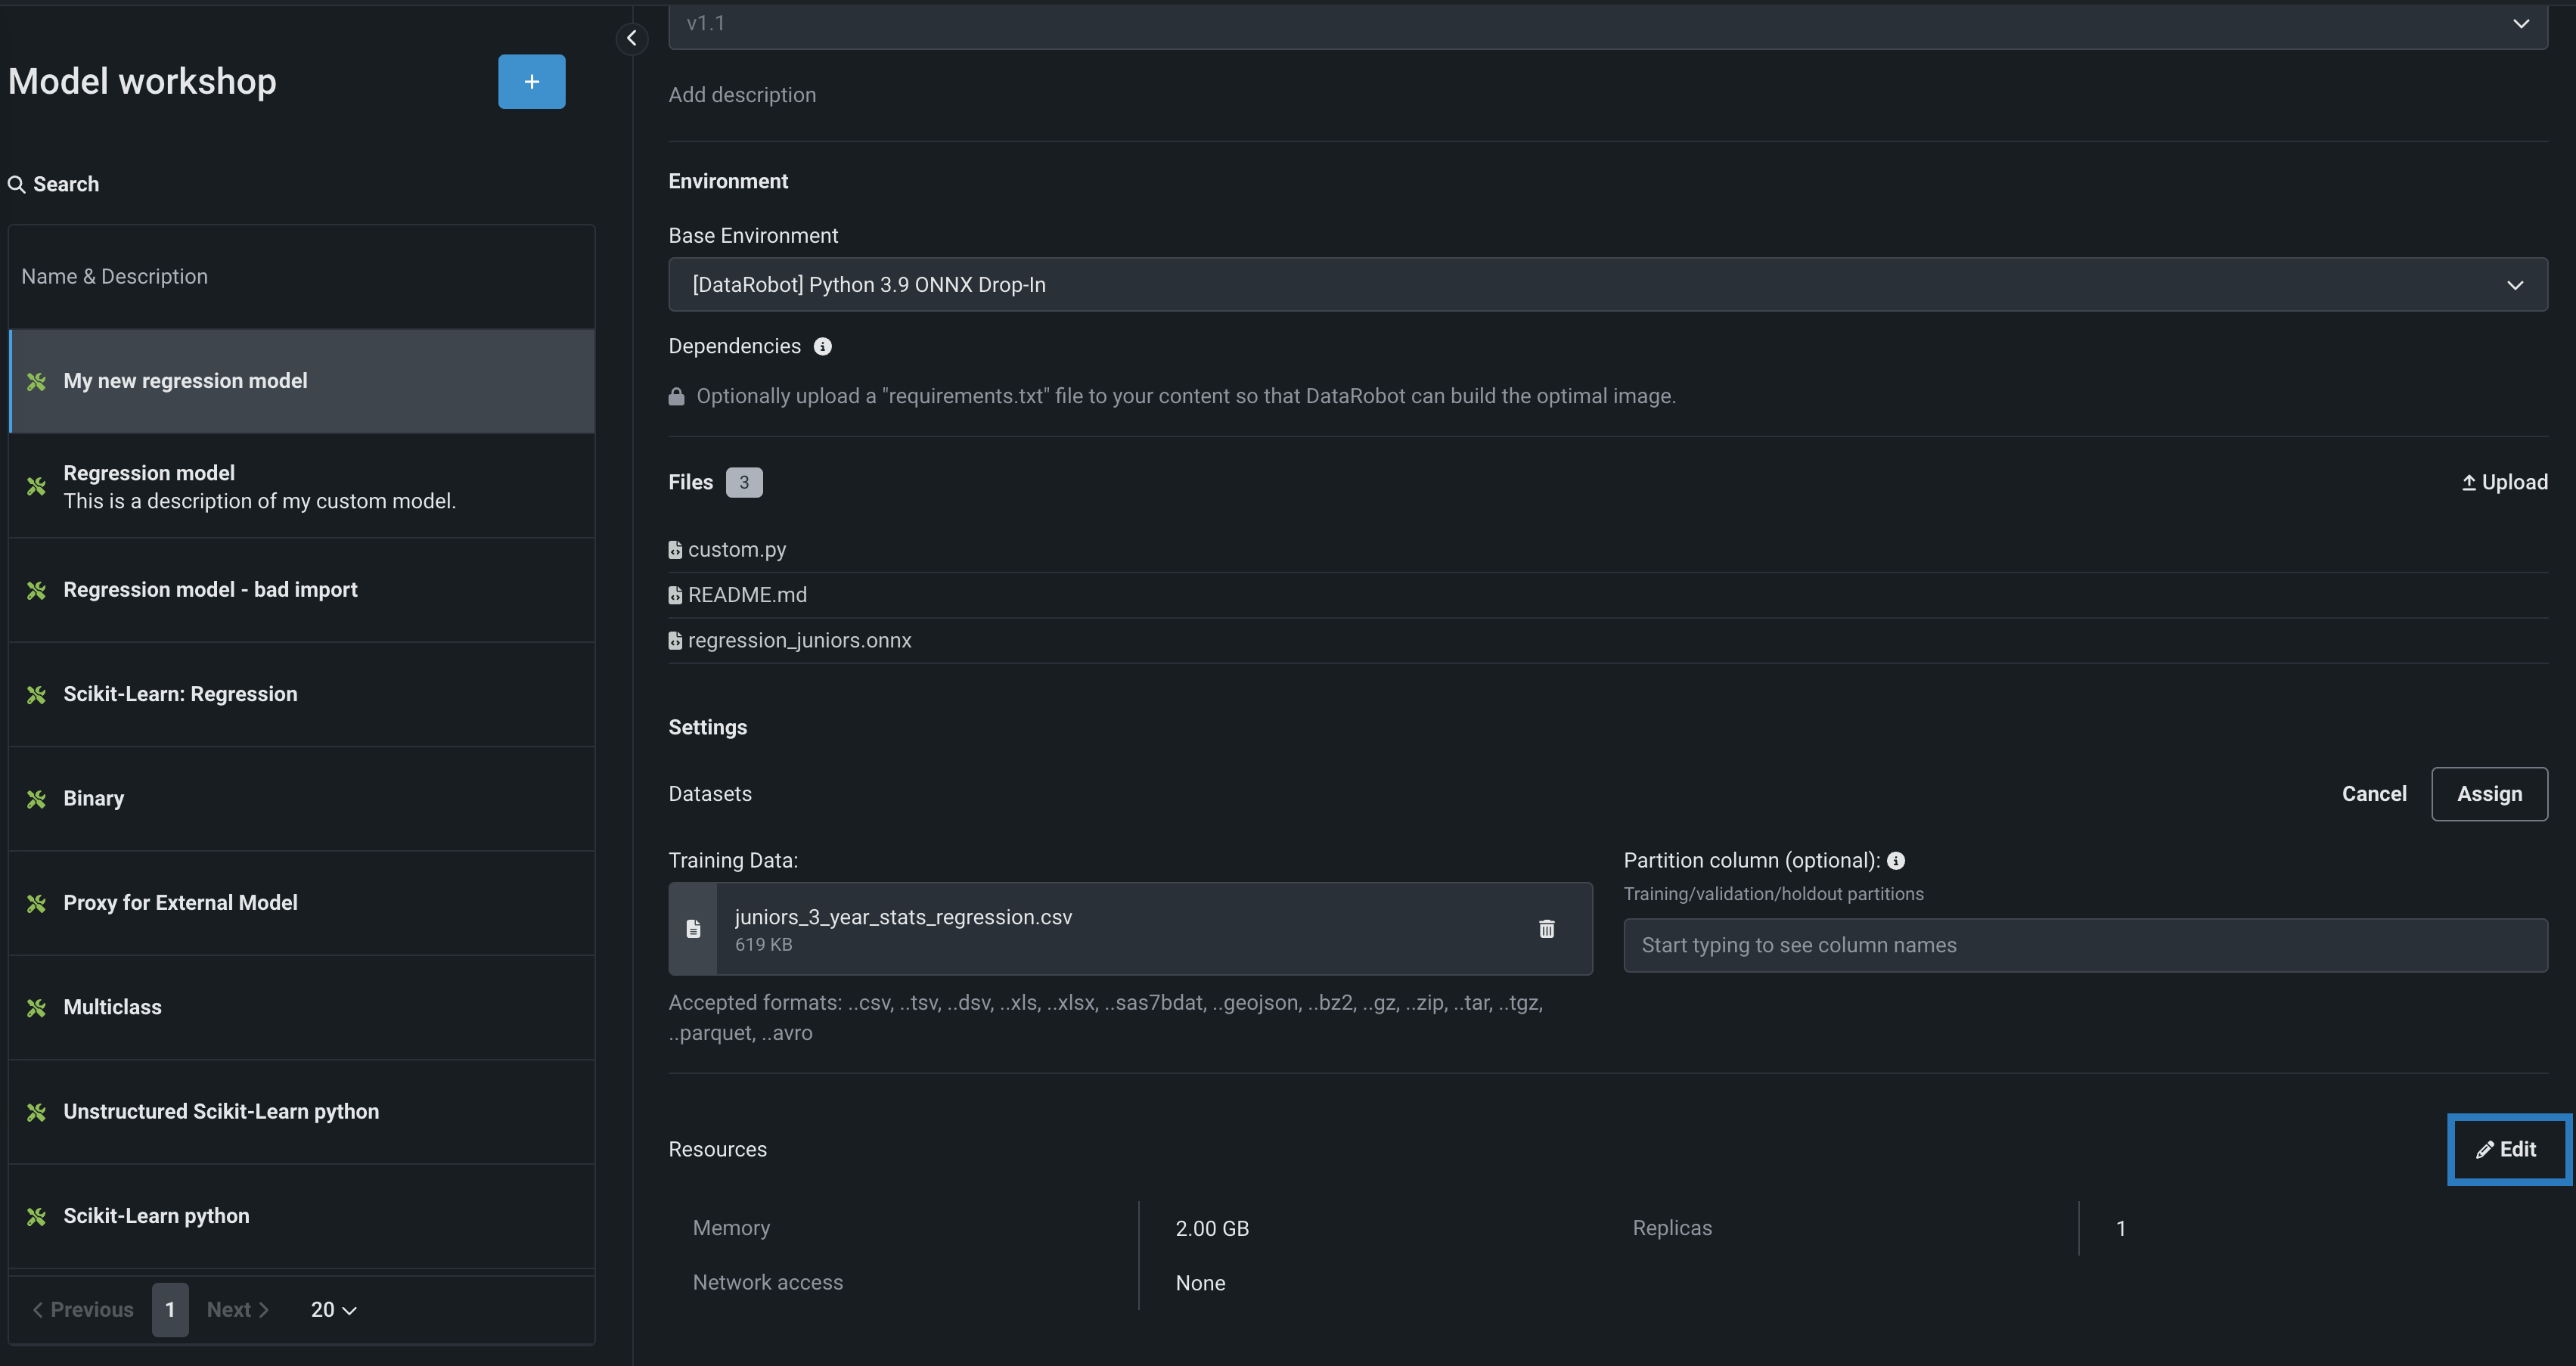
Assemble a proxy model
To assemble the proxy model, bring the proxy code you created to connect with your external model into the Workshop and ensure the proxy model has network access.
-
On the Assemble tab, navigate to the Environment section and select a model environment from the Base environment dropdown menu.
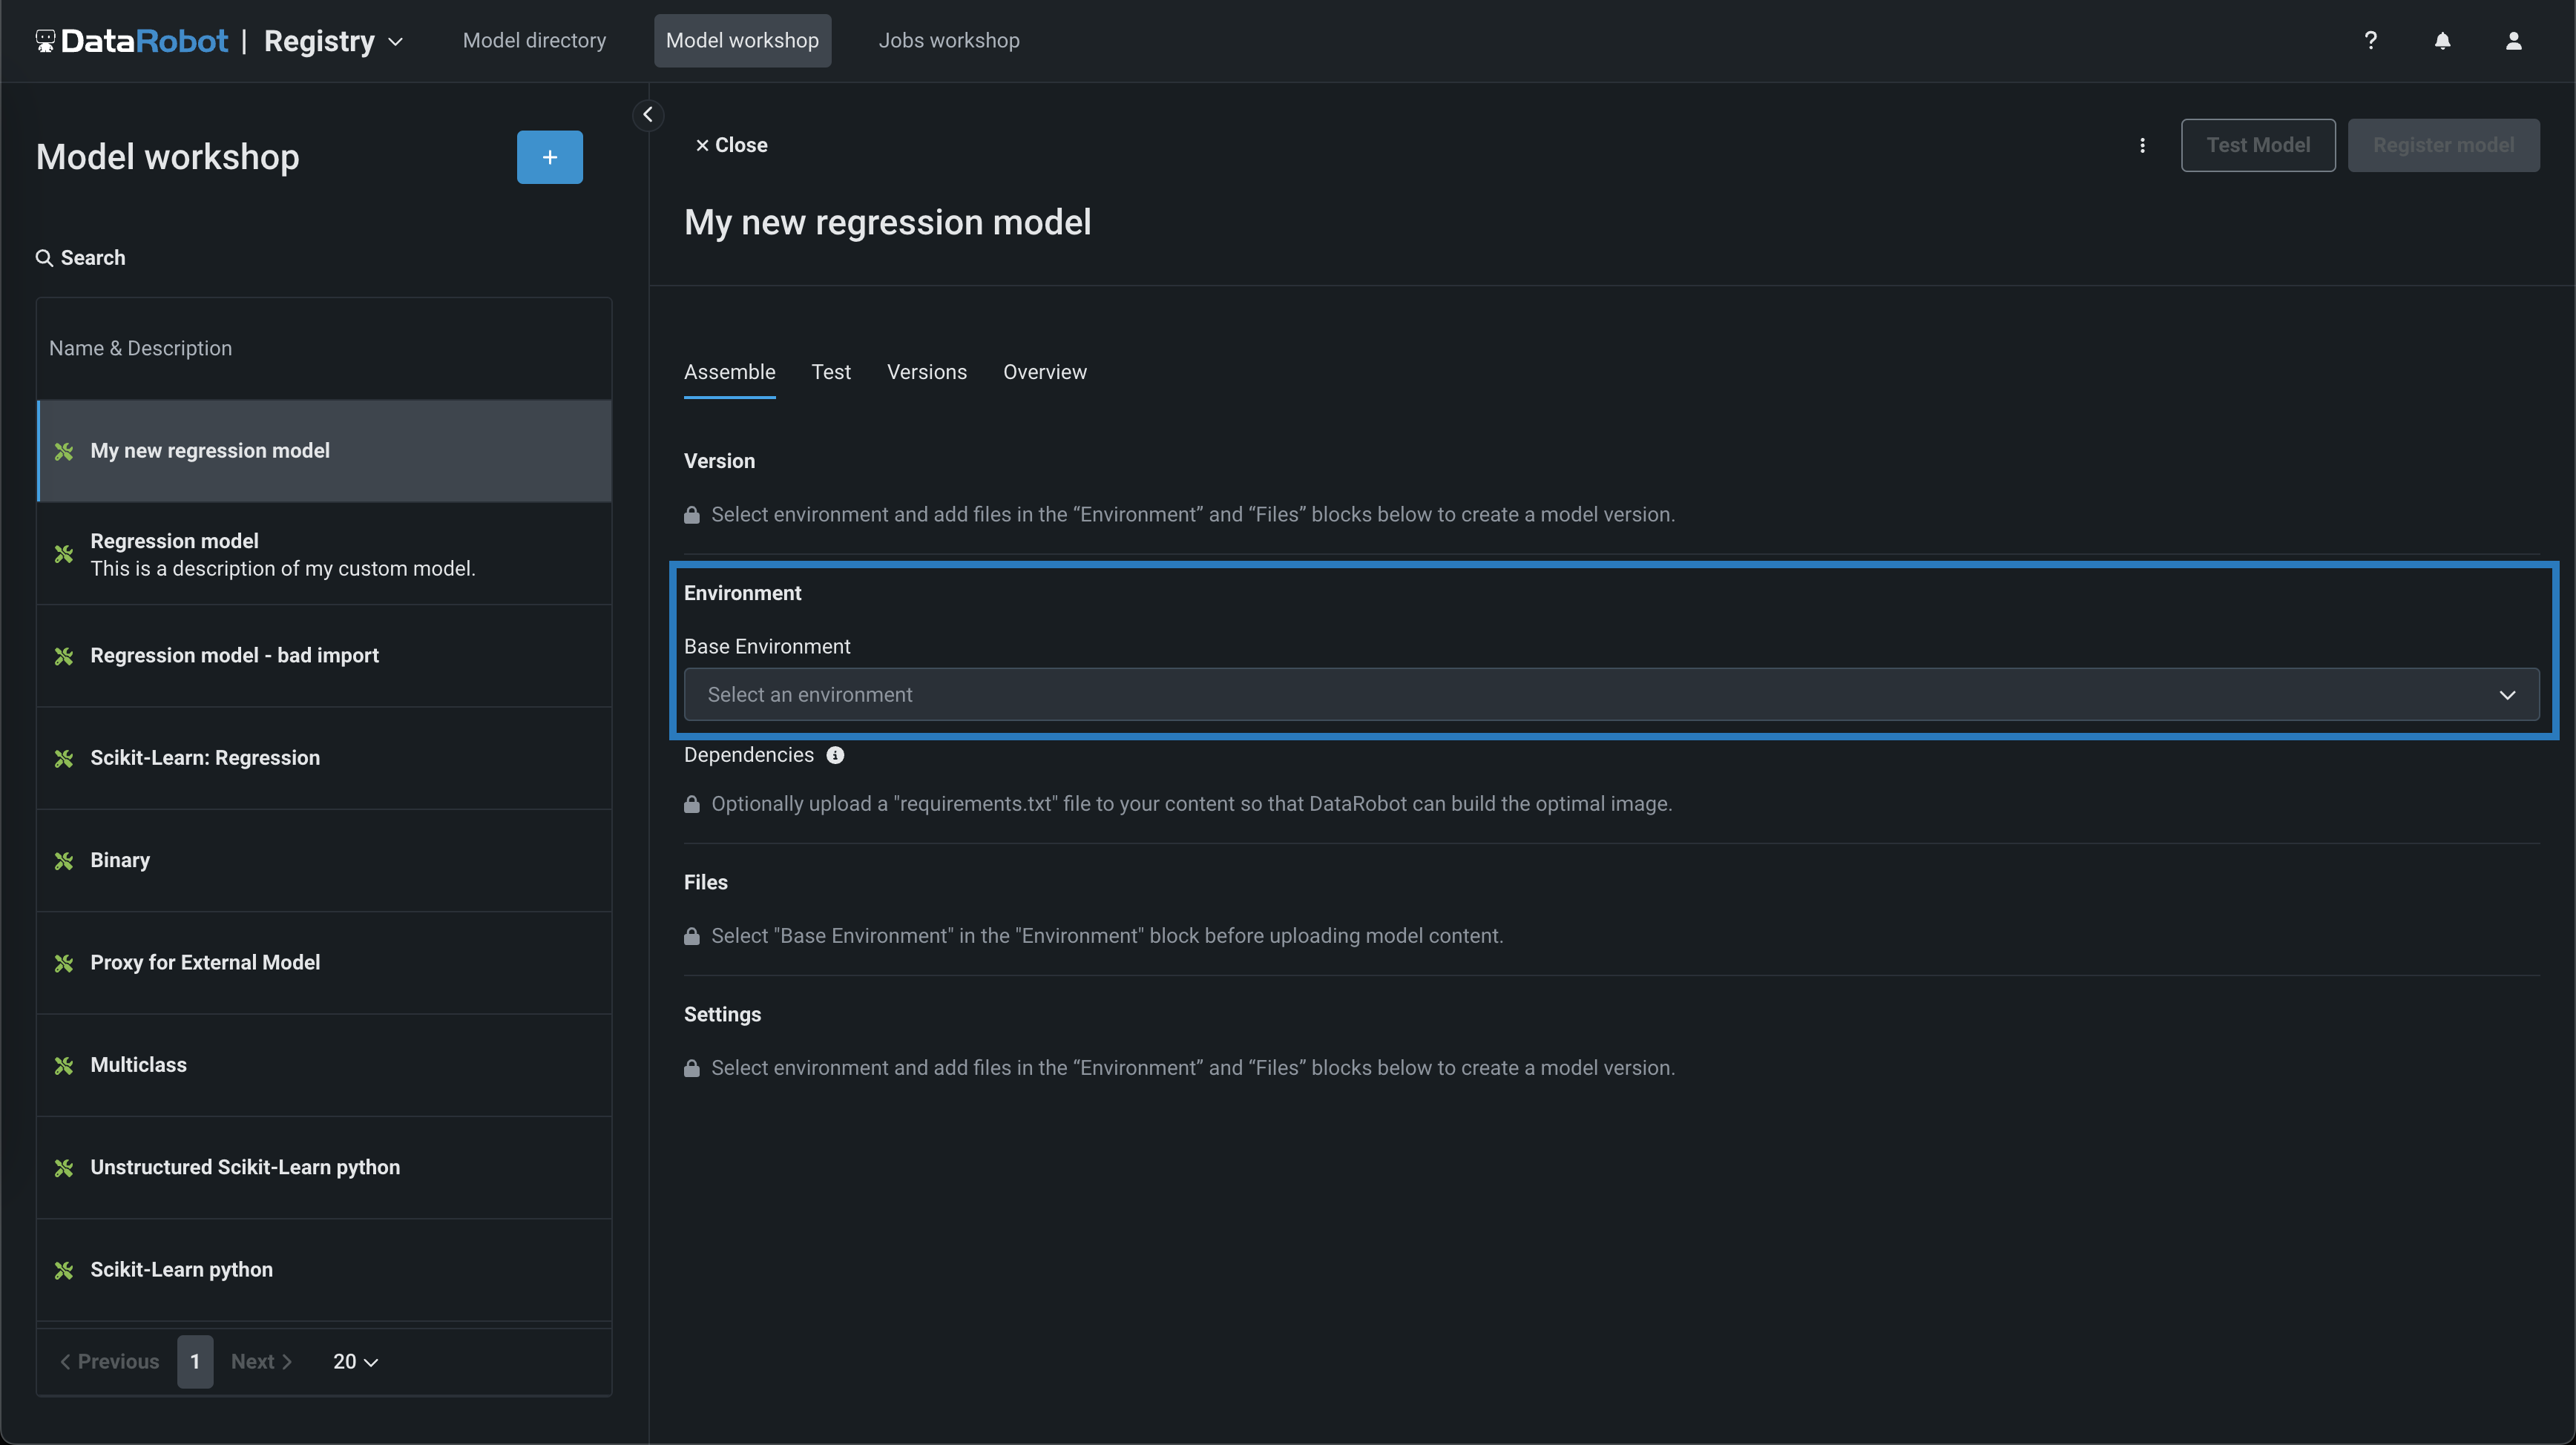
Model environments
The model environment is used for testing and deploying the custom model. The Base Environment dropdown list includes drop-in model environments and any custom environments that you can create. By default, the custom model uses the most recent version of the selected environment with a successful build.
-
To populate the Dependencies section, you can upload a
requirements.txtfile in the Files section, allowing DataRobot to build the optimal image. -
In the Files section, add the required proxy model files. If you aren't pairing the model with a drop-in environment, this includes the custom model environment requirements and a
start_server.shfile. You can add files in several ways: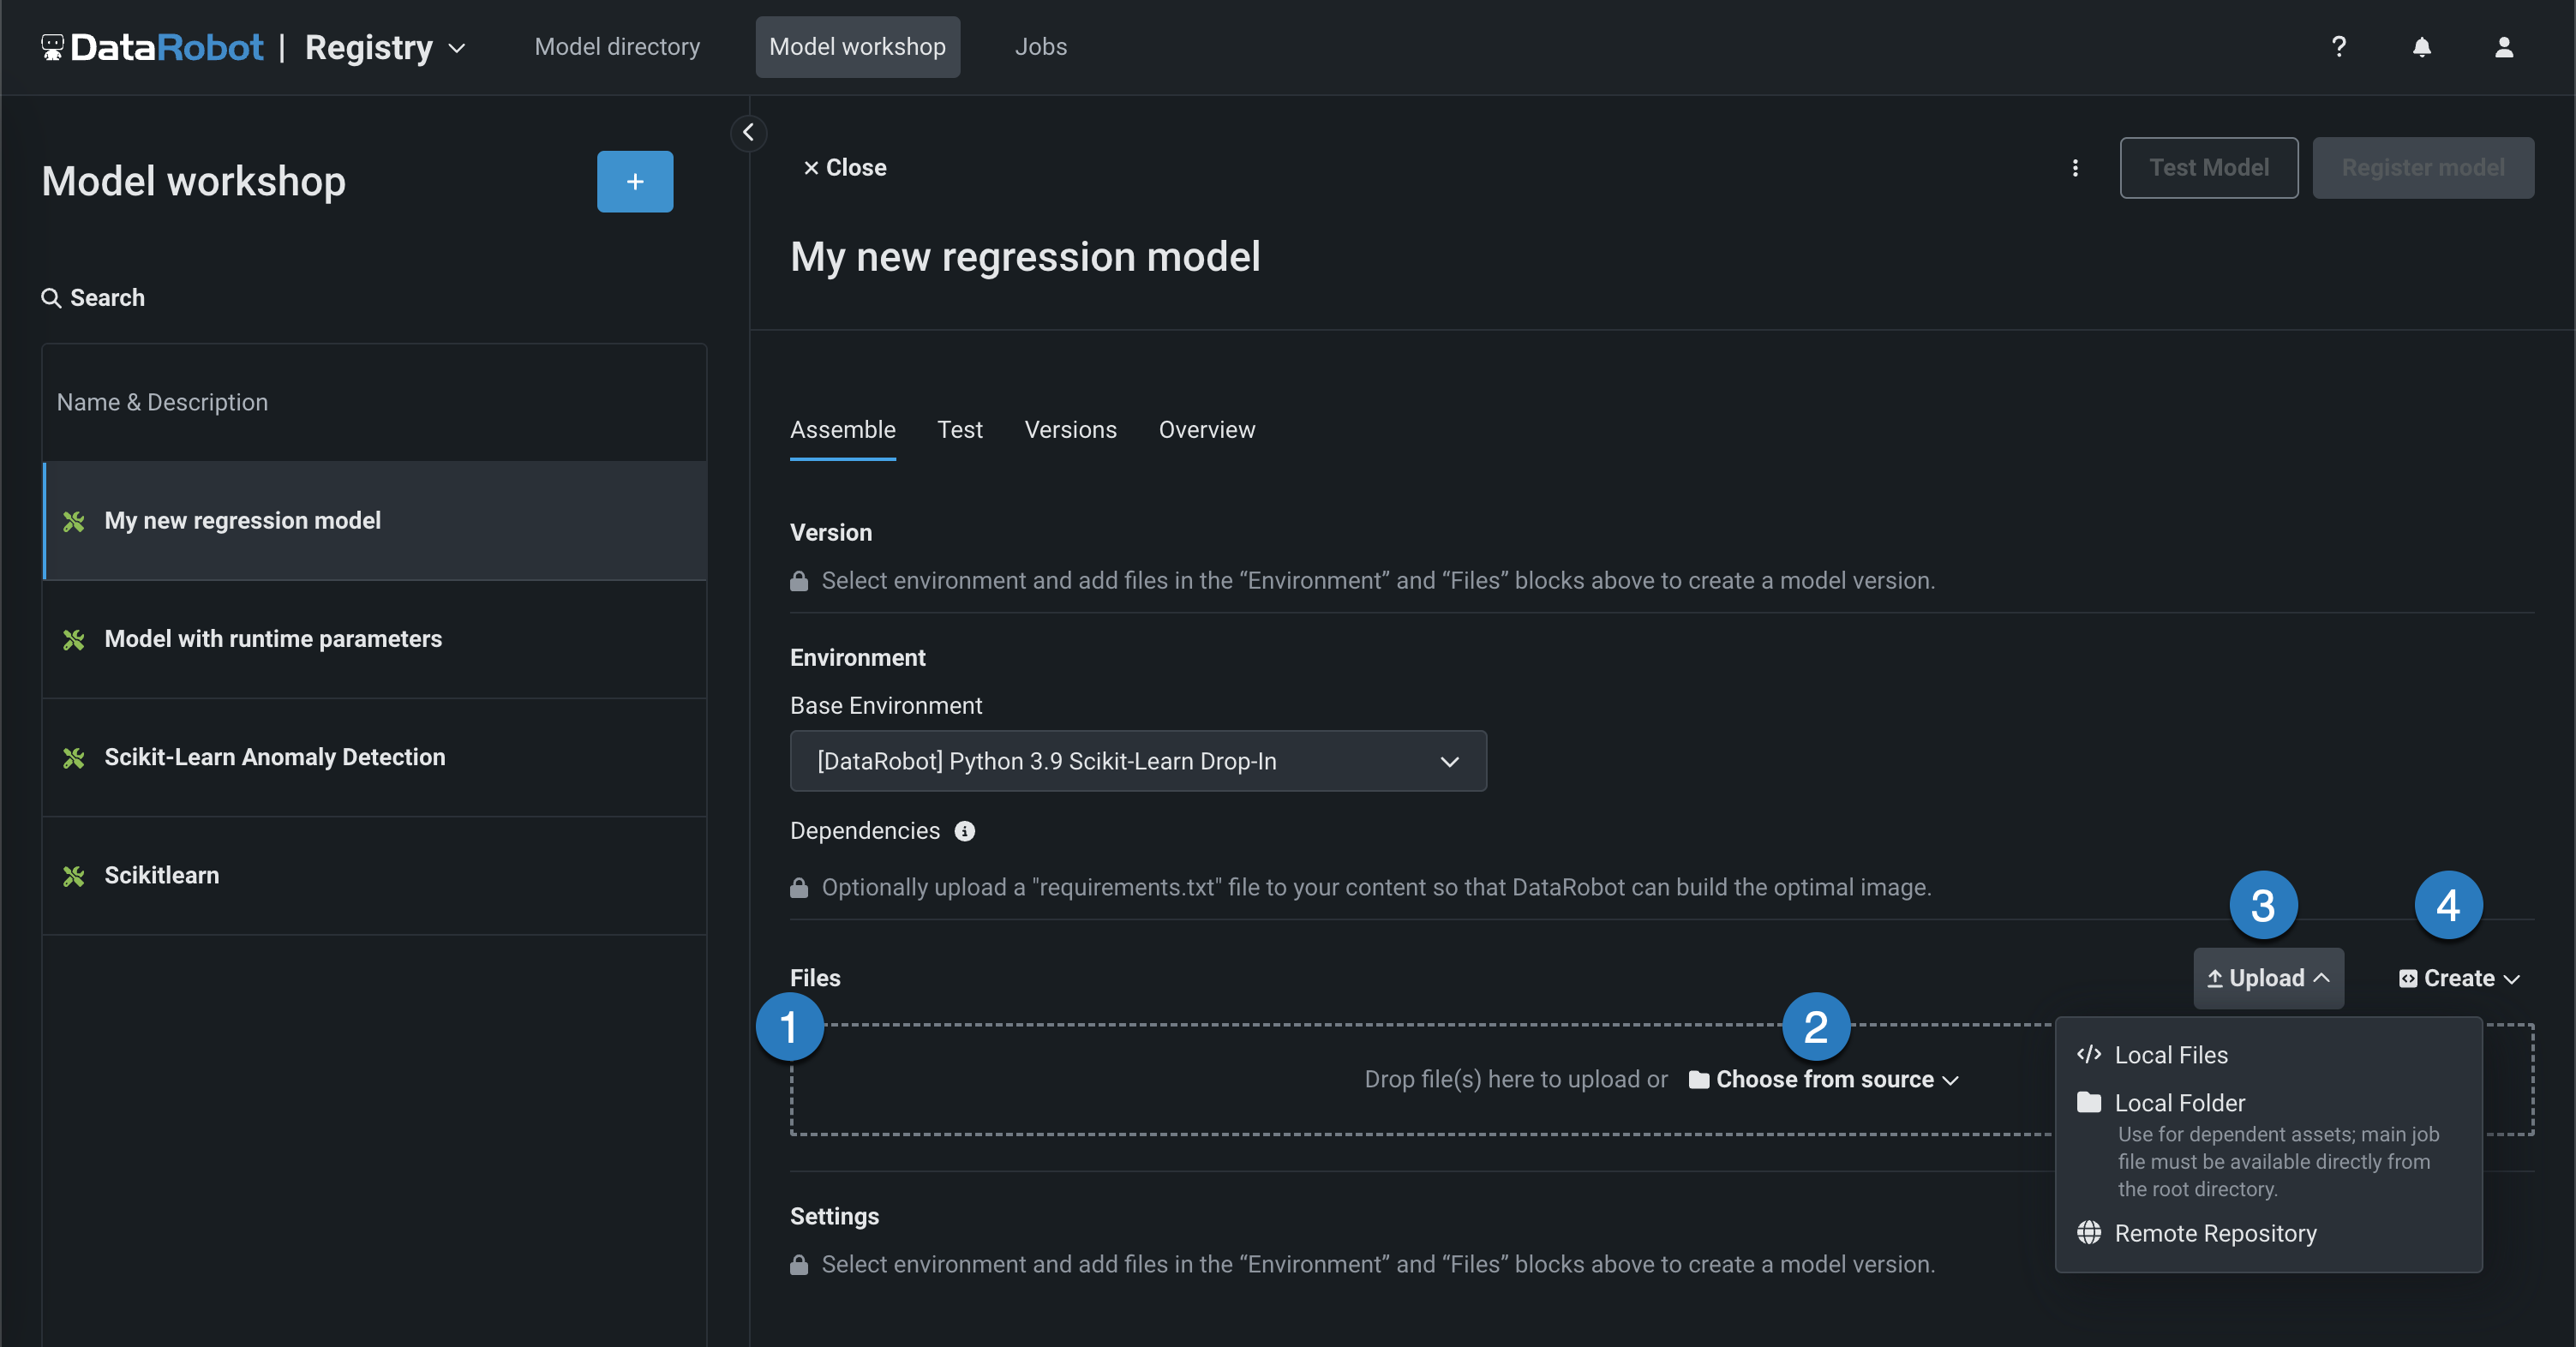
Element Description 1 Files Drag files into the group box for upload. 2 Choose from source Click to browse for Local Files or a Local Folder. To pull files from a remote repository, use the Upload menu. 3 Upload Click to browse for Local Files or a Local Folder or to pull files from a remote repository. 4 Create Create a new file, empty or as a template, and save it to the custom model: - Create model-metadata.yaml: Creates a basic, editable example of a runtime parameters file.
- Create blank file: Creates an empty file. Click the edit icon () next to Untitled to provide a file name and extension, then add your custom contents.
File considerations
If you add a new file with the same name as an existing file, when you click Save, the old file is replaced in the Files section. When you add files from a Local Folder, make sure the model file is already at the root of the custom model. Uploaded folders are for dependent files and additional assets required by your model, not the model itself. Even if the model file is included in the folder, it will not be accessible to DataRobot unless the file exists at the root level. The root file can then point to the dependencies in the folder.
-
On the Assemble tab, in the Settings section, next to Resources, click () Edit and set Network access to Public.
-
If you provided runtime parameters in the model metadata, after you build the environment and create a new version, you can configure those parameters in the Runtime parameters section.
-
Finally, you can register the custom model to create a deployable proxy model.