SageMakerでの自動デプロイと置換
プレミアム機能
Sagemakerのカスタムモデルとスコアリングコードの自動デプロイおよび置換はプレミアム機能です。 この機能を有効にする方法については、DataRobotの担当者または管理者にお問い合わせください。
機能フラグ:SageMakerでカスタムモデルの自動デプロイと置換を有効にする(プレミアム機能)
DataRobotが管理するSageMakerの予測環境を作成し、SageMakerでリアルタイム推論やサーバーレス推論を用いてカスタムモデルとスコアリングコードをデプロイします。 DataRobotの管理を有効にすることで、外部のSagemakerへのデプロイは、MLOpsによる管理(モデルの自動置換など)を利用できます。
外部モデルと監視ジョブのサービス正常性に関する情報
サービス正常性の情報は、エージェントによって監視される外部のデプロイでは入手できません。また、予測監視ジョブを介して予測がアップロードされるデプロイでも入手できません。
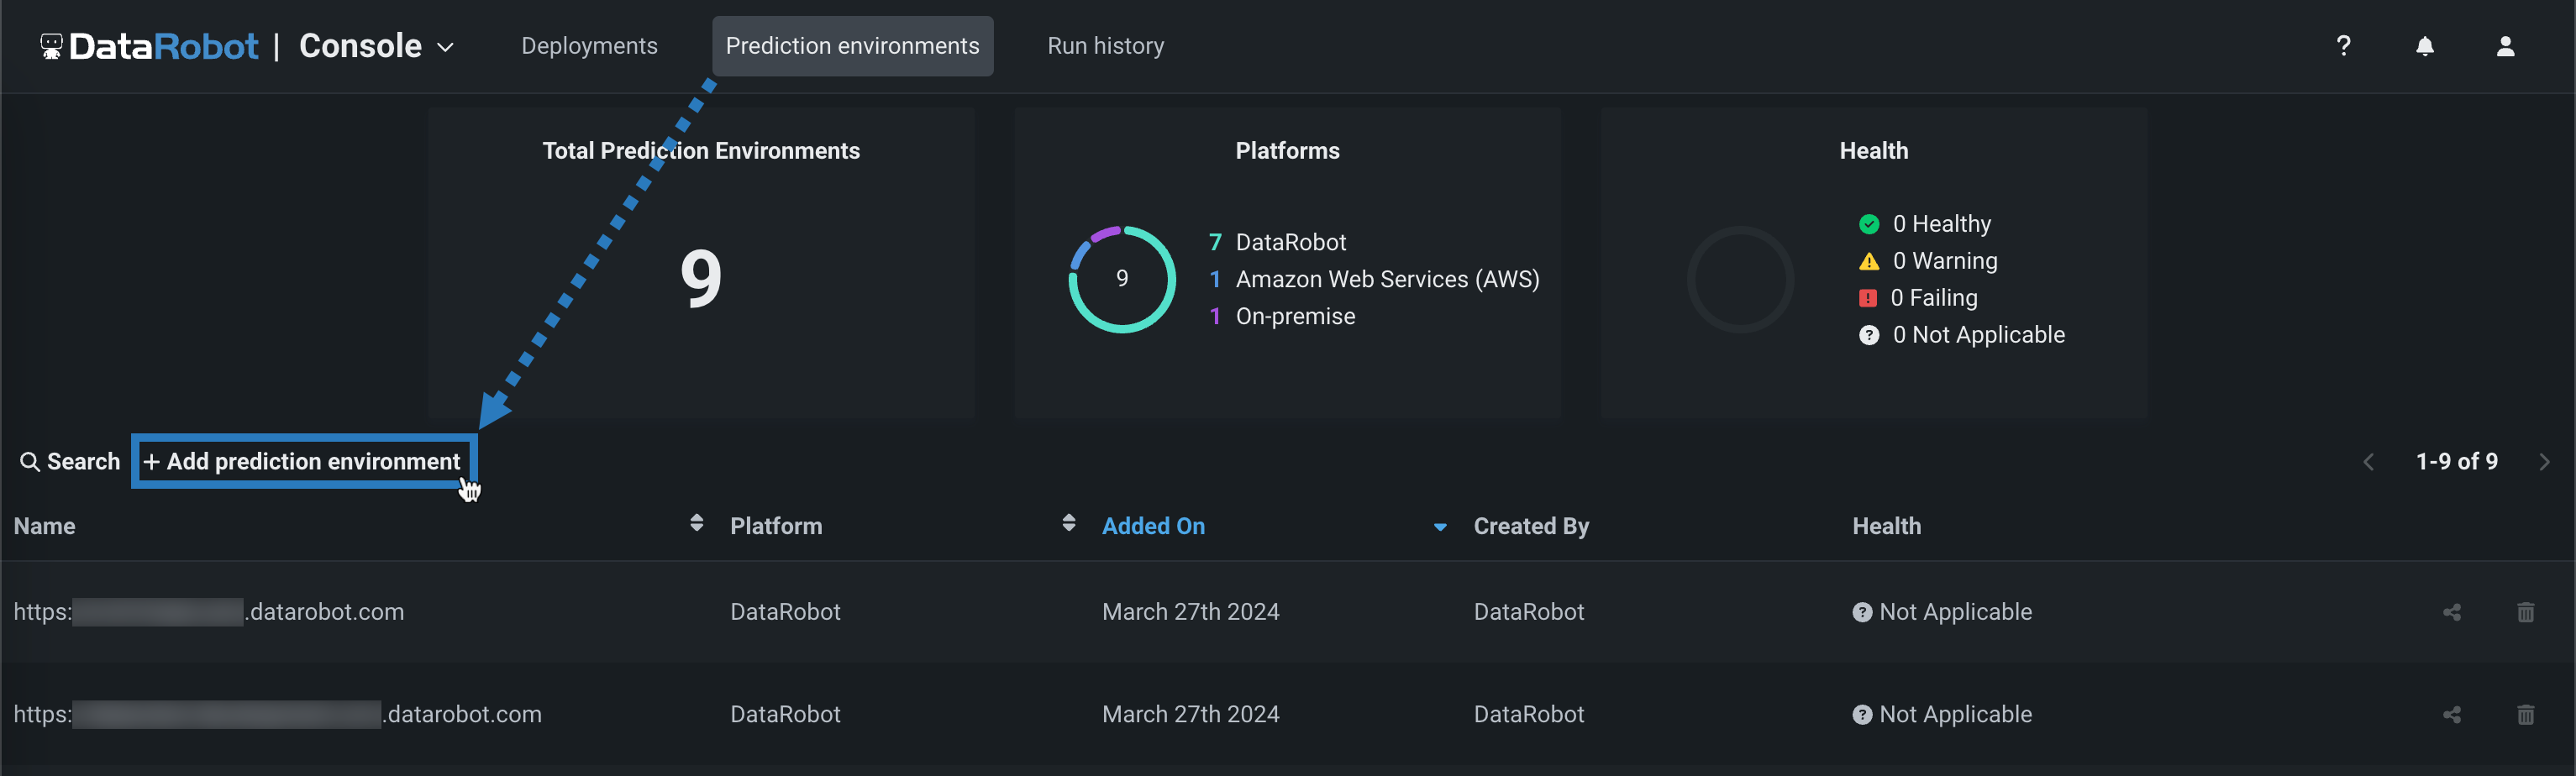
SageMaker予測環境の作成
SageMakerにモデルをデプロイするには、まずカスタムSageMaker予測環境を作成します。
-
コンソールで、予測環境、+ 予測環境を追加の順にクリックします。
-
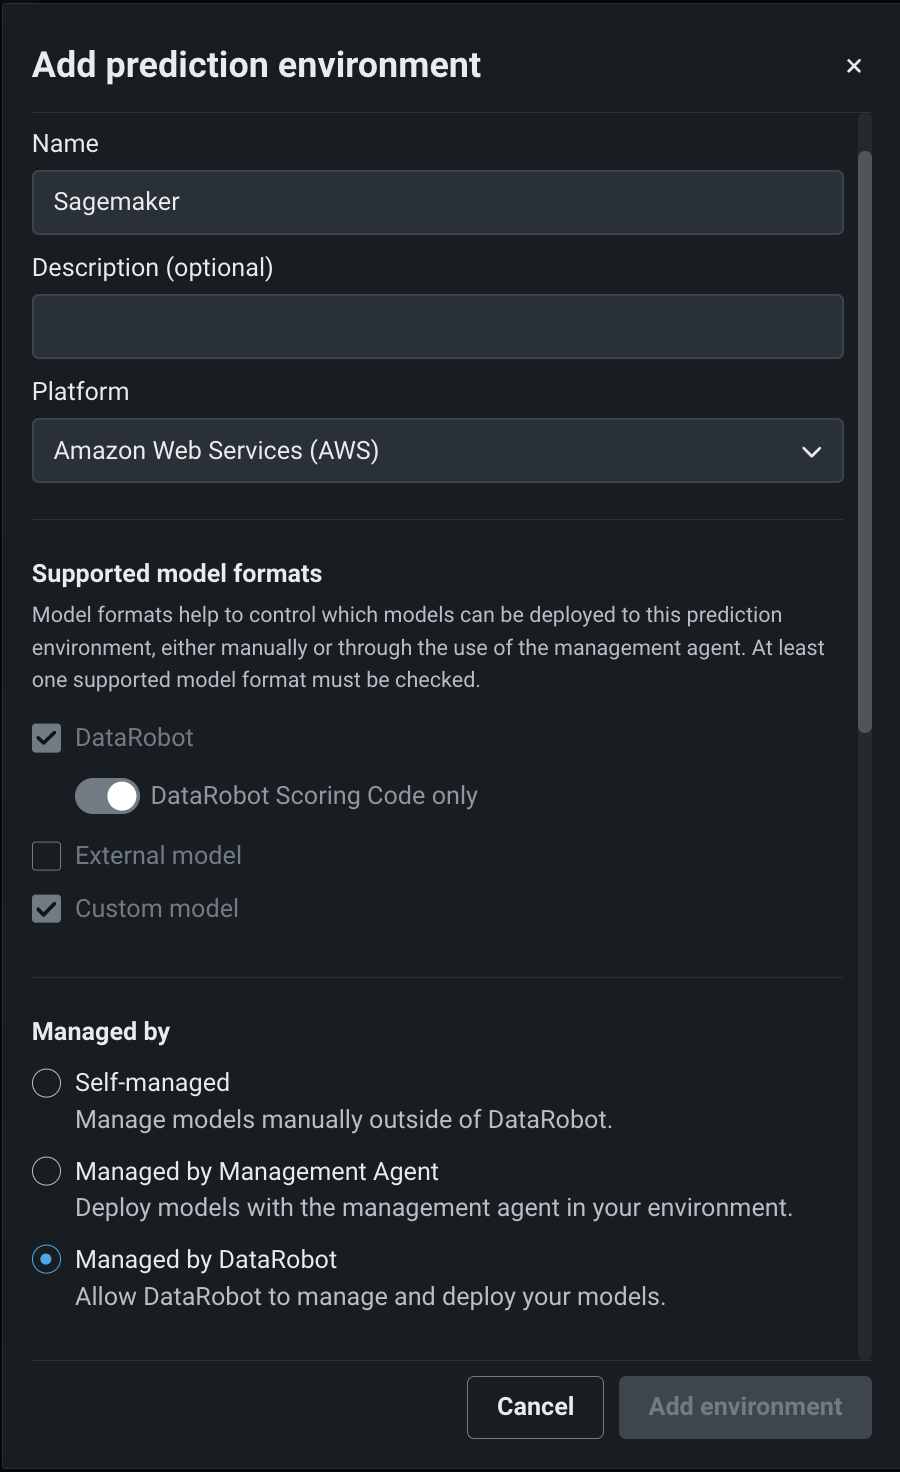
予測環境を追加ダイアログボックスで、予測環境設定を行います。
-
予測環境について、わかりやすい名前を入力し、必要に応じて説明も入力します。
-
Amazon Web Services(AWS)を、プラットフォームドロップダウンから選択します。
-
DataRobotが管理設定を有効にすると、この予測環境が管理エージェントを介して、DataRobotカスタムモデルとスコアリングコードモデルを自動的にパッケージ化してデプロイできます。
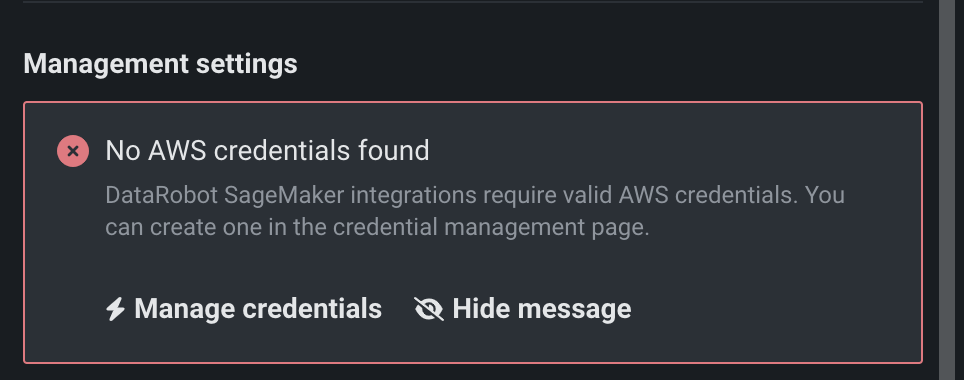
AWS認証情報が必要
SageMakerでのスコアリングコードのDataRobot管理には、SageMakerへの既存のデータ接続が必要です。 既存のSageMakerデータ接続がない場合、データ接続が見つかりませんアラートが表示され、データ接続に移動して SageMaker接続を作成するよう指示されます。
-
-
管理設定で、関連するAWS認証情報を選択し、リージョンを指定します。 指定されると、DataRobotは利用可能なロールを自動的に取得します。 以下の項目を設定します。
-
SageMaker IAM Role: 予測環境のSageMakerロールを設定します。 IAM実行ロールを設定するには、 SageMakerのドキュメントを参照してください。 実行ロールには、次のAmazon SQS権限が必要です。
"sqs:SendMessage""sqs:GetQueueUrl""sqs:GetQueueAttributes""sqs:ListQueues"
-
CodeBuildのIAMロール:CodeBuildでモデルイメージを構築するために必要なAWS CodeBuildサービスロールを設定します。 CodeBuildまたはAWS CodePipelineコンソールを使用して、CodeBuildサービスロールを作成します。これを行うには、 AWSのドキュメントを参照してください。 CodeBuildサービスロールには、次のAmazon SQS権限が必要です。
"ecr:ListImages""iam:GetRole""iam:PassRole""sts:AssumeRole"
-
ECRリポジトリ: ECRリポジトリの作成については、AWSドキュメントを参照してください。
-
ECRキャッシュ: Docker HubのECRリポジトリキャッシュの作成については、AWSのドキュメントを参照してください。
-
S3バケット:S3バケットを選択します。
-
AWSのタグを追加:(オプション)AWSワークスペースを区別するためのタグを追加します。 空のキーは許可されず、保存時に削除されます。
-
-
(オプション)監視のためにAmazon SQSに接続してAmazon SQSからデータを取得するには、監視設定セクションで監視の有効化をクリックし、AWS認証情報、リージョン、SQSキューフィールドを設定します。 オプションで、可視性タイムアウト(秒)を定義して、メッセージがSQSキューから削除されるまでの時間を設定できます。
環境変数をクリックしてから、+ 新しい環境変数をクリックして、予測環境に環境変数を追加することもできます。
-
環境設定を行った後、環境を追加をクリックします。
これで、予測環境ページからSagemaker環境を利用できるようになりました。
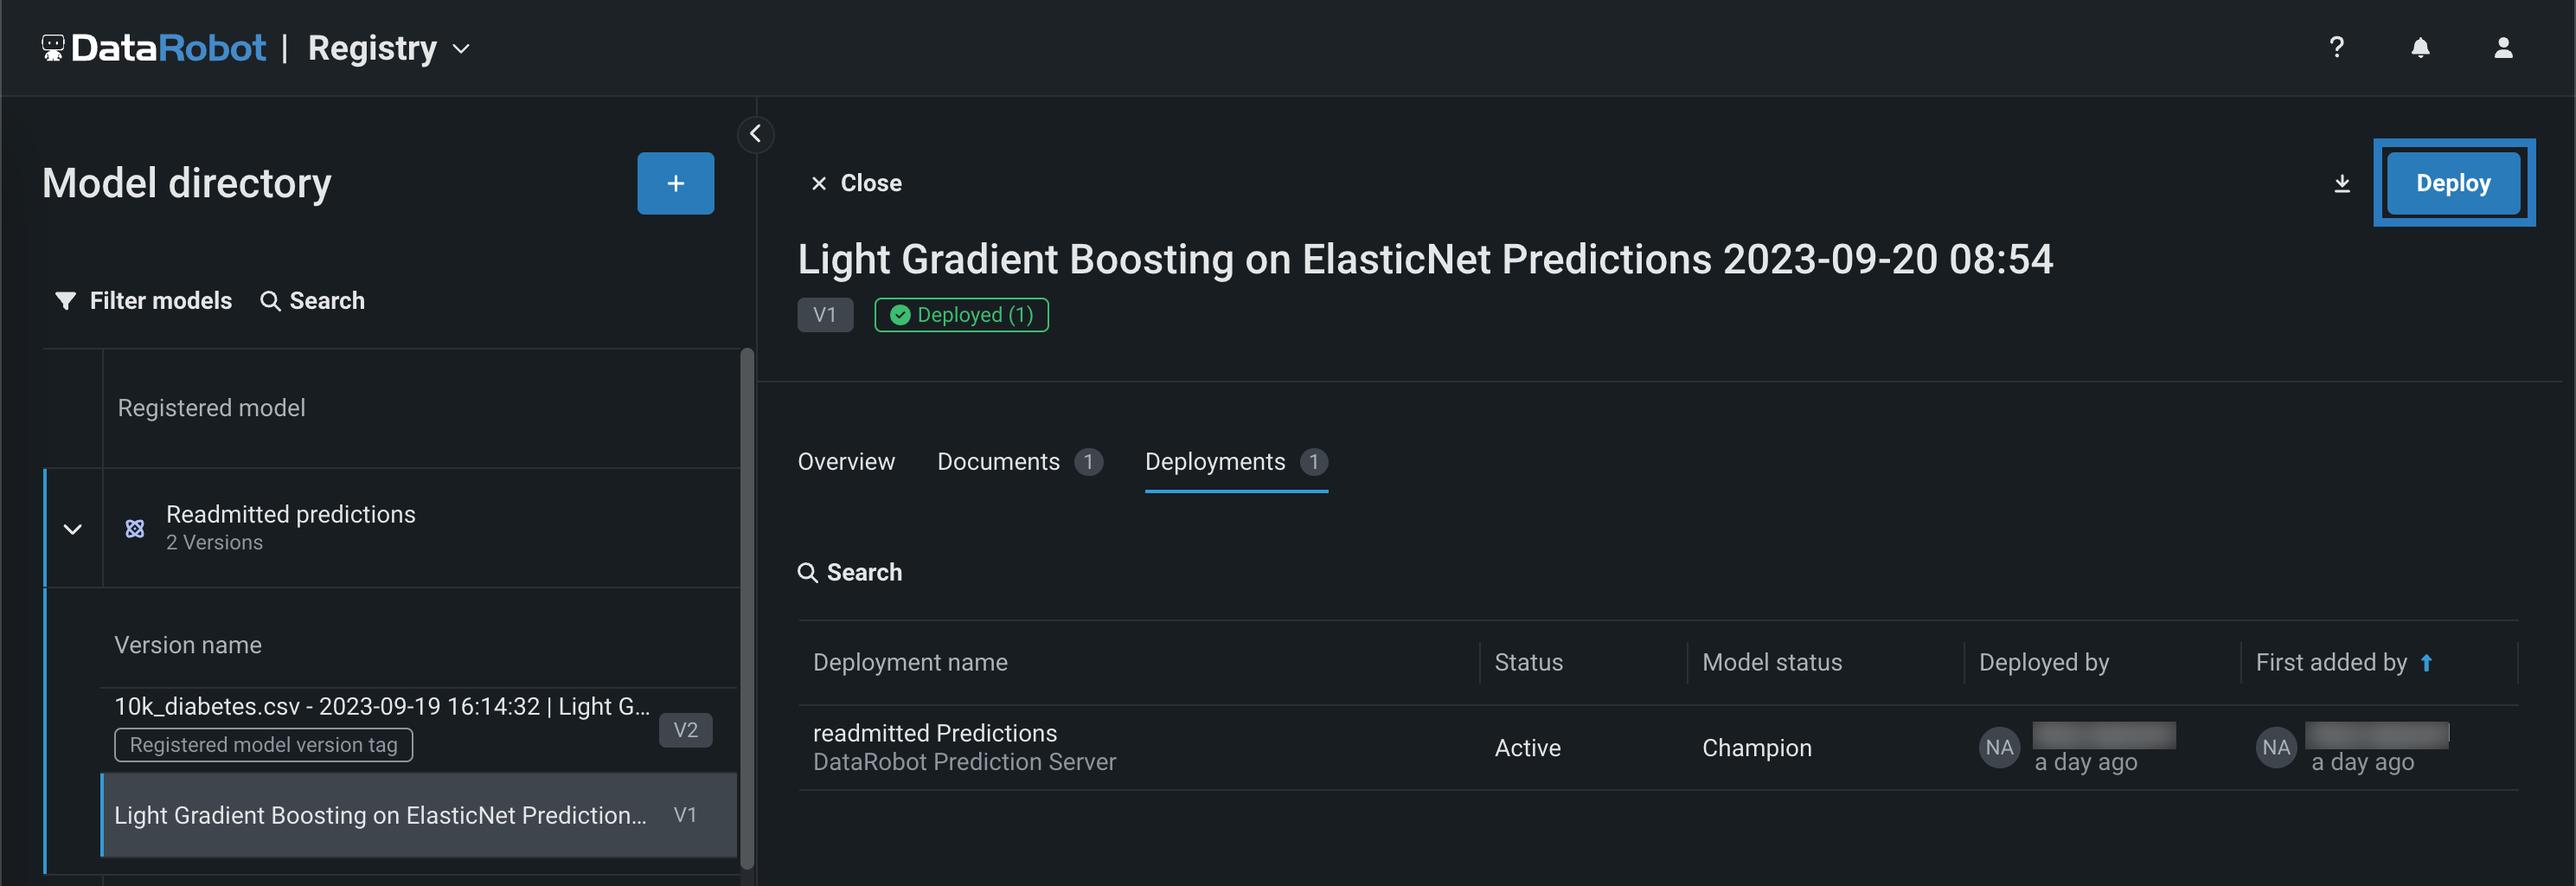
モデルをSagemaker予測環境にデプロイ
Sagemaker予測環境を作成したら、その環境にモデルをデプロイできます。
-
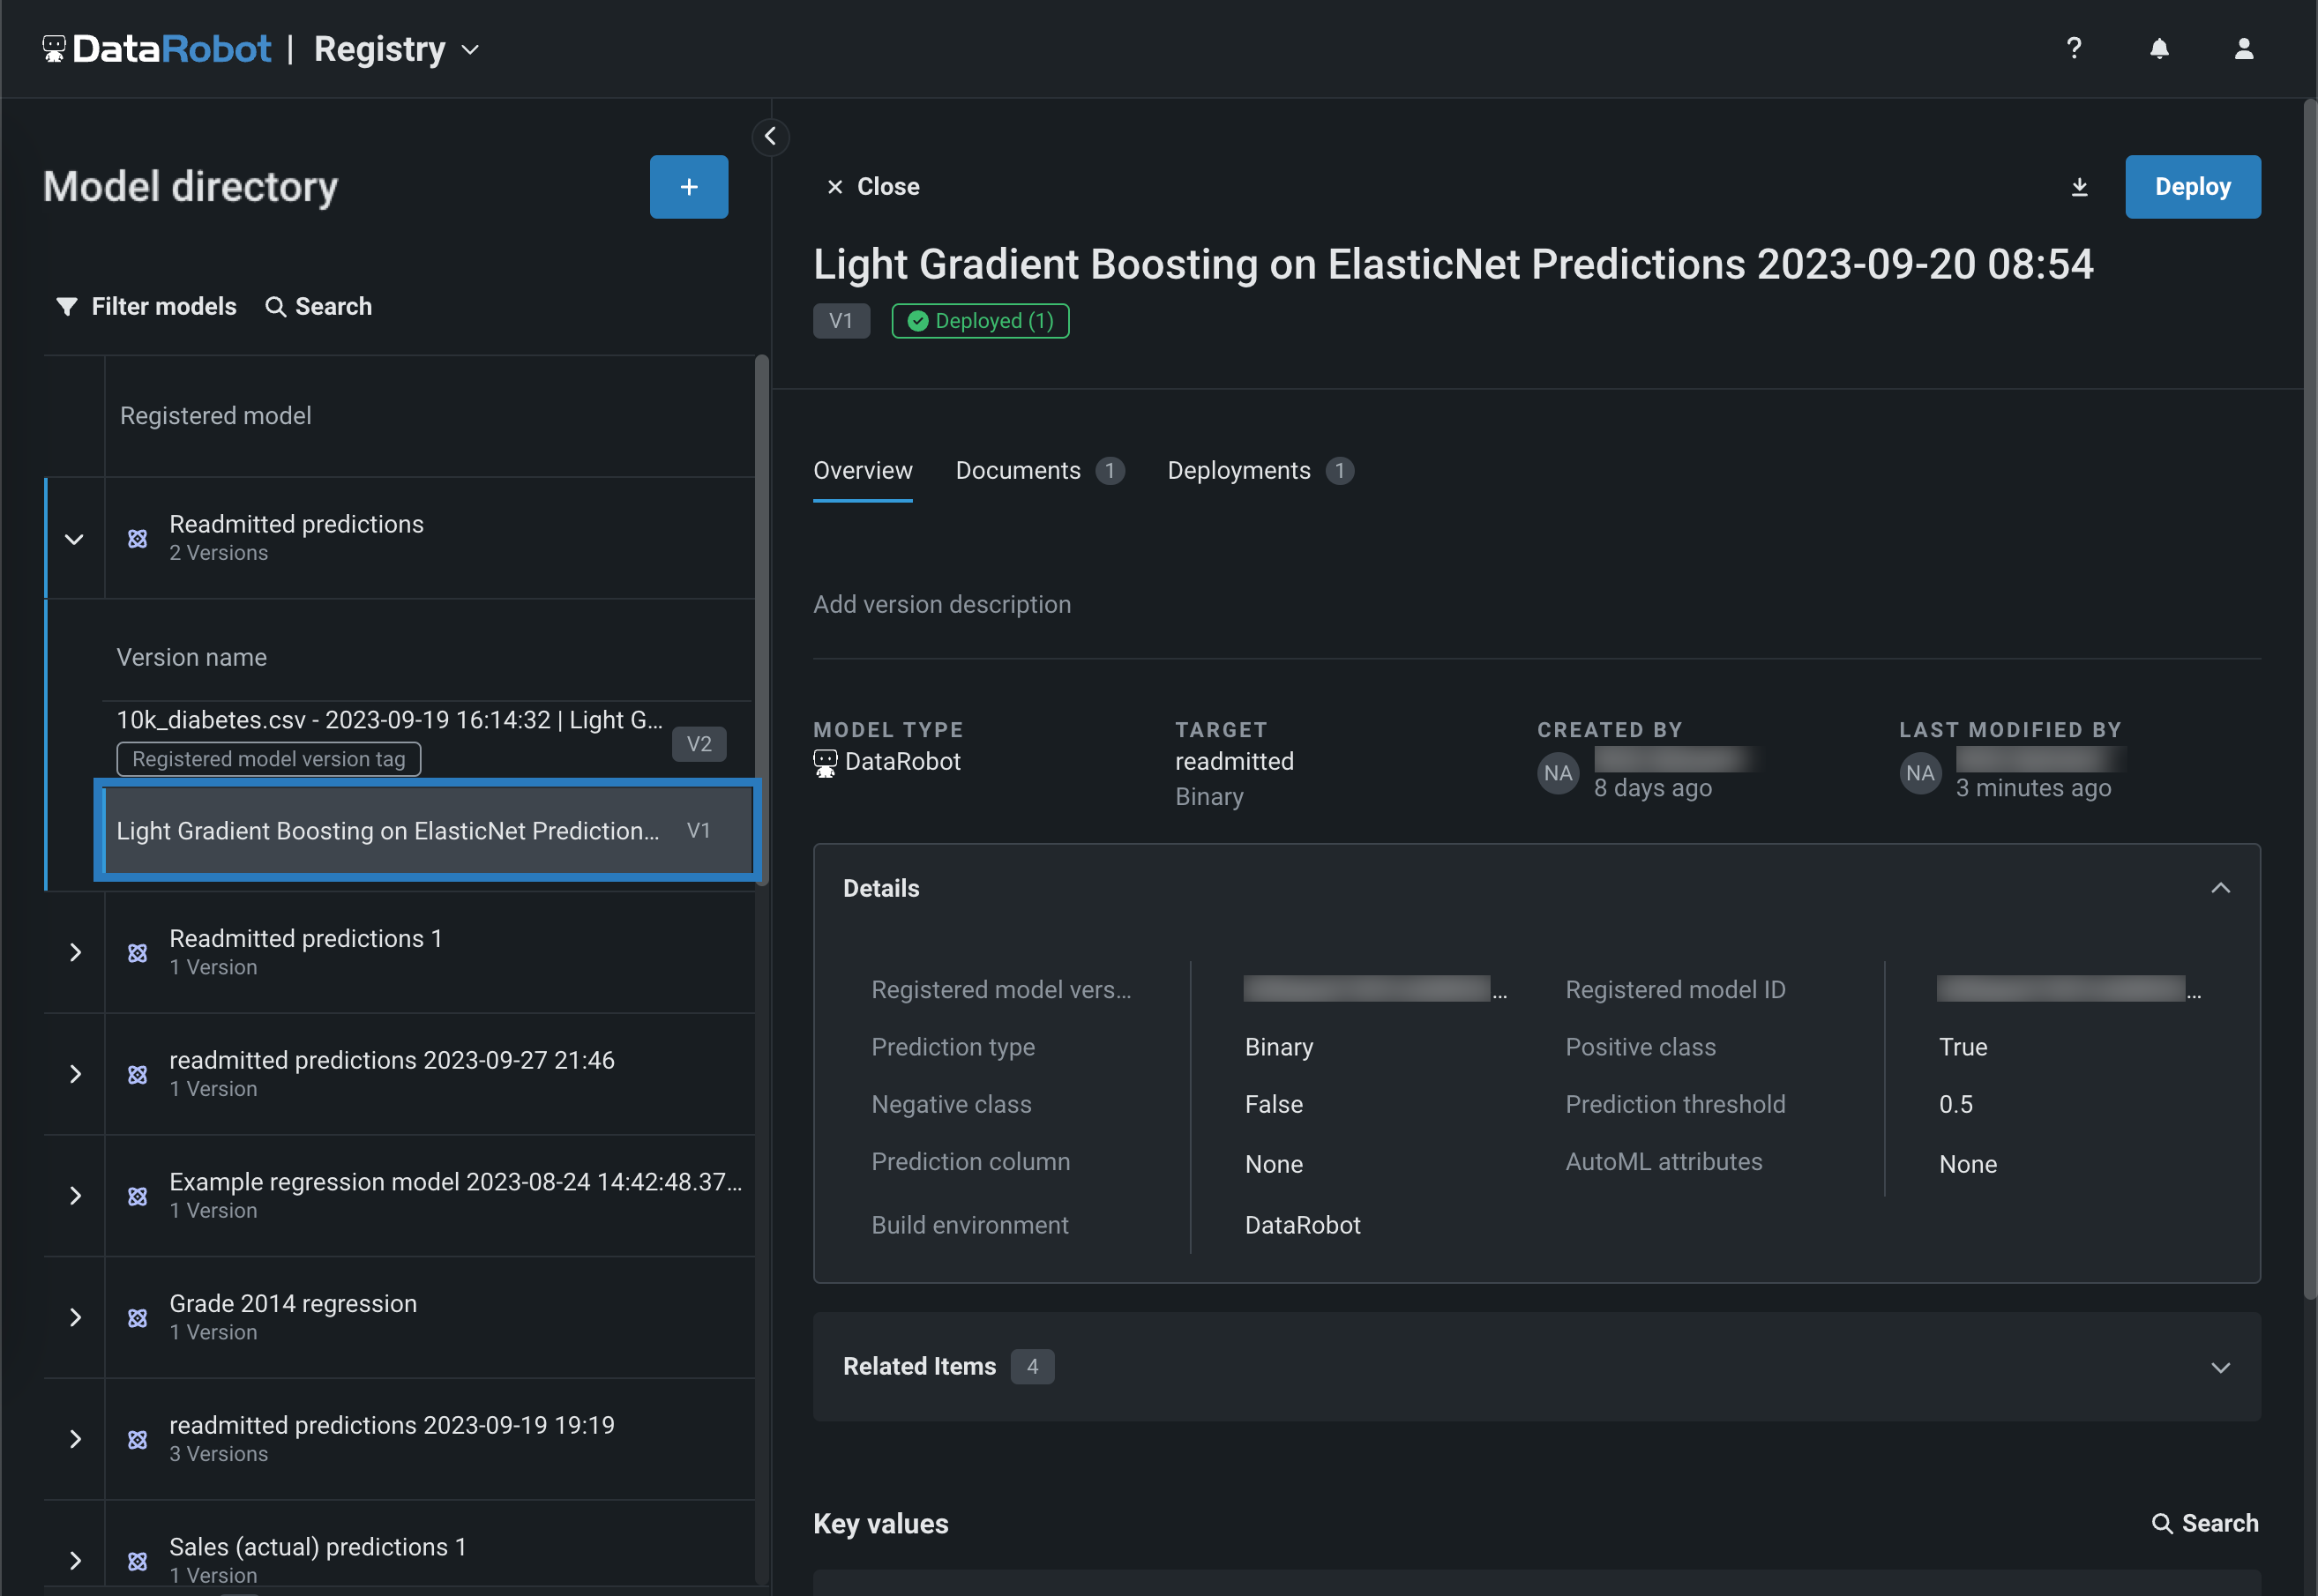
レジストリ > モデルタブの登録モデルのテーブルで、デプロイしたいバージョンを含む登録モデルをクリックすると、バージョンのリストが開きます。
-
バージョンのリストから、デプロイするカスタムモデルまたはスコアリングコード有効バージョンをクリックし、登録済みモデルのバージョンパネルを開きます。
-
登録済みモデルバージョンパネルのいずれかのタブの右上隅で、デプロイをクリックします。
-
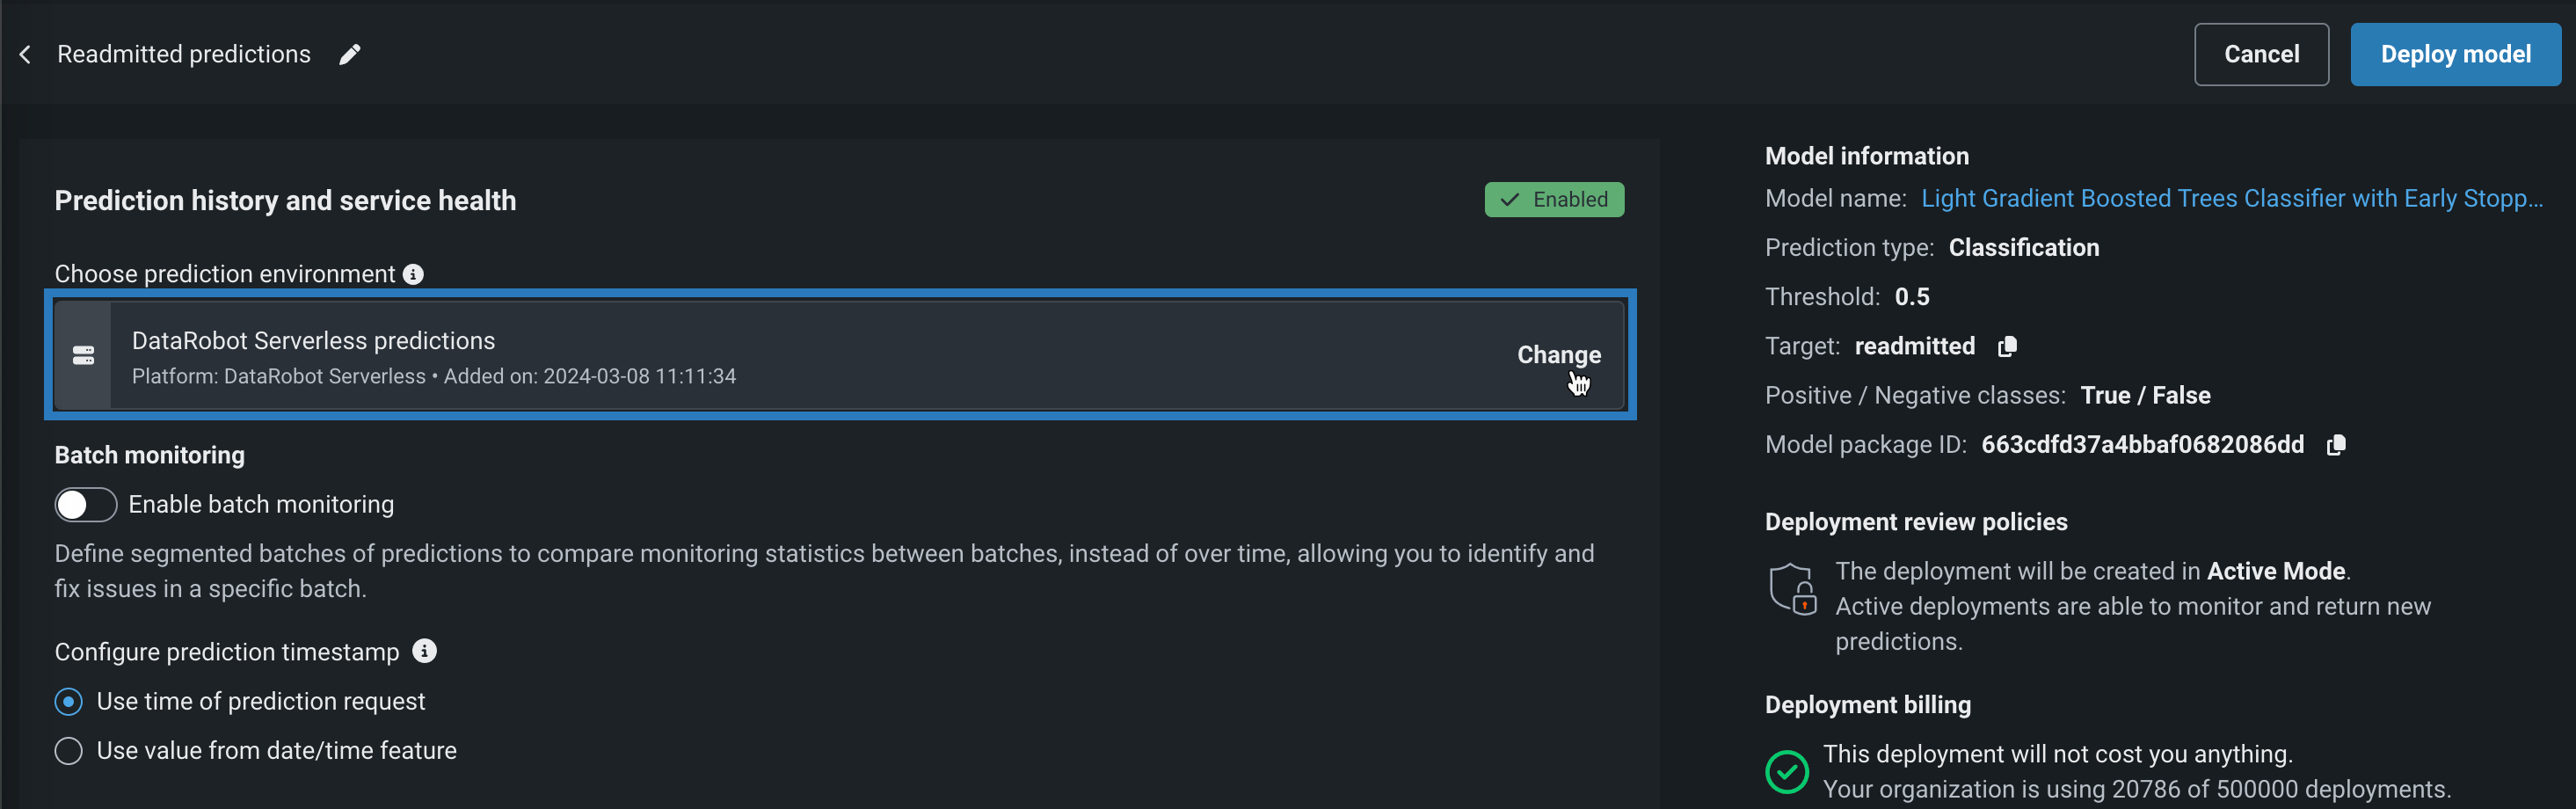
予測履歴とサービスの正常性設定の予測環境の選択の下にある変更をクリックします。
-
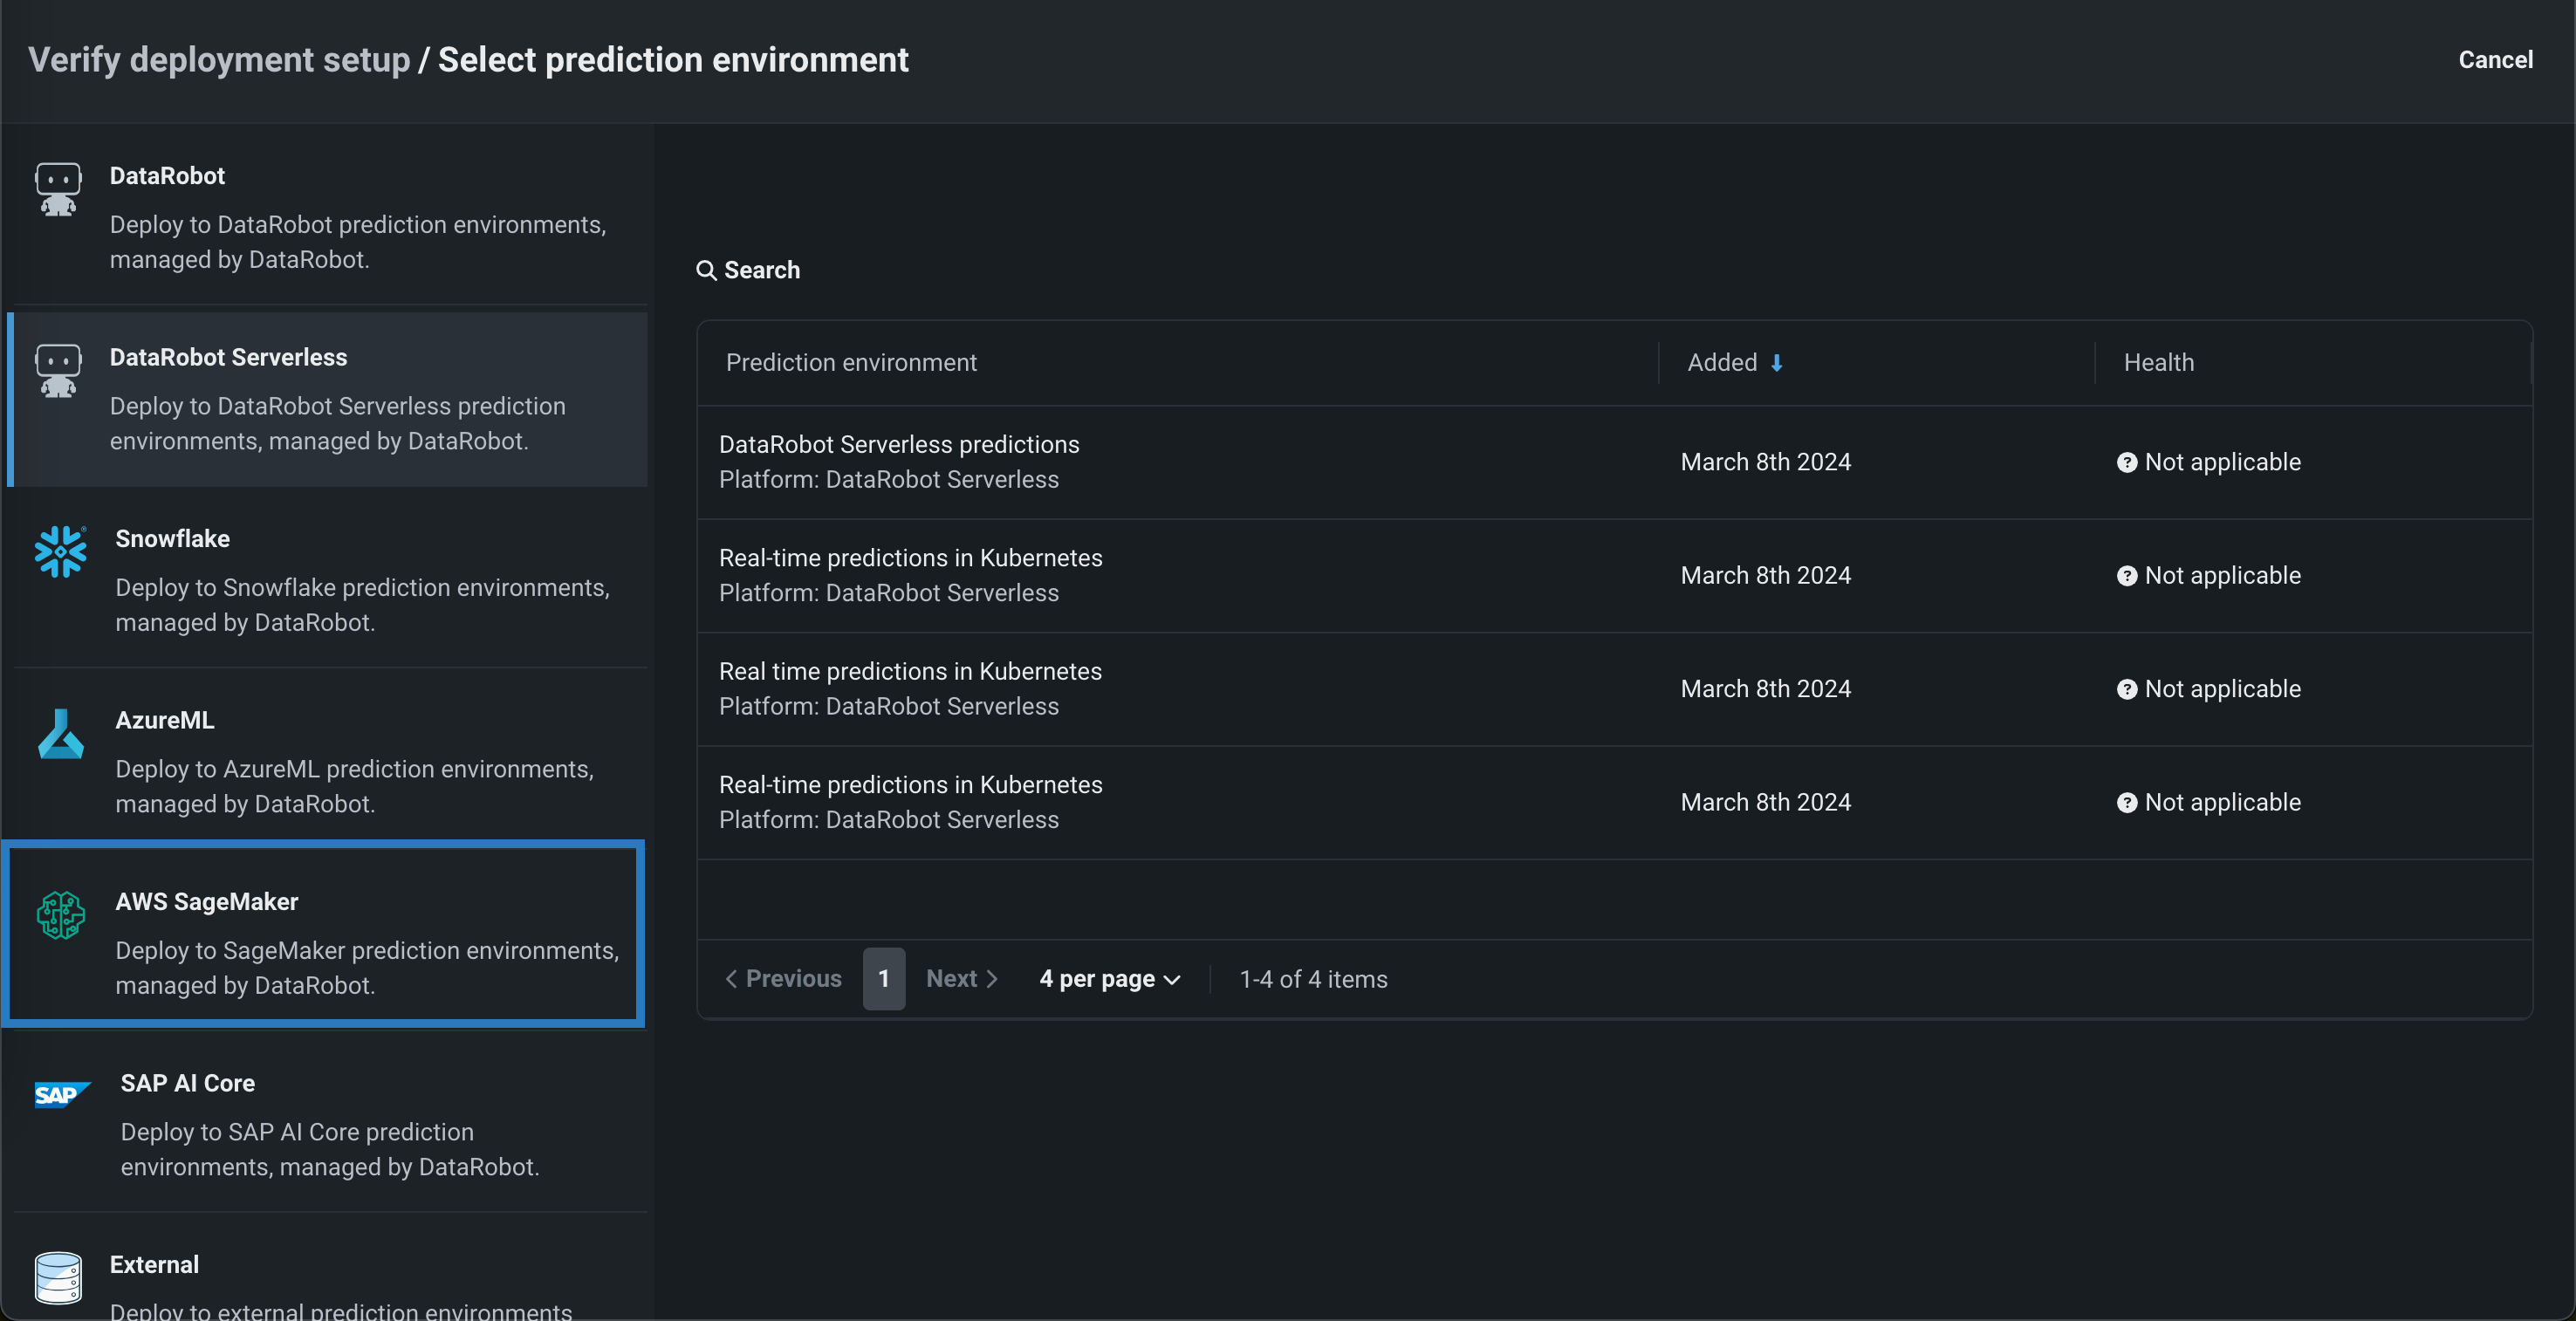
予測環境の選択パネルで、AWS Sagemakerをクリックしてから、デプロイする予測環境をクリックします。
-
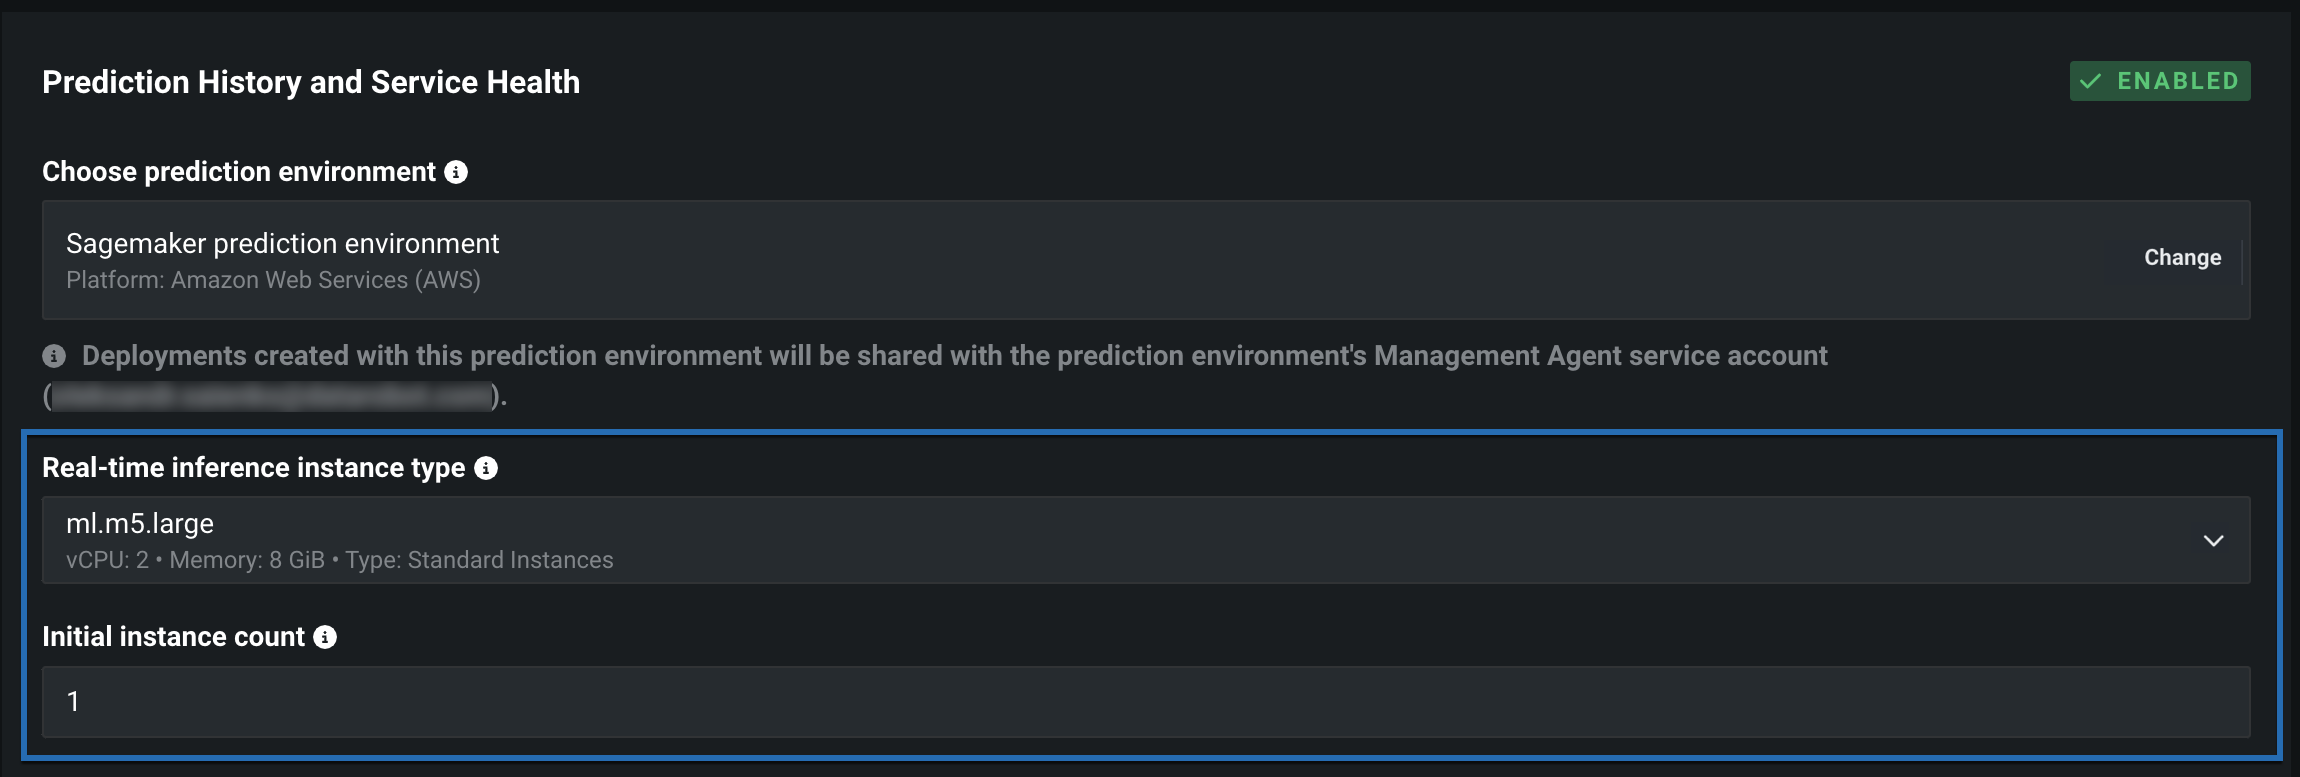
Sagemaker環境を選択した状態で、予測履歴とサービスの正常性セクションで、リアルタイム推論インスタンスタイプと初期インスタンスカウントフィールドを設定します。
-
(オプション)高度な環境設定を開き、追加の環境キーと値のペアを定義して、Sagemakerデプロイインターフェイスに追加のパラメーターを提供します。
-
残りのデプロイ設定を行います。 完了したら、モデルをデプロイをクリックします。
モデルがSagemakerにデプロイされたら、予測 > ポータブル予測タブからデータをスコアリングコードスニペットを使用して、Sagemaker内でデータをスコアリングできます。
Sagemaker予測環境を再起動
予測環境で使用されるSagemakerデータ接続のデータベース設定または資格情報を更新する場合、環境を再起動して、環境にこれらの変更を適用できます。
-
デプロイ > 予測環境ページをクリックして、リストからSagemaker予測環境を選択します。
-
予測環境設定の下にあるサービスアカウントで、環境を再起動をクリックします。