ユースケースの管理
ユースケースは、組織化され、権限管理メカニズムを提供し、チームが相互にコメントし、レビューできるコラボレーションスペースです。 ユースケースの操作には、新しいユースケースの作成とDataRobot Classicから移行したプロジェクトの操作も含まれます。
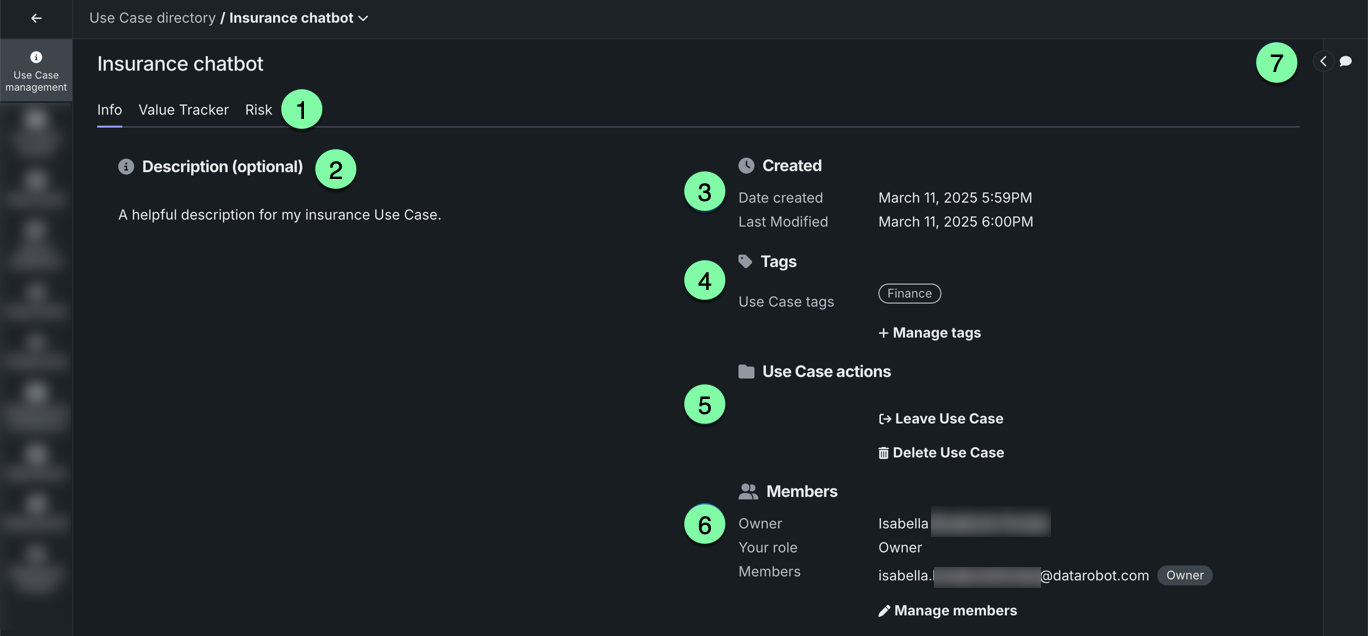
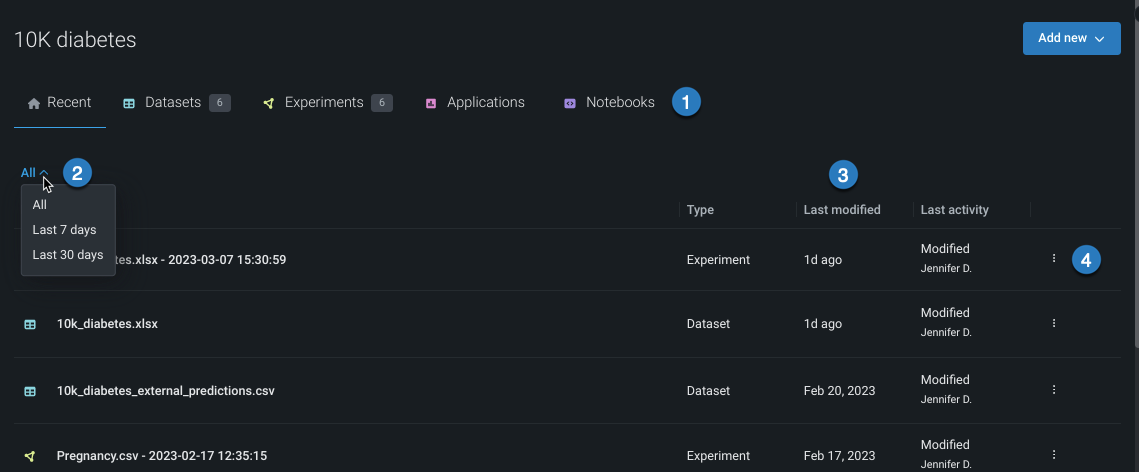
ユースケースをメンバーを含めて管理するには、ディレクトリからユースケースを開き、ユースケース管理をクリックします。
| 要素 | 説明 | |
|---|---|---|
| 1 | ユースケース管理タブ | ユースケース管理のページには以下のタブがあります。
|
| 2 | 説明 | ユースケースについて役立つ説明を入力します。 |
| 3 | ユースケースのメタデータ | 作成日と最終変更日を報告します。 |
| 4 | タグ | 割り当てられたタグを表示し、管理オプションを使用してタグを削除したり、新しいタグを追加したりして、ディレクトリ内のユースケースの分類や検索に役立てることができます。 |
| 5 | ユースケースのアクション | ユースケースを使用するためのオプションを提供します。
|
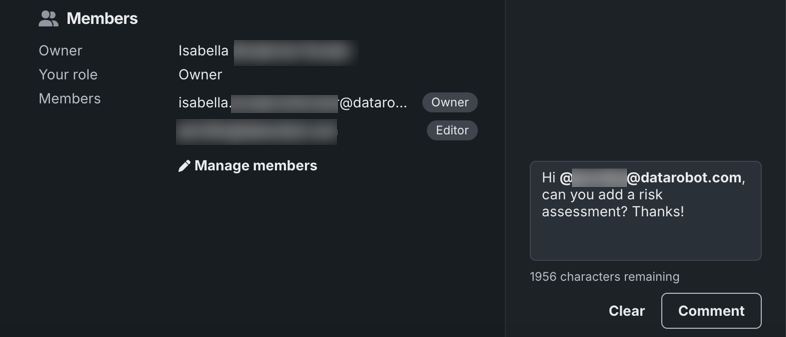
| 6 | メンバーを管理 | 共有モーダルを開き、ユーザーの追加と削除、およびメンバーのロール変更を行うことができます。 |
| 7 | コメント | 展開して、ユースケースにコメントを追加し、他のメンバー全員に見えるようにします。 |
メンバーを管理
ユースケースのオーナーは、チームメンバーの ロール(権限レベル)を編集したり、ユースケースからメンバーを削除したりできます。
-
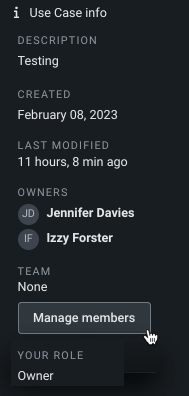
ユースケースの管理の情報タブから、メンバーを管理をクリックします。
-
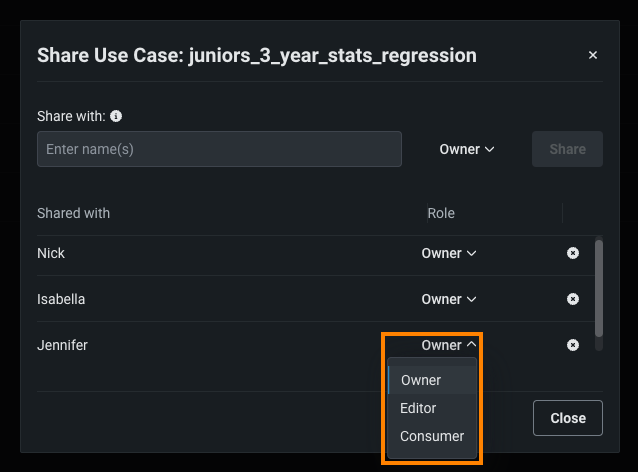
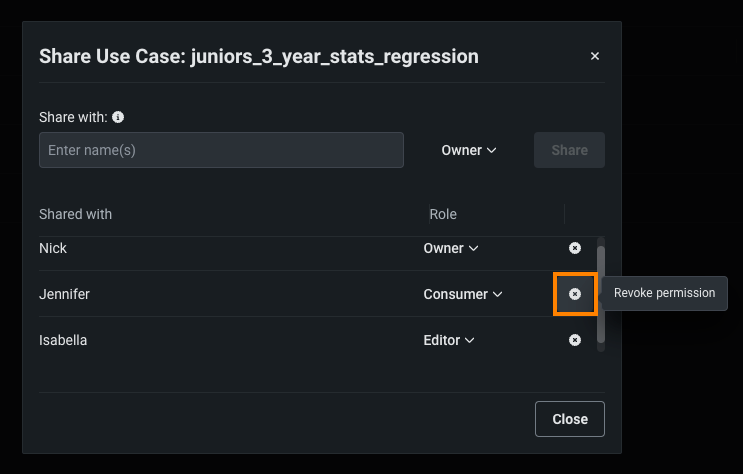
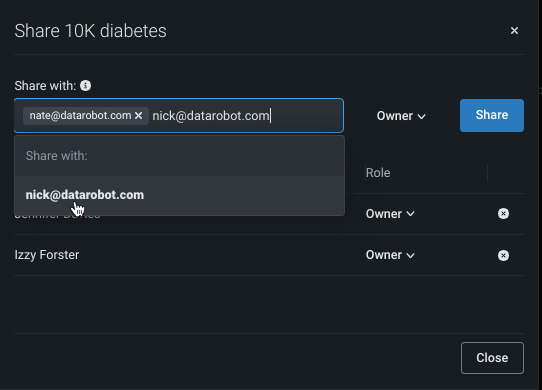
共有ダイアログボックスのロール列では、以下の操作を行うことができます。
-
閉じるをクリックすると、ユースケースに戻ります。
共有
ワークベンチでは、ユースケースを共有すると、受信者は関連付けられたすべてのアセットにアクセスできます。
サポートされているエンティティ
現在、ユースケースを共有できるのは、個々のユーザーと組織だけです。グループでの共有はサポートされていません。
ユースケースを共有するには:
-
情報タブから、メンバーを管理をクリックします。
-
共有モーダルが開きます。 1つ以上のチームメンバーEメールアドレスを入力し、関連するドロップダウンの名前をクリックして、目的の 権限レベル(ロール)を設定します。
-
共有をクリックします。
コメント
ユースケース管理のページでは、コメントを投稿して、他のチームメンバーとのディスカッションを主催したり、自分用のメモを残したりすることができます。 なお、コメントパネルはこのページにのみ表示されます。
コメントを投稿するには:
ユースケースを削除
ユースケースを削除するには、以下のいずれかを実行します。
-
ユースケースディレクトリで、削除したいユースケースの横にあるアクションメニュー をクリックし、ユースケースを削除を選択します。
-
ユースケースのユースケース管理タイルで、ユースケースを削除をクリックします。
ユースケースの削除が関連アセットに与える影響について説明するウィンドウが表示されます。 このウィンドウには、完全に削除されるすべてのアセット(完全に削除するアセット)と、ユースケースのアセットに関連付けられていても削除の影響を受けないアセット(影響を受けないアセット)が一覧表示されます。 アセットタイプをクリックすると、影響を受けるアセットが具体的に表示されます。 削除を続行するには、はい、削除しますをクリックします。
影響を受けないアセットセクションには、たとえば、登録または本番環境にデプロイしたエクスペリメントモデルが表示される場合があります。 この場合、エクスペリメントは削除されますが、登録されたモデルとデプロイは残ります。
削除されたアセット
ユースケースにはさまざまなアセットを関連付けることができますが、ユースケースが削除されたときにすべてが同じように処理されるわけではありません。 各アセットの処理方法については、以下の表を参照してください。
| アセット | ユースケース削除時の処理 |
|---|---|
| データアセット | データセットはデータレジストリから削除されませんが、データセットからユースケースへのリンクは切断されます。 |
| ベクターデータベース | すべてのベクターデータベースが削除されます。 |
| エクスペリメント | すべてのエクスペリメントが削除され、エクスペリメントに関連付けられているすべてのデプロイが非アクティブ化されます。 |
| プレイグラウンド | すべてのプレイグラウンドが削除されます。 |
| ノートブックとCodespace | すべてのcodespaceが削除されます。 |
